

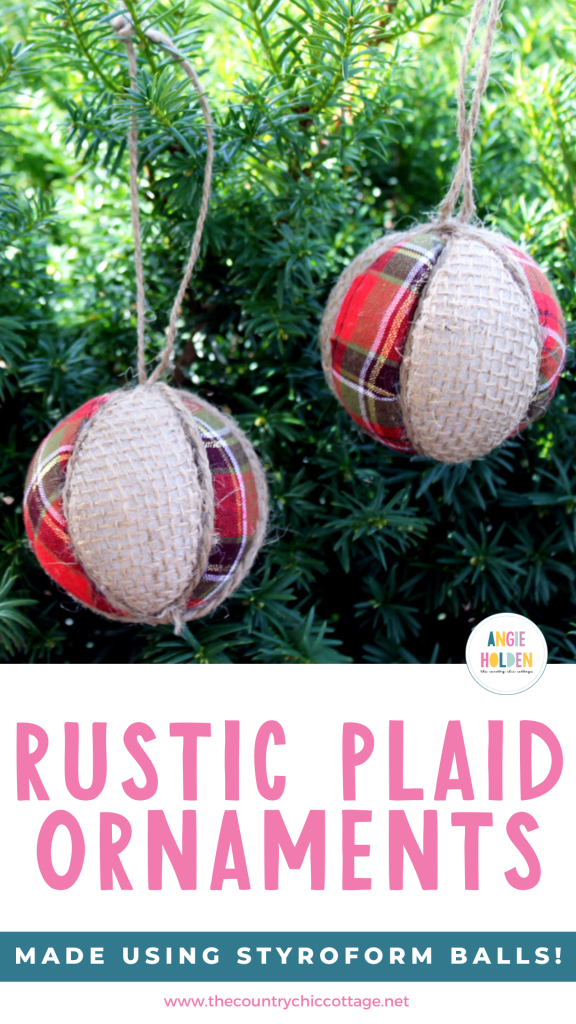
The holiday season is a perfect time to bring warmth and charm into your home, and there’s no better way to do that than with rustic Christmas decorations. If you have a penchant for modern farmhouse-style decor, you know how challenging it can be to find the right pieces that capture that cozy, inviting feel. Instead of searching high and low for the perfect ornaments, why not create your own? In this post, we’ll show you how to make beautiful rustic plaid ornaments that will add a personal touch to your holiday celebrations and enhance your rustic decor. Let’s get crafting!
Video Tutorial For Rustic Plaid Ornaments
Ready to see how to make these rustic plaid ornaments? Watch the short video below to see the process in action!
TIP: If you want to check out the other ornament mentioned in the video, check out the Lace Embossed Clay Ornaments.
Can't watch the video or missed some of the steps? Then keep reading for the step-by-step instructions.
How To Make Rustic Plaid Ornaments
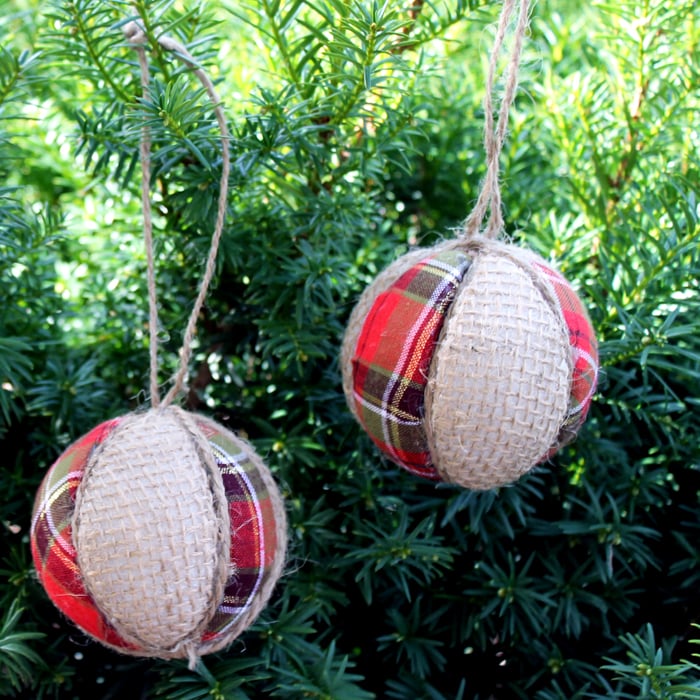
Have you been searching for classic yet rustic Christmas decorations? You can't go wrong with these plaid and burlap ornaments made from styrofoam balls!
I personally love rustic Christmas decorations and use them anywhere that I can in my house. There's no doubt these homemade ornaments are going to fit right in around here this holiday season.
But the best part about them isn't how amazing they look (although they DO look beautiful).
It's that they're much easier to create than you may think, and you can quickly make your own with just a few materials! Today, I'm taking the mystery out of making plaid and burlap Christmas ornaments by showing you how!
NOTE: If you love making Christmas ornaments as much as I do, you won't want to miss my Red Truck with Christmas Tree Ornament, DIY Paper Ornament, and DIY Stained Glass Christmas Ornament ideas.
Supplies Needed To Make Rustic Plaid Ornaments
- Styrofoam balls
- Styrofoam tool set – this is the best tool for the job, but you can also try a butter knife
- Plaid fabric
- Burlap
- Jute twine
- Scissors
- Hot glue and glue gun
Step 1: Wrap Twine Once Around Styrofoam Ball
Wrap twine once around the styrofoam ball as a guide.
Step 2: Score Styrofoam Ball
Next, use a foam tool or a butter knife to score the foam beside the twine.
Step 3: Remove Twine & Score Styrofoam Ball Deeper
You can now remove the twine and deepen the scoreline with the tool, making it easier to see and follow.
Step 4: Repeat Steps 1-3
Repeat this same process to get three more lines that go all the way around the ball and are as evenly spaced as possible.
Step 5: Add Plaid To Styrofoam Ball
Lay plaid over one section that you have created. Stuff the fabric a little bit into the line all the way around the section.
Step 6: Trim Fabric
Use scissors to trim fabric as close to the ball as possible.
Step 7: Add Burlap To Styrofoam Ball
For the next section, stuff the burlap fabric into the line completely, all the way around.
Step 8: Repeat Steps 5-7
Repeat for all sections, alternating between plaid and burlap.
Step 9: Hot Glue Twine Into The Scorelines
Hot-glue twine into the scorelines (on top of the fabric) to cover where all the fabrics meet. This will also help to secure everything in place.
Step 10: Add Hanger To Ornament
Use an additional piece of twine for a hanger at the top. Secure with hot glue.
Your plaid and burlap ornaments are ready for your tree! They also make great DIY gifts for anyone on your list.
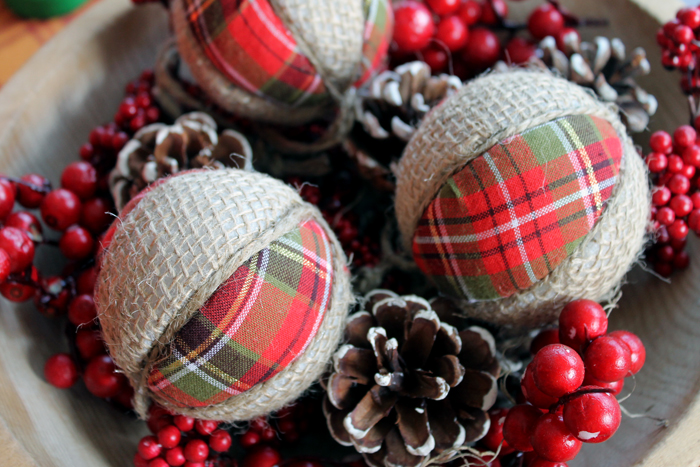
Add these rustic plaid ornaments to your must-make list this year! You will love the results hanging on your tree, especially if you have a rustic farmhouse theme to your decorations.
FAQs About Rusic Plaid Ornaments
Here are answers to some of the most frequently asked questions I receive about creating these rustic plaid ornaments. If your question isn’t listed, feel free to drop it in the comments, and I’ll be happy to help!
Can I Change The Size Of These Rustic Plaid Ornaments?
Absolutely! You can make these ornaments any size that you like. However, keep in mind that if you make these ornaments larger, you will need more plaid and burlap fabric.
When Tucking The Fabric On One Side, The Other Side Pops Out. How Can I Fix This?
You may be stretching too much. Try not to pull from that side. Also, I highly recommend using the Styrofoam tool set because it's perfect for stuffing the fabric into the styrofoam ball.
Can I Use A Different Kind Of Glue For These Rustic Plaid Ornaments?
Yes, you could use craft glue if you don't have a hot glue gun. However, I have found that hot glue works best for securing these ornaments in place.
Can I Use Something Other Than Twine To Make A Hanger?
I love the way the twine looks, as it perfectly complements the rustic vibe. But, if you want to do something different, you can play around with using ribbon, baker's twine, embroidery floss, or even thin metal wire.
Can I Use Scraps Of Fabric For This Project?
Of course! As long as the scraps of fabric are big enough to cover a section and can be stuffed into the Styrofoam ball, you can definitely use them for this project.
10 More Ornament Crafts
If you love these rustic plaid ornaments and want even more quick and easy ornament ideas, check out the links for more ideas below!
- Painted Plaid Ornaments
- Retro Cut Paper Ornaments
- DIY Glitter Mini Mason Jar Ornament
- Let it Snow – Scrabble Tile Ornament
- Initial Ornament Made with Glitter Paint
- DIY Rudolph Ornament
- Paper Gingerbread Ornaments With Template
- Canning Lid Snowman Ornament
- Online Shopping Ornament
- Christmas Llama: A DIY Ornament Idea


So pretty! I love these, Angie.
I love the video! I am a visual learner so this really helped to understand how you made these adorable ornaments. Thank you for sharing this on Talk of the Town Link Party!
Julie @ Love My Simple Home
These are really cute! Thanks for the tutorial 🙂
I hope you can stop by and consider joining the 2017 PenPal sign-ups:
http://collettaskitchensink.blogspot.com/2016/11/tea-time-penpals-and-snow-112516.html
Colletta
I love these ornaments! I am drawn to more rustic holiday decoration and even more so when I don’t have to sew them! I am adding you to my DIY holiday ornament list! 🙂