
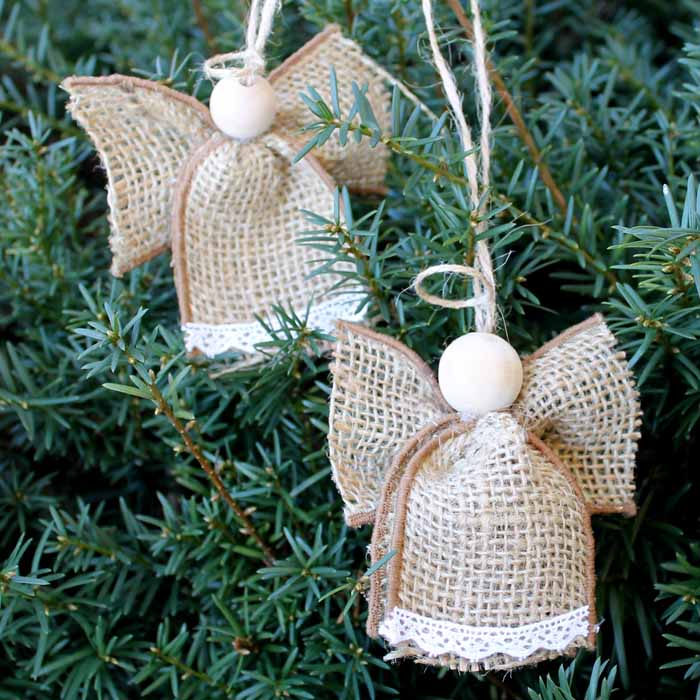
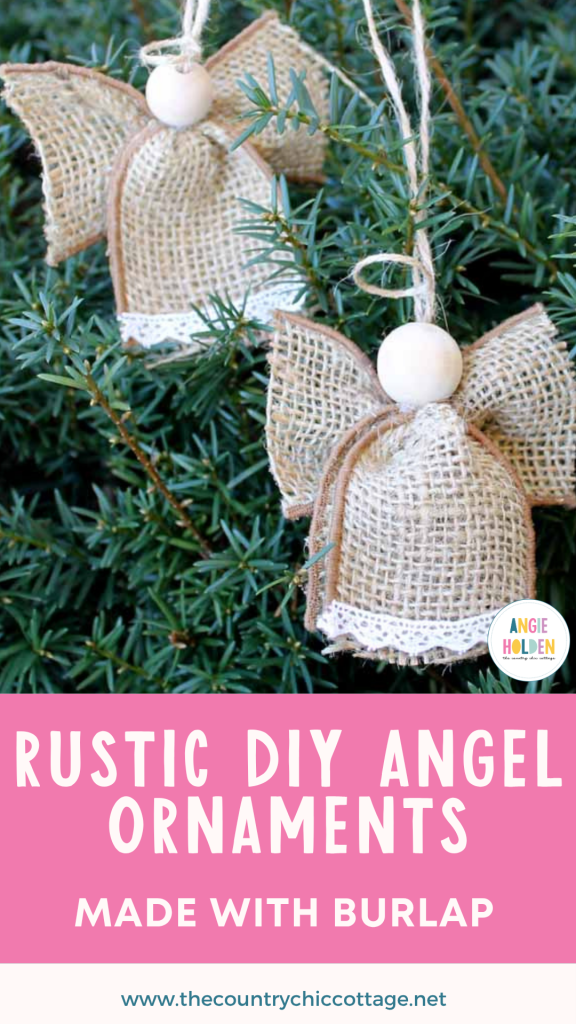
Angel ornaments are a classic holiday ornament found on most Christmas trees. This holiday season, give your ornament a rustic twist by making these DIY angel ornaments with burlap instead of ribbons or colored fabrics. Are you ready to create some beautiful burlap angel ornaments for your tree? Pair these with other homemade ornaments, such as the Fingerprint Reindeer Ornaments, or choose from some of my favorite Hoop Ornament Ideas for a gorgeous, rustic farmhouse-themed tree.
How To Make DIY Angel Ornaments
Some look forward to holiday decorations, while others wait in anticipation for baking Christmas cookies. Me? I impatiently wait all year long for ornament-making season. They really do make the perfect quick and easy gifts for friends, neighbors, and co-workers. They're also a great family craft that makes for a treasured memento to look back on year after year. Does anyone else have decades' worth of homemade ornaments in a box you just can't throw out?
These easy, DIY angel ornaments with burlap are perfect for the rustic, farmhouse-themed tree. Quick and kid-friendly, this Christmas craft takes just a few minutes and is simple enough for anyone to make.
Supplies Needed To Make DIY Angel Ornaments
- Wired burlap ribbon 2 inches wide
- Lace trim
- 3/4 to 1 inch wood beads
- Jute twine
- Hot glue and glue gun
Step 1: Cut Burlap Ribbon For DIY Angel Ornaments
Cut two pieces of burlap ribbon with scissors. One piece should measure 4 inches in length, and the other should be 6 inches in length.
Step 2: Add Lace Trim To The 6-Inch Piece Of Burlap
Add lace trim along one end of the 6-inch-long piece with hot glue.
Step 3: Fold The 6-Inch Piece Of Burlap Ribbon In Half
Fold the 6-inch-long piece in half and gather it at the top, securing with a piece of twine.
NOTE: This piece of twine should be really long, as we will use it to hang on the tree.
Step 4: Tie Twine Around The Middle Of The 4-Inch Burlap Piece
Gather the 4-inch piece of burlap ribbon in the center and tie with a piece of jute twine. Trim this twine, but save the ends for later.
Step 5: Hot Glue The 4-Inch Piece Of Burlap To The 6-Inch Piece Of Burlap
Hot glue the 4-inch piece (the wings) to the back of the 6-inch piece (the body).
Step 6: Add Wooden Bead With String
Thread the string from the top of the 6-inch piece (that we did not cut in step 3) through a wood bead, then use hot glue to secure the bead in place.
Step 7: Tie Twine or Ribbon For Hanging
Tie the strings together for hanging on the tree and trim any excess.
Step 8: Create Halo
Use a scrap piece of jute twine to make a small circle (halo).
Step 9: Hot Glue Halo To String
Add hot glue to the string just above the head, and secure the halo into place.
Step 10: Hang Your DIY Angel Ornaments
Your burlap angel ornaments are complete and ready to hang on your farmhouse-style tree!
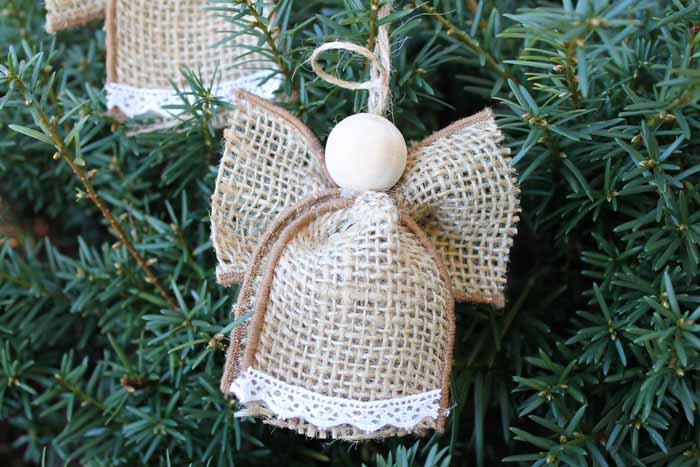
It is worth noting that I used two different-sized wooden beads on my two ornaments, as that is what I had on hand. However, I think a wood bead that is about 3/4 to 1 inch in diameter would look best. So, if you are headed out to purchase supplies for this project, look for beads about that size.
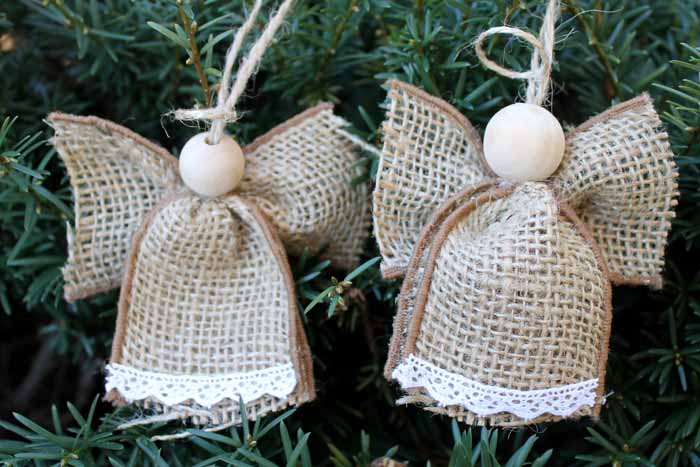
See how easy this Christmas craft is? Gather your friends and family together, and make some angel ornaments for your tree today! You will love how perfectly this rustic, burlap ornament pairs with your farmhouse-style Christmas tree.
Tips and Tricks for DIY Angel Ornaments
Now that you’ve seen these fun DIY angel ornaments, are you ready to make your own? Here are a few tips and tricks to help!
- Use Wire Burlap – Don't Skip the Wire Burlap! It will be tempting to use regular burlap, but stick with the wire burlap because it will help give your angel shape and be easier to work with in this project.
- Have Fun With Color – When making my angels, I chose to go with the classic burlap color, but you can use any color of wire burlap for this project.
- Use 3/4– to 1-inch diameter wood beads. As I mentioned before, you will want to use wood beads that are 3/4 to 1 inch in diameter. This size is perfect for the ornaments because it is readily available at any craft store and makes the angels look proportional in comparison to their bodies/wings.
- Don't Skip The Hot Glue – I do not recommend using regular glue for this project because it will take longer to dry and will be messier. Instead, use your finger protectors and your hot glue gun to make these angel ornaments in under 10 minutes!
5 More Burlap Crafts
If you loved these DIY angel ornaments, here are some other burlap crafts that you won’t want to miss!
- Easy Snowman Painting with Free Printable Template
- Christmas Crafts ~ Burlap Christmas Trees
- Cross decor with burlap
- Lighted Burlap Garland For Christmas
- Candy cane wreath from burlap


So simple, but so effective. I love your little hessian angels. Here in Australia, we call burlap, hessian.
These angels are so cute… and so simple! Thanks for sharing. 🙂 Liz
These are so darling! I love them. Thanks for sharing this post with us. I’m definitely pinning and sharing =)
Hi Angie, I featured your adorable angels on Shoestring Elegance’s What to do Weekends party this week as well as on my Facebook page! Pinned to the party board as well! Thanks for sharing with us.
The little angels are delightful!
Found on FR blog hop. Sharing at The Farmers Lamp- love this craft!
These angels are so, so cute! (And I loved your video – you are a natural!)
Hi Angie, I have been wanting to make these for a while so today I sat down and did it! I made 20. Couldn’t find my ball of jute so I used gold tinsel and white irridescent pipe cleaners with green ornament hangers., After I made a few burlap ones like yours, I branched out to a finer woven burlap with red zig zags, then 8″ wide sheer ribbon with an irr. pattern and glitter. I had bot some Big Lots 2 boxes of plastic bow ornaments with silver glitter 4/.40 after Christmas and used them for wings. I had 6 beads with faces, lots of plain apple wooden ones with only a stem hole and beads with large holes all the way through. I made my angels bigger because I could! I used different kinds of lace on the burlap ones; some look like choir members. Still have have 2″ gold sheer ribbon and and improbable pearl necklace that I want to use to make small angels. I divvied my pile in half-some for me to sell, some for our church bazaar in Nov. I try to make something every month so I don’t go crazy in Oct..Thanx for your great tutorial. Happy Easter!
This is awesome! So glad you made some!
What a great Angel.
Every year I make Angels and give to all our family and friends.
This year’s Angel is done, but this burlap angel goes into my file for next Christmas.
What is that finger protector you have for when working with hot glue???
I need to get one. Ouch. many burnt finger tips.!
Silicone finger tip! They are lifesavers!