

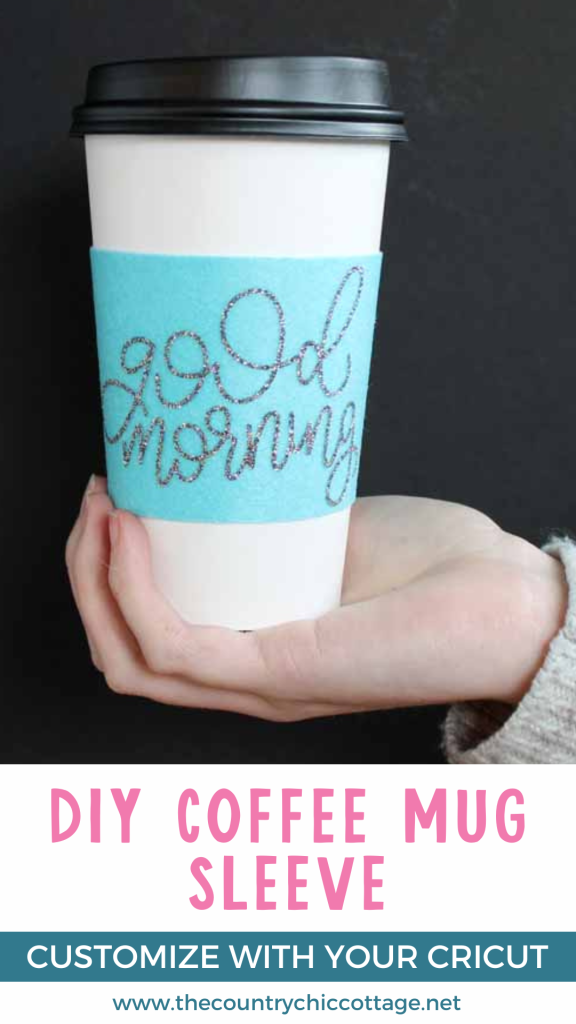
A DIY coffee mug sleeve is a fantastic, eco-friendly, and budget-friendly gift idea. It’s easy to make and can be tailored to suit anyone's preferences!
Today, I’ll show you how to both cut and customize one using your Cricut machine. If you prefer a plain version, you can easily cut it from felt with scissors. However, who doesn’t love a little sparkle?
This project is part of Craft Lightning week, where we are sharing felt projects that can be completed in 15 minutes or less. If you're interested in more ideas (and trust me, you will be!), I’ve compiled a list of all the felt craft ideas for you.

Supplies Needed to Make DIY Coffee Mug Sleeve
- Felt (I used the Cricut felt sheets)
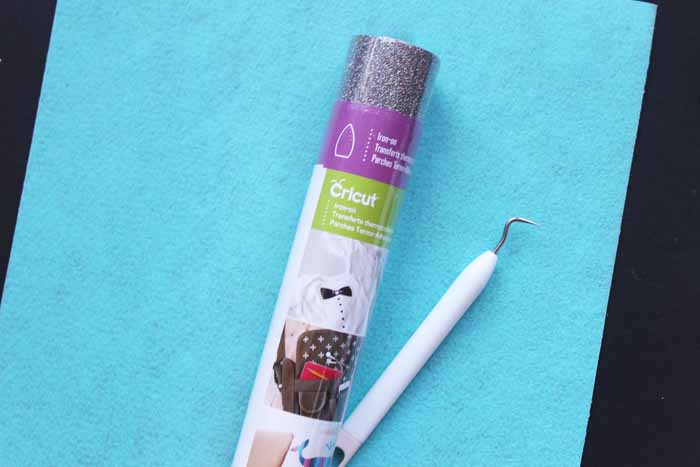
- Iron On Vinyl (I used the glitter vinyl in silver)
- Cricut Cutting Machine (Want to see the difference between the machines? I compared the Cricut Maker and Explore here.)
- Weeding tools (optional)
- Cricut EasyPress (optional but recommended – see below for details)
- Velcro
- Fabric glue or sewing machine
- Cut file
How To Make DIY Coffee Mug Sleeve
I am listing out each step of the process and including images to help guide you from start to finish! Additionally, at the end of the post, I addressed some of the most frequently asked questions I receive about this project and my feelings.
Step 1: Upload Files To Cricut Design Space
Start by uploading the files to Cricut Design Space. When you upload the file, you will have three pieces. One is the wording, and the other two are coffee mug sleeves (so you can make two individual sleeves for your coffee mugs).
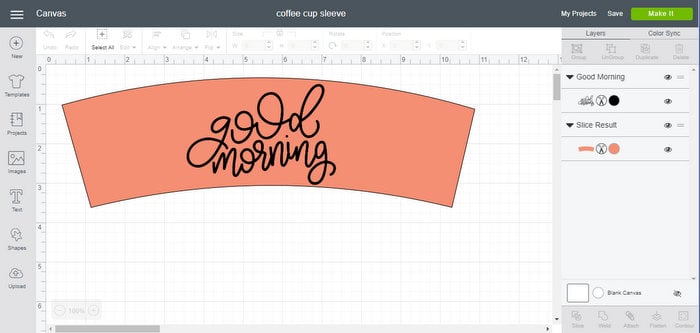
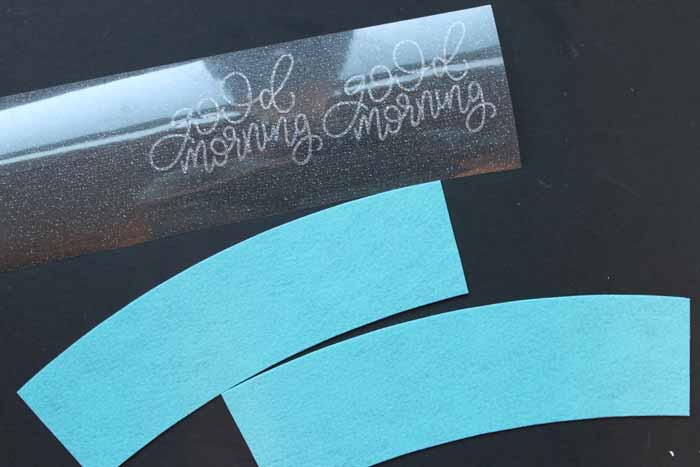
Step 2: Cut Wording Using Iron-On Vinyl
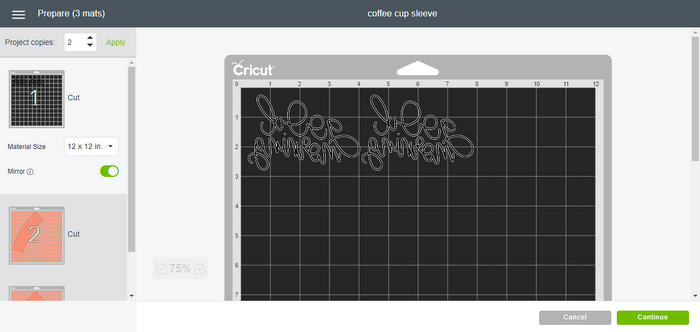
Cut the words from glitter iron-on vinyl using your fine-point blade. Remember to mirror the cuts on the iron-on vinyl and place it shiny side down on your mat.
Step 3: Cut Coffee Mug Sleeve Using Felt
Cut the sleeve itself from felt. I use my rotary blade and the Cricut Maker for all felt cutting to get those lovely, clean edges.
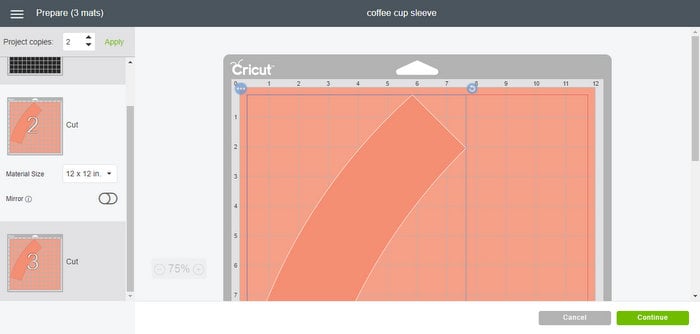
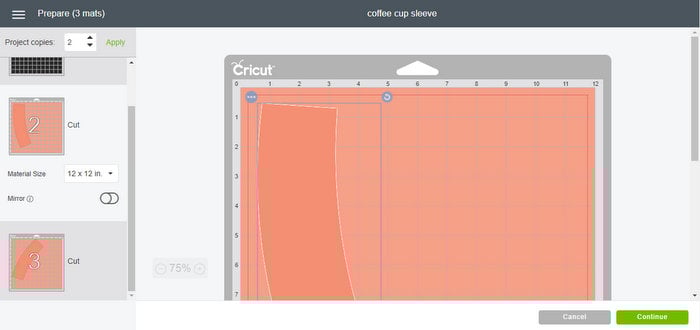
If you're cutting two sleeves at a time, you may want to adjust the position within Design Space to maximize the use of your material. This is because Cricut will want to cut each sleeve from one sheet of felt (shown below).
To make the most of your materials, continue reading below to learn how to cut two coffee mug sleeves at once.
How to Cut Two Coffee Mug Sleeves at One Time (Optional)
Step 1: Highlight Your First Mat With A Coffee Mug Sleeve
Start by highlighting your first mat with a sleeve. Then click on the sleeve itself. Click the round arrow and rotate it to take up less space on the felt.
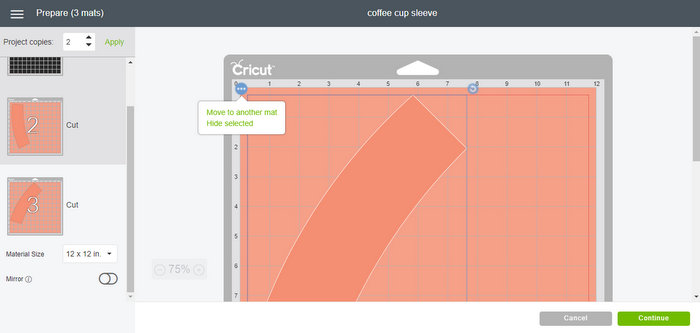
Step 2: Click The Second Mat With A Cofee Mug Sleeve
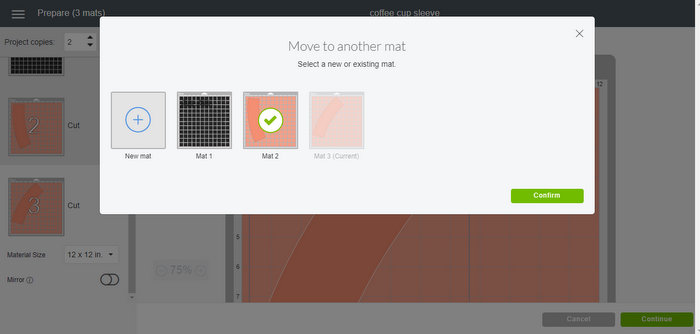
Next, click the second mat that has a sleeve. Click the sleeve itself and click the three dots. Then choose “move to another mat”.
Pick the mat with the first sleeve.
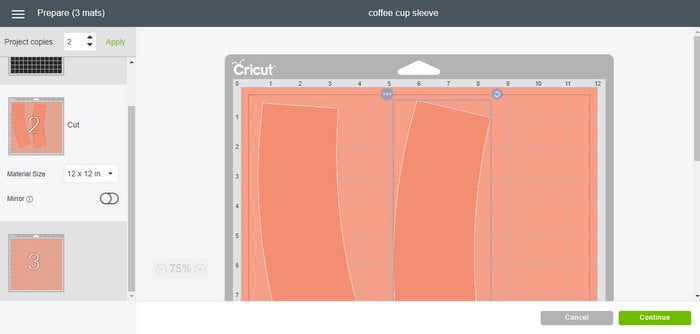
Step 3: Rotate Your Coffee Mug Sleeve On Mat
Now, rotate it and adjust its position so it doesn't overlap the first coffee mug sleeve. You can now cut two sleeves from one sheet of felt.
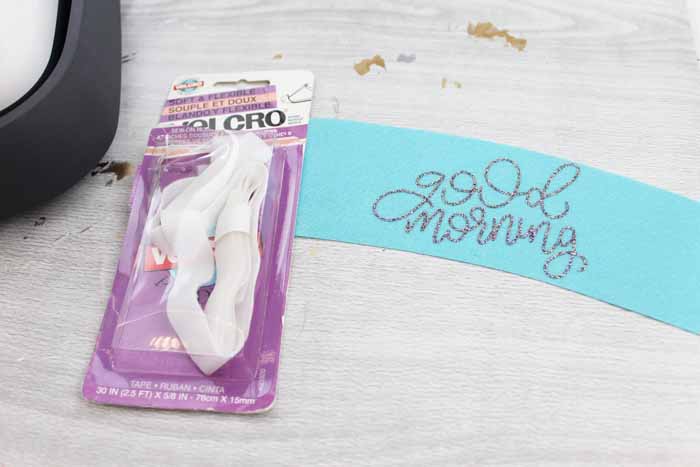
Step 4: Weed Vinyl
Remove all excess from your vinyl cutout, including the centers of your letters. I recommend using weeding tools to make this task easier.
Step 5: Add Vinyl To Felt Coffee Mug Sleeve Using EasyPress
Then it is time to add your vinyl to the coffee sleeve.
To make this task easy, I use the Cricut EasyPress. Be sure to follow all the instructions that come with the EasyPress you are using.
Also, if you'd like to see me add the vinyl for this project to the coffee sleeve, check out the video below!
In the video, I explain everything you need to know about the Cricut EasyPress and share a brief DIY coffee mug sleeve tutorial. I highly recommend watching the full video to learn more about the EasyPress. However, if you want to see this project, you can skip to 5:30 in the video.
Personally, I will not do a vinyl project without cranking up the EasyPress! It has been a lifesaver for all my iron-on vinyl projects around the house.
If you have never used a Cricut EasyPress and want to learn more, scroll down to the section titled ”Cricut EasyPress Resources. In that section, I share helpful resources about the EasyPress and how to use it in your crafting projects.
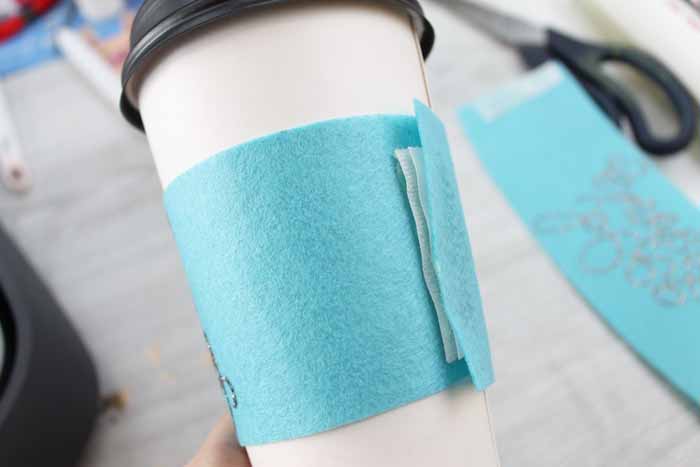
Step 6: Add Velcro To Coffee Mug Sleeve
Cut two pieces of Velcro to fit your sleeve, and then attach them to the ends of your coffee sleeves using fabric glue. Allow this to dry completely before continuing.
You could also sew this into place with your sewing machine. I found it easiest to wrap the sleeve around the cup that I intended to use when adding the Velcro to get proper placement.
Once everything is dry, you'll have a great gift or something to wrap around your morning cup of joe!

FAQs About DIY Coffee Mug Sleeve
Here are answers to some of the most frequently asked questions I receive about creating a Coffee Mug Sleeve. If your question isn’t listed, feel free to drop it in the comments, and I’ll be happy to help!
What Cricut Machine Did You Use For This Project?
I used the Cricut Maker because it was designed to cut a variety of materials, including fabric and felt.
However, you can also use the Cricut Explore series, Cricut Joy, Cricut Joy Xtra, and Cricut Venture to cut felt.
The critical thing to keep in mind is that all Cricut machines are different! Therefore, if you are not using the Maker, you will need to use the correct type of felt, the correct blade, and the correct material setting for your machine.
How Do I Know What Felt Or Blade To Use With My Cricut Machine?
As I mentioned earlier, using the correct type of felt and blade is crucial when creating your felt projects. If you have never made a felt project before, check out my blog post titled Cutting Felt With A Cricut: How To Guide.
In the guide, I cover everything you need to know about cutting felt and share the type of felt and blade required for each Cricut machine.
What Coffee Cup Size Is This Sleeve Designed For?
This coffee mug sleeve is designed to fit a standard 12-oz cup. However, you can adjust the size in Cricut Design Space.
Can I Change The Good Morning To Another Design?
Yes, you can!
You can add whatever you would like to the front of the coffee mug sleeve, and you can even customize it if you are giving it as a gift!
In Cricut Design Space, you have a ton of options when it comes to designs and phrases. If you are looking for something specific, I recommend typing your search term in the search bar and then scrolling through all the designs.
One design that I think would be really cute is this Coffee Bean Monogram!
The only thing to remember is that you may have to resize the design to fit it onto your coffee mug sleeve.
Do You Have Any Coffee-Themed or Coffee Mug SVGs I Can Use For This Project?
Yes, I do!
If you want to change the ”Good Morning” to a coffee-themed or coffee mug design, check out my free SVGs below!
Cricut EasyPress Resources
As I mentioned in step 5, I always crank up my Cricut EasyPress when working on a vinyl project. That is because it can be used in so many ways, whether it is adding vinyl to a project, prepping a surface, or simply ironing out wrinkles in fabric.
If you have never used a Cricut EasyPress and don't know where to start, I recommend checking out the resources below.
- Cricut EasyPress Versus Iron: Which is Better?
- How to Use Cricut Iron-On Vinyl with the EasyPress
- Cricut EasyPress Mini: Everything You Need to Know
- Cricut EasyPress versus EasyPress 2
- Mini Heat Press Review: 6×7 EasyPress Alternative
- Cricut EasyPress 3: What is new? Do you need it?
- Cricut EasyPress 3 Review: New Features and Upgrading
40 More Felt Projects
Now that you know how easy it is to make a DIY coffee mug sleeve, will you be making one for everyone on your list?! This is a quick and easy felt craft that everyone will love!
Also, speaking of felt crafts, if you are looking for even more felt projects to make, check out my Felt Crafts: Over 40 Felt Craft Ideas to Make Today blog post!


Love these Angie!
These are so cute. I really like your work
These would make great gifts for a wedding shower or party. Thanks for sharing with us at #HomeMattersParty
Great ideas for party, they are sooo cute, I love the coffee sleeves so much.
Thanks, Angie!
Is there another way to access this cut file? when I try to open in design space it says it cannot open because it is a private file
Try it now! I just fixed it!