

Today, I'll show you how to use the contour feature in Cricut Design Space. We will also discuss what contouring is and why you might want use it. It is actually a convenient feature that can be used to easily customize your images within Design Space. Keep this Cricut hack in your back pocket, as it will come in handy.
I first became aware of the Cricut contour feature when I started using my Cricut Maker. I have used it a few times since then, but I recently fell in love with it when I figured out how to use it on text. It is a lifesaver in so many ways. Get ready to customize the images you upload or those that are already in Design Space.
What is Cricut contour?
In Cricut terms, contour is the feature you would use if you want to remove cuts from the inside of any image or even text. It allows you to basically hide unwanted cuts. I say hide them because you can always go back to the contour menu and turn those cuts back on. That means it is reversible, which is a good thing, especially if you enjoy experimenting with your images.
When would you use the Cricut contour feature?
If you have an image that you wish didn't have certain areas cut out, the Cricut contour tool is for you. If you want to remove the centers of some letters, again, contour is a great way to do that. Whenever you want to modify a design to remove cuts, I recommend using the contour feature. It is even great for dividing up a cut file into multiple layers or colors.
How to Contour on a Cricut
If you'd like to watch me use the contour feature directly in Cricut Design Space, click the play button below. From there, you can see how the Cricut contour feature works and learn more about using it for your crafts.
Can't watch the video or missed some of the steps? You can also follow along below as I share how to use the Cricut Contour feature.
How to Use Contour in Design Space
Cricut Contour is a simple yet very powerful tool. It is definitely one that you want to keep in your pocket when working in Design Space. Let's explore how to utilize this feature for both images and text.
How to Contour an Image
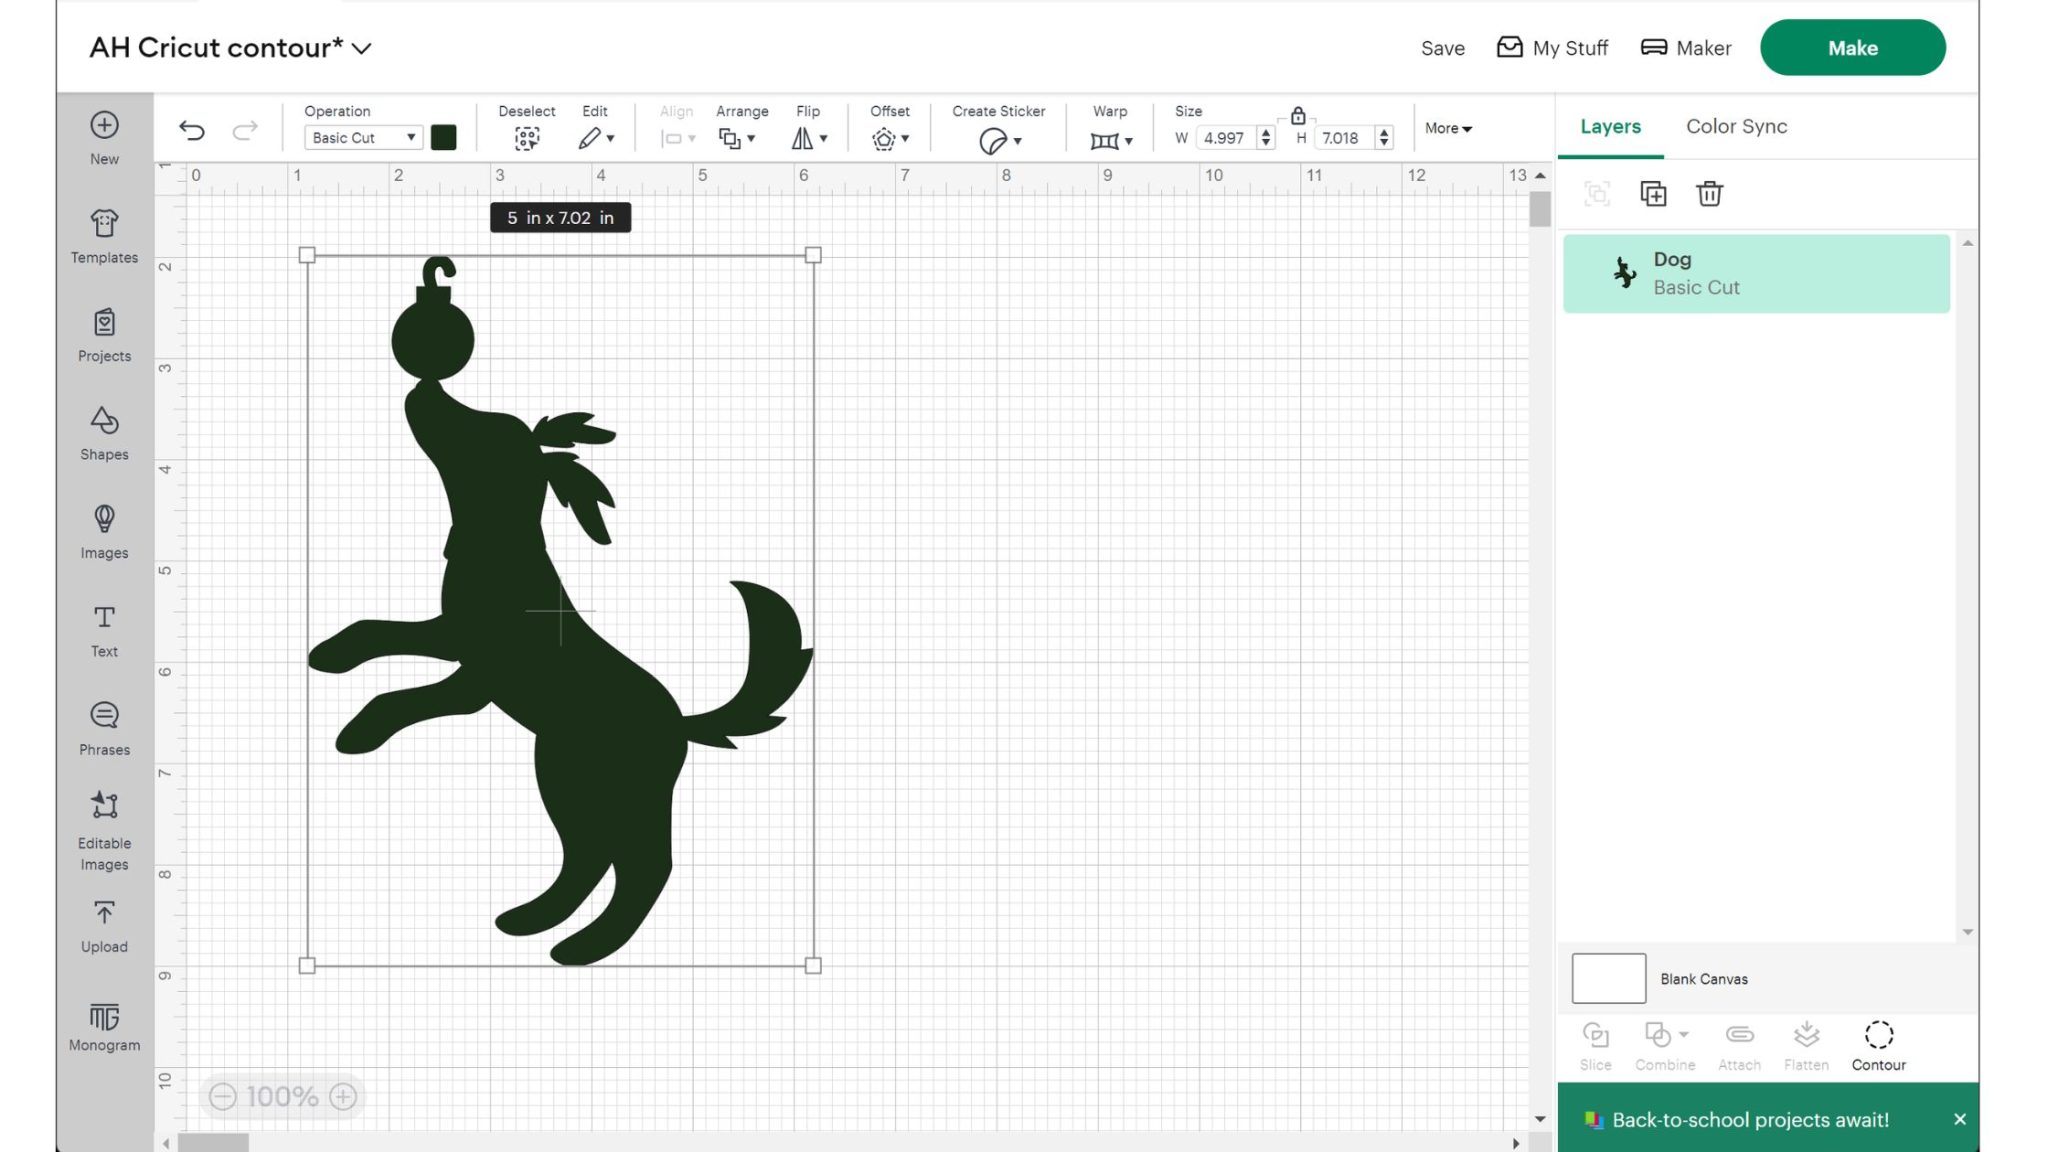
Let's start with using the contour feature on an image. I have selected an image of a dog with numerous internal cut-outs for illustration.
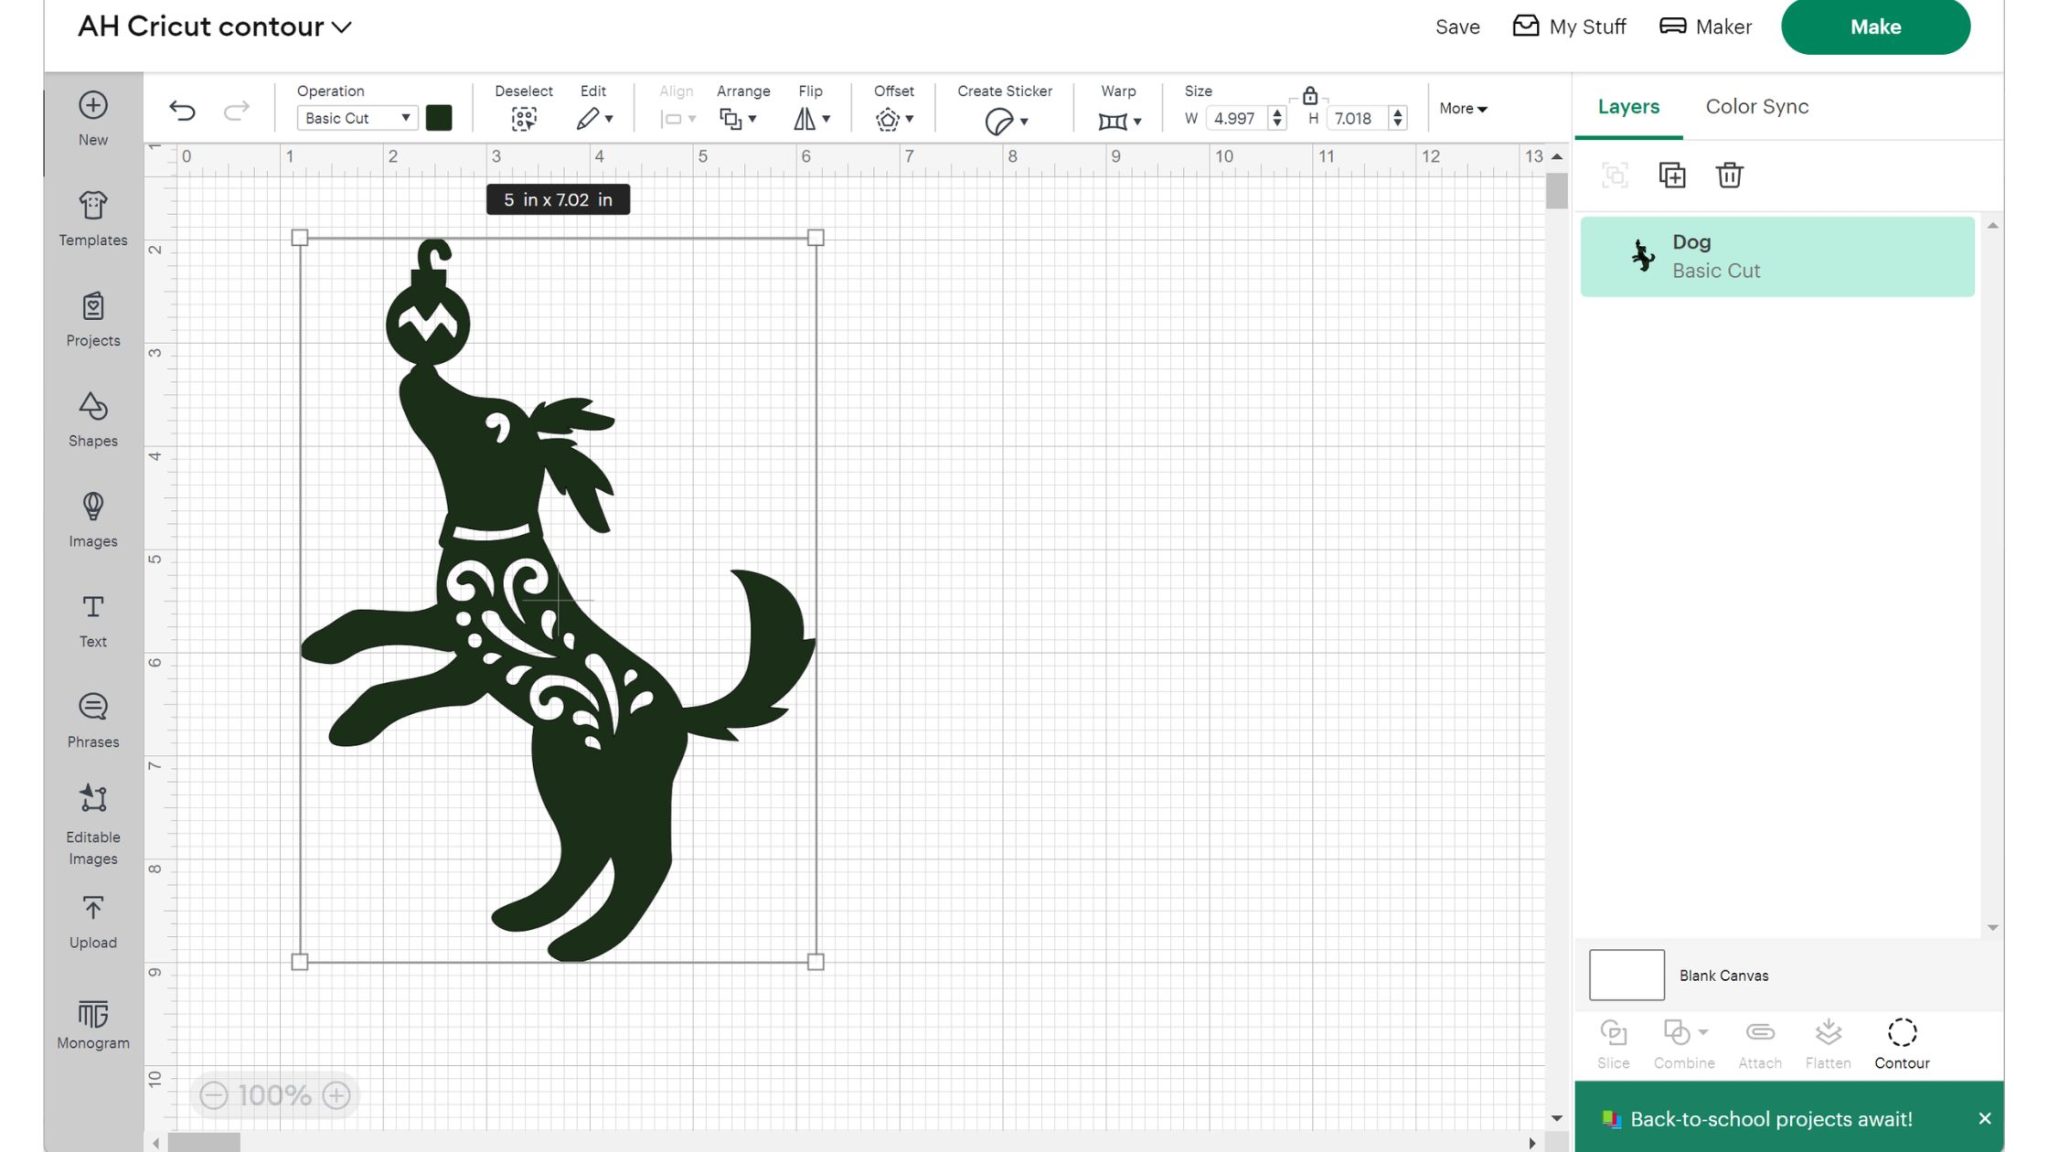
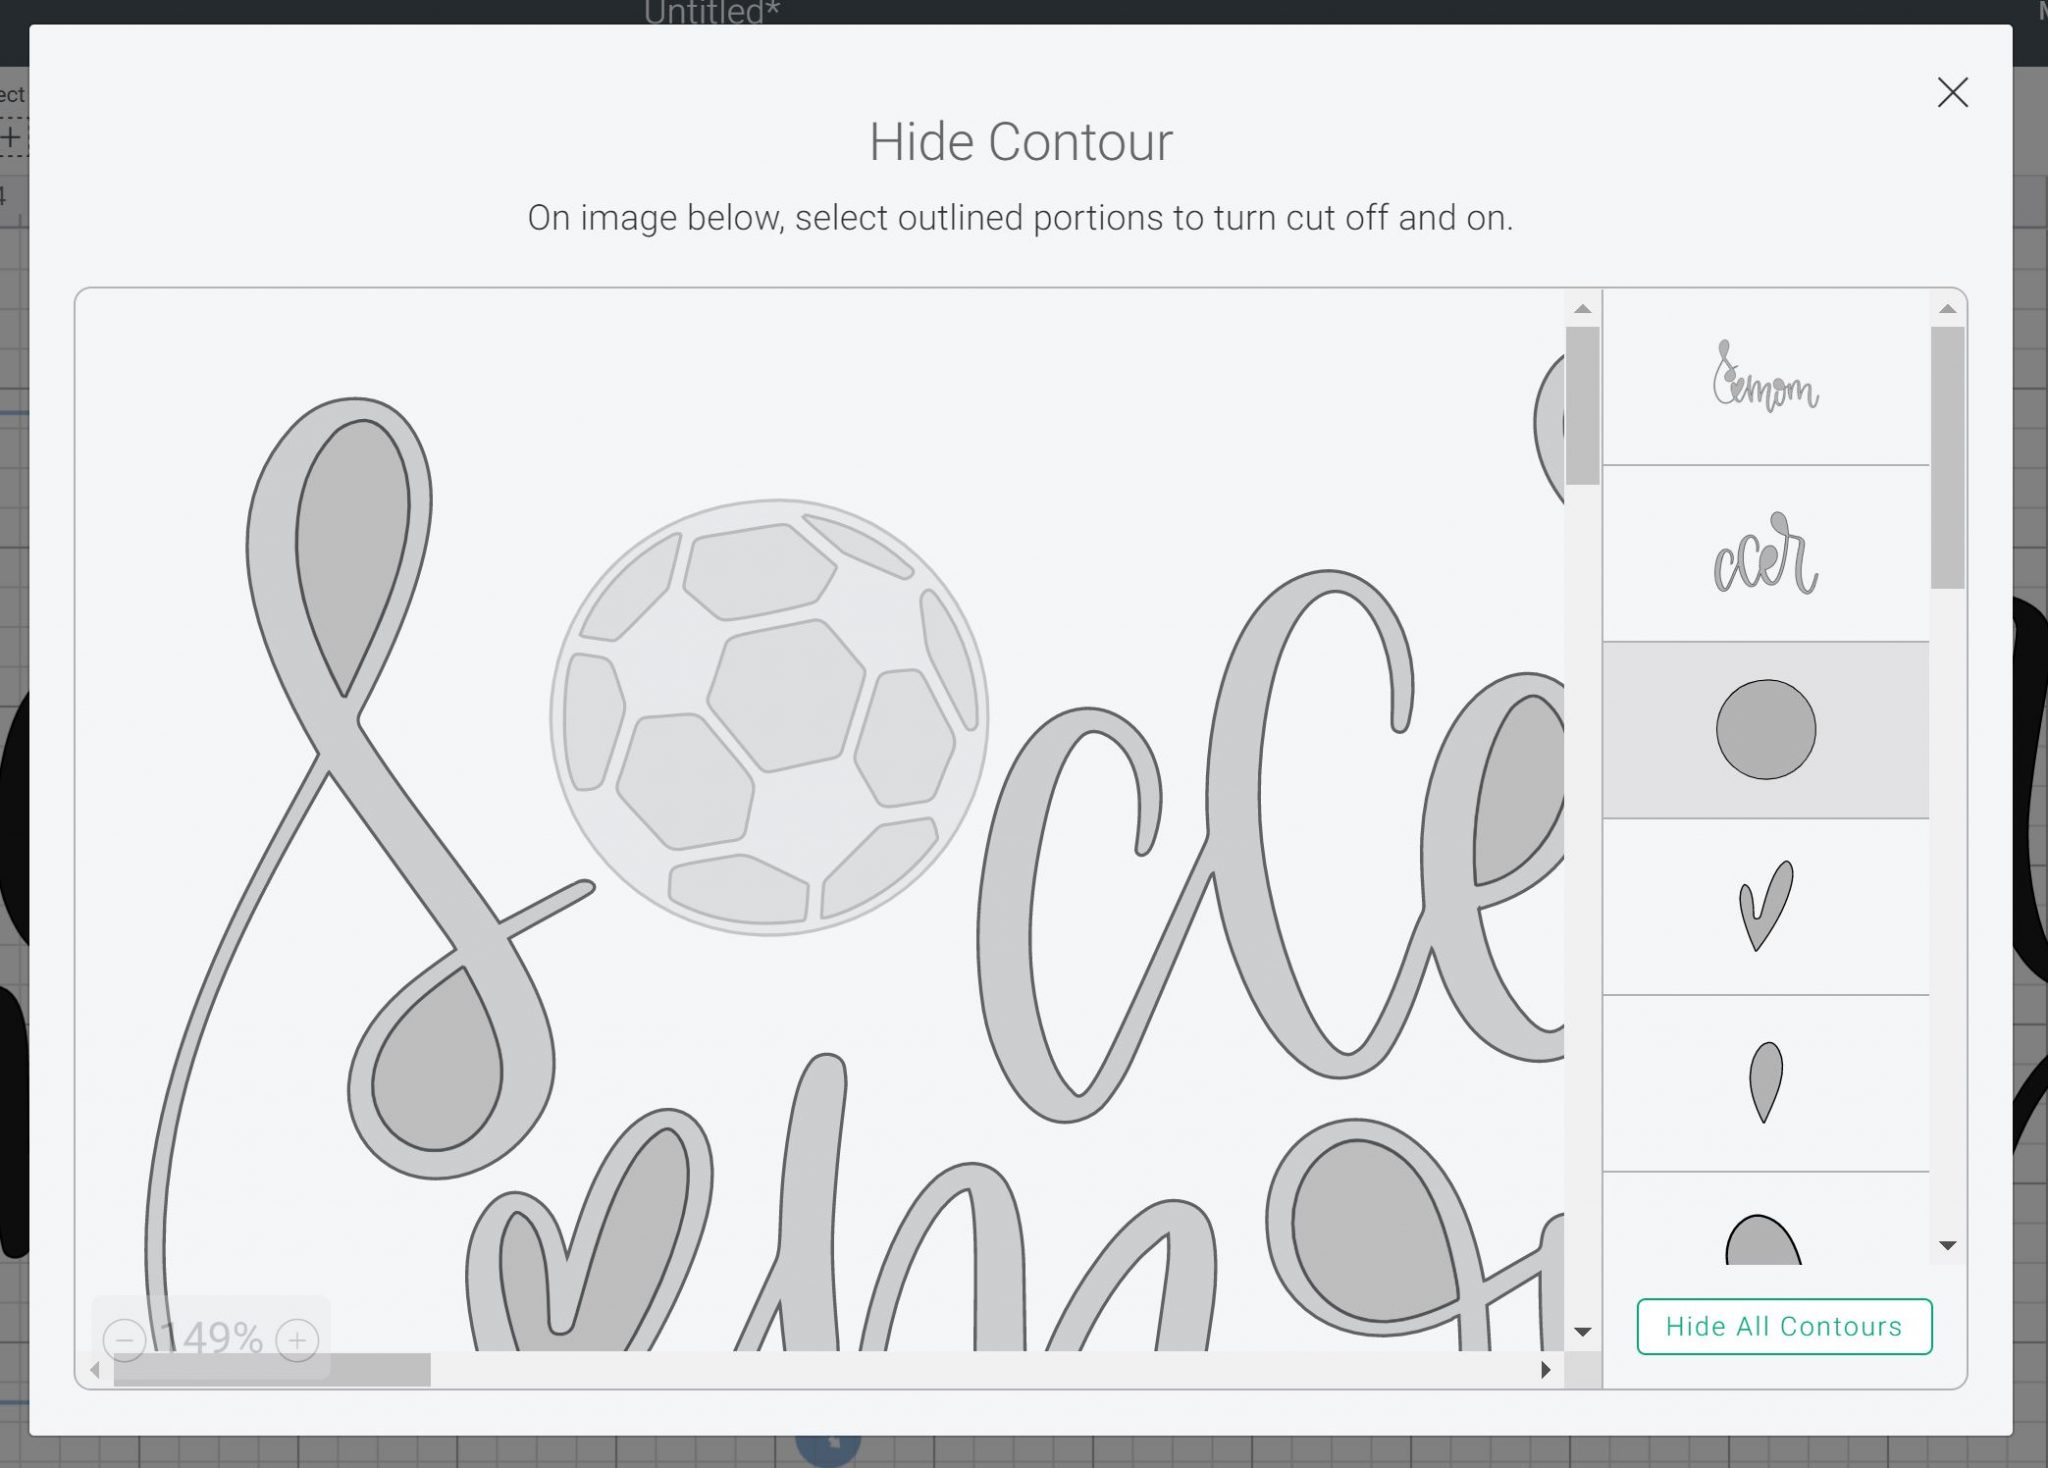
Highlight the image and click the contour button all the way in the lower right-hand corner. You will get the contour dialogue box.
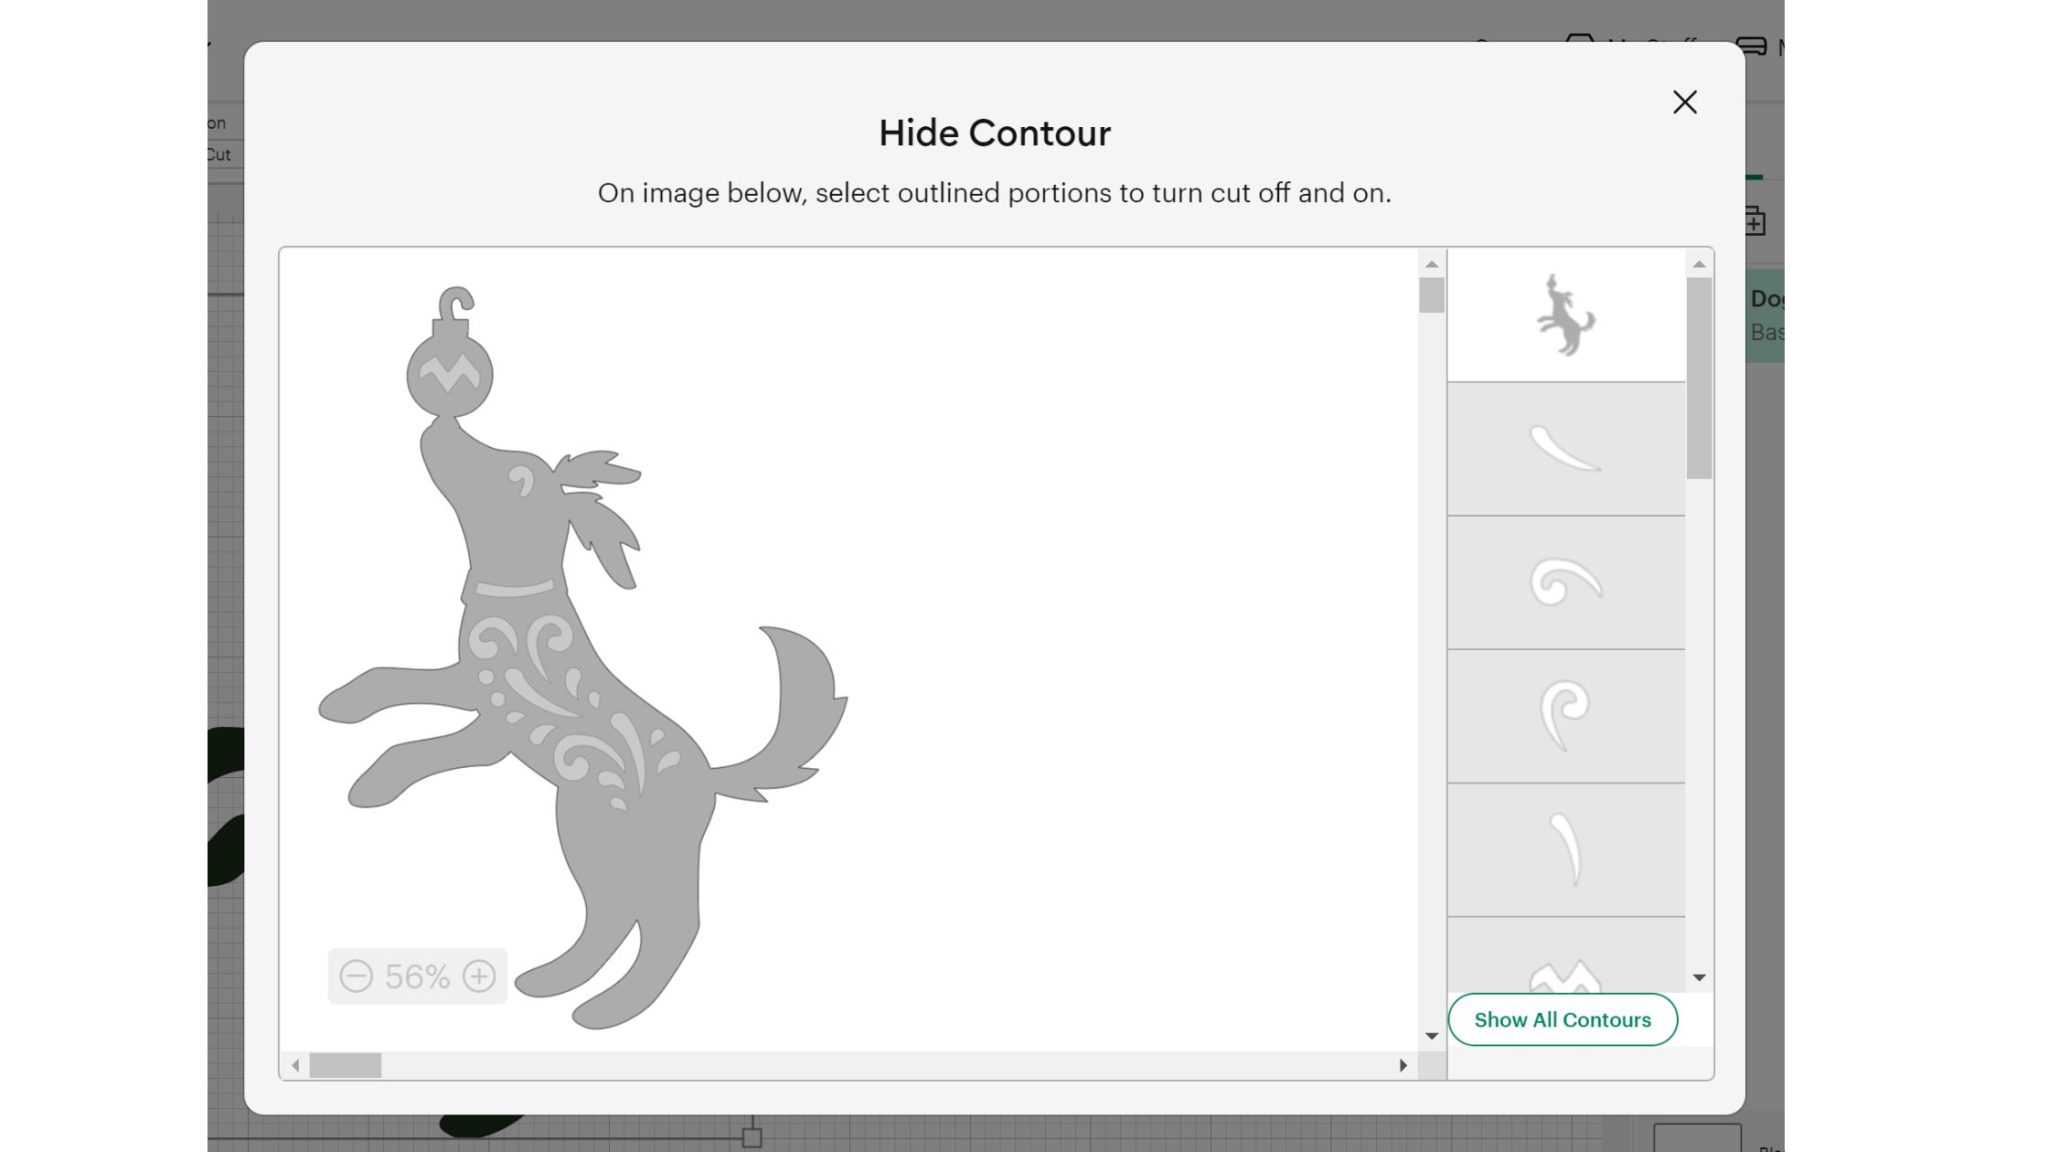
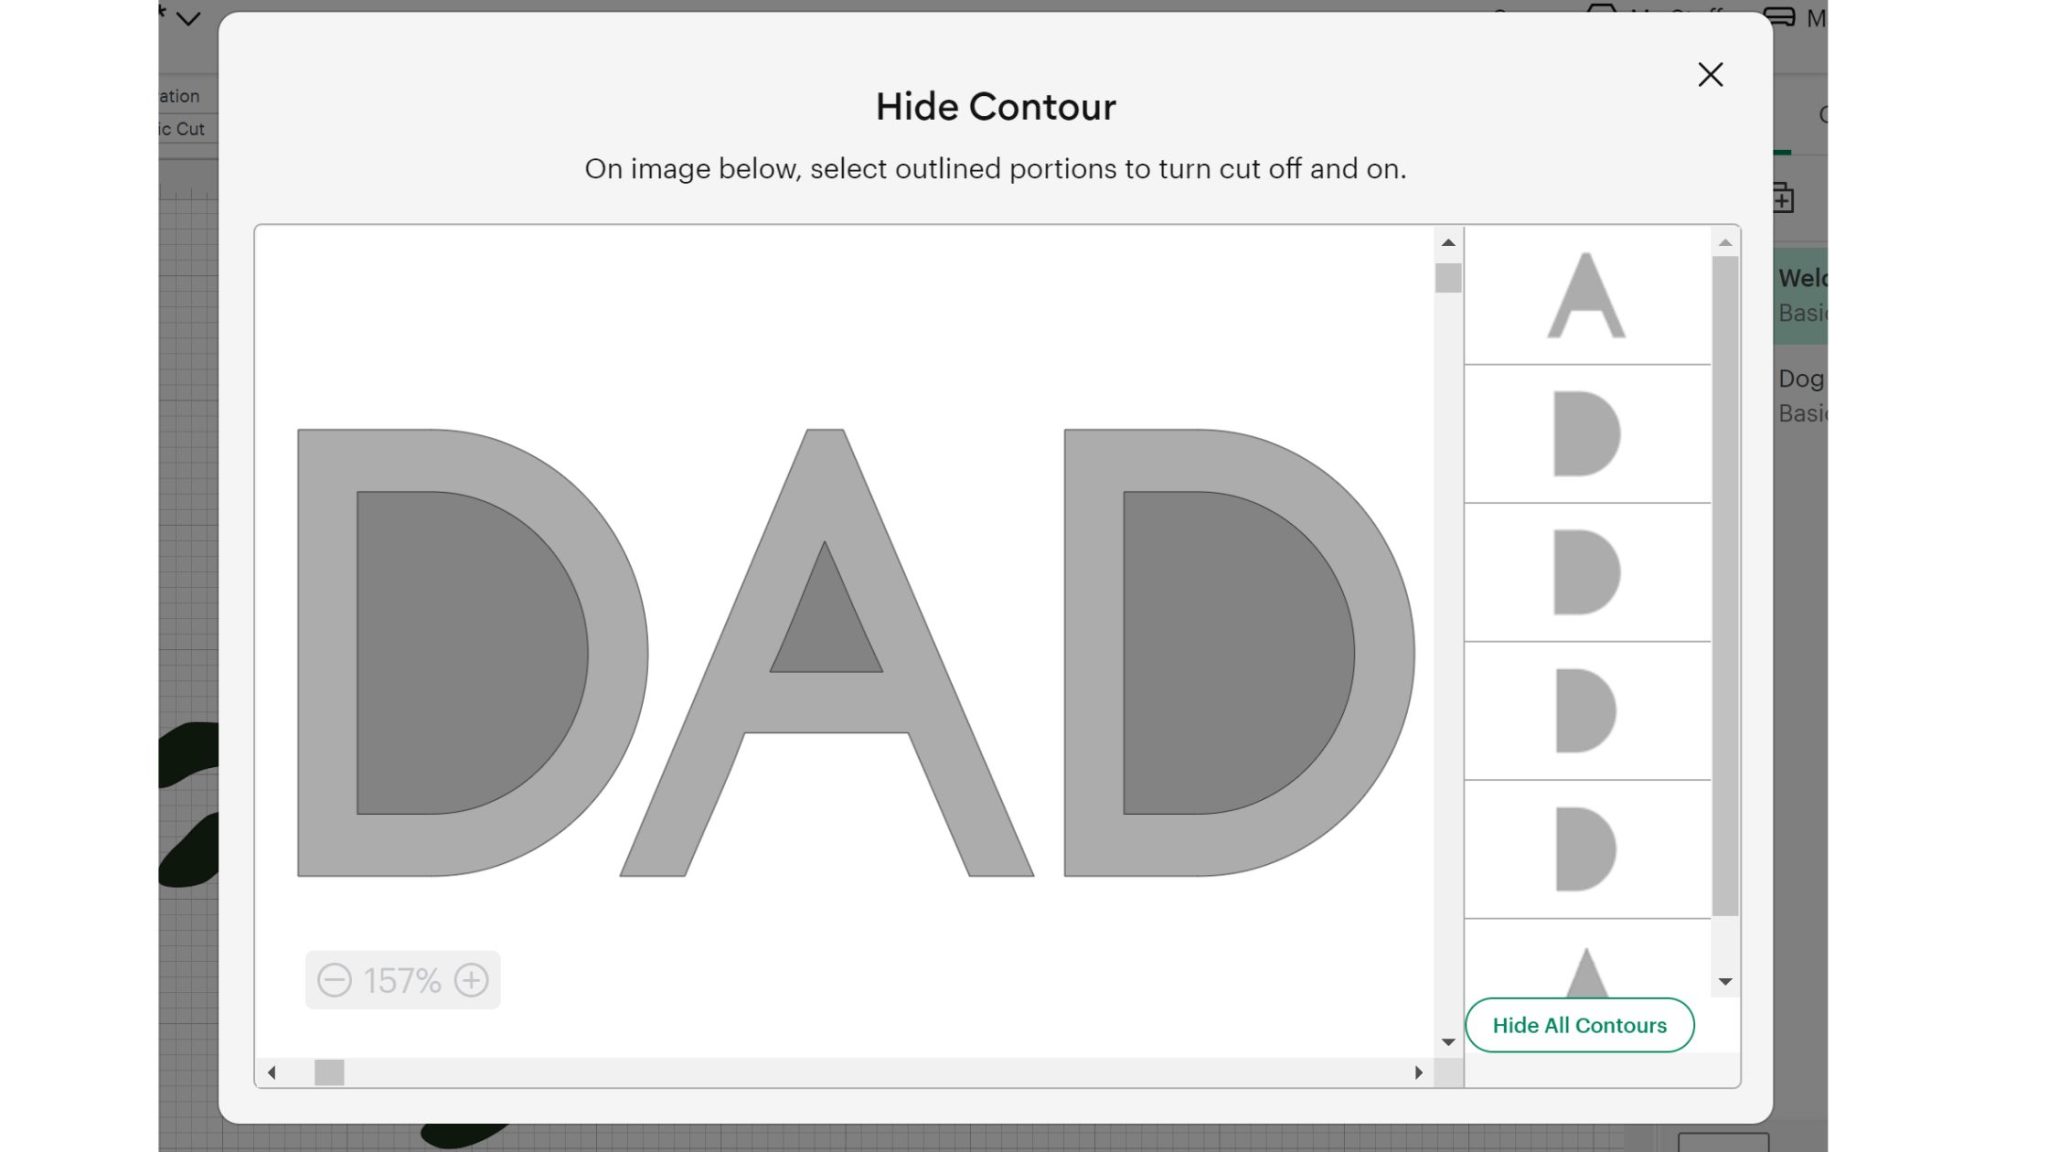
From this window, you can click each contour to remove just a few pieces, or you can click “hide all contours” in the lower right-hand corner. Hiding all contours will leave you with a silhouette of your image.
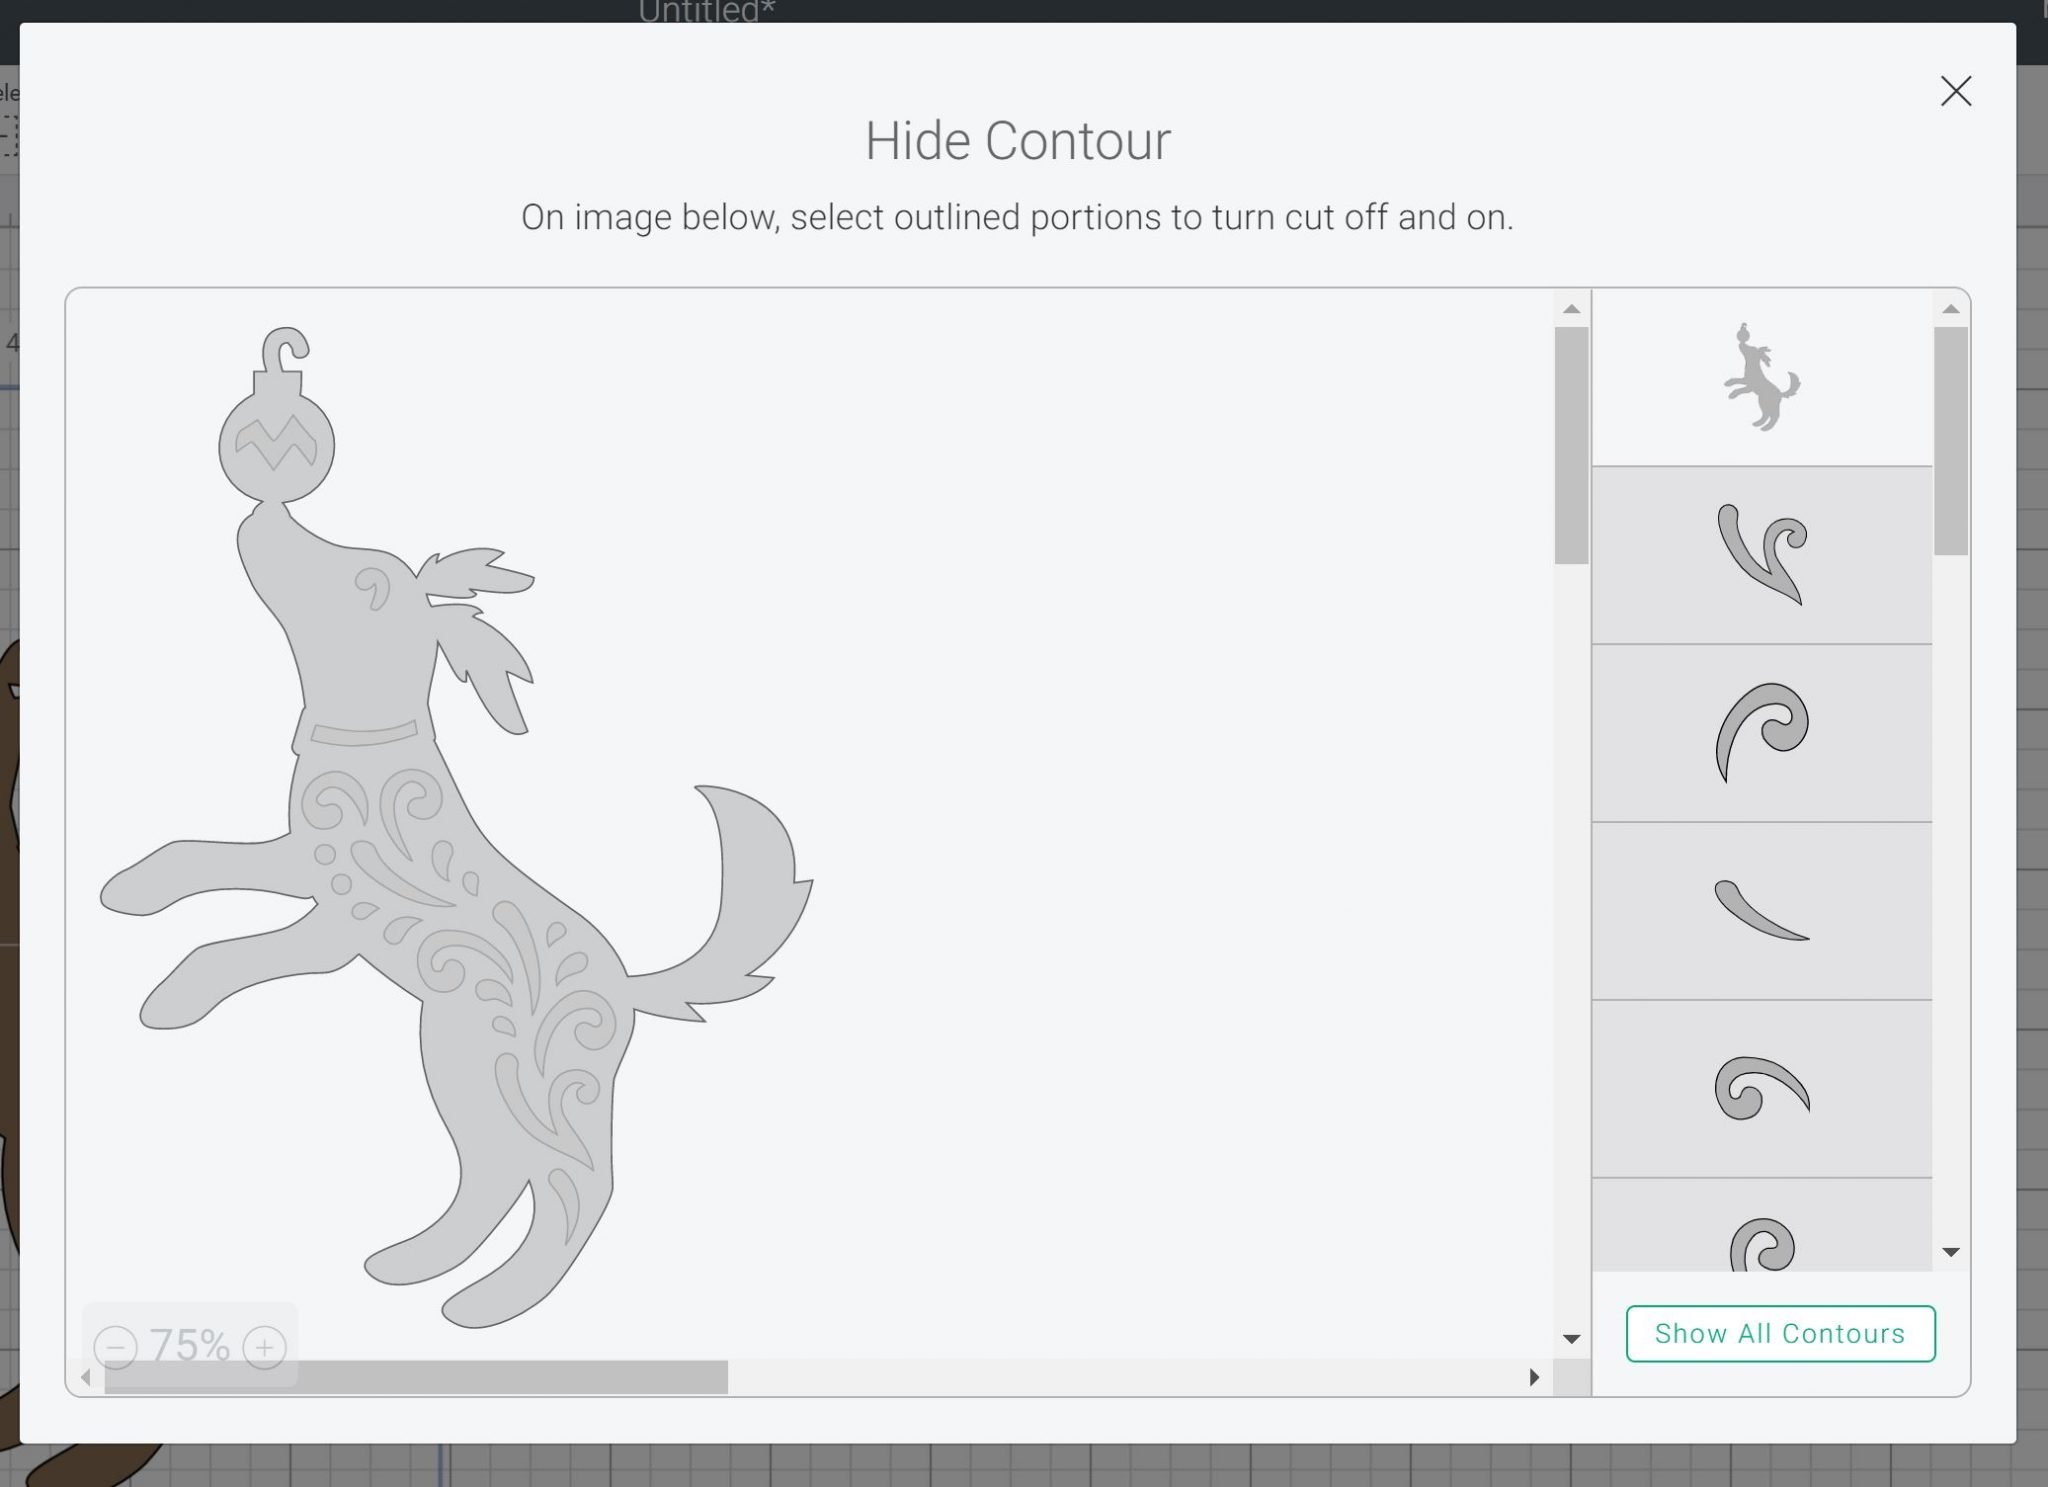
Once you have it looking the way you want, click the “X” in the top-right corner to close the box. Then you can see the result of your contour on your canvas. Remember that you can go back to the contour feature at any time to remove or add pieces.
How to Contour Text
Now that you know how to contour an image in Cricut Design Space, let's move on to text, as there is one additional step. First, add your text to your canvas. You will want to choose the font and get it exactly how you want it now, as you will not be able to alter the text later.
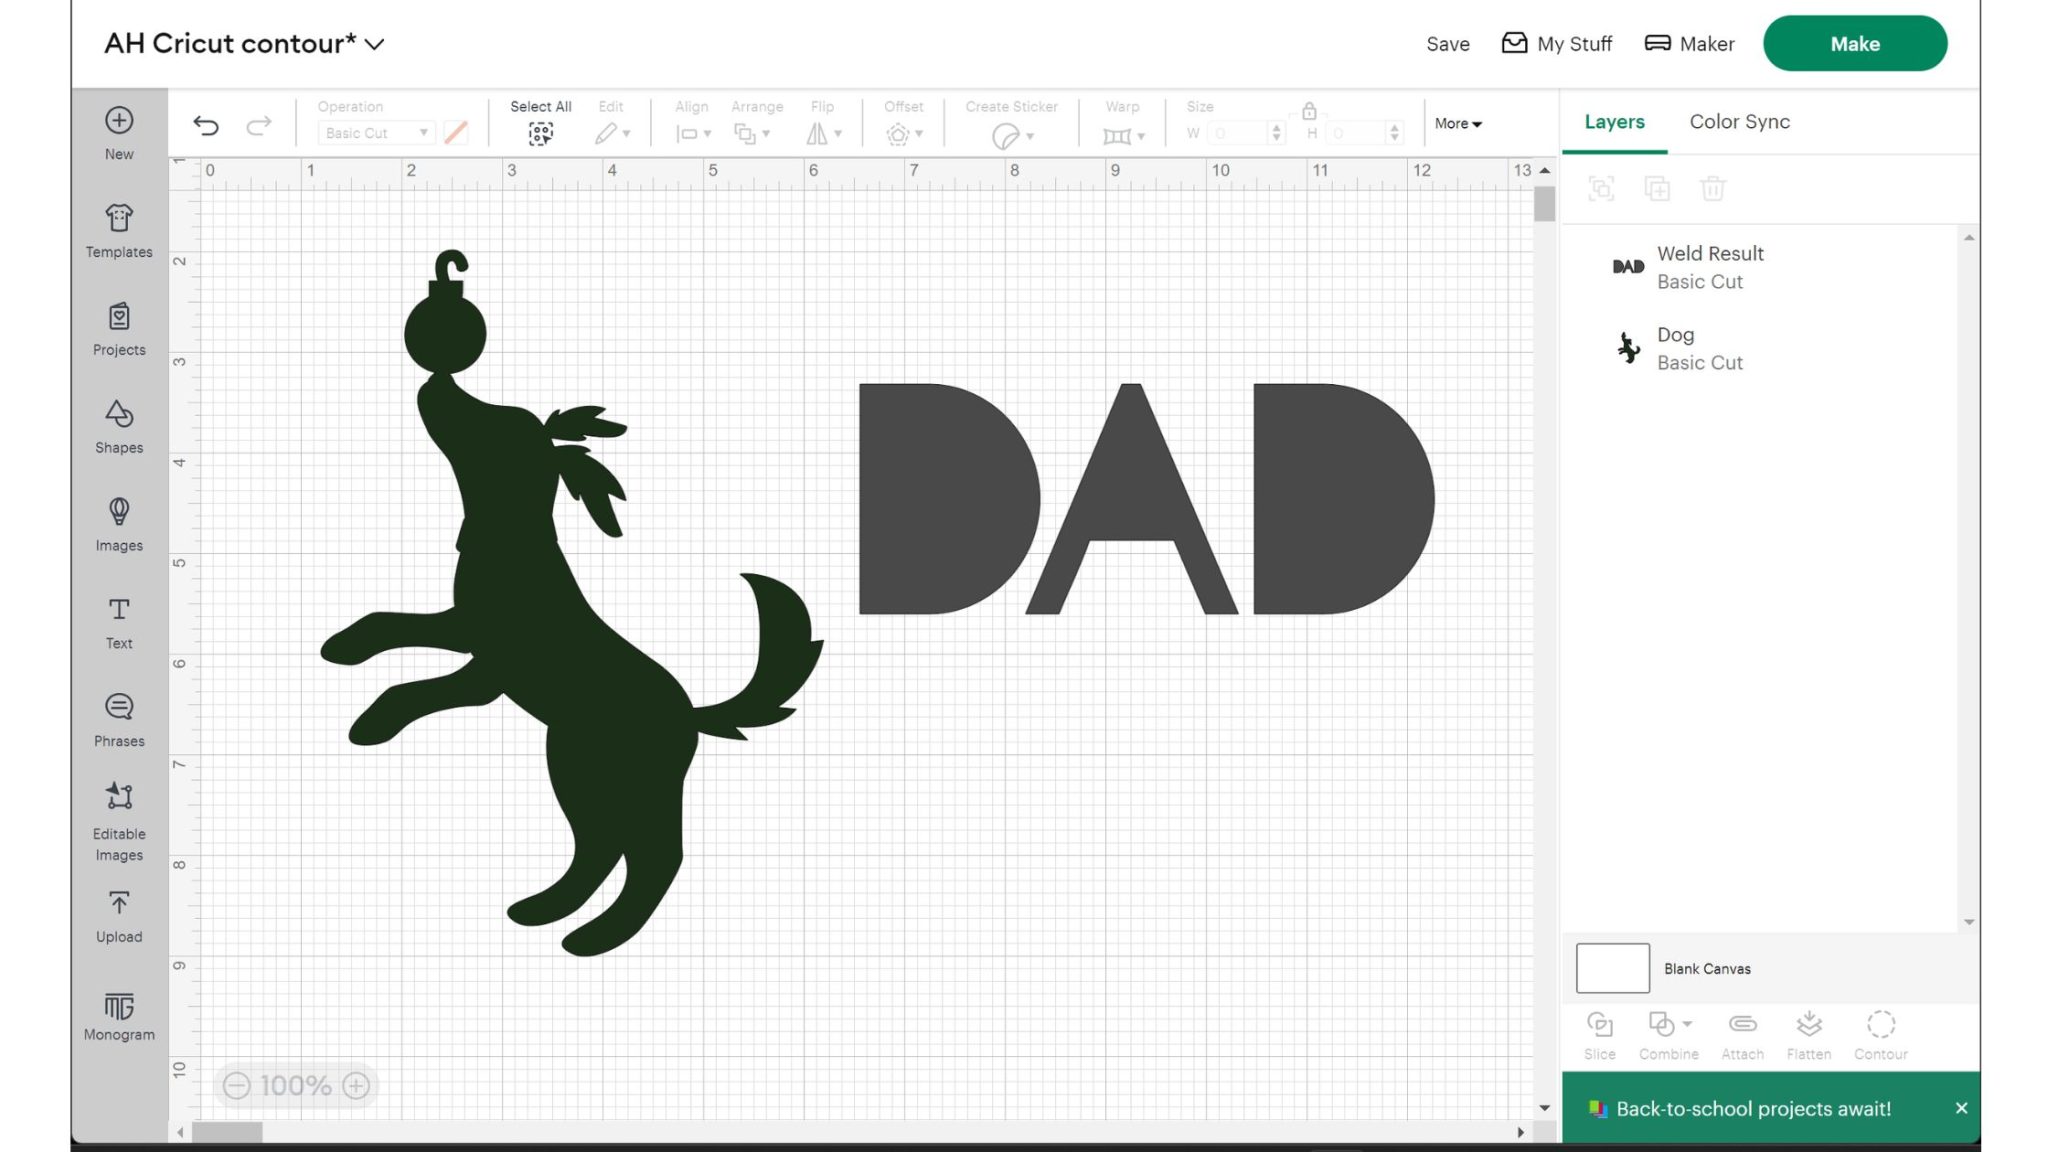
Once you have it the way you want it, click the text and select ‘Weld'. This will create a single cut that can then be contoured. However, this weld function cannot be undone. Click on your welded text and then click the Contour button.
You can then remove cuts just as we did before for images. This is a great way to modify your text for projects.
Using Contour to Create Layers
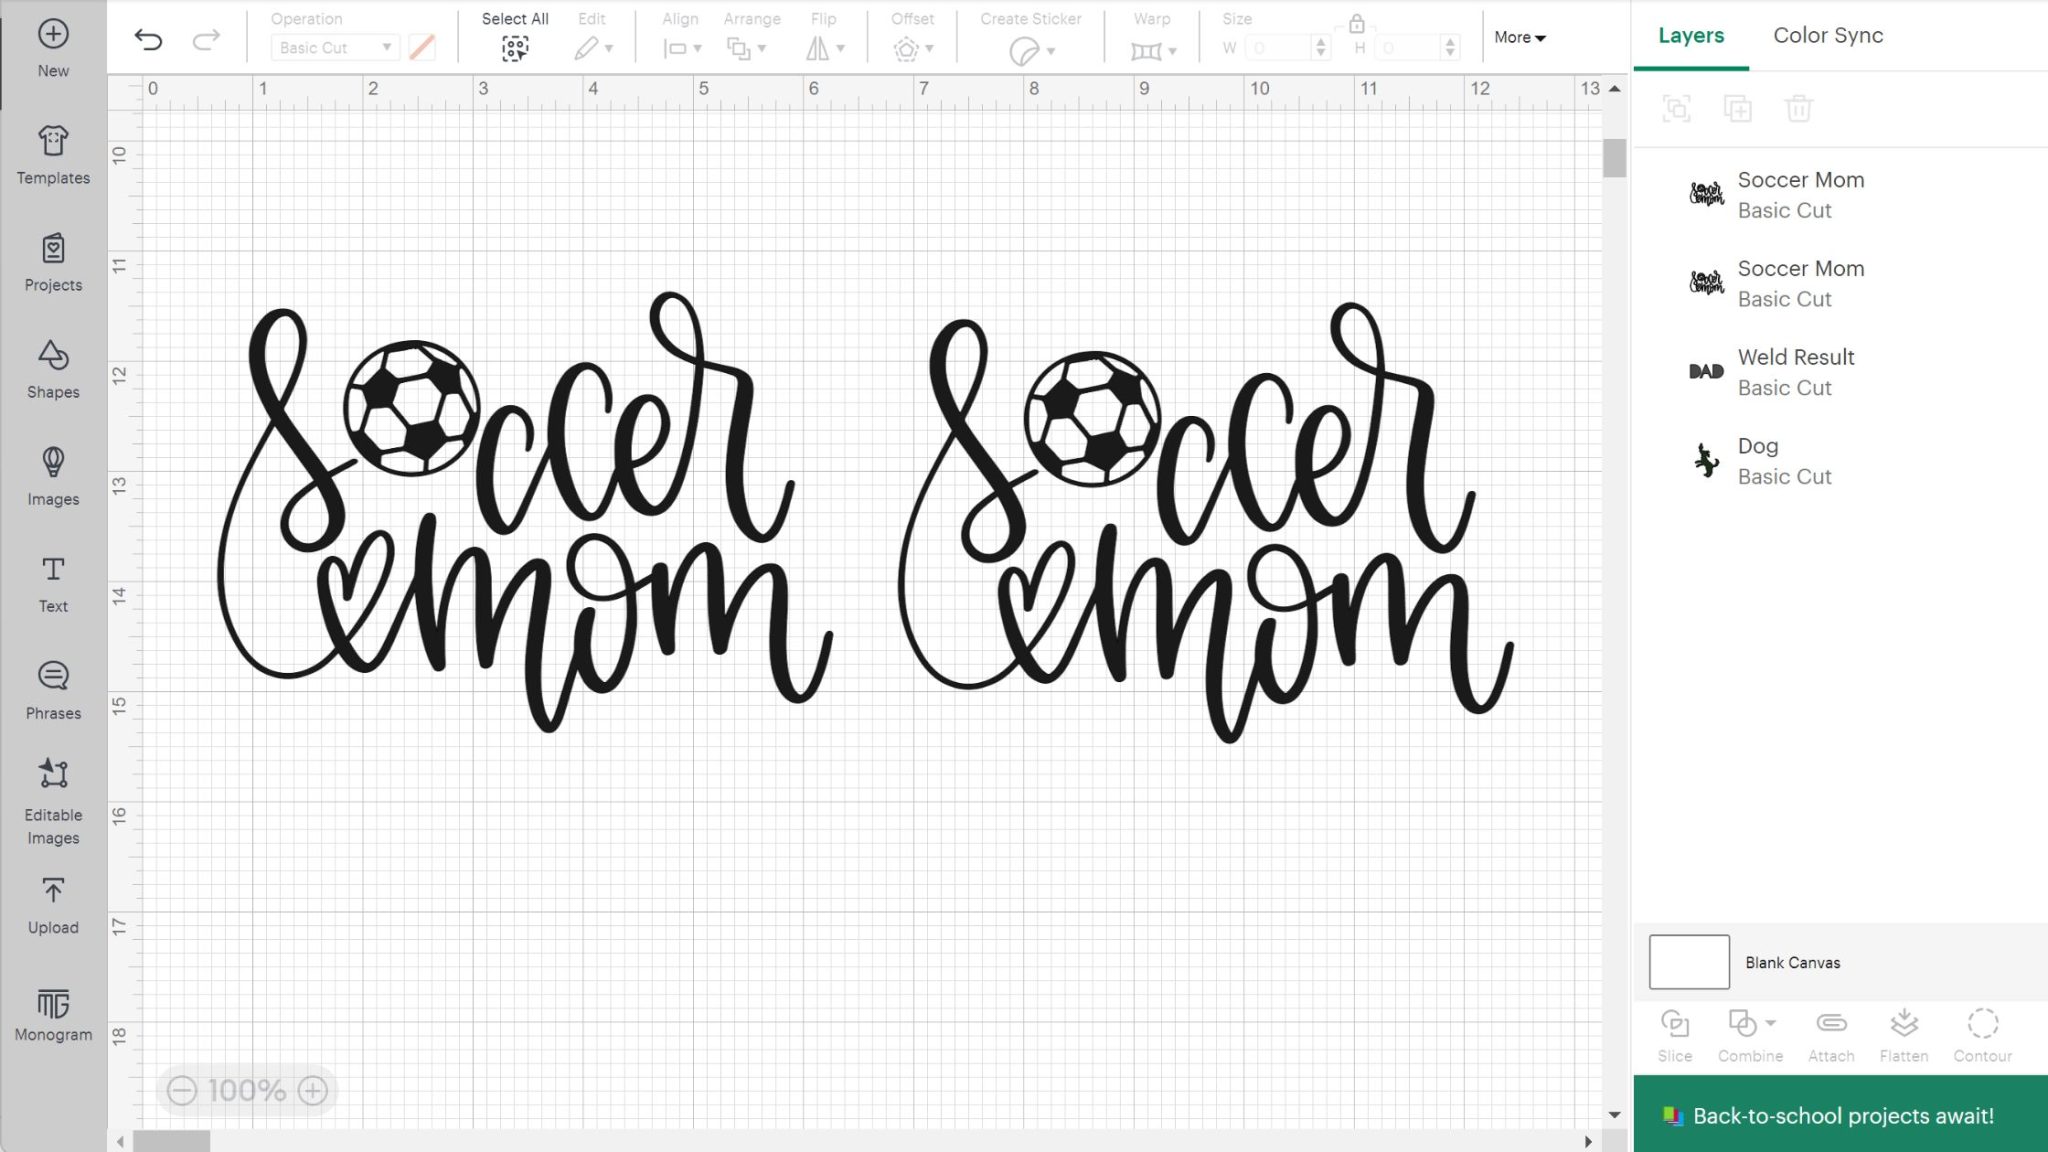
Now that you are a bit more familiar with contour, let's make some layers on a project using this feature in Design Space. Below is an image from Cricut Design Space. It is all one cut, but let's say I wanted to make the soccer ball a different color from the letters. The contour feature is a great way to do that!
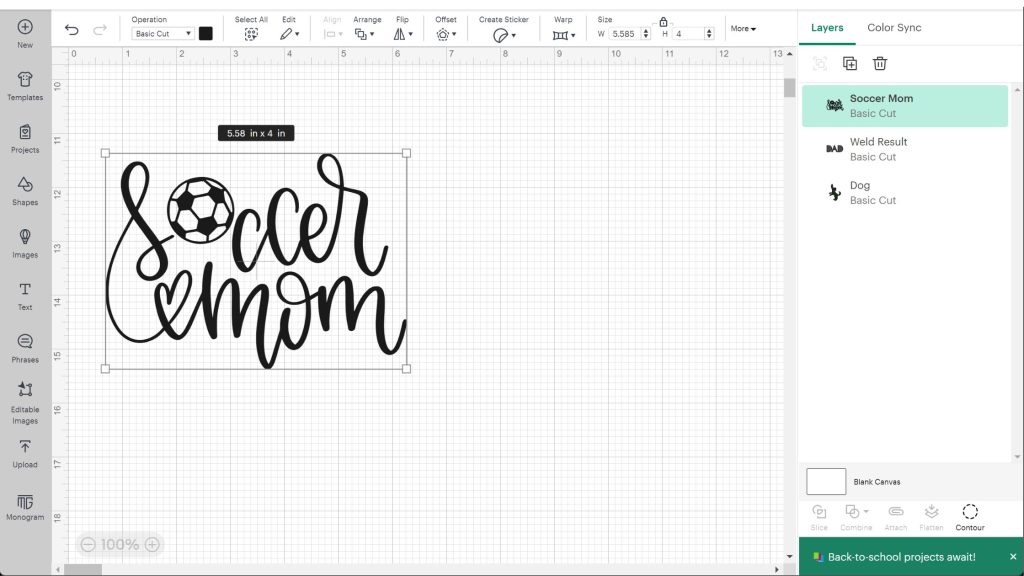
First, you will want to make as many copies of your image as you want layers in your design. I made two.
Then, for each of those layers, use the contour feature to remove anything you don't want to be that color. So, I will remove the ball from one of the images.
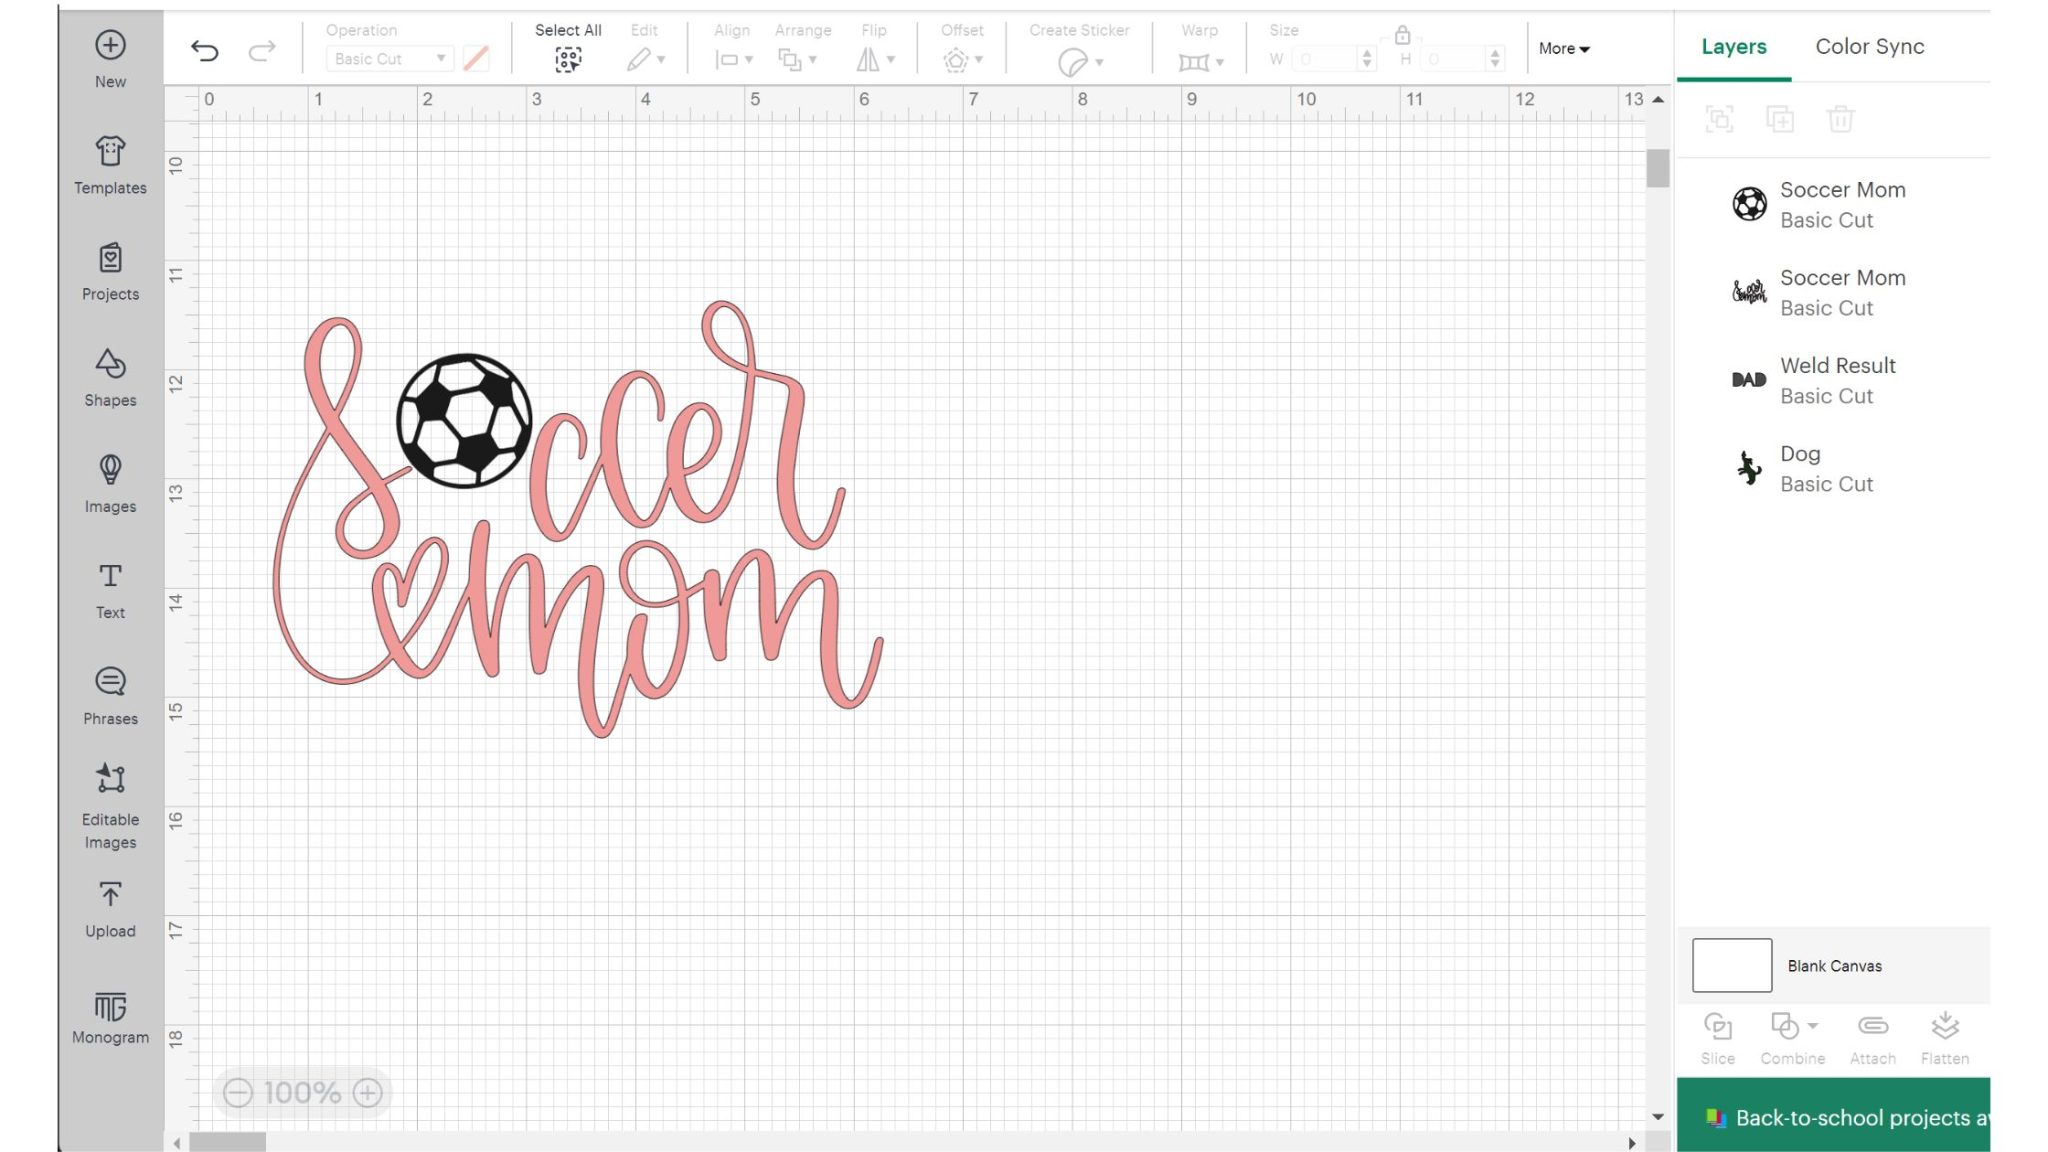
On the other image, I removed everything EXCEPT for the ball. Now I have two layers for a design.
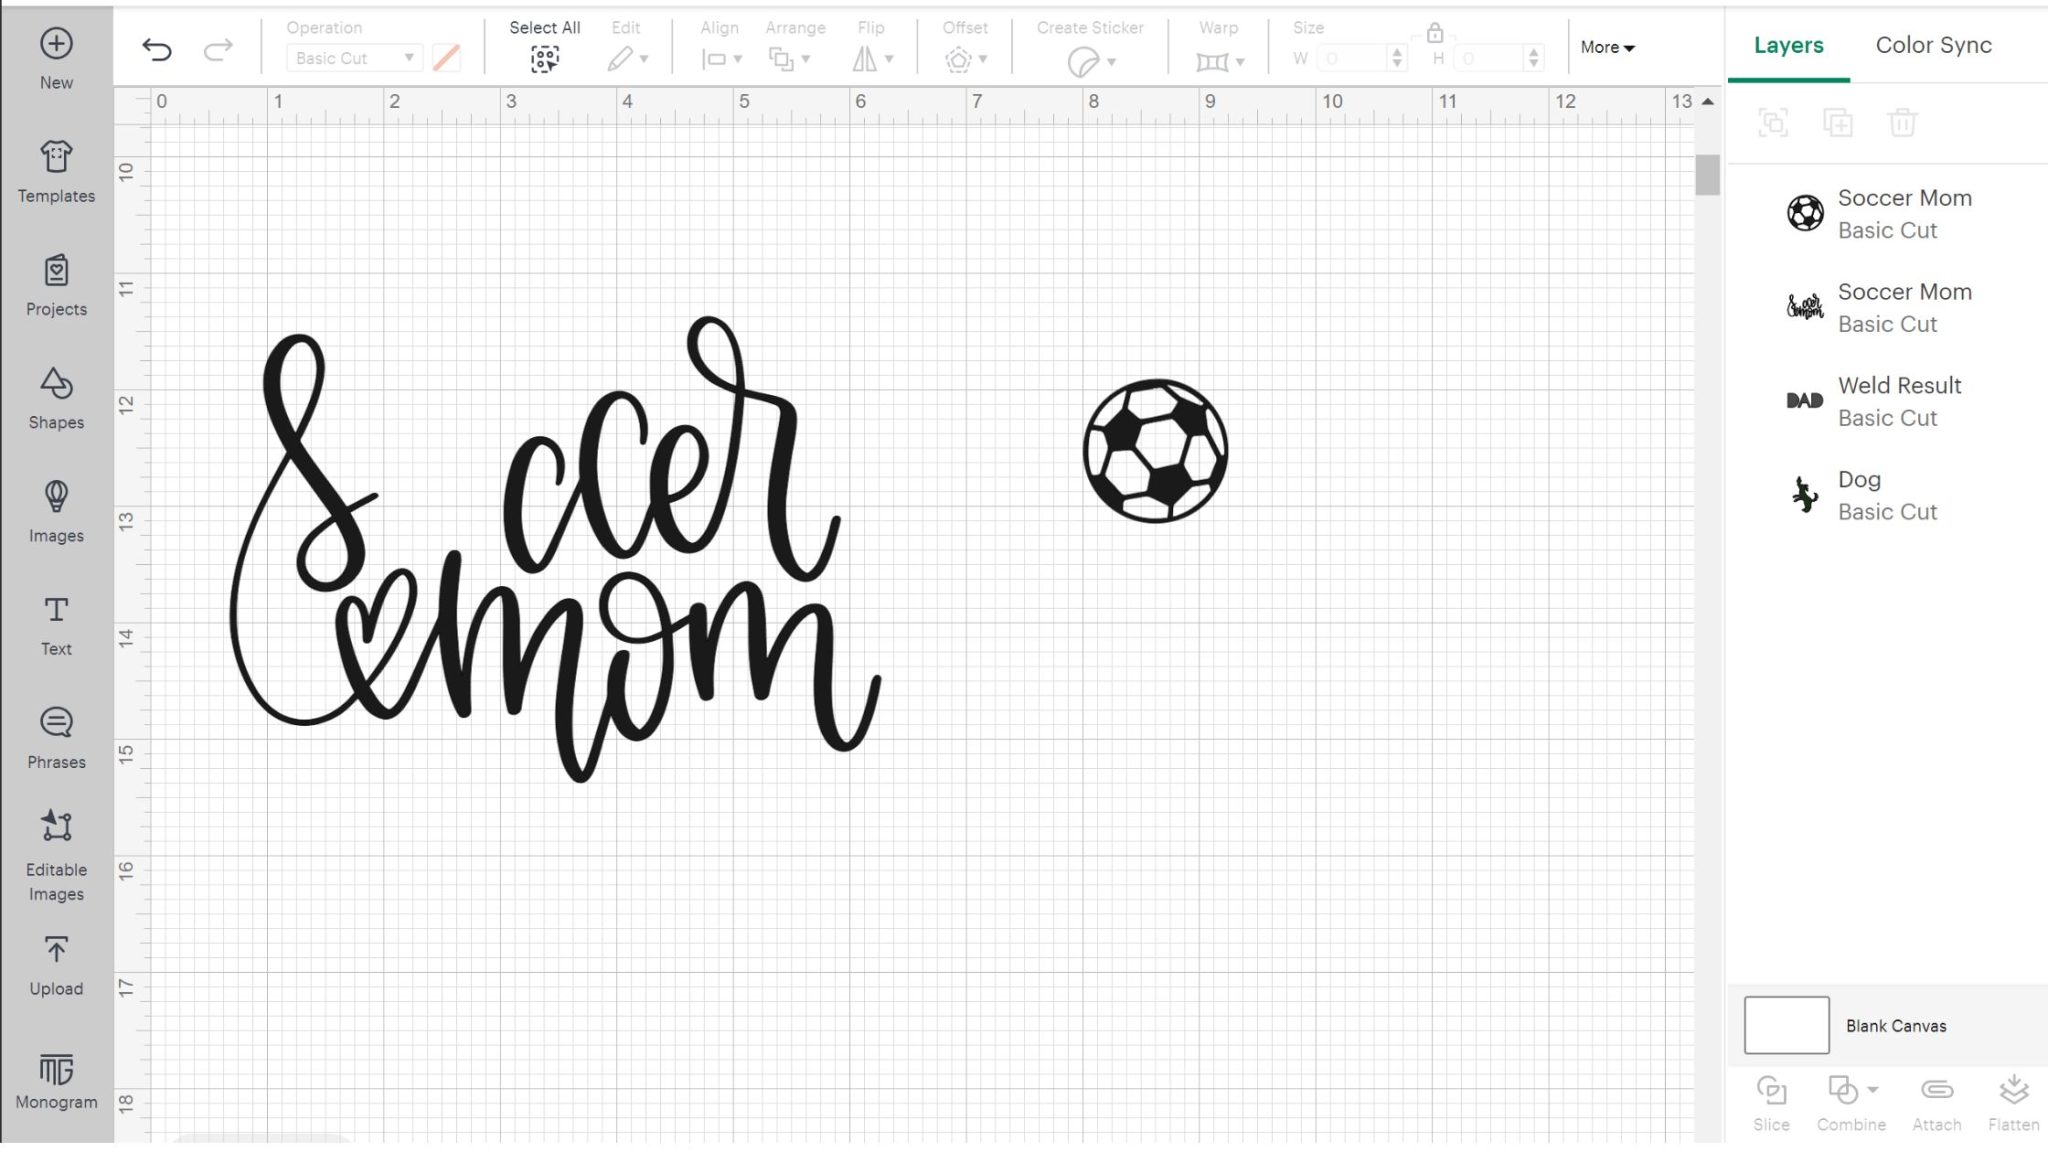
Just change those to two different colors so they cut on different mats, and you are ready to make your layered design!
Projects that Use Cricut Contour
Now that you know how to contour on a Cricut, put your knowledge to the test by creating a few projects! Here are some ideas to get you started.
- Make your own puzzle with the Cricut Maker and use contour on text to make your puzzle base.
- Make custom mats for frames like these. The contour feature allows you to remove the insides of letters, as you don't need those in your mat!
- These constellation coasters are made from Infusible Ink and I always recommend removing any small pieces using contour if you can for this material.
- Make footprint ornaments with this tutorial. Yes, you can even use contour on images you upload if needed.
Conture FAQ
Here are some common issues with the Cricut Contour feature and how to resolve them.
The contour button is not working
There are a few reasons this may be the case:
- Your image is part of a group or attached to something else. Contour will only work on one layer, so be sure to ungroup or detach. You can also weld several layers together and then contour if there is a bunch of scattered objects on your mat.
- Your image doesn't have any internal cuts, so there's nothing to contour.
- You have not welded your text. If you are trying to use contour on text, be sure to read more about how to do that above.
- Your layer is not a cut layer. Look at your layers panel to make sure the piece says “cut” because if it says “print/cut,” you will not be able to contour it.
I want to add the contours back that I removed
Just highlight your image and click contour once again. Click on any contours you want to add back in, or click “show all contours” to add them all back in. You can even do this after saving your design, so there are no worries about losing those hidden cuts.
How is contour different than weld or slice?
You can do these same functions by adding shapes and slicing or welding areas to remove cuts. Technically, you would get the same results when you do to cut. The difference is that a weld or slice cannot be undone after you save your project. So, those cuts that you remove would be lost. With contour, the cuts are just hidden, and you can add them back at any time.
I can't find contour in the app
The screenshots above are from the desktop version of Cricut Design Space, but you can also click on actions in your app and find contour there. It is on iOS as well as Android. Once you click contour, you can click pieces to hide them.
Hopefully, that helps answer some of your questions about the contour feature in Cricut Design Space. Feel free to ask any additional questions in the comment section; I'll be happy to help!
Loving our Cricut Basics series? You can watch all of the videos by clicking here. My goal is to make Cricut Design Space as easy as possible for you! You can also download our free beginner's guide by clicking here.
Now, head out and experiment with the contour feature. Now that you know how to contour in Cricut Design Space, you can do more with your projects in a shorter amount of time. You will love using it when making your latest Cricut projects.
More Cricut ideas
Love this and want more Cricut ideas? Try the links below as well!


I always wondered how to use the contour button. Thank you so much for this video. You explained perfectly.