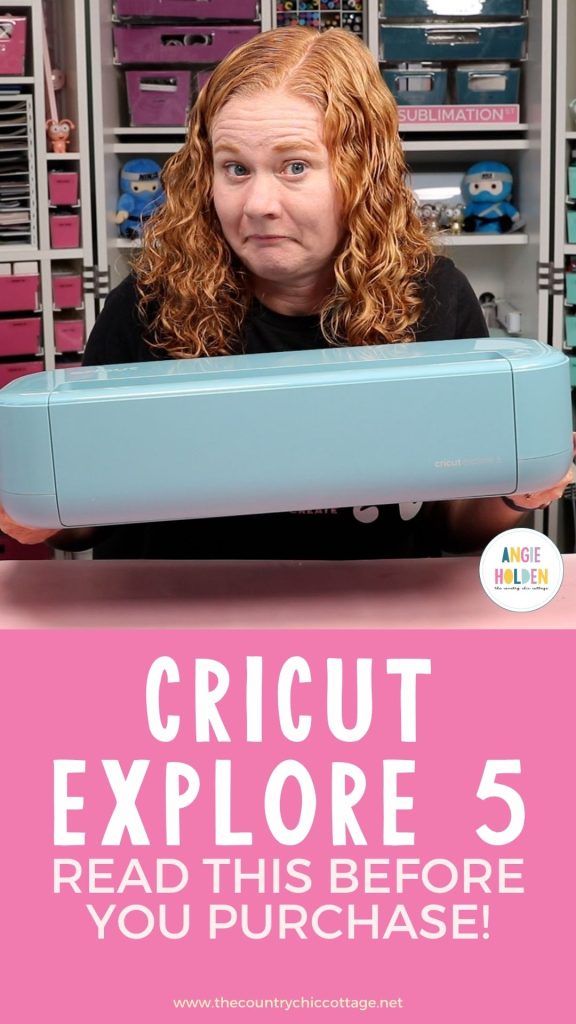
Do you need the newest Cricut machine? I am unboxing and reviewing the new Cricut Explore 5 to help you decide if it's a machine you should consider or not.
I have owned every Cricut machine that has been made, including every one in the Cricut Explore line, every Cricut Maker machine, every Joy machine, and even the Venture.
The Cricut Explore 5 came out the same day as the Joy 2. If you'd like to learn more about that machine, you can find the review here.
NOTE: I purchased the Explore 5, and this review is not sponsored.
Before I dive into the machine review, I want to tell you that I was disappointed in the Explore 5. I'll walk through all the reasons in detail below.
You can watch me go through everything the Explore 5 can do and what comes in the box by pressing play on the video below.
What is a Cricut Explore 5 Machine?
Before we get into the review, if you're new to learning about Cricut machines, an Explore 5 is a digital craft cutter that can cut thin materials like paper, vinyl, HTV, and some thicker materials like foam, wood veneer, and some magnet sheets.
There are a few different Cricut machine lines, and the Explore line is in the middle.
The Explore 5 can cut all the same materials that previous Explore machines could cut. It also has the ability to cut Smart materials without a mat.
The Cricut Joy series can cut the same materials as the Explore machines, but they are smaller machines and have a smaller maximum cut size.
The Cricut Maker is slightly larger than the Explore machines, and it has more force and power. It has different tools that allow it to cut more materials, including thicker materials like thin woods and chipboard. It can also cut more delicate materials like tulle, tissue paper, and other thin fabrics.
The Cricut Venture is a very large machine that can cut the same materials that Explore machines can cut.
What Size Materials Can the Cricut Explore 5 Cut?
Cricut Explore 3, 4, and 5 machines can cut matless or on a mat.
Mats come in both 12-by-12-inch and 12-by-24-inch sizes in LightGrip (blue), StandardGrip (green), StrongGrip (purple), and Fabric Grip (pink). There is also a Card Mat that can cut up to 4 cards at once.
The maximum width that can be cut on a 12-by-12-inch mat is 11.75 by 11.75 inches. On the 12-by-24-inch mat, you can cut 11.75 inches wide and 23.75 inches long.
The mats that fit the Cricut Explore 5 are the same mats used in previous Explore and Maker machines.
When cutting without a mat, you can cut slightly wider and up to about 12 feet long. Cutting matless allows you the ability to cut very long cuts, perfect for wall decor and front porch signs. However, you must use Cricut Smart Materials for this feature.
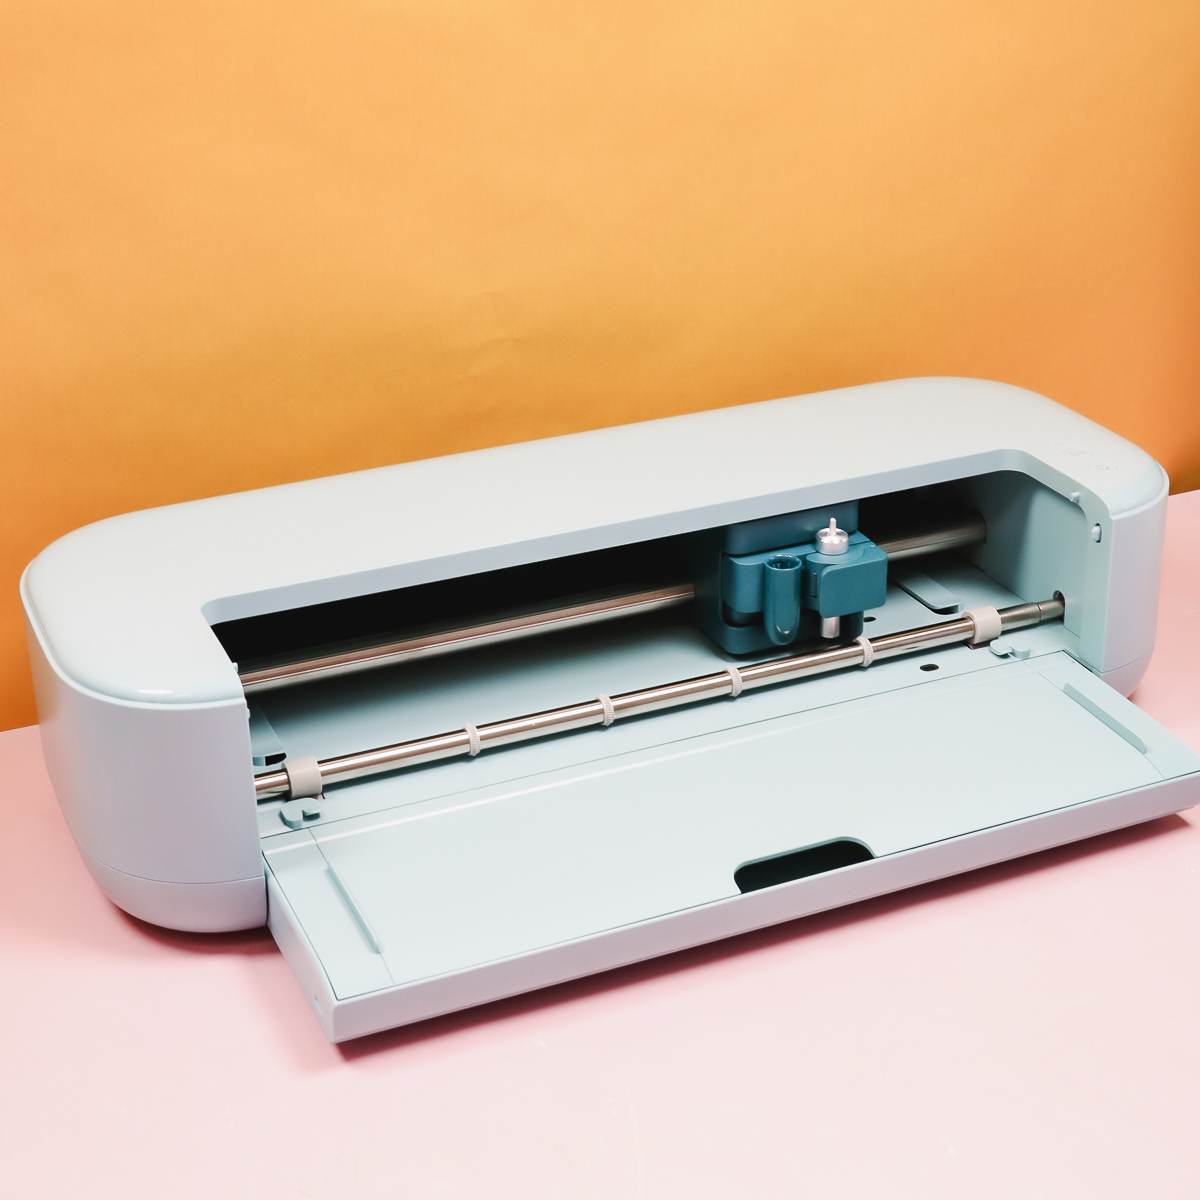
Explore 5 Unboxing and Setup
First, I want to say that when you purchase your Cricut Explore 5, what is included will depend on the bundle you purchase.
I purchased the Explore 5 + Essentials bundle in Teal from Michaels; it came with extra tools and materials that are not included with the machine-only bundle.
The machine-only bundle comes with a Fine Point Blade, Scoring Tool, a Dual-sided Marker, a Mini Weeder, and a collection of materials including Smart Vinyl, Smart Iron-on, Transfer Tape, and Value Cardstock.
There is also a LightGrip mat, a paper ruler, the power cord, and a USB cord to connect it to a computer or printer.
The Essentials Bundle includes more of the same materials, a set of tools, and a 2-by-1 card mat.
Set up the Cricut Explore 5
With everything unboxed and the packaging removed, you can start the setup process.
Go to cricut.com/setup and walk through the setup process.
Connect the power cable to the back of the machine, and plug it in. You can use either Bluetooth or the USB cord to connect the machine to Design Space. This is the program you will use to communicate with your new Cricut machine.
If you don't already have a Design Space account, make sure to create one. It is free to set up a Design Space account. There may be a Design Space update if you have an older version.
During the process, your machine may need a firmware update. If it does, it can take some time; allow it to work through that update.
A Close-up Look at the Explore 5
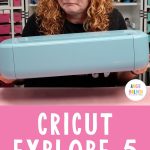
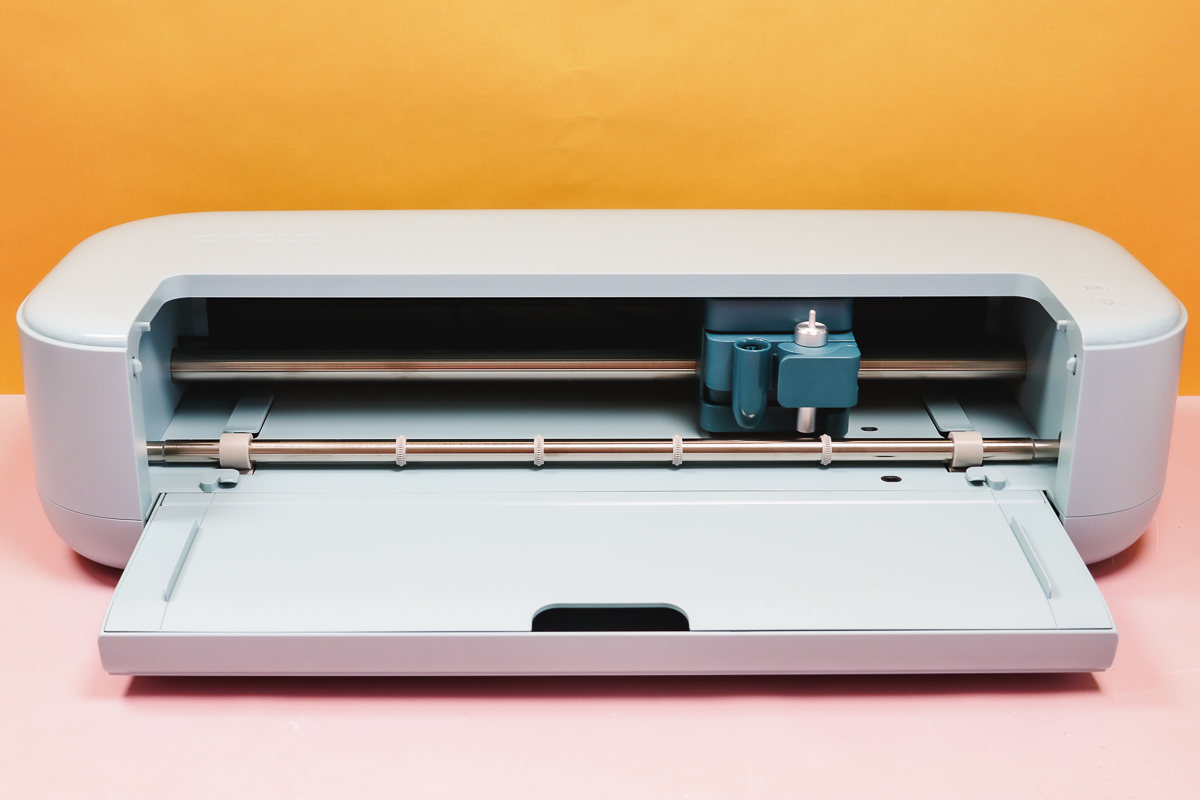
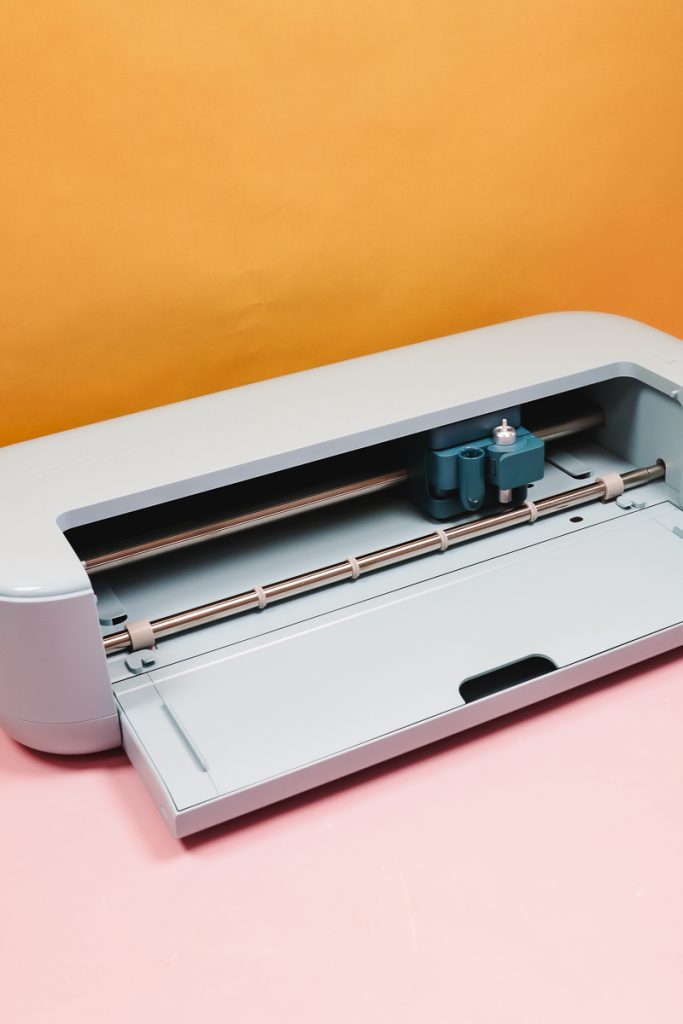
With the machine out of the box, let's look at the Explore 5 more closely.
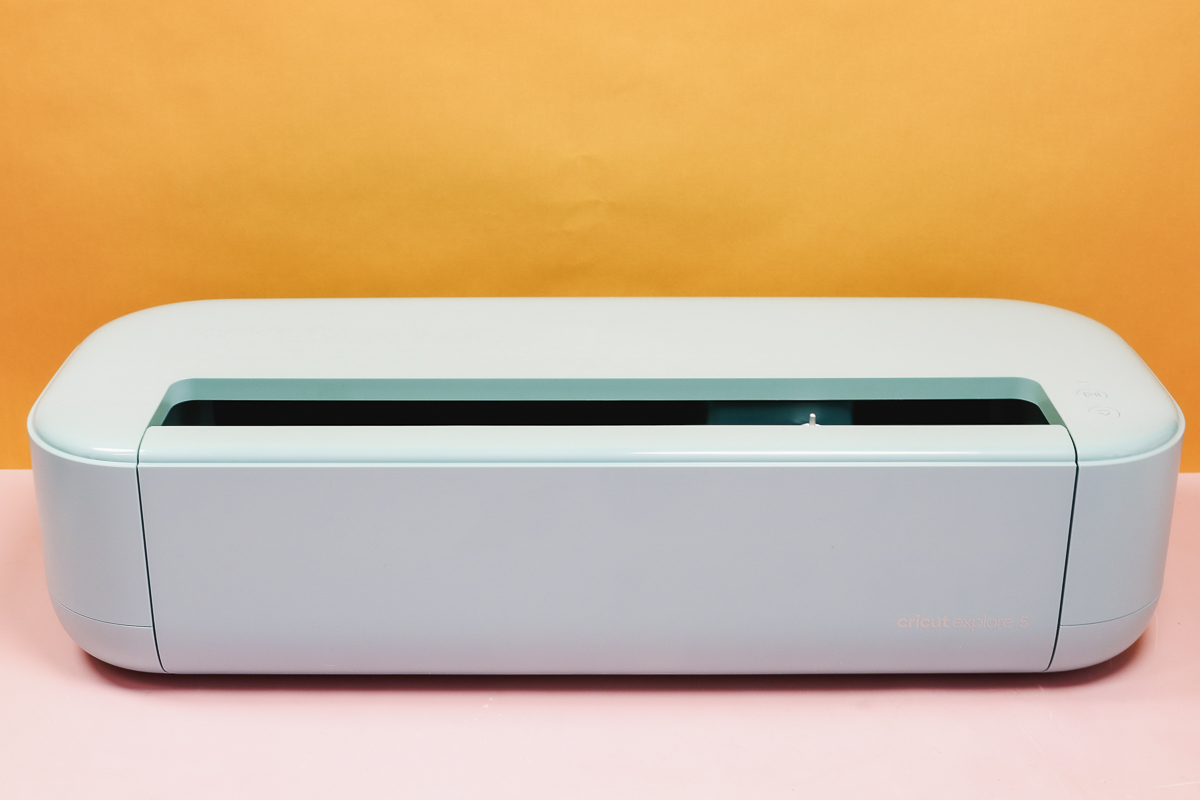
The Cricut Explore 5 looks very different from previous Explore machines. It's also a bit smaller because there is no longer a storage cup on the side. You can cut over 100 materials with Explore machines.
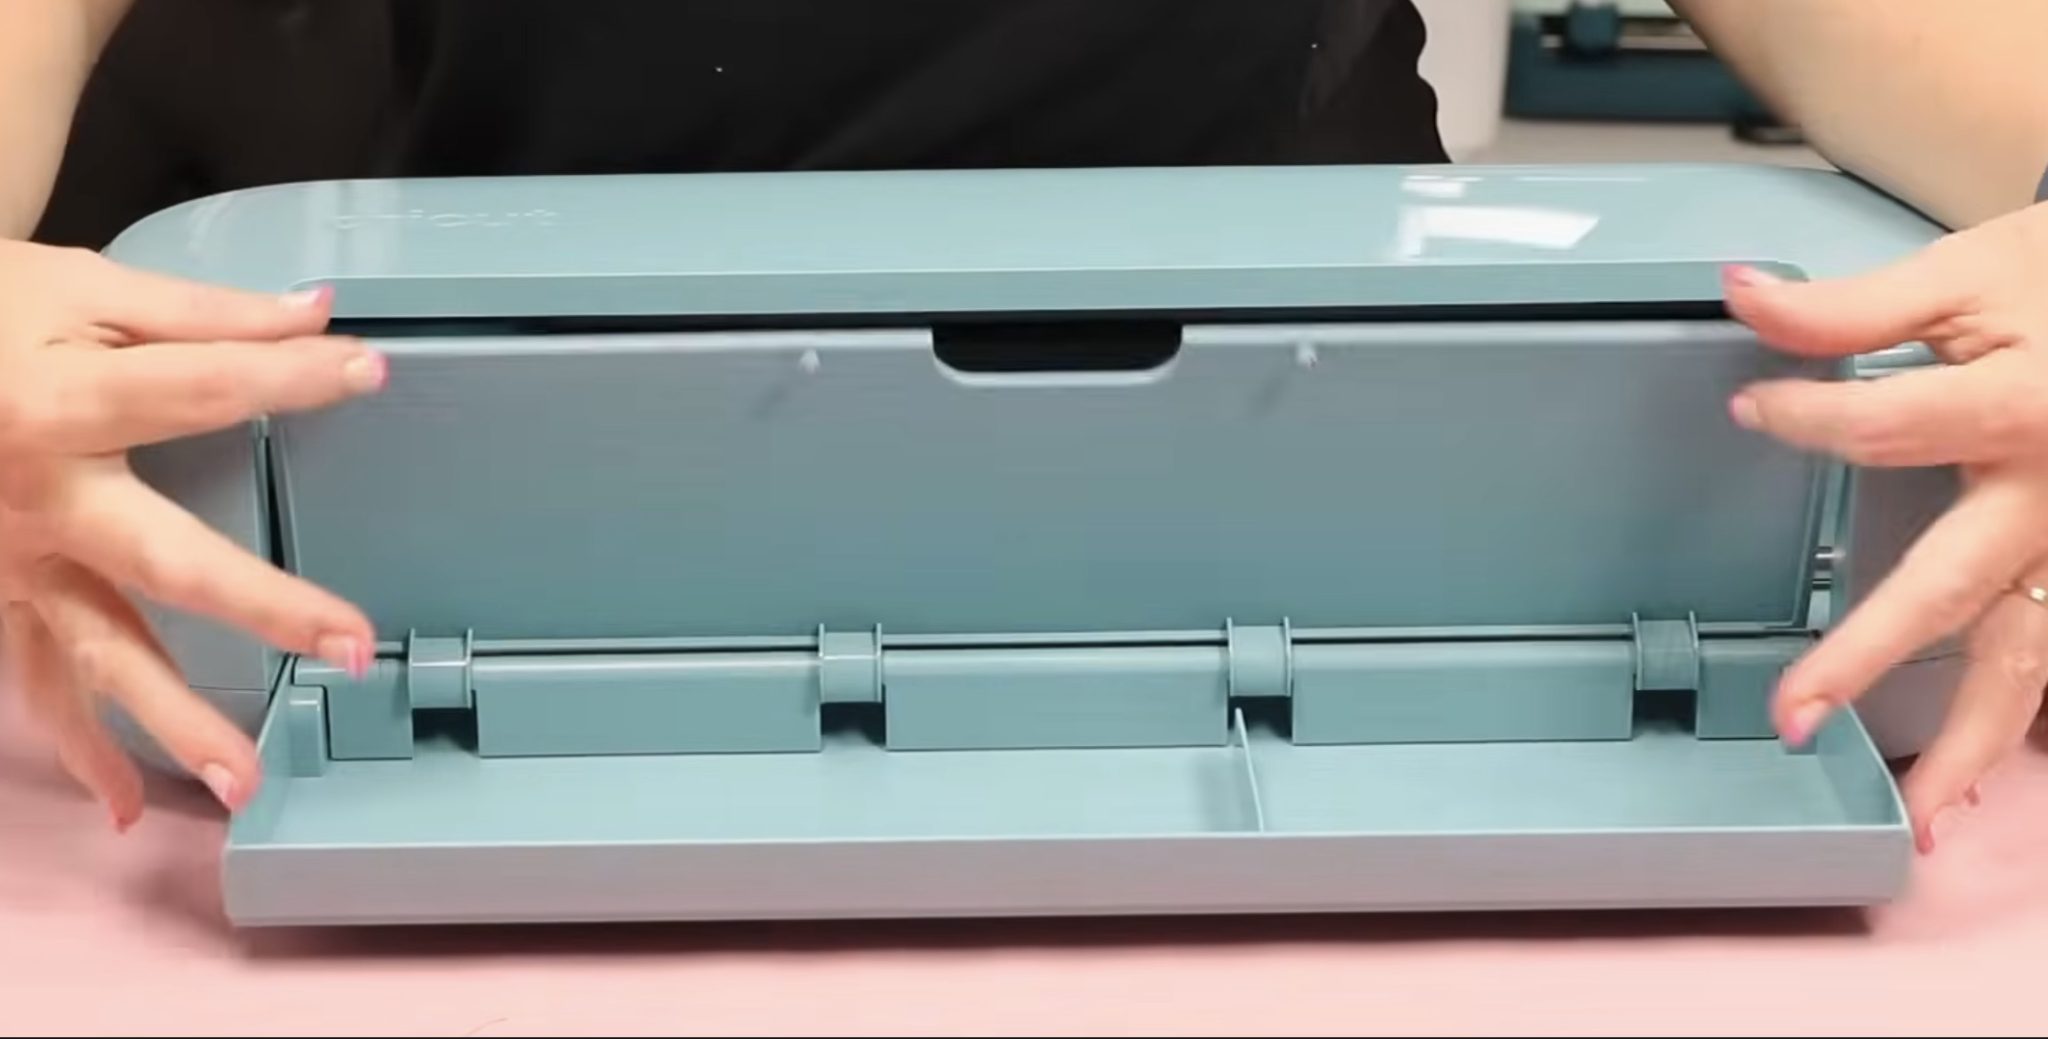
Previous Explore machines have a front door and a top lid. The Explore 5 has the front door, but there is no top lid, resulting in the top always having an opening.
To open the machine, press the door on the inside, and it will open. There is some storage in the door to hold blades and tools.
The buttons have also changed. There is no longer a power button. Now, when you plug in the machine, it automatically turns on.
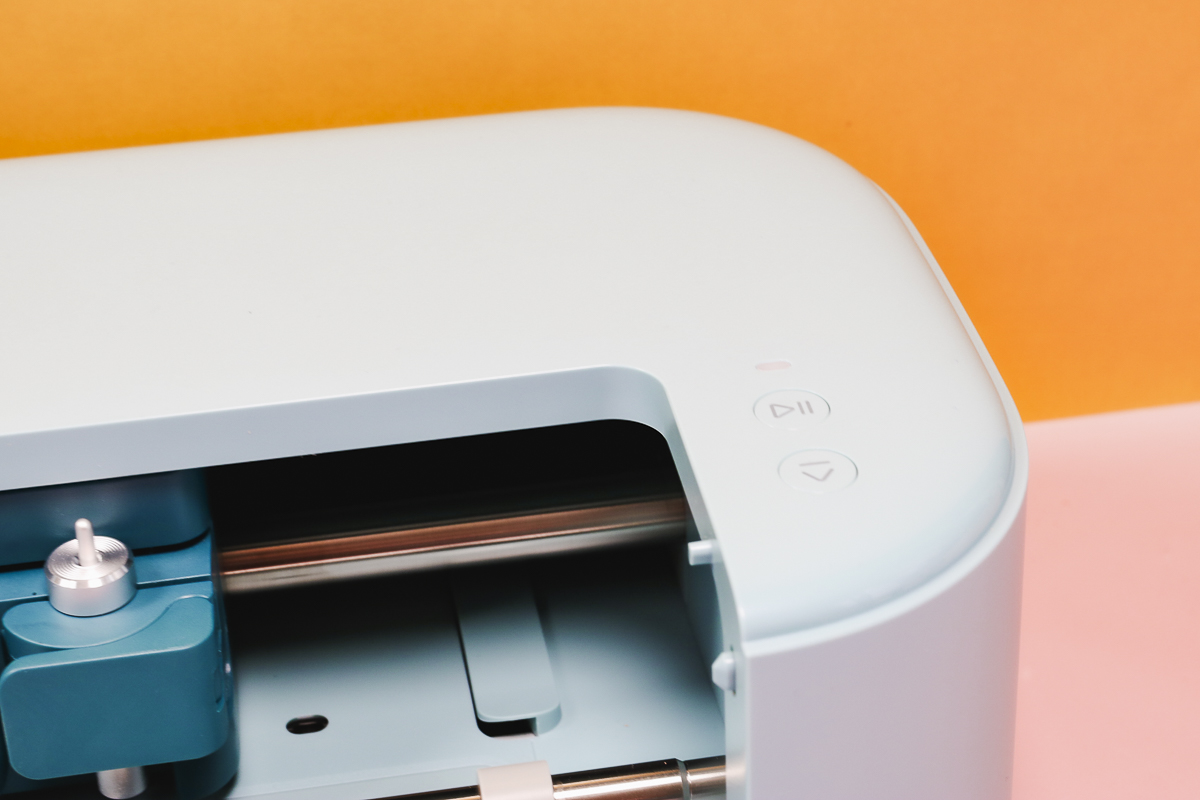
There is a play/pause button and a load/unload button. There is also a light that will indicate when the machine is plugged in and when it is connected via Bluetooth.
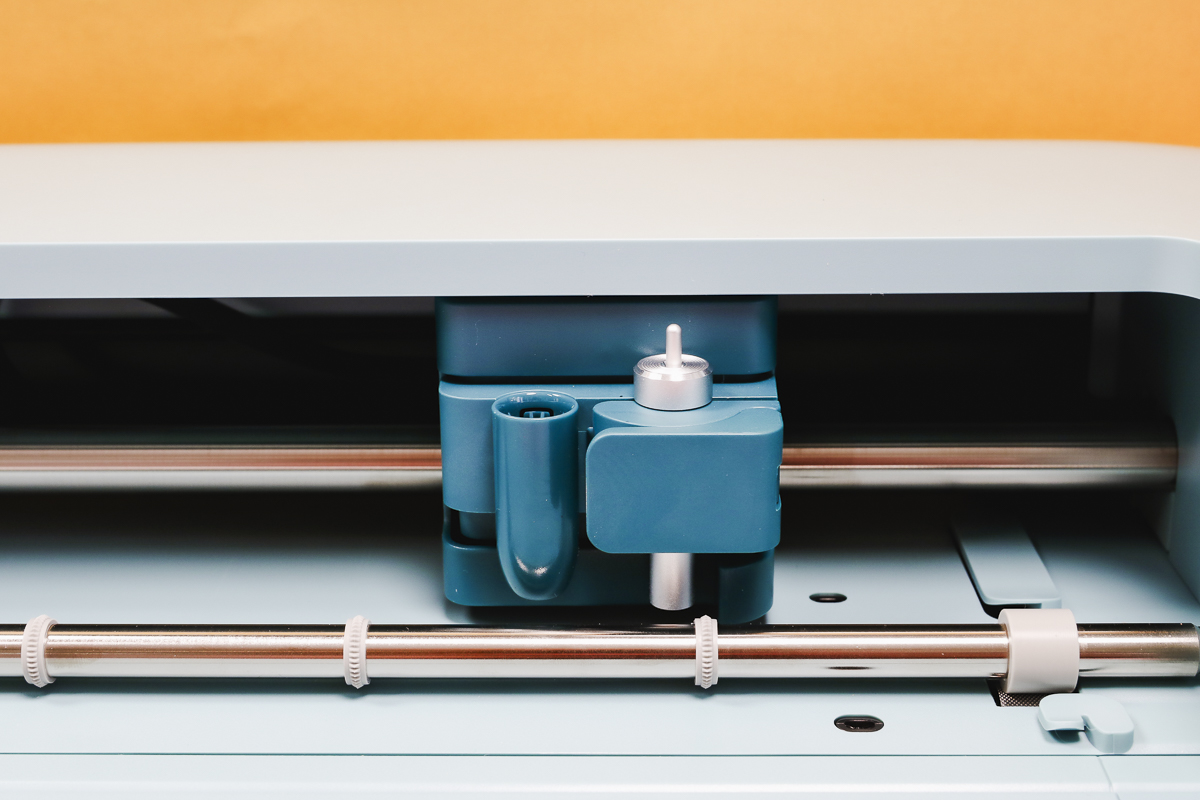
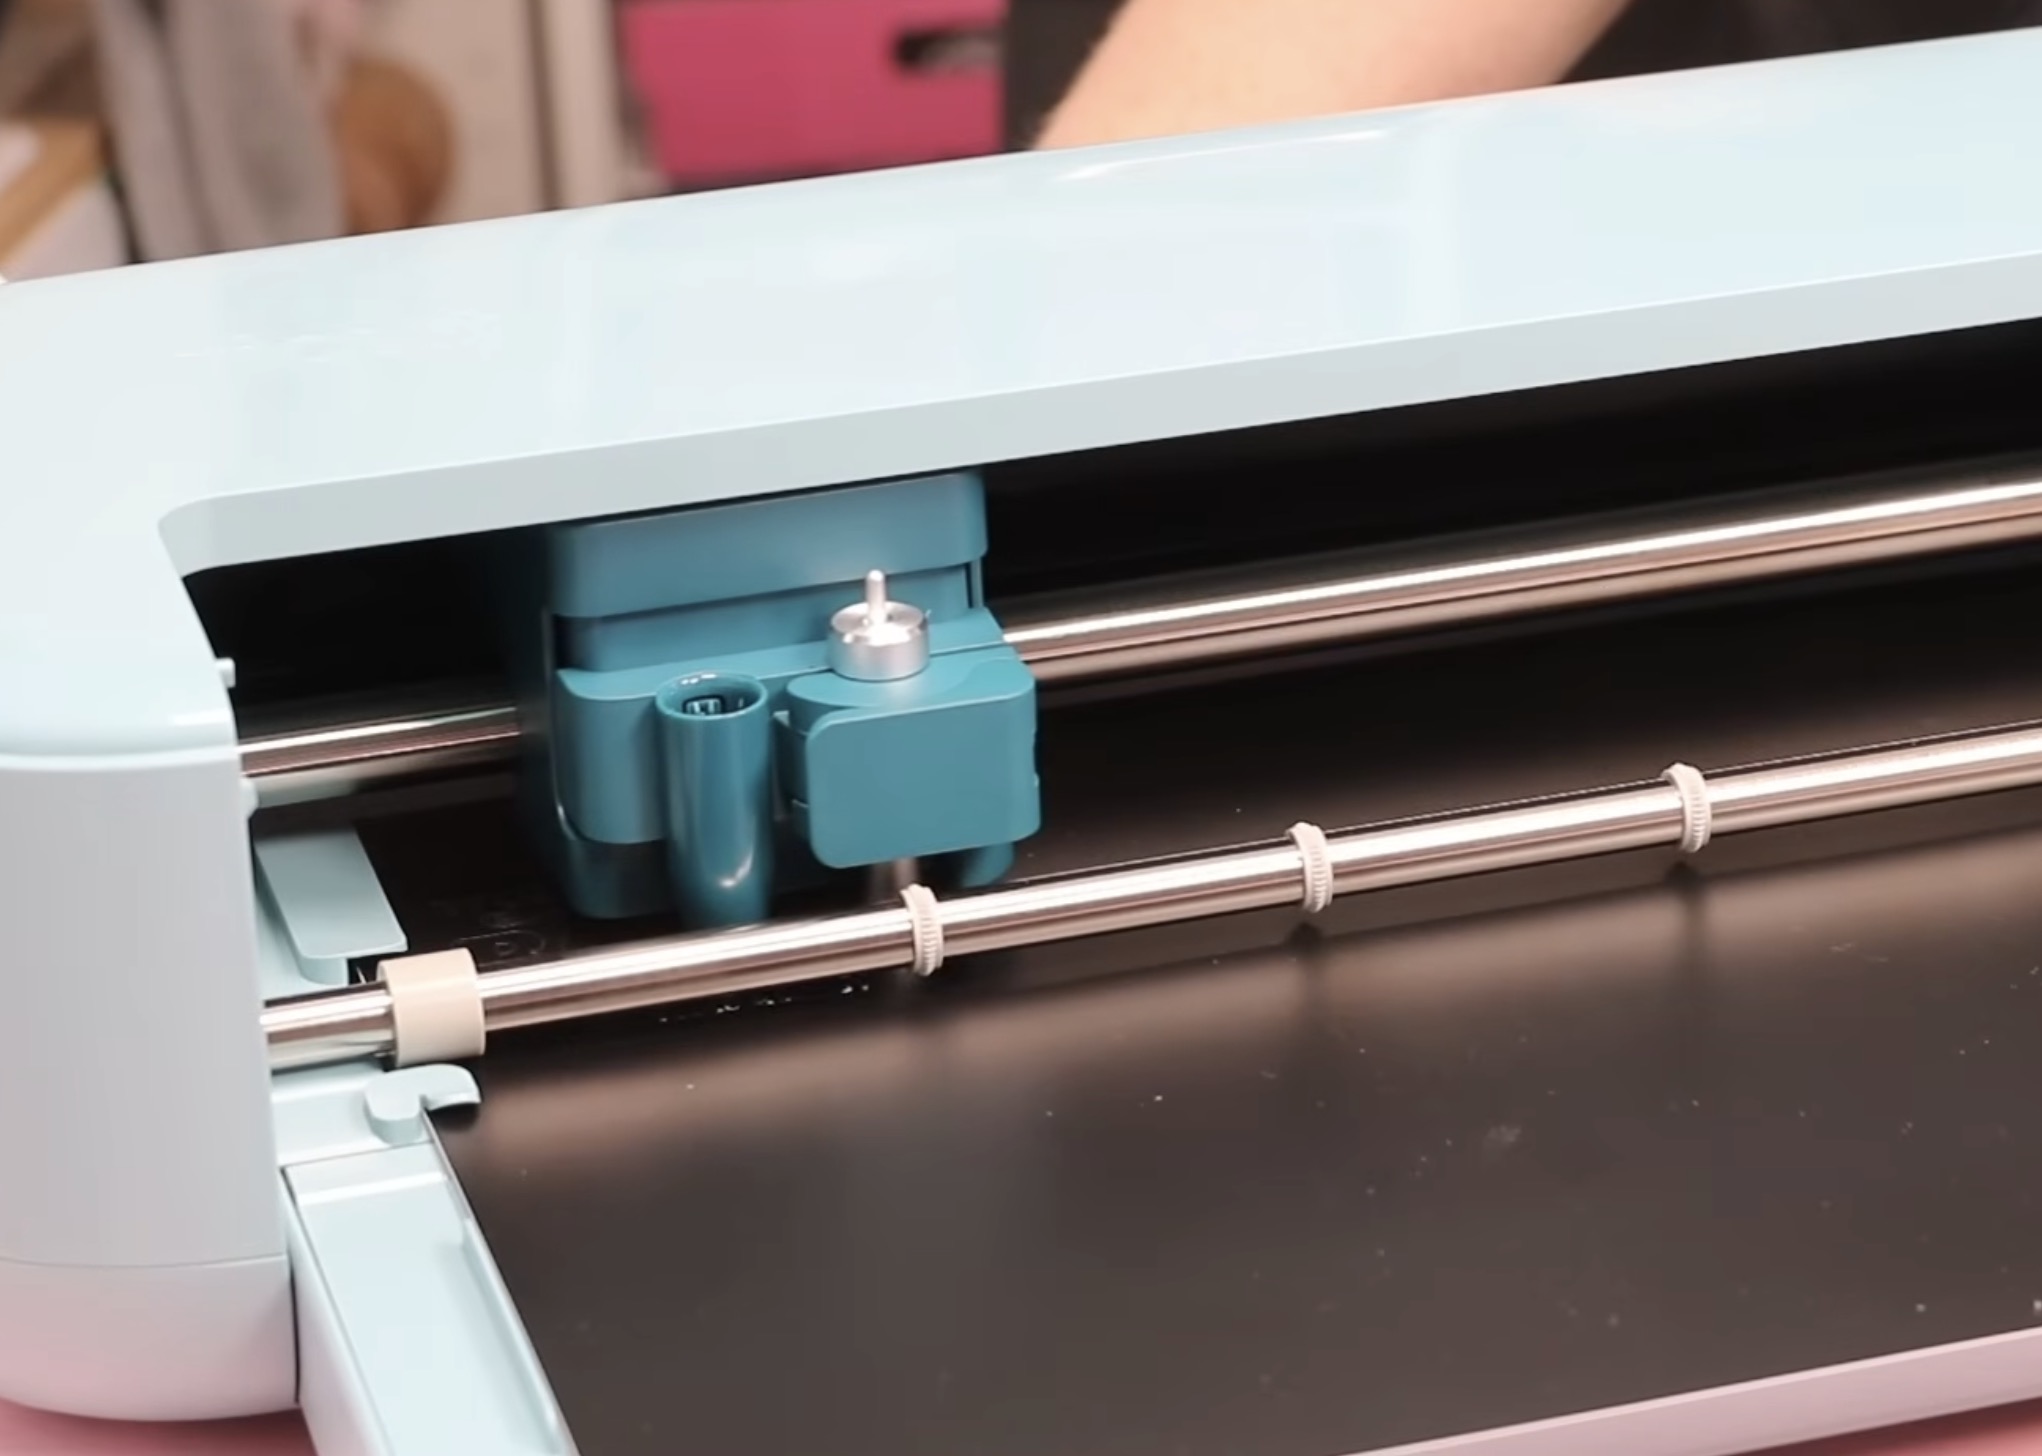
Another change is the redesigned carriage. In previous Explore machines, there were two clamps. Now, there is one clamp for holding blades and a pen housing.
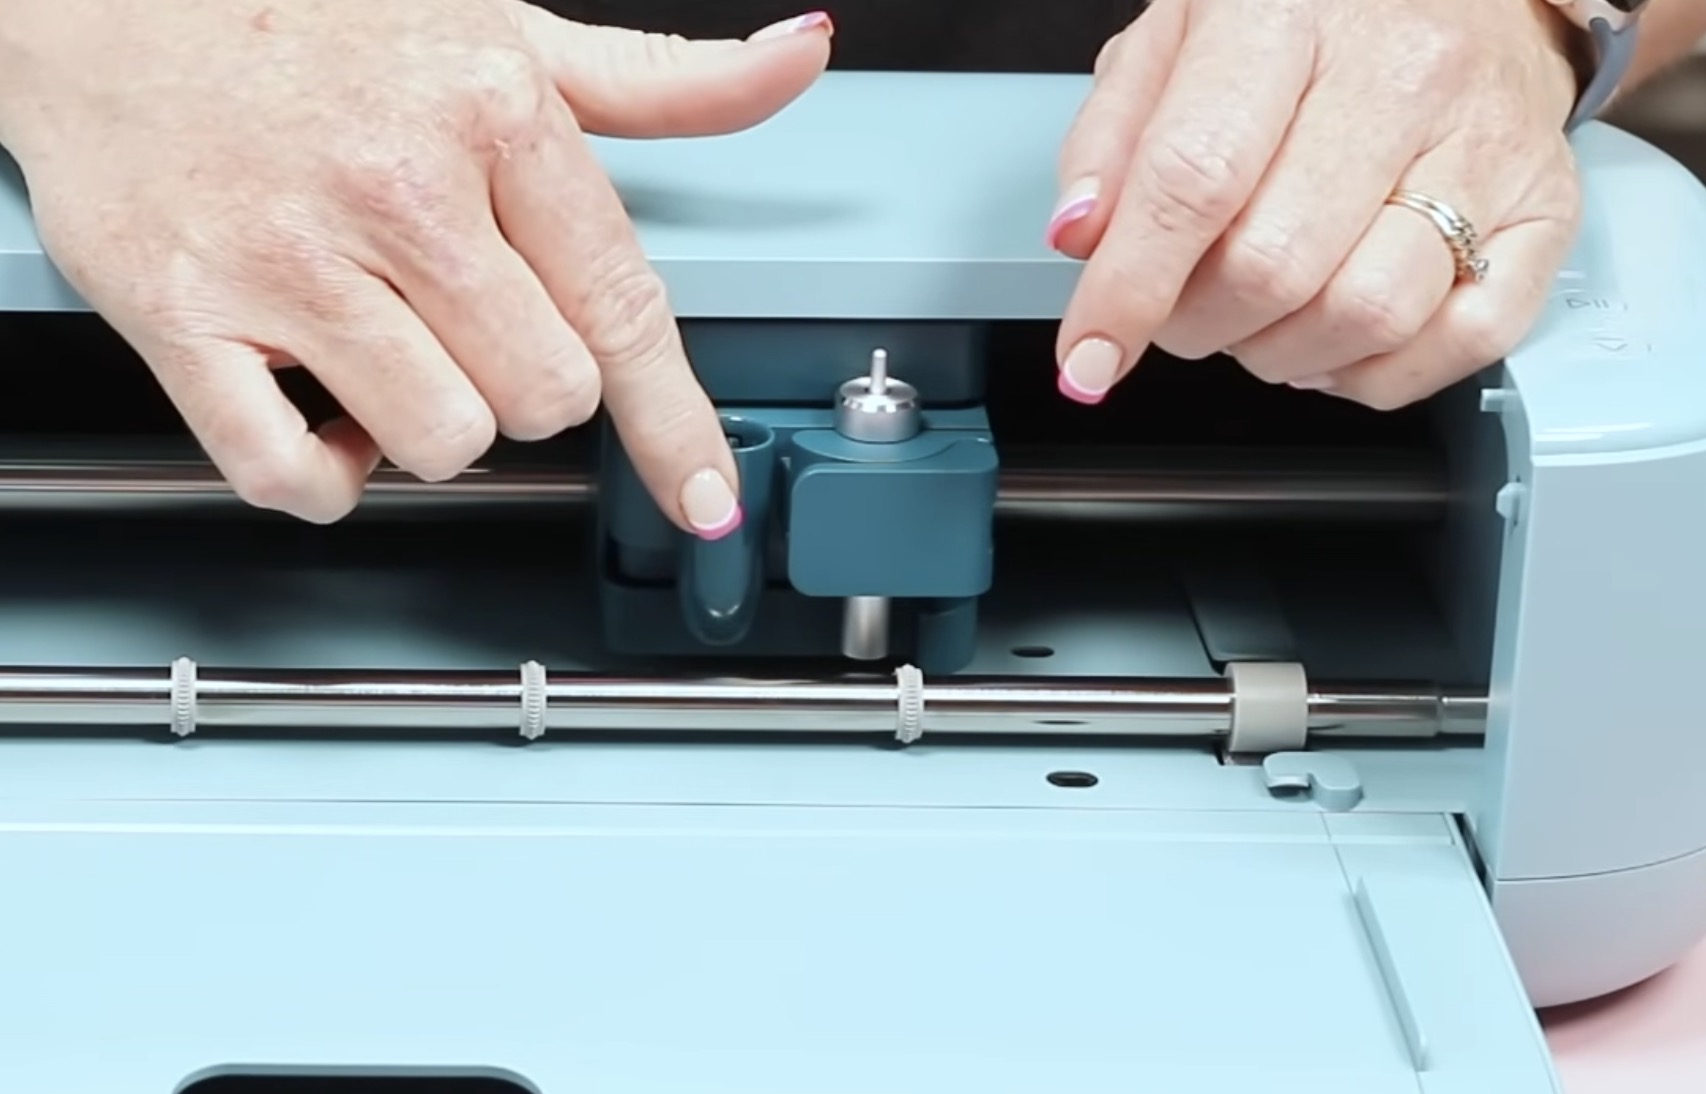
Instead of clamping pens in place, you drop them in the new housing, and they are ready to go.
The most noticeable changes when comparing the Cricut Explore 5 and previous Explore machines are:
- Overall smaller size (change in buttons and no storage cup)
- No top lid
- Carriage redesign
Blades, Tools, and Pens
Outside of the machine changes, there are also changes in the blades, tools, and pens.
Included with your machine is a fine-point blade and housing. In previous machines, the blades were loaded inside the housing and could be changed as needed.
Now, instead of changing just the blade, you swap out the entire blade/housing combo.
The old-style blades and housings fit inside the Cricut Explore 5, and depending on your machine, you may get the old version instead of the new version. My Essentials bundle from Michaels had the old-style blade and housing.
There is a new scoring tool that comes with the Explore 5. The scoring tool looks very similar to the new blade and housing so make sure you're putting the correct one in the machine.
The scoring tool replaces the scoring stylus, and the scoring stylus will not fit in the Explore 5.
This is a big downgrade as far as I am concerned. I really liked being able to use the scoring stylus in the pen slot, so I didn't have to swap it out for the blade.
All other previous blades and tools that worked in Explore machines will continue to work. The foiling tool with three tips, previous fine point blades, bonded fabric blades, and the deep point blade will all work in the Explore 5.
Note – this is an Explore machine, which means any blades or tools with the gear on top that specify they're Maker tools will not work in this machine. Even though it is a newer machine, it is not a Maker machine.
I also want to note that for cutting without a mat, the roll holder that came out with the Explore 3 and Maker 3 will work with the Explore 5.
Pen Changes
Another change I am not happy about is the pen change. What used to be Clamp A in previous Explore machines is now a drop-in pen housing.
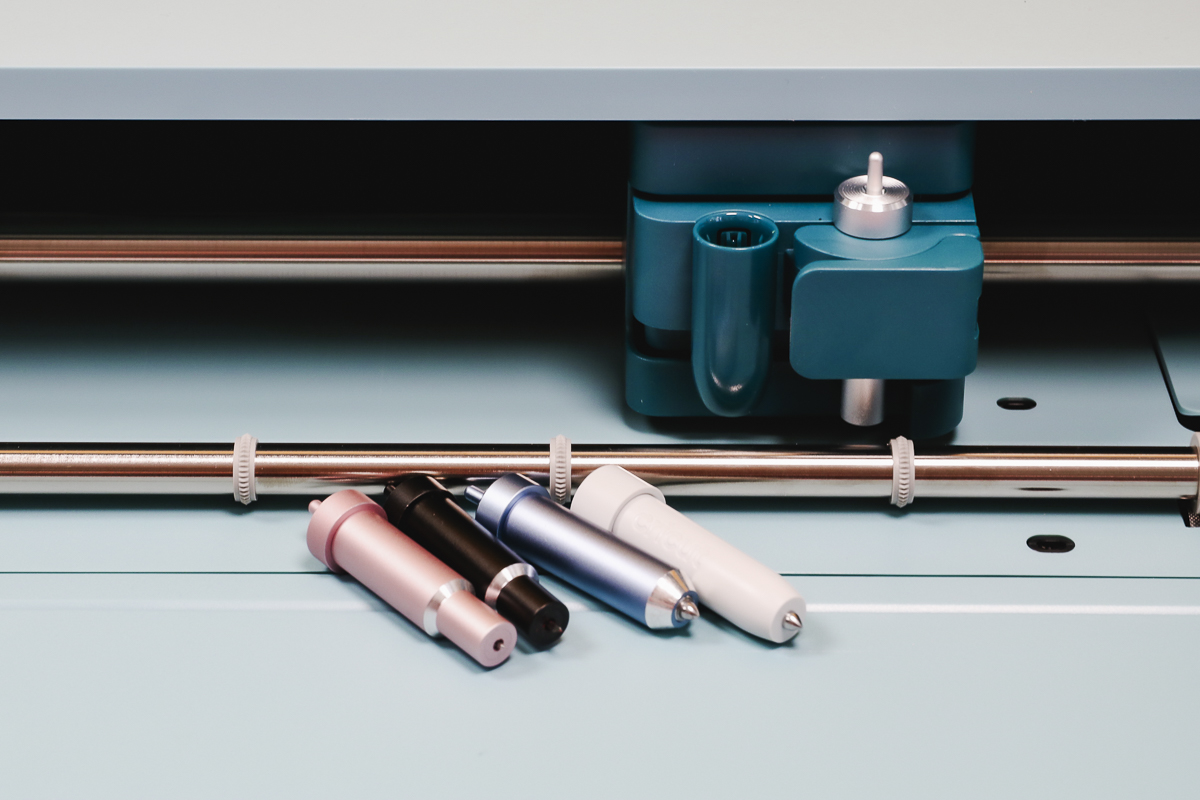
The scoring stylus does not work, and no previous Explore/Maker pens and markers will work in the Explore 5.
With your machine, you'll get a dual-sided black pen that has a .4mm thickness and 1.0mm thickness.
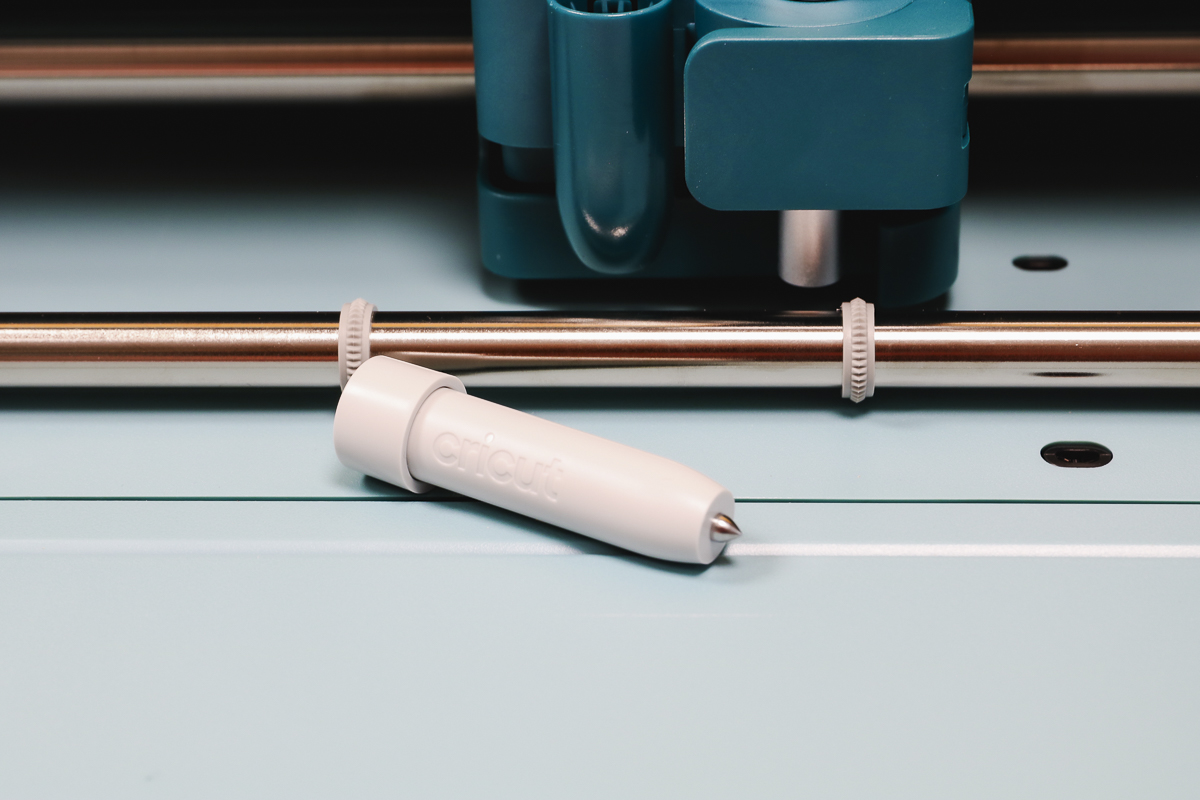
To use these pens in the pen housing, you'll remove the cap, drop the pen in place, place your finger under the carriage to hold it in place, and then push down on the pen until it clicks in place.
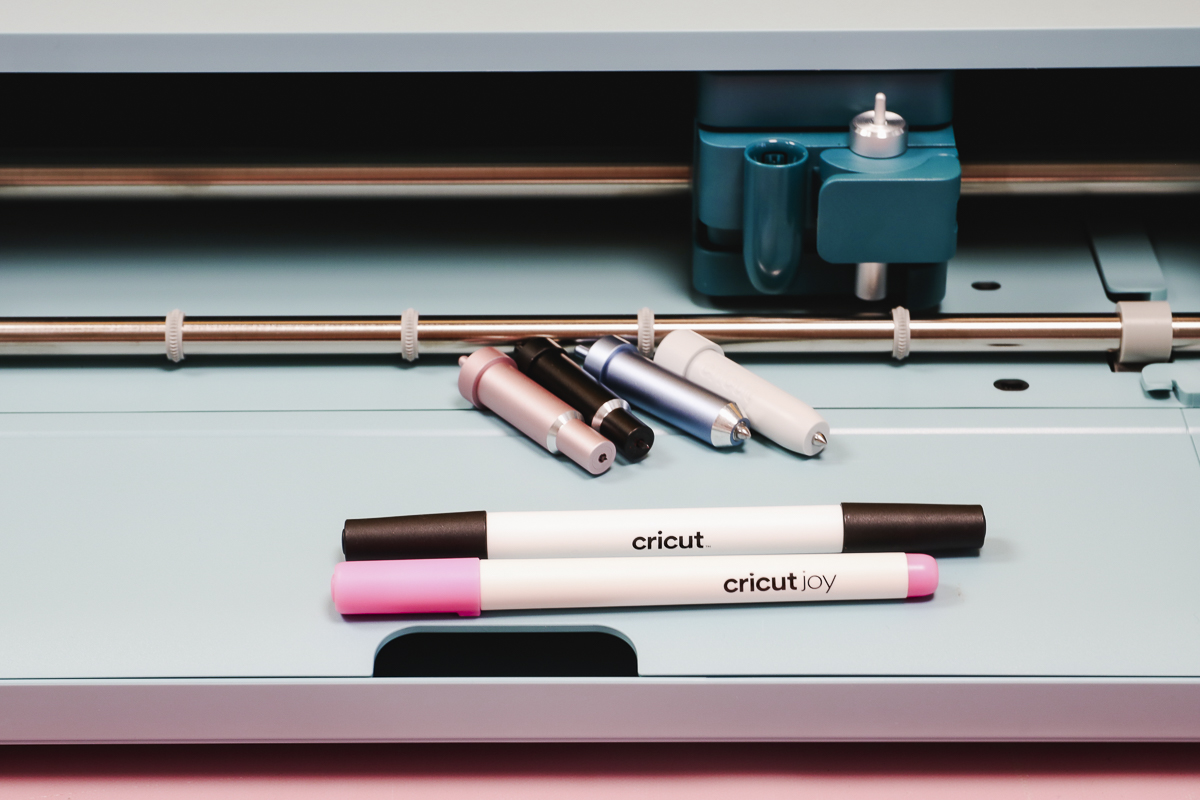
Will Cricut Joy Pens Work in the Explore 5?
The pen that came with my Explore 5 is the same pen that came with the Joy 2 machine. Cricut states that previous Joy pens work in the Joy 2, so that got me thinking, can I use the Joy pens in the Explore 5?
We'll look at this more closely later in one of the projects, but the answer is yes. You can use previous Joy pens in the Explore 5.
When I tested it, it didn't feel like the Joy pens fit the same way, but when I tried them, they worked, and they stayed in place.
Machine Mats
I spoke about machine mats above when talking about cutting sizes.
The mats have not changed for the Explore 5. The only real difference is that no matter how you purchase your machine, it will come with a LightGrip mat.
There is one new mat that came with my Explore 5 + Essentials Bundle, and I really hope they make it available for purchase separately.
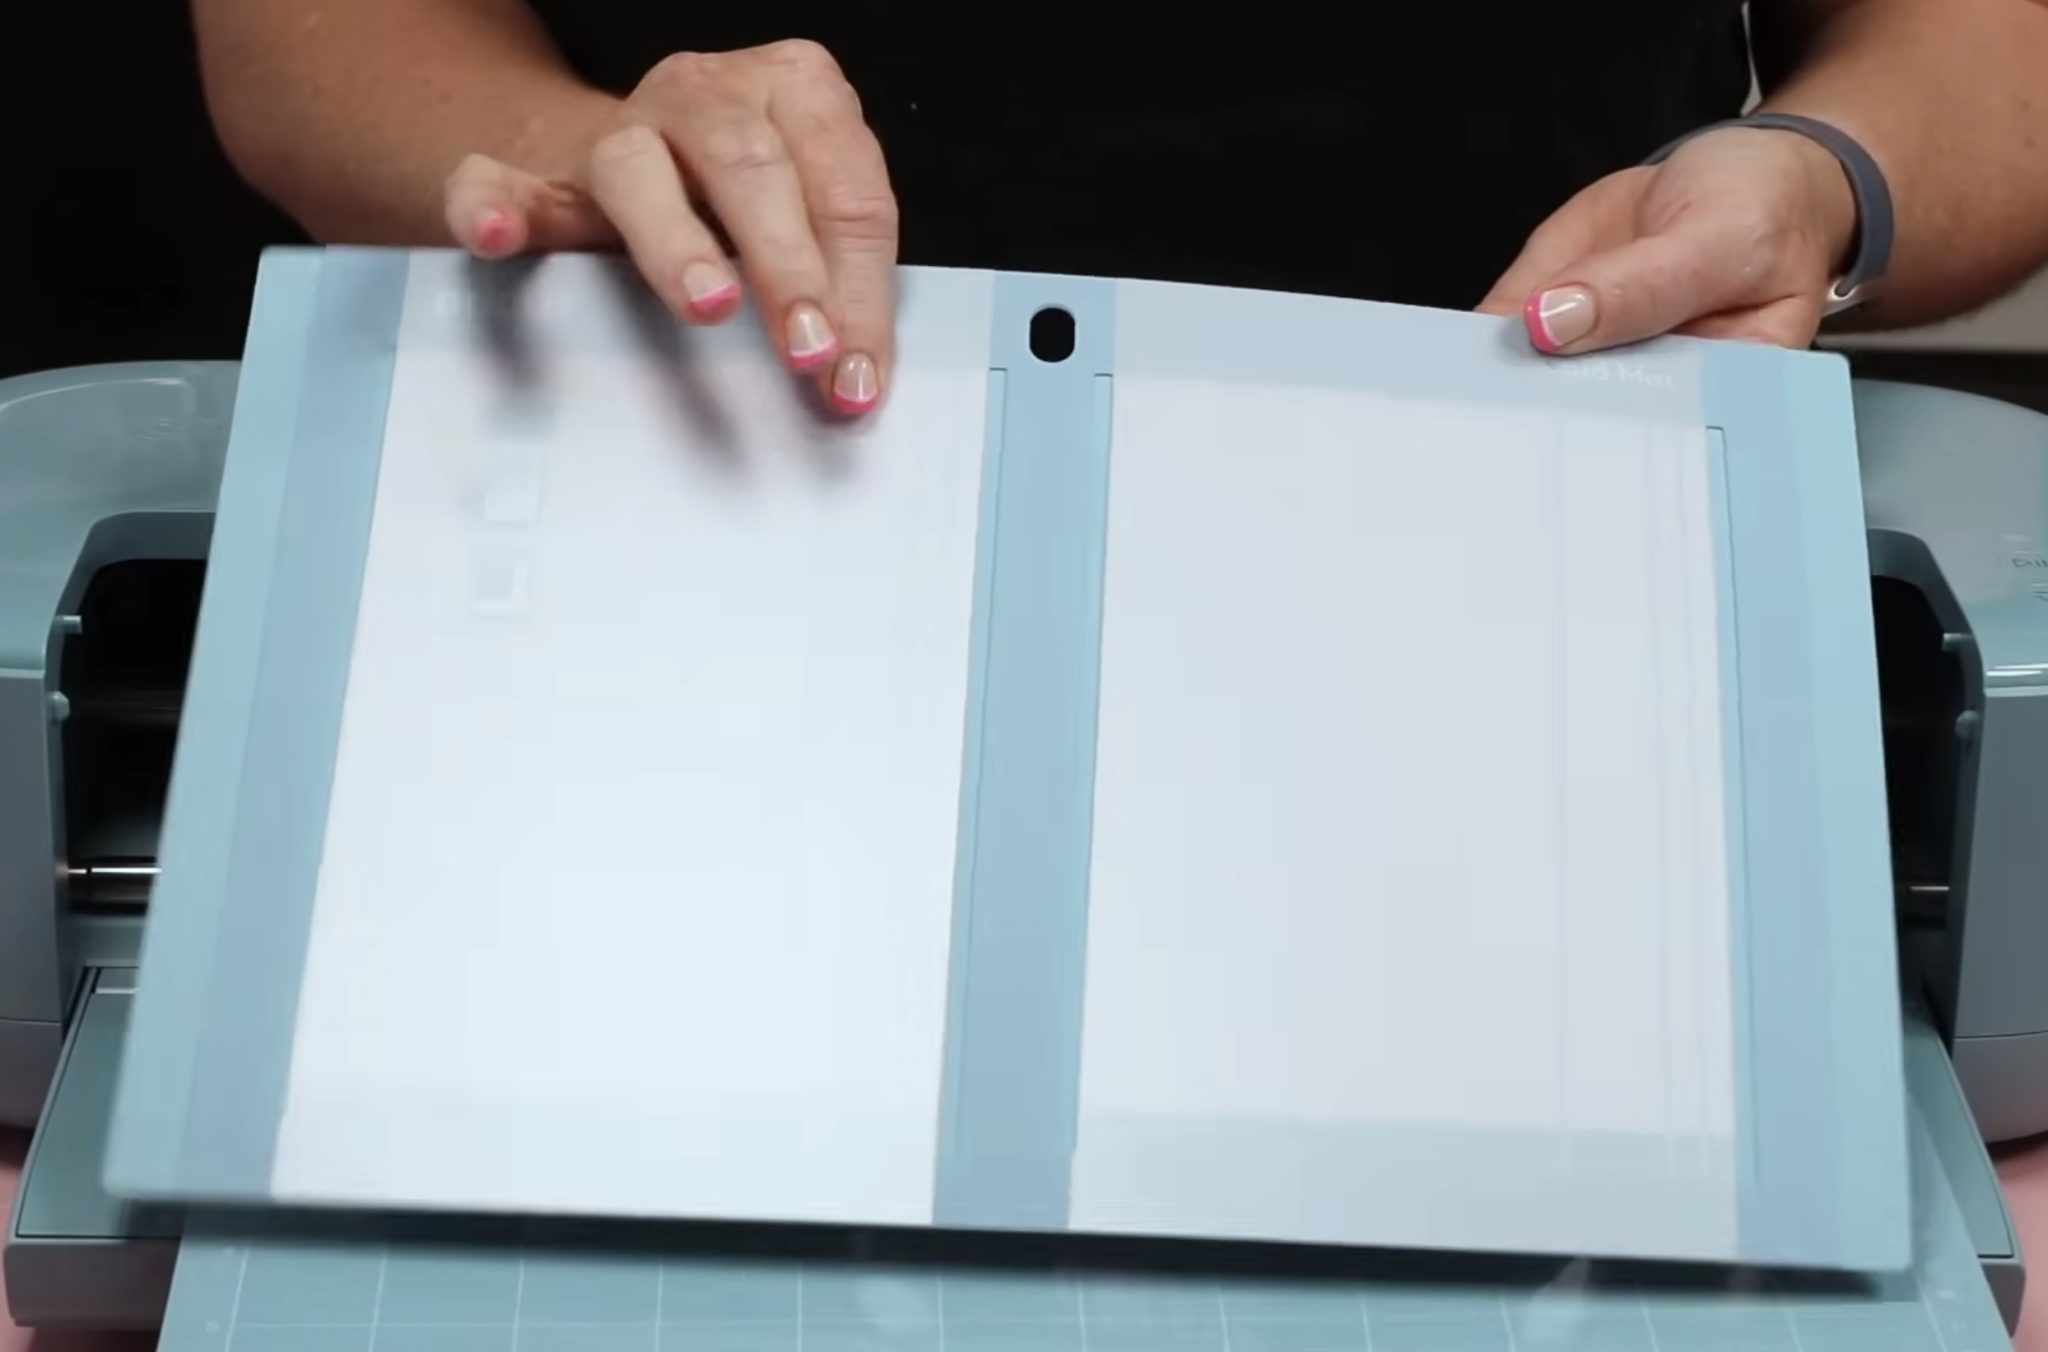
My bundle came with a 2-by-1 card mat, and I love the size. I am not always going to make 4 cards at once, and I like this smaller card mat option.
Cricut Explore 5 uses all the same mats and blades as other Explore machines, but you can't use previous Explore/Maker pens or the scoring stylus.
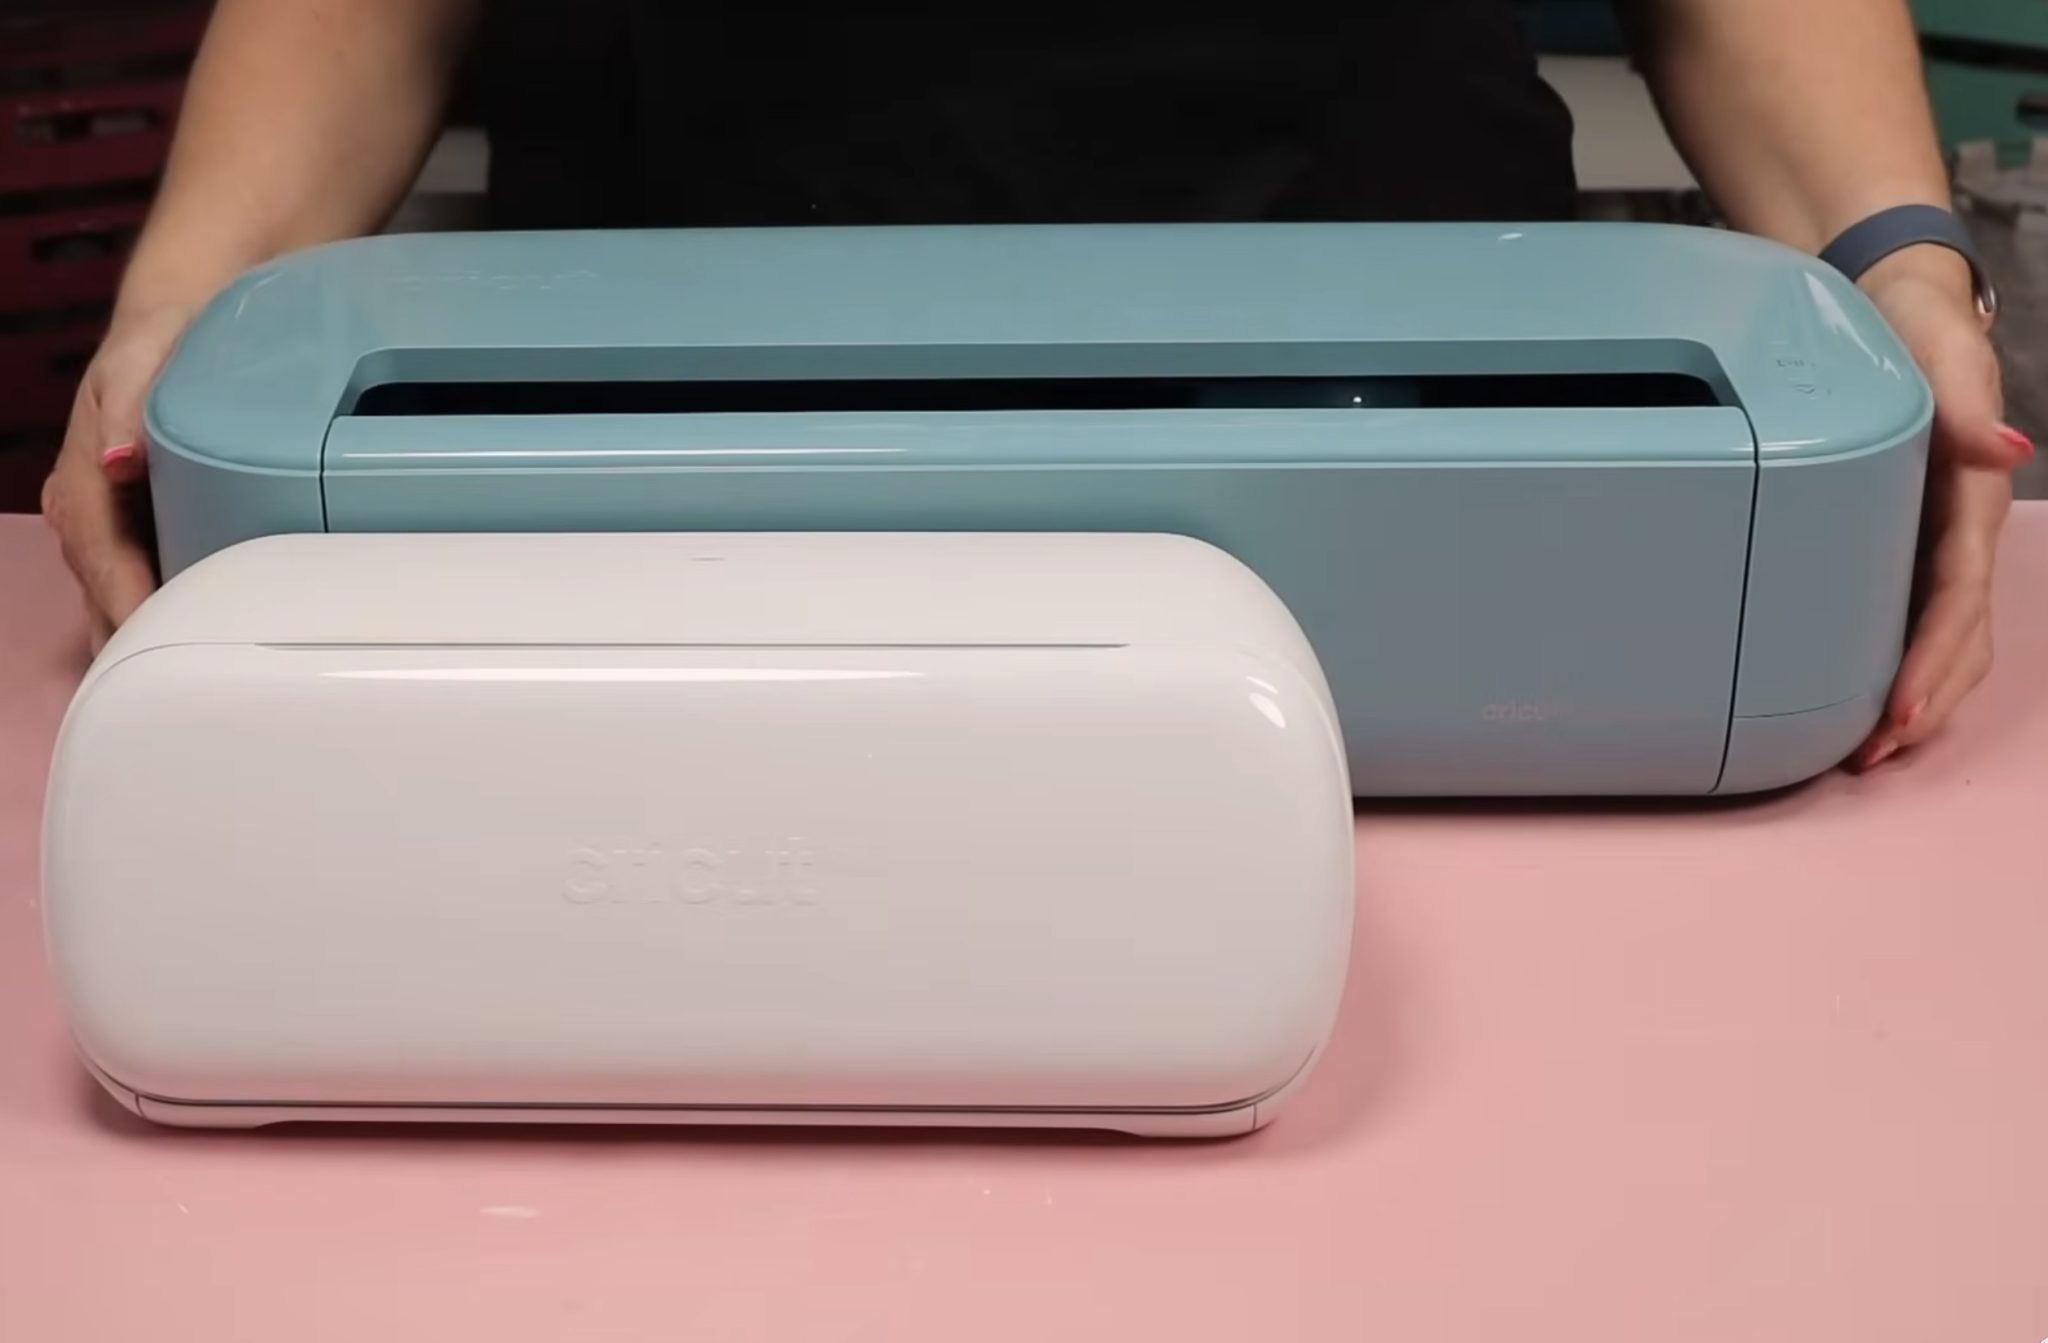
Side-by-Side Comparison
For this comparison, I am using my Explore 4. The Explore 4 is almost exactly the same size as previous Explore machines. The size hasn't really changed at all from the first Explore machine until now, with the Explore 5.
Here I have my Explore 4 and the Explore 5. Cricut lists the Explore 5 as 30% smaller than the Explore 4.
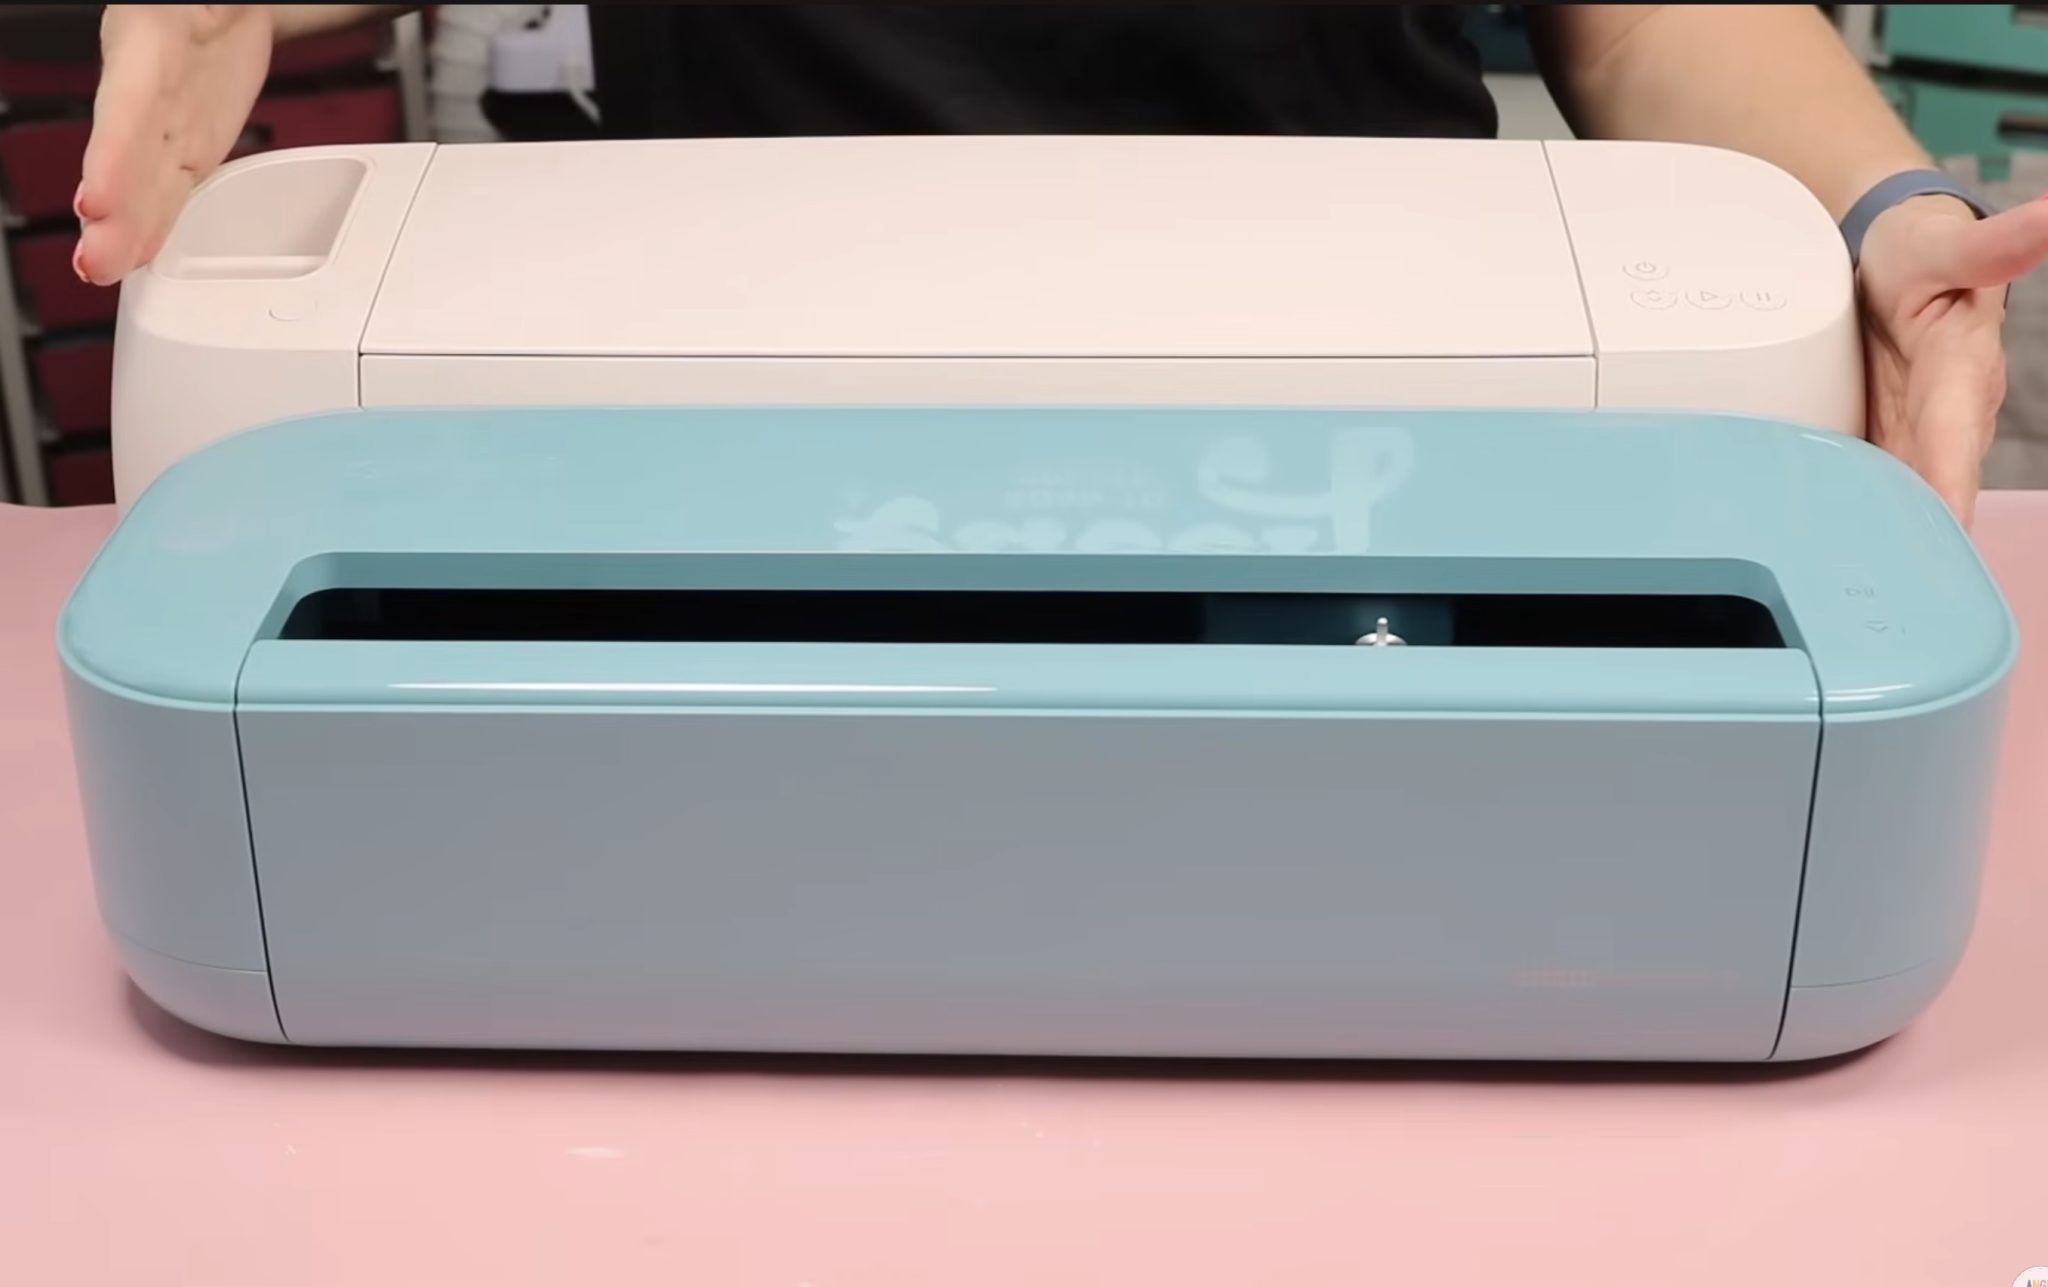
When measuring, at the widest point, the Explore 5 is actually about an inch wider front to back. The overall length, side to side, is shorter, and the height is shorter as well.
When you have the door and lid open on the Explore 4, it is definitely bigger than the Explore 5.
I will say that I do not miss the lid. If you've ever tried to use your Cricut on a shelf that has a shelf above it, you probably know that the lid usually makes you have to remove it from the shelf to use.
I think this machine will be easier to use in place on a shelf because it doesn't have that lid piece.
When comparing the Explore 5 to the Joy Xtra, I was a little sad. I was hoping it would be a little closer in size to the Xtra, but it is quite a bit bigger and a lot heavier.
If you're looking for a more compact machine that is also lighter, you may want to look at the Joy Xtra.
Overall, Explore 4 is smaller than both Maker and the previous Explore machines, but it is still quite a bit bigger than the Joy Xtra and other Joy machines. I am not sure that I think the size of the machine would be a deciding factor on whether you should purchase it or not.
Making Projects with the Cricut Explore 5
Now that we've really looked at the machine, let's make a few projects.
All of the projects we're going to make today are specifically to test out the different features with the Explore 5 machine.
How to Make Vinyl Decals with Cricut Explore 5
First, I always recommend you start simple. You can do the text project during the setup or you can make a custom decal that you will actually use!
Step 1. Create Vinyl Decal Design
Open Design Space, click New Project, and then select Vinyl Decal.
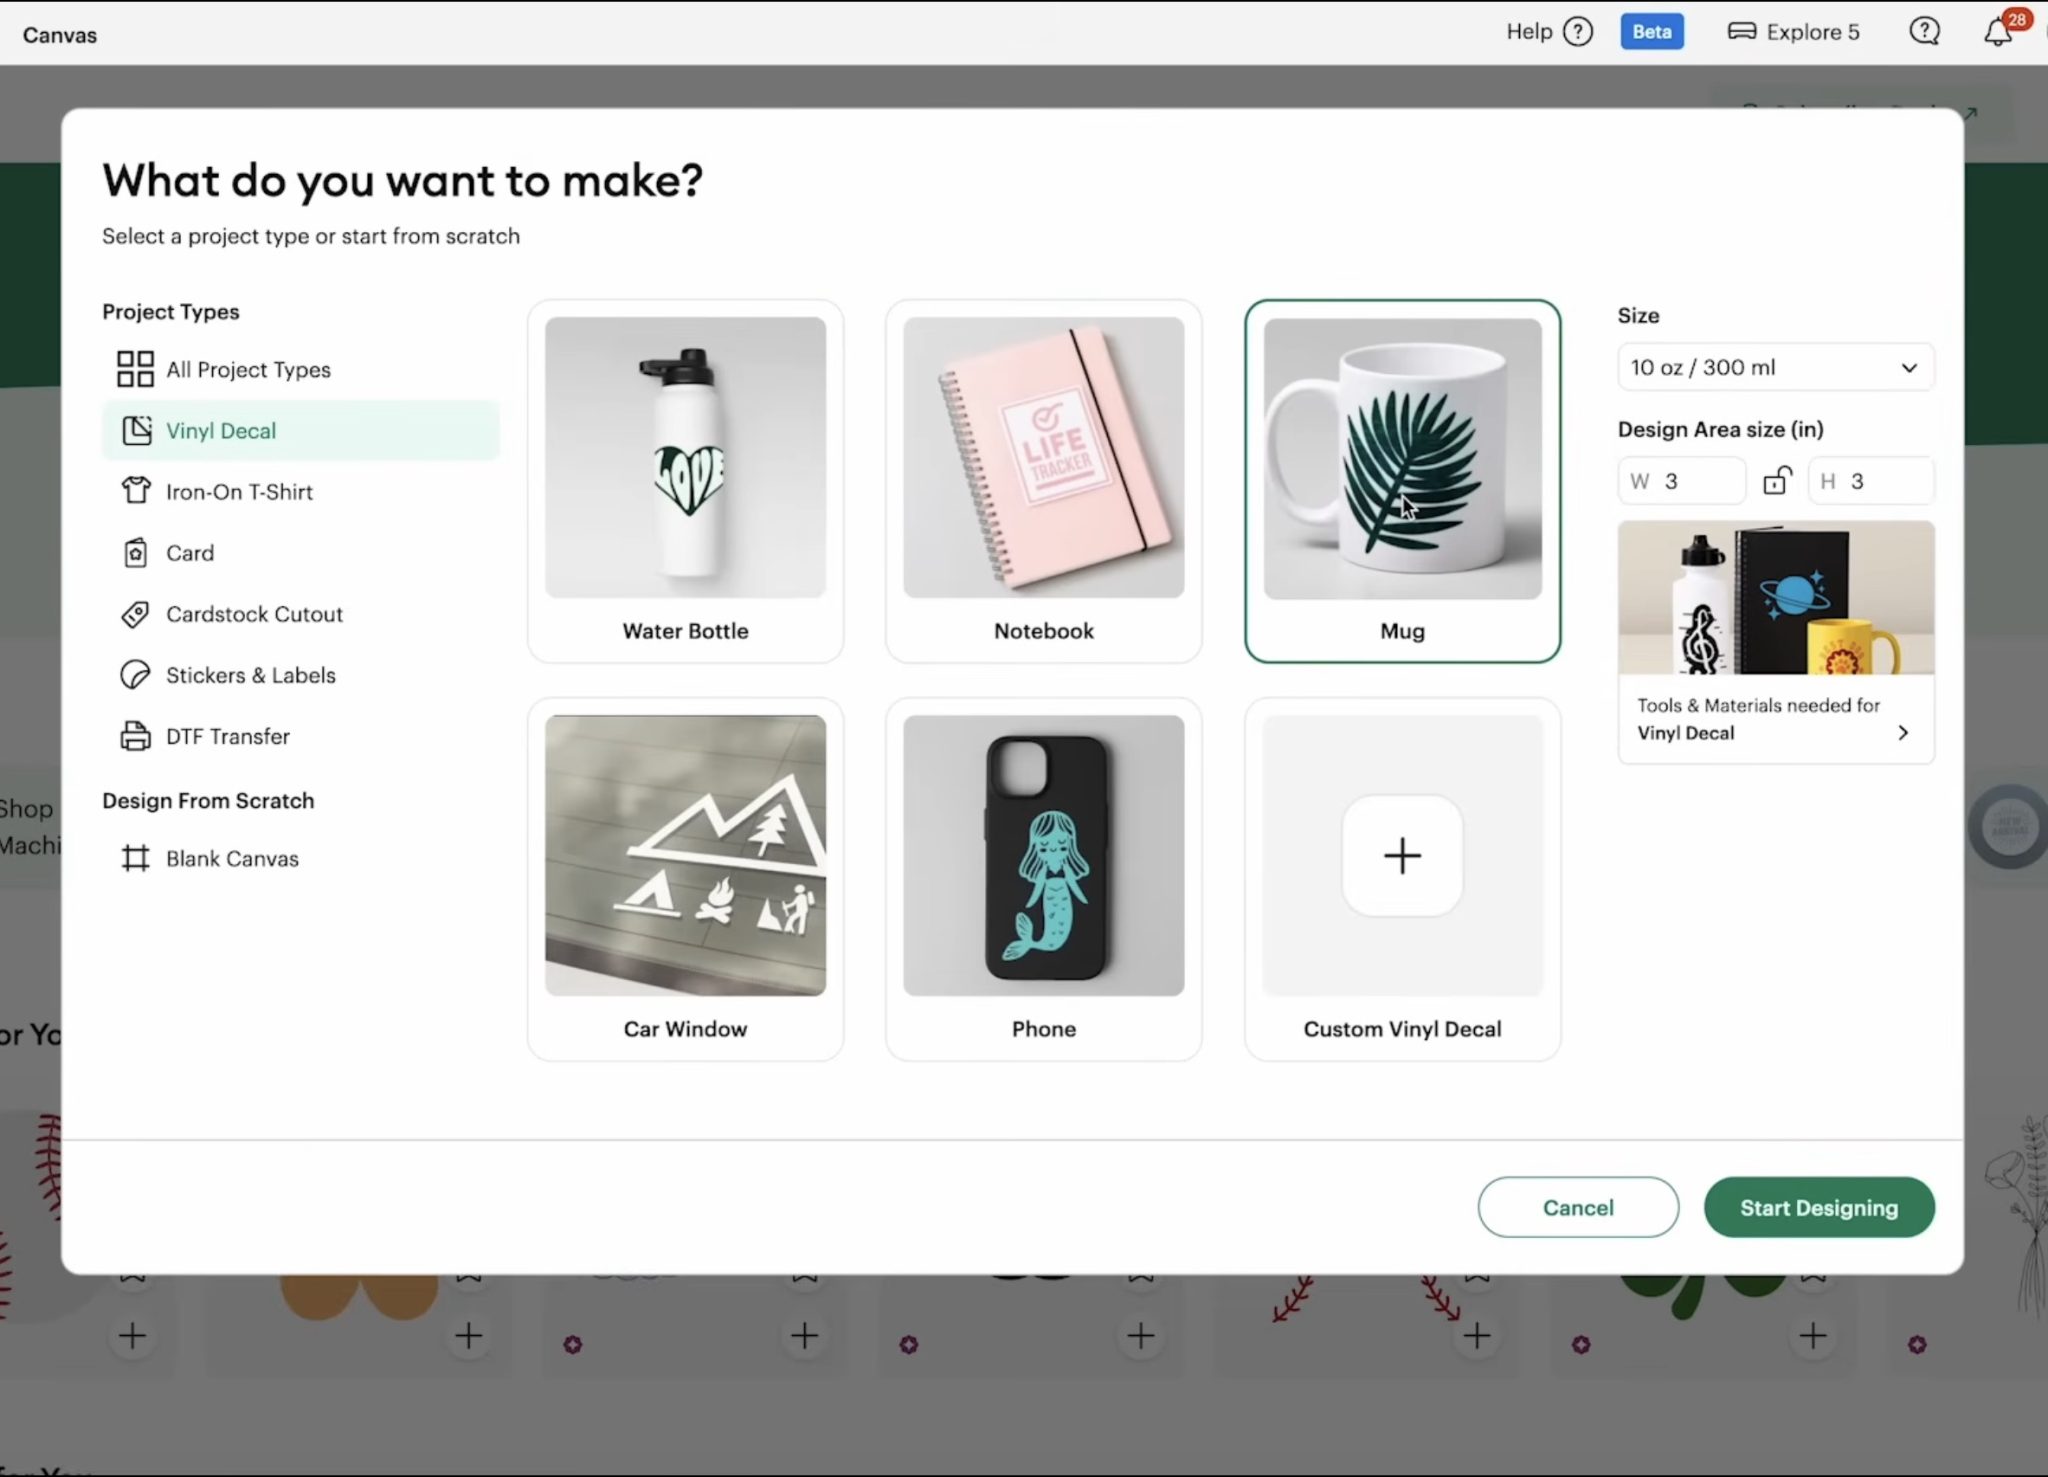
I want to create a design for a glass can. The size is similar to a mug size, so I am going to select that and then choose 3×3.
With the purchase of your Cricut machine, you'll get a free trial for Cricut Access. I am using designs from Design Space, but you can upload your own images or filter for free images in Design Space.
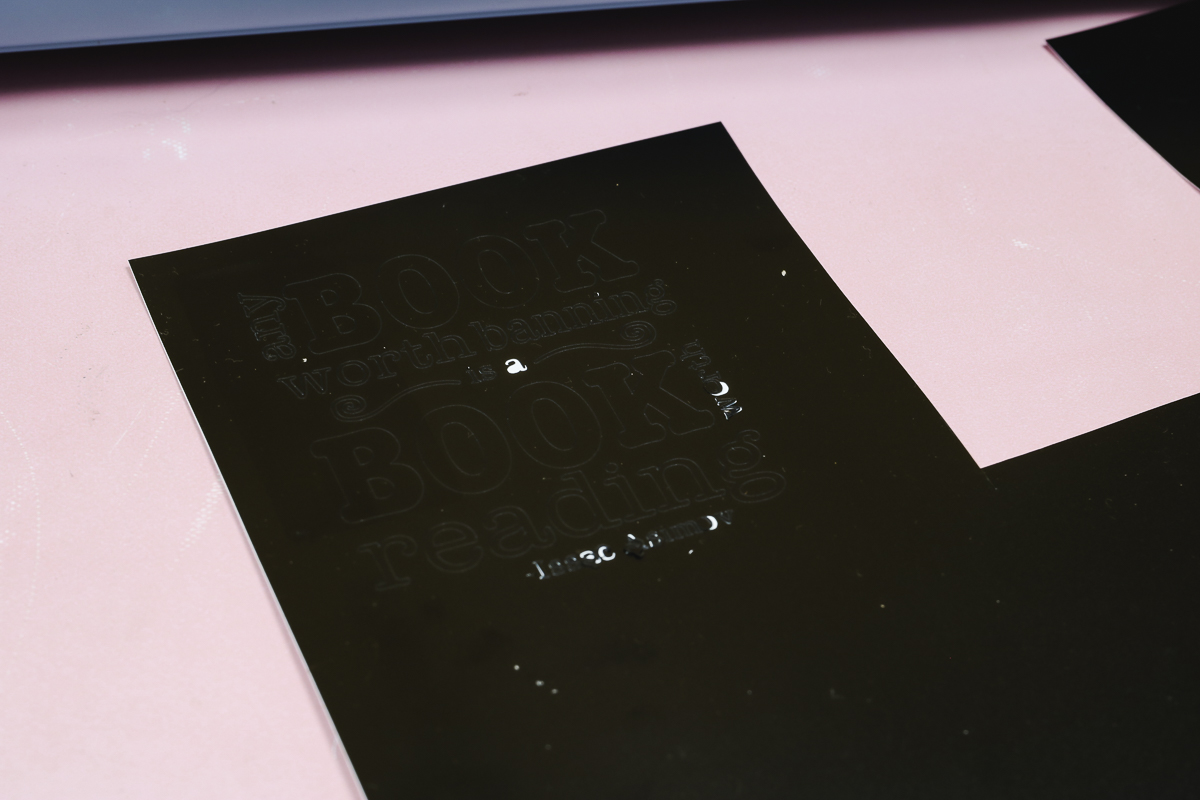
I did a search for book quotes and found a design I liked. When I selected the design, it added it to the canvas, and because I selected that 3×3 size at the beginning, my design is already sized to the size I want for my project.
If you needed to resize the design, you can do that now.
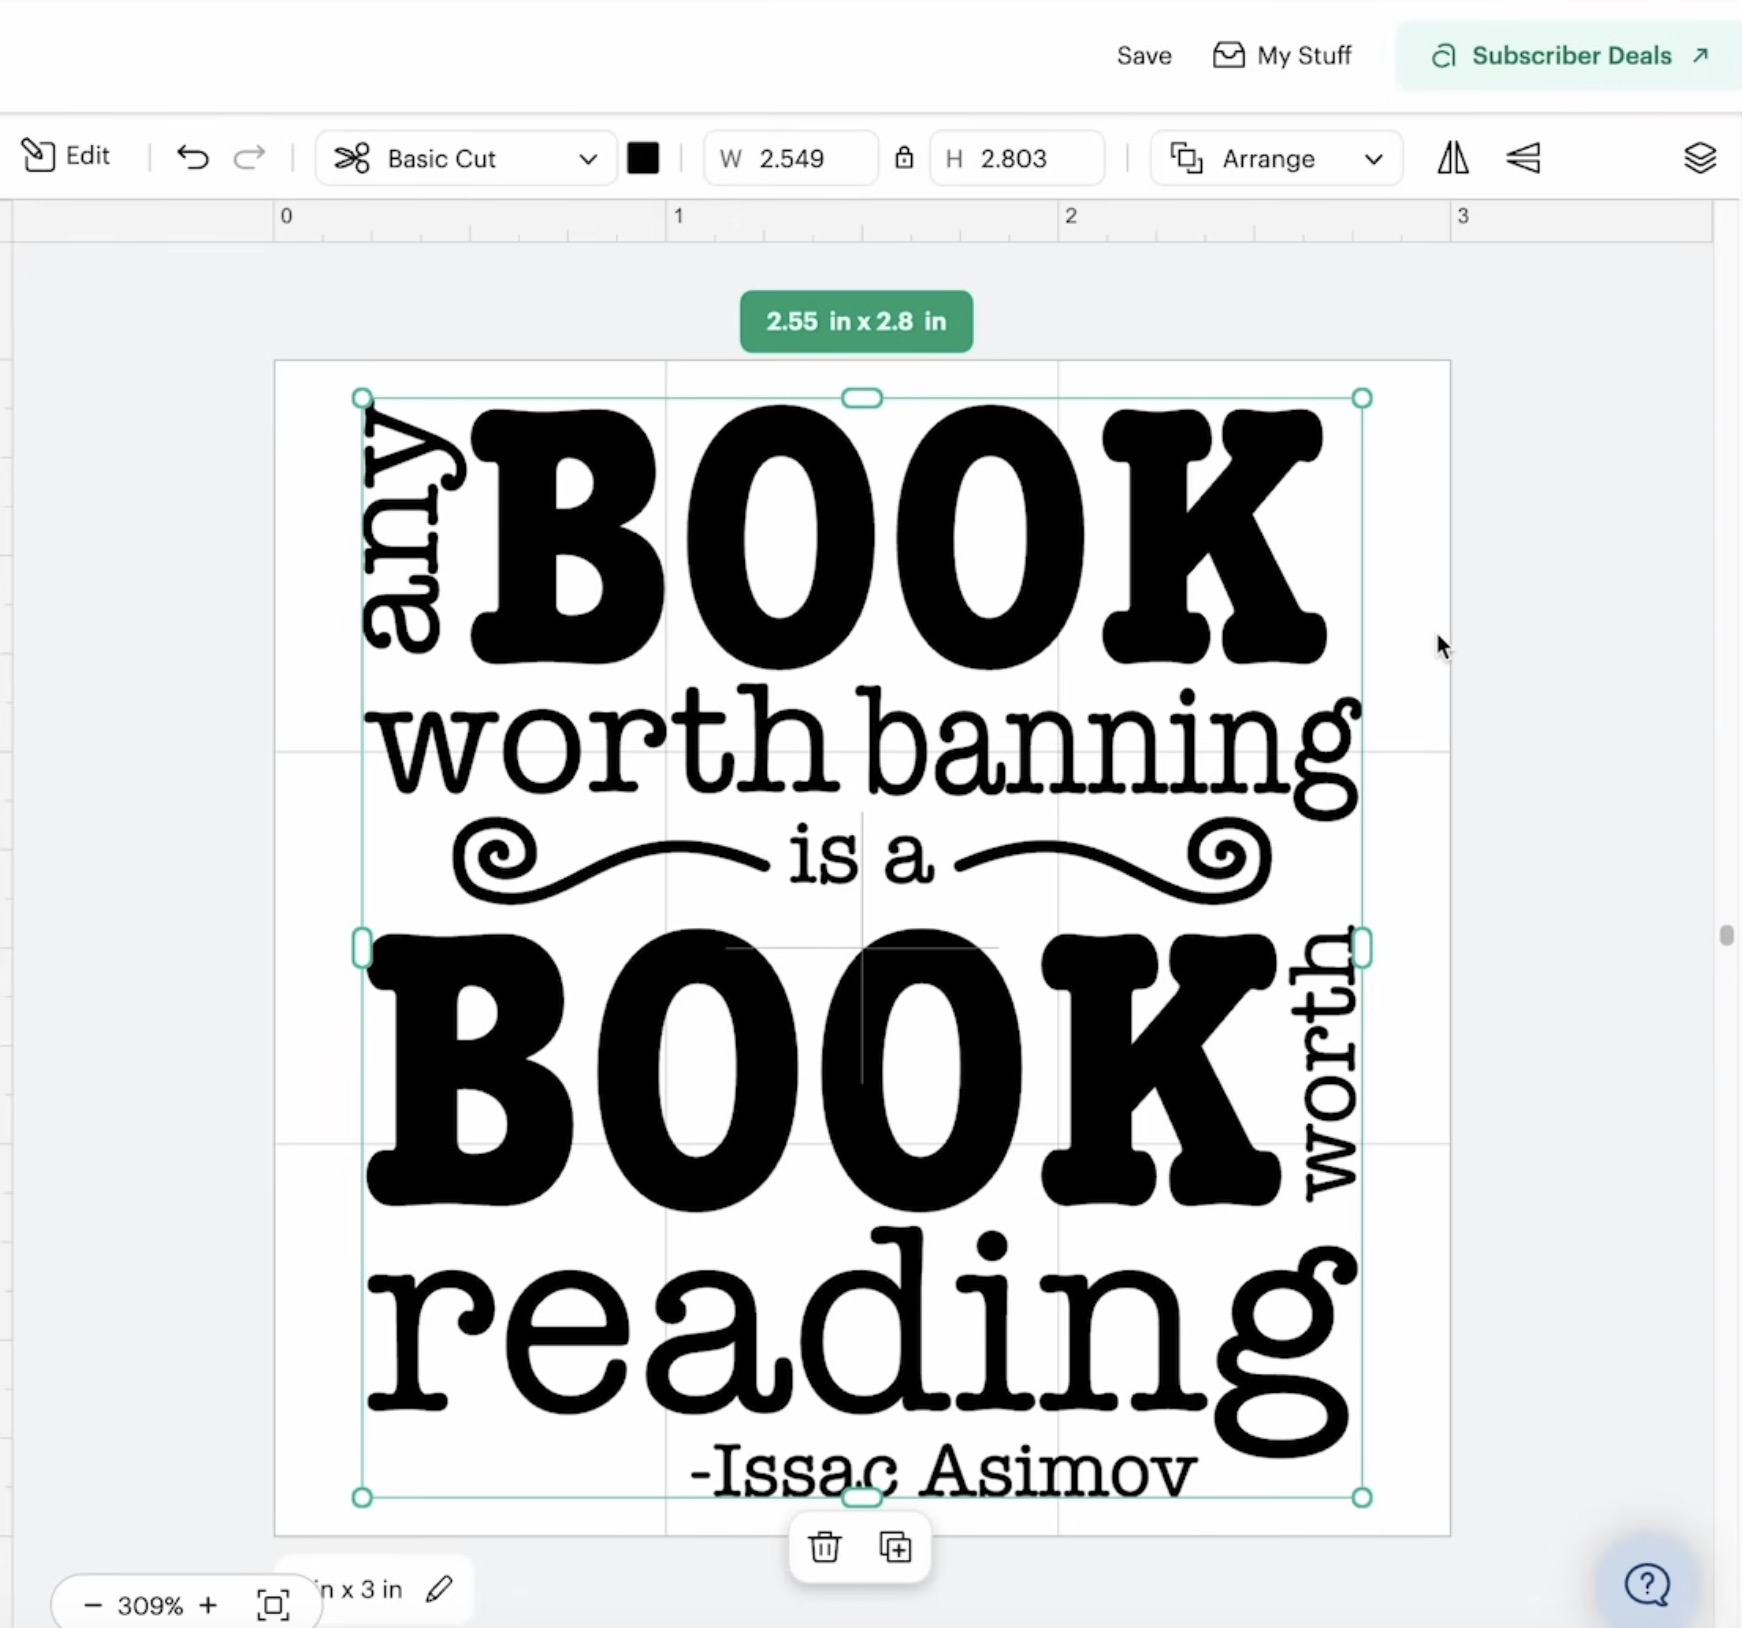
Make sure the design is laid out how you want it, and since this is all one color, I can select everything and click Attach. That will ensure it cuts out the same as it looks on the canvas.
Step 2. Cut Out Vinyl Decal
Click Make and then select Without a Mat if you're using smart vinyl like I am.
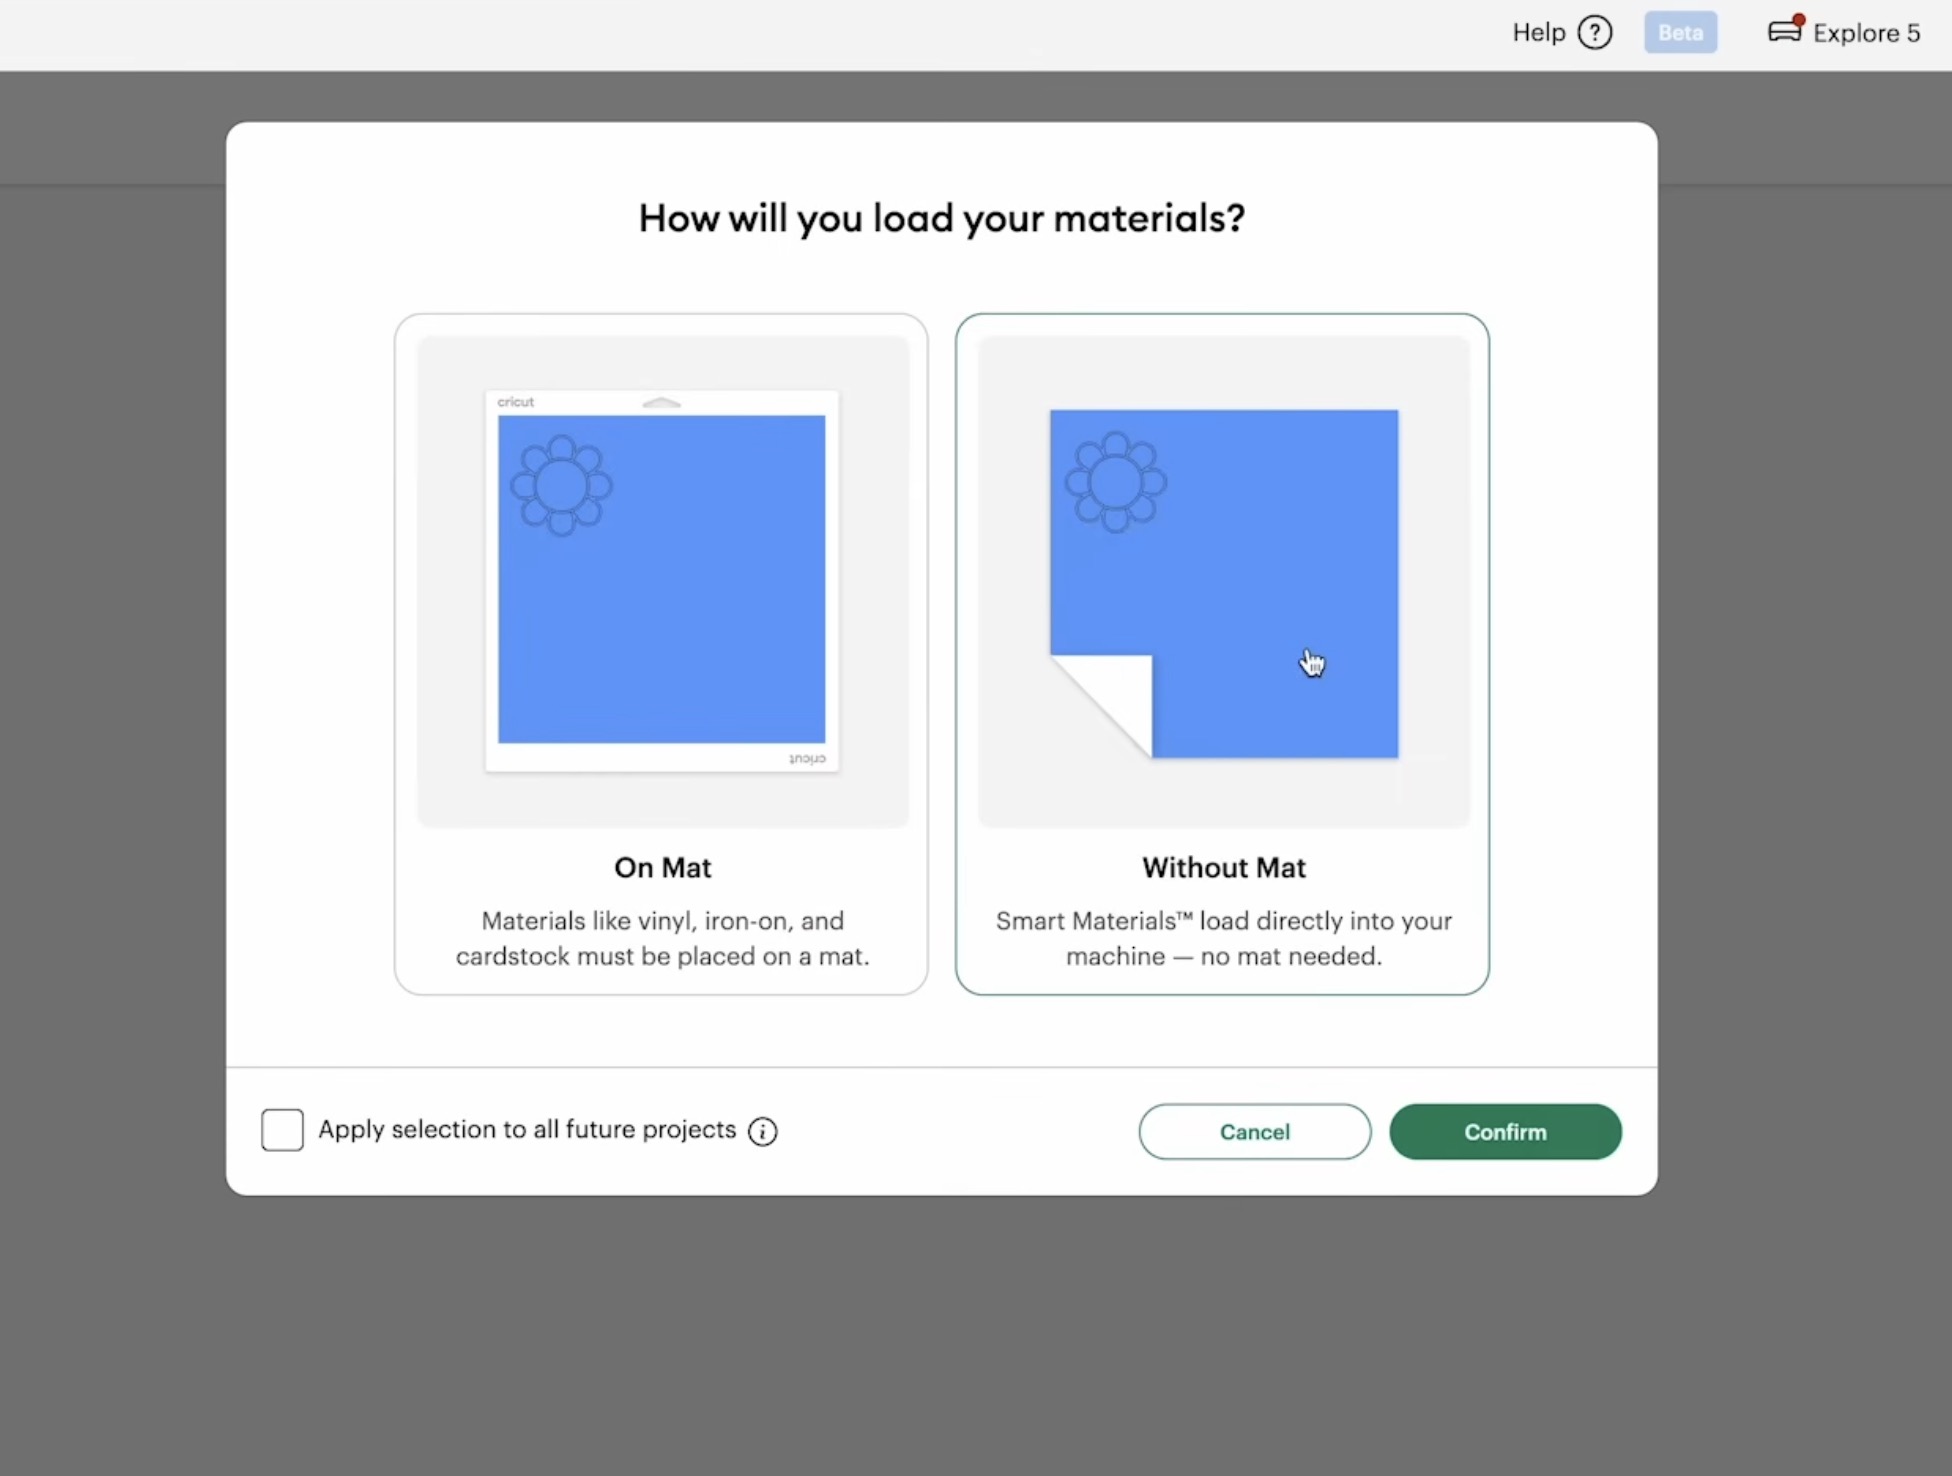
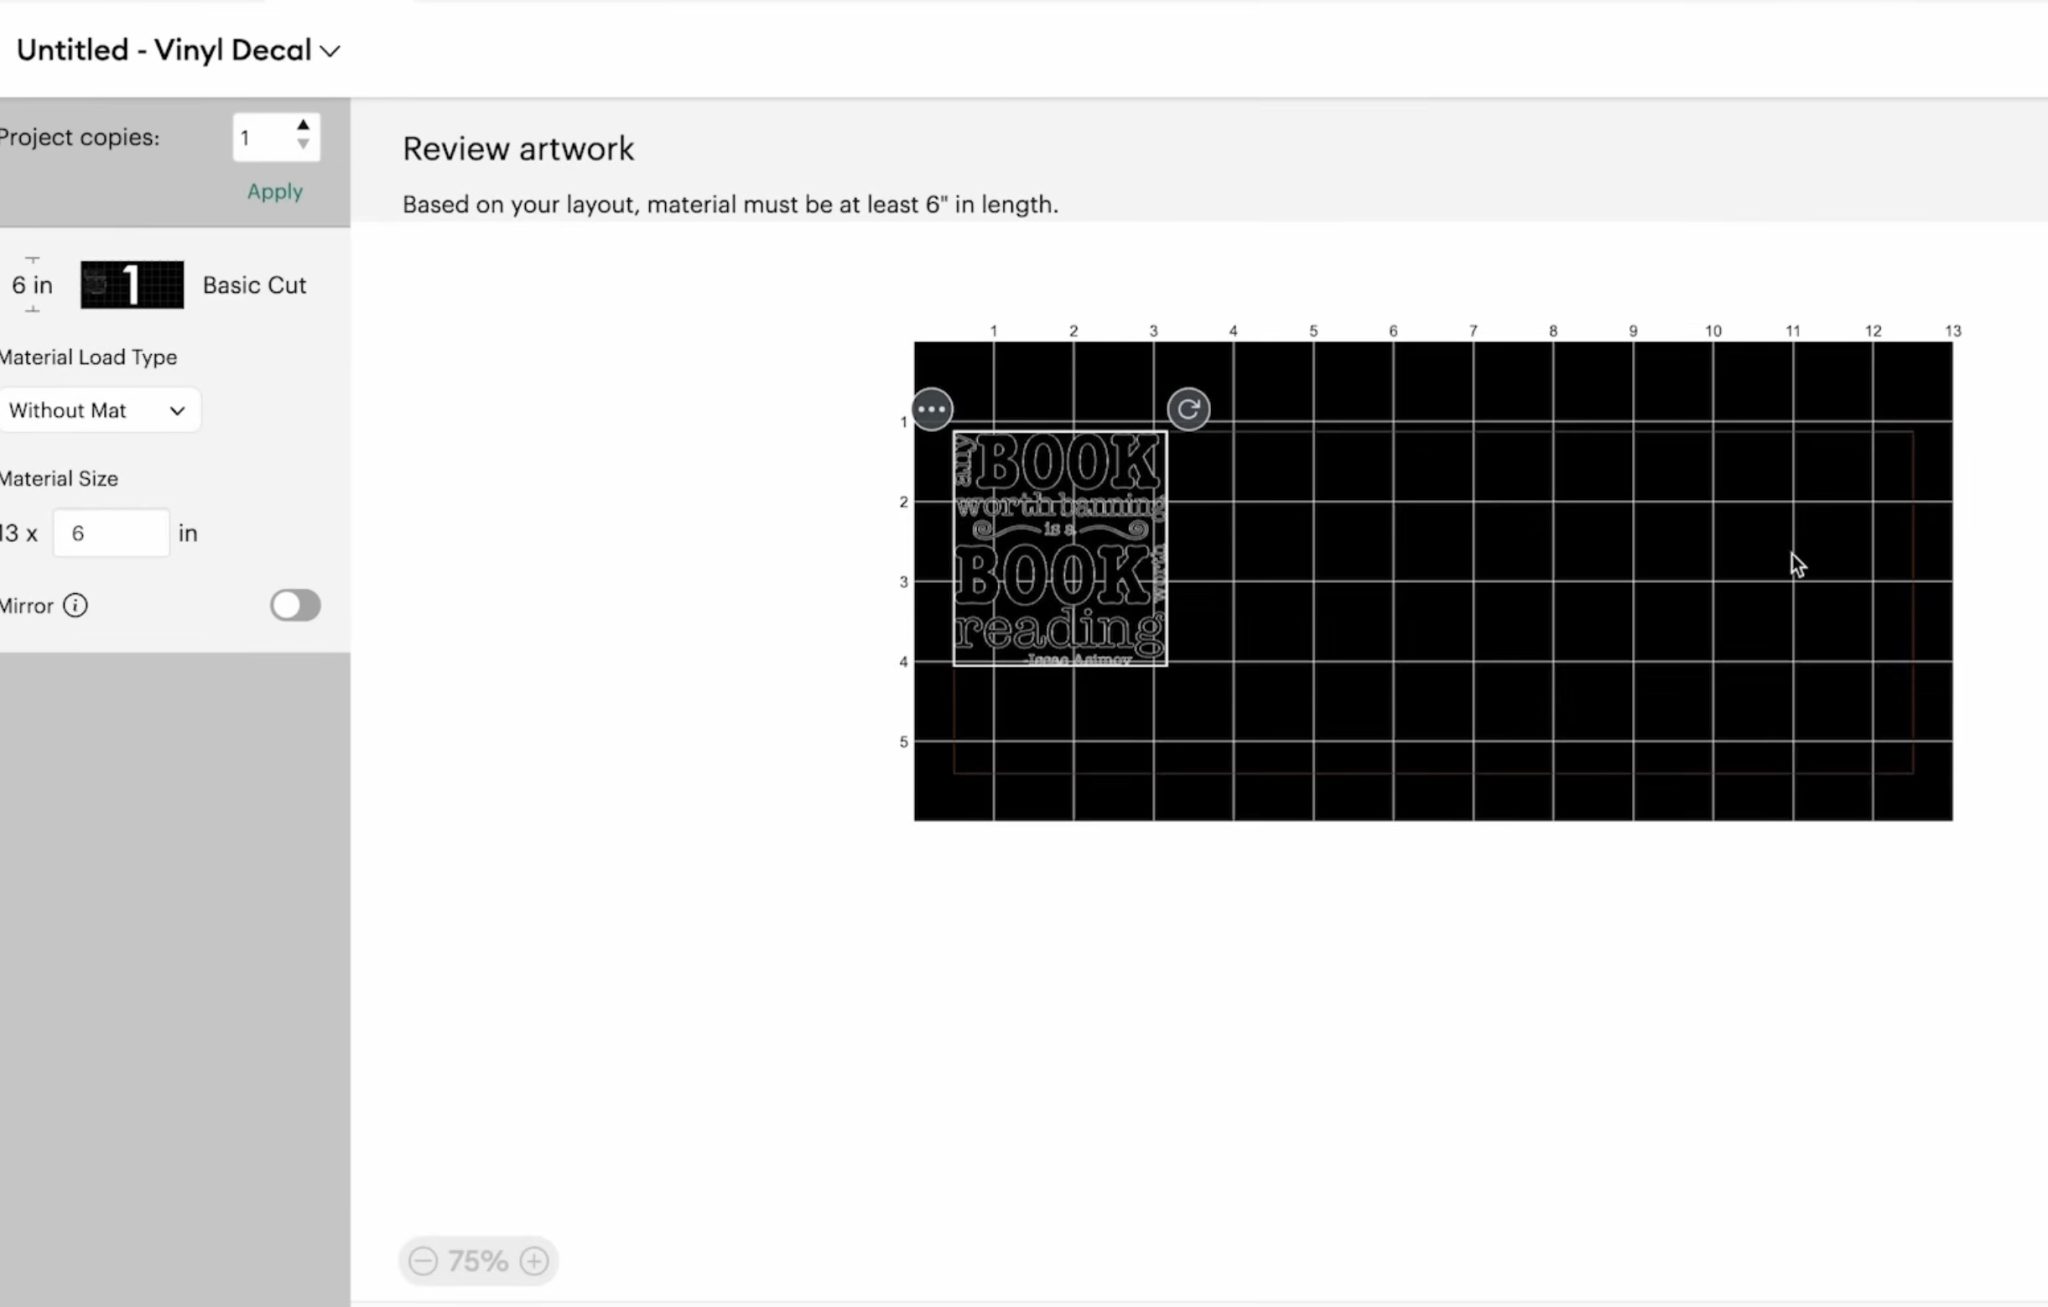
Confirm everything looks correct on the mat screen. Because I am using vinyl, I don't need to worry about mirroring my design.
On this screen, it'll tell you how long the smart material needs to be. When using smart materials, you will have some wasted material. The machine needs enough material to pull it into the machine. I always save these scraps because you can place them on a machine mat and use them like regular vinyl later.
Click Continue and then choose the material you're using. I am using Smart Vinyl Matless Permanent Vinyl.
I always remind people to follow the steps in Design Space. If you follow the steps, you're unlikely to make mistakes.
Here it's telling me to load the Fine Point blade into the tool clamp and to press the Go button to start.
Place the smart material under the guides so it's sitting against the rollers, and you're ready to go.
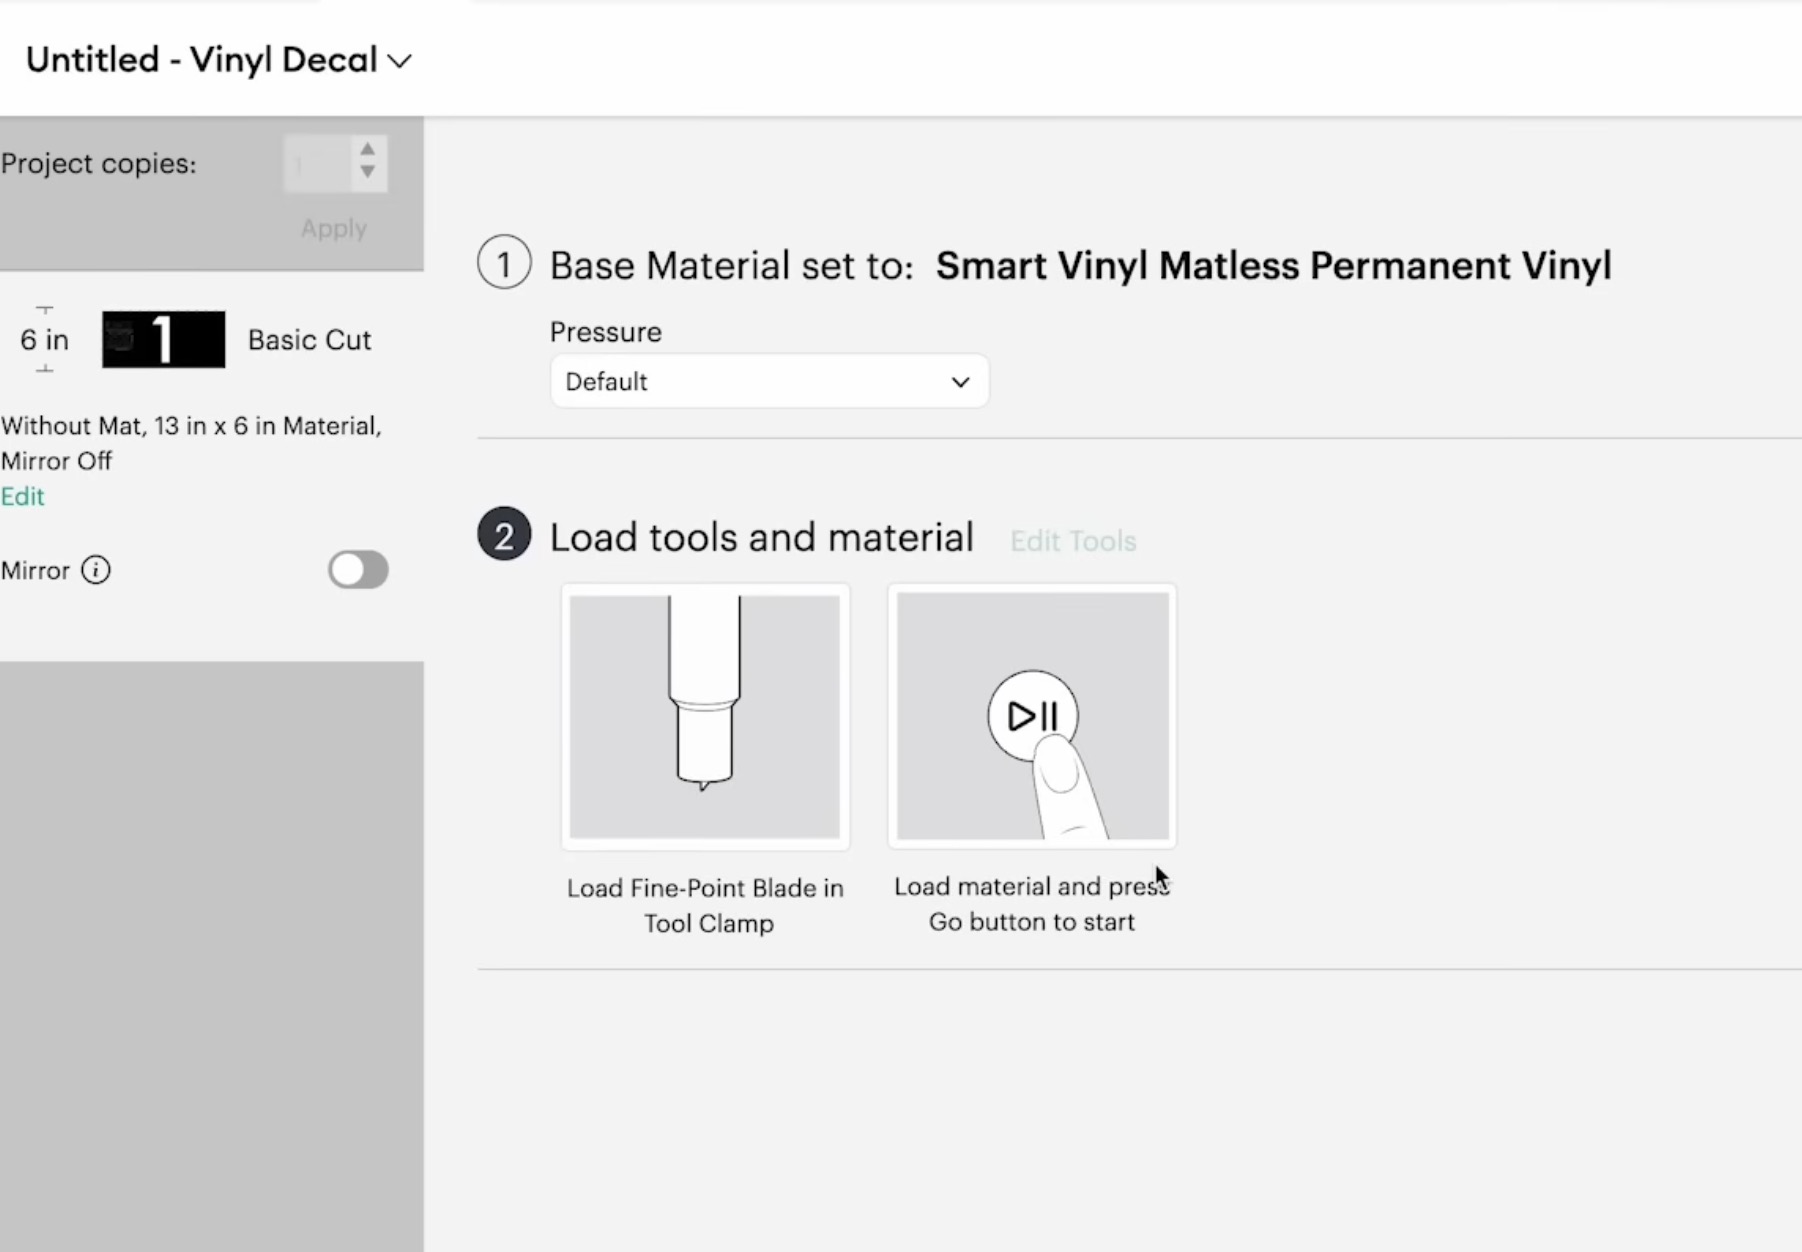
The Explore 5 has a new load and go feature. You want to ensure everything is set up correctly because once you press Go, it's going to measure your material and immediately start cutting.
With previous machines, you'd click the load/unload button to load the material, and after it was measured, you'd click Go to start cutting.
That extra step has been eliminated, so once you load the material, it'll measure it and then cut out your design.
When it's done, you'll be prompted in Design Space to unload the mat.
Optional: Do a Test Cut First
Here you can see that some of the smaller details in my design lifted up. This did not cut really well.
Anytime you use a new machine or a new material, I suggest doing a test cut. This will help you dial in the correct setting for the material and design you're using.
This design was more detailed, and there isn't an Intricate Cut setting for smart vinyl. If I really wanted to use this design, I would go back a couple of steps and tell Design Space I was cutting vinyl on a mat.
This would allow me to choose an intricate cut setting.
For this example, I am going to choose a different design and try again.
This design cut much better, so now we're ready to move on.
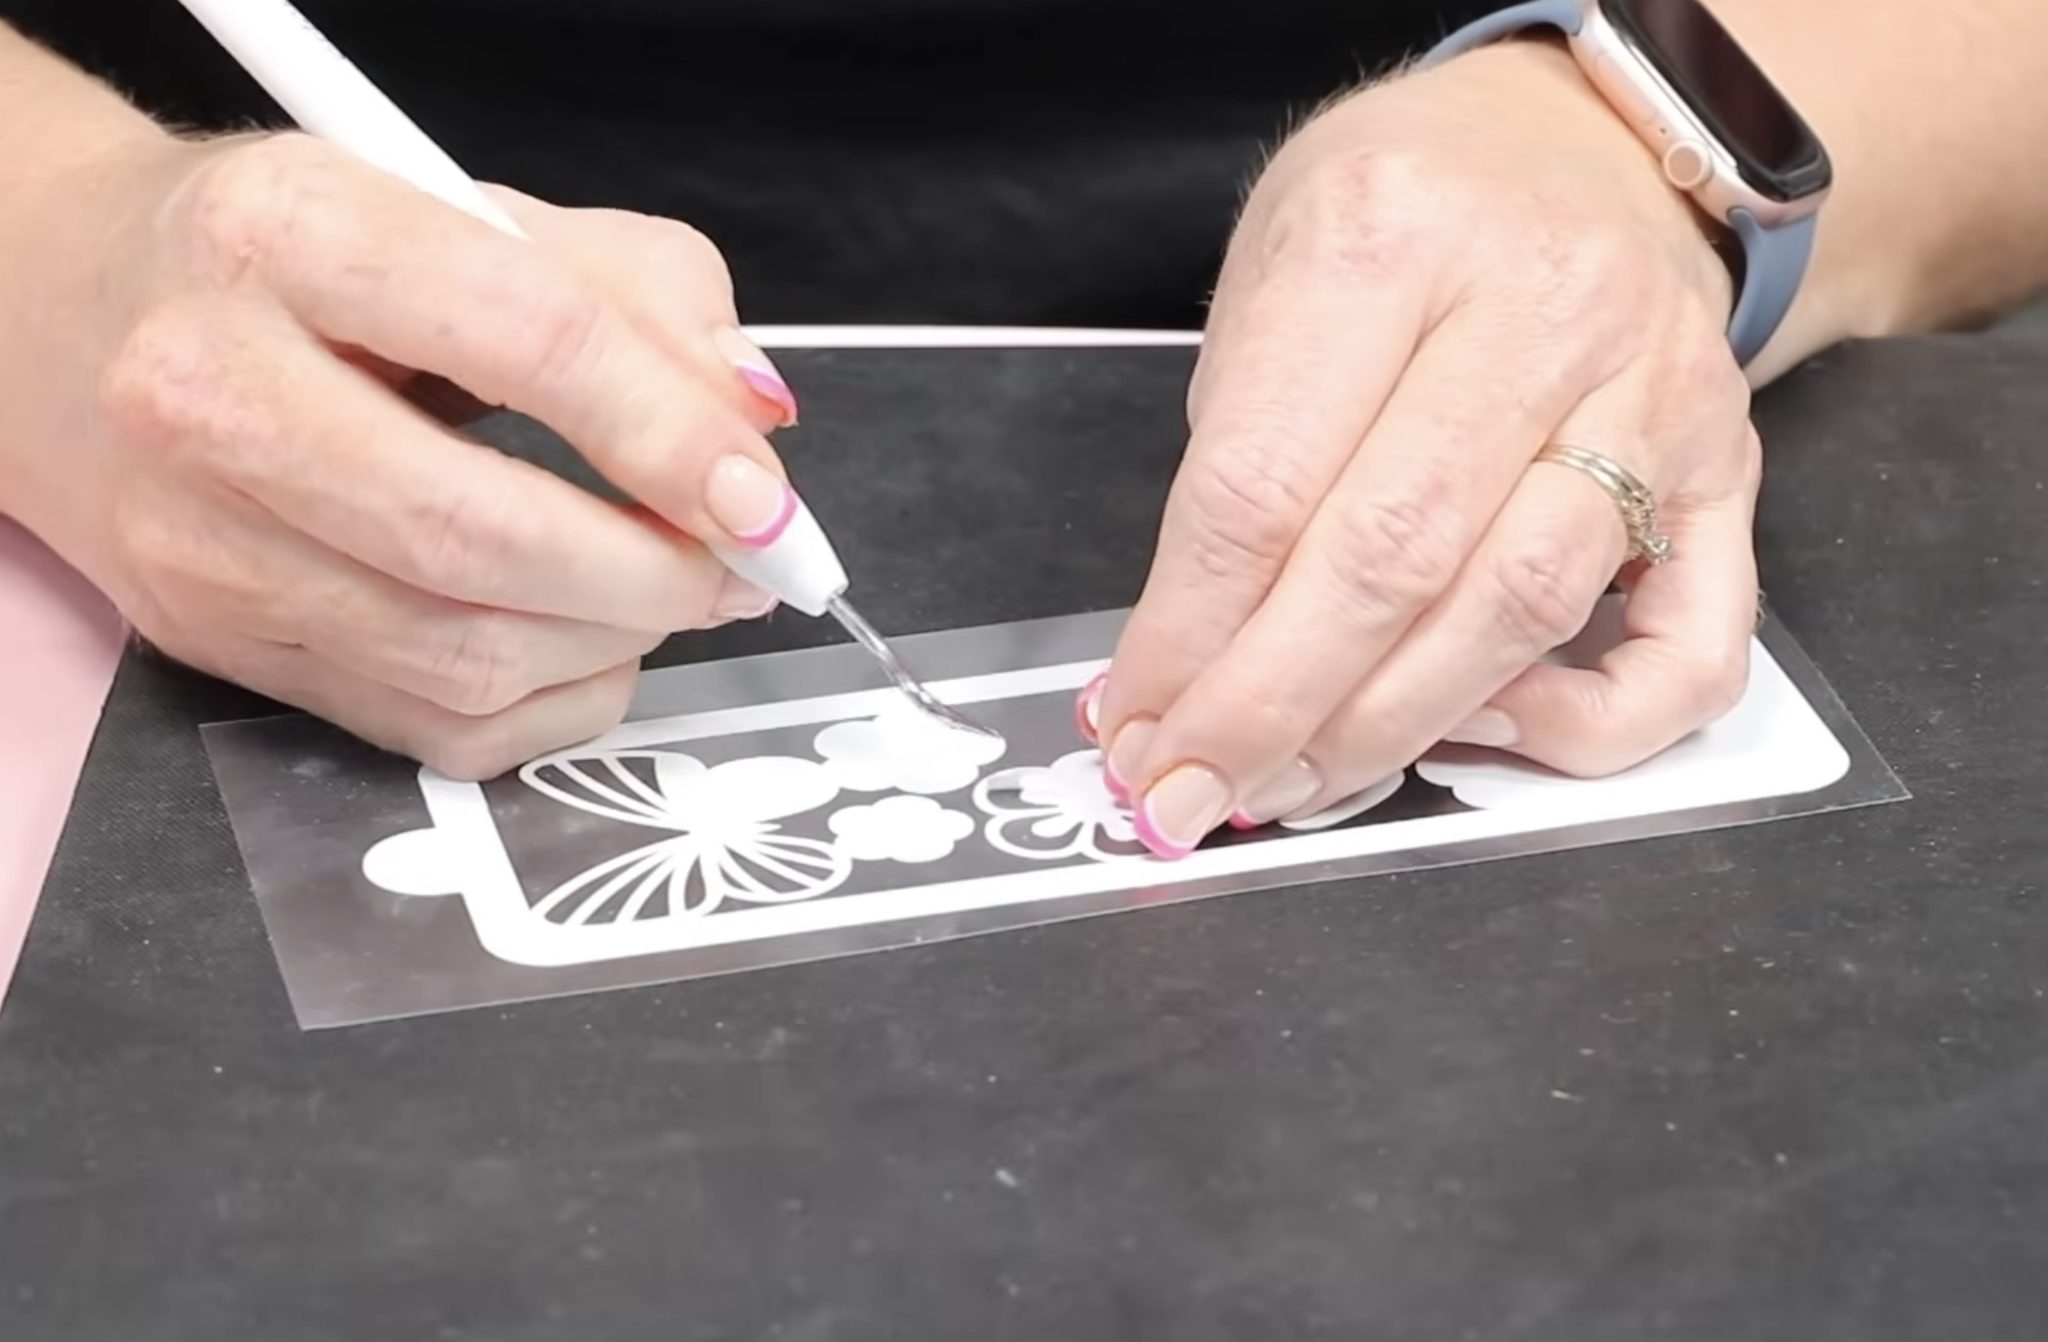
Step 3. Weed Design
I trimmed my design away from the rest of the material and used a weeding tool to remove everything I don't want on my glass cup.
When doing this, make sure to get all the inside pieces, including the insides of letters and numbers.
Step 4. Add a Vinyl Decal to Glass Can
Cut a piece of transfer tape slightly larger than the vinyl decal. Remove the backer and place it on top of the vinyl.

Use a scraper tool to burnish the transfer tape onto the vinyl, then flip it over and repeat the process on the back.
Make sure your glass can is clean and dry, and locate the design on the can.
With the design in place, press it down really well using the scraper tool or your fingers.
Gently remove the transfer tape starting in one corner, rolling it back on itself. The vinyl should stay stuck down on the glass can. If it's lifting, replace the transfer tape and burnish it down a bit more.
With the transfer tape removed, the glass can is finished. Mine looks really good, and I love how easy the project came together.

Allow the vinyl to sit on the blank for no less than 24 hours and up to 72 hours before using it to allow the adhesive to really bond with the blank.
Draw and Cut with Cricut Explore 5
I really wanted to test the old Joy pens to see how well they work in this machine, so I chose a bookmark design that has a lot of draw lines to see how it does.
Note – In previous machines, you would load the pen in clamp A and the blade in clamp B, and it would draw and then cut. With the Explore 5, you'll load the pen and the blade, but when it's done drawing, you'll be prompted to remove the pen.
Step 1. Choose a Bookmark Design
There are a lot of bookmark designs in Design Space. I clicked on Images and then searched Bookmark.
Add the design you want to use to the canvas and resize it to the size you want.
Optional: Use Filters in Design Space to Narrow Your Options
There are filters in Design Space that you should be using if you're not already.
Click on Filters, and there are a few options.
The first option is General. This is where you can filter Free, Purchased, Downloaded, and Bookmarked designs. If you don't have Cricut Access, you can select Free, and it will only show you the images that don't have a fee associated with them.
There are several more filters but the one I like beset is the Operation Type filter. I'll use it to make sure the images I see include using pens. The options here are Cut, Draw, Cut + Draw, and Print then Cut.
I am going to choose the Cut + Draw filter here.
Step 2. Prepare Mat and Machine for Cutting
Click Make, choose On Mat, and click continue.
I am using an 8.5 by 11-inch sheet of white cardstock for this project, so we can see the different colored pens.
Place the cardstock on the cutting mat. I am using the blue LightGrip mat.
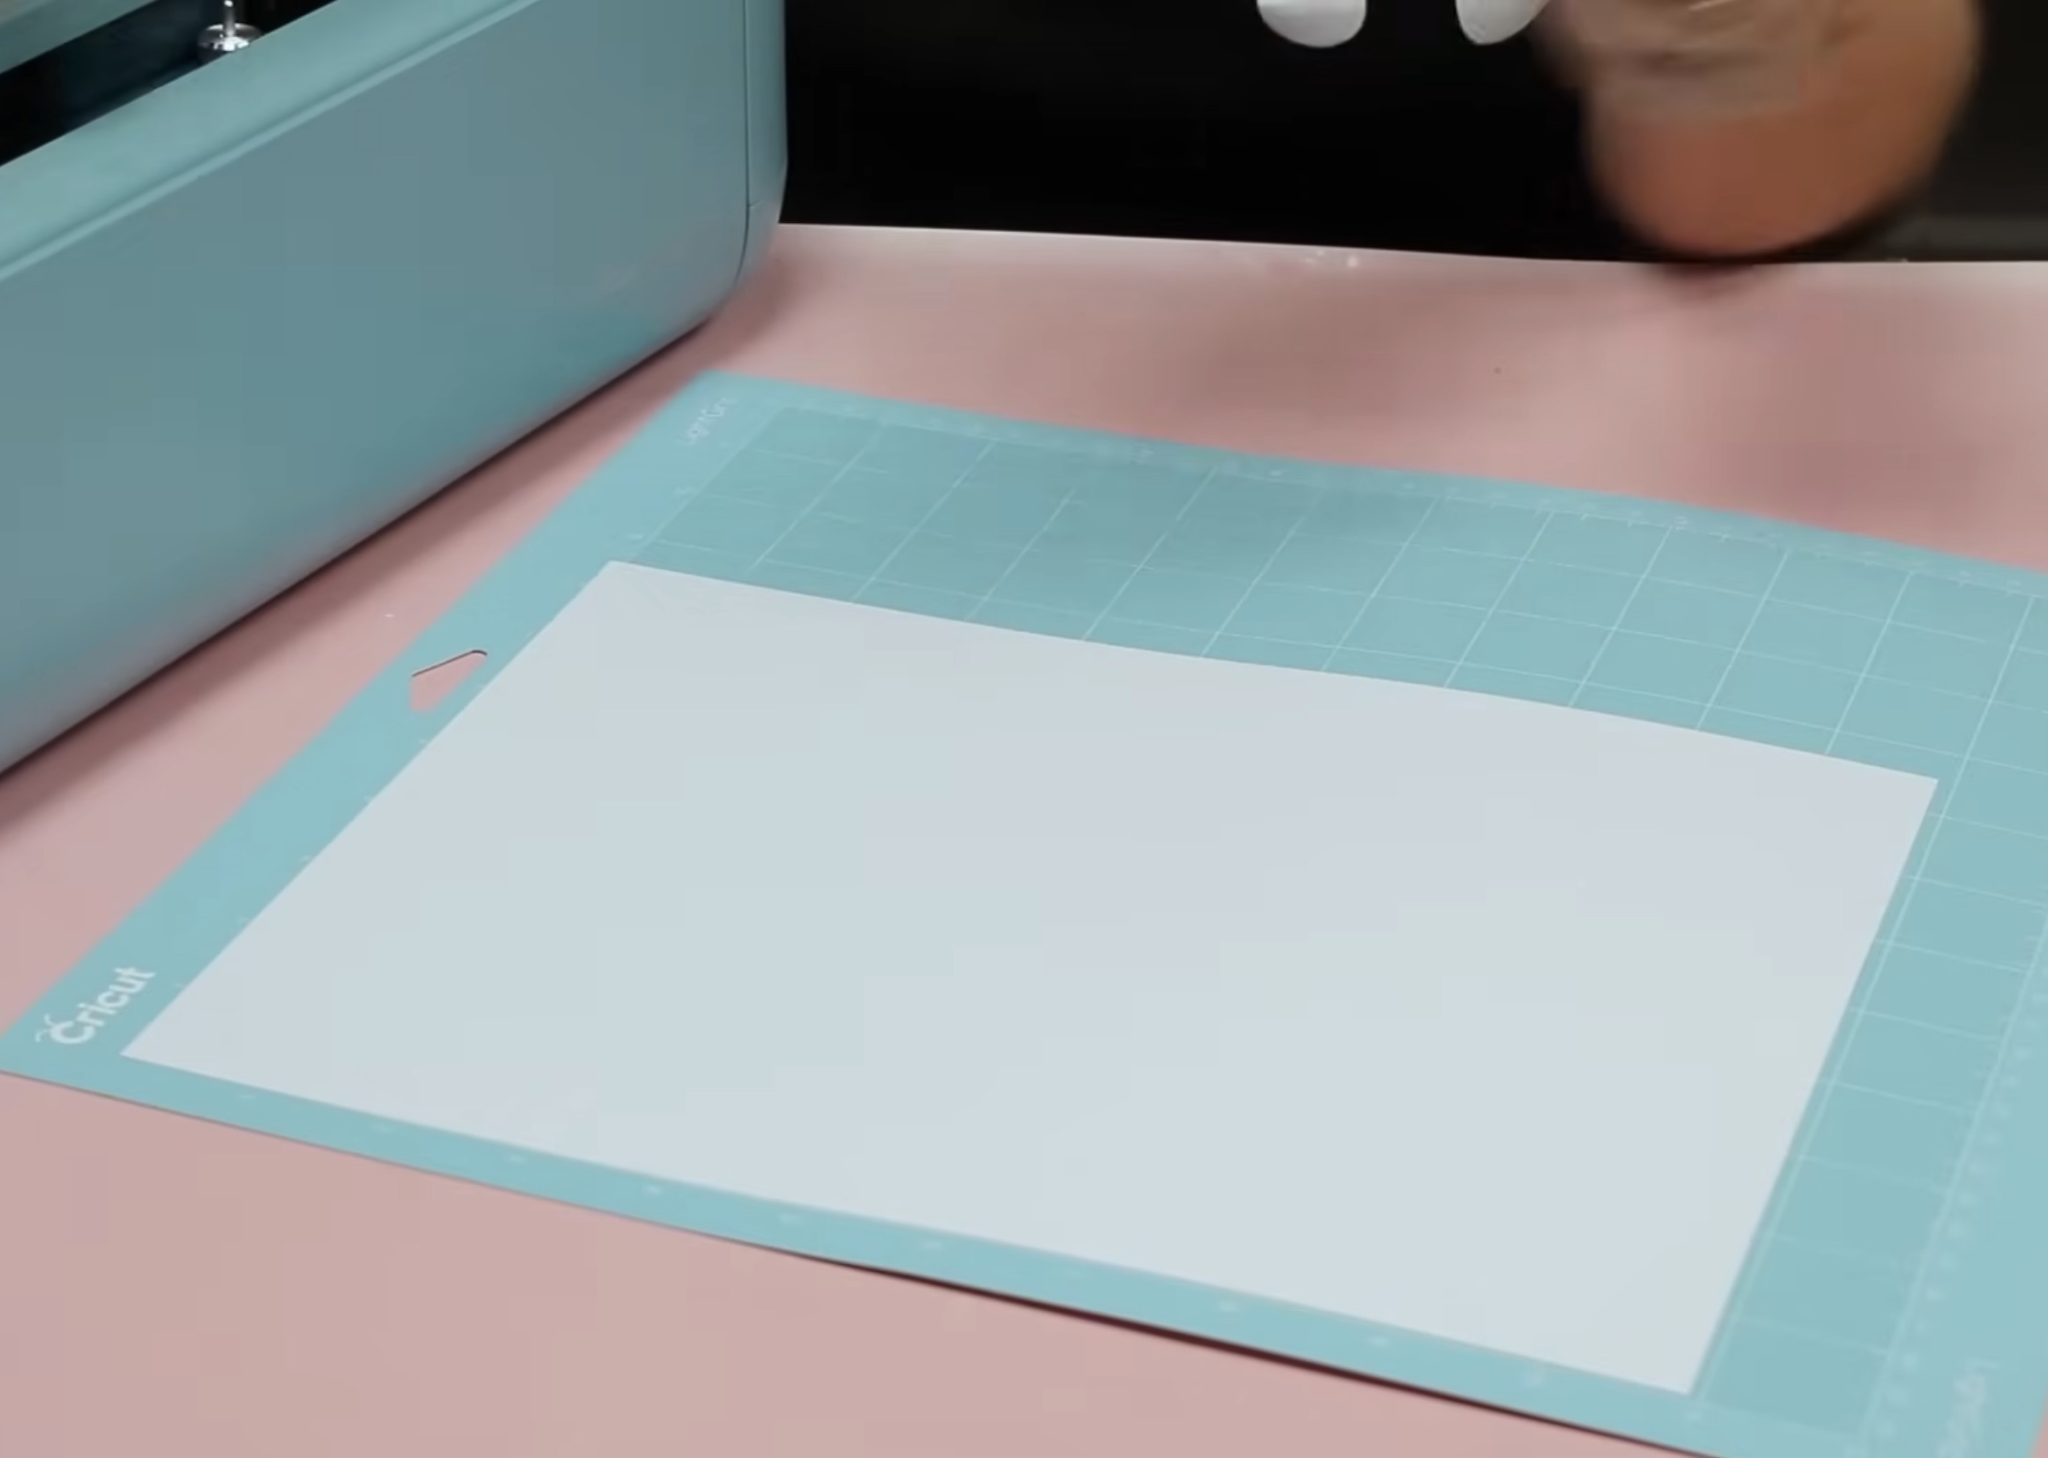
In Design Space, select the material. I chose Medium Cardstock.
Follow the instructions in Design Space. It says to use the pen that came with the machine or pens that have the universal symbol. The old Cricut Joy pens don't have that symbol, but I still hope they will work.
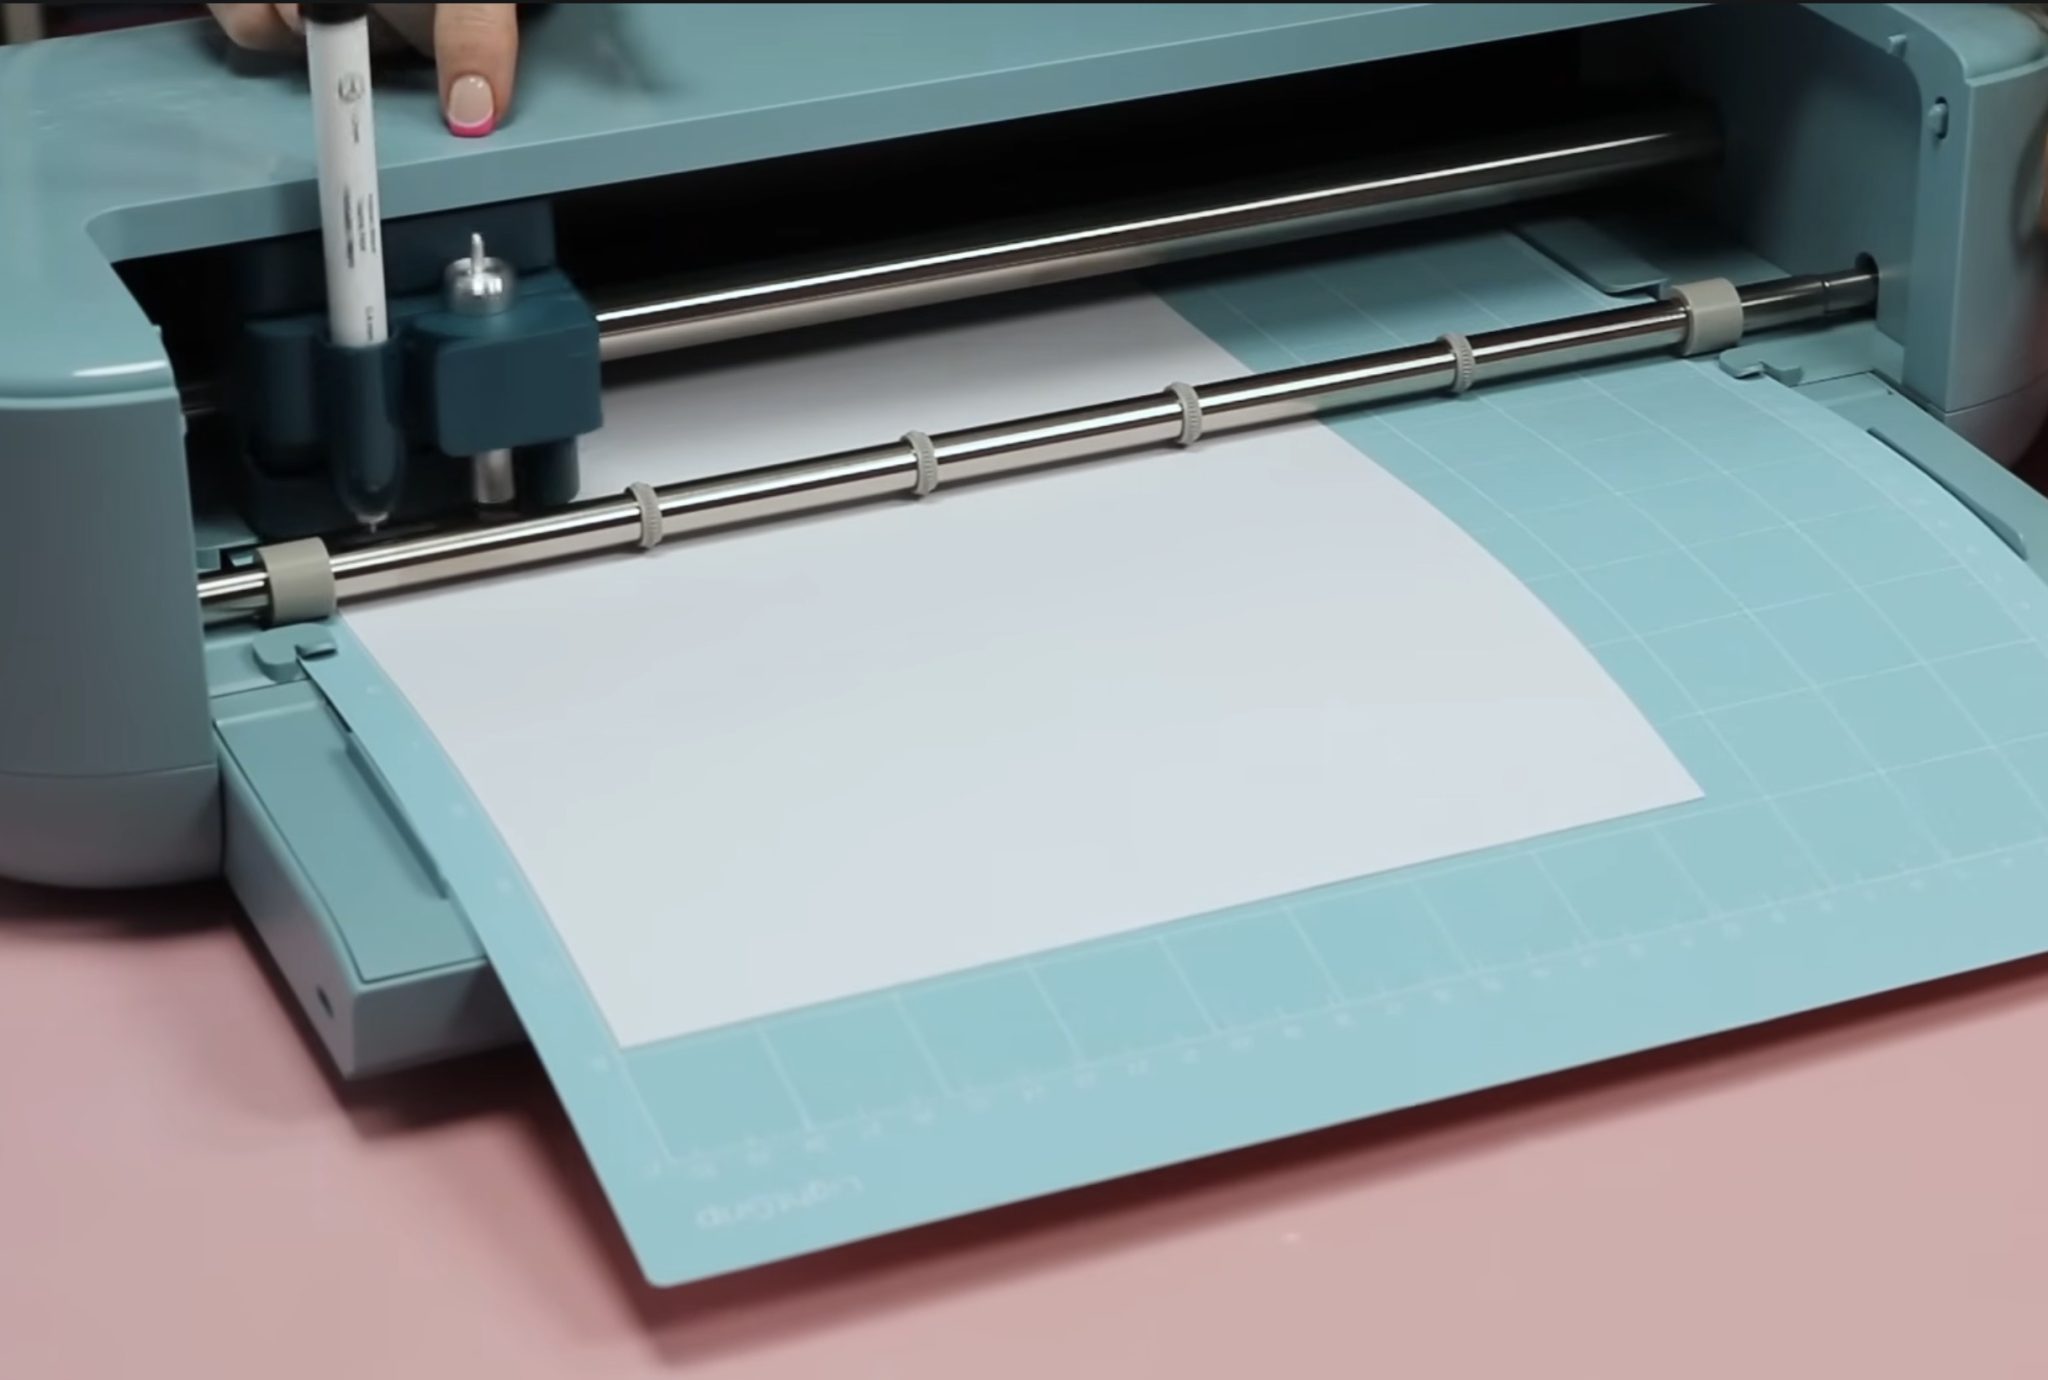
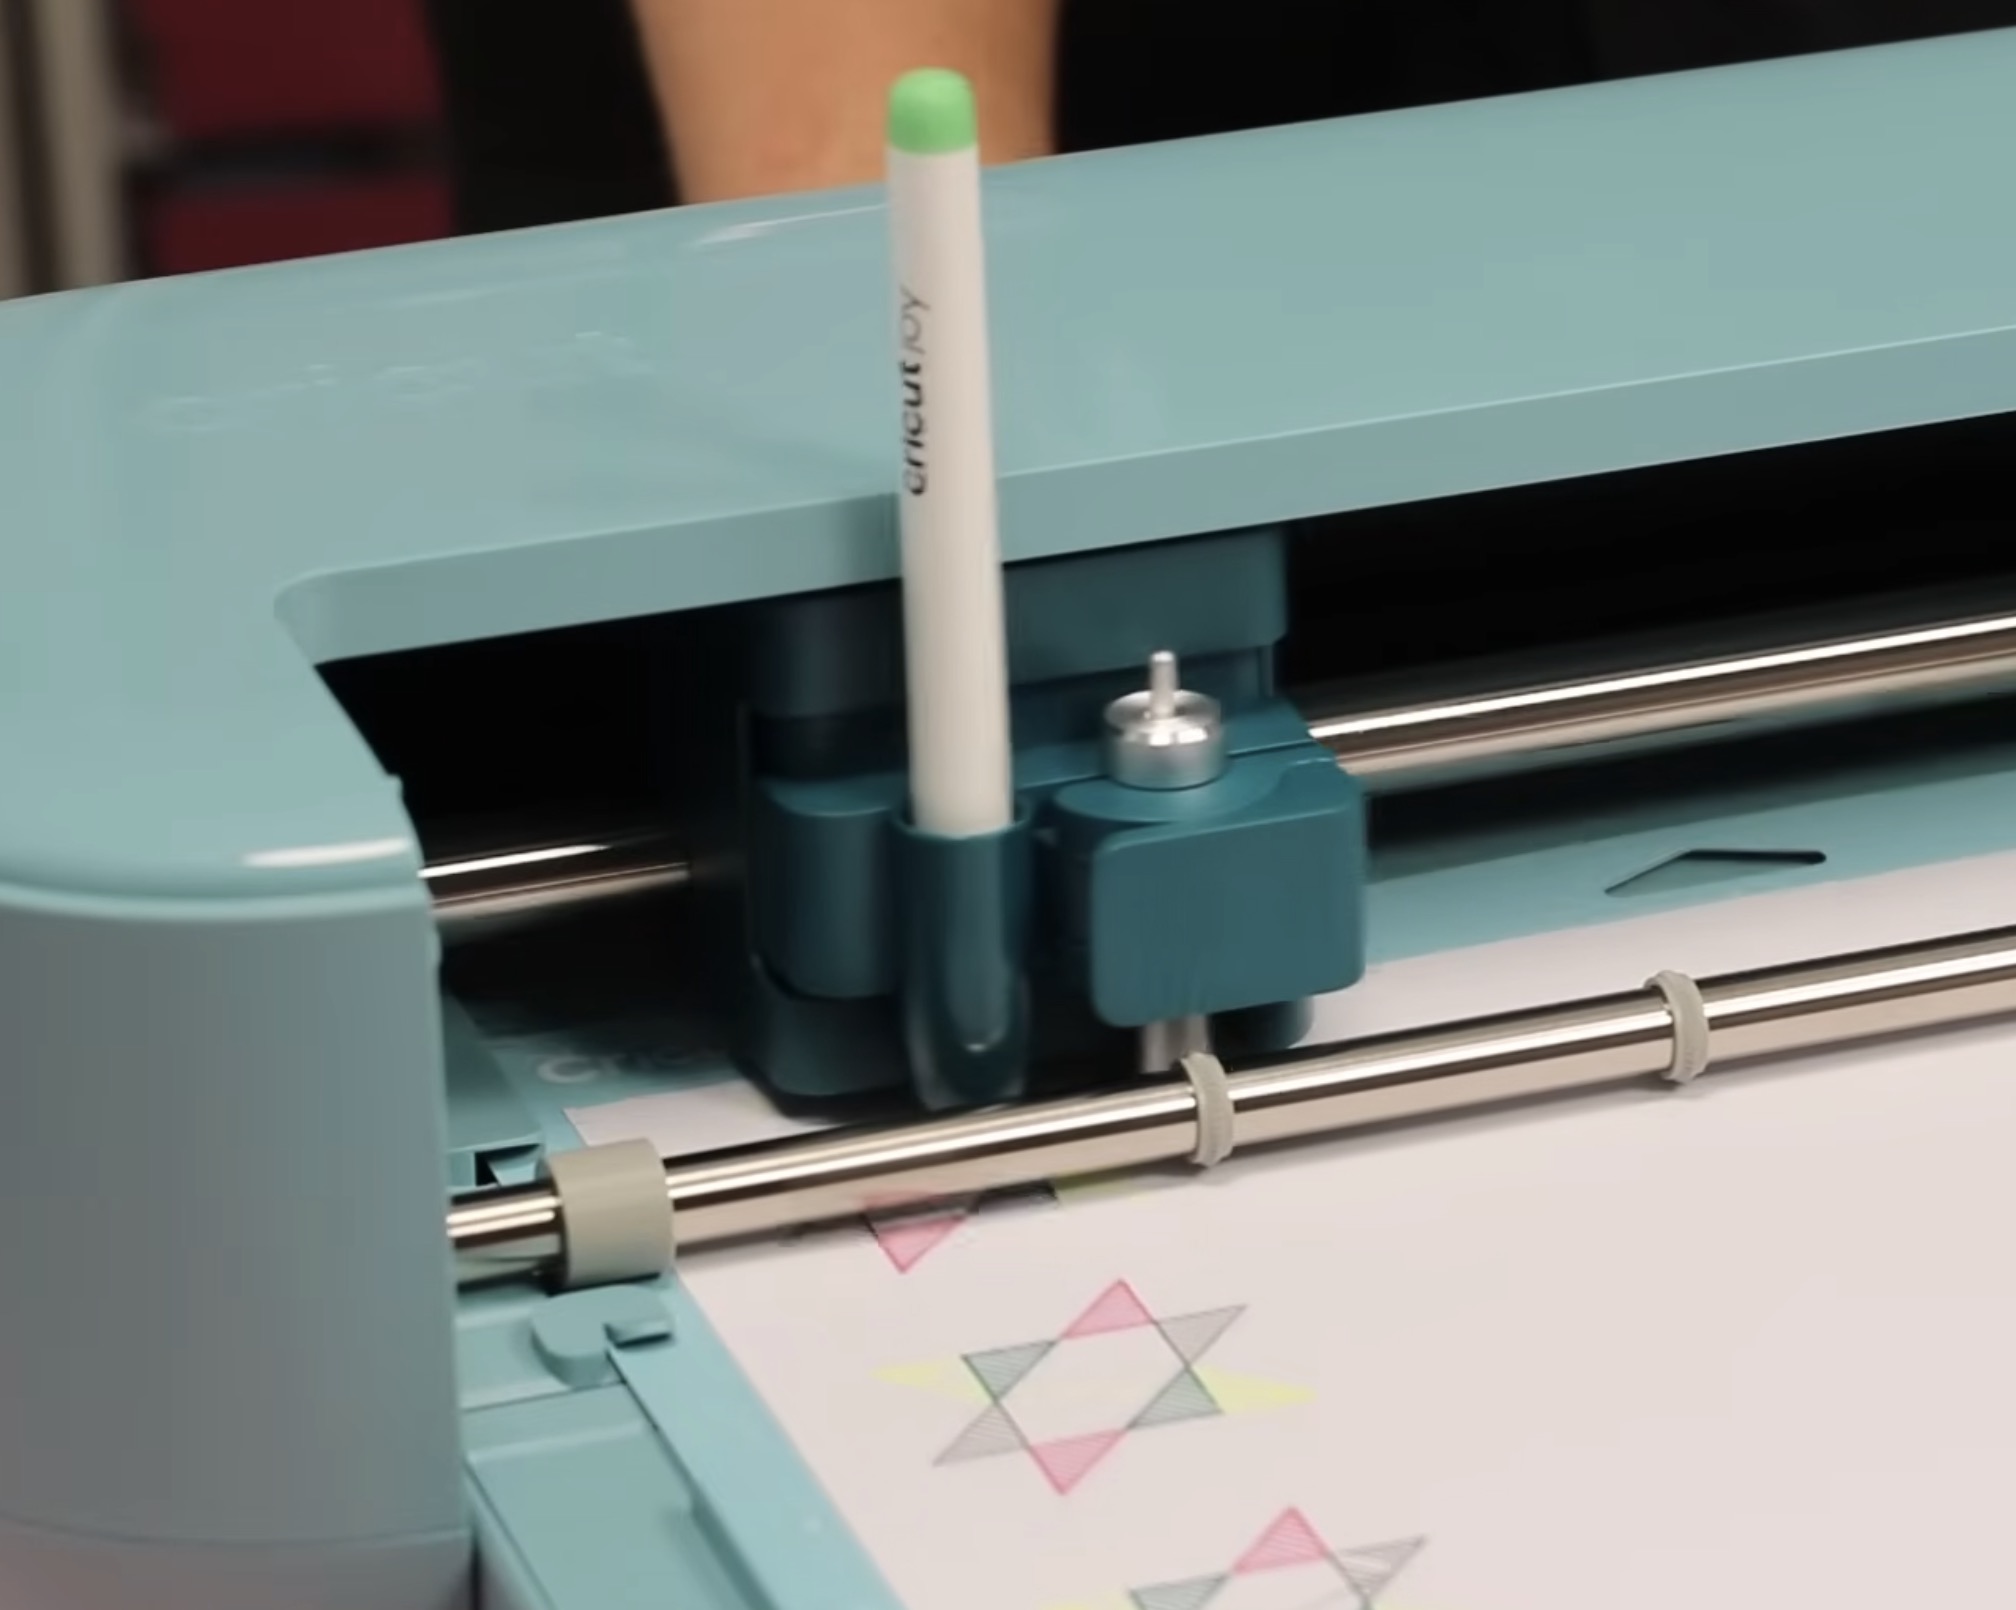
First, I am loading the pen that came with the machine into the pen holder, and I am using the 4mm side. Press the pen down until it clicks.
Step 3. Load the Mat and Draw + Cut the Bookmark
With the paper on the mat, load the mat into the machine, and remember, it has the Load and Go. Once you load it into the machine, it will measure the mat and then automatically start drawing.
When it's done, it will stop and prompt you to change the pen.
For this project, I don't care what order the pens are used, so I am just adding one of the old Joy pens to see if it works.
After changing the pen, you'll press Go and continue for each different pen.
After the last pen is done, it will stop and prompt you to remove the pen. This is one change from previous machines and I do not like this at all. This means extra time when creating a project with pens with the additional stop.
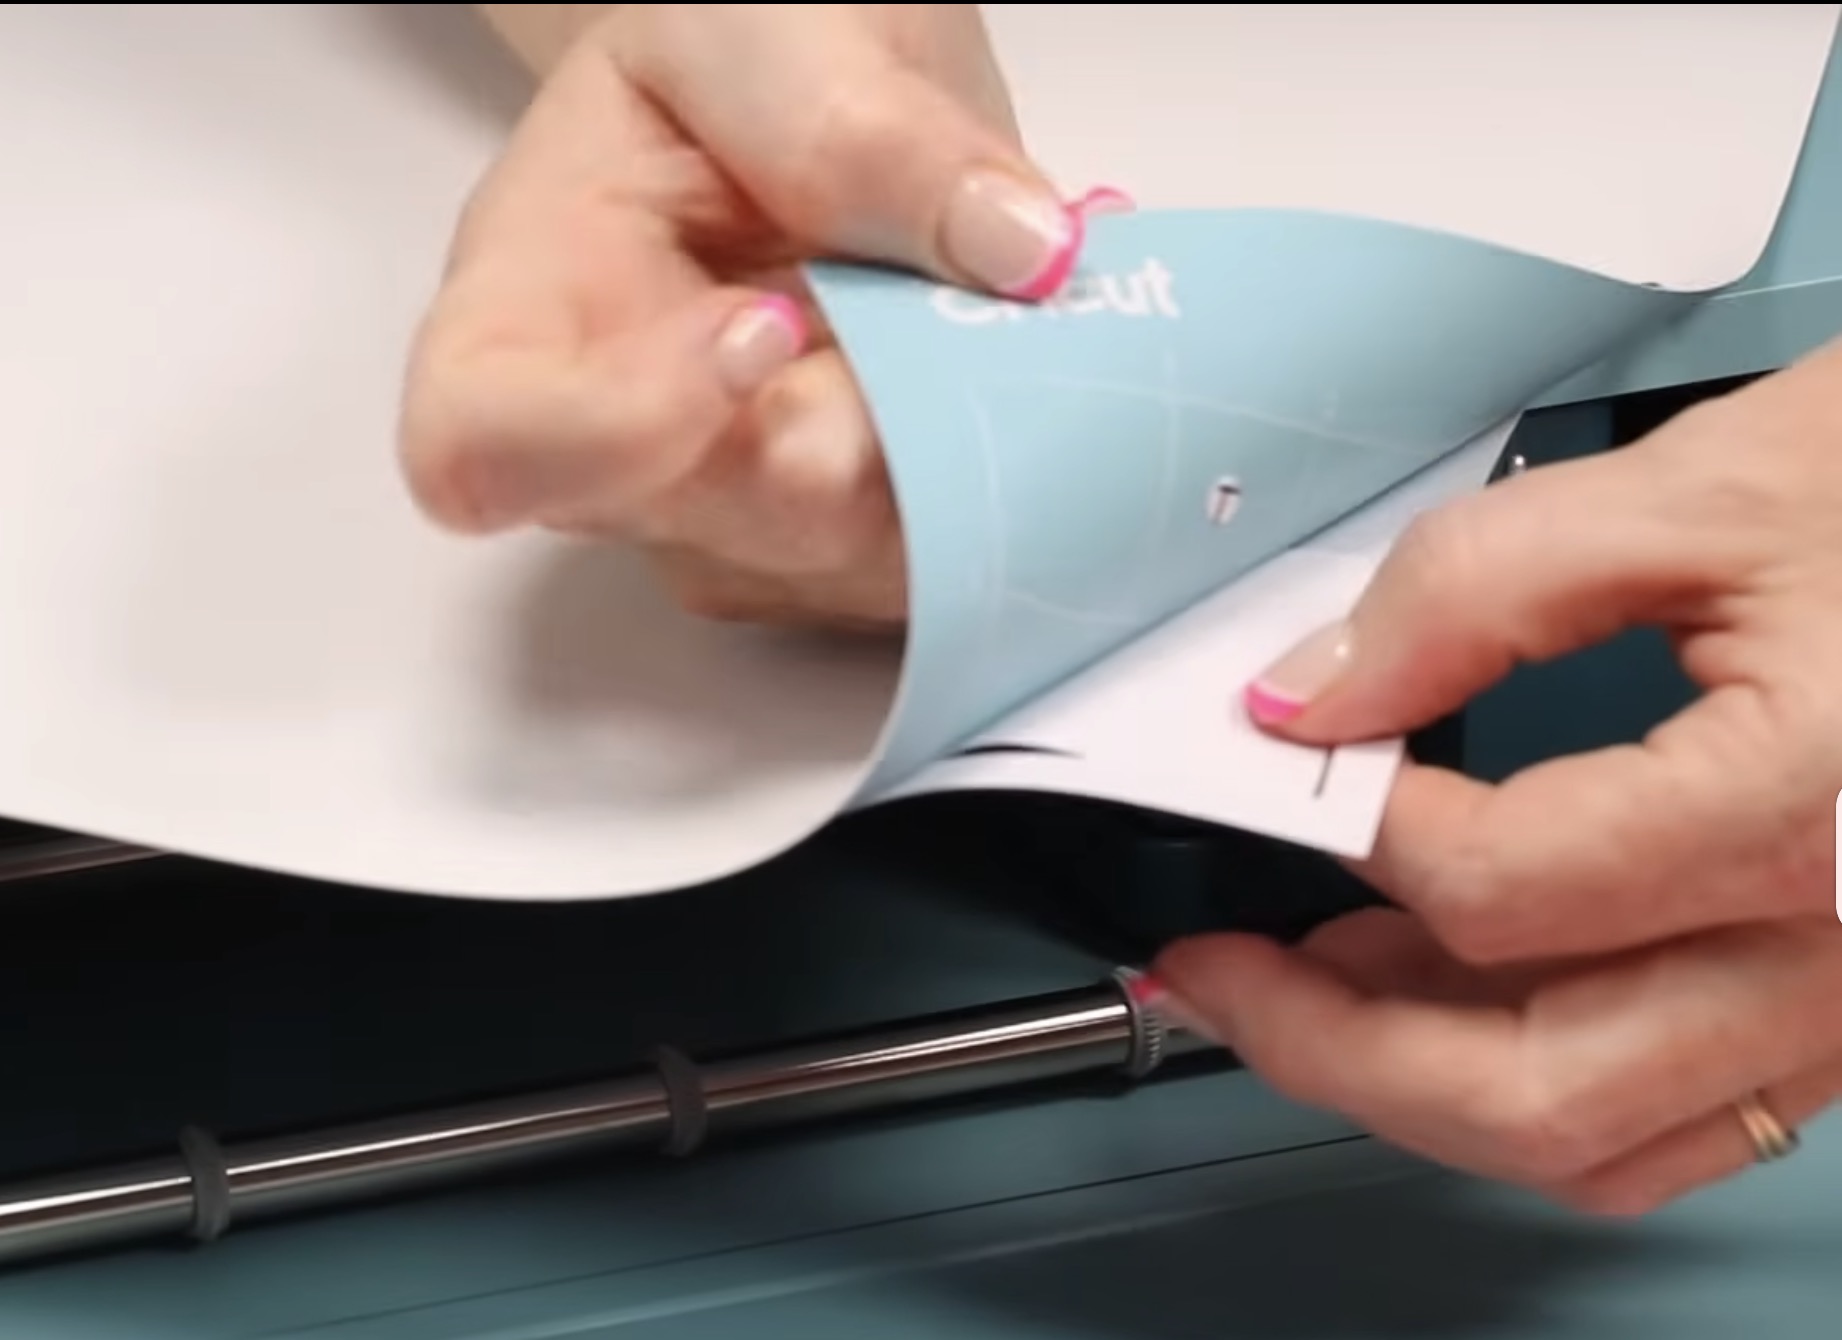
Step 4. Remove the Finished Bookmark From the Mat
Now that we're done drawing and cutting, let's look at the bookmark. The old Joy pens did work in the Explore 5.
Unload the mat from the machine, flip it over, and roll the mat off the bookmark.
Note – the first time I used the Explore 5 and the draw + cut feature, I had some drag marks from the blade. It did not cut the paper, but it kind of scratched the surface. I have not had that happen again. If it happens to you, check that your pen is inserted all the way so it sits lower than the blade. I reached out to Cricut, and they said the blade can be installed while the pen is working.
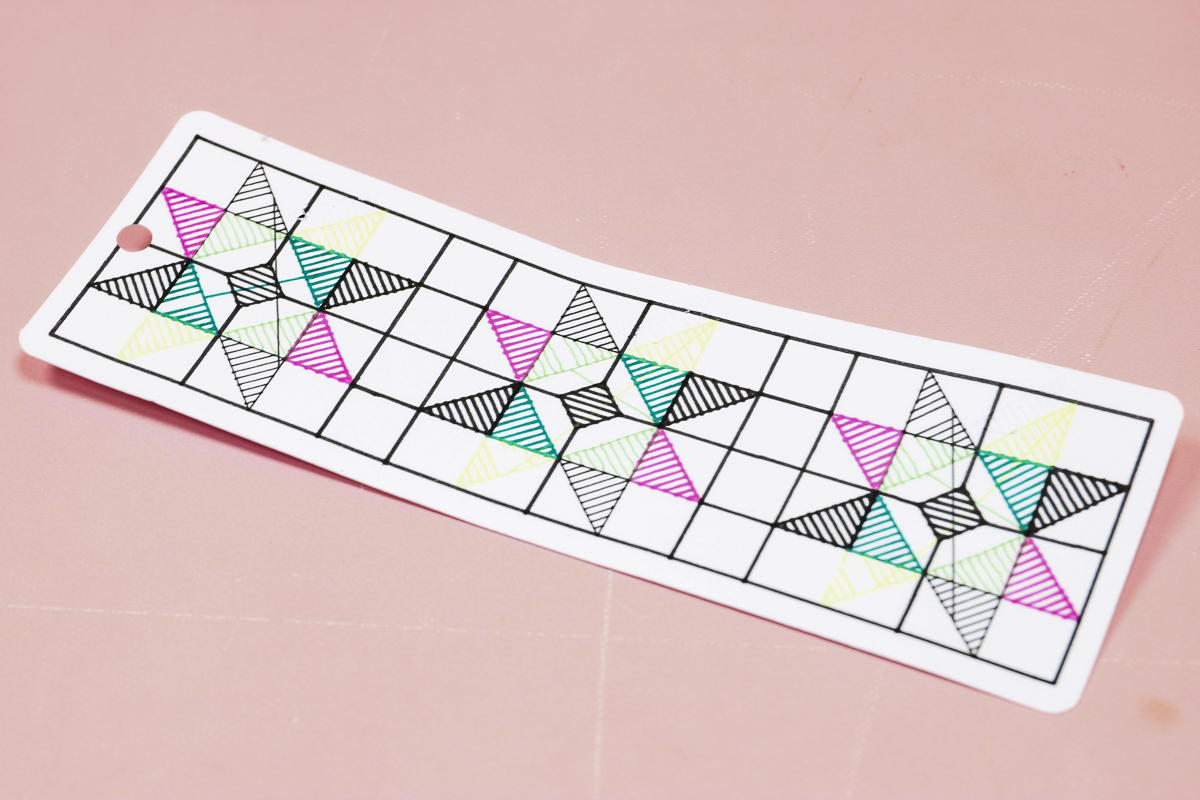
The bookmark I made today has drag marks from the blade and from the pens, so I can't say it turned out perfectly. I believe these are from one of the older Joy pens that was perhaps worn.
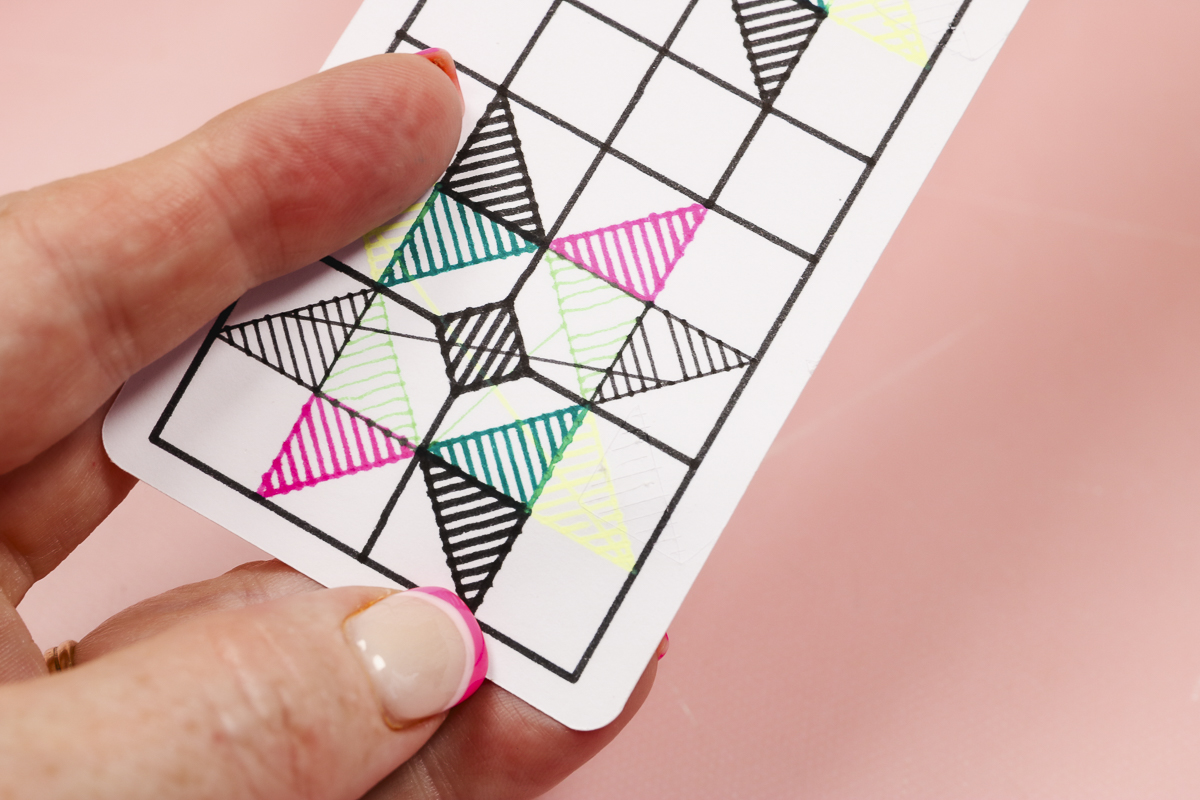
This was a text project for me to see if the old Joy pens would work. They did work, and I'm glad I tried it because I was able to get some answers about how to properly use the pens in this machine.
Make sure to remove the pen when it's done drawing and double-check that it is completely clicked into place.
Print Then Cut and Score Tool
Next, I wanted to test Print then Cut and the new score tool. I'm going to use a project in Design Space for this text.
IMPORTANT: Before you begin, if you haven't already, you'll want to do a Print then Cut calibration.
In Design Space, click your image in the upper right-hand corner and click Settings. Scroll down to Machines, select Explore 5, and then Machine Calibration. Follow the steps in Design Space to calibrate your machine.
Step 1. Choose a Design
For this project, I want a design that has a Print then Cut element and a score element.
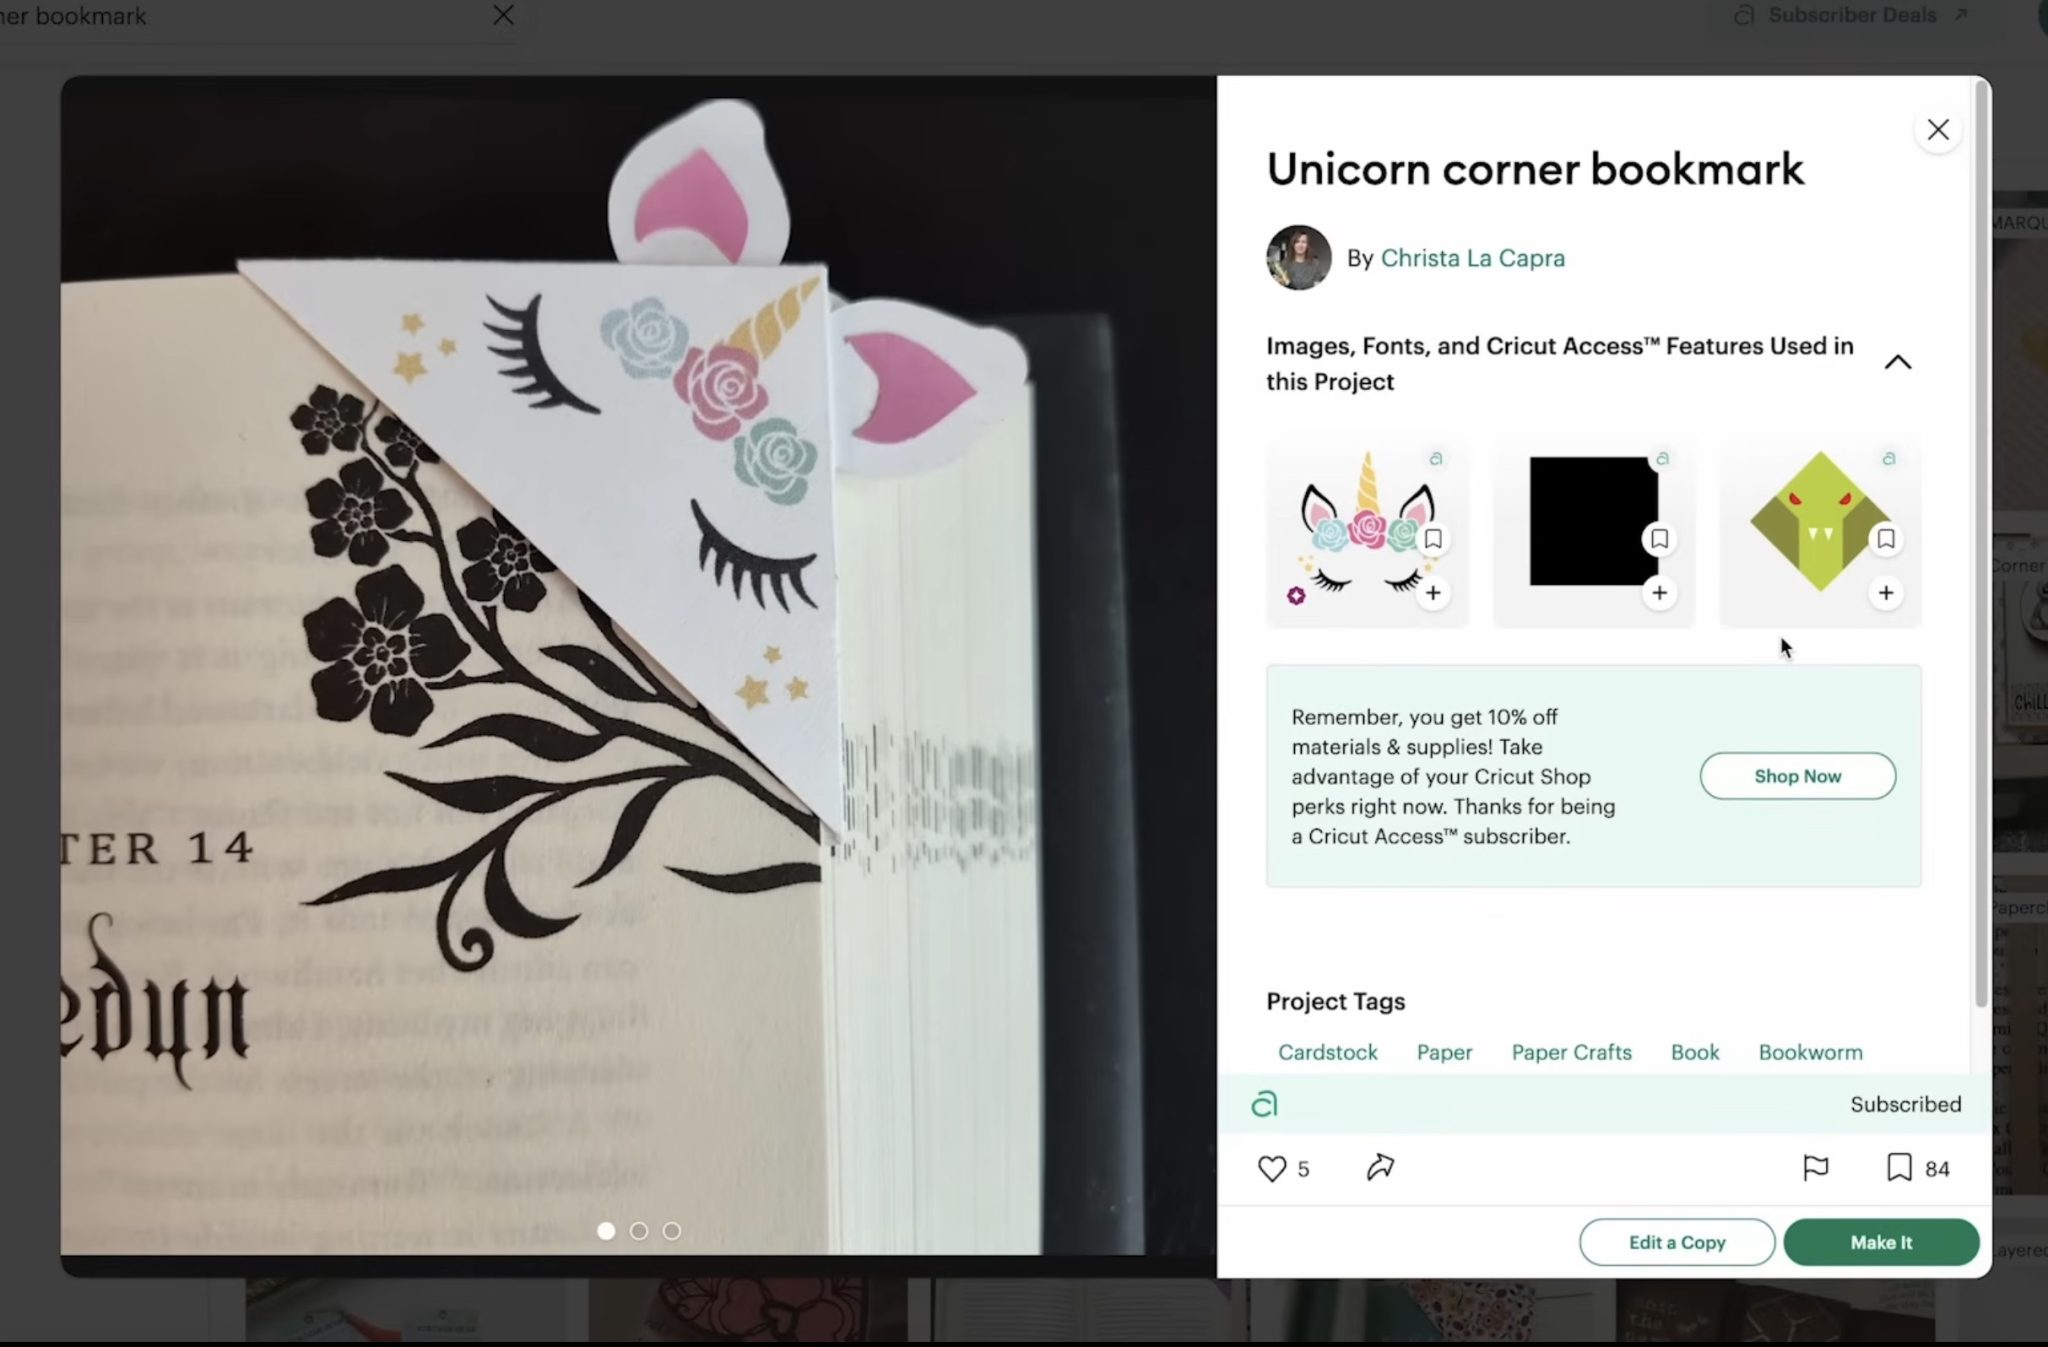
I chose this cute unicorn corner bookmark. Part of the design is Print then Cut; it uses the score tool, and it has a couple of cut elements as well.
Because this is a Design Space project, not just an image, I can click Make and skip any designing steps. If you want to change colors or anything, you can click Edit and edit a copy of the design.
I don't need to change anything, so I am going to click Make.
Step 2. Print and Cut the Design
I am making this project on a mat.
Click Continue, and you'll be prompted to print the design.
Select your printer, and since this design is white, I don't need to have the bleed on. I like to use the system dialog.
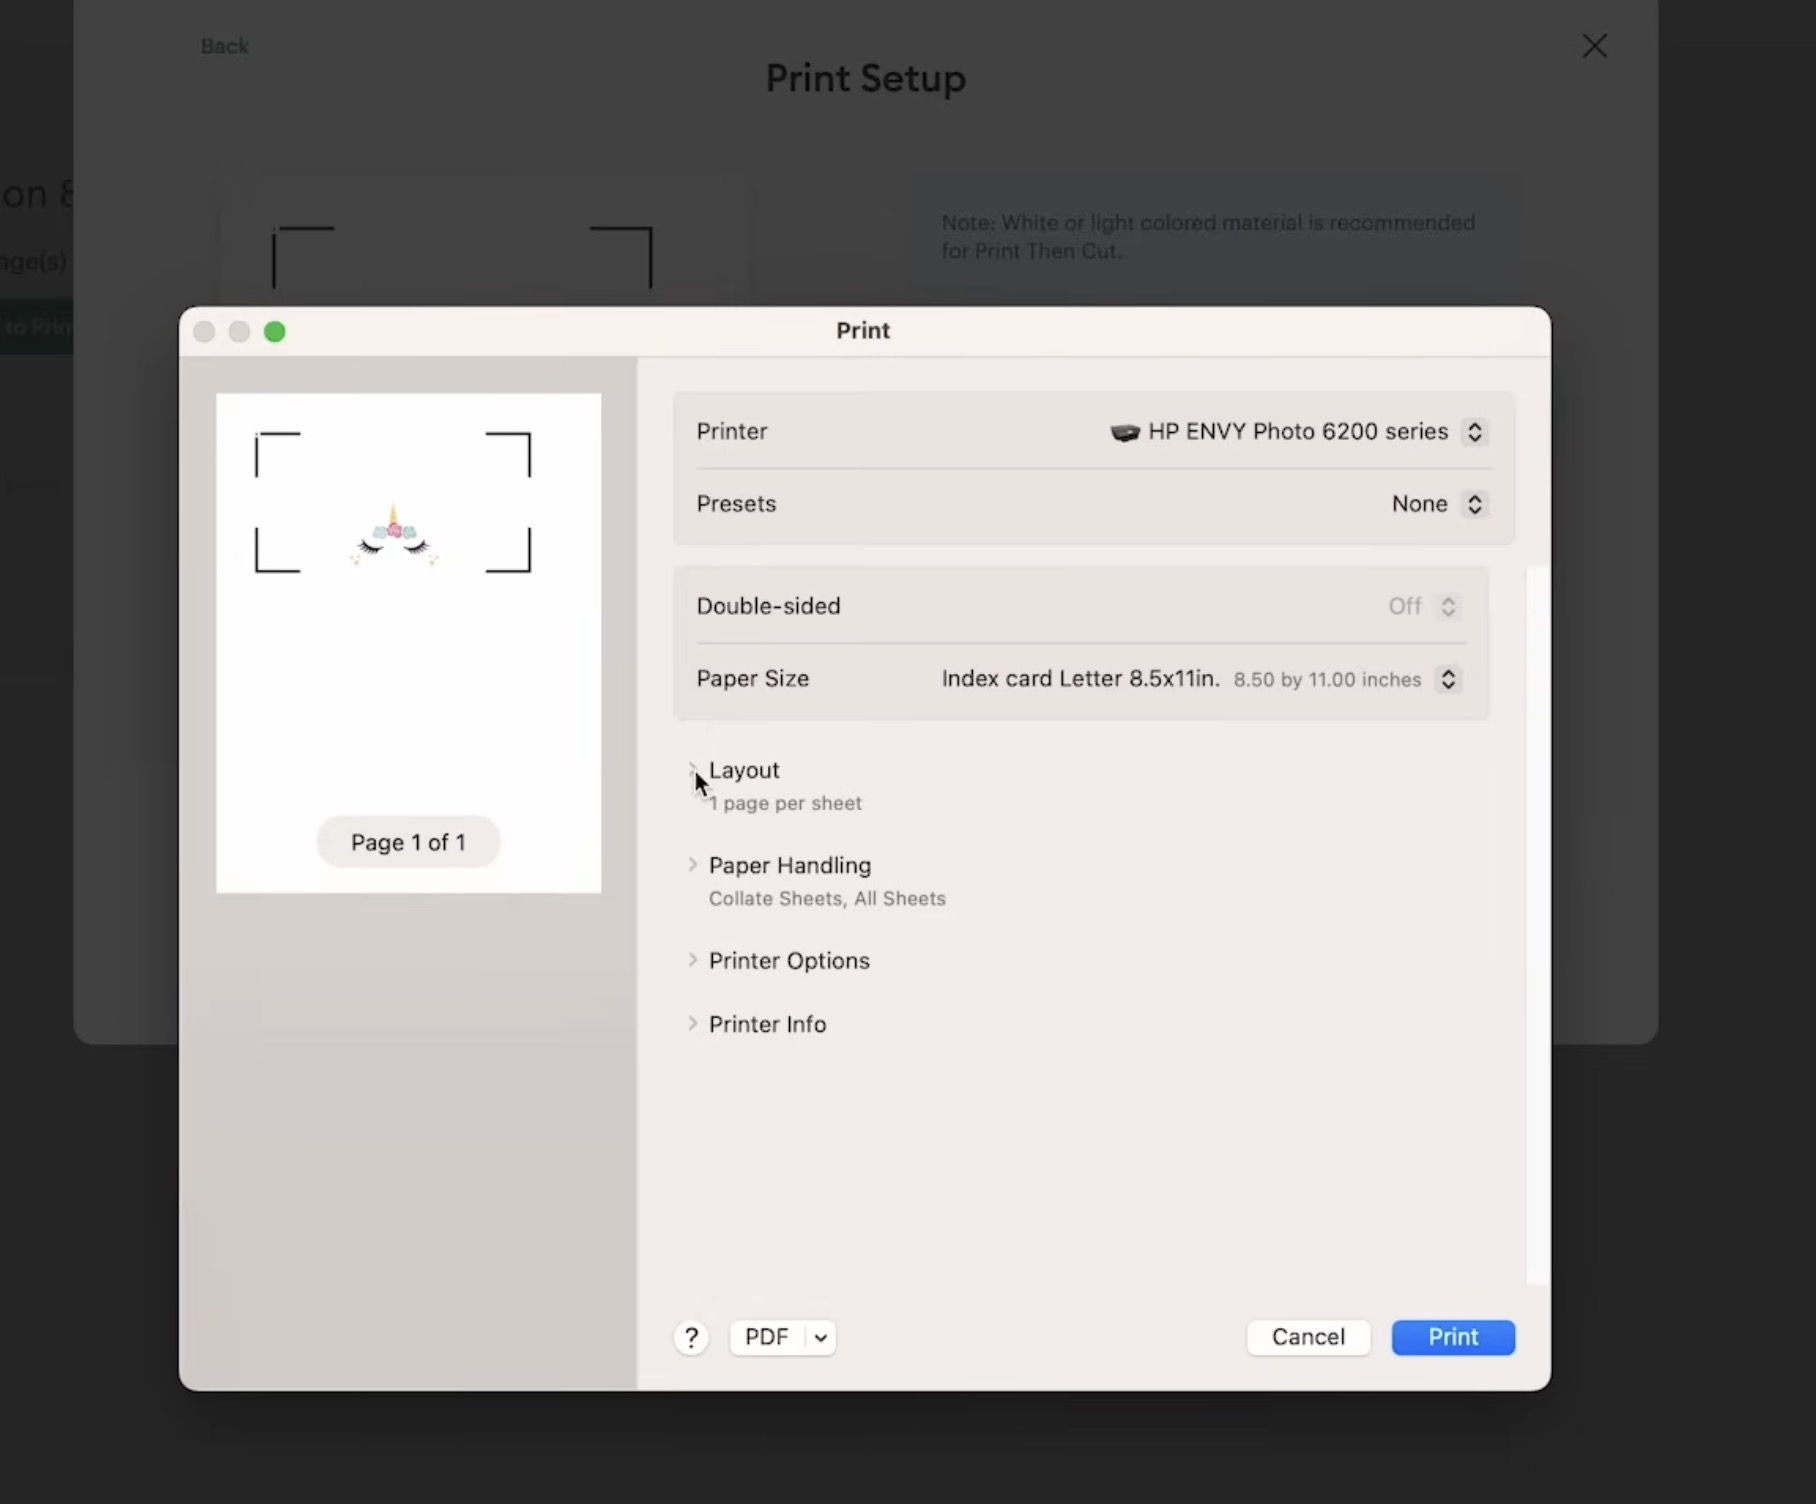
Within the System Dialog, you can make any changes you need to your print settings and then click Print.
The design will print with registration marks in the corners.
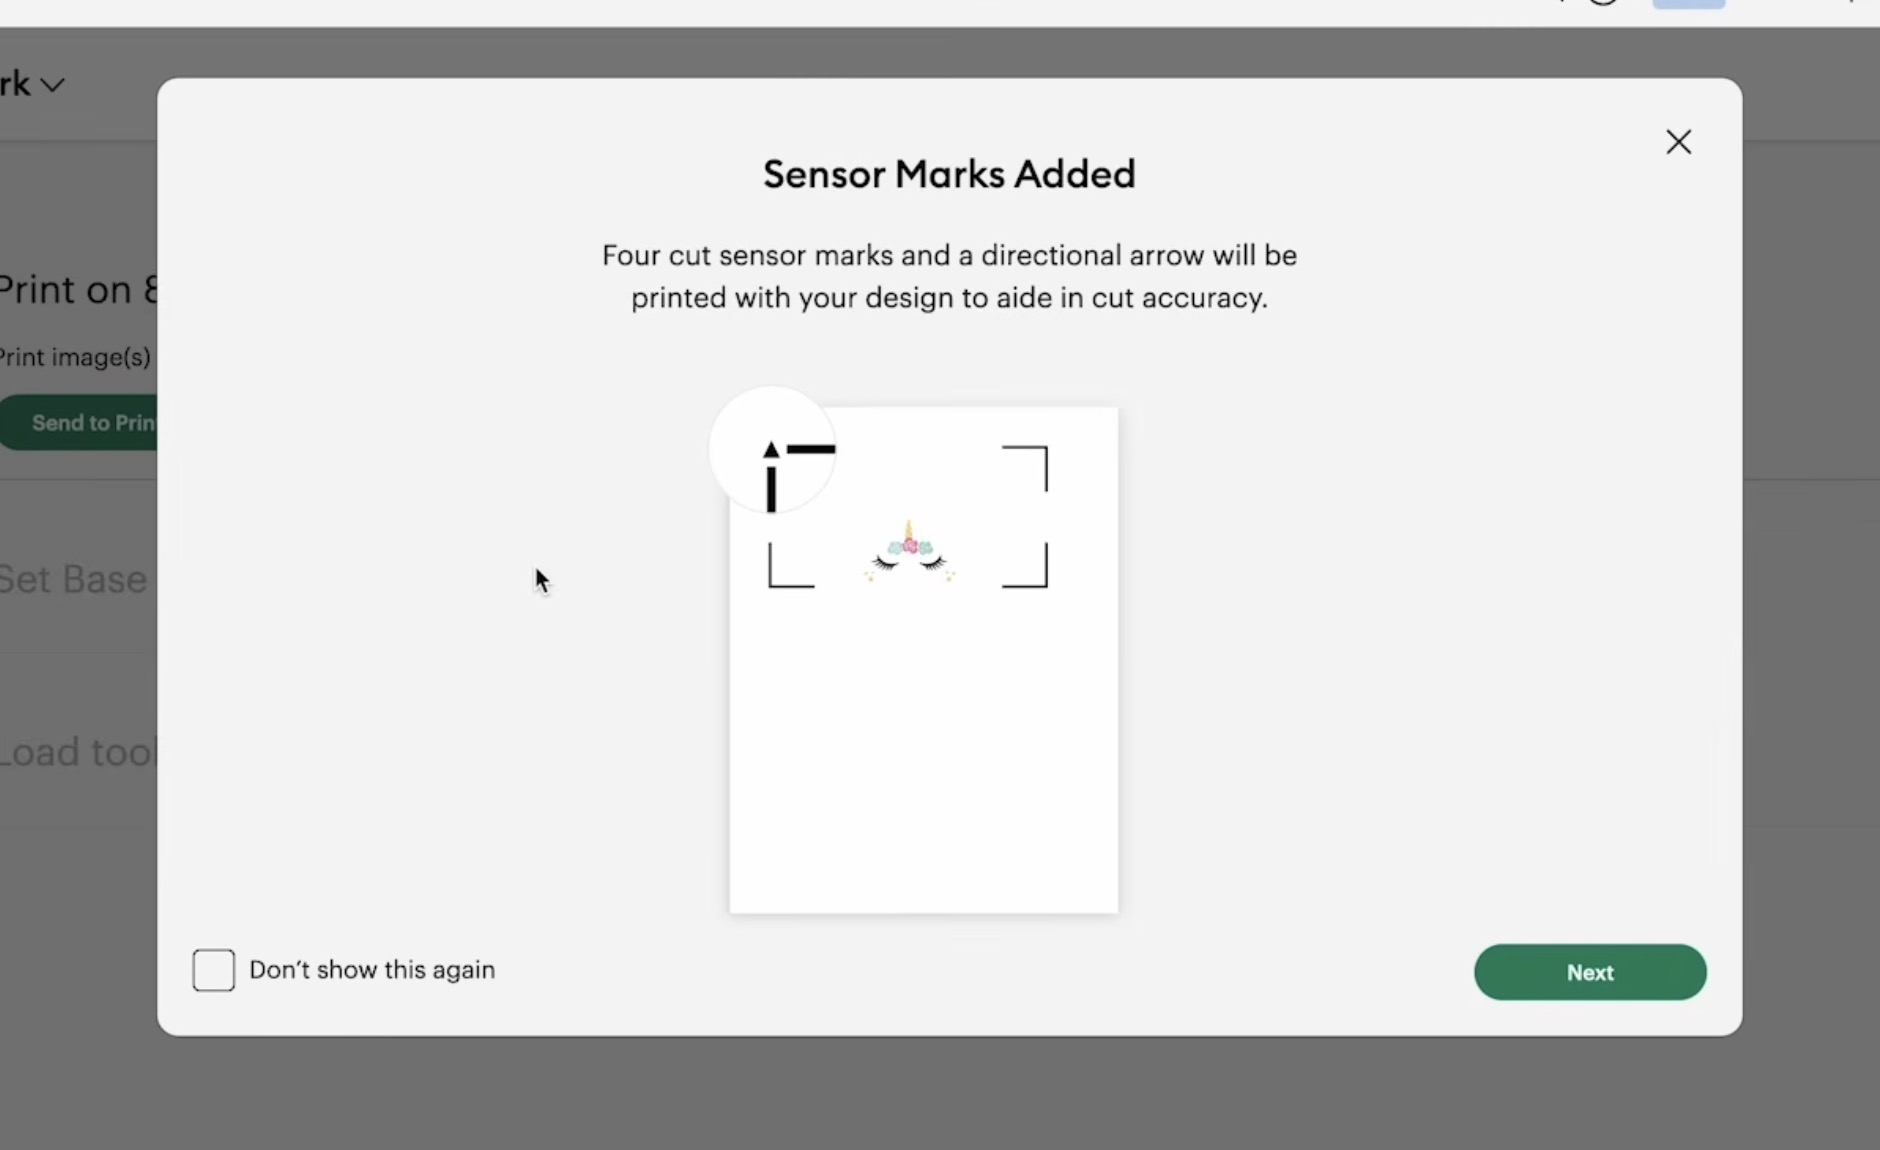
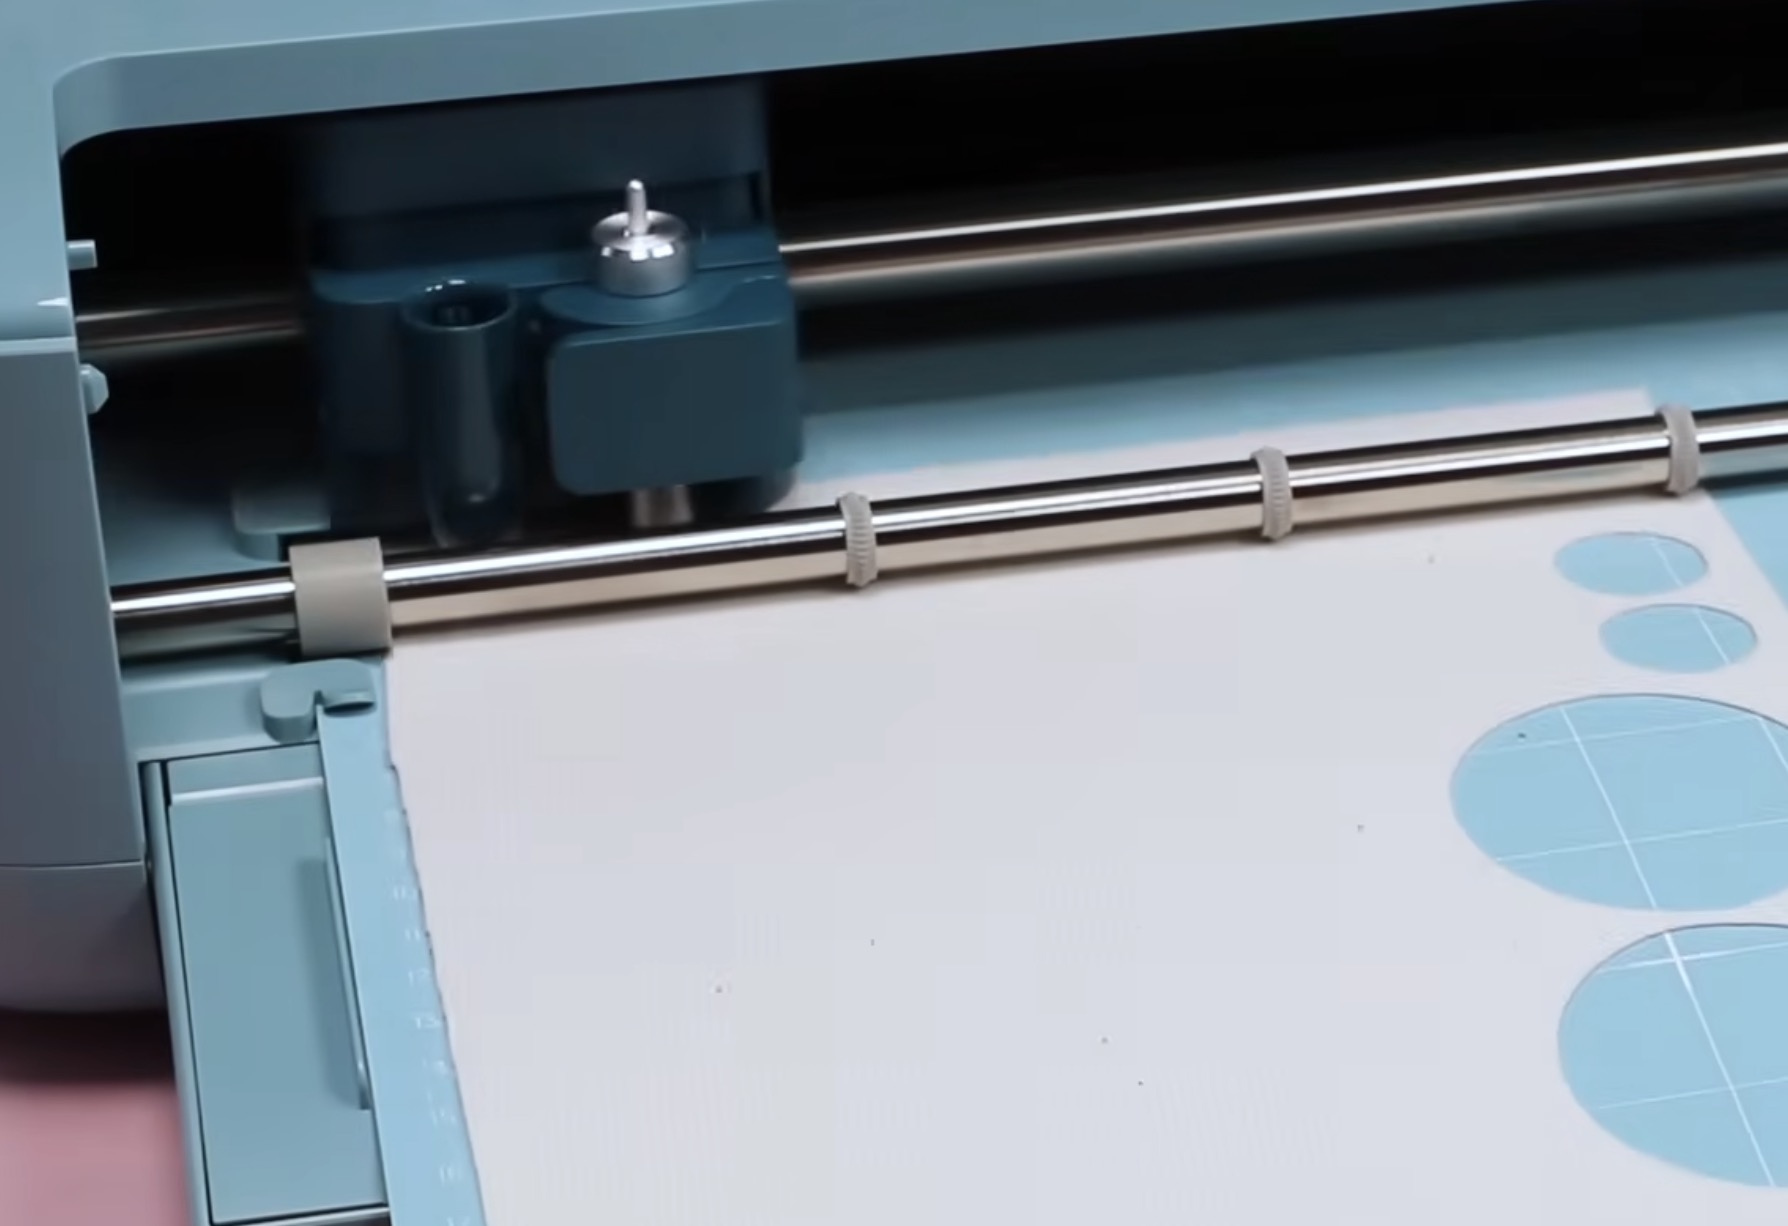
In Design Space, choose the material you're going to use, and you'll see it prompts us to load the scoring tool into the machine.
Add the print to the mat with the arrow in the upper left corner, and we're ready to go.
Click Go in Design Space and load the mat into the machine. Remember, this has Load and Go, so as soon as you load the mat, it will do the score lines.
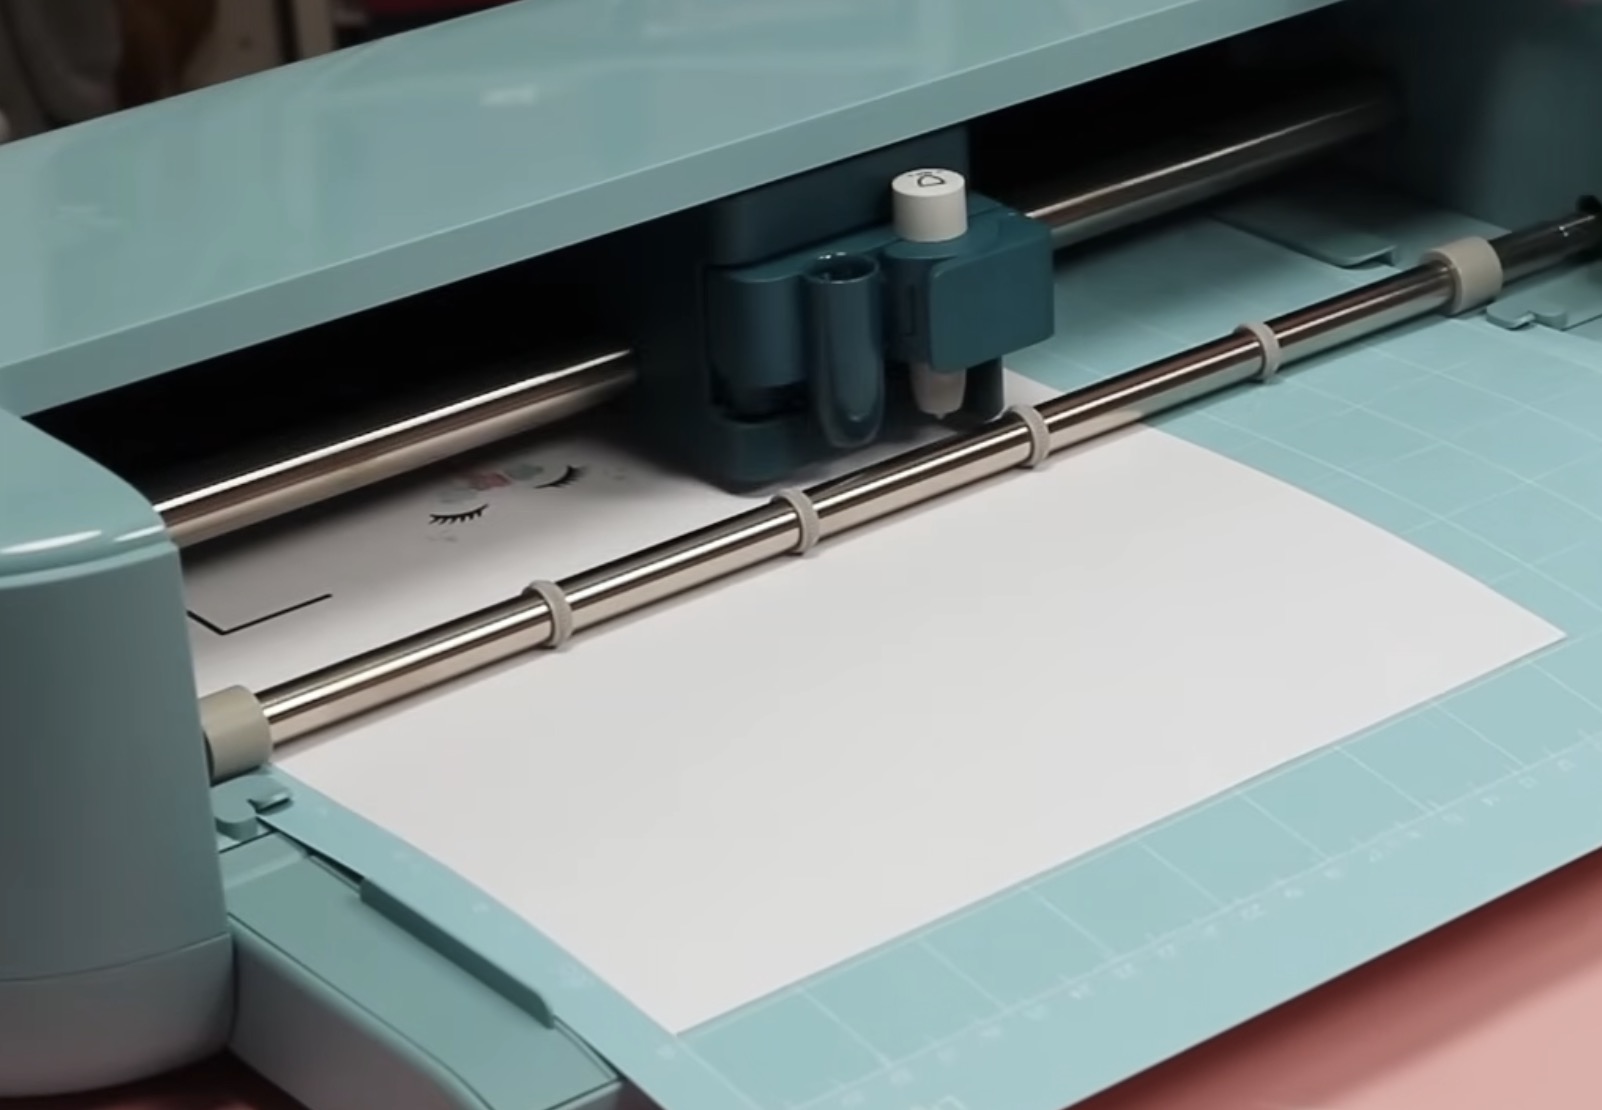
When it's done, remove the score tool and load the fine point blade. Click Go, and it will cut out the bookmark, and we can unload the mat.
This bookmark has two other elements to cut out, so I am going to do that, and then we can assemble the bookmark.
Step 3. Assemble the Bookmark
First, fold the bookmark on the score lines. Glue the two back flaps together and press them down well so they're stuck together completely.
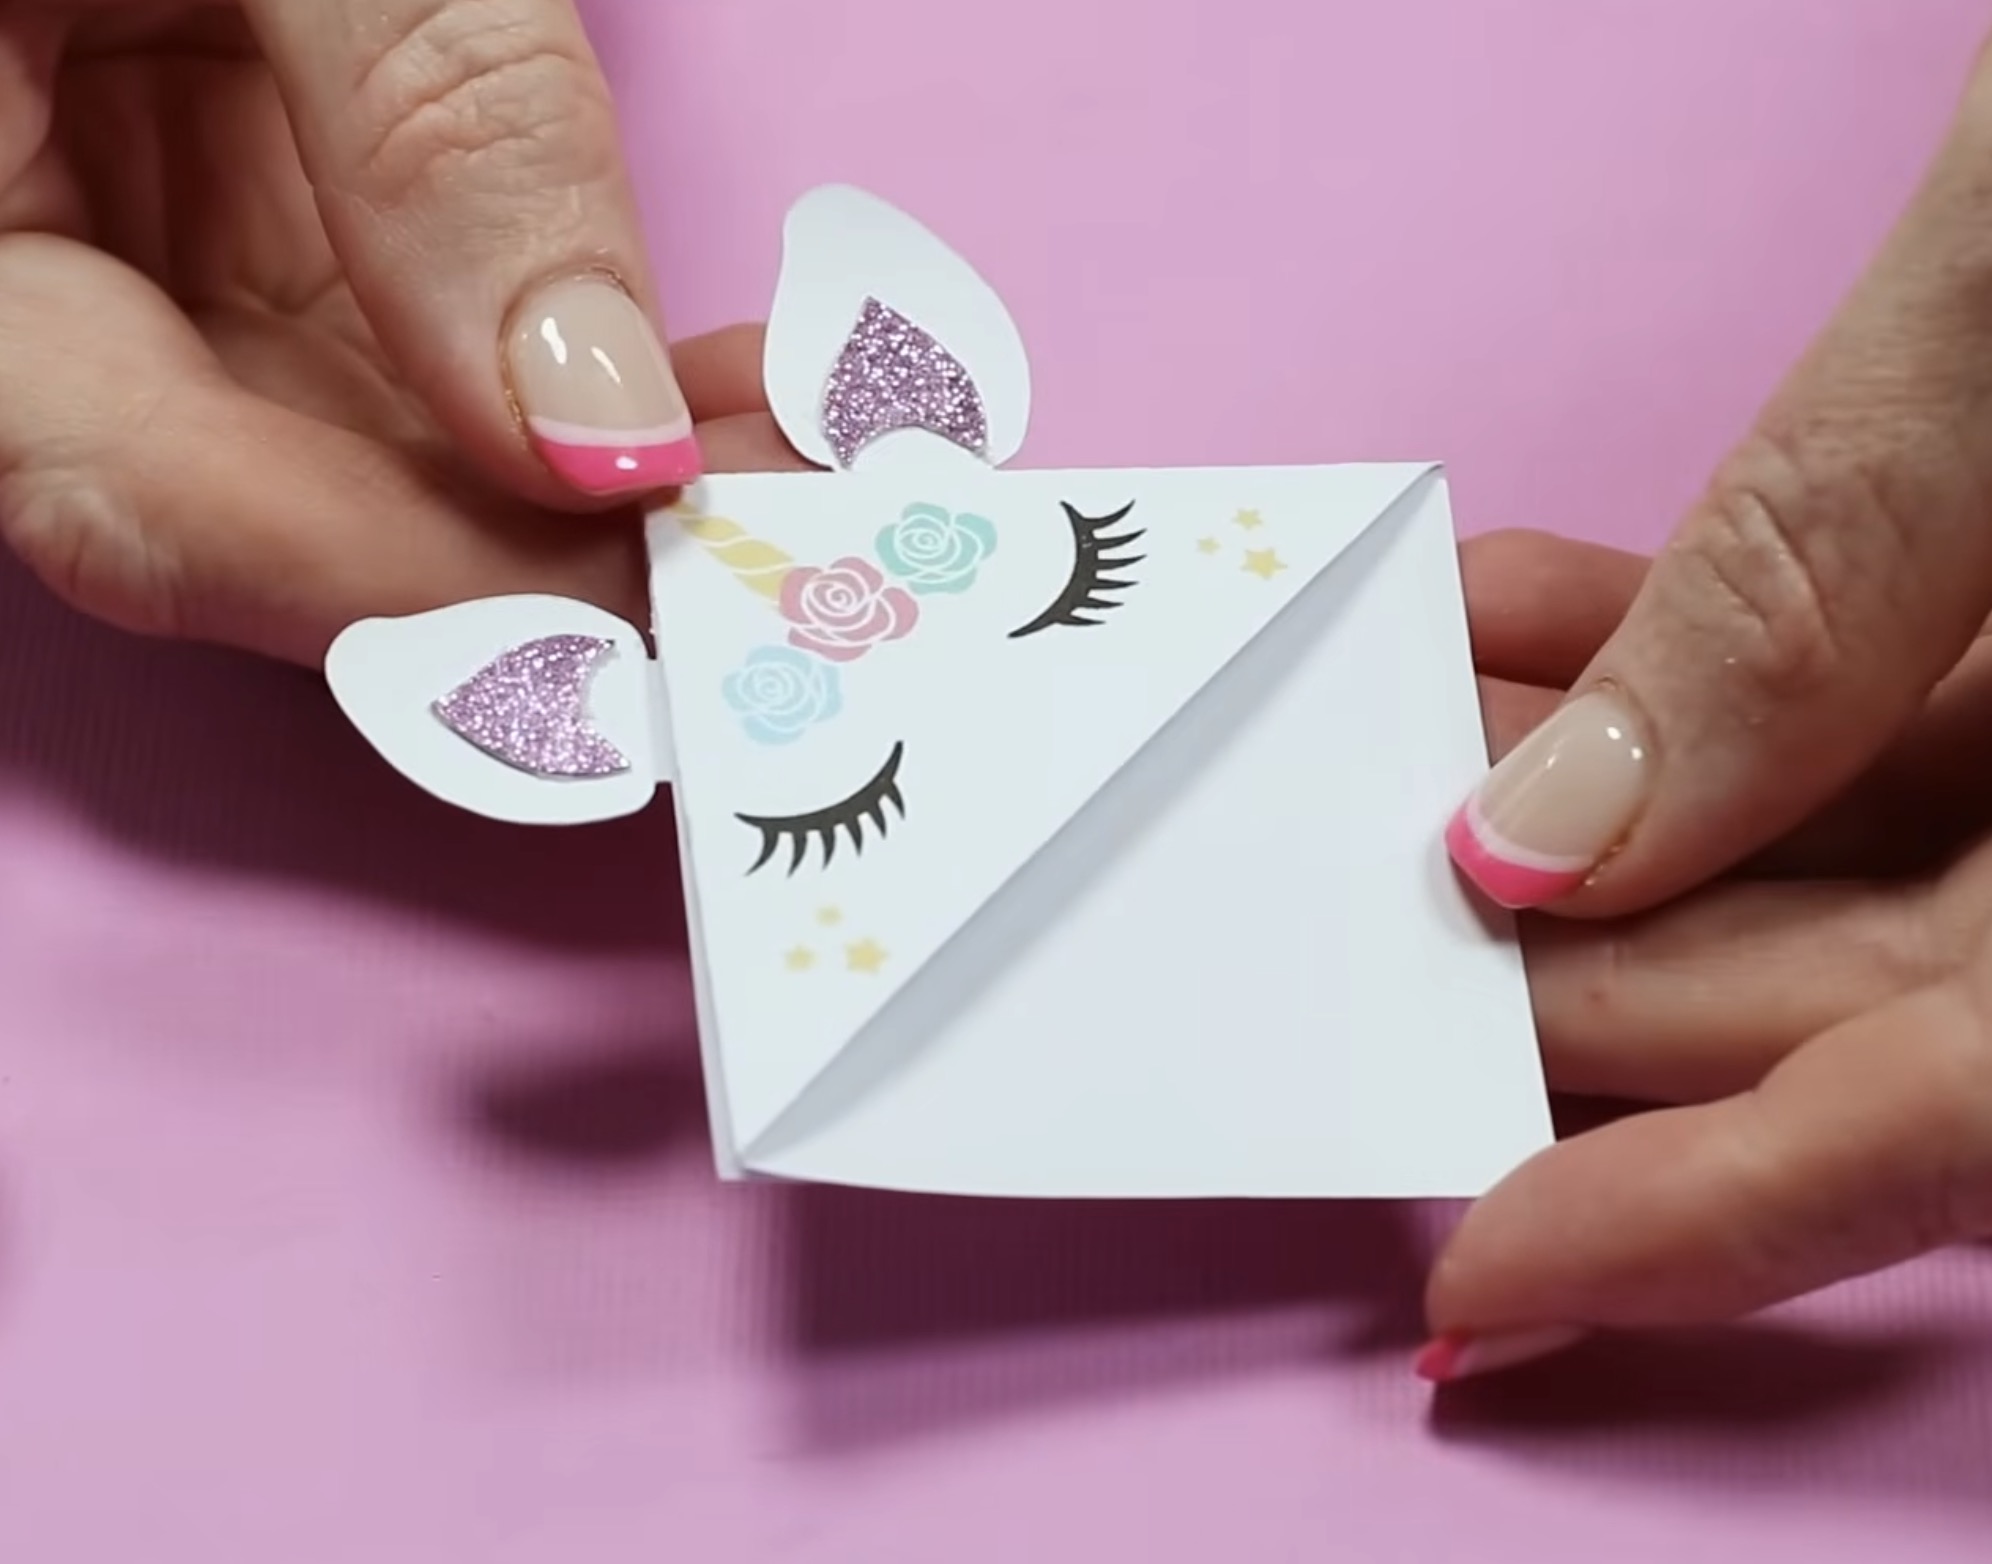
Add the inside ear piece to the larger ear piece with adhesive, and then glue the ears to the bookmark.
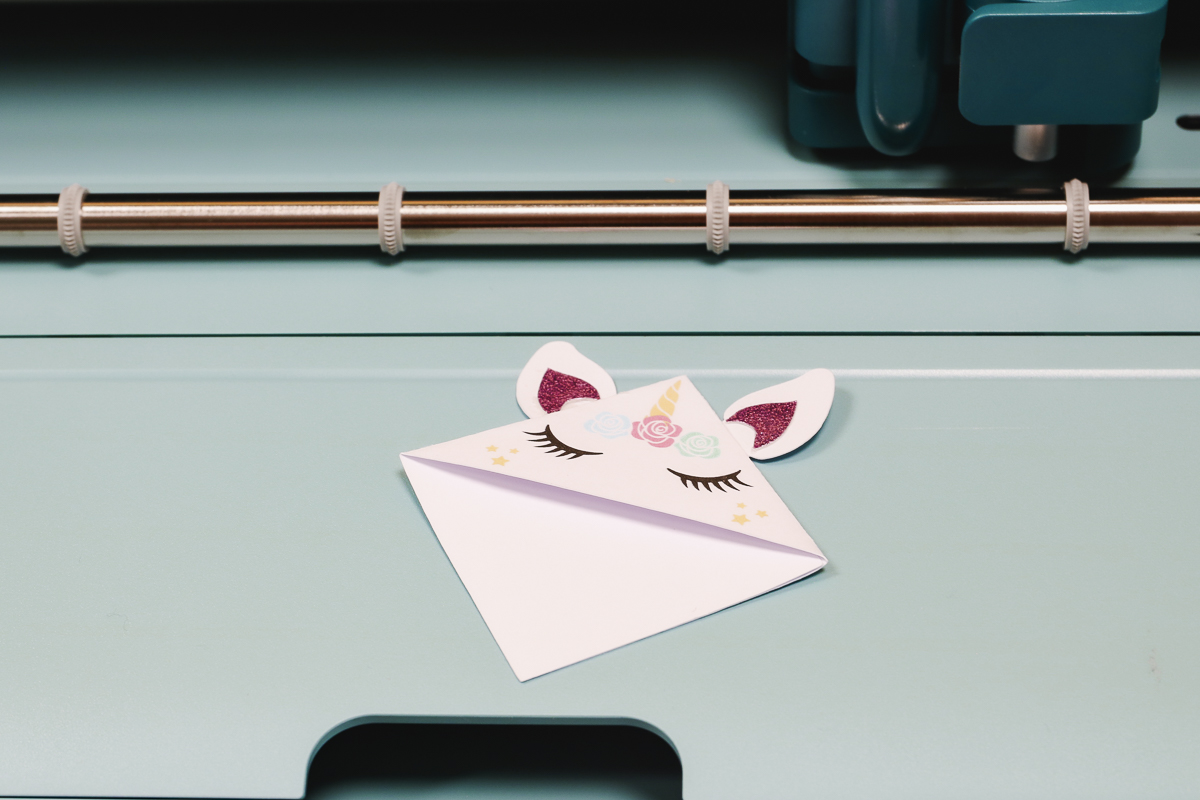
This corner bookmark turned out really cute, and the score tool worked really well.
Faux Leather Bookmark
I'm going to test a couple more materials, including HTV and faux leather.
The process for this is the same as the projects we made before:
- Find a design in Design Space
- Resize the design for the project you want to make
- Click Make
- Mirror the faux leather and HTV mats
- Click Continue
Both of these materials can be cut with the fine point blade.
I chose On Mat for the Faux Leather material and Without a Mat for the HTV material.
Place the faux leather face down on the mat. Choose faux leather as the material.
Load the mat into the machine and click Go.
Before unloading the mat, check to make sure it has cut all the way through the material. If it hasn't, without unloading the mat, you can press the Go button, and it will cut again in the same place.
When it's done cutting, unload the mat and remove the material.
I am using Smart Iron-on for the top layer. Make sure the mat is mirrored and choose Smart Iron-on as the material.
Load the smart vinyl into the machine shiny side down and press Go. The machine will load the material and cut out the design.
When it's done, unload the mat and weed away anything you don't want transferred to your project.
Place the faux leather bookmark on a heat-resistant mat and locate the HTV on top.
I am using an EasyPress Mini preheated to the second setting. Press the entire surface for the full recommended time.
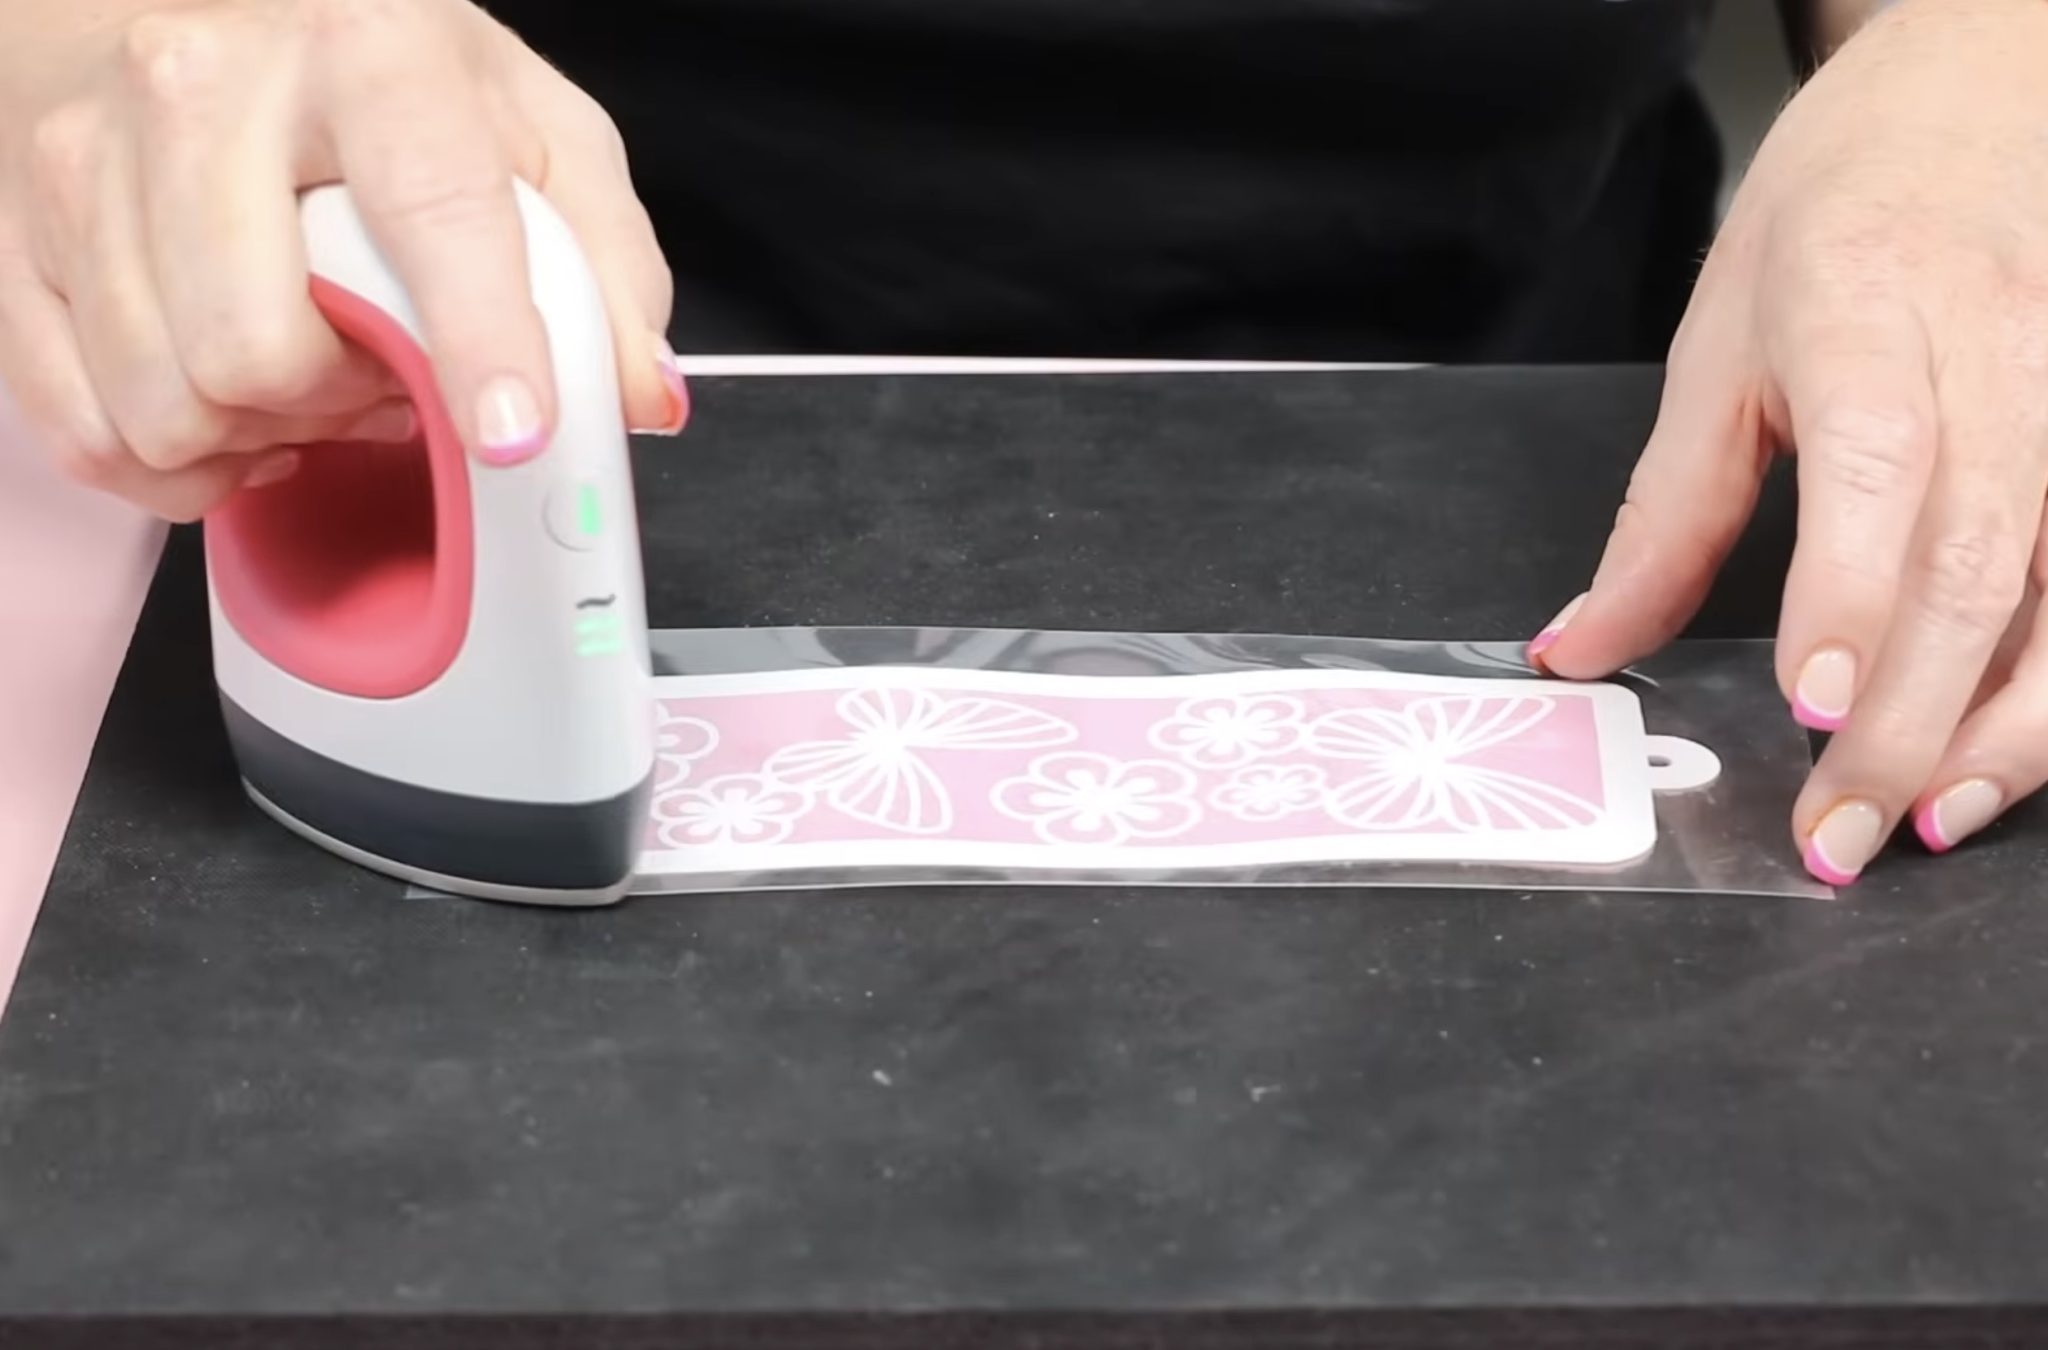
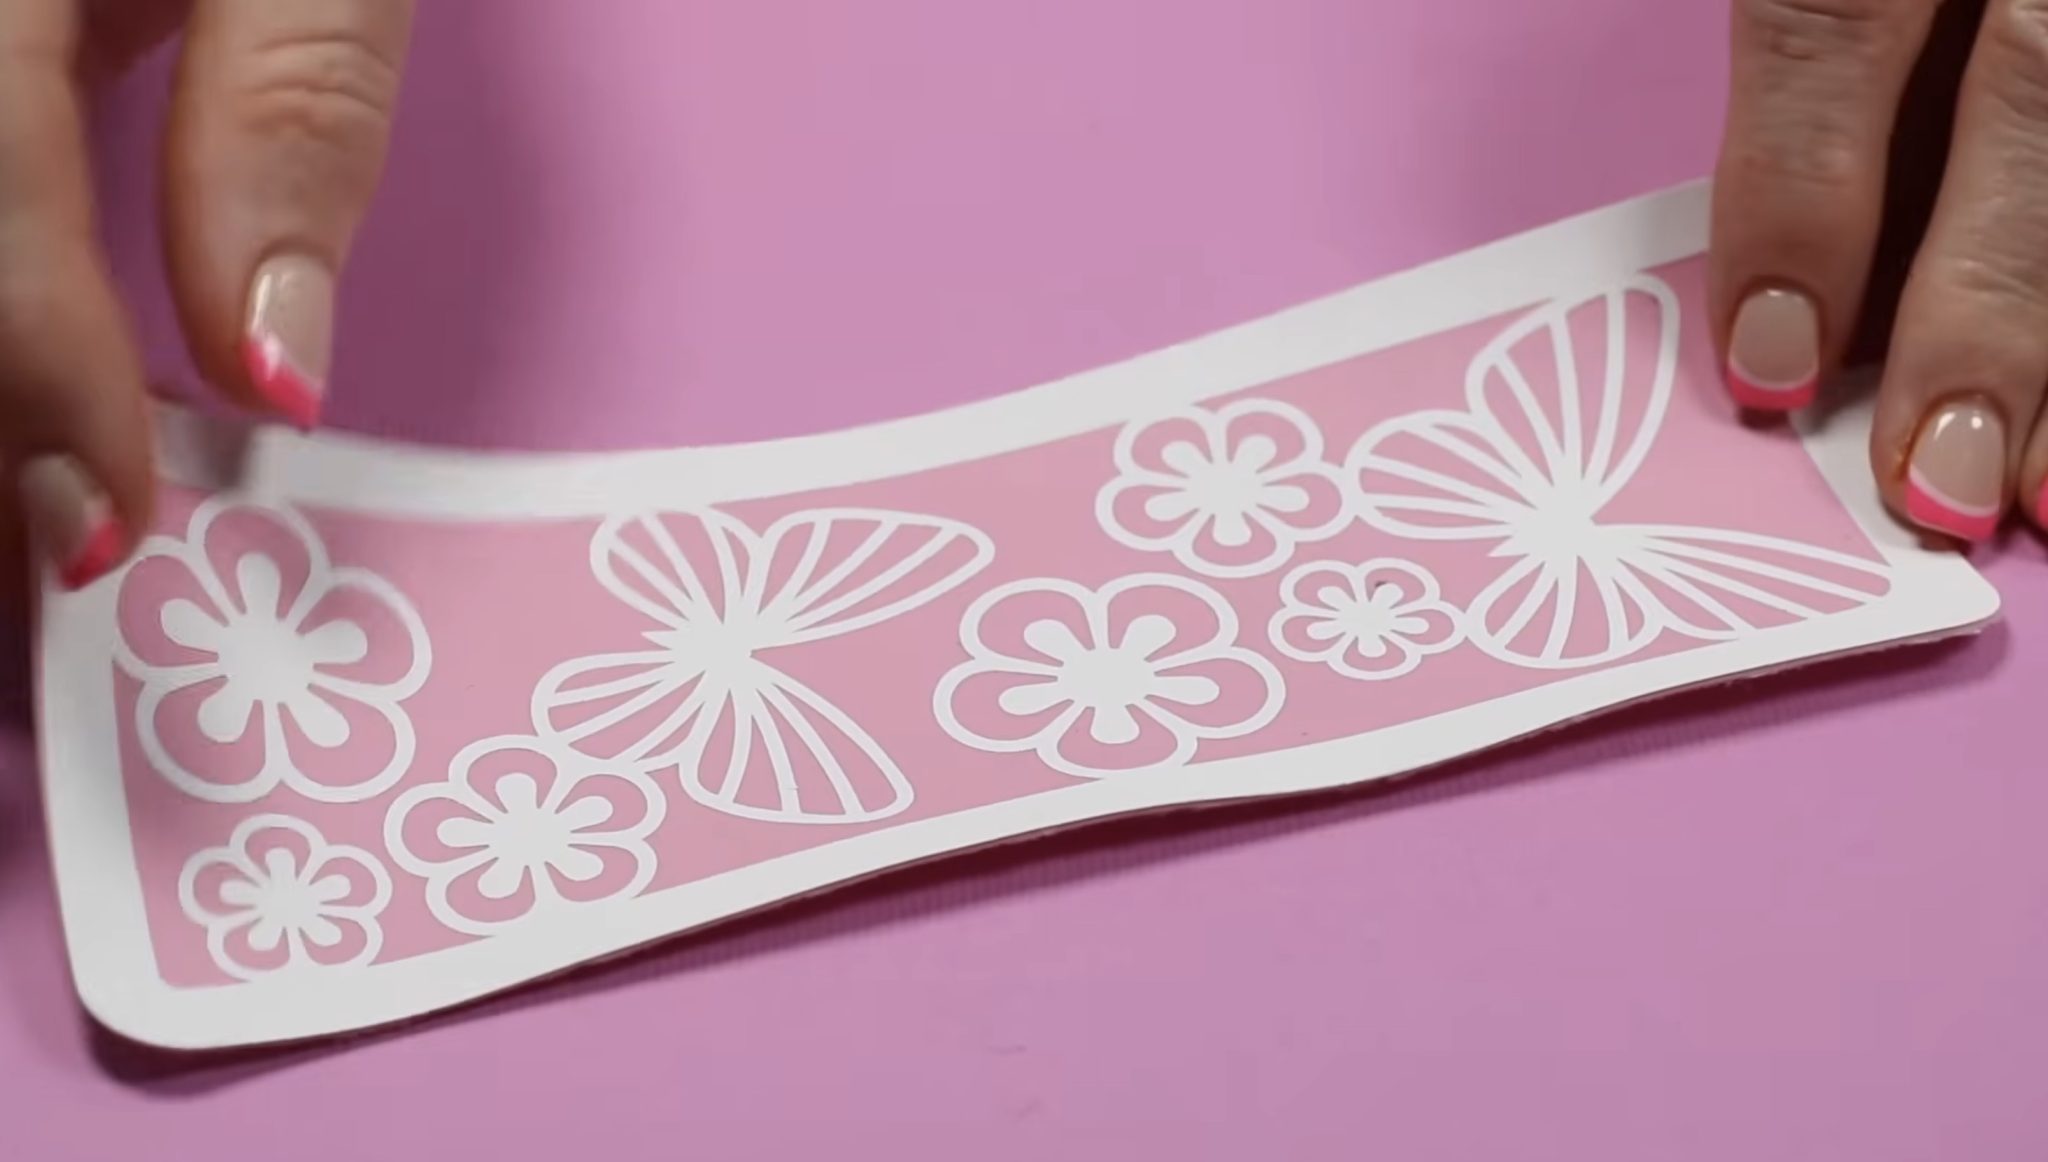
Allow the HTV to cool and peel back the carrier sheet.
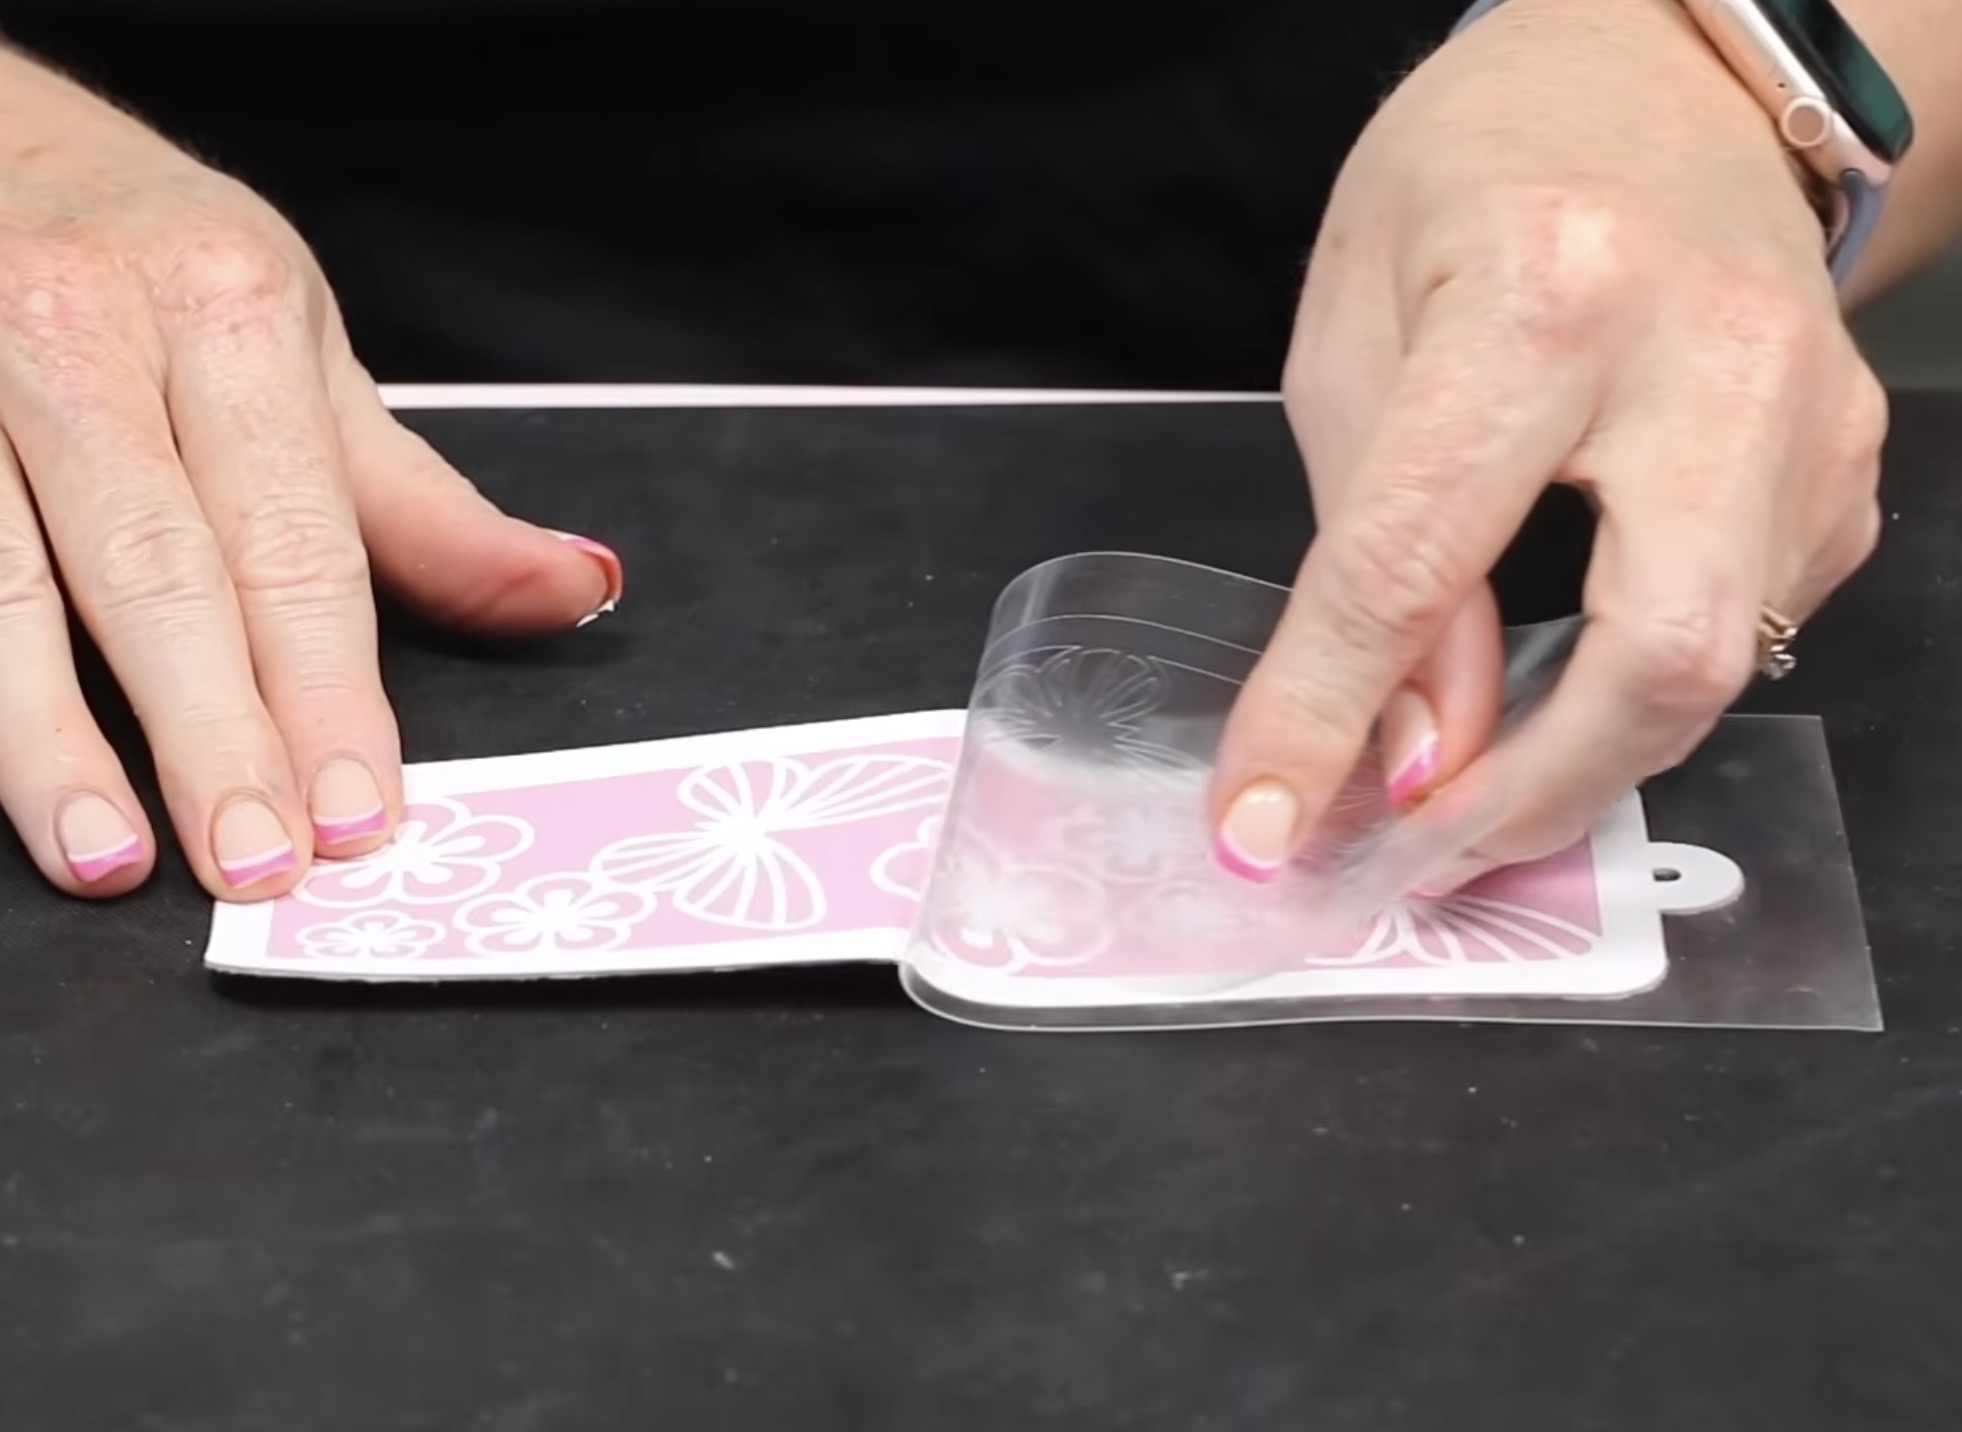
The Smart Iron-on stuck to the faux leather really well, and the bookmark turned out gorgeous. I love using iron-on on faux leather.
This faux leather has a suede-like backing, and it's thin enough that it can be cut with the fine point blade.
Cricut Explore 5 Issues
Now that I've finished my projects, let's talk about the Cricut Explore 5.
I have a handful of issues with the Explore 5, so let's talk about those.
Cutting Issues
With the vinyl decal project, I had an issue using Smart Vinyl and a more intricate design. I think this problem could happen with any Cricut machine and Smart Vinyl because there is no intricate setting for that material.
If you want to cut out a design that has fine lines or small, detailed elements, I would place the Smart Vinyl on a mat and use the intricate cut setting.
This isn't an Explore 5 specific issue, but I did want to leave it in so you know that can happen.
Incompatible Pens
A big issue for me is that I can't use any of my previous Explore or Maker pens and markers with this machine. I own all the different Cricut pens, and this feels like a waste.
If this is your first Cricut machine, you may not see this as an issue, but for me, I really don't like this.
Extra Steps and Time Adding/Removing Tools and Pens
With the previous Explore machines, I could load the pens into Clamp A and the blade into Clamp B, and the machine would draw and then cut without stopping.
Now, when it is done drawing, it stops, and I have to stay nearby to remove the pen and click Go.
I didn't time this machine, but it seems to work as quickly as my Explore 4, which is great, but having it stop to remove the pen before cutting is going to take extra time for every project that uses pens.
I did have some blade drag when doing some of the drawing. I am assuming this was from a worn pen but it is a big issue for me.
Scoring Tool Change
Another issue I have is the change to the scoring tool. The new scoring tool worked well, but not necessarily better than the scoring stylus.
In previous Explore and Maker machines, I could load the scoring stylus into clamp A and have the blade in clamp B, and it would score and then cut without stopping.
The scoring stylus will not work in the new pen holder, so now, I have to load the scoring tool, let it do the score lines, and then unload the scoring tool and load the blade.
Again, this is an additional step that I didn't have in previous machines, which means projects with score and cut lines will take longer than they did before.
Cricut Explore 5 Pros and Cons
Now, let's talk about the pros and cons of this machine.
Pros
- I think the biggest pro is that it is smaller and doesn't have a lid on top. This isn't as small as the Joy or Joy Xtra, but it is smaller and still has the almost 12-inch cut width.
- I said I was not happy with my previous pens not working in this machine, and I am not, but I like the direction they're going with universal pens. From now on, pens will be able to be used in any Cricut machine.
- I think the price point is a pro. The Explore 5 is about $50 less expensive than the Explore 4 was when it was released. It also comes with more materials and the scoring tool. You actually get more for less money.
- Even though this machine costs less, I find it just as substantial as my Explore 4. I don't think you're getting less machine for the price.
- I also think the materials included with the machine are a pro. The included materials allow you to make multiple projects right out of the box without making an additional purchase.
- I like that I can use the old-style blades and housing, and that the roll holder I have for my Maker 4 and Explore 4 works with this machine.
- Cricut Explore machines are beginner-friendly, easy to set up, and are a go-to Cricut machine for me. The Explore 5 is still an Explore machine, so it is beginner-friendly, and it is the newest machine.
- I always recommend the latest and greatest model. If you've done the research and an Explore machine is the right machine for you, I would go with the Explore 5 so you know you have the most up-to-date machine.
Cons
- Right out of the box, I was very disappointed that my Explore 5 came with the old blade and housing. I really wanted to touch, feel, and test that new blade, and I wasn't able to.nAfter looking, it does say on the box that you may get either blade with the machine. For me, having the old-style blade and housing was definitely a let-down.
- Right now, I'm not a big fan of the drop-in pen holder. I don't like that I can't use my old pens, but as I said above, I feel like this is an issue for people who've had previous machines, not for new users.
- I've heard a lot of complaints about it no longer having a storage cup on the machine. I didn't use it for storage, but I did use it while making projects if I had multiple tools or pens I was using.
- I like that there is no top lid, but I don't love the opening. When I spoke to Cricut, they told me they have tested the machine at length and haven't had an issue with dust or other debris from that opening. My house has a lot of dog hair, and this concerns me. Since the front is closed, I feel like dust and pet hair, etc is likely to collect in this opening.
- Another con for me is that this machine doesn't really offer anything new. The look has changed, and there are new pens and a scoring tool, but none of that changes what I can make with the machine.
- Add to that, now I have to remove the pen before the machine will cut. I can't use the scoring stylus, which means I also have to stop and swap tools before I can cut.
Should You Purchase the Cricut Explore 5?
If you already own a Cricut Explore or Maker machine, I don't know why you'd need the Cricut Explore 5.
This machine doesn't do anything that those previous machines couldn't do. If you own a Joy or Joy Xtra and need the ability to cut larger, but only need to cut the same types of materials, the Explore 5 may be right for you.
When the Explore 4 came out, I already owned the Explore 3, and the only real difference was that it was faster. I expected not to recommend that machine to anyone who owned the Explore 3, but I ended up loving that machine so much that I recommend it all the time.
Unfortunately, I don't feel the same way about the Cricut Explore 5. After the first use, I can't say that I was impressed.
I do think a lot of the changes will just take time to get used to. As I've mentioned before, I have owned all the past Cricut machines. Some of these changes, like removing the pen and scoring tool before cutting, are things I am going to have to get used to doing.
I wasn't impressed with the size difference, and it's as heavy as the larger machines, which makes it just as cumbersome to move around as previous machines.
If you're looking for a smaller machine, I would look at the Joy and Joy Xtra to see if those machines might do what you need.
While I'm a huge Cricut fan, I have to say, the Cricut Explore 4 will continue to be my go-to machine when I reach for an Explore machine.
I hope I've answered any questions you have about the Cricut Explore 5. If you have any additional questions, leave them in the comments, and I'll be happy to answer them for you.