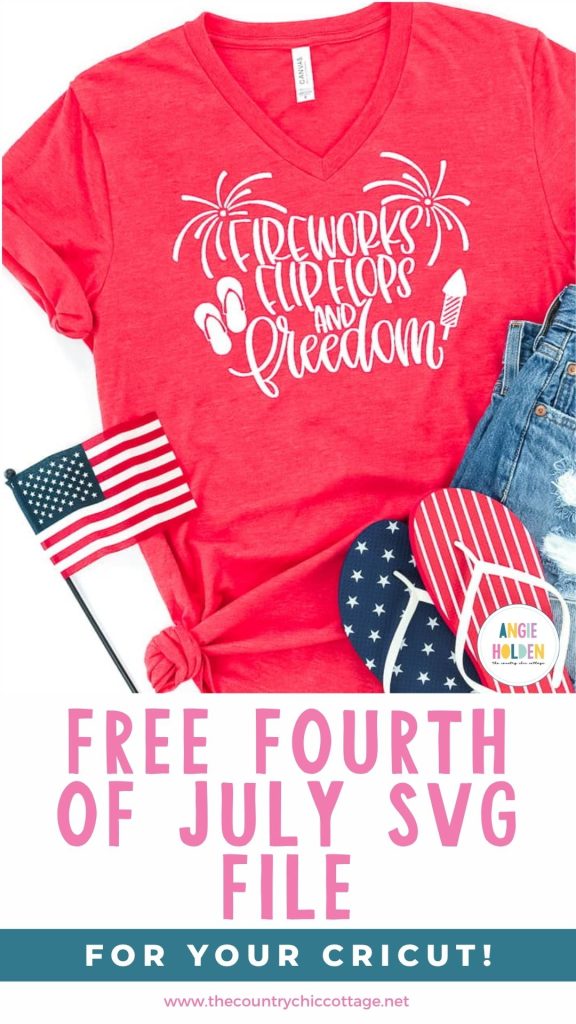
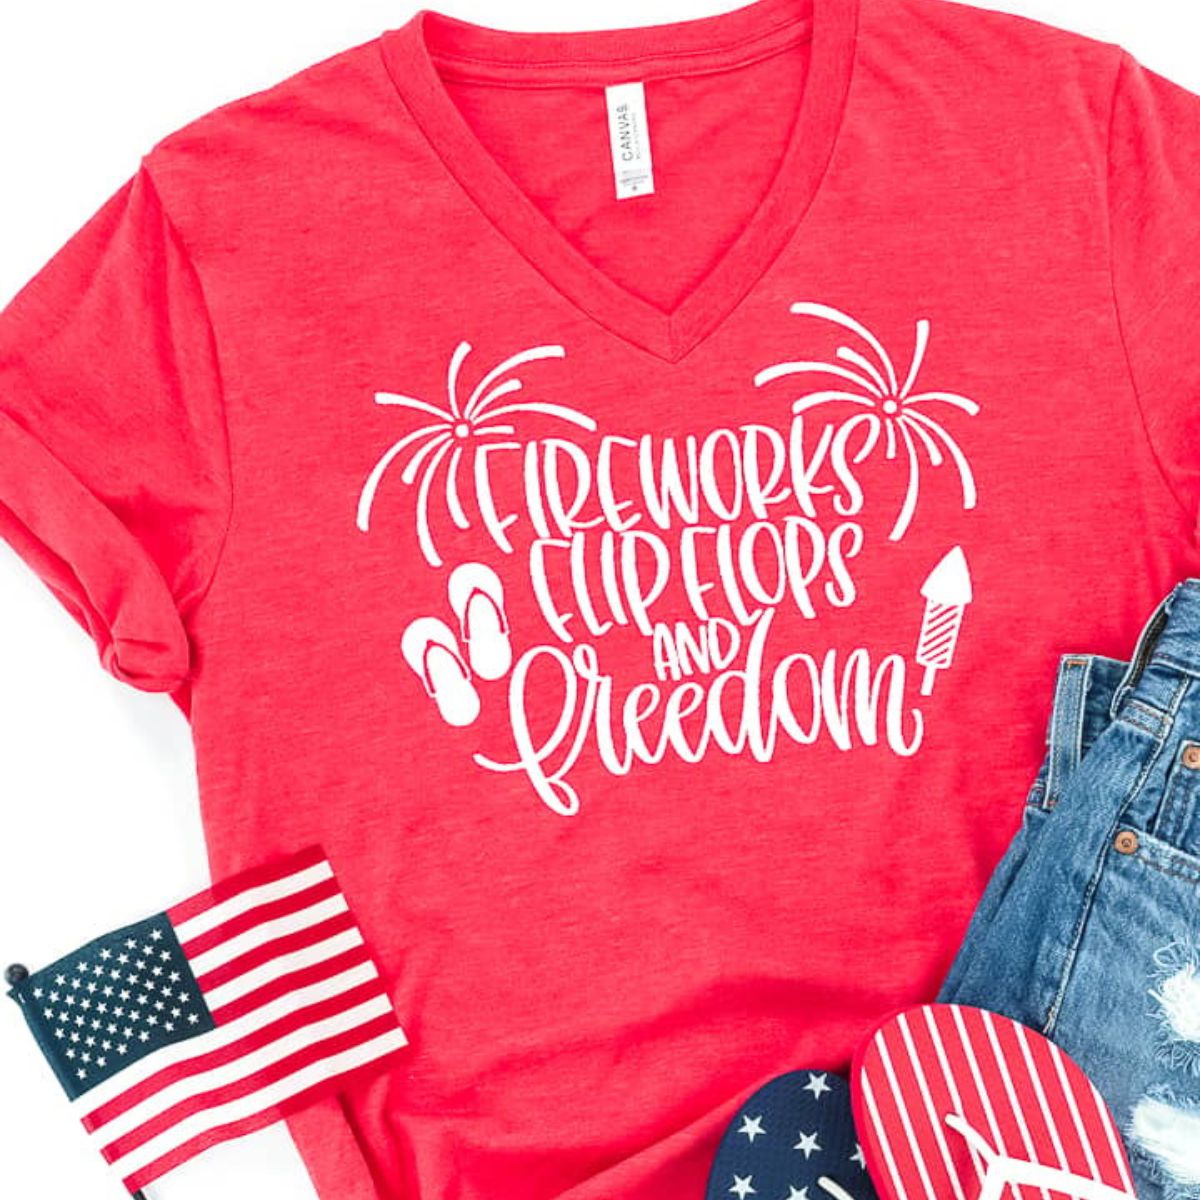
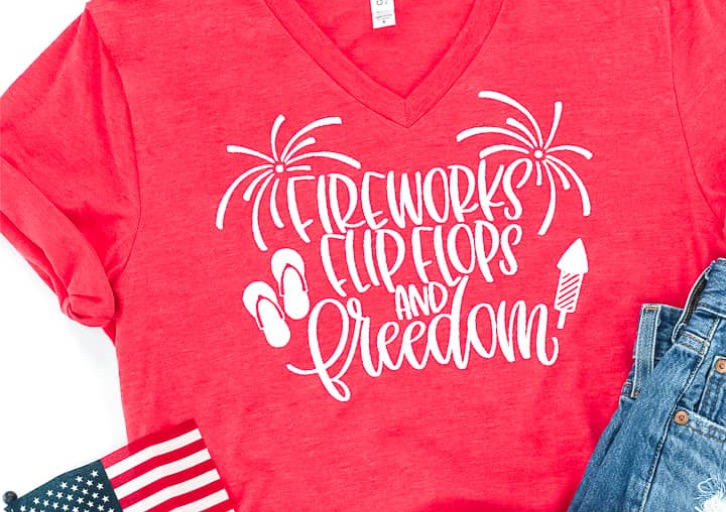
To help you celebrate America’s birthday, I have a free 4th of July SVG: Fireworks, Flip Flops, and Freedom that's perfect for all of the projects you're making to celebrate. You can use this design to make mugs, garden flags, cake toppers, totes, shirts, and more.
If you want to add this design to a shirt using HTV, my how-to-use Iron-on tutorial will help you if you’re new to using HTV.
How to Make a 4th of July Shirt with HTV
I am using HTV and a t-shirt for this project, but you can also easily use this free 4th of July SVG to create sublimation projects.
Supplies Used
- Free 4th of July SVG
- Cricut Machine
- Cutting Mat
- Weeding Tool
- HTV
- Brayer
- EasyPress
- EasyPress Mat
- T-shirt (or other blank)
Step 1 – Download the Free 4th of July SVG File
Download the file by clicking here and enter your first name and email address. If you have already signed up for my emails, you will not be signed up for anything extra, and the file will be sent directly to your inbox.
Next, download the file to your computer. If you're using Design Space to cut out the design, use the SVG file. I've also included JPG and PNG files that can be used for sublimation or printed projects.
Step 2 – Upload the File into Design Space
To cut this design on a Cricut machine, you need to upload the file into Design Space. If you've never done that before, my How to Use an SVG with Design Space tutorial can help.
Step 3- Measure Your Shirt (or Other Blank)
I always recommend measuring your blank to make sure you size your design correctly.
I know that I want my design right on the chest of the shirt. Measure across the chest, from armpit to armpit, and decide how large you want the design to be.
Remember, the shirt will curve as it moves toward the armpit, so leave at least a couple of inches on either side.
Measure both the height and width of your blank to ensure the design will fit.
Step 4 – Adjust the SVG in Design Space
Now that you have the design uploaded, you can resize it to fit your blank.
If you decide to split up any of the layers to make the design multiple colors, make sure you resize all of the layers at the same time.
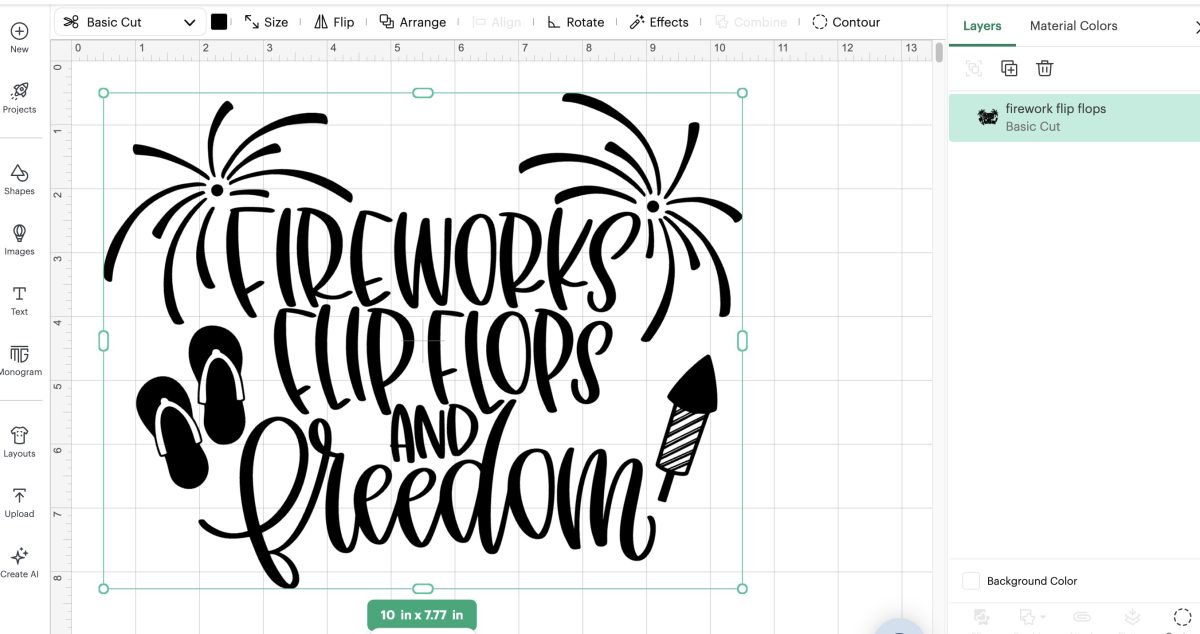
Remember – the colors on the canvas do not dictate the color of your project. The color of the Iron-on you add to the cutting mat will be the color of your project.
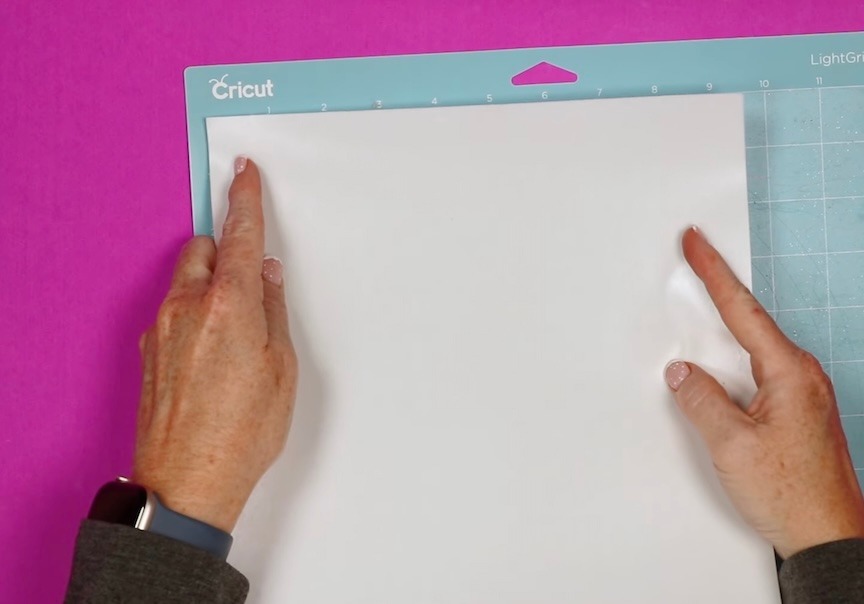
Step 5 – Cut Out the Iron-on
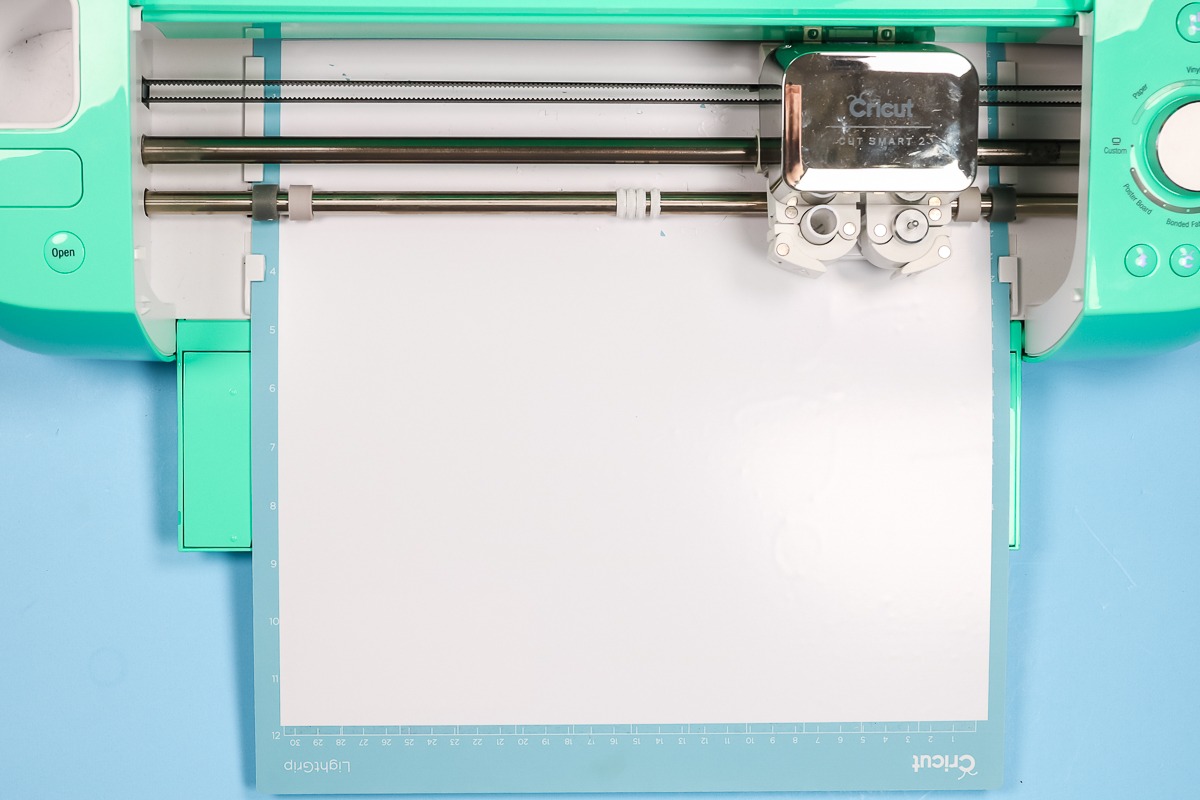
Place the HTV on the cutting mat, shiny side down. I usually use the blue LightGrip mat for regular HTV materials.
If you’re using a different material like glitter HTV, you may want to use the green StandardGrip mat.
I also recommend using a brayer to ensure the HTV is firmly stuck to the mat, with no bubbles under it.
Now we’re ready to load the mat into the machine.
You can use any Cricut machine to cut HTV. If you have a smaller machine like the Joy xTra, Joy, or Joy 2, you may need to separate your layers to get the design as big as you want.
Click Make and choose the material you're using.
Load the mat into the machine and press Go.
Anytime you change your blade, use a new machine, or try a new material for the first time, don't forget to do a test cut. Test cuts help make sure your cuts are deep enough without cutting all the way through the backing.
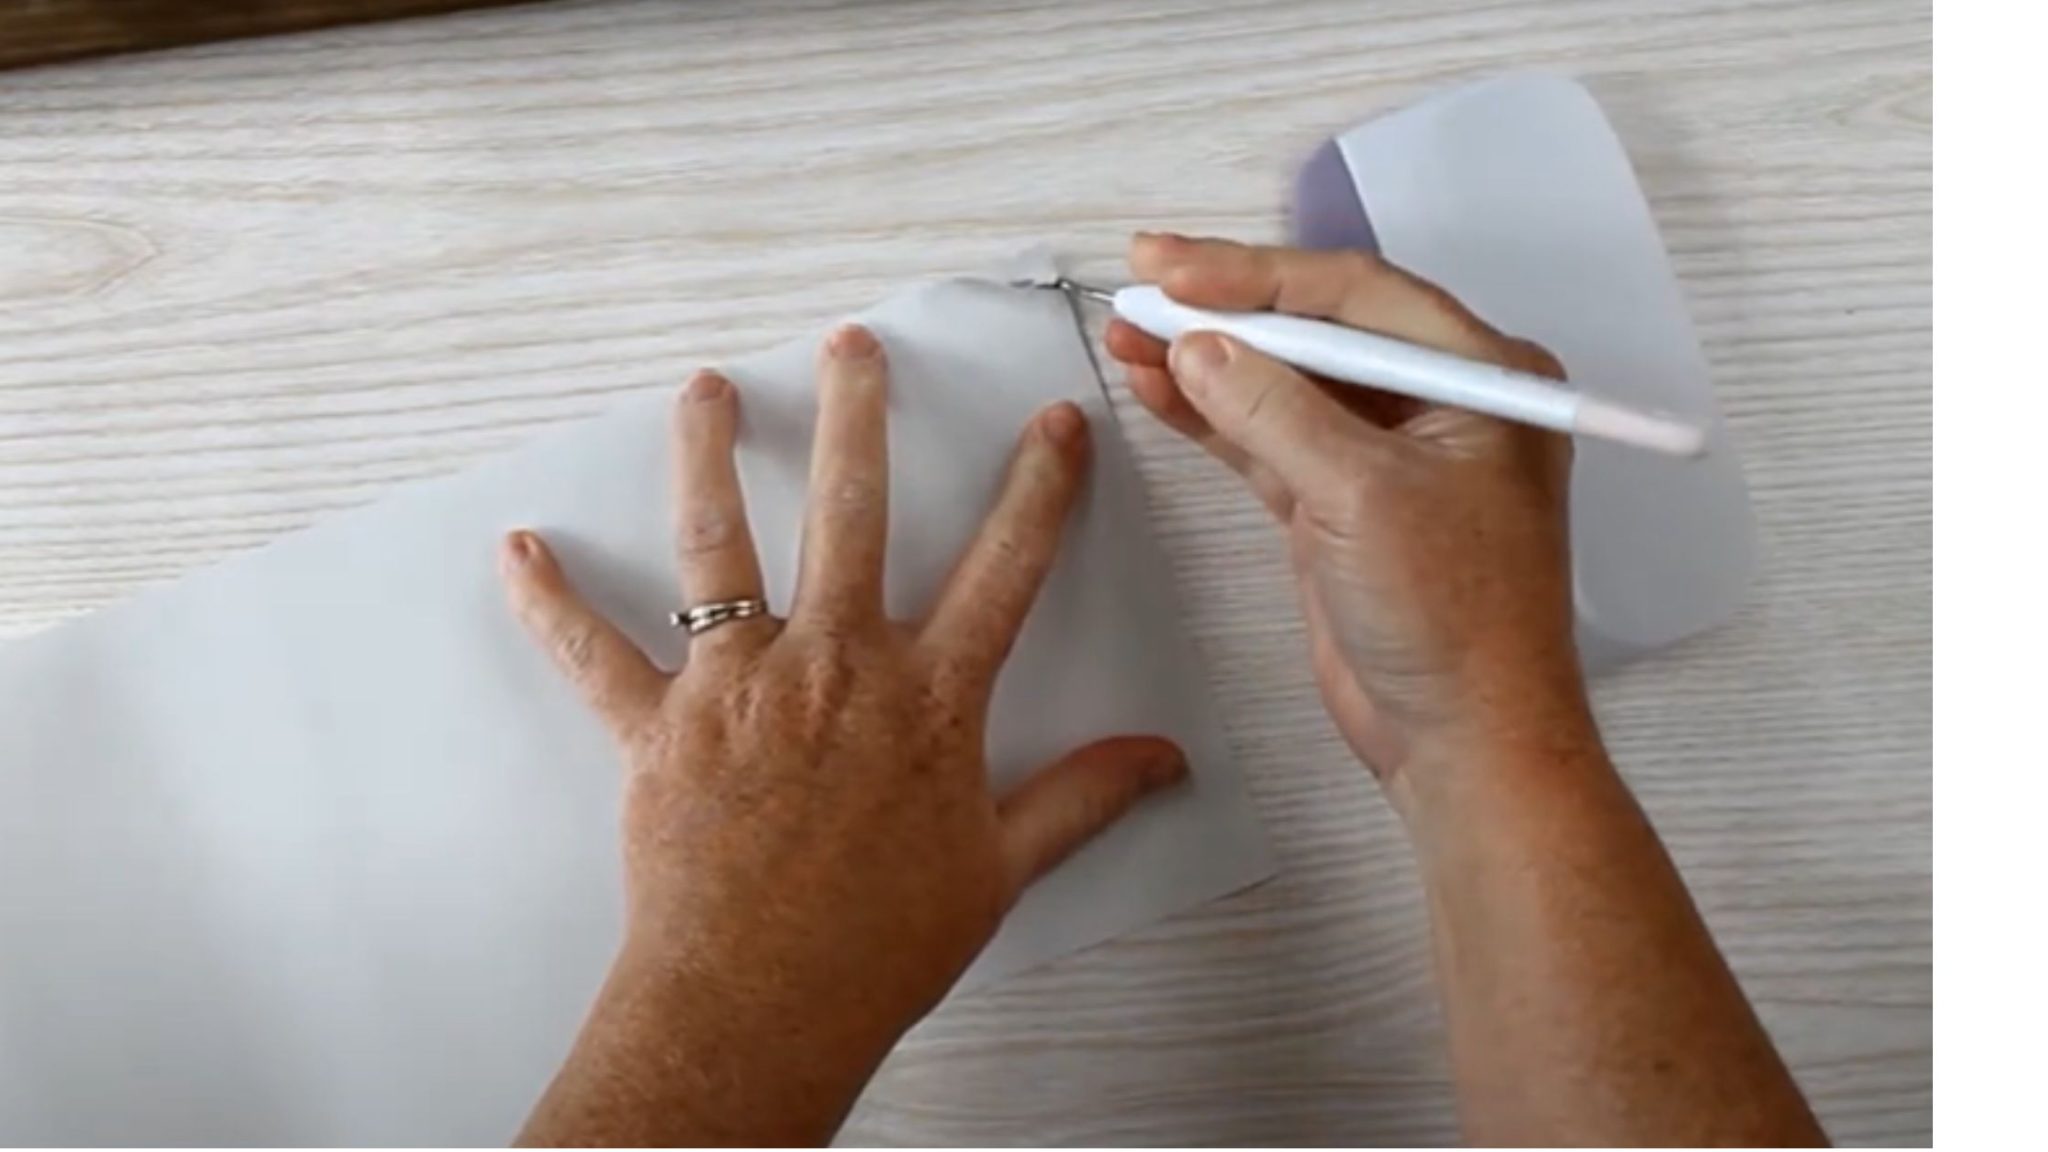
Step 6 – Weed the HTV
When the machine has finished cutting, press Unload to unload the mat.
Next, use a weeding tool to remove all the excess Iron-on. Don’t forget the inside pieces, including the insides of the letters.
Step 7 – Locate the HTV Design on the Shirt
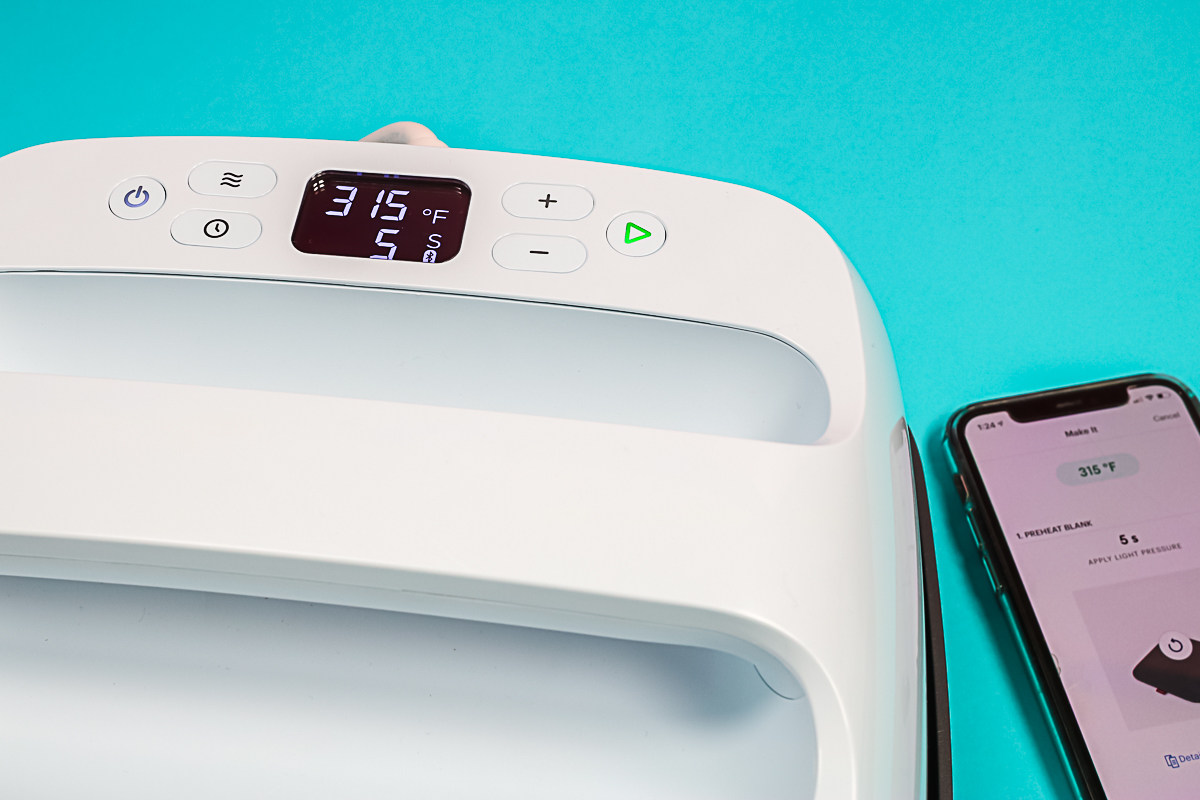
When using HTV, I always recommend preheating your blank to remove any moisture and wrinkles.
Preheat for at least a few seconds because moisture in the blank can prevent the adhesive from sticking.
If you can, avoid seams when locating your design. If you have to press over a seam, use a pressing pillow or the EasyPress mat to raise the pressing area.
Adding an additional pressing pillow inside the shirt allows the seam to press down into the mat, giving you an even surface when pressing.
The back of HTV is not sticky until you apply heat. You can relocate the design as needed until it's right where you want it. When you have it located where you want it, press down so the carrier sheet sticks to the shirt.
If your print is moving because the carrier sheet isn't very sticky, use heat-resistant tape to secure it in place.
Step 8 – Apply Heat to the HTV
I used an EasyPress and EasyPress Mat to add the free 4th of July SVG to my shirt.
Because my design fits under the heat plate, I was able to press it all at once. If your design is larger than your heat press, press each section for the full time.
When the time is up, place the EasyPress back in its carrier and follow the instructions for removing the carrier sheet for the iron-on material you’re using. If it is a cold peel, allow it to cool completely before trying to remove the carrier sheet.
Even if the instructions say hot or warm peel, allow it to cool for at least a few seconds so the adhesive can bond to the fabric.
Step 9 – Remove the Carrier Sheet
Slowly peel back the carrier sheet. If your design is lifting at all, allow it to cool for a few more seconds. If it still lifts, press again for a few more seconds and try again.
Step 10 – You’ve Made a Patriotic Shirt with My Free 4th of July SVG
With the carrier sheet removed, your shirt is finished.
I recommend waiting 24 hours before washing or wearing to give the adhesive plenty of time to adhere to the fabric.
If you are making a last-minute shirt for an event and can’t wait 24 hours to wear it, make sure you don’t wash it for at least 24 hours.
I’m a big fan of how this shirt turned out, and the free 4th of July SVG can be used on so many projects. I think it would be great on a tote, and you could change some of the fireworks to different colors if you wanted.
Don't forget to grab the free SVG today so you can make your own projects in time for America’s 250th birthday.
If you have any questions about making a shirt with iron-on, leave them in the comments, and I'll be happy to answer them for you.