

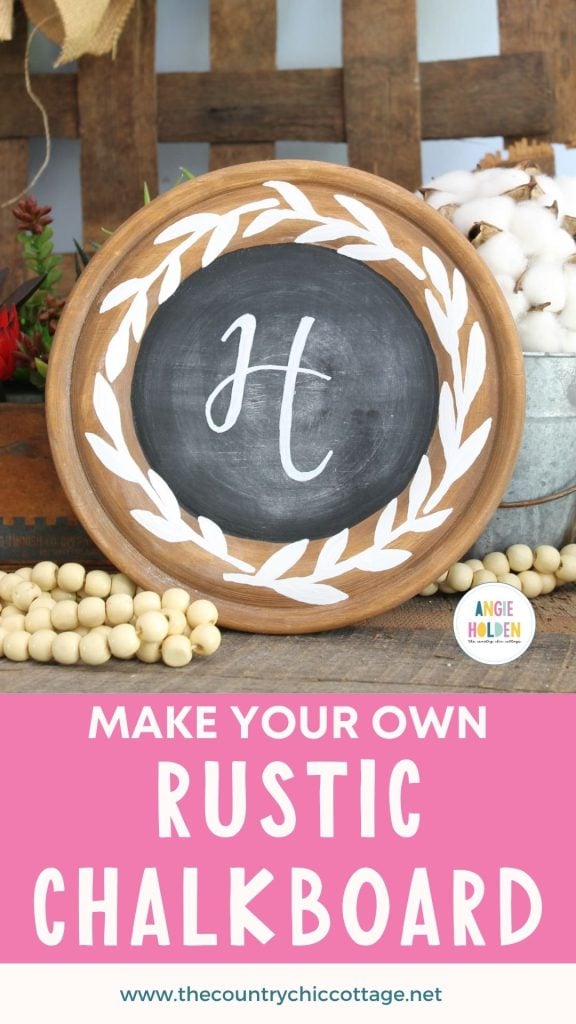
Transform an unfinished wood plate into a gorgeous rustic chalkboard perfect for any farmhouse-style home! This tutorial leads you through the entire process step-by-step.
If you've been hanging around this site for any length of time, you know how much I love farmhouse decor. That rustic, vintage quality is just beautiful and appealing. I love the simplicity of it too.
I've shared several farmhouse decor tutorials, including my Utensil Organizer and ‘Fresh Eggs’ Sign. Both of these are a natural fit for any farmhouse kitchen.
Recently, I shared how to make a DIY Farmhouse Kitchen Menu Board, which helps the whole family know what yummy dishes are coming their way. Now I have a new farmhouse decor tutorial I want to share with you! It's a rustic chalkboard.
I really love how this project turned out, and I think you will as well! It's perfect for leaving notes for family members in the kitchen (ex: “be home by 5 pm”), or it could work in any room of the house!
Note: If you want even more farmhouse decor inspiration, check out our Farmhouse Window with a Wreath, Farmhouse Wreath with Iron-on, and Farmhouse Sign from Burlap!

How To Make A DIY Rustic Chalkboard
Here's everything you need to know about this fun project. I even have a video tutorial for you down below!
Supplies Needed
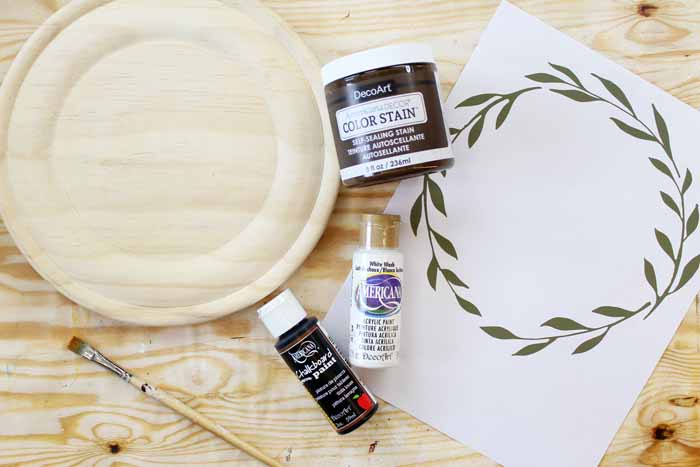
Here's what you'll need to gather to complete this project. I've included some handy links to help you find some items more easily.
- Unfinished wood plate (available at most craft stores)
- Americana Decor Color Stain in Chocolate
- Americana Chalkboard Paint
- Paint brushes
- Rag
- Printable wreath file (download here)
- Printer and ink
- White transfer paper
- Americana White Paint
- Chalk marker (optional)
- Tape
- Pen
Video Tutorial
This is a really easy project. Don't worry about that decorative painted wreath around the outer edge. I have a method for getting that just right. Trust me y'all… anyone can make this rustic chalkboard.
Watch the video below to follow along with me and see just how to make it.
Instructions
Can't watch the rustic chalkboard video or missed some of the steps? Just read below to get the instructions.
Step 1
Start by staining the outer edge of the plate with the Americana Decor Color Stain.
Brush on an even coat, allow to sit a minute or so, then wipe off with a rag.
Note: I stained the outer edge of the plate as well as the portion of the back that will show when it is hanging on the wall.
Step 2
Next, you will need to add chalkboard paint to the center surface. Paint one coat with a paintbrush and allow it to dry completely.
Your project will also need a second coat of chalkboard paint.
Pro Tip: When working with chalkboard paint, apply the two coats in two different directions to ensure that the entire surface of your rustic chalkboard sign is well-covered.
Allow it to dry according to the package directions.
Step 3
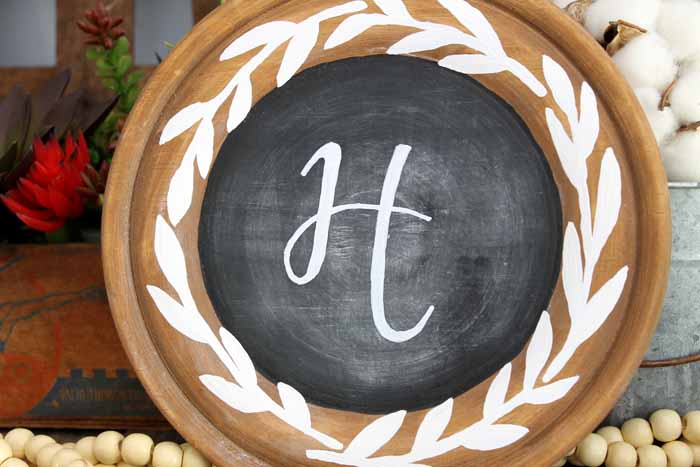
Once the chalkboard paint is dry, you can add the white wreath around the outer edge.
Step 4
Print the wreath file on a standard sheet of paper (download here).
Pro Tip: If you have a larger plate, enlarge the wreath and print in poster mode. Cut the paper and then tape the design together to the size desired.
Step 5
Cut out the wreath from the paper.
Step 6
Lay the transfer paper onto the plate, with the shiny side down.
Then lay the wreath on top of the transfer paper in the desired location.
Tape the design down to ensure nothing moves.
Step 7
Use a pen to trace around all of the lines.
Remove the paper, and you will be left with a white outline where you need to paint your wreath.
Step 8
Next, use a thin paintbrush and white paint to fill in the wreath with a couple of coats of paint.
Allow everything to dry completely.
Step 9
To prepare the chalkboard surface for use, rub the edge of a piece of chalk over the entire surface, then erase.
Step 10
You will also need to add something to the back of the plate if you plan to hang it on a wall. Try a sawtooth hanger or a piece of twine hot-glued in a loop shape.
Your rustic chalkboard is ready to display in your home!
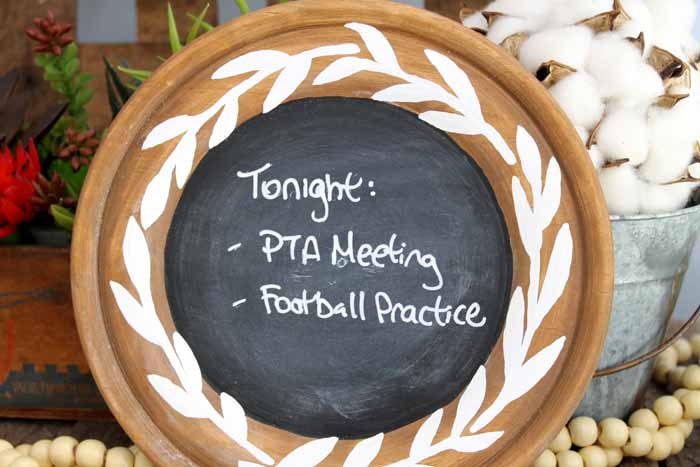
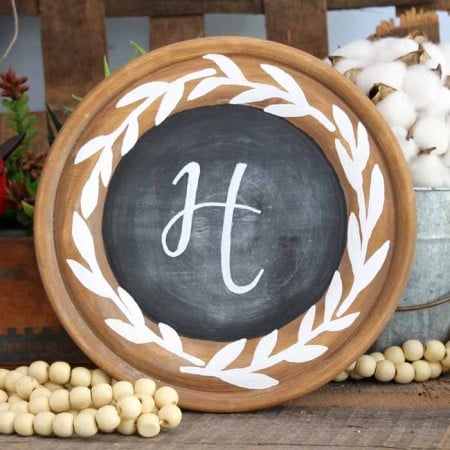
Pro Tip: To get clean chalk lines on any chalkboard surface, use a chalk marker. These make clean lines and can only be erased with water. Draw anything you would like on the surface of your chalkboard. In the image below, we added a monogram, but you can add anything your heart desires.
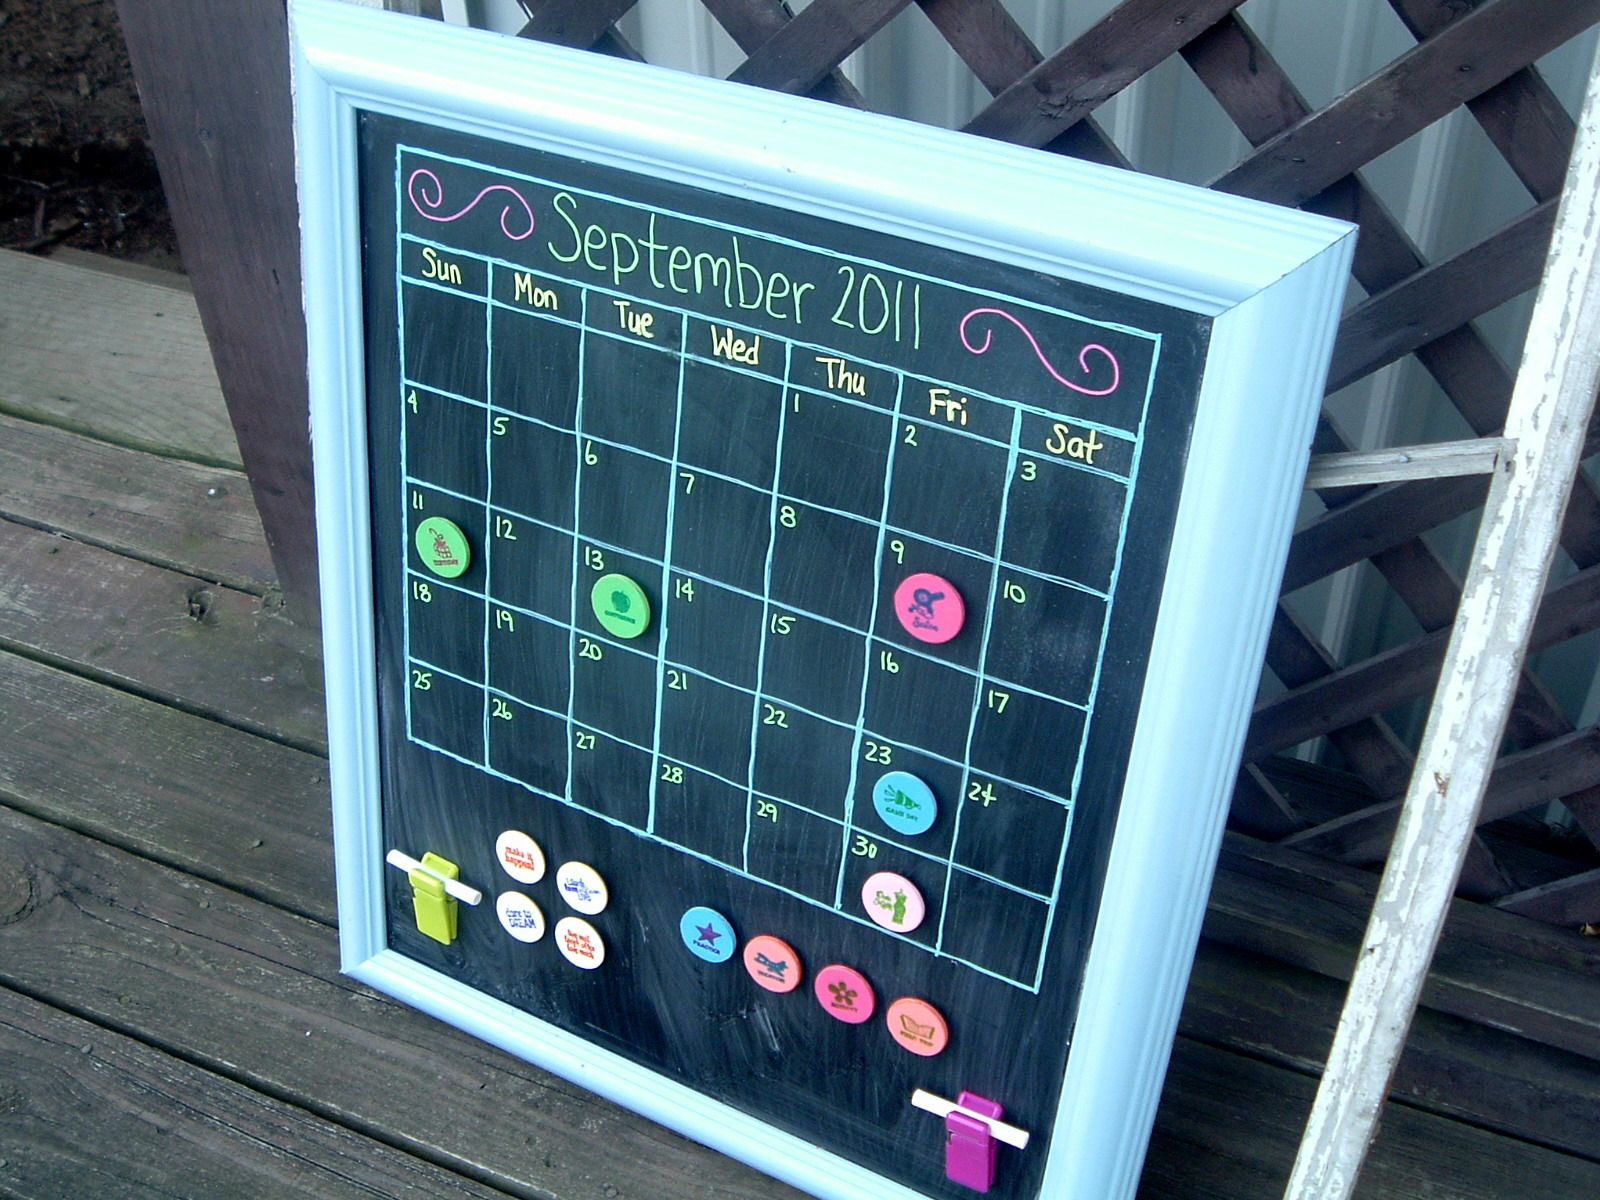
This rustic chalkboard can also be used for family reminders. In fact, it is perfect for back to school. Who says a command center chalkboard has to be ugly?
Make a gorgeous chalkboard, then proudly display it around your home!
FAQs
This project is super simple, but you still may have a question or two. Here are some questions that I've seen readers ask.
Can I make this design into a square or rectangle?
Yes! You can use the same methods of staining wood and painting chalkboard paint onto a piece of wood that's a different shape. You wouldn't be able to use the wreath, but you could take the same basic idea and hand draw if you wanted to. It's a simple design that doesn't need to be perfectly drawn to look terrific.
If you want some inspiration for other rustic chalkboard ideas, check out this one from Canary Street Crafts or this one from Anderson + Grant.
How do you make a permanent rustic chalkboard sign?
If you want to make a rustic chalkboard decor sign where the written part permanently stays (ex: a monogram you display around your home), it's easy to do!
Just follow the same process that I detailed above. Then, when you finish making the chalk design that you want to keep, spray over it with a thin coat of hairspray (spraying about 10 inches away). It will look like the chalk disappears when it gets wet, but let the hairspray dry, and it will reappear.
More Farmhouse Crafting Inspiration
If you love this rustic chalkboard sign and want to make even more farmhouse-style decor, check out these popular projects!
Supplies
- Unfinished wood plate
- Americana Color Stain chocolate color
- Americana chalkboard paint
- Paintbrushes
- Rag
- Printable wreath file download here
- Printer and ink
- White transfer paper
- Americana White Paint
- Chalk marker optional
- Tape
- Pen
Instructions
- Stain the outer edge of the plate with Americana Decor Color Stain.Brush it on evenly, allow to sit a minute or two, then wipe off any excess with a rag.Note: Be sure to stain the outer edge of the plate and a little of the back that will show when it is hanging on the wall.
- Paint a coat of chalkboard paint in the center of the plate with a paintbrush and allow it to dry completely.Add a second coat of chalkboard paint, this time in the opposite direction of the way you applied the first coat.Allow it to dry according to the package directions.
- Once the chalkboard paint is dry, you can add the white wreath around the outer edge.
- Print the wreath file on a standard sheet of paper (download here).Pro Tip: If you have a larger plate, enlarge the wreath and print in poster mode. Cut the paper and then tape the design together to the size desired.
- Cut out the wreath from the paper.
- Lay the transfer paper onto the plate, with the shiny side down.Place the wreath on top of the transfer paper in the desired position.Tape the design down to ensure nothing moves.
- Use a pen to trace around the wreath design.Remove the paper, and you will be left with a white outline of your wreath to paint.
- Next, paint a couple of coats of white paint with a thin paintbrush to make your wreath.Allow everything to dry completely.
- Rub the edge of a piece of chalk over the entire surface of the chalkboard paint then erase it to prepare it for use.
- You will also need to add something to the back of the plate if you plan to hang it on a wall. A sawtooth hanger is a great option.


What a fun project. 🙂
This is so cute!
I would love for you to share this with my Facebook Group for recipes, crafts, tips, and tricks: https://www.facebook.com/groups/pluckyrecipescraftstips/
Thanks for joining Cooking and Crafting with J & J!
That is super cute. Pinning!
I love this! And I have just the farmhouse to put it in. 😉 Pinning! #WonderfulWednesday
This is beautiful! I can’t believe how easy it to make, either. Thanks for the awesome tutorial!
I love chalkboards and yours is absolutely perfect!
chalk boards are so versatile & this is a great incorporation for fall. Would love if you’d share at Reader Tip Tuesday: http://www.jodiefitz.com/2017/08/08/reader-tip-tuesday-food-craft-party/
It’s open all week & growing! Hope to see you & this great addition at the party. xo
This is so pretty. I love the way it came out! I really like the leaves around the outside, too!
This is a cute little chalkboard for a quick little saying or a note. It is adorable.
Super cute, and very creative!
I love how cute this is! The perfect size to use for write down reminders!! Thanks for sharing at Celebrate It!