
Are you ready to add a touch of fairy magic to your child's bedroom? Join me as we transform a simple mason jar into a whimsical nightlight, perfect for easing nighttime fears and inspiring sweet dreams.
I truly understand how tough it can be when your child is afraid of the dark. I went through the same thing with my own kids! During my search for a suitable nightlight, I realized a few things: – Nightlights tend to be small and often don’t really provide enough light. – They’re not always the most charming addition to a kid's room!
I love using my Cricut for creative projects, so I was inspired to make a super cute fairy nightlight to bring comfort and smiles to bedtime.
Note: If you love this DIY nightlight, consider checking out my posts on how to make an engraved acrylic nightlight with my Cricut Explore!
Supply Update For DIY Fairy Jar
For this project, I originally used a Frosted Glass Paint in the color Sapphire. Unfortunately, this product is no longer available.
However, you can still create this project using an alternative technique that involves Mod Podge and food coloring.
This technique still produces the same frosted glass effect and is more budget-friendly.
In the video below, you will see the Frosted Glass Paint being used, but if you follow our written instructions (in this blog post), you can substitute it with Mod Podge and Food Coloring and still follow along with the tutorial.
Finally, if you would rather skip the Mod Podge and Food Coloring, you can use this Sea Glass Spray Paint instead.
DIY Fairy Jar Video Tutorial
Want to see me make the DIY fairy jar? Then check out the video below!
Can’t watch the video? Missed some of the steps? I am also including the instructions below.
How To Make DIY Fairy Jar Nightlight
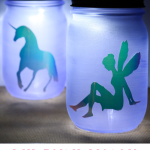
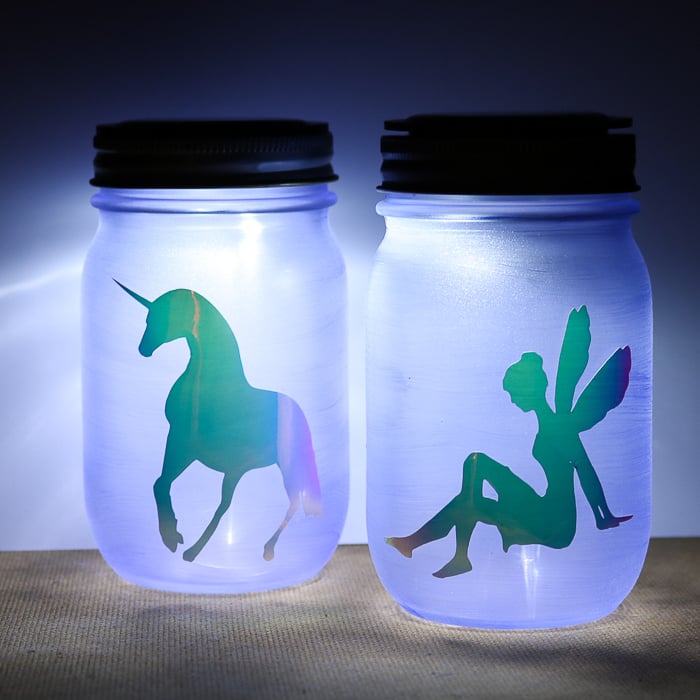
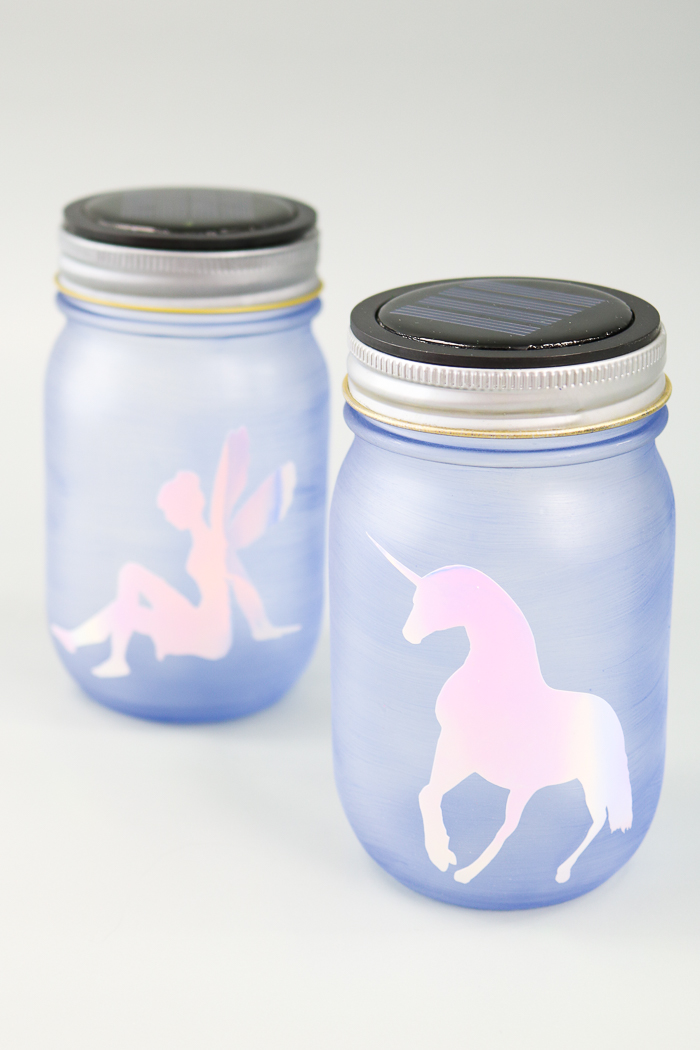
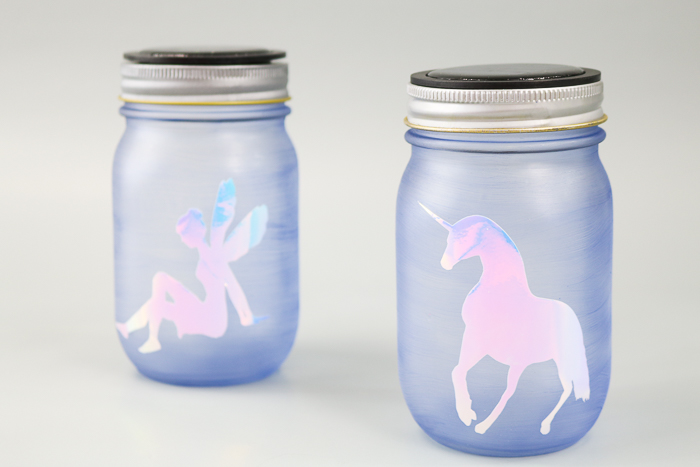
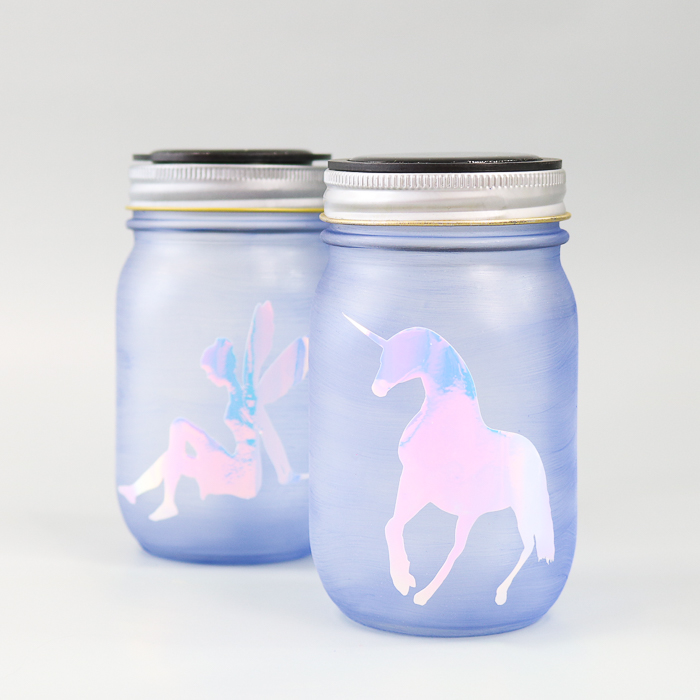
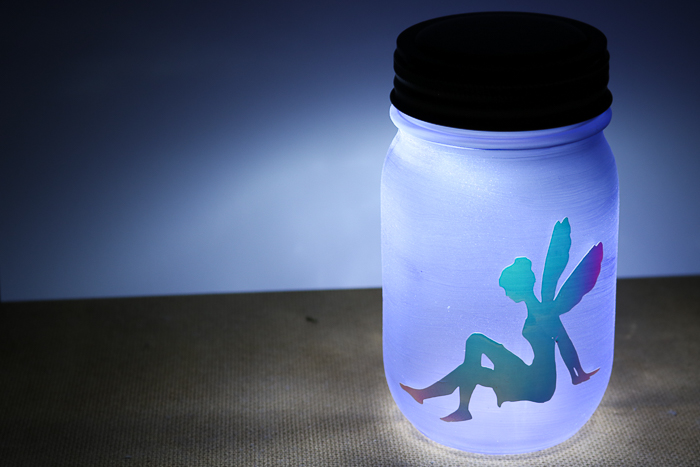
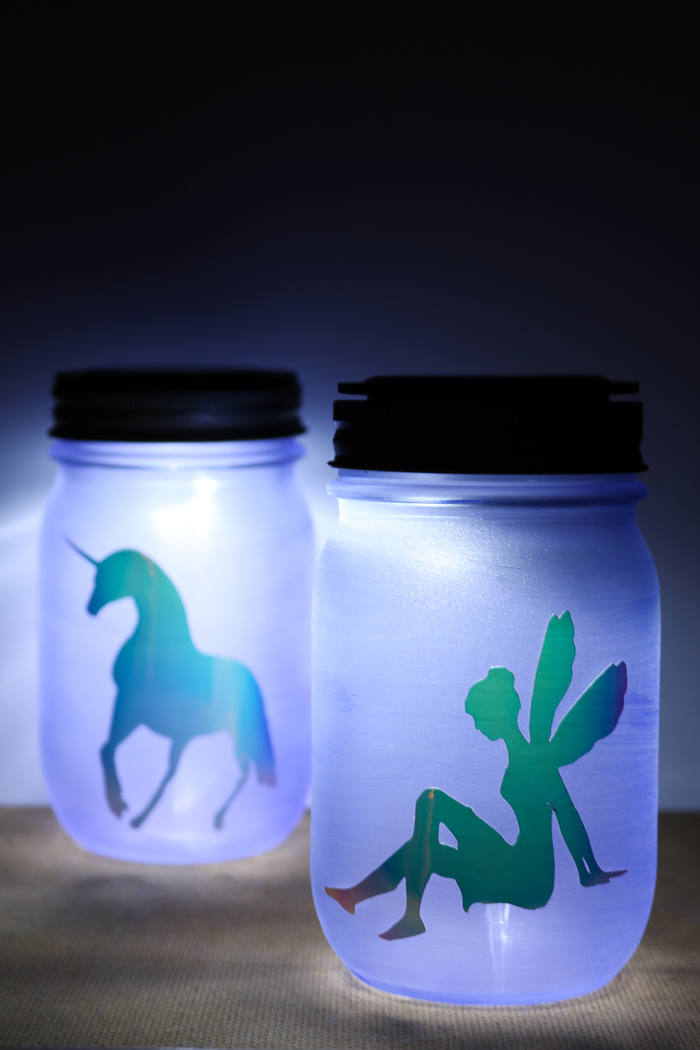
A fairy nightlight is a great addition to any kid's room! This solar-powered mason jar nightlight was super easy to make, and I had my kids help me make them.
I added a fairy to one and a unicorn to another. You can mix it up and add any design you want to the front of your mason jar.
Then, let the light shine in!
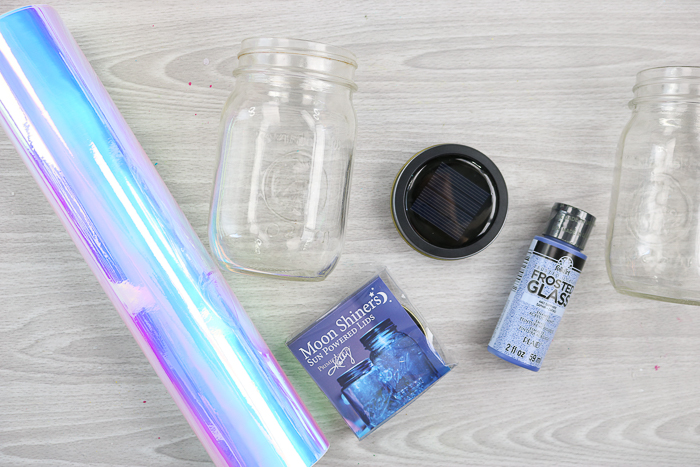
Supplies Needed To Make DIY Fairy Jar
- Pint-sized mason jars (with at least one smooth side)
- Solar-powered mason jar lids
- Mod Podge
- Food Coloring
- Paintbrush
- Holographic vinyl
- Cricut machine (click here to see which is my favorite)
- Fairy file (click here to access)
- Unicorn file (click here to access)
Note: The frosted glass paint shown in the photo below is no longer available.
Step 1: Clean Your Mason Jar
Clean your mason jars well. I recommend using rubbing alcohol and then allowing them to dry completely.
Step 2: Mix Mod Podge With Food Coloring
Mix the Mod Podge with the food coloring in disposable cups. Mix a small amount of Mod Podge with 3-4 drops of food coloring. When adding the drops of food coloring, keep in mind that the more food coloring you add, the darker your color will be.
To get the color shown above, mix 2 drops of blue food coloring with 1 drop of green food coloring.
Step 3: Paint Mason Jar
Paint the entire jar with one coat of your Mod Podge and Food Coloring, and set it aside to dry.
Pro Tip: You will want the Mod Podge/Food Coloring to be completely dry before adding the vinyl, so you might want to wait overnight.
Step 4: Download & Upload File To Cricut
Download the files above and upload them to your Cricut machine. You can see how to do that here!
Pro Tip: You can also add other files if you prefer, in addition to the fairy and unicorn options. In fact, we have free unicorn SVG files here and a mermaid one here that might work!
Step 5: Cut Design Out Of Holographic Vinyl
Size your design to fit your mason jar and cut the shape you like from the holographic vinyl. Then, weed away all excess.
Step 6: Add Design To Jar
Transfer the design to your mason jar. You can use transfer tape if needed.
Step 7: Add Solar Light
Add the solar light to the lid, and your DIY fairy jar nightlight is ready for any room!
Pro Tip: Be sure to remove the tab from the inside of the lid so your light will work.
Will you add a mason jar night light to your child's room? Just look at these jars when the lights are on!
They are super cute and add a little something just as is.
But when the lights go out, the show really begins!
The frosted glass and holographic vinyl make the perfect combination for a nightlight!
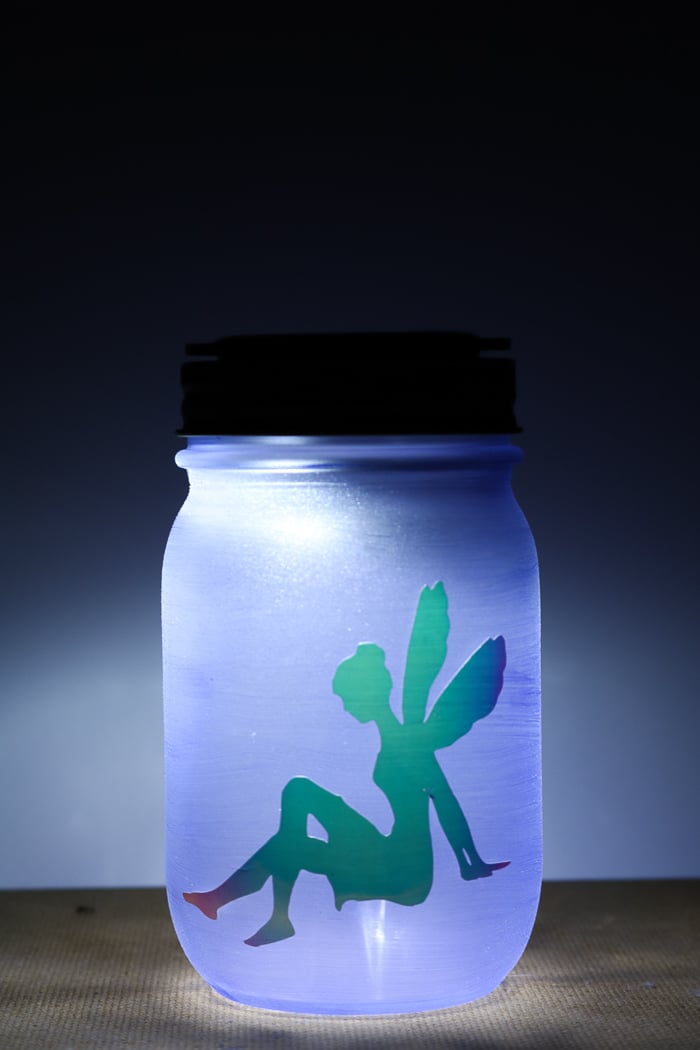
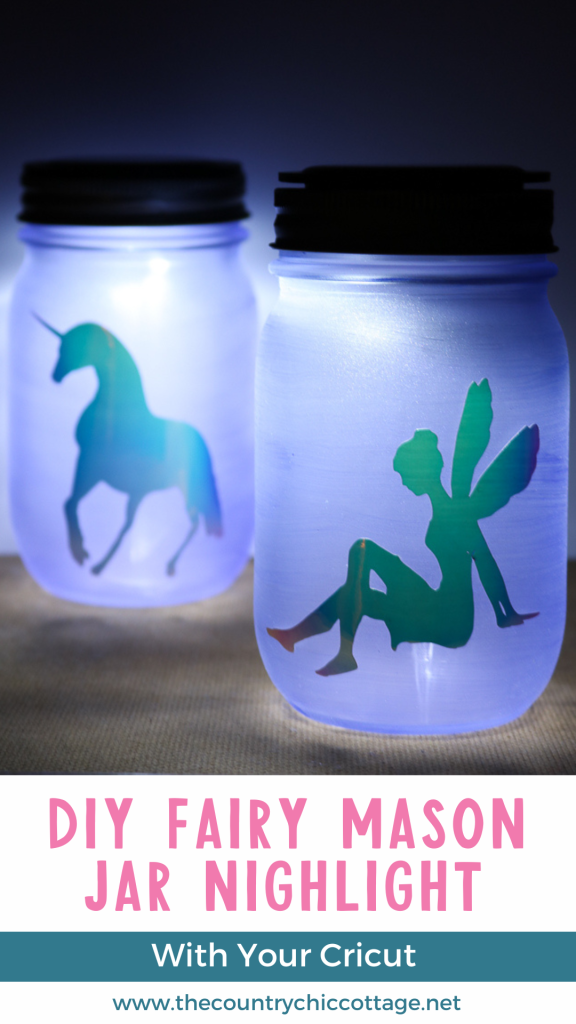
A fairy night light is something your child will love, and they are so easy to make! Plus, with the solar lid, they turn on as soon as it gets dark. No switch required!
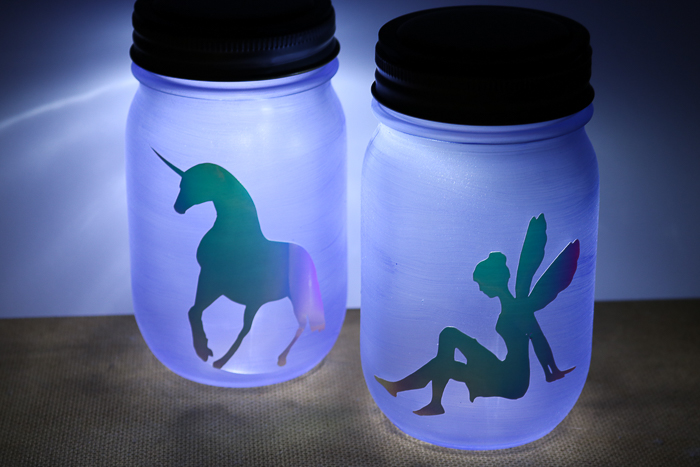
Make a fairy nightlight everyone will love these gorgeous solar-powered mason jars! You might even need to make one for your bedroom as well.
FAQs About DIY Fairy Jar
Here are a couple of questions that I see readers ask about learning how to make a DIY Fairy Jar Nightlight. If you have a question, please check to see if I’ve already answered it below. Don’t see it? Leave it for me in the comments!
Can I Make This Nightlight Using A Different Sized Jar?
Yes! You can make this project using any size of mason jar. Just adjust the design file to fit your jar.
Can I Make This Project Using A Cricut Explore?
Yes! You can use any current model, including the Cricut Explore, to make this project.
Can I Use A Different Color Vinyl?
Yes! You can use any color vinyl you like for this project. Just be sure to size your design file to fit your jar.
My Vinyl Didn't Stick Well, What Do I Do?
If your vinyl doesn't stick well, you can apply a coat of Mod Podge to the front of the jar before adding the vinyl. Allow it to dry completely before proceeding to the next step.
What Type Of Mod Podge Is Best For This Project?
For this project, I found that Matte Mod Podge works best to achieve the desired matte finish, similar to the jars shown above.
Can I Mix Up Multiple ”Paint” Colors?
Yes! Even though we are working with food coloring, you can still treat it as ”paint”. For example, you can mix multiple cups of Mod Podge and food coloring to create different shades for painting over your mason jar.
If you are looking for a place to start when it comes to mixing up food coloring, check out McCormick’s Food Color Mixing Chart. This chart is helpful because it indicates the number of drops required to achieve a specific color. Now, with that being said, this is for McCormick’s Food Coloring. However, you could use it as a guide, or you could Google the brand of food coloring you are using to see if they have their own chart.
What Can I Use In Place Of Solar Power Lights?
If you don't want to use solar lights, you could also use a battery-operated light and place it inside the mason jar. Just be mindful that it might go out faster, and you may have to swap it out more frequently.
My Light Isn't Working, What Do I Do?
If your light isn't working, you might have to remove the tab from the inside of the solar lid. Be sure to check out the video for more information!
5 More DIY Fairy Projects
Did you love this DIY fairy jar, and are looking for more fairy crafts? Then check out the projects below!
- Mason Jar Gift Ideas With A Fairy Garden Top
- Fairy Lantern In a Mason Jar
- How To Make A Fairy Garden With A Pool
- Spring Wreath Ideas: A Fairy Garden On Your Door
- DIY Mason Jar Fairy House


Where is your clean windows C
I assume you are looking for this post: https://www.thecountrychiccottage.net/best-way-to-clean-windows/
Wow very nice. I like it