
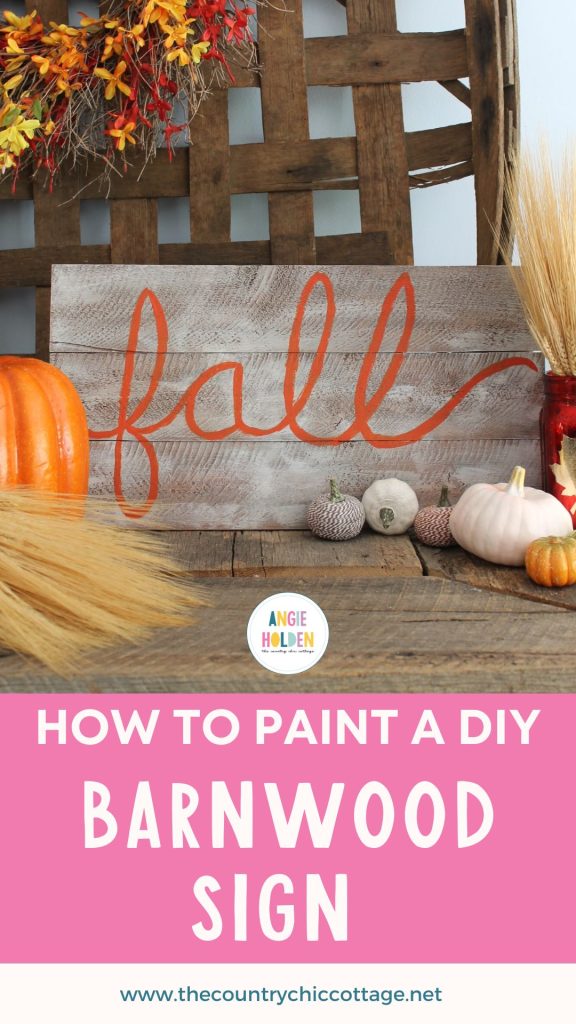
Add a perfect rustic DIY barnwood sign to your fall decor this year. Use this tutorial to learn how to paint barnwood style so that you can easily create your own signs and beautiful projects!
Barnwood signs are wonderfully simple and rustic. They really make a perfect addition to your home any time of the year, but my favorite time is during the fall.
Want a barnwood sign for your home? It can be time-consuming to collect one yourself. That's why I'm going to show you how to make your own sign for your fall decor with a painting technique you need to see to believe!
It's a quick and easy method that will have you making a new barnwood sign for every season of the year and every area of your home!
Case in point: this Garden Barnwood Sign, my Farmall Barnwood Sign, or go even bigger with a project like My Barnwood Christmas Mantel.

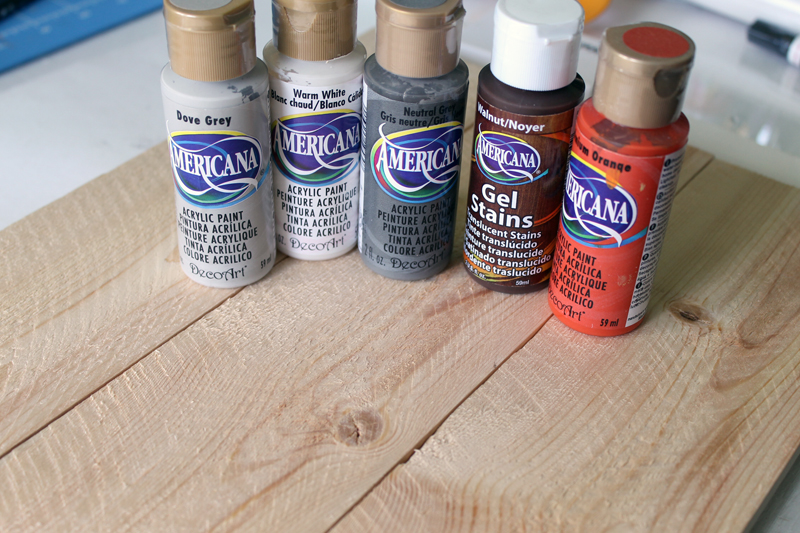
Barnwood Sign Supplies Needed
You only need 4 supplies to create this barnwood paint technique! Here's what you need:
- Wood Stain (in a dark color)
- Craft Paint (in white, light grey, orange, and dark grey)
- Blank Wood Pallet Sign
- Paint Brush
How To Paint Barnwood-Style
Before we dive into this project here's a very brief overview of the barnwood painting technique. This technique uses a dry paintbrush and you put very little paint onto it. Then, dab most of it off on a piece of paper.
Next, you run the dry paintbrush over your surface quickly so that it leaves both dark and light spots as well as spots that are not even covered in paint. Now that you know the basics, here's how to make this fun fall barnwood sign.
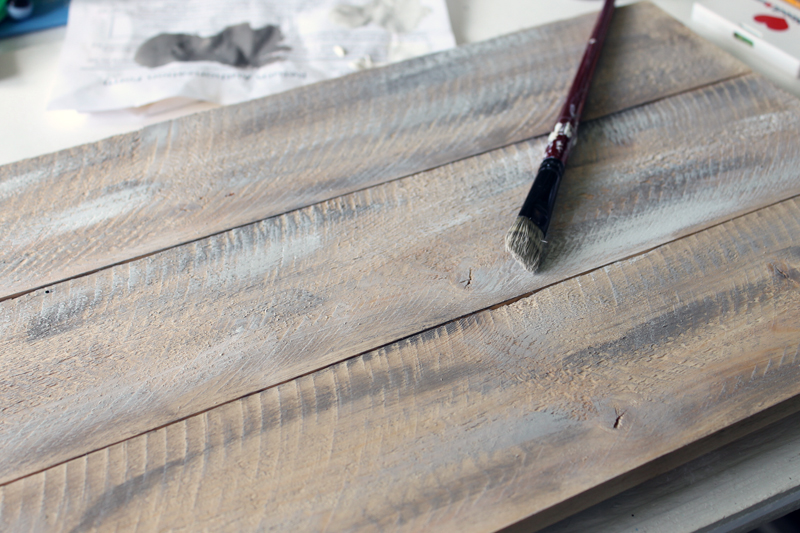
Step 1
Start by using this technique on your pallet sign with the dark grey paint as shown in the image below.
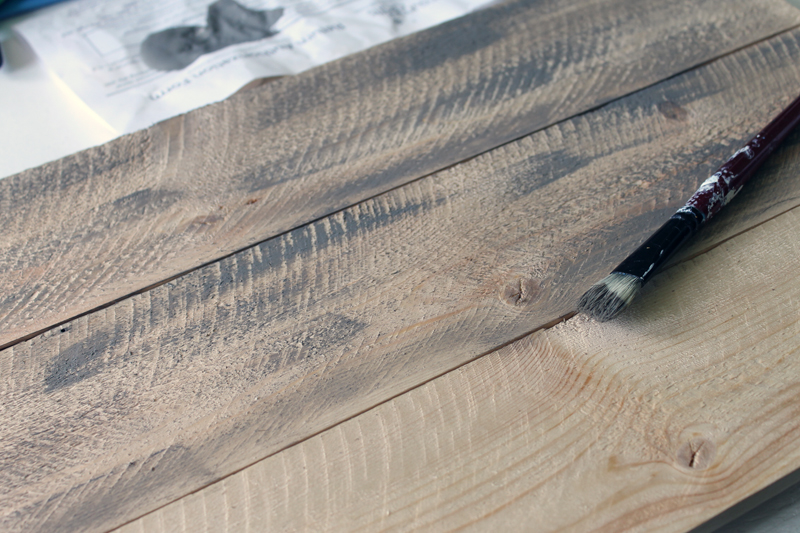
Step 2
Then, add the light grey paint on top of that using that same dry brush technique.
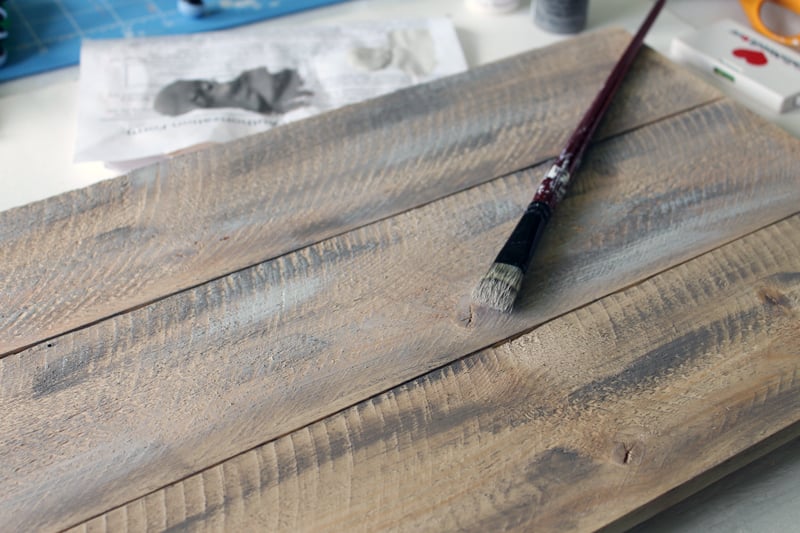
Step 3
Finally, use the same technique one more time with the white paint. You should still have some raw wood showing through at this stage. Each layer is a very, very thin coat of paint.
Also, because you are using such a small amount of paint, the layers dry almost instantly. You can therefore add all of these layers within a few minutes!
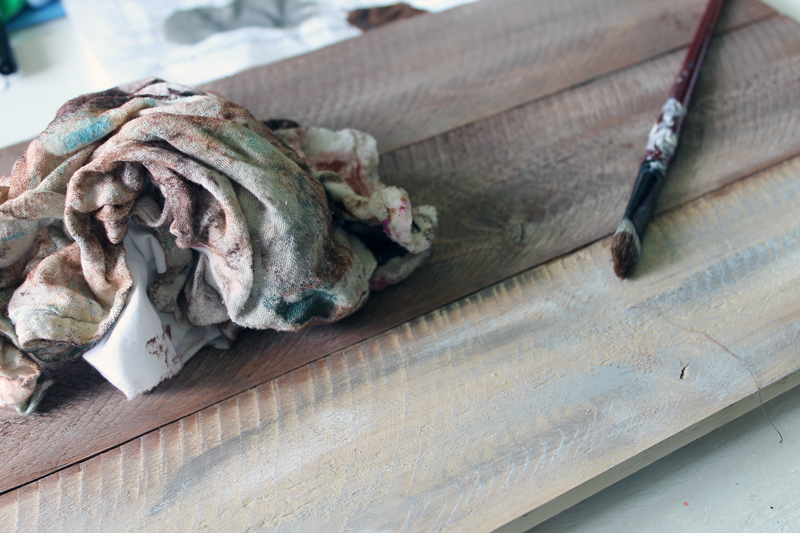
Step 4
You can now use your dark stain. Add it to the entire surface with a brush, allow to sit a few seconds, then wipe off with a rag.
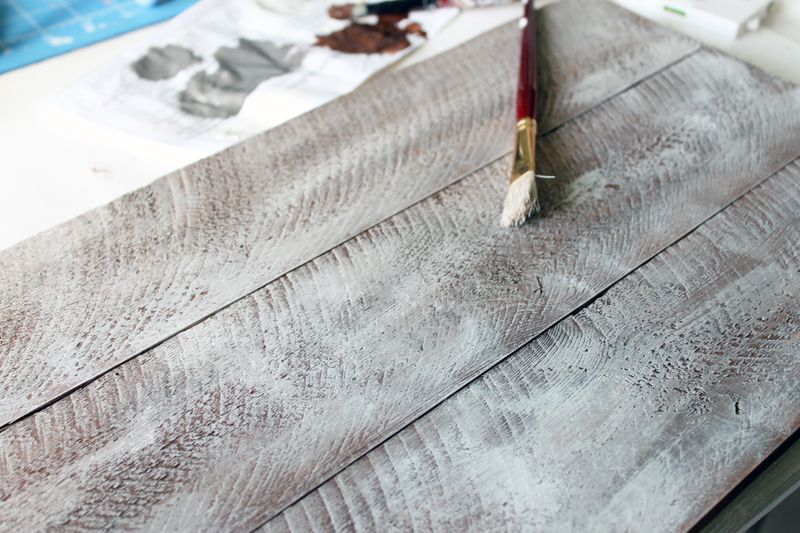
Step 5
I then repeated the dry brush technique that I did above with all three paints over the surface. This gives you a rustic rough appearance that is worn and layered. But, the great part is that this only takes a few minutes to do on any surface!
One note: Don't forget those edges when you're painting! You want to get those covered while at the same time not ruin the look of your barnwood sign.
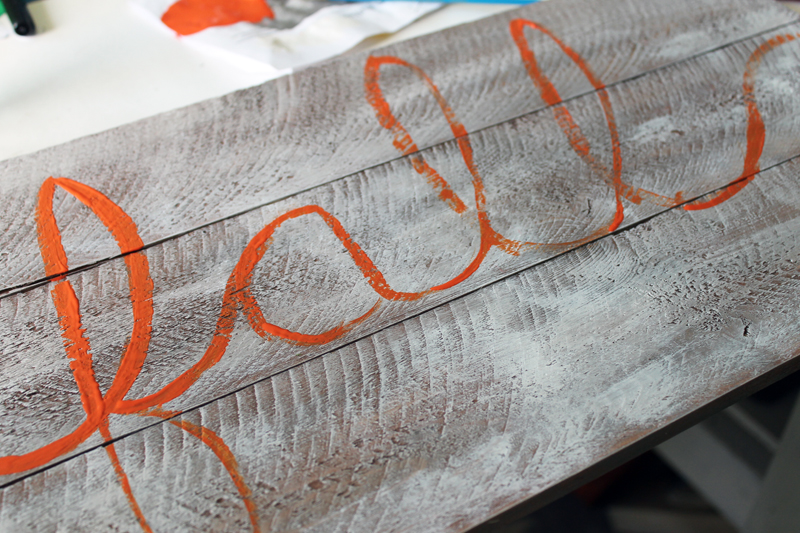
Step 6
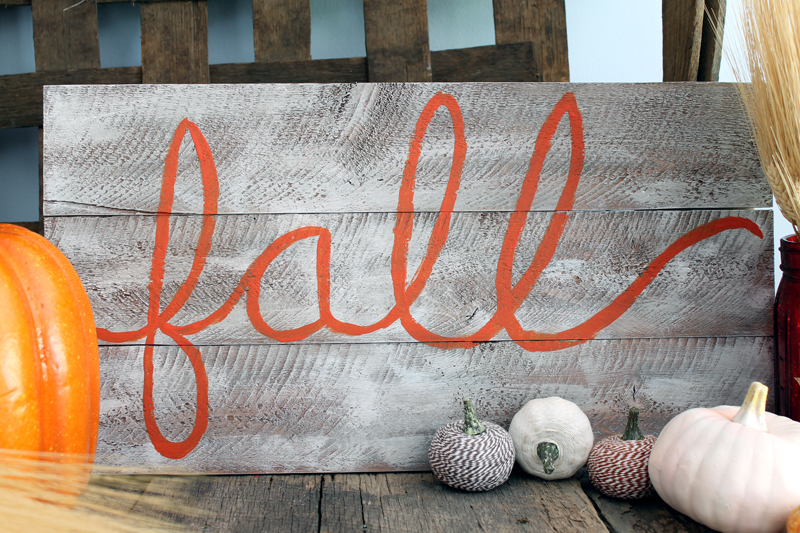
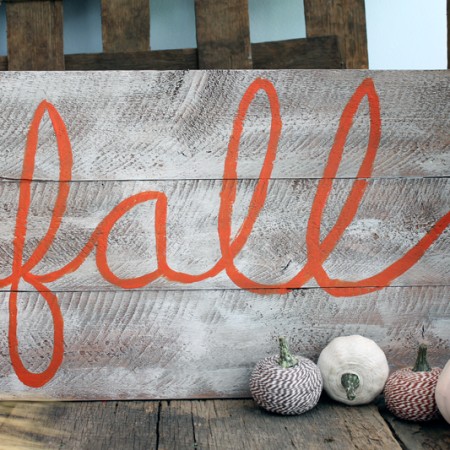
You now have a barnwood like surface that is ready to add any design on the top. I free-handed the word “fall” but you can add anything that you like.
If you want to get better at hand lettering, be sure to check out this post for a course you do NOT want to miss!
DIY Barnwood Sign Comparison With Authentic Barnwood
Ready to see how this barnwood paint technique compares with real barnwood? The sign is sitting on the real thing in the image below. You can see that mine turned out a little lighter, but overall it is a good representation!
If it comes to buying an expensive barnwood sign or making my own DIY version, I'll make my own every day of the week.
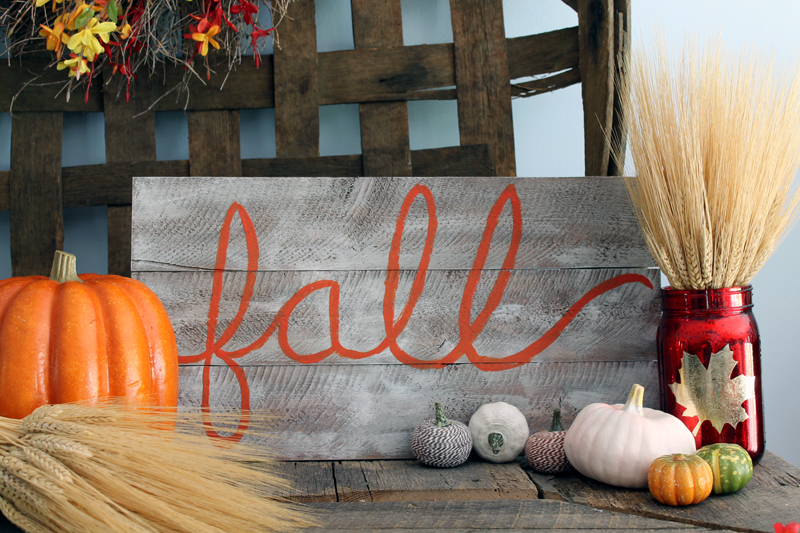
If you want to create a very similar arrangement to this one, make the metallic leaf mason jar that is shown above or the baker's twine pumpkins, too! They'll really complete the look!
I feel confident that you'll be amazed at how quick and easy this project is. It's one of those that techniques that over-delivers!
Grab your craft paints and make your own barnwood sign today. You will love the results, I promise.
Will you put it on your door, your wall, or your mantle?
Love This Barnwood Sign? More Fall Crafts You'll Love
Love this barnwood sign idea and want more? Try the links below!
- Wheat Wreath for Fall
- Fall Burlap Craft Ideas
- Jar Ideas for Fall
- Quick and Easy Fall Wreath
- 3D Paper Pumpkin
- Fall Mason Jars You Need to Make
- Fall Tray You Can Make with Buttons
- Simple Fall Fairy Light Luminary
Supplies
- Wood Stain dark color
- Craft paint white, light grey, orange, and dark grey colors
- wood pallet sign
- Paint brush
Instructions
- Put a small amount of dark gray paint on your dry paint brush. Then run the dry paintbrush over your surface quickly so that it leaves dark spots, light spots, and spots not covered in paint.
- Repeat the same process with light gray paint.
- Repeat the process one more time with white paint.
- Brush on the dark stain, let it sit for a couple of minutes, and wipe it off with a rag.
- Repeat the dry brush painting technique with the dark gray, light gray, and white paints again.
- Use your orange craft paint as you freehand the word "free" on the sign.


This sign came out great! I love it!
Loving your sign and how you conditioned the pallet wood to look like barn wood. Free handing the word “Fall” looks great also. You sure make awesome signs, love them all. What is it I wonder about rustic wood signs that appeal to us so much we keep making them? Do you like to rotate your signs for holidays and seasons?
When I get tired of a sign I sand it down then make new sign, no sense wasting wood. Sometimes can’t get Mr.Furry to cut some more wood for me..tempermental wood cutter.
Have been rounding up Fall projects to start, organizing all my current print outs. Need to go thru older printouts to make room for current projects.
Have wonderful week
I do rotate them! And I often give them away to friends and family. Sanding them down is a great option however!
Very useful, thanks for posting
Looks GREAT! Would love if you’d share at Reader Tip Tuesday: http://www.jodiefitz.com/2017/08/15/reader-tip-tuesday-craft-recipe-party/
Finally thinking autumn….
Great tutorial. Saw this on the Show/Tell Link Party. Love the sign especially since fall is my fave time of year!
This is so cute! 🙂
I would love for you to share this with my Facebook Group for recipes, crafts, tips, and tricks: https://www.facebook.com/groups/pluckyrecipescraftstips/
Thanks for joining Cooking and Crafting with J & J!
Excellent tutorial! It has been a long time since I painted and miss doing projects. I hope one day I get a chance to do that!
Saw this on Thursday Favorite Things, I’m #64 on the list. Hope you’ll stop by and say Hello. Have a fabulous day.
This is an interesting painting technique. I’ll have to try it on my next sign. Thanks for the tutorial!
The sign turned out wonderfully! That paint technique really does make the wood look like barnwood. Great idea for Fall!
I’m looking forward to fall & more fall projects. This barn wood sign turned out cute. Thanks for sharing at the Inspiration Spotlight party. Sharing.
Very cute and simple sign. I love it!
Super cute sign! I am ready for fall! Sharing on FB & Twitter! Thank you for sharing on Merry Monday! Hope to see ya next week!
Kim
I love how your sign turned out! Great tutorial as well!!
This technique is so neat. It really does look like the real thing! Thanks for linking up with Merry Monday this week; I’ll be featuring your barnwood sign at our upcoming party. I hope you’ll stop by and link up again!
Hi! Thanks for sharing this. It sure looks great.