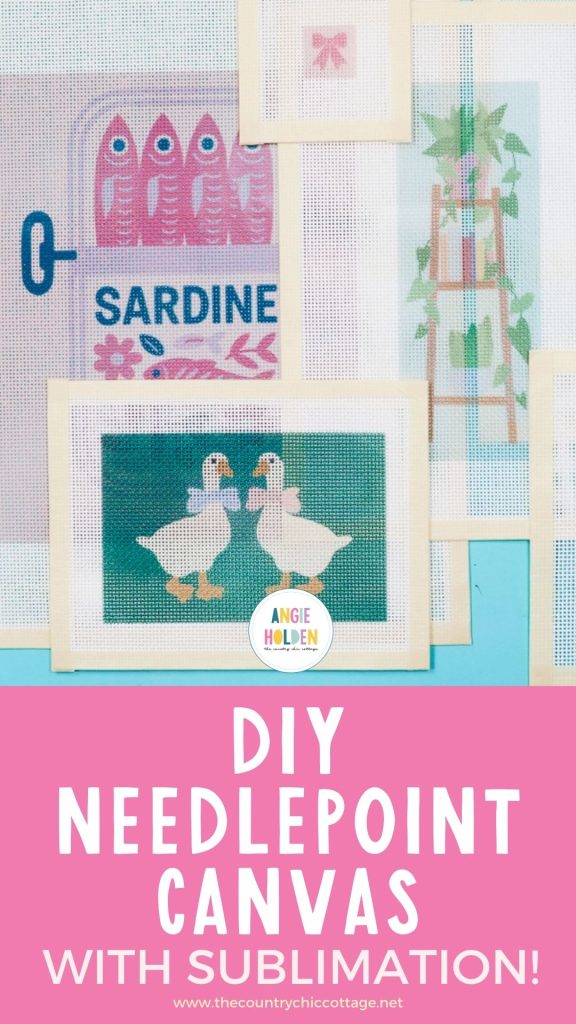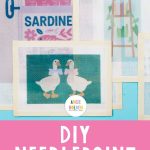
Are you in your needlepoint era like I am? If you are, you're going to love how easy it is to create your own needlepoint canvases with sublimation.
Everywhere I look, I see these amazing needlepoint canvases, and I'm not going to lie, I want them all.
If you're interested in needlepoint and have been shocked by the canvas prices, making your own with sublimation may be the right process for you.
I used to do cross-stitch projects, and when I saw that needlepoint was having this amazing moment right now, I knew I wanted to try it out and see if it was a good craft for me.
If you're interested in making your own canvases with sublimation, you can watch me make mine by pressing play on the video below.
How to Make a Sublimation Needlepoint Canvas
As I mentioned above, I've recently started my needlepoint journey, and I'm having the best time with it. I am finishing projects more quickly than I expected, which has me shopping for canvases regularly.
Hand-painted canvases are beautiful and definitely an art, but they are quite expensive.
A hand-painted canvas about the size of the one below could be priced anywhere from $60 to $100.
This large canvas could easily be $150 to $200 for a hand-painted canvas.
Because I want to be able to get all the canvases, I decided I wanted to come up with a way to make them myself.
Sublimation working was a very happy surprise, so I'm going to show you how I created these canvases so you can make your own.
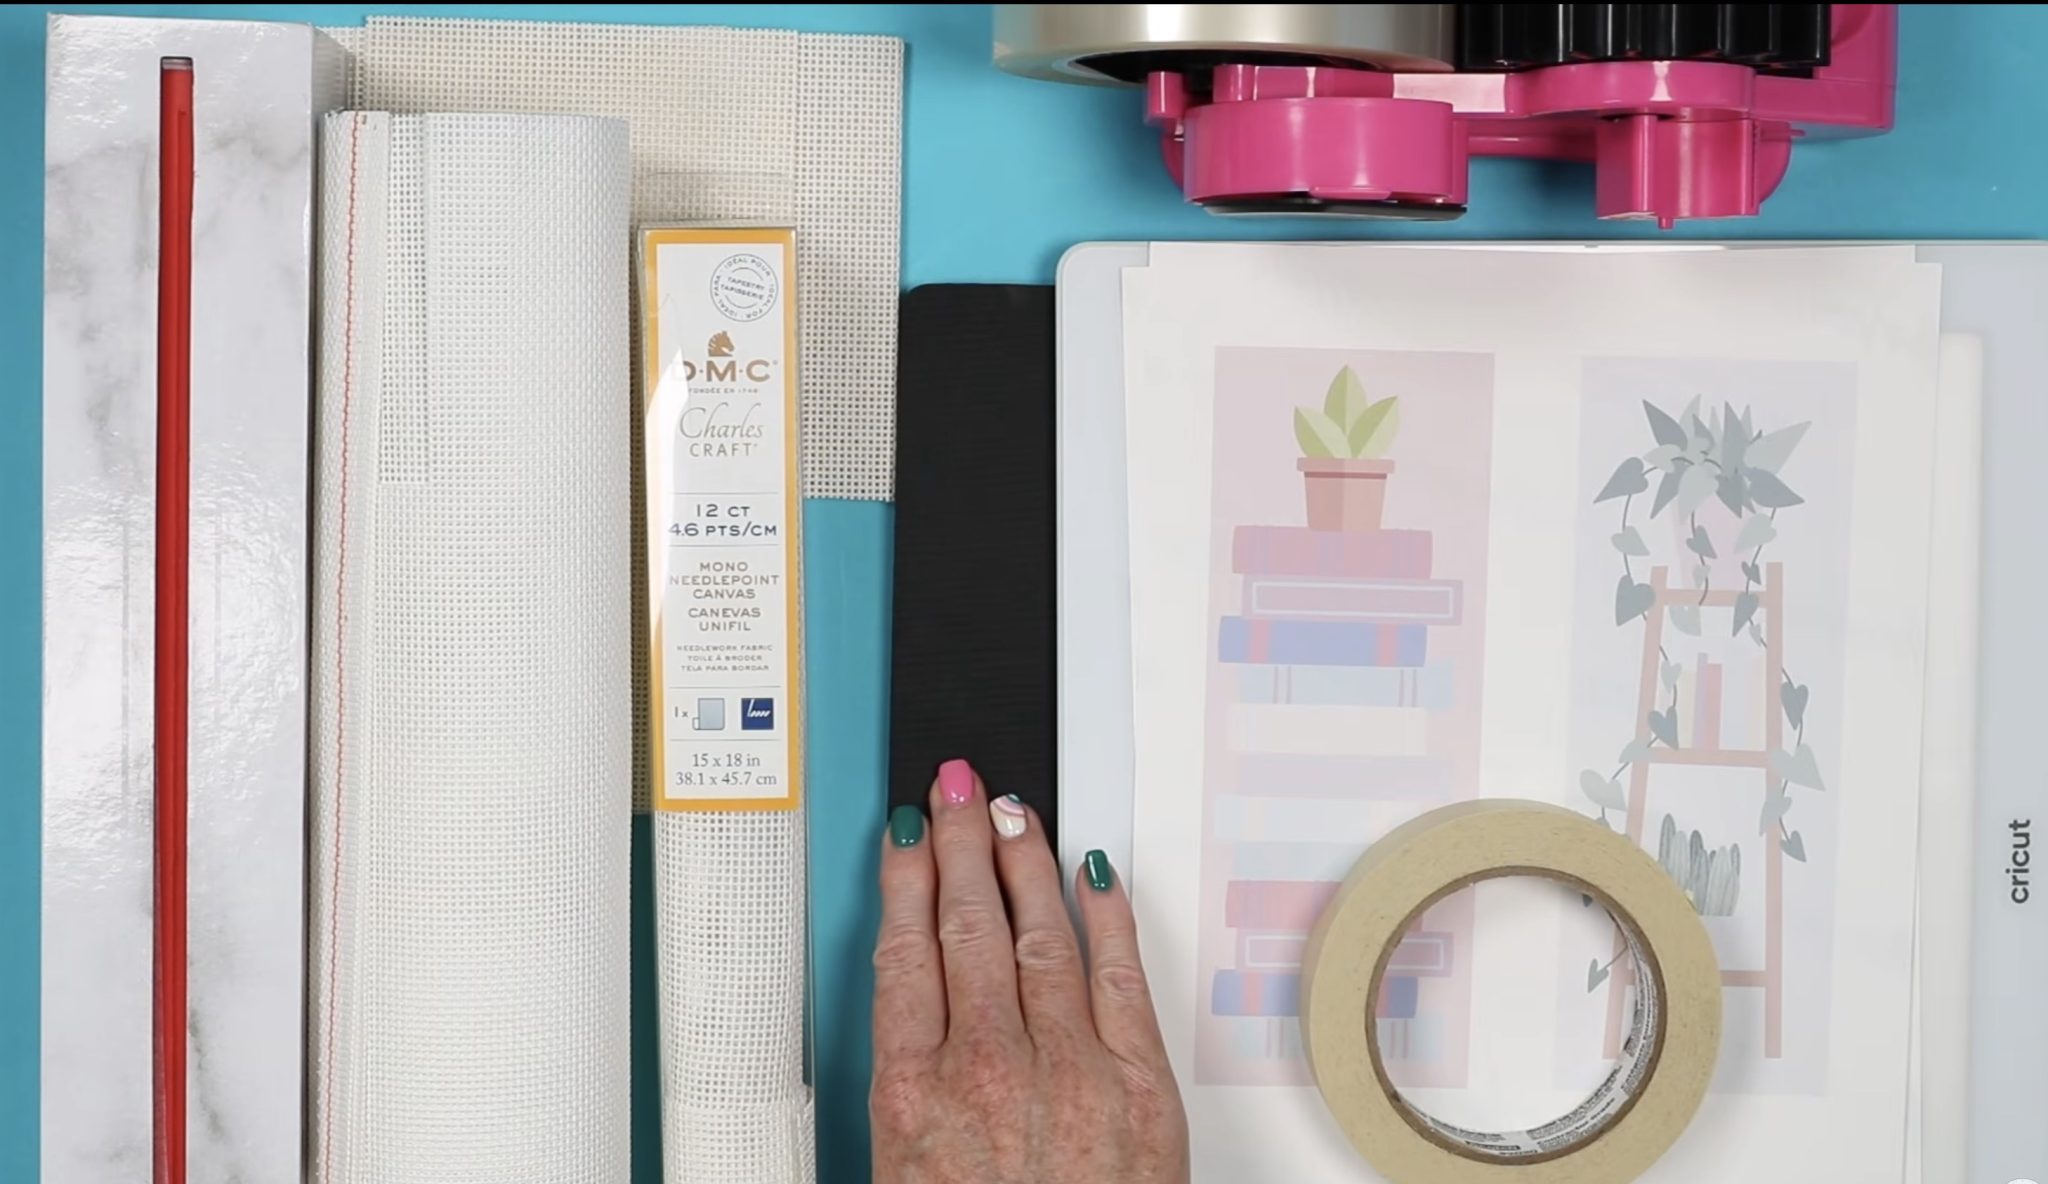
Supplies Used
- Needlepoint Canvas (You can try Option 1, Option 2, or Option 3.) NOTE: Because needlepoint is so popular right now, even needlepoint artists are having a hard time finding canvas. There has been an actual nationwide shortage.
- Brother Sublimation Printer
- Sublimation Paper
- Lint Roller
- Heat-Resistant Gloves
- Protective Paper
- Paper Dispenser
- Heat Press
- Heat-Resistant Mat
- Lightpad
Step 1 – Purchase Blank Needlepoint Canvas
To ensure that sublimating on needlepoint canvas would work for everyone, I purchased a variety of brands to test.
Two are no-name brands from Amazon, and I was able to get some DMC brand canvas to test as well.
There are different sizes of needlepoint canvas. The size number indicates the number of squares per inch. The higher the number, the smaller the hole. Today, I am using both 12-count and 13-count canvas.
Needlepoint canvas is cotton, but they add something to the fabric to make it stiff, and whatever that is, it accepts sublimation ink.
You do need needlepoint canvas, but I think you could try any brand, which is very exciting.
Note – If you wanted to try this same process for something like Cross Stitch fabric, you'd need to test it first because I'm not sure it would accept the sublimation.
Step 2 – Choose a Design
I am using Canva to create my design. Start by creating a canvas the size of your sublimation paper. Mine is 8.5 inches by 11 inches.
Now, you can choose an image right in Canva or upload an image you've created or found on Creative Fabrica. Regardless of where you choose your image, you'll want to look for a similar type of design.
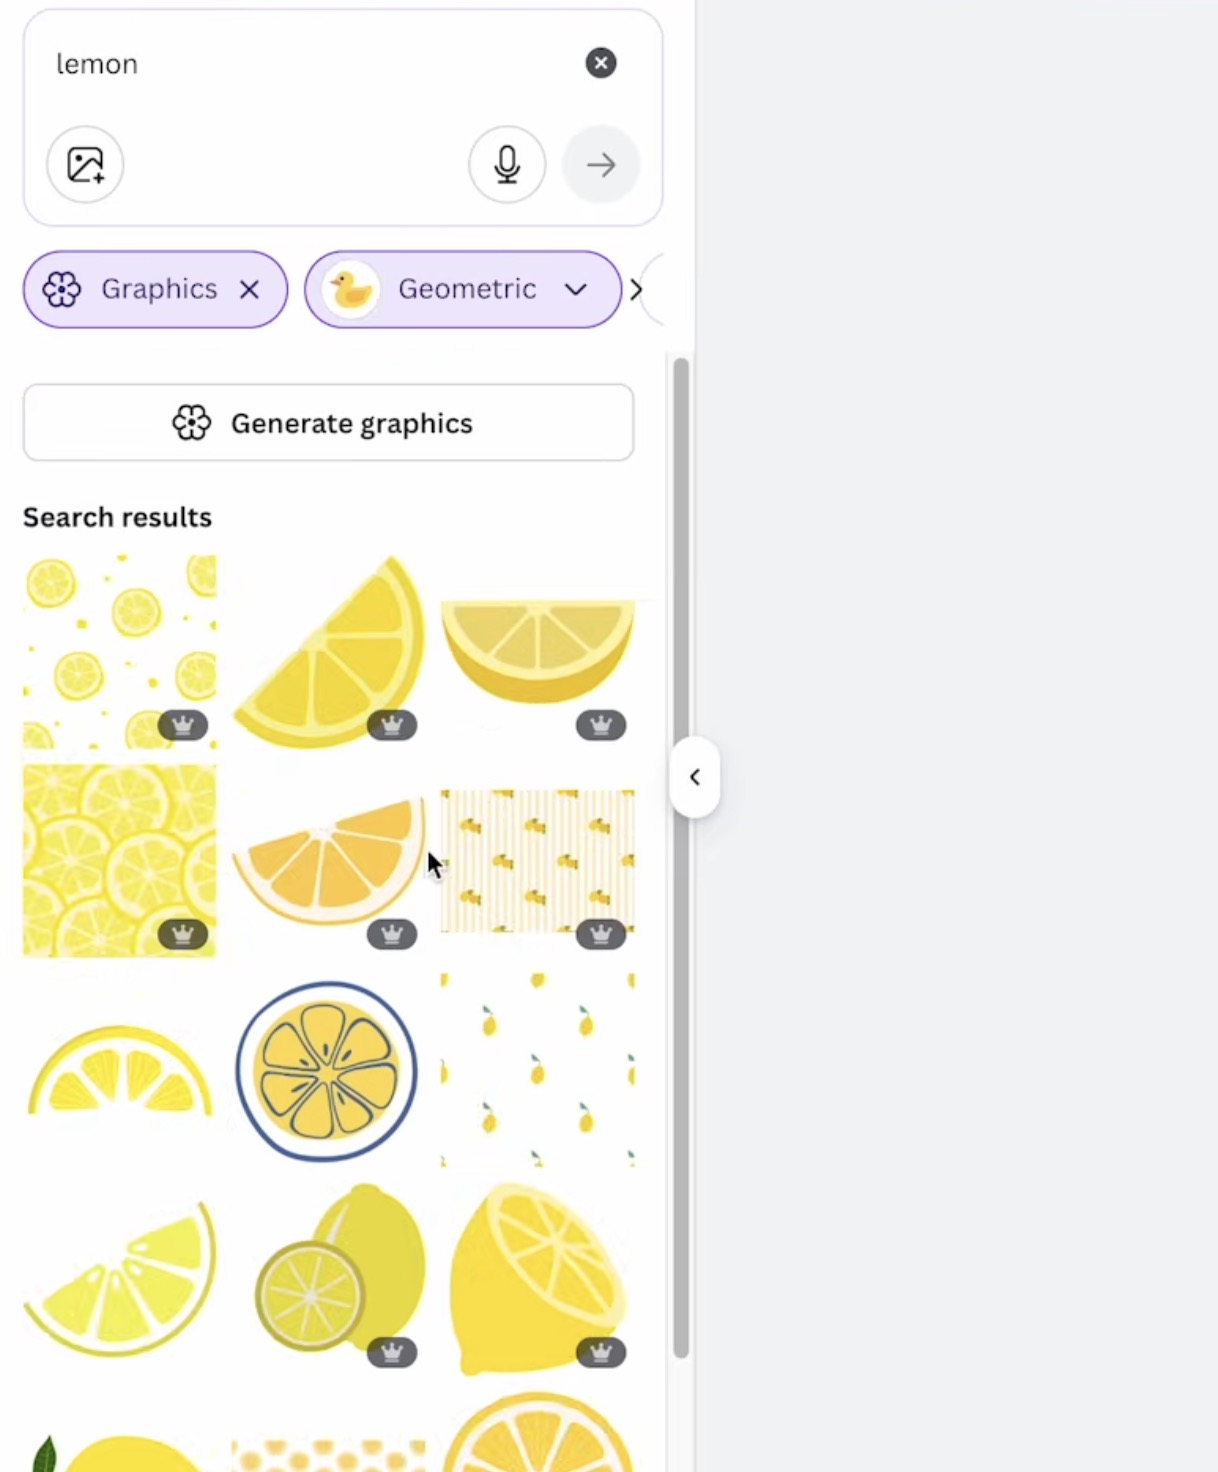
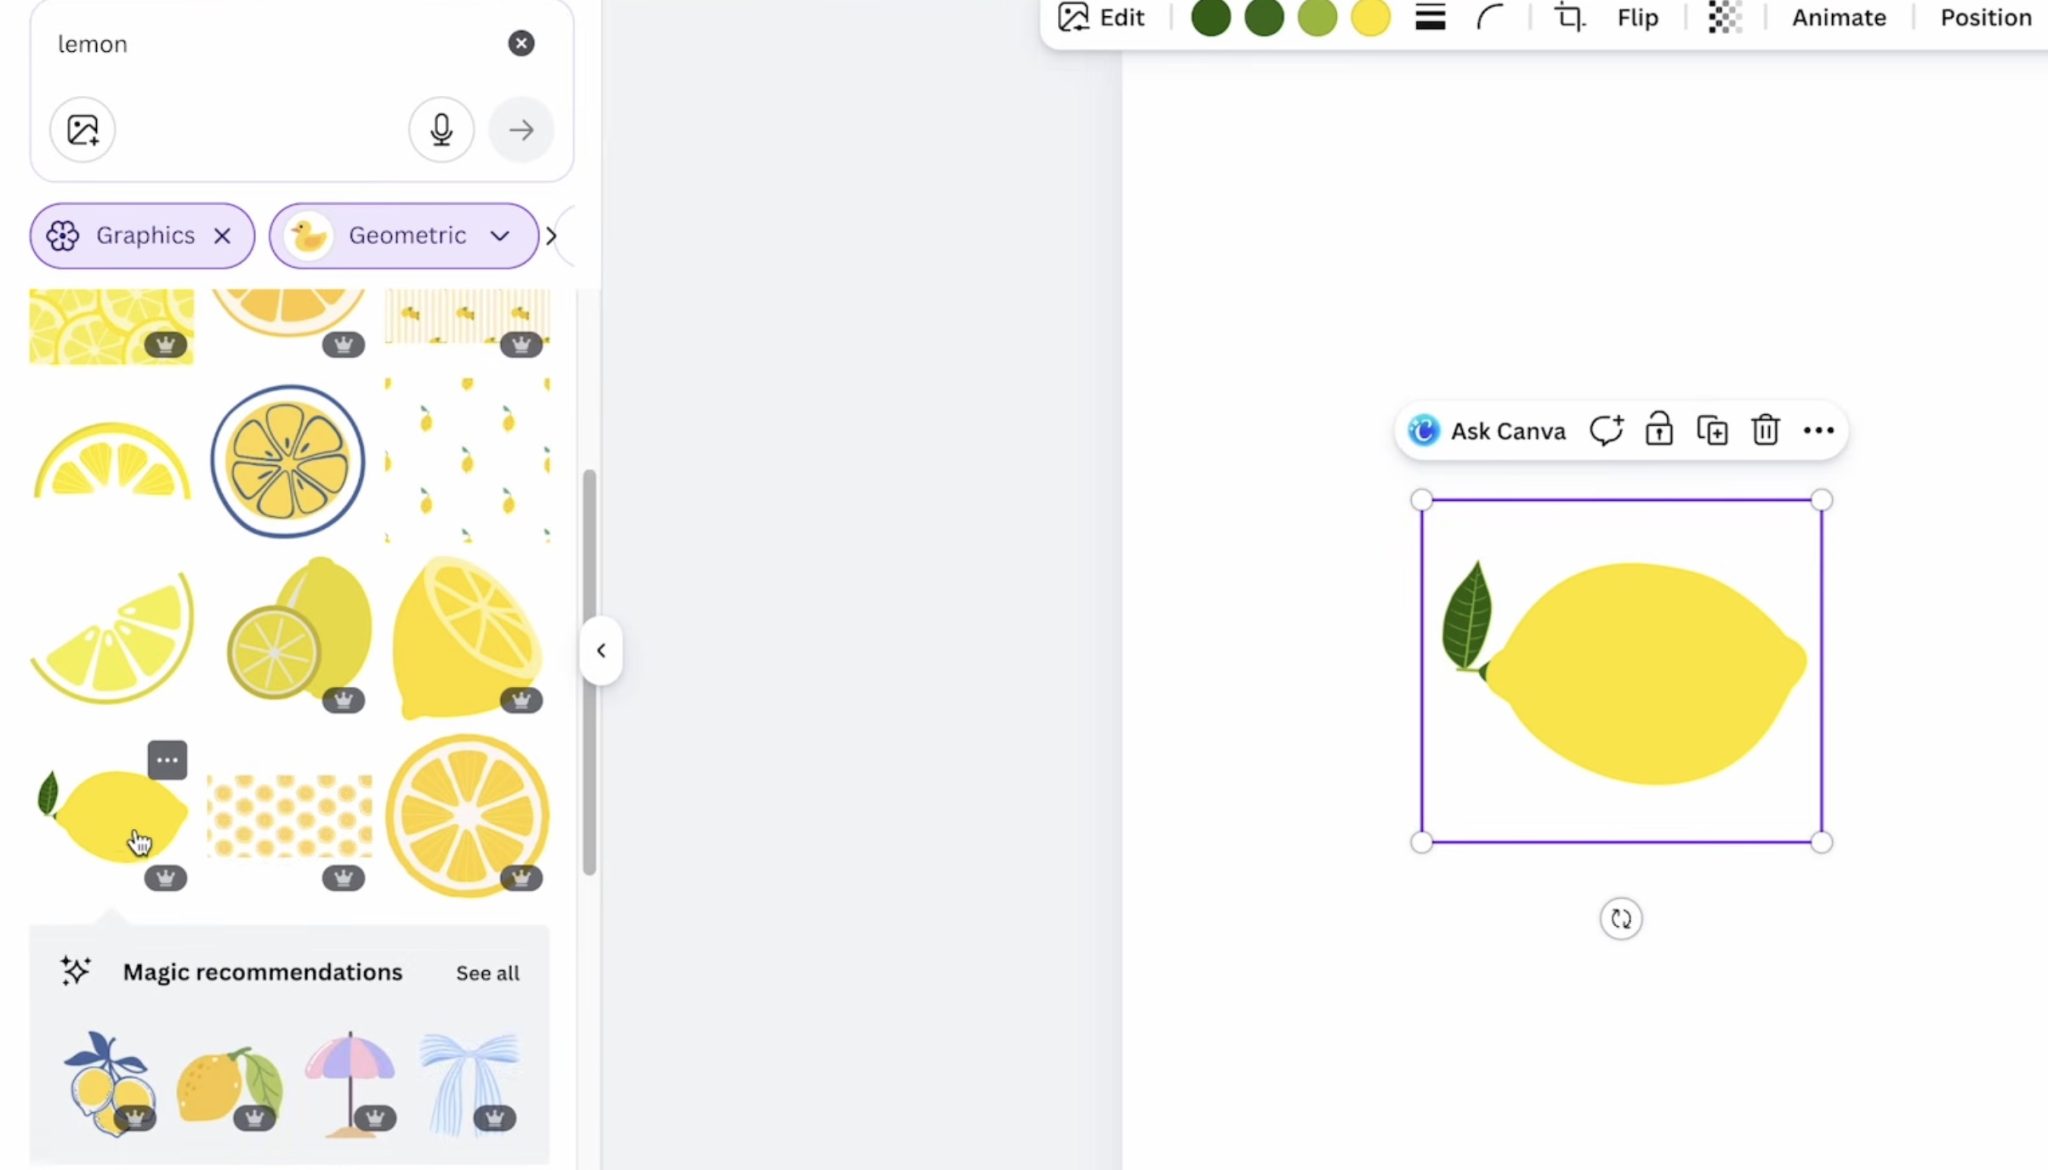
In Canva, if I were looking for a lemon design, I would click on Elements and then type Lemon. From here, select Graphics.
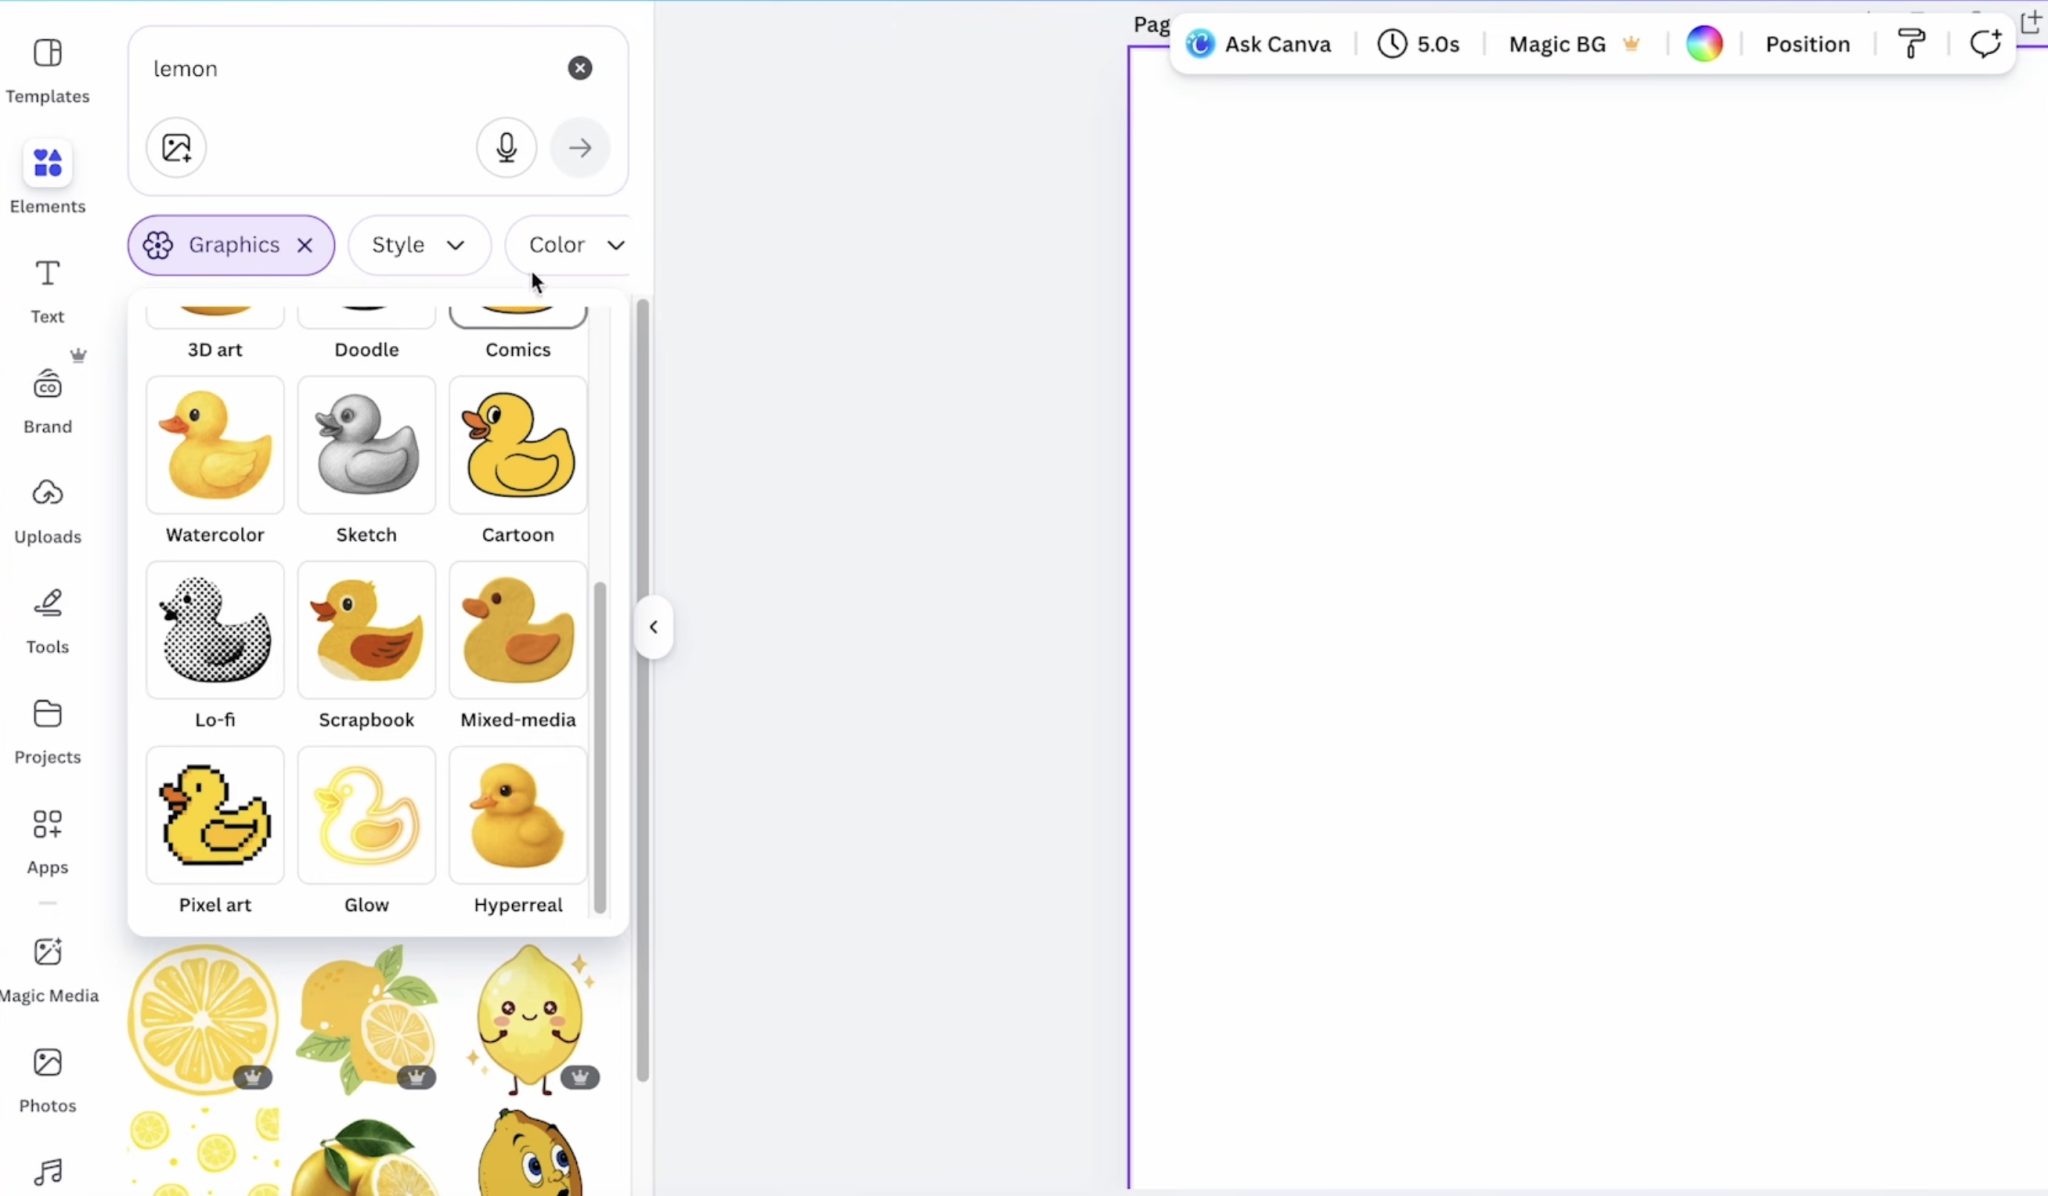
From here, you can click on Style to see images that may work well as a needlepoint design. Options that have worked well for me are Geometric and Scrapbook.
We're looking for simple designs that will work well for the size of canvas we're making.
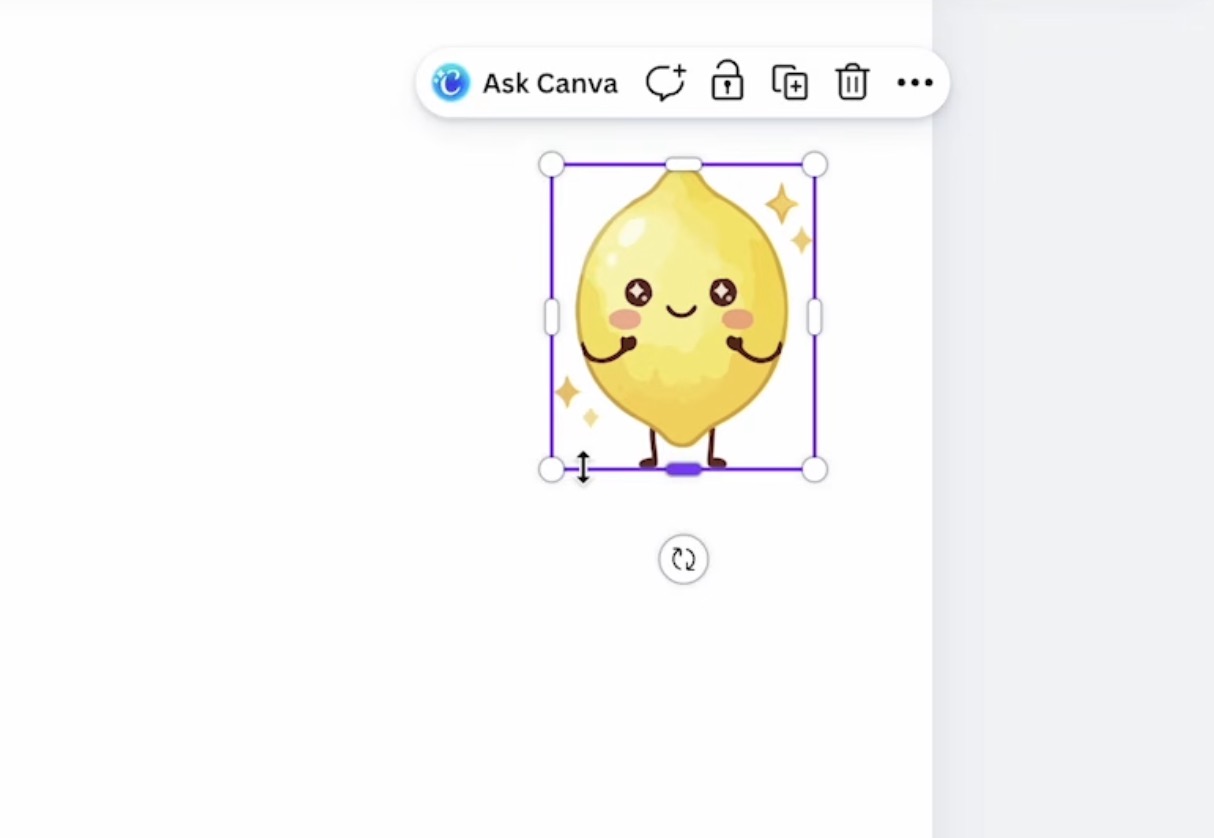
Here you see a really cute lemon design. If I were making a large needlepoint canvas and were more experienced with needlepoint, this design could work.

However, when I make it smaller, you can see that some of the details would be really difficult to stitch.
Geometric is a great Style option; these are usually a simpler design type.
This lemon is a great option. It is simple and can easily be stitched on a needlepoint canvas.
Depending on the size of your project, you may need to remove the vein lines in the leaf. Sometimes, you need to look at the small details to decide if the project will look okay if you lose some of them.
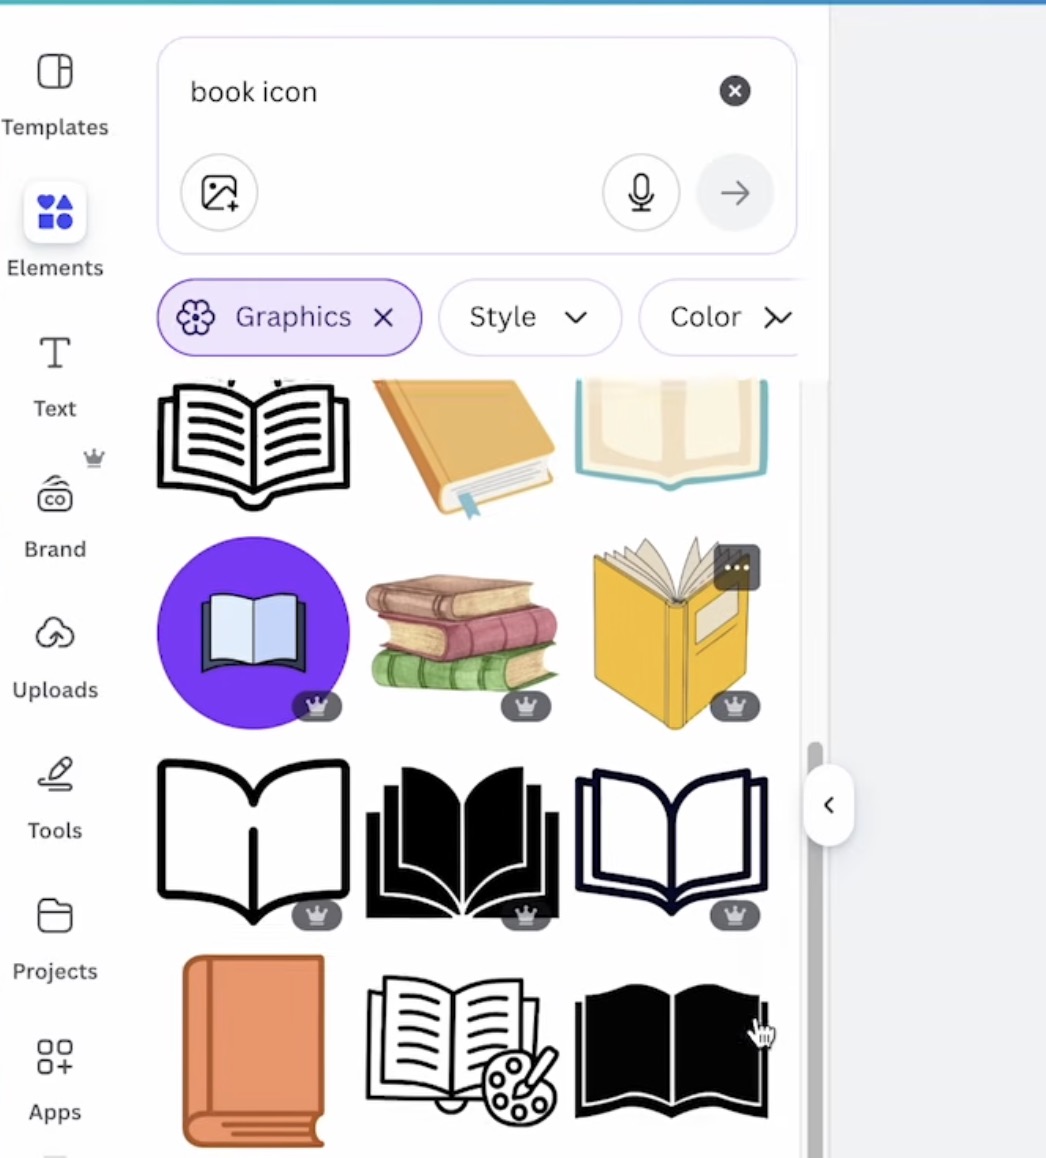
Another way to search for images in Canva and Creative Fabrica is to use the word Icon behind what you're looking for.
Even without using the Geometric style filter, typing Book Icon in the search box brings up images that are simpler than others.
You can also search SVG in Creative Fabrica, Design Bundles, or other design sites.
Comparing Designs in Canva
Here I'm looking for a goose design with a bow that I can add to a needlepoint canvas.
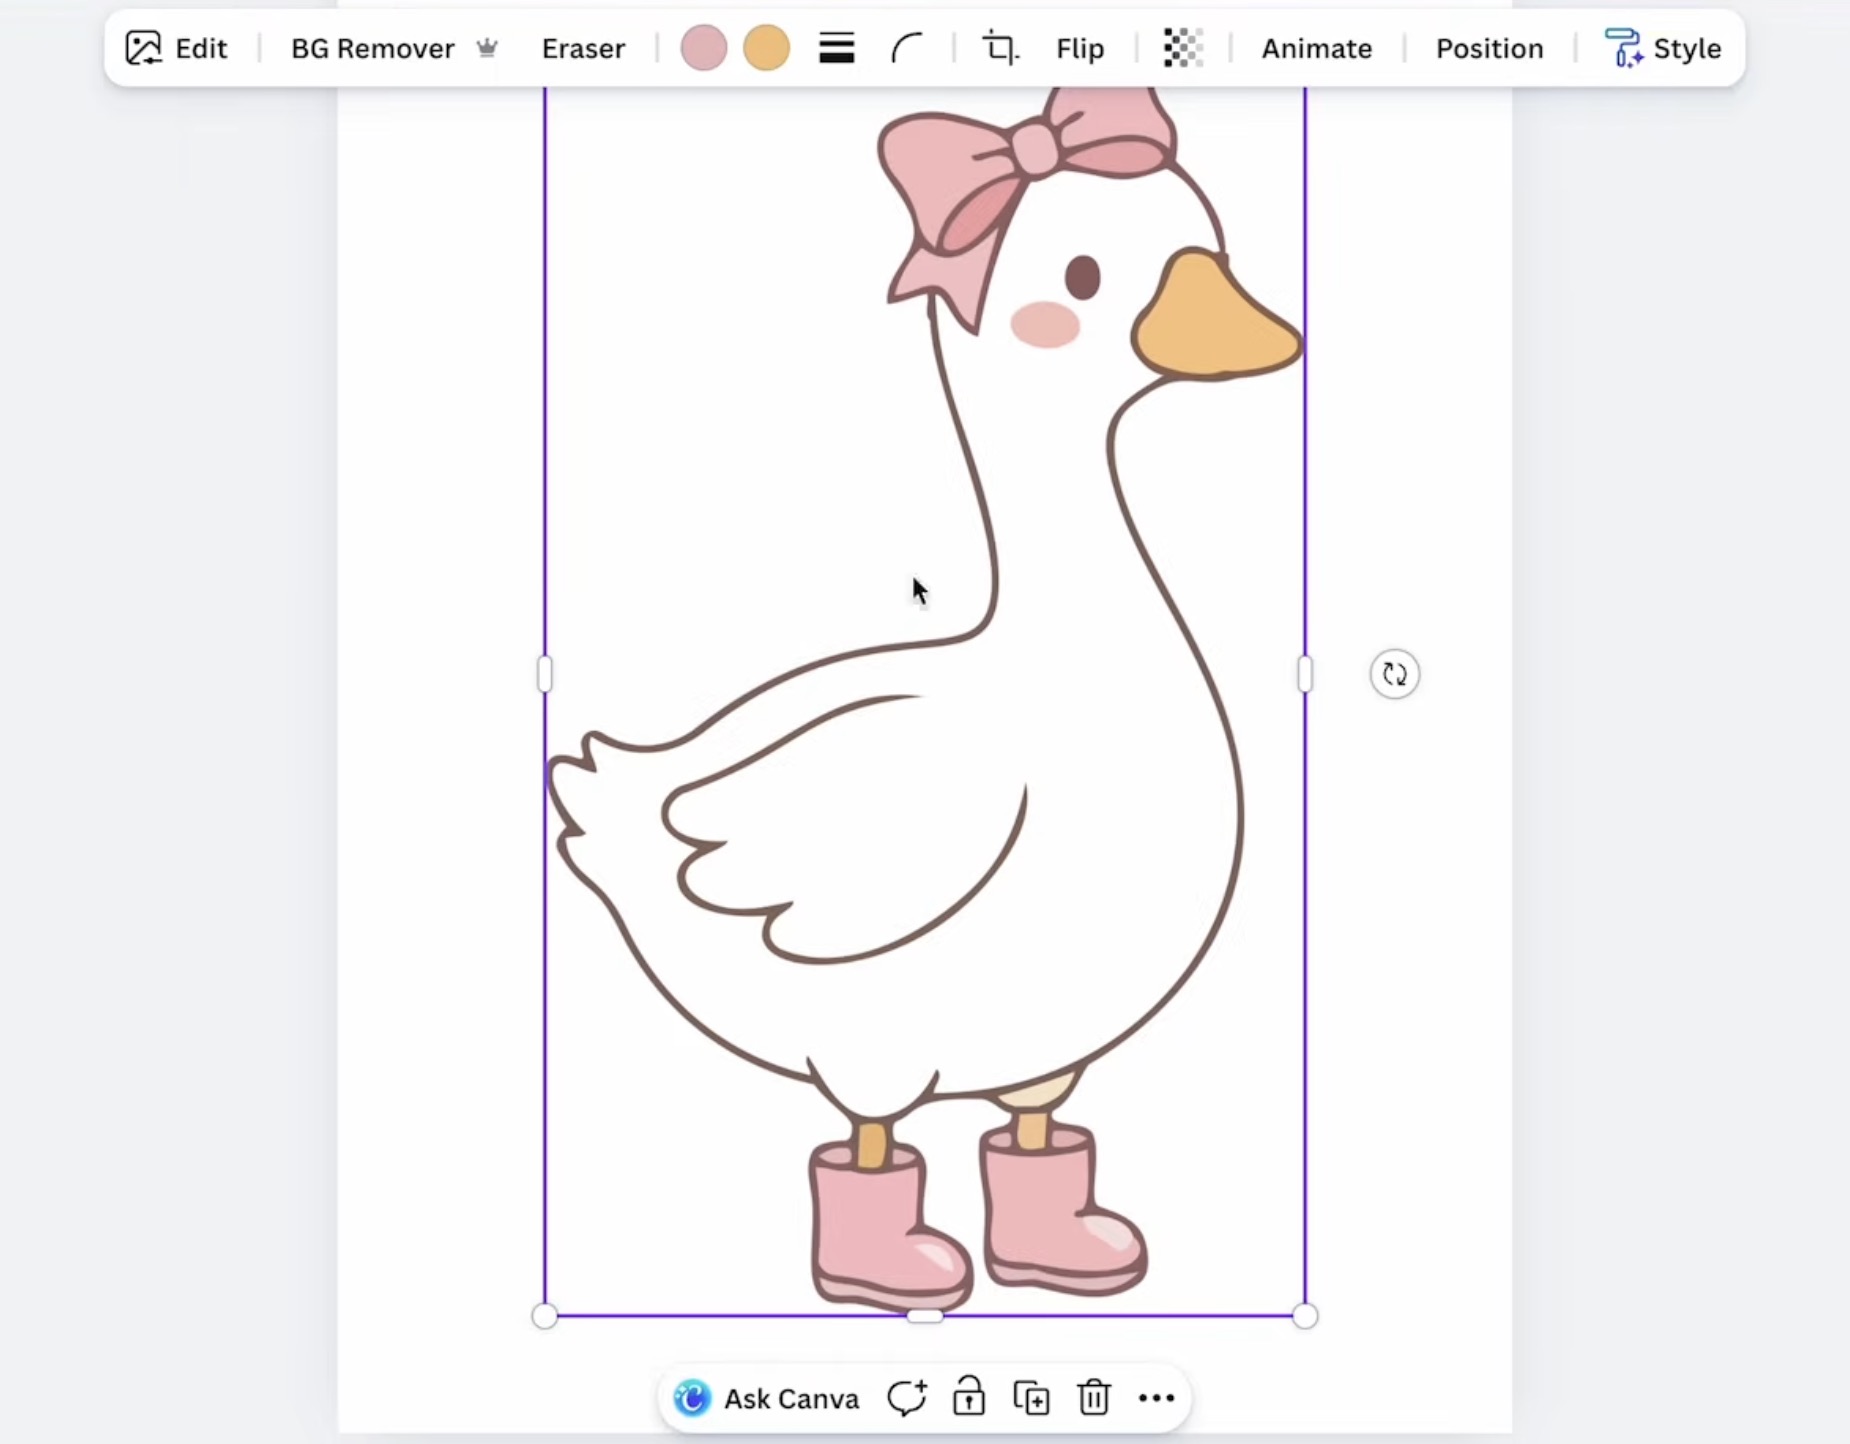
This goose is so cute. I love the bow and the boots, but the thin outline around the whole design would make it difficult to stitch.
This goose design would be much easier to stitch. There is no outline, and even the different colors of the bow are thick enough to stitch, even if it were a smaller project.
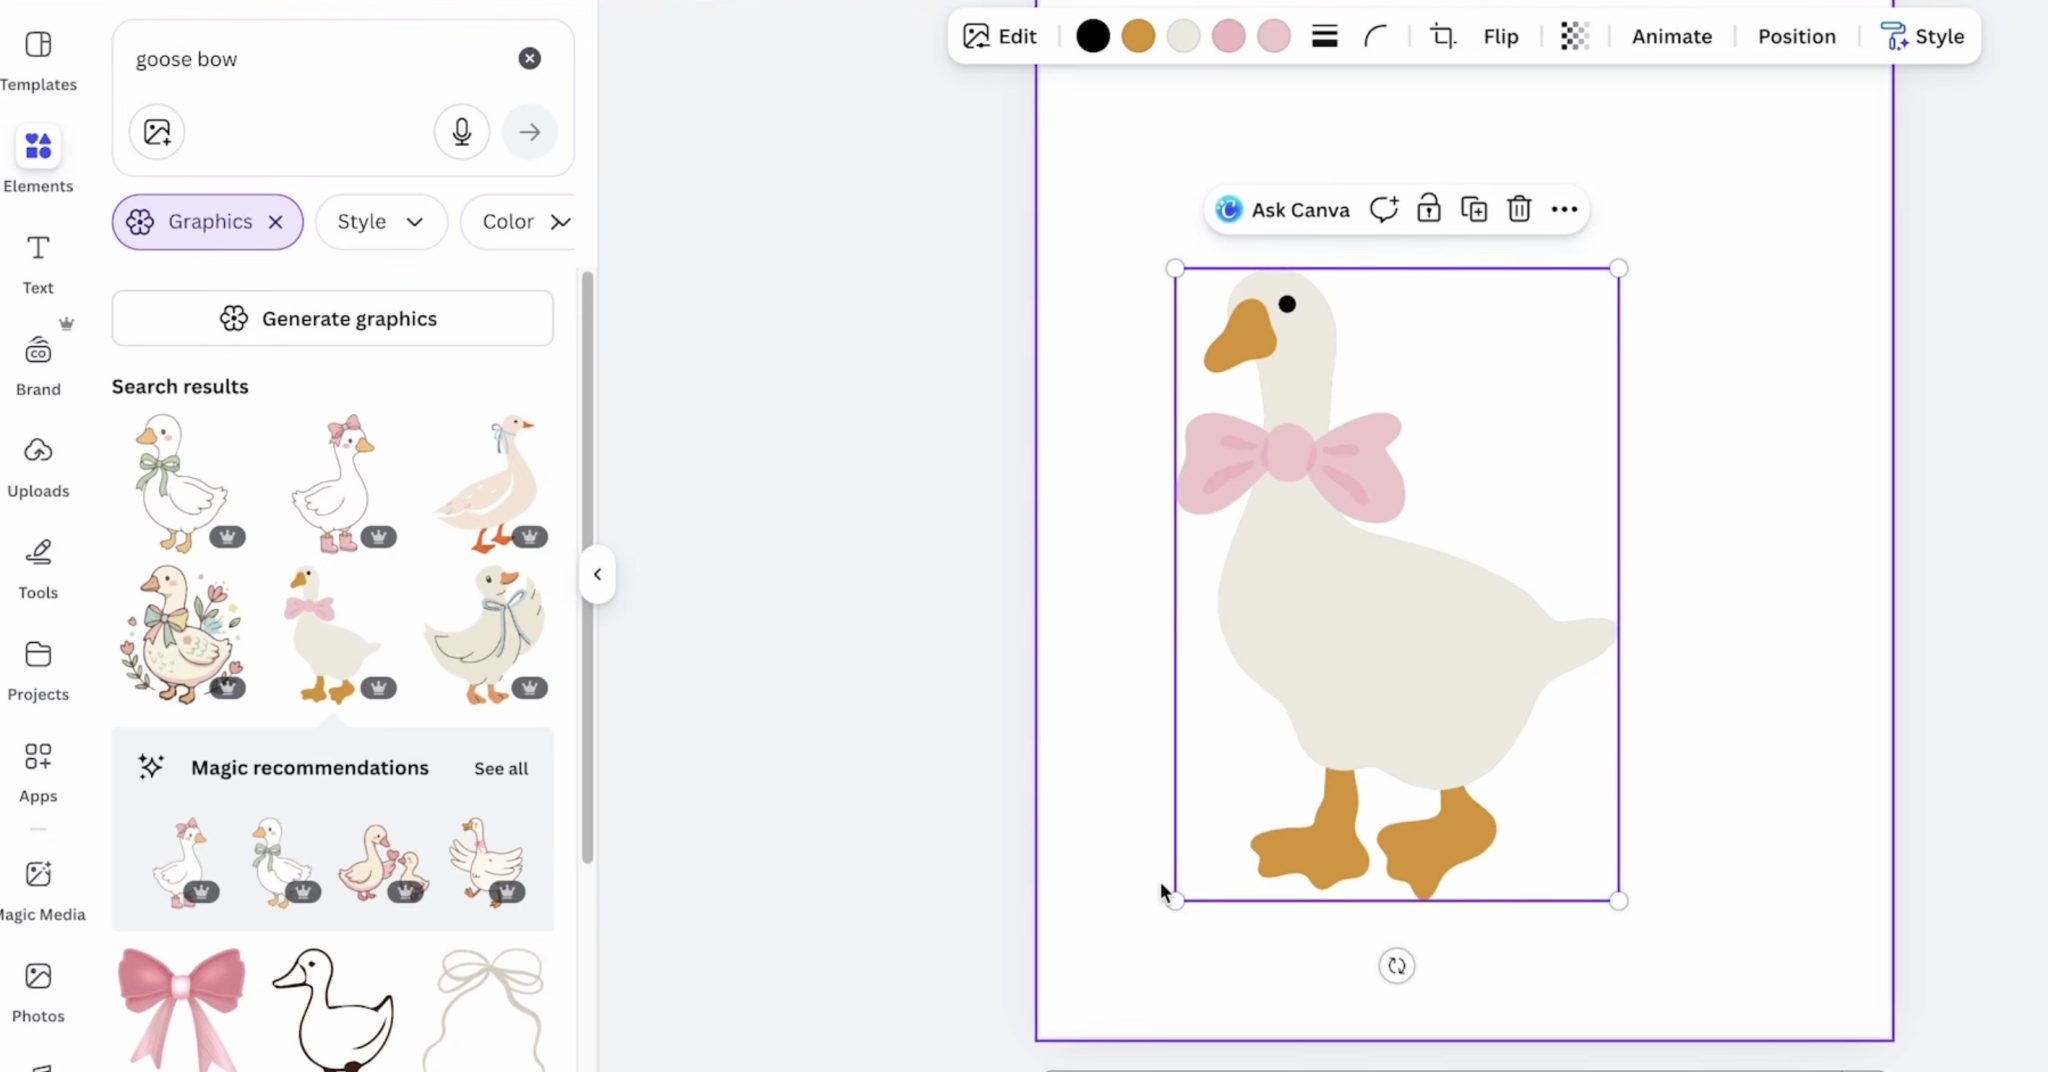
I do feel that over time, you'll learn the type of images that would work well for a needlepoint canvas.
Should I Use an App Like Stichly?
You can absolutely use a site like Stitchly to create needlepoint designs. I haven't spent a lot of time doing that and was looking for an option that would work well for crafters who are just getting started with needlepoint.
If you enjoy creating your own canvases, you may want to move on to a more professional option, like painting your own canvases.
Using sublimation is a great option for those who are new to needlepoint.
Do I Need to Add a Background to My Needlepoint Design?
Whether or not you need to add a background, I think, depends on your design.
Here are two bookmark designs I created.
As you can see, neither design has a straight edge on the top/sides/bottom. This would make it hard to line up with the squares on the canvas.
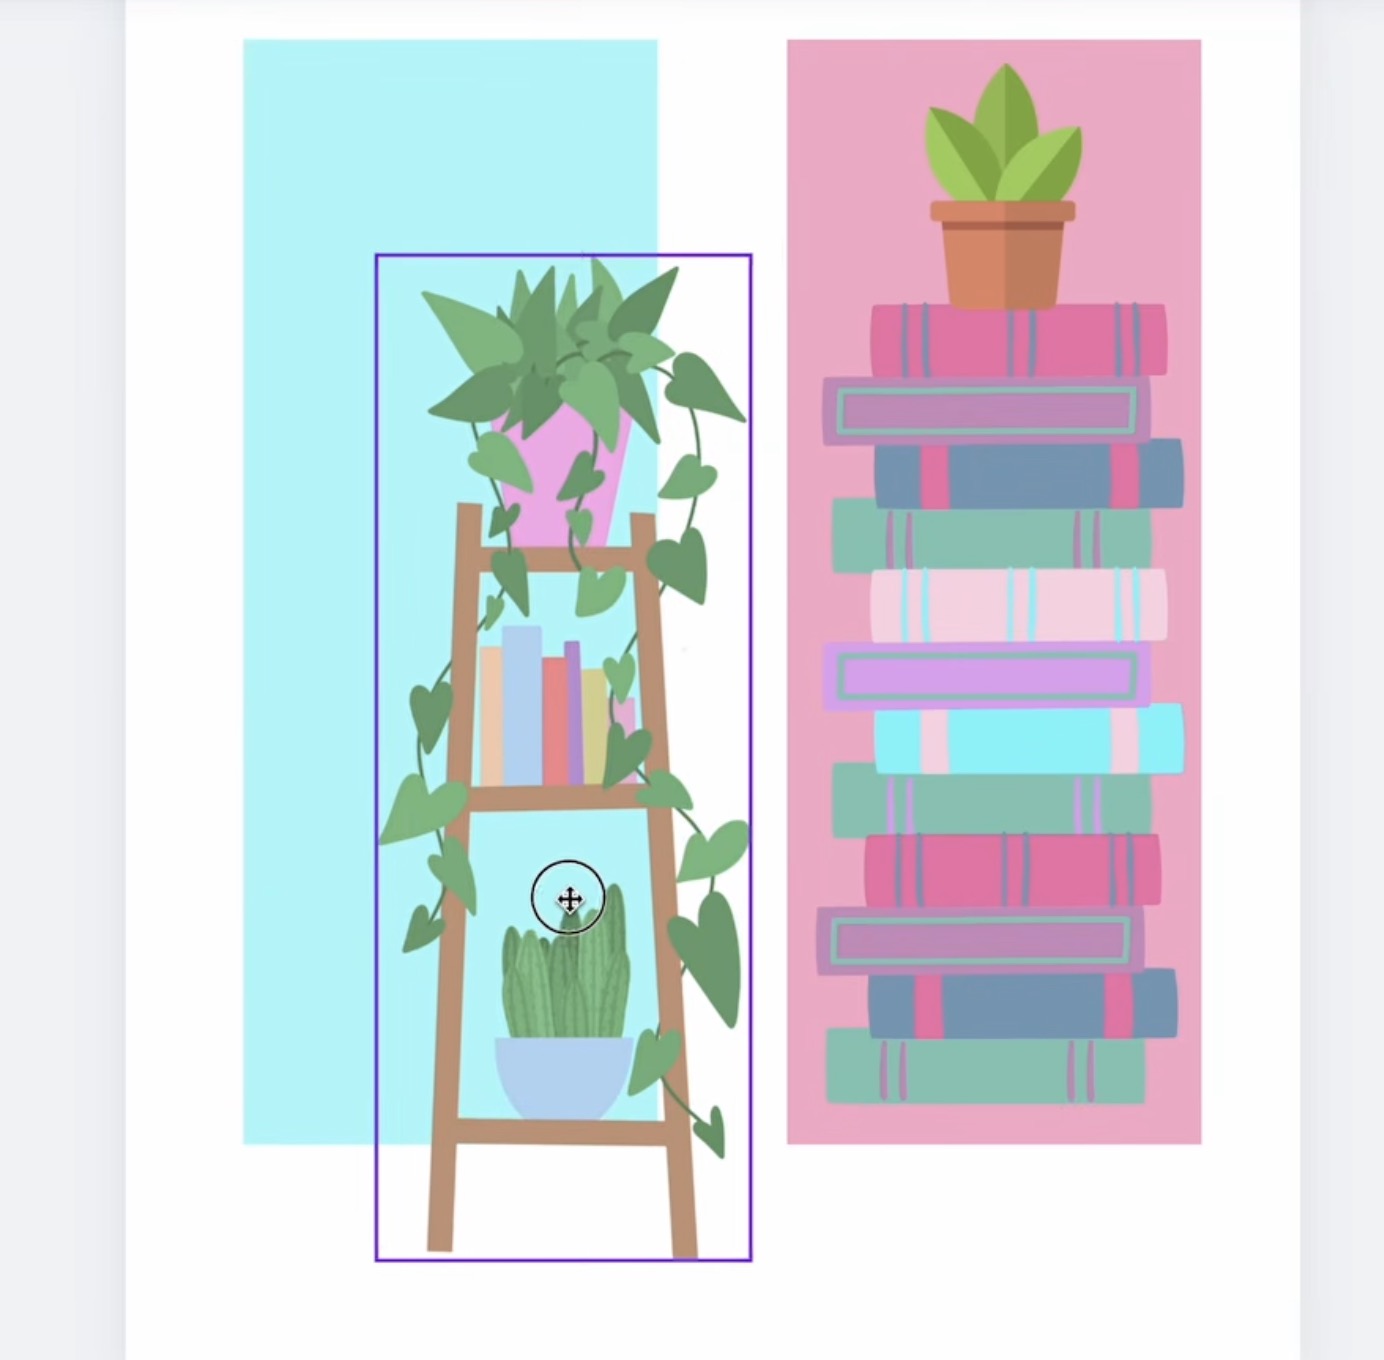
For both of these designs, if you really wanted to use them without a background, you could try to line up a straight line in the design with a line on the canvas.
I find it's easier if you have both a horizontal and a vertical straight line that meet at a corner to line up with the lines on the canvas.
I also think, especially if you're just getting started making your own sublimation needlepoint canvases, having a darker background makes things even easier.
Step 3 – Print the Sublimation Print
Once you have your design set up and sized how you want it in Canva, you're ready to print.
You cannot print directly from Canva. Click Share, Download, and I like to download it as a PDF for Print, and then I choose CMYK.
Print the design on sublimation paper with sublimation ink from a sublimation printer. Be sure to mirror the design when printing.
Step 4 – Prep the Sublimation Print
I like to trim the sublimation print fairly close to the print. To ensure I don't cut into the print at all, I leave a small white outline around the entire design.
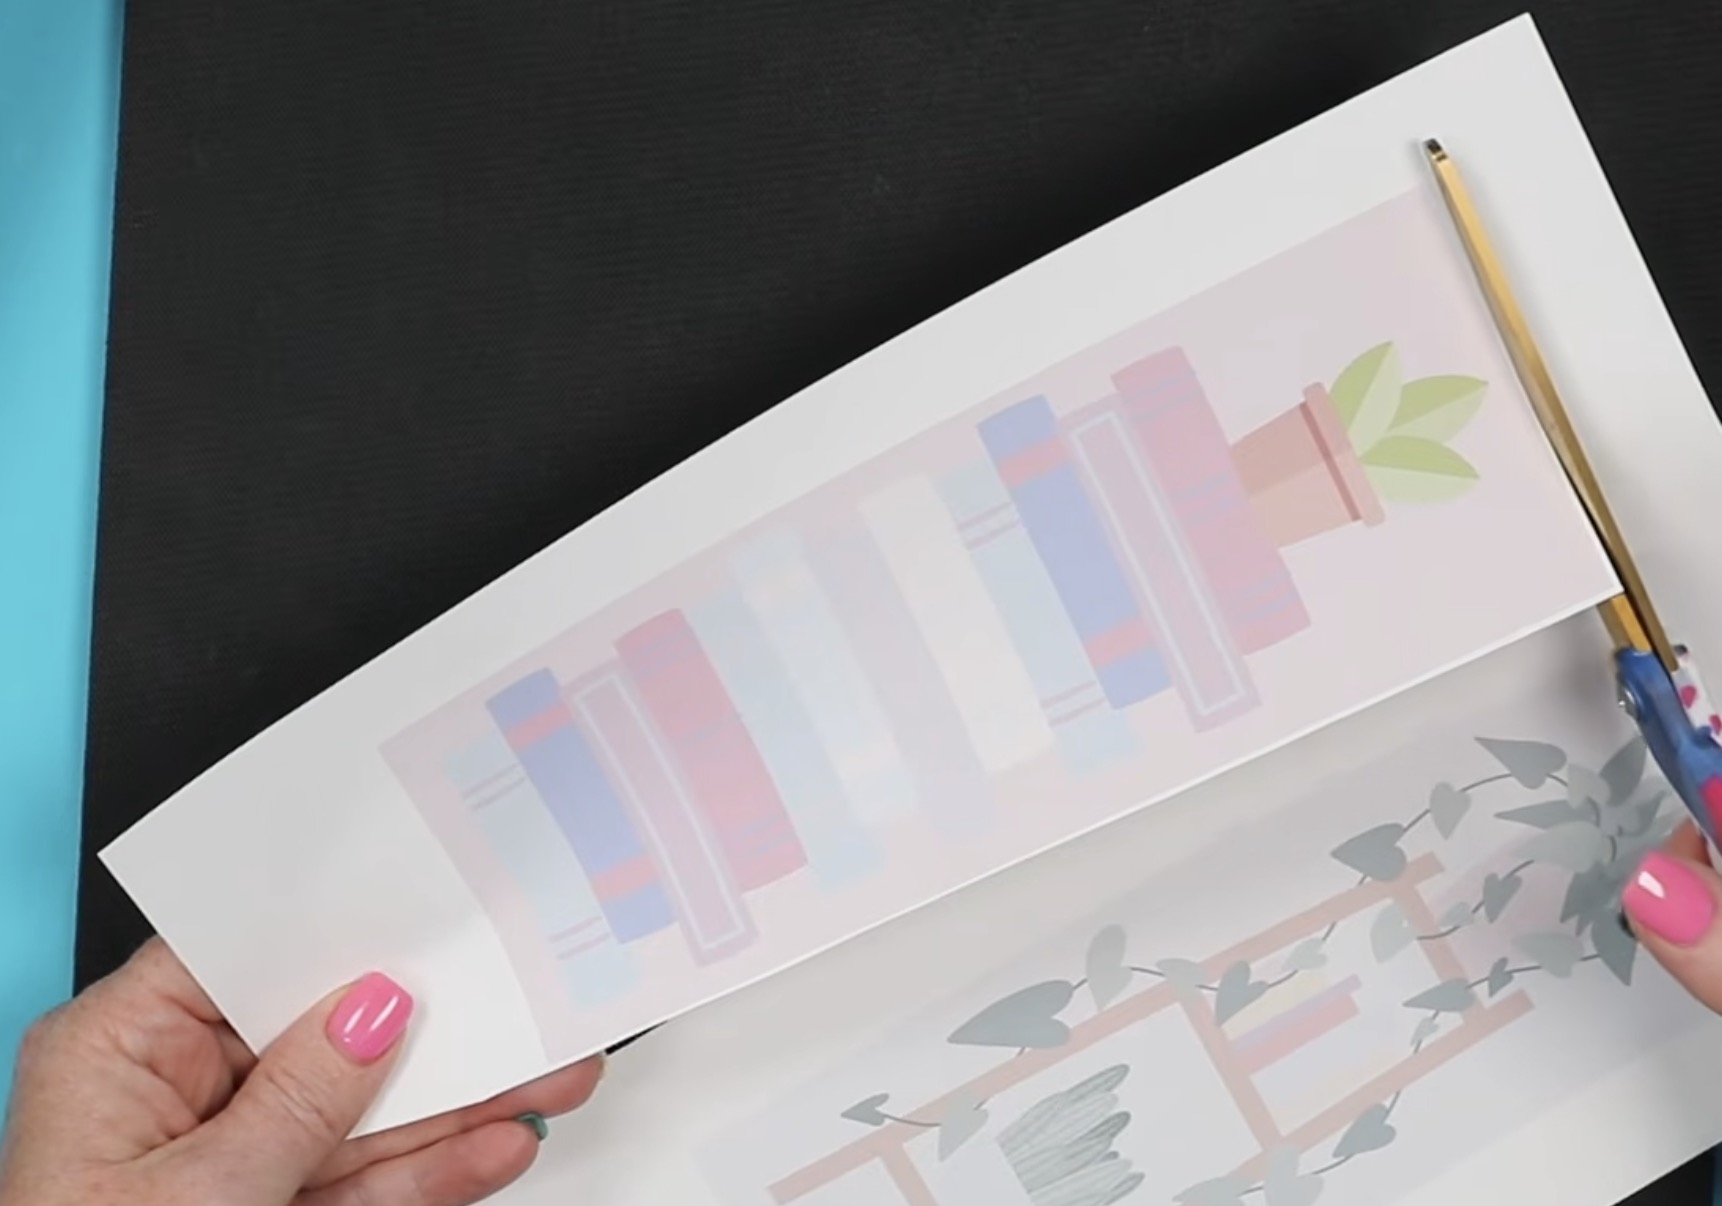
If the background of your design is dark, you may not need to trim away the excess paper. I found it helps a lot if the background is a light color.
Step 5 – Prep the Needlepoint Canvas
The needlepoint canvas I purchased came in pieces much larger than I need for one project. This allows me to make a lot of projects with one canvas.
I like to have at least an inch and a half of canvas on all sides of the design.
This piece of canvas is about the correct size, so I'm going to cut the canvas on that same row.
To keep the canvas straight, follow one row of squares.
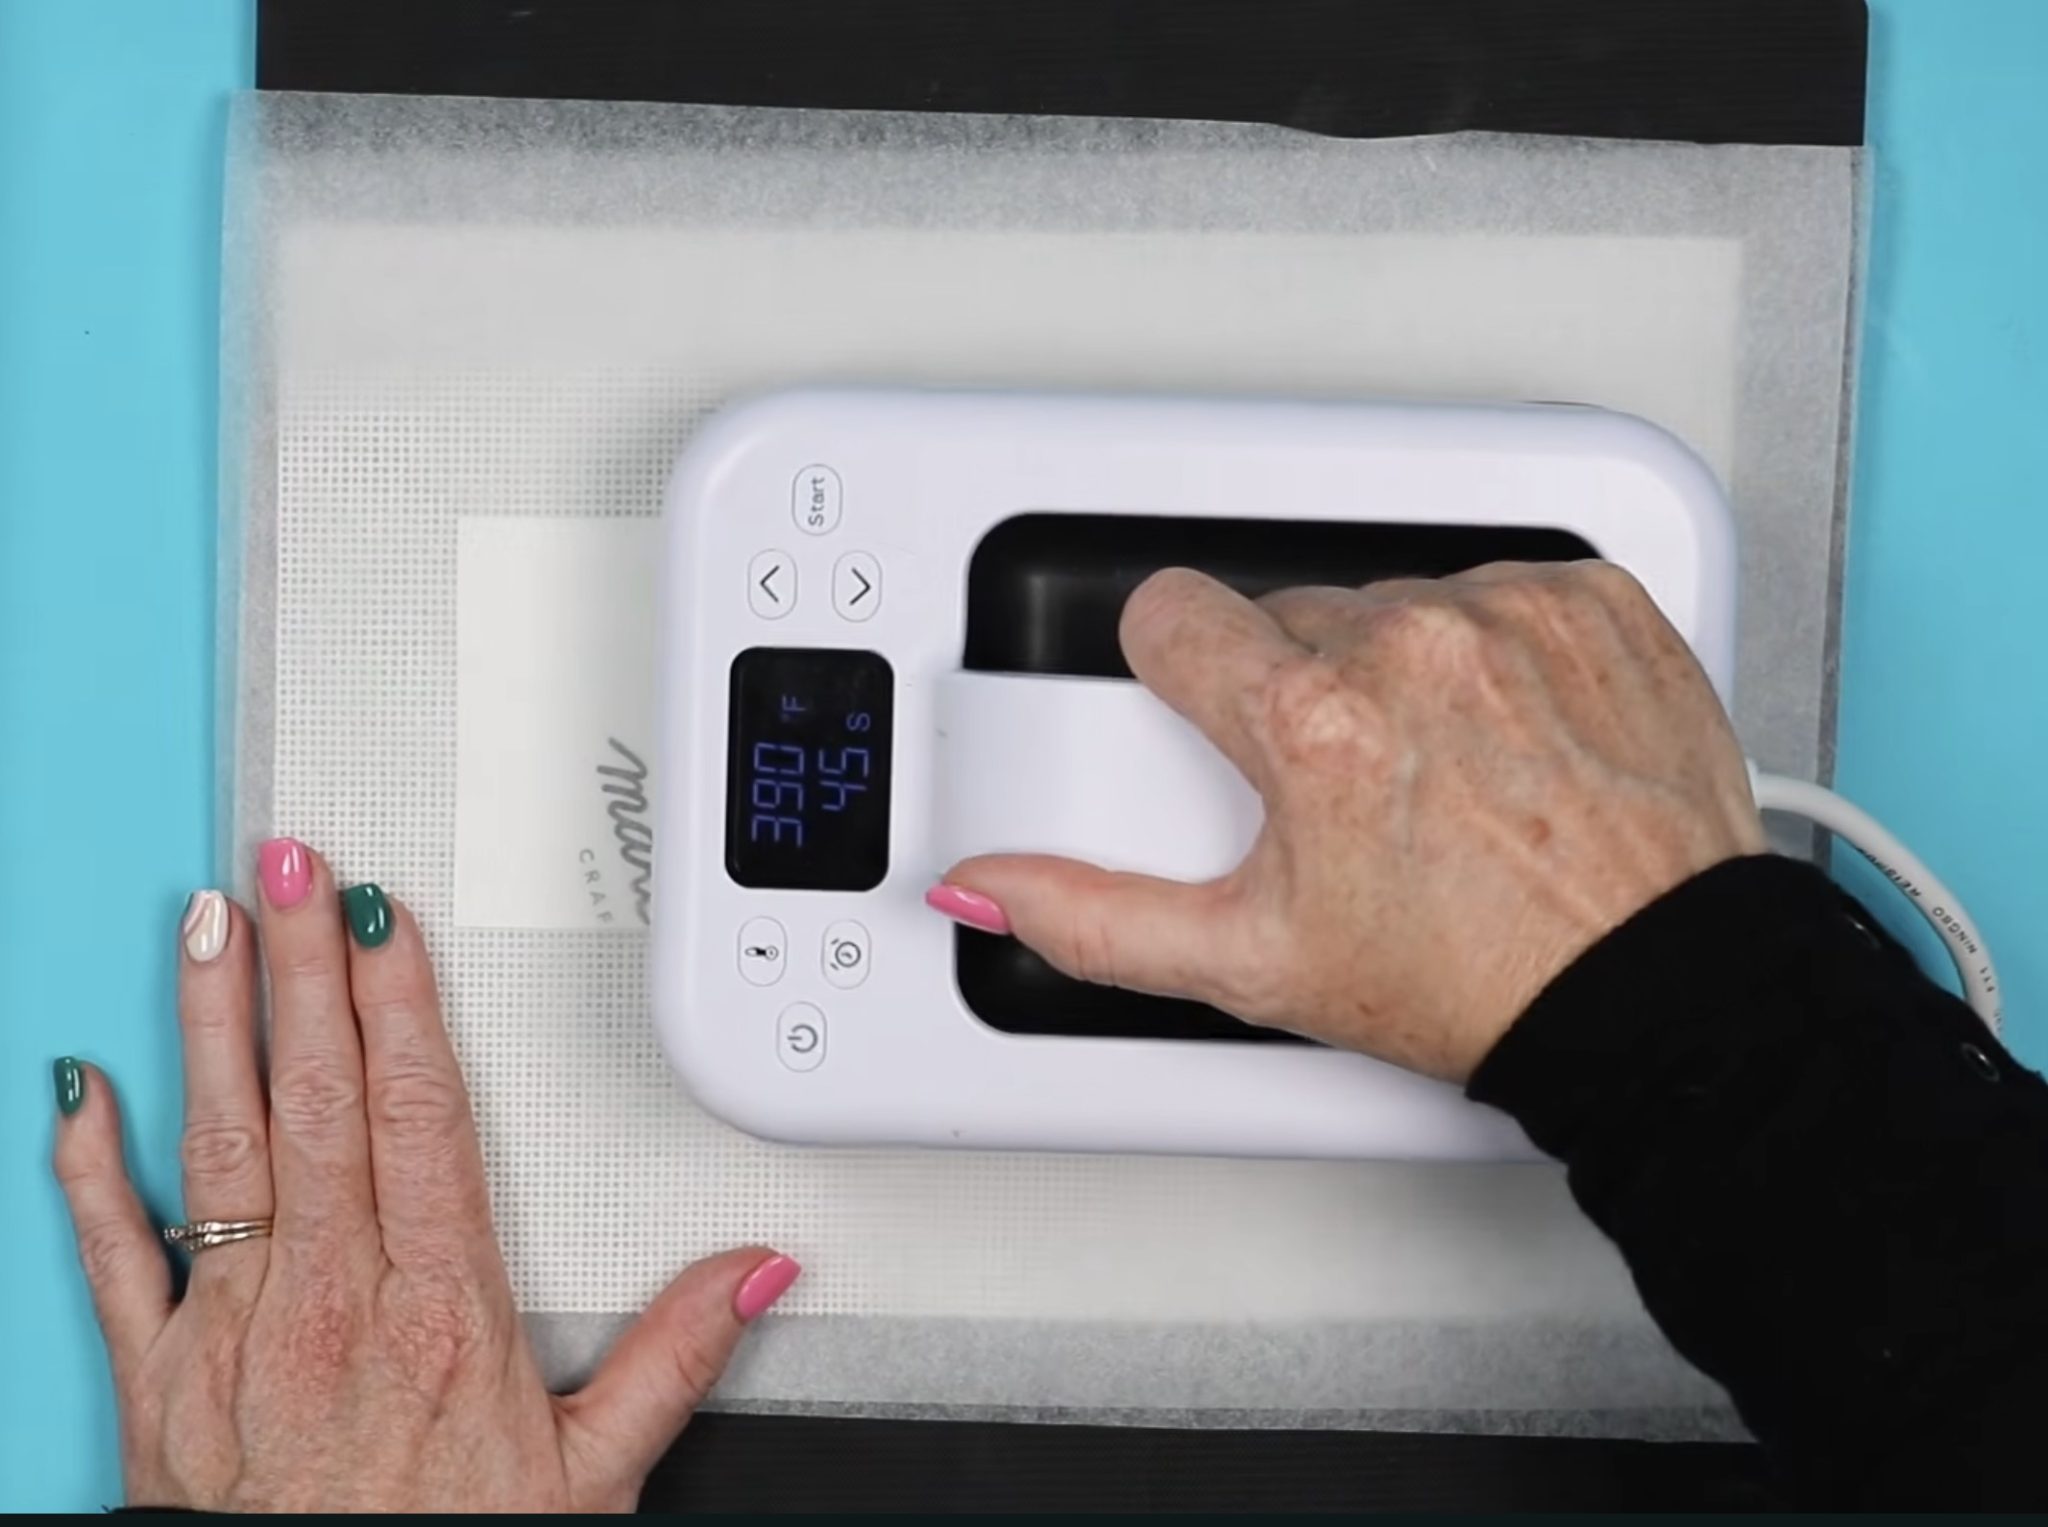
Next, place the needlepoint canvas on a heat-resistant mat and pre-press to flatten the needlepoint and remove any moisture.
A lot of these brands hold a lot of moisture. Since moisture is the enemy of sublimation, we want to remove as much of that moisture as we can.
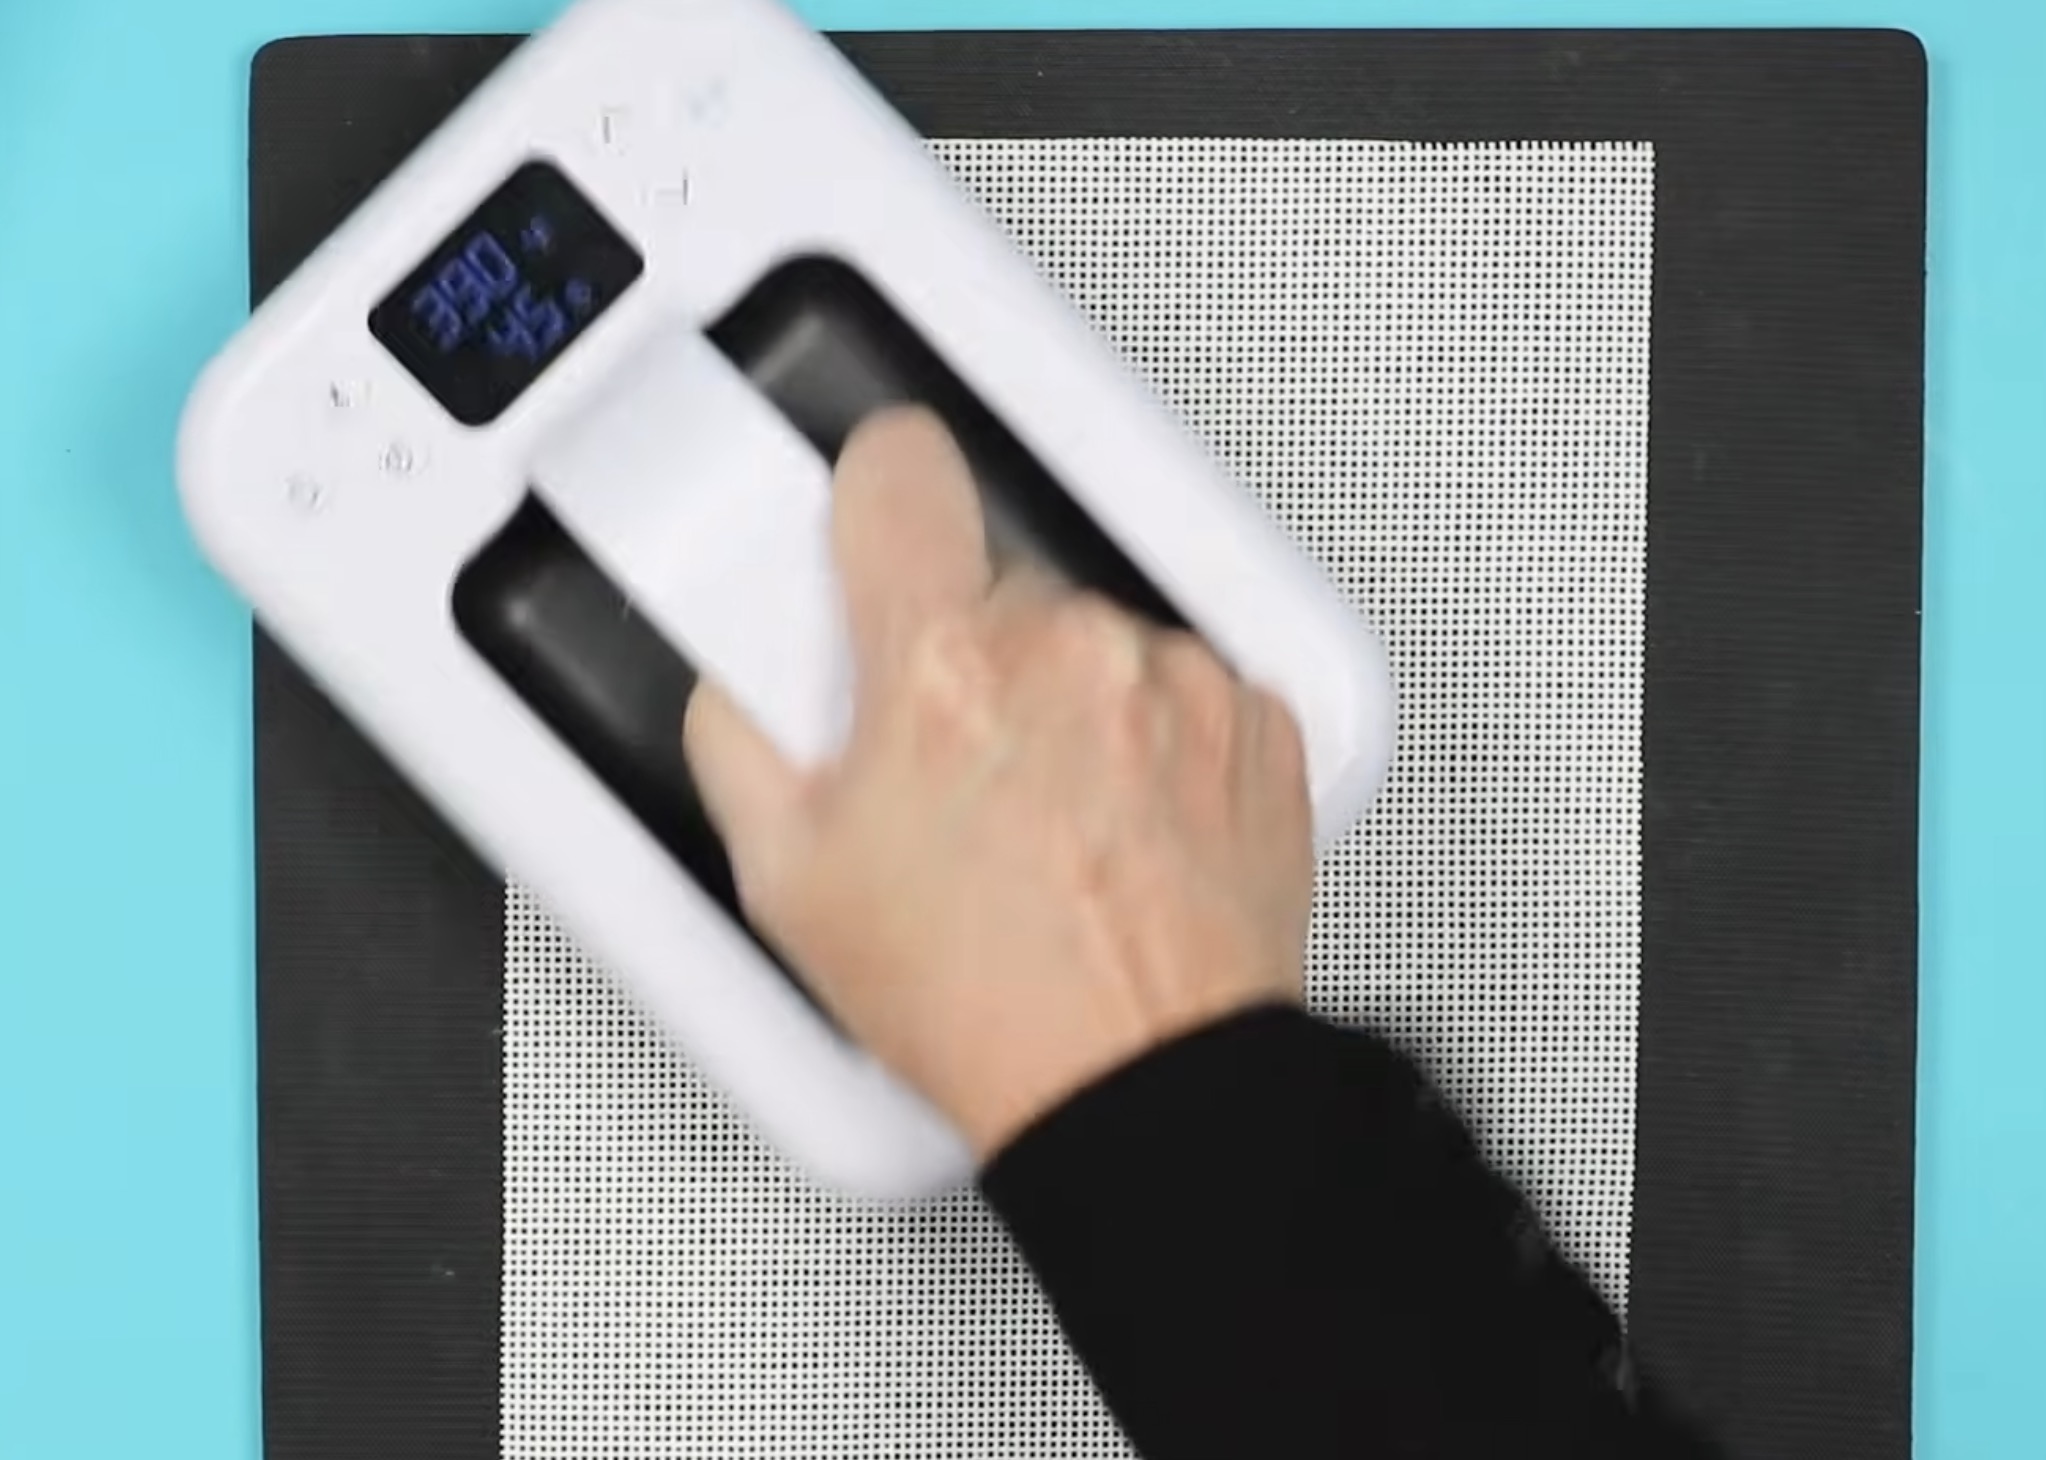
I have my heat press set at 390 degrees for 45 seconds, and I'm going to press the entire canvas.
If you see moisture on your heat-resistant mat, flip it over before pressing the sublimation print.
Now, we have a flat needlepoint canvas we can add a sublimation design to.
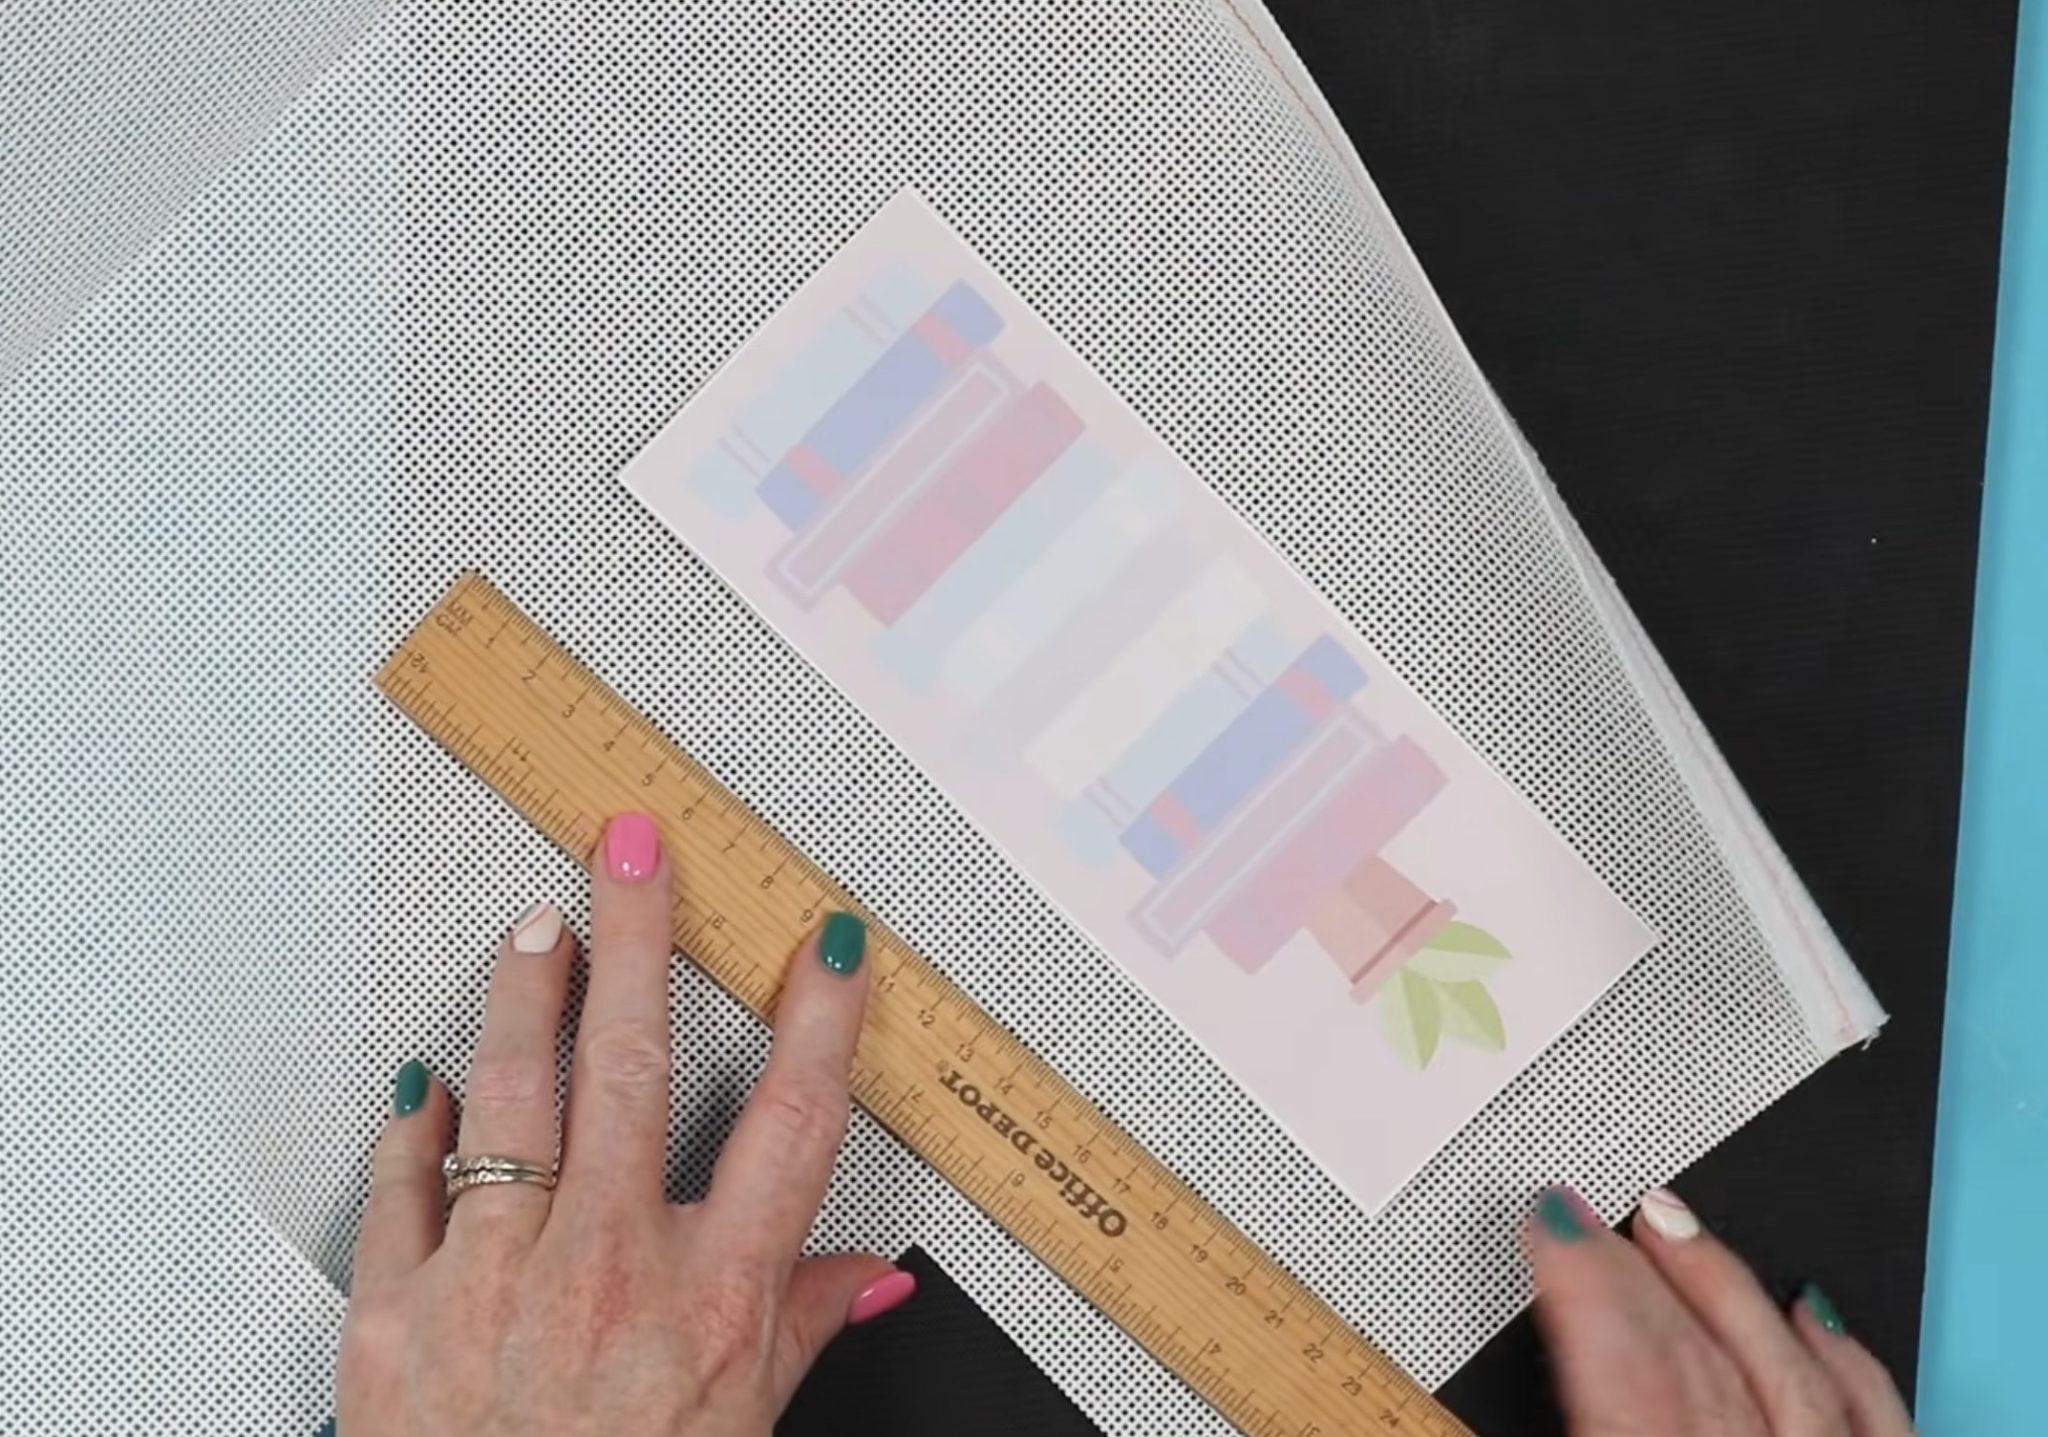
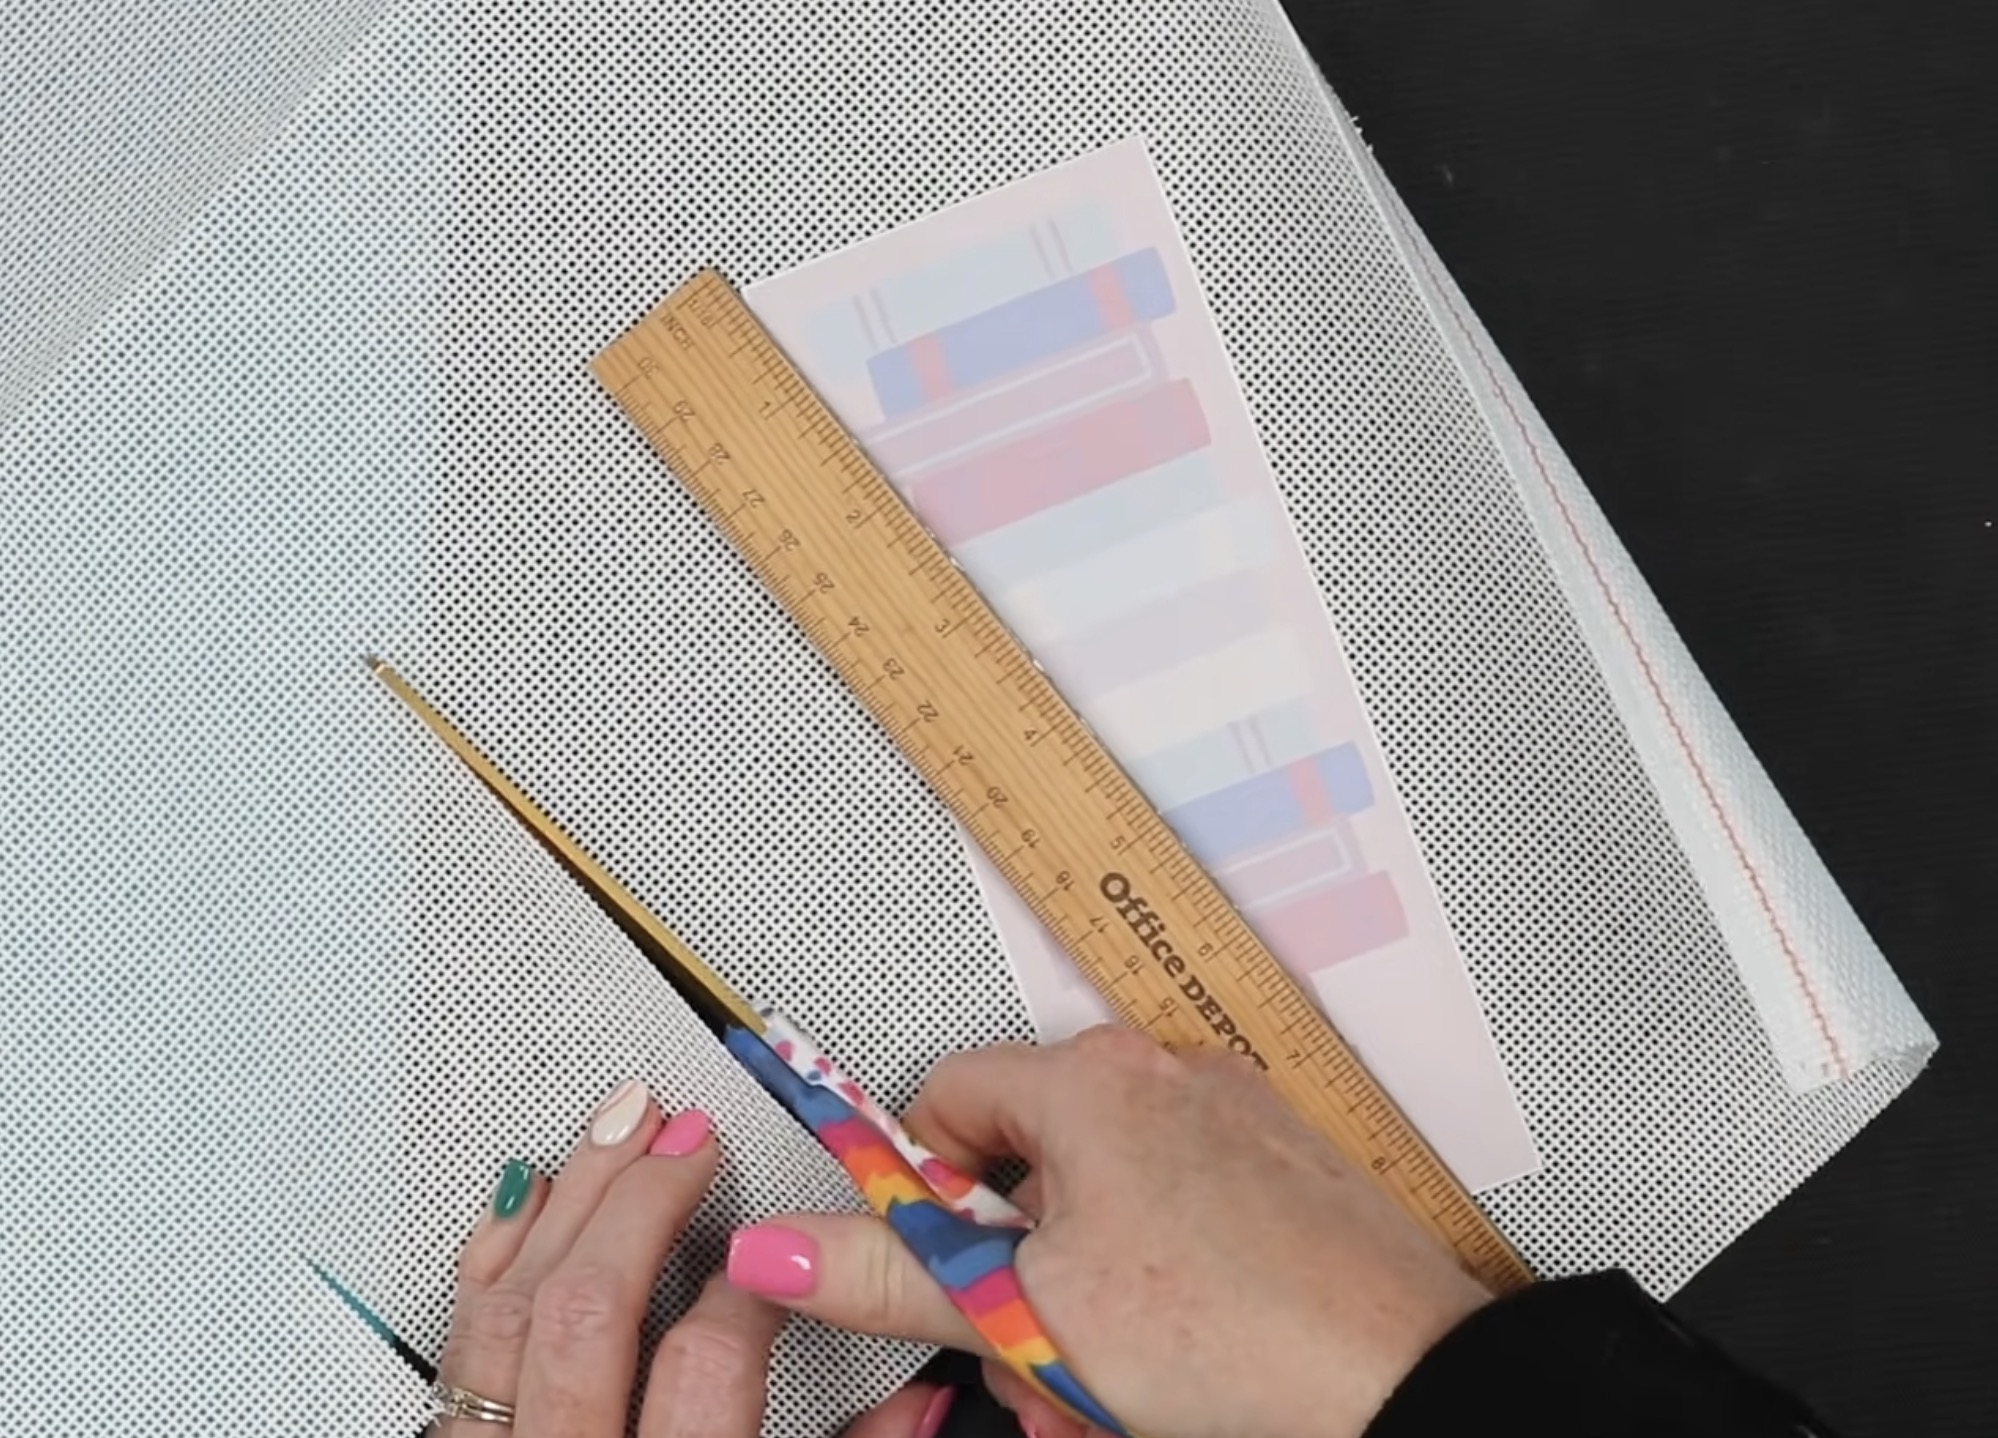
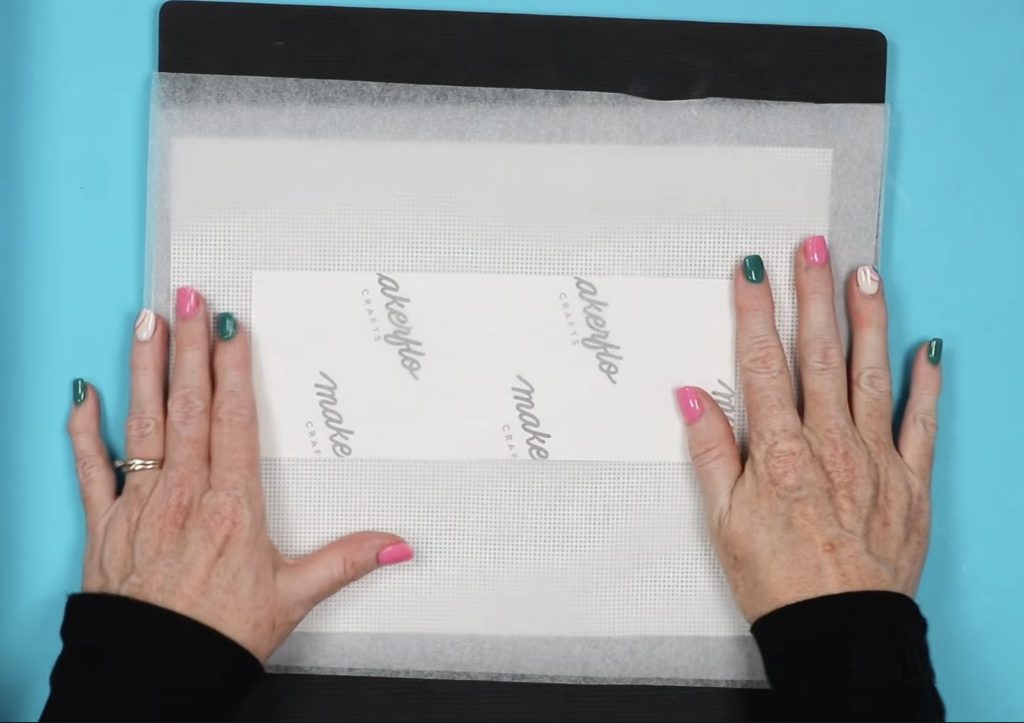
Step 6 – Locate Sublimation Print to Needlepoint Canvas
Next, we're going to add the sublimation print to the needlepoint canvas.
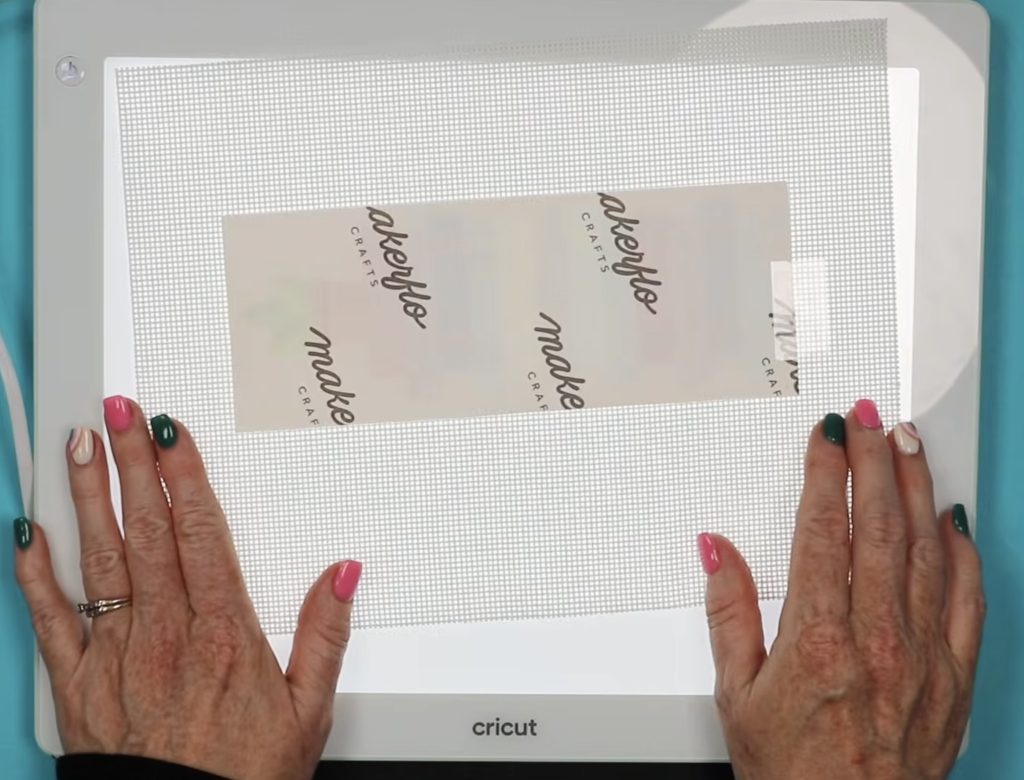
I've found that using a light pad like the Cricut BrightPad, is helpful in locating the print, especially if your background is light.
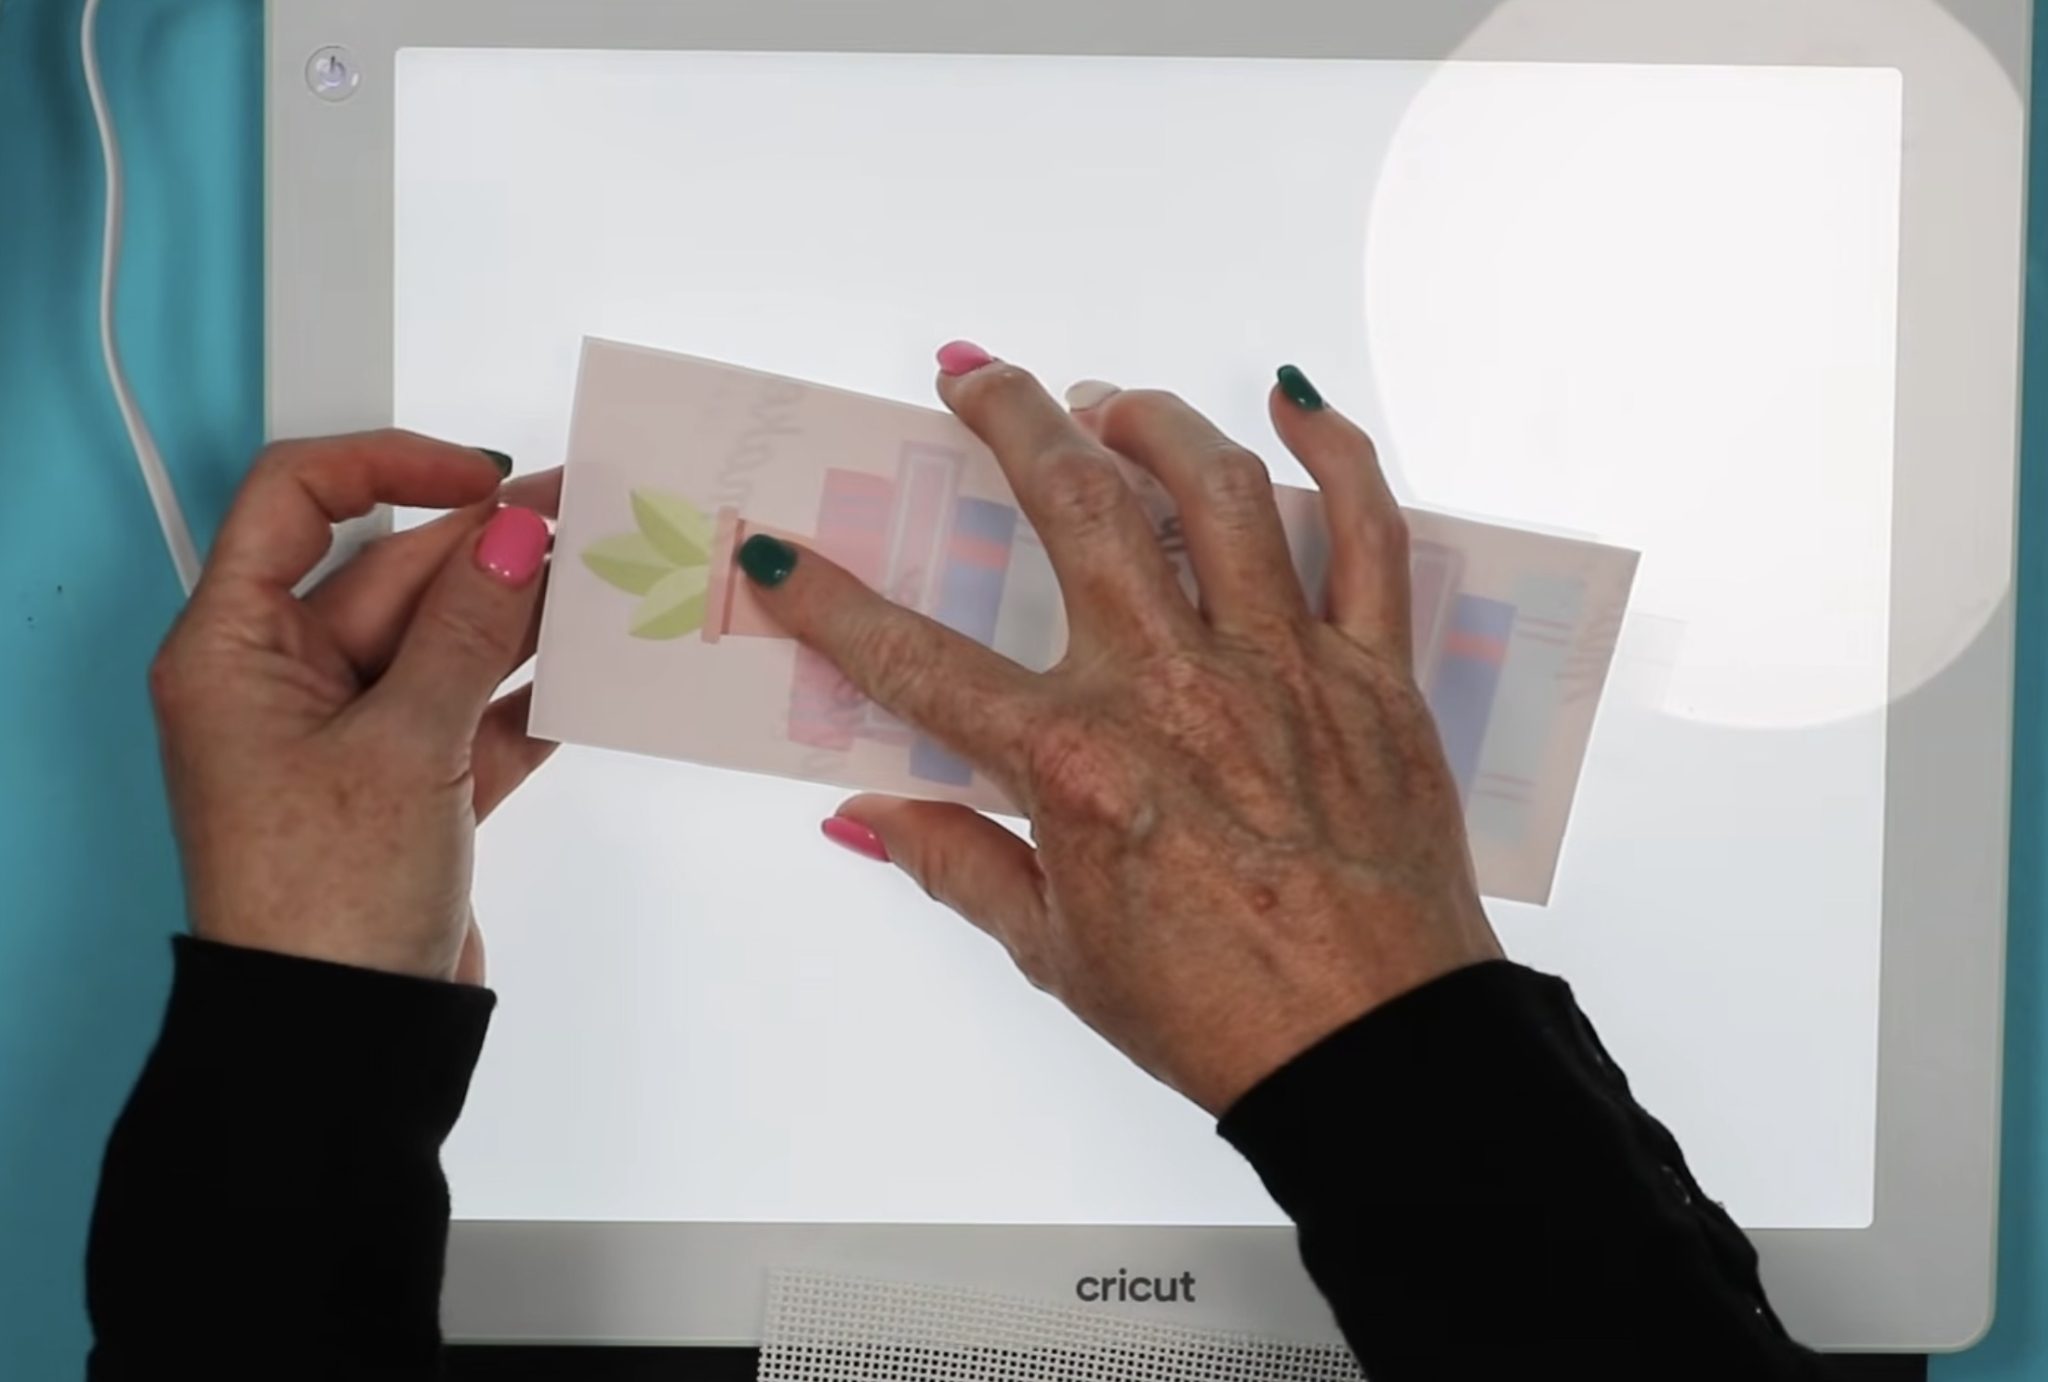
Place the sublimation print, design side up, on the light pad. I like to add a piece of heat-resistant tape, sticky side up, to each end. This helps keep the needlepoint canvas in place once I have it located.
Now, my goal is to line up the edge of the sublimation print with the squares in the needlepoint canvas. I want the line in the middle of the two rows of squares.
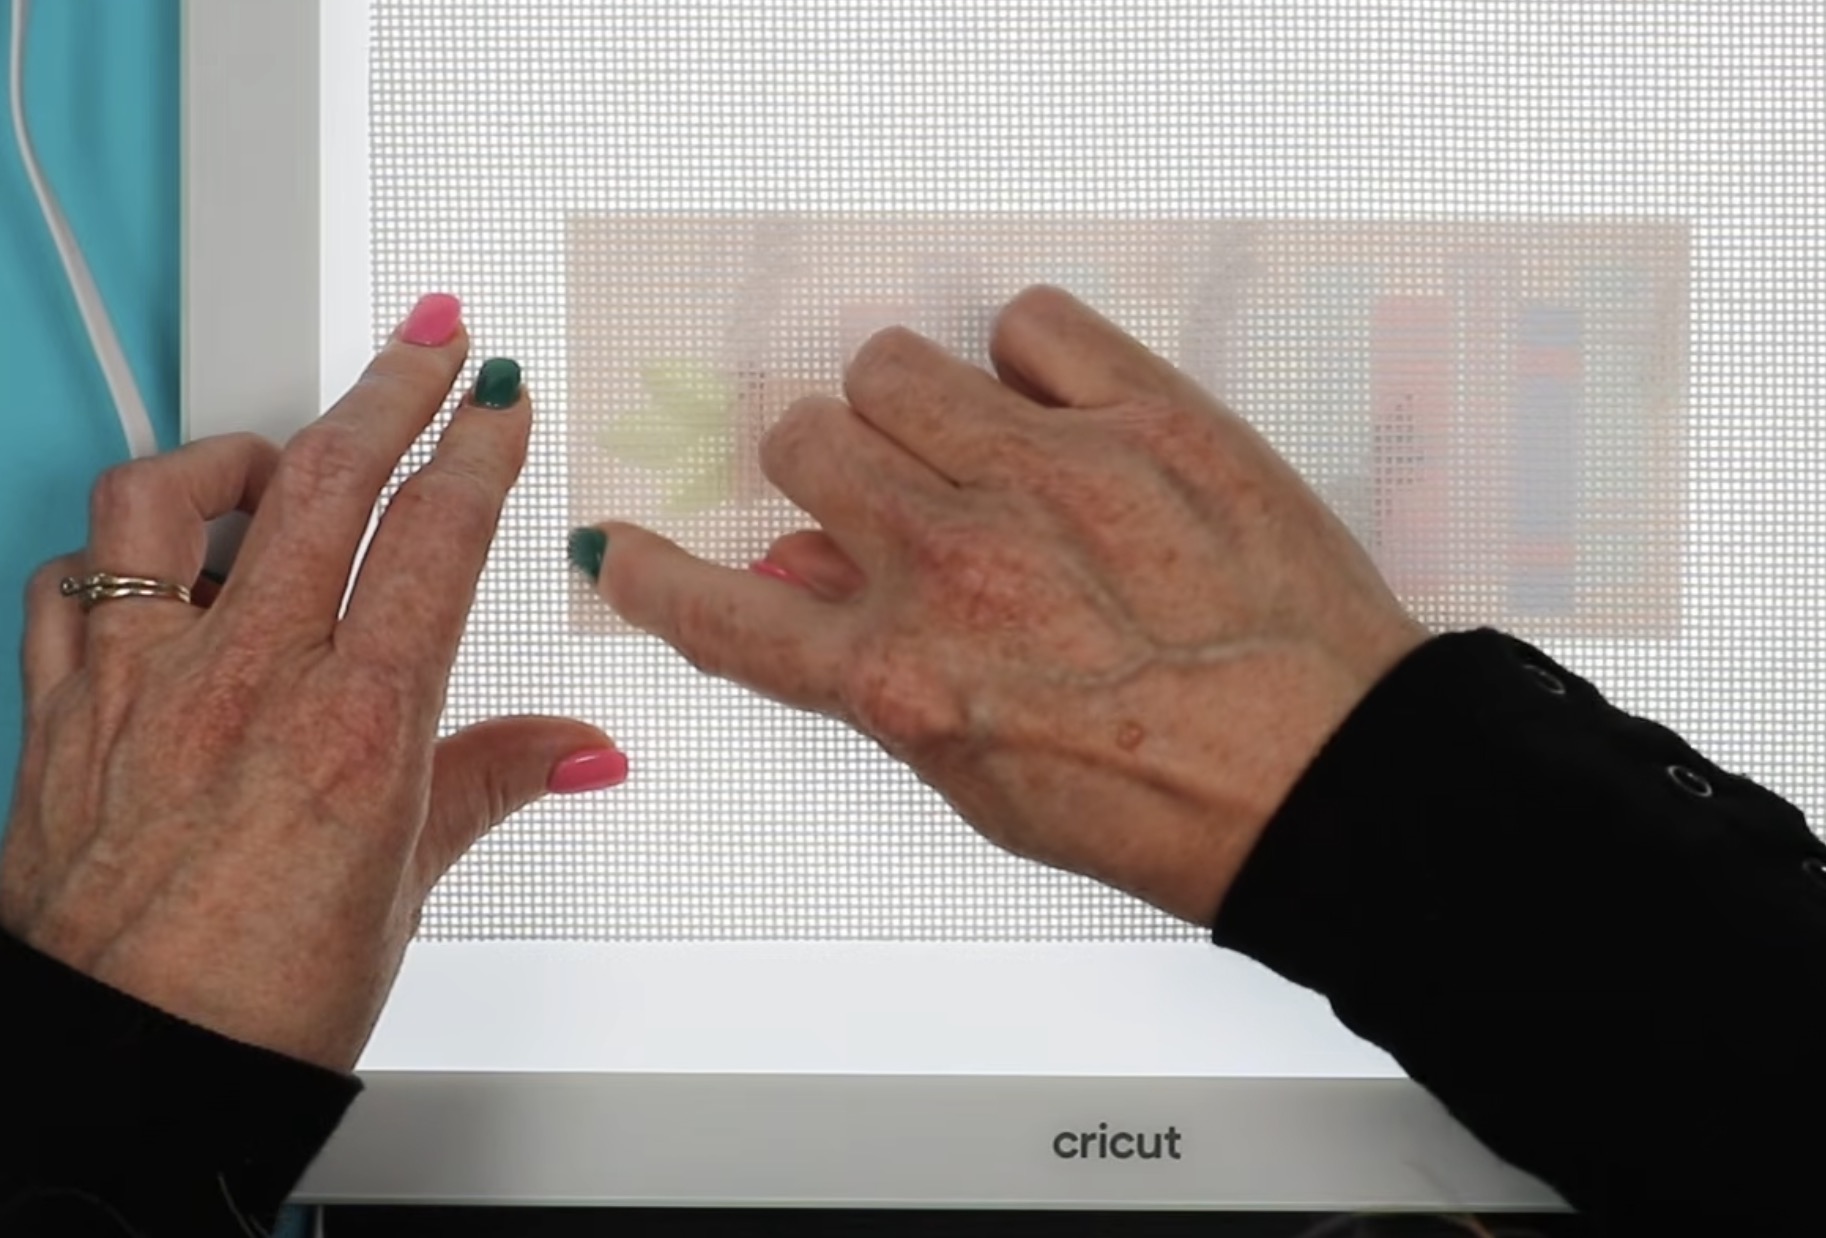
I also like to try to get the design as close to the middle of the canvas as possible.
Starting with the corners makes it easy to line up both the horizontal and vertical lines.
Take your time and check the line from top to bottom and side to side. We don't want the edge of the print to move between rows.
When you have the print exactly where you want it, press the canvas onto the tape and then flip it over and secure it with more heat-resistant tape.
Step 8 – Press the Sublimation Print onto the Needlepoint Canvas
Place a piece of protective paper on the heat-resistant mat to protect the mat from sublimation ink. This is an important step for this project because the canvas has holes in it, and the ink will bleed through those holes.
Place the needlepoint canvas on top of the protective paper with the print side up.
Cover it all with another piece of protective paper.
If your heat press isn't large enough to press the entire design at once, that is okay for this project. I haven't had a problem, even with large prints.
For this project, I am going to press each section twice at 390 degrees for 45 seconds.
Use light to medium pressure while pressing, and it's okay if you overlap the print while pressing.
Step 9 – Remove Sublimation Paper from the Needlepoint Canvas
When the time is up, remove the press and lift the protective paper. If you're not sure, the sublimation design transferred to the needlepoint canvas, lift one corner to check the design.

Remove the sublimation paper to reveal the printed needlepoint canvas.
My sublimation ink transferred perfectly.
Throw away both pieces of protective paper. They will have ink on them, and we don't want that ink to transfer to other canvases.
Step 10 – Add Masking Tape to the Edges of the Needlepoint Canvas
The last step to finish the sublimation needlepoint canvas is to add some masking tape along the edges on all sides.
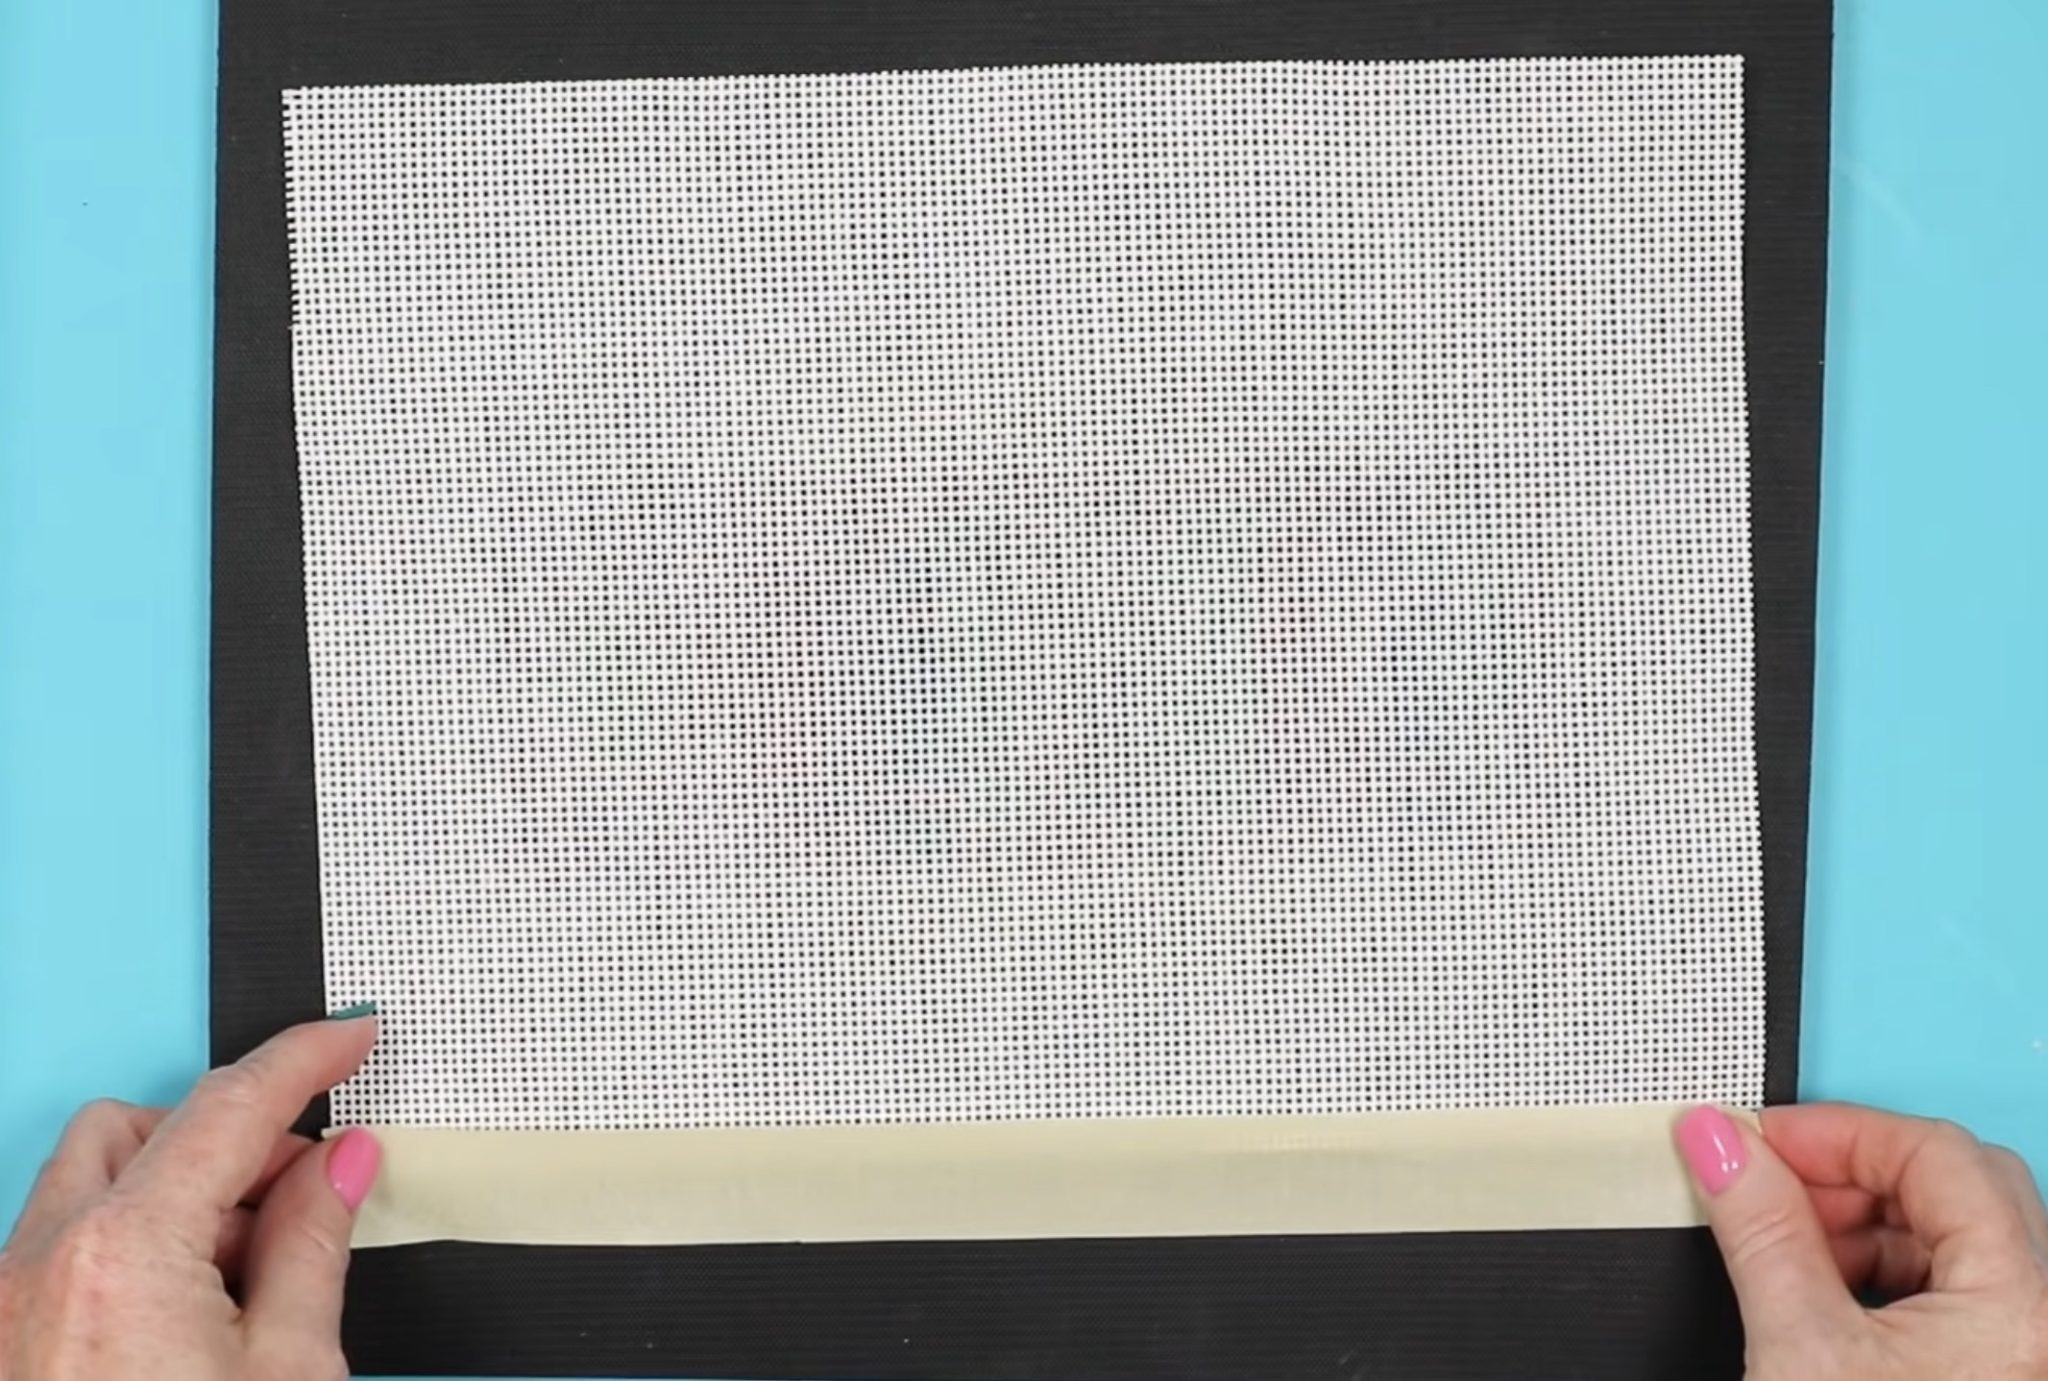
Adding masking tape will prevent the canvas from fraying and will keep your threads from snagging on the canvas.
Here you can see how great the needlepoint canvas sublimated.
I am really happy with the placement of the print. The background is lined up with the squares and looks really good.
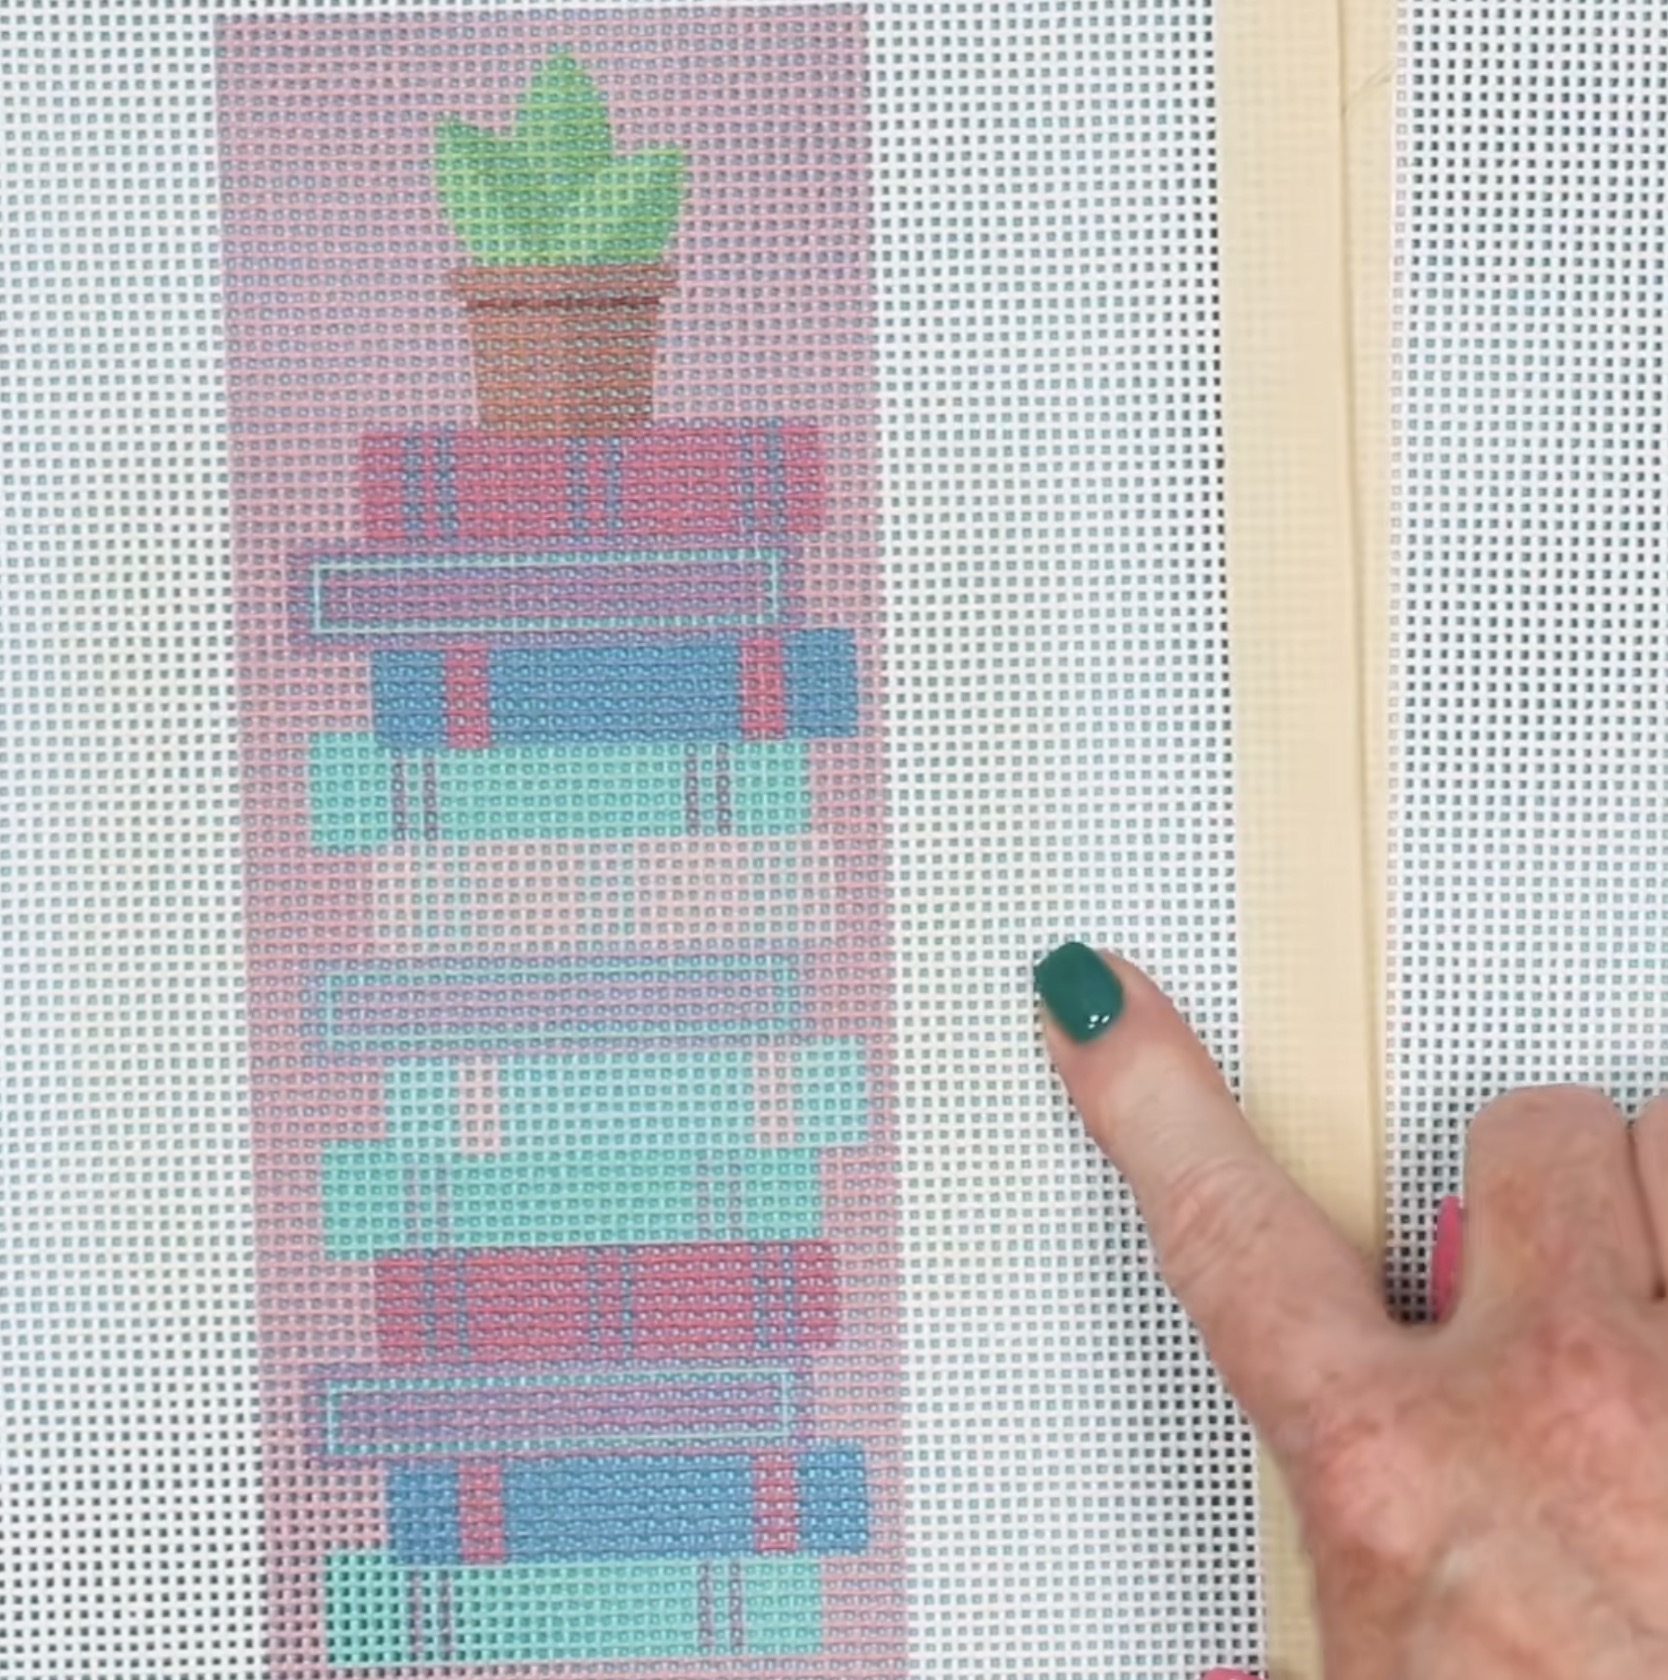
You may be able to see that there is a slight discoloration in the area where I overlapped the pressing.
This is likely due to the heat because the canvas is cotton. Typically, if you spray it with peroxide, you can remove those marks.
I am not worried about that with this canvas because I am stitching these myself, and this area will all be stitched. You won't see the canvas when I'm done.
If these marks bother you, there are a couple of things you can do:
- Use a larger heat press so you can press the entire design at once.
- Try adjusting the time/temperature to reduce either if possible.
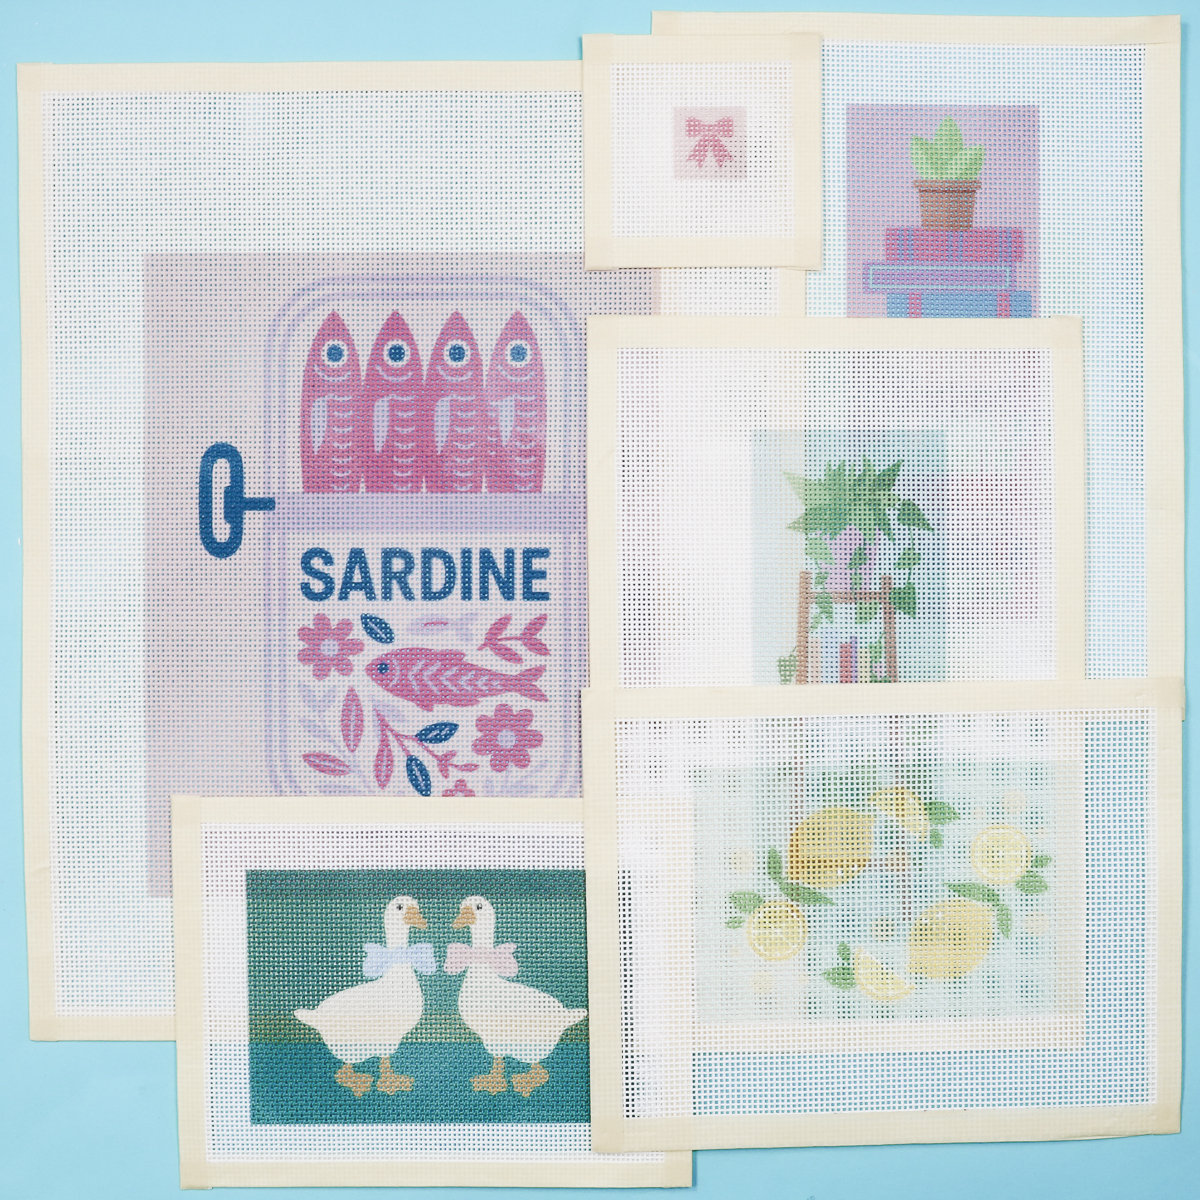
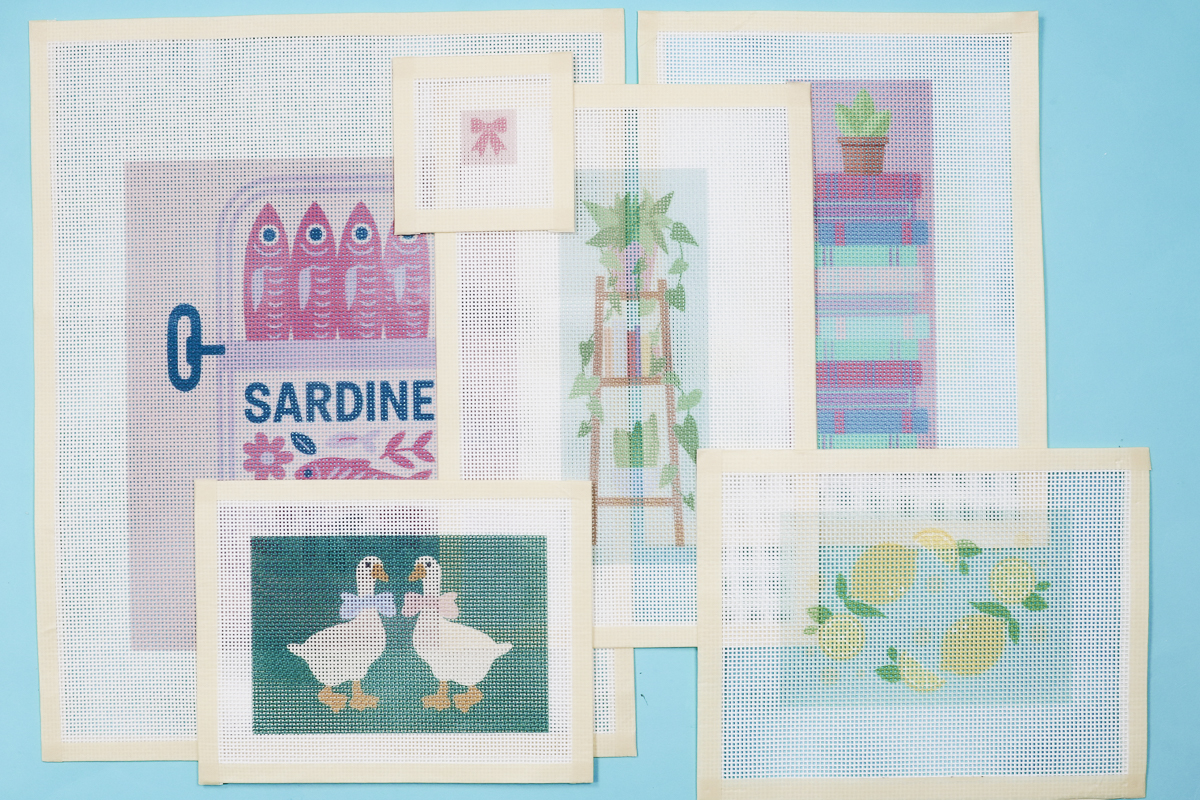
Finished Sublimation Needlepoint Canvases
I'm really happy with how these sublimation needlepoint canvases turned out.
I've made a variety of sizes, so you can see, if you're excited about needlepoint, sublimation is a great option.
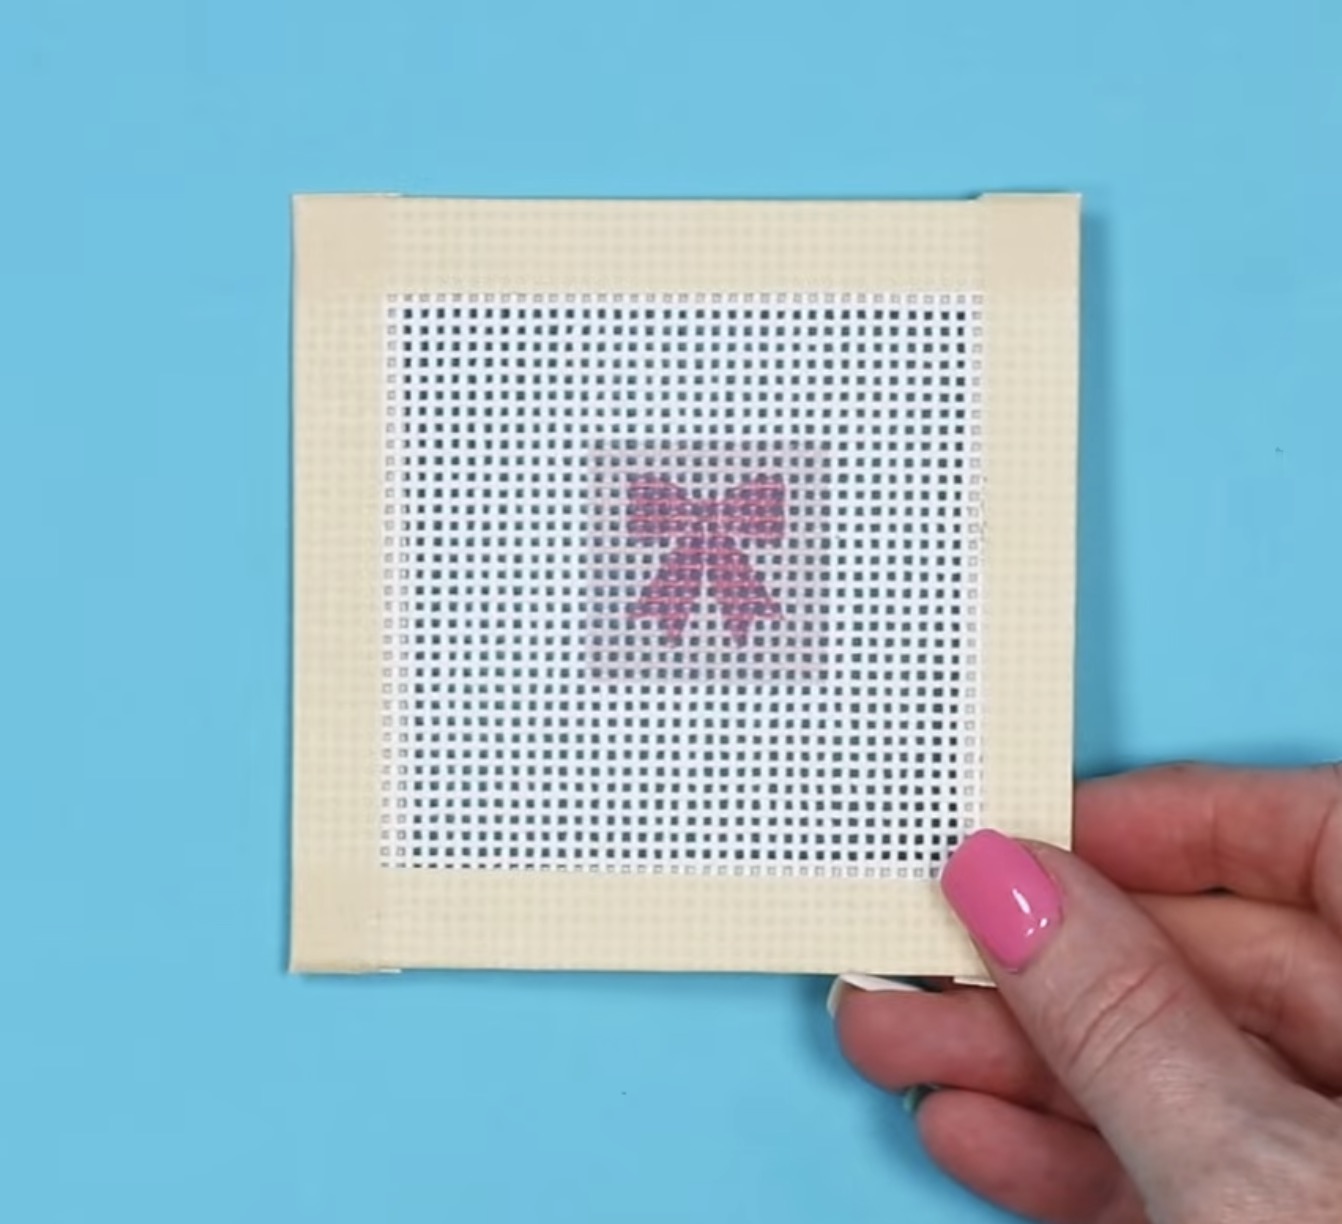
Here is a small bow design that would be great for a keychain.
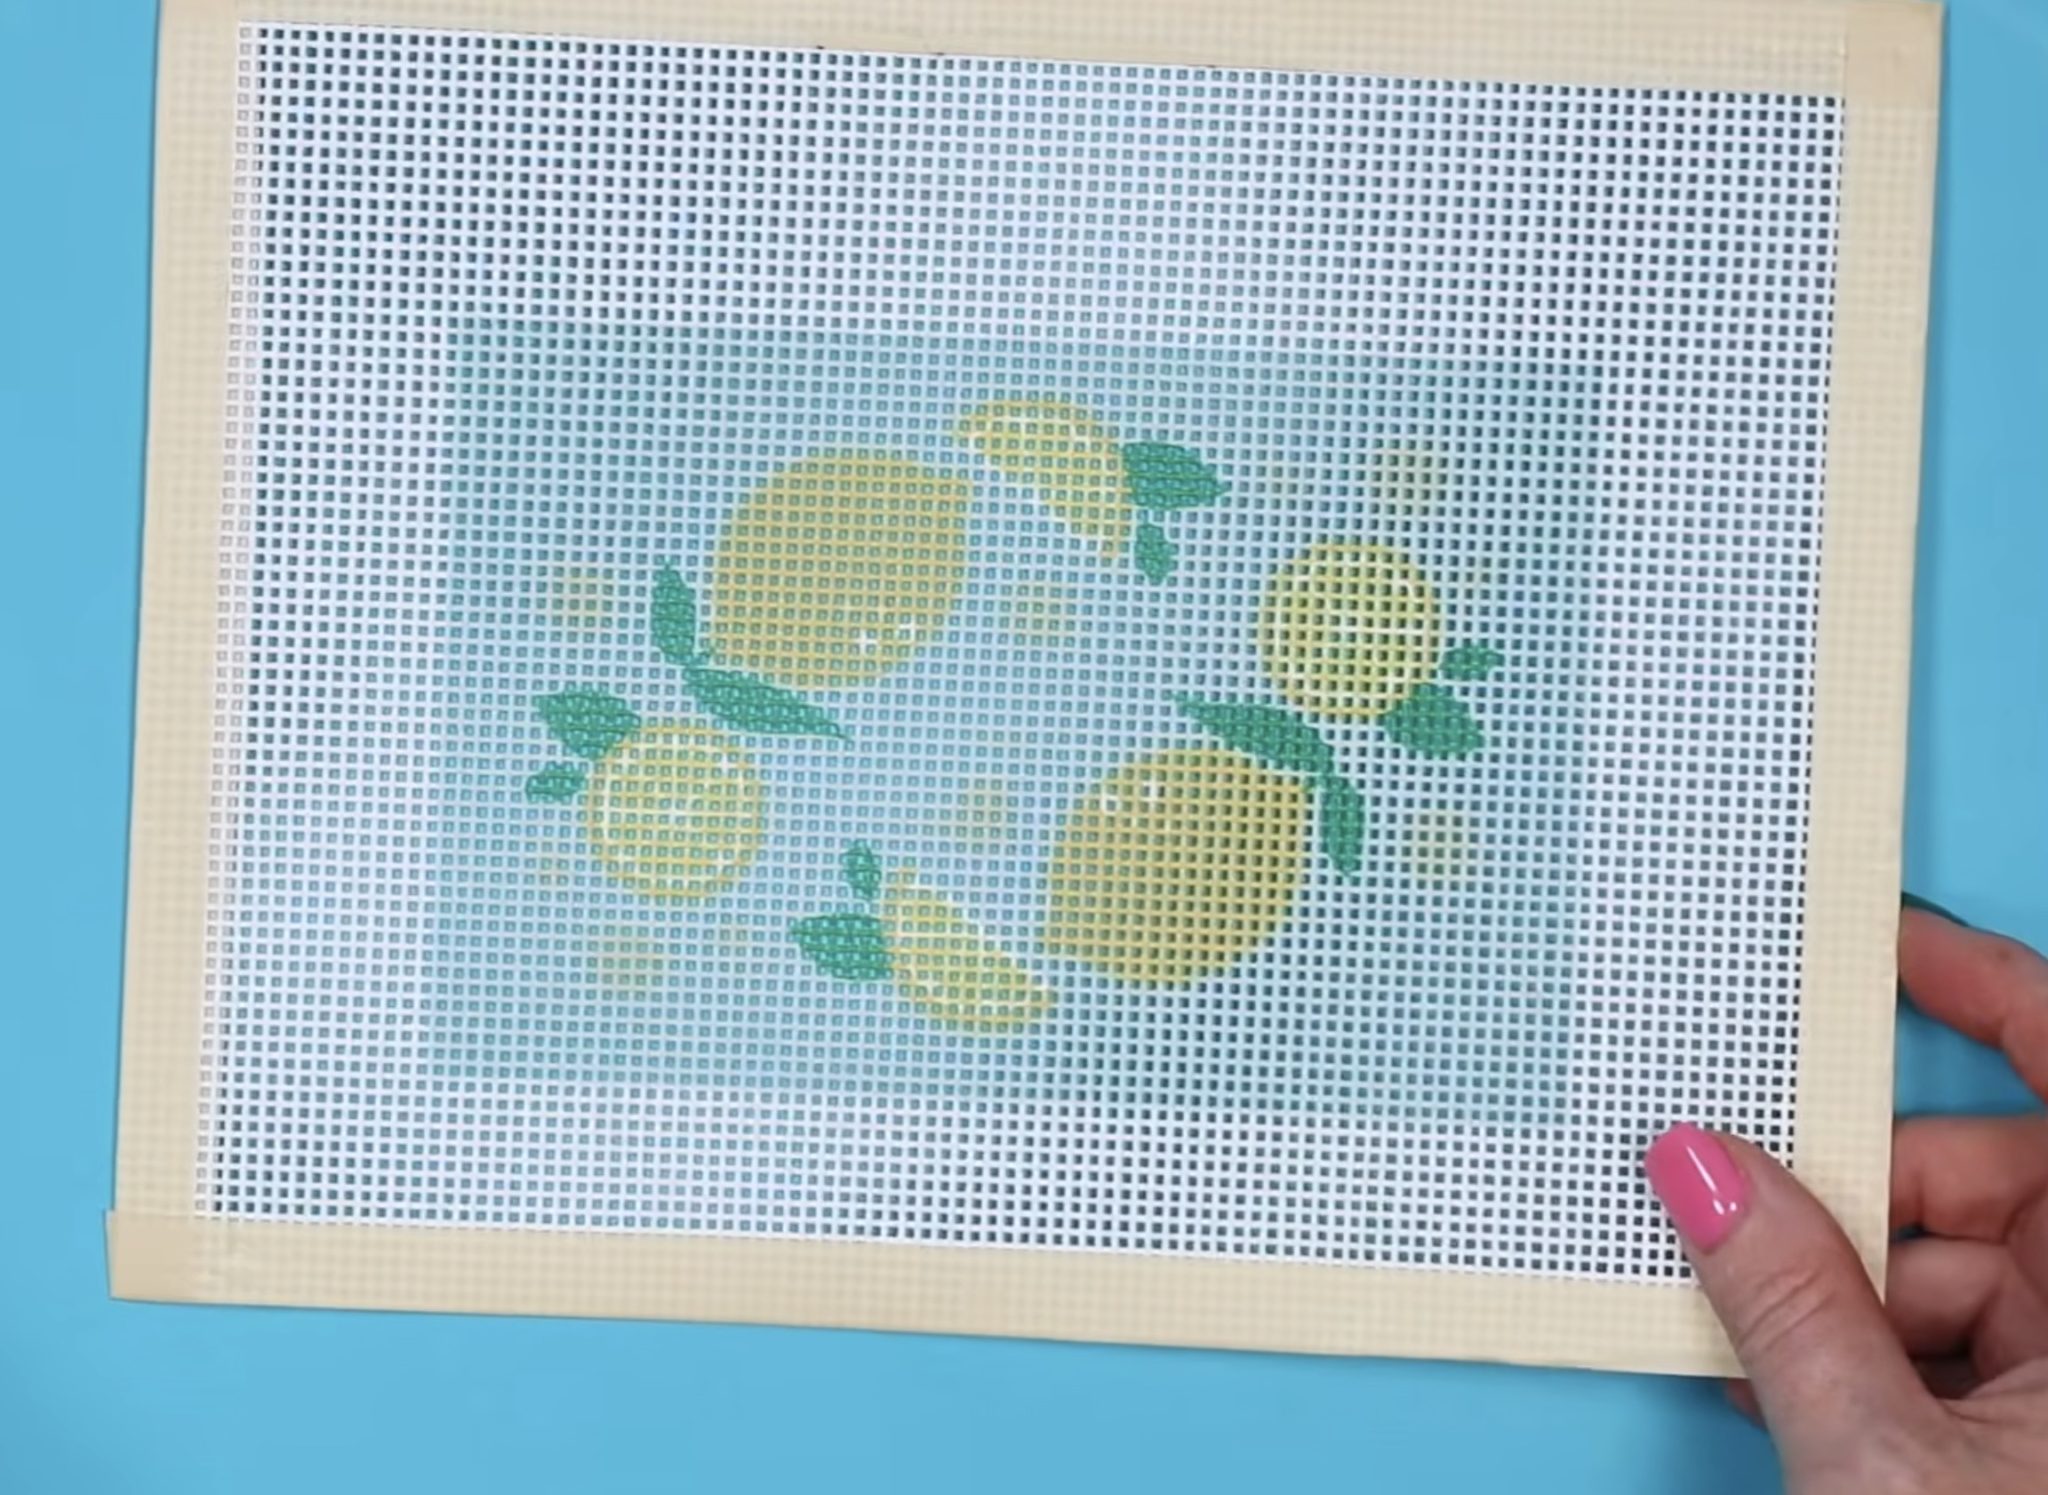
Next, we have a medium-sized canvas with a light blue background and lemons.
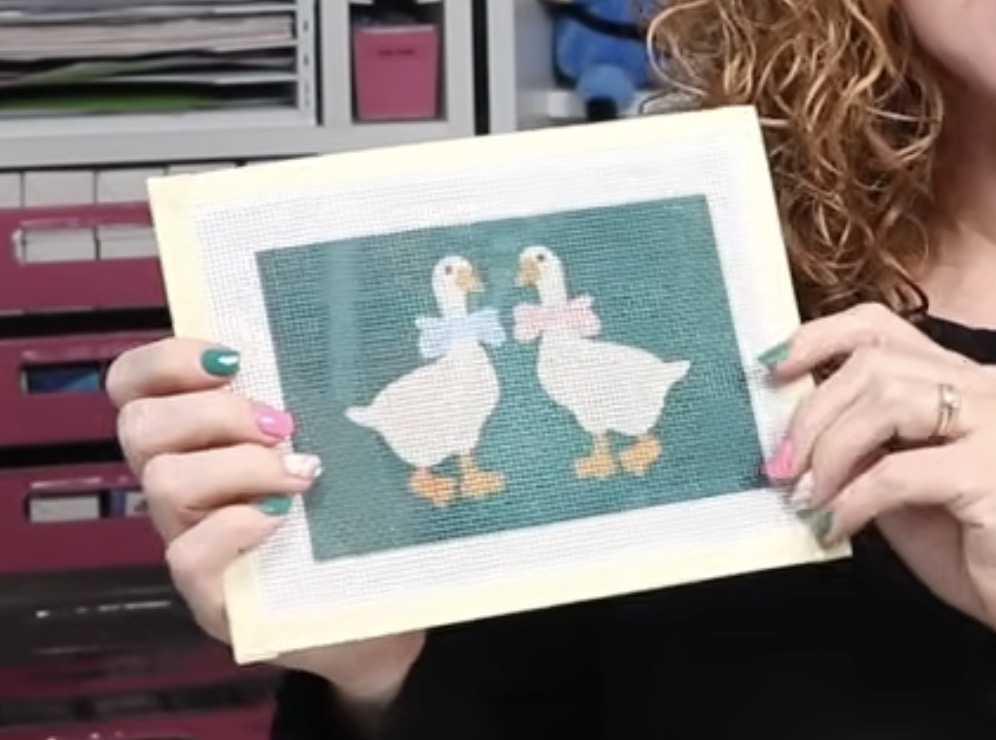
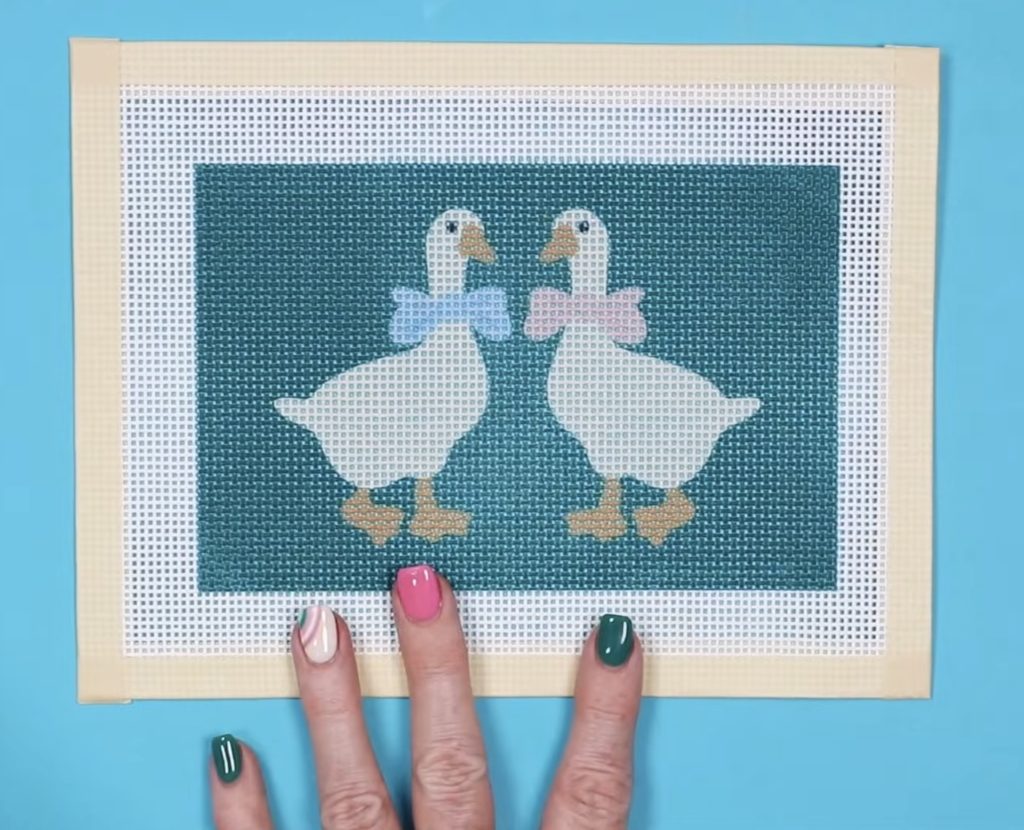
I love this goose design. It's so cute, and I like the dark background with the white geese.
Last, we have a very large canvas with a pink background and a can of sardines. I love the colors of this design, and because of how large it is, I don't have to worry about the details.
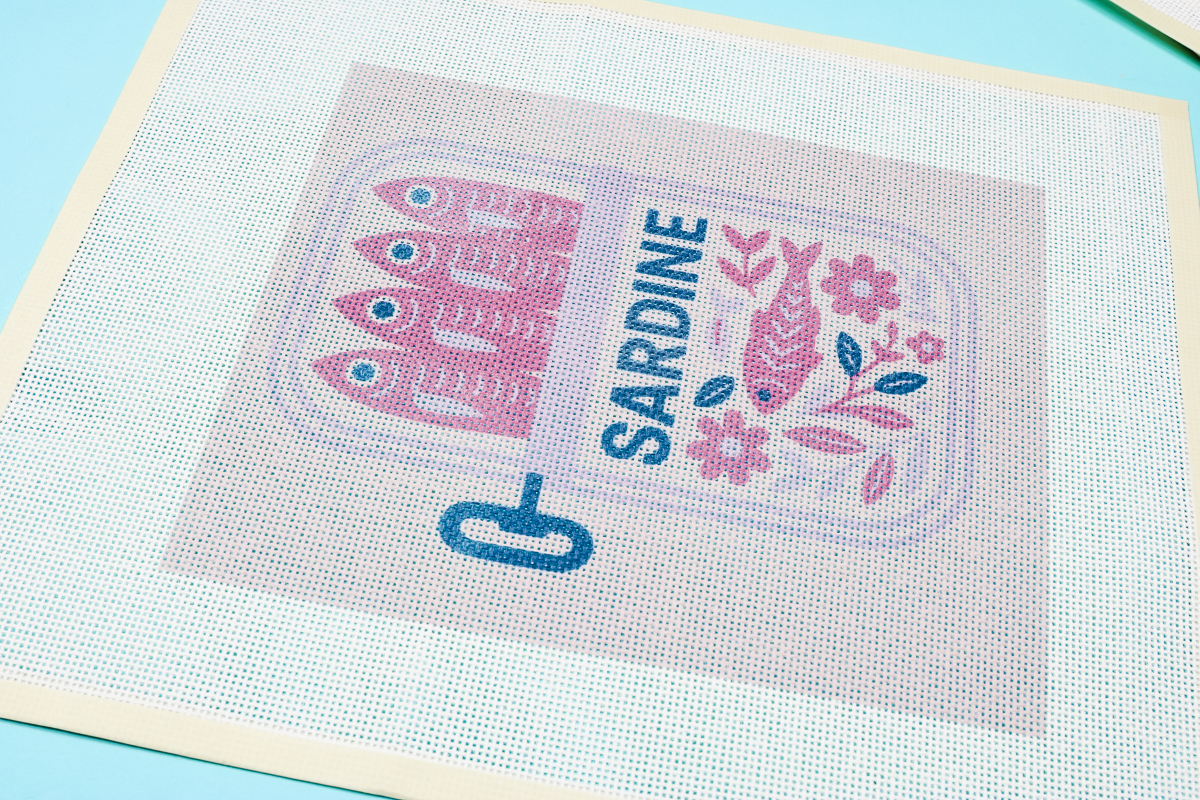
This same design may not work as well if it were smaller.
Are You Ready to Make Your Own Sublimation Needlepoint Canvas?
I hope you're as excited as I am about making your own needlepoint canvases with sublimation.
While these canvases aren't perfect, and at this point I wouldn't recommend selling them without making it very clear they were sublimated and pricing them accordingly. They are a great option for projects I want to stitch myself.
I can easily see the colors of the design, which means knowing which threads to use will be easy, and the finished project should look really good.
Again, since these are for me, if I have to make a judgment call on what color a certain line should be, I can do that without issue.
If you don't want to make your own sublimation needlepoint canvas or you don't have a sublimation printer, there are other options:
- You can hand-paint designs on your own canvas.
- You can purchase hand-painted or professionally printed canvases.
- You can try printing a canvas with your home printer. This is my least favorite option at this time because I'm not sure how you'd get the design lined up with the canvas correctly.
Figuring out ways to use the machines I have in my craft space to make my favorite grandma hobbies easier is a theme I intend to stick with throughout 2026. Sublimation + needlepoint canvas turned out to be a match made in heaven.
Using my light pad to line the design up with the grid on the canvas was a helpful step in the process.
I hope I've answered any questions you have about making your own sublimation needlepoint canvas. If you have any additional questions, leave them in the comments, and I'll be happy to answer them for you.