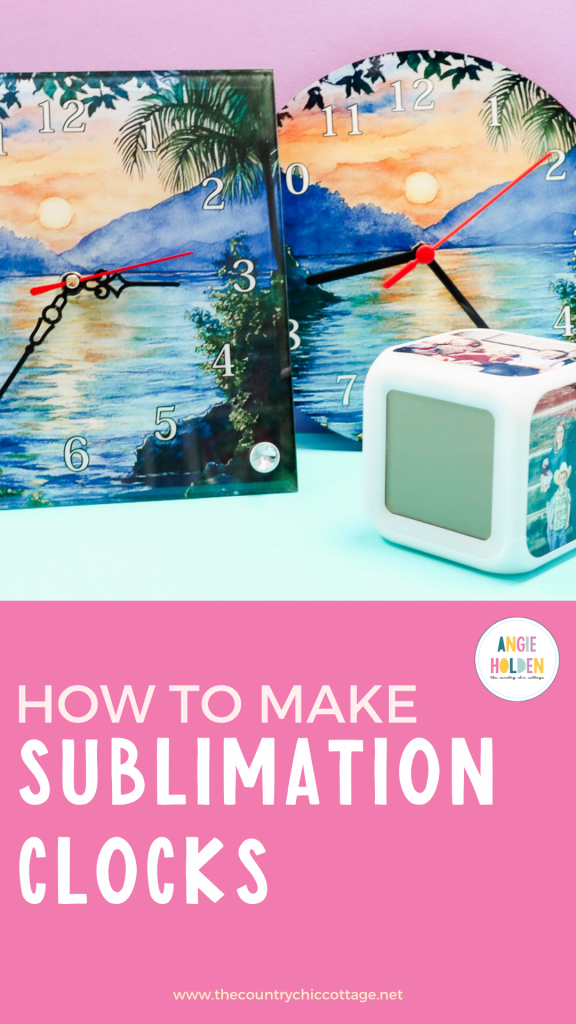
If you're looking for an amazing, customizable gift, you're going to love these sublimation clocks. I'm going to show you how to make 3 different types of sublimation clocks so you're sure to find the perfect blank for your needs.
If you are just starting your sublimation journey or are considering starting, make sure you check out my Sublimation Beginner's Guide for my best tips and tricks.
Making these sublimation clocks is pretty simple, but they are each a little different. These are just three of the examples I've found. There are a lot more options if you're looking for something a little different.
You can watch me make each of the clocks by pressing play on the video below.
Sublimation Clocks
The three different types of clocks I'm making today are:
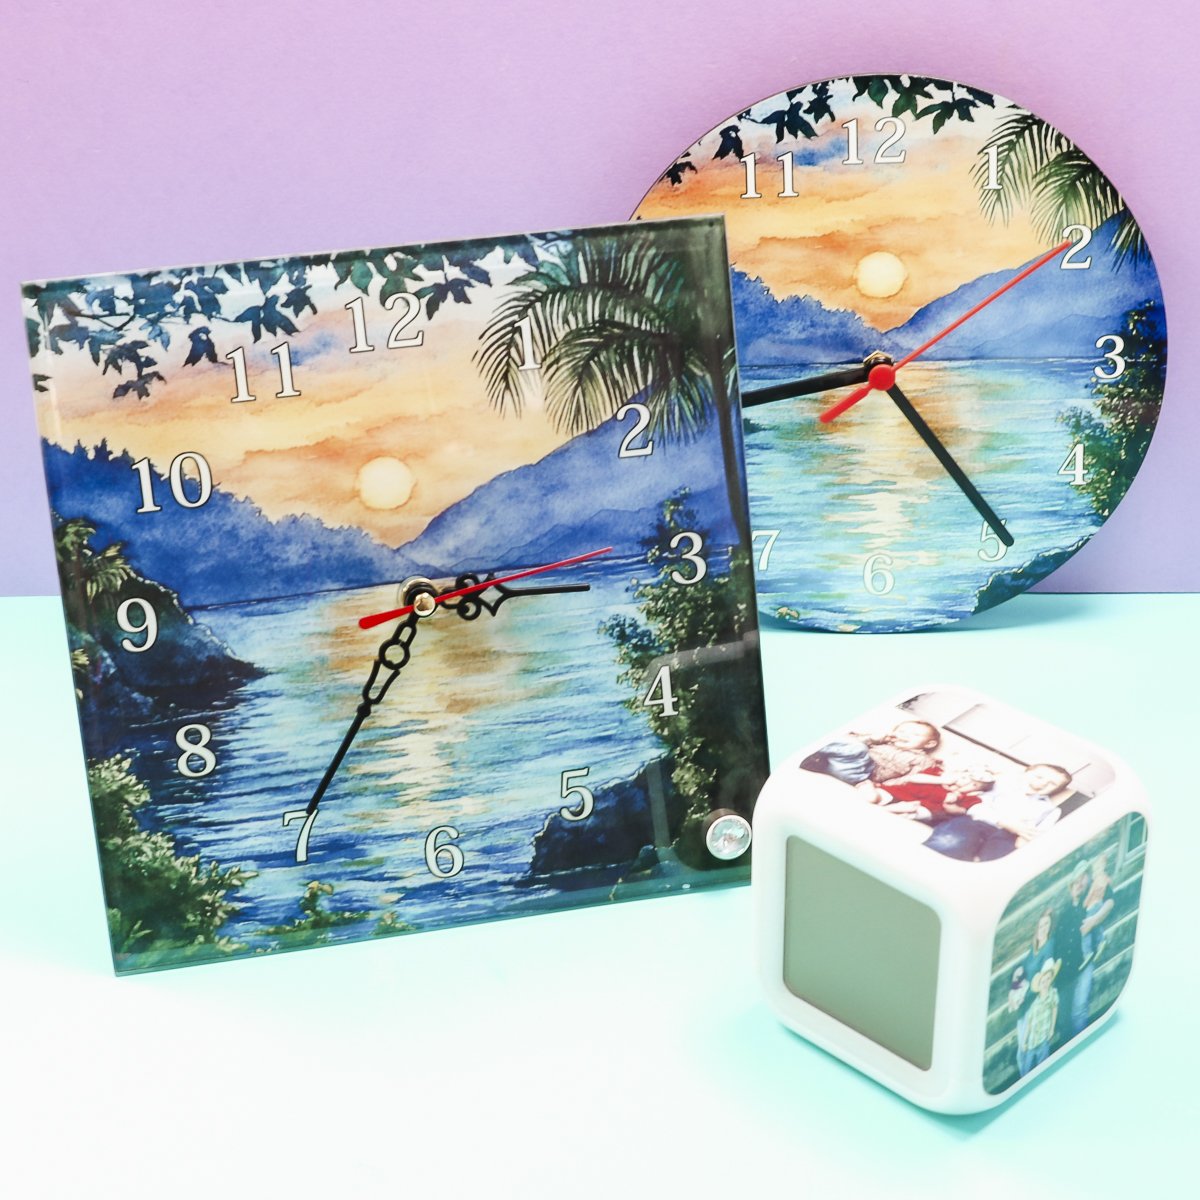
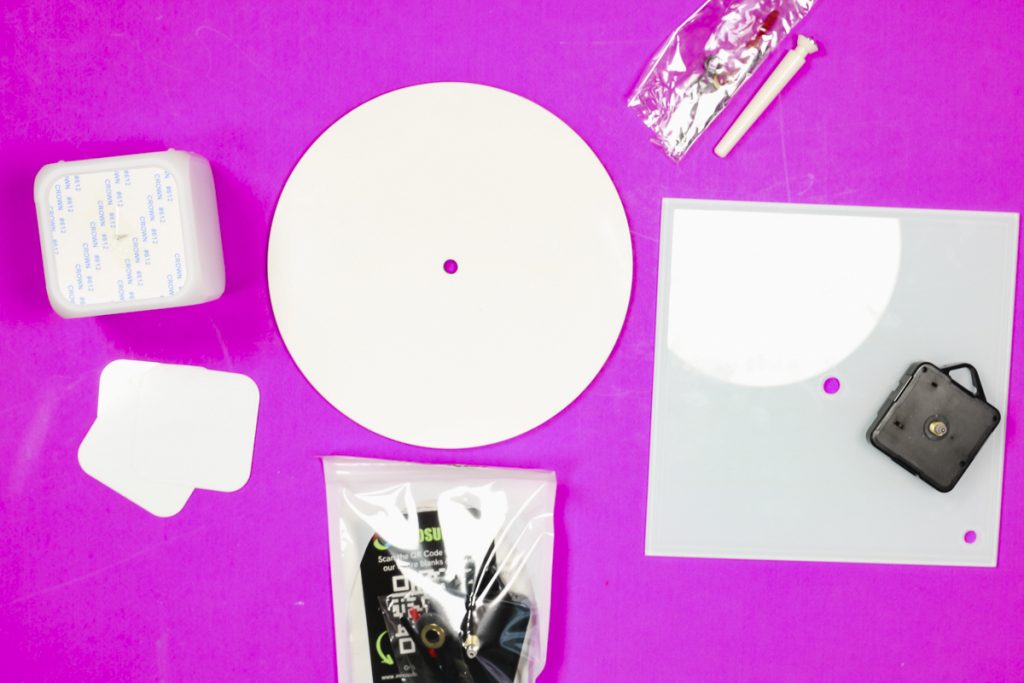
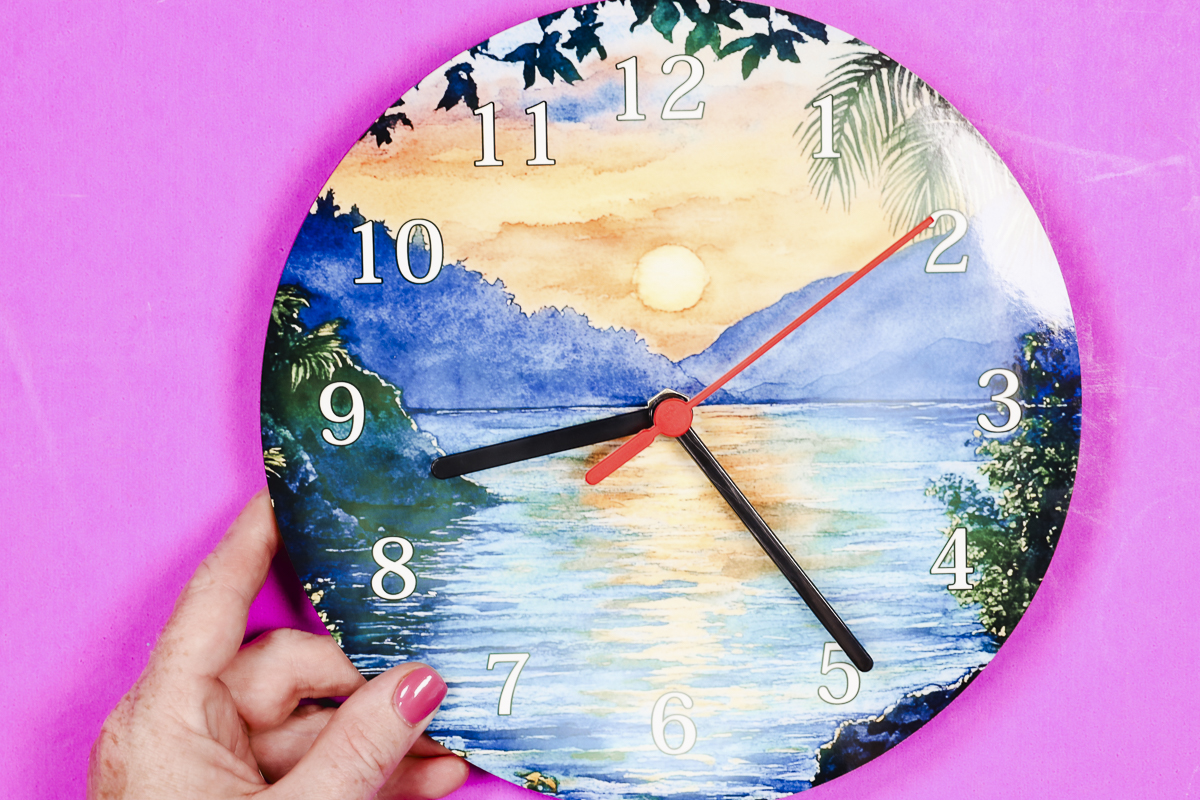
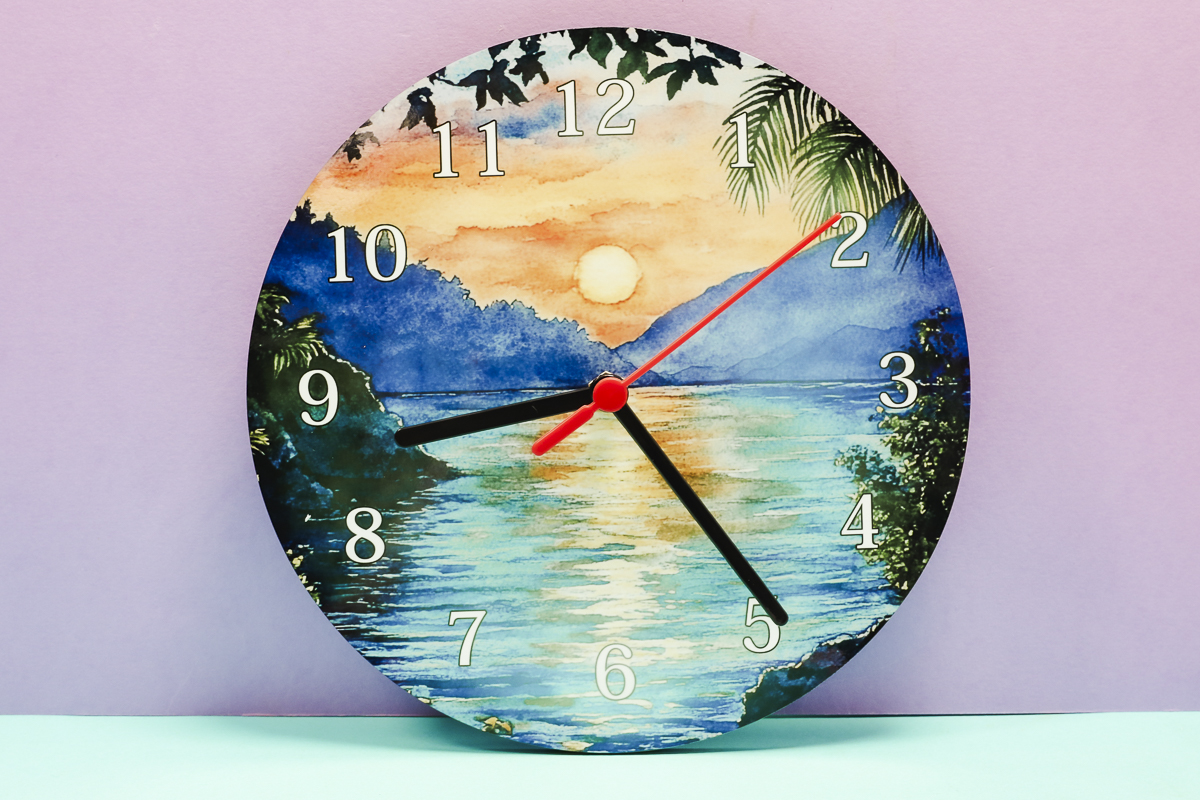
- A traditional round hanging clock that is a MDF board blank.
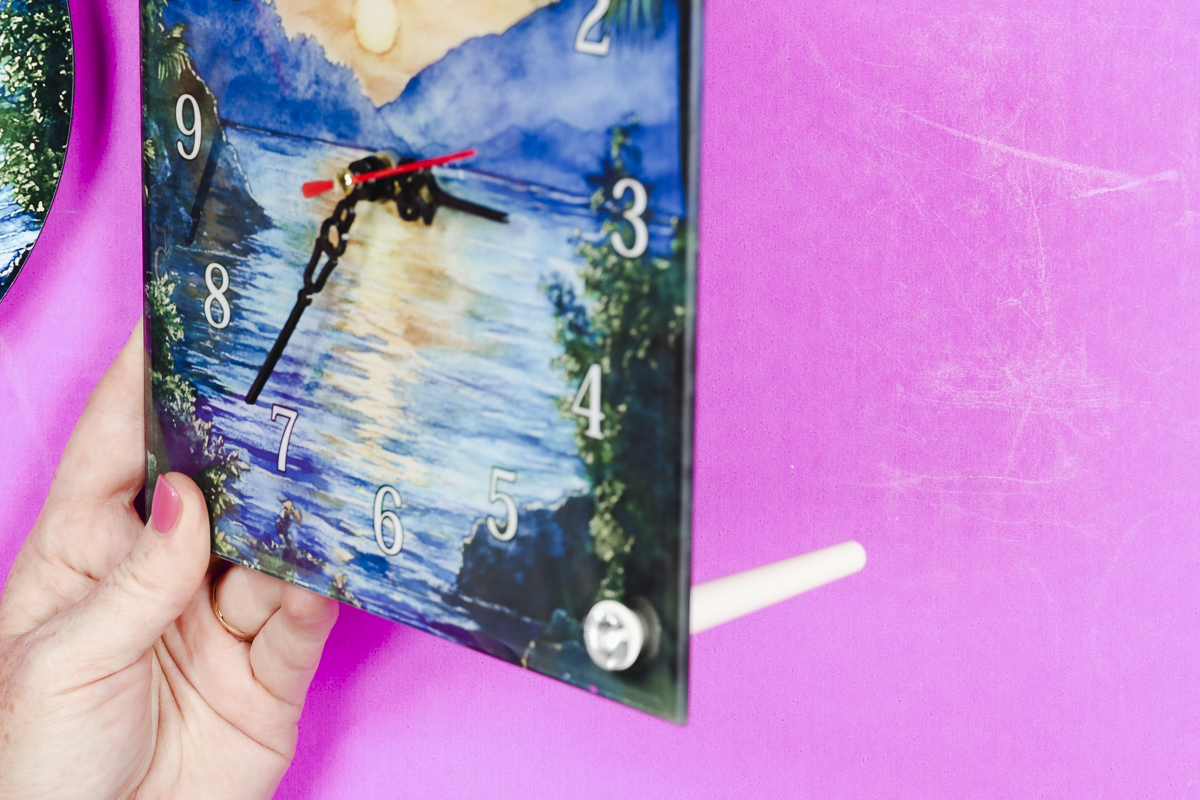
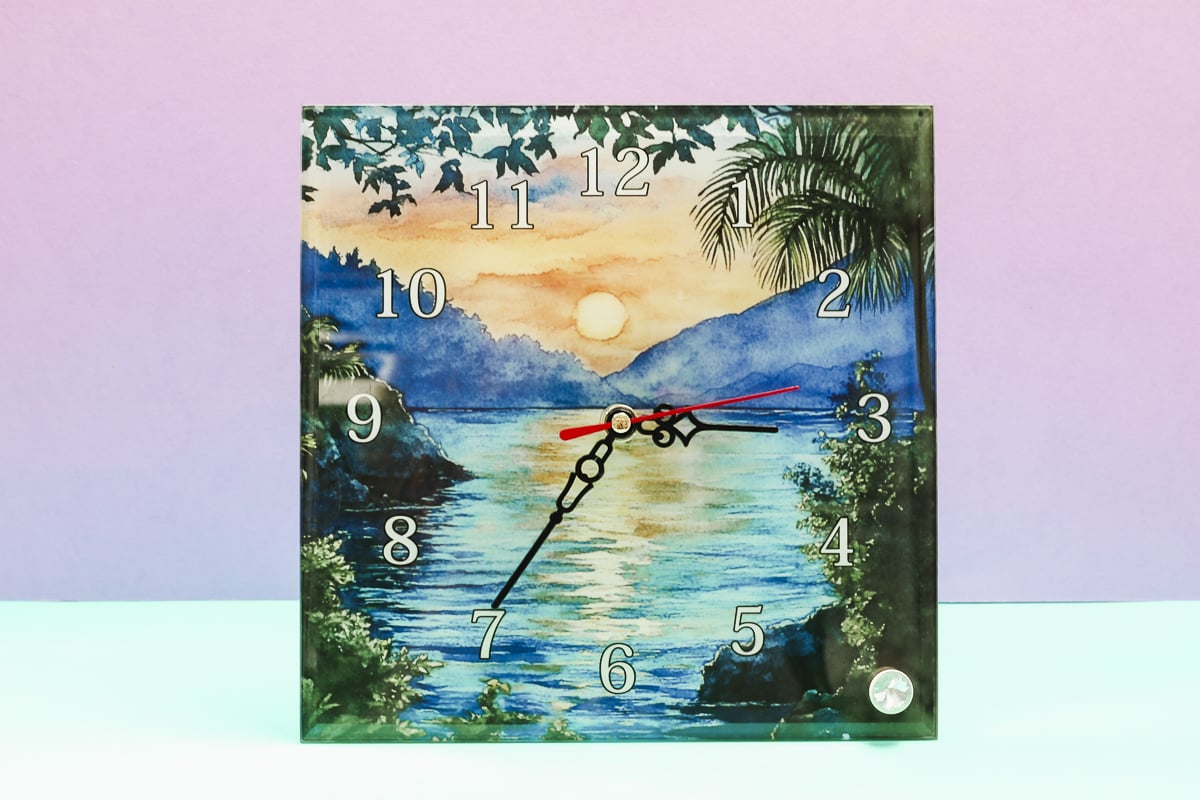
- Square glass clock with a stand that can also hang.
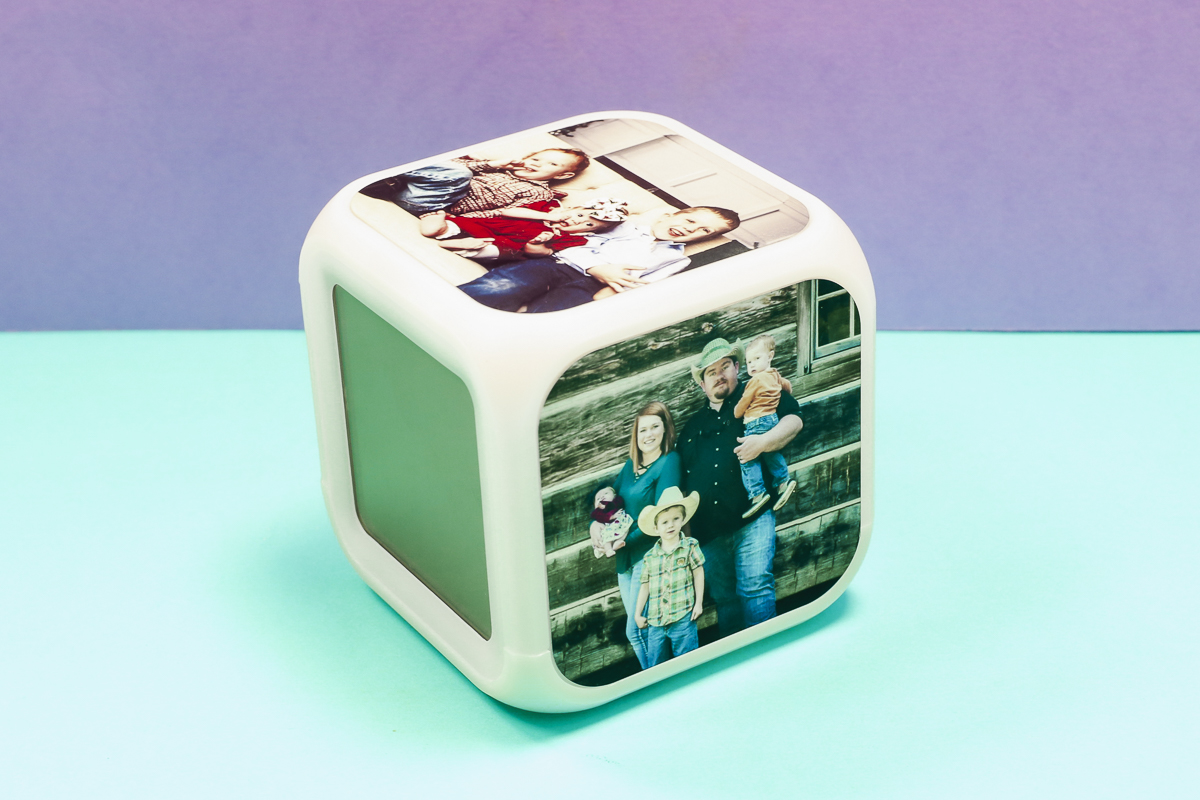
- Block plastic alarm clock with metal sublimation panels.
These are just some of the sublimation clock options on the market. If you choose to use a different option, make sure you check reviews to see what others say about them.
You do need a sublimation blank for this project. A sublimation blank has a special coating applied that will accept the sublimation print, making it permanent.
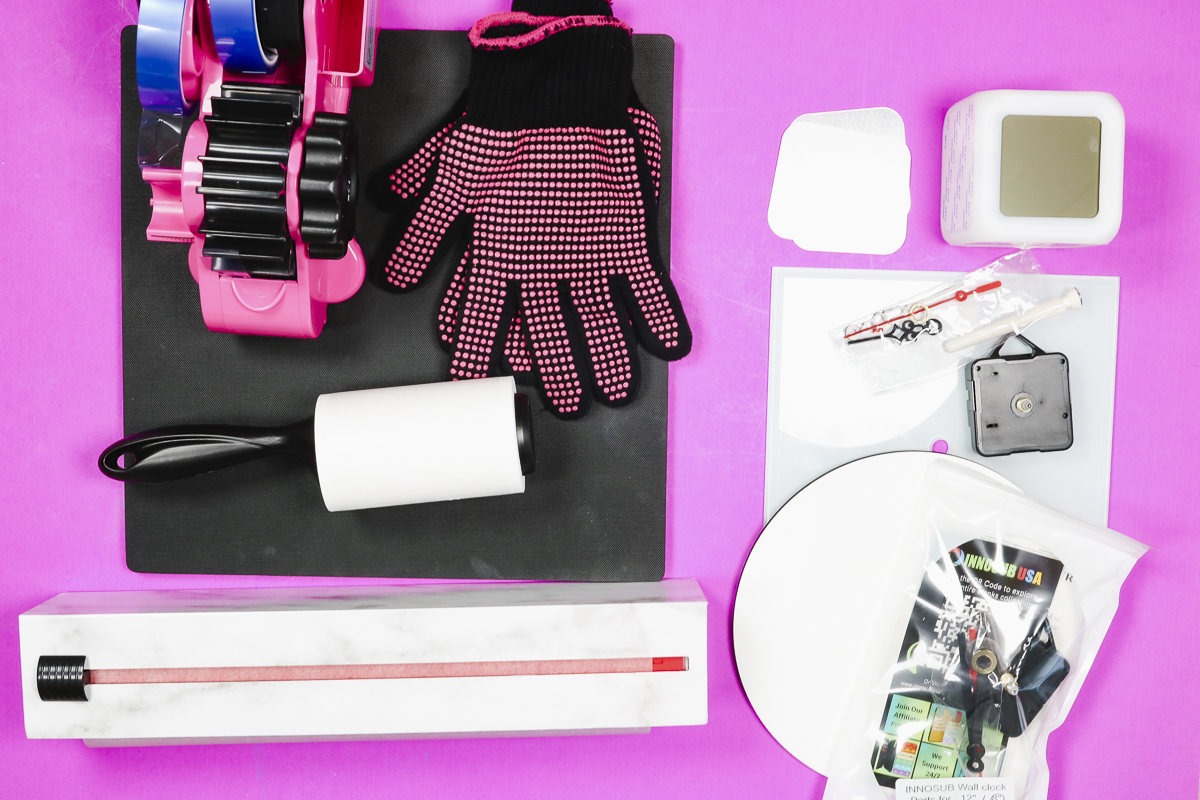
Supplies Used
- Free Sunset Design
- Sublimation Wall Clock
- Sublimation Glass Clock
- Sublimation Alarm Clock
- Cricut EasyPress
- Heat Resistant Mat
- Brother Sublimation Printer
- Sublimation Paper
- Lint Roller
- Heat Resistant Tape
- Heat-resistant Gloves
- Tape Dispenser
- Protective Paper
- Paper Dispenser
Step 1: Create Sublimation Design
Now, we need to create our sublimation design. I am using Canva because I find it easy to use for creating designs for shaped blanks.
I like to measure the blanks so I know exactly what size to make my designs.

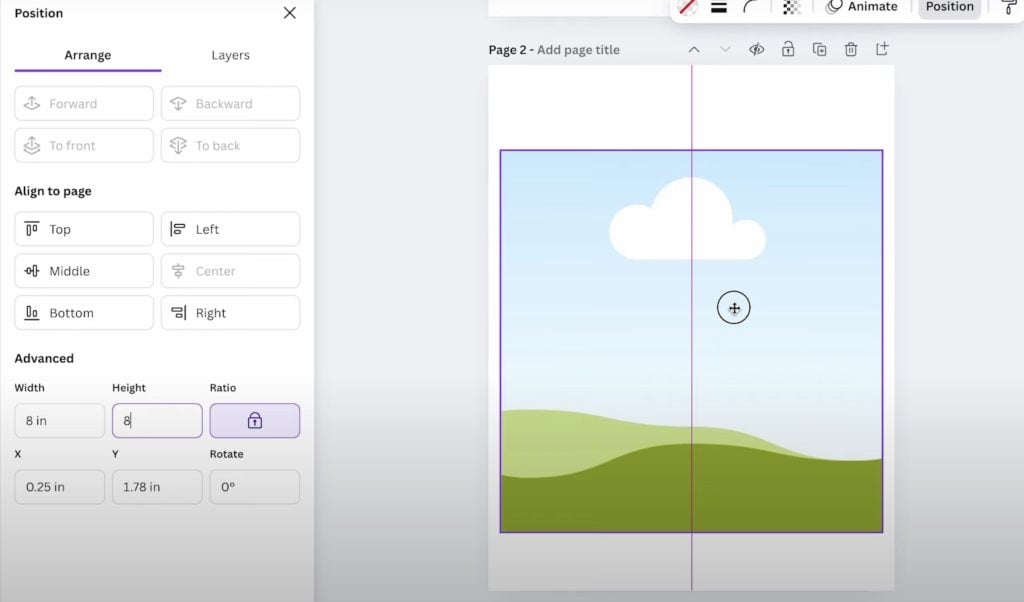
Open Canva and create a canvas. My sublimation paper is 8.5 by 11, so I am creating my canvas that same size.
Create A Round Clock Face Design
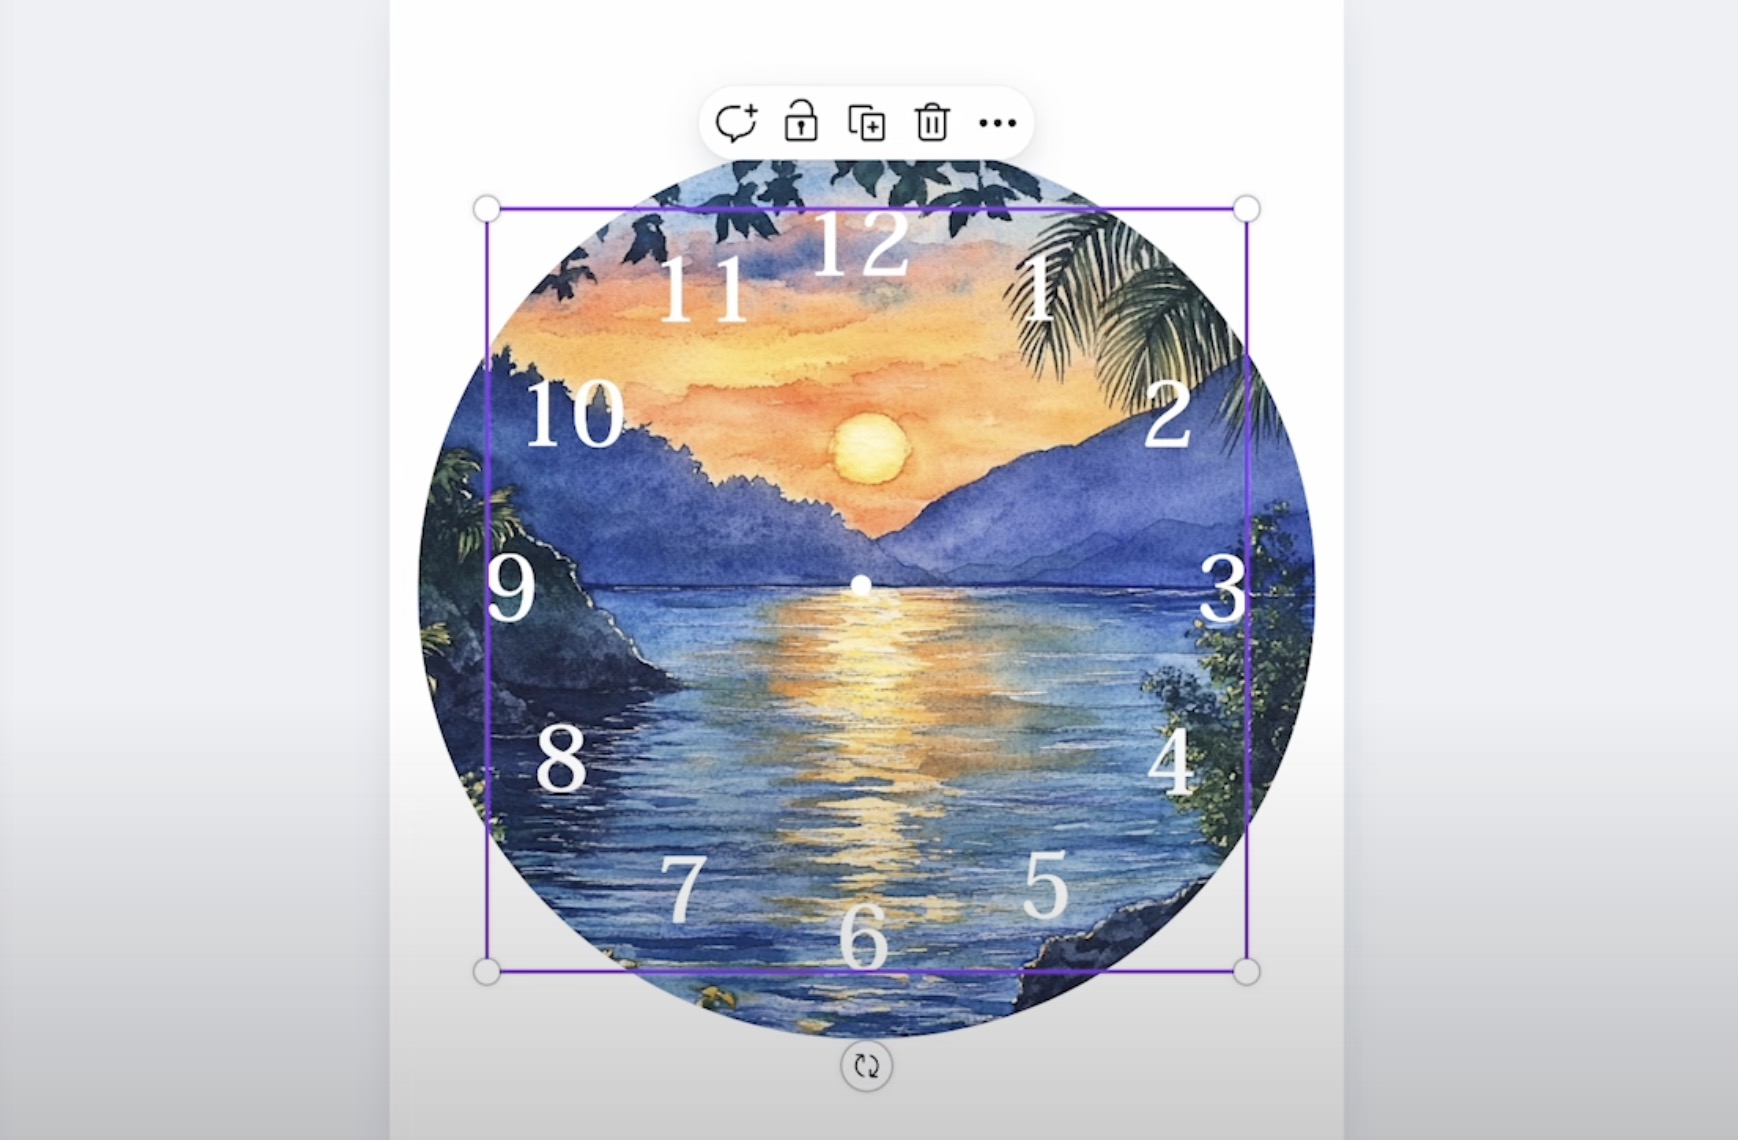
Click on Elements and then type Circle. Click a circle frame and add it to the canvas.

There are different circle frame options, some have a border. I want one that is a full circle frame.
Click Position and resize the design to match your clock. I need my frame to be 8 inches by 8 inches.

Click Elements again and search Clock Face. Look under Graphics and find a clock face that you like.
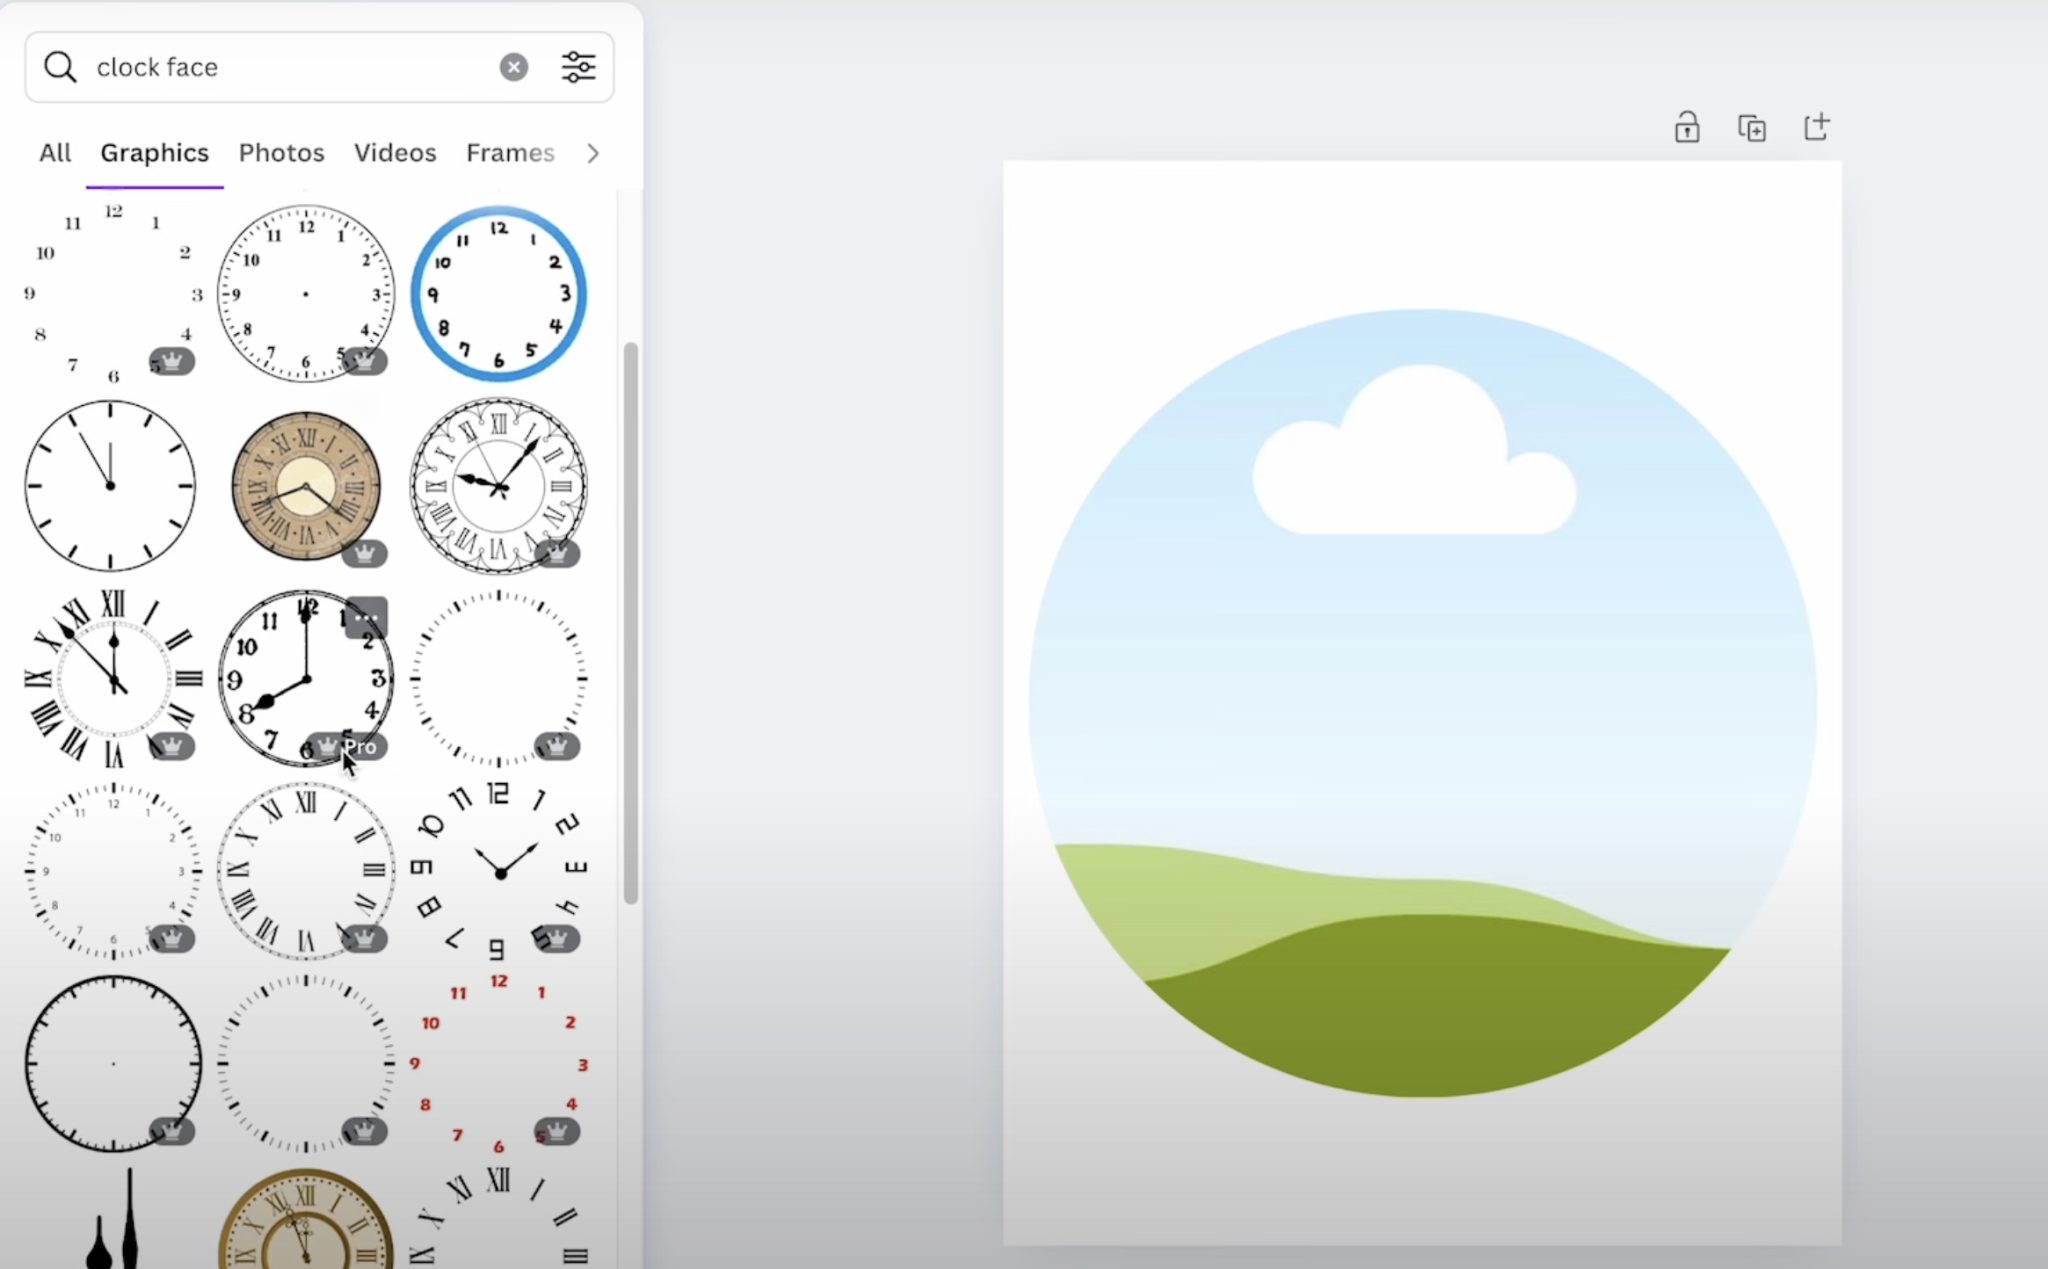
You can change the color of the clock numbers if you want to. I would make sure the color you choose shows up well on the image you are using.
Upload the design you want to use and then drag it onto the circle frame.
Double-click the image to resize it and move it as needed.
Remember, in the middle you will have the hole for the clock and the thicker parts of the hands. I would avoid locating designs with people's faces in those areas.
Once the design is set up to your liking, click Done.
Next, select the clock numbers and set them up how you want them. You can make them as big or as small as you would like. Ensure you have the clock face centered on the design, so the numbers are where they need to be to keep time correctly.
I like to decide my number color at this point because I can see which colors will show up best on the design.
A lighter image may look best with darker numbers, and a darker image may look best with lighter numbers.
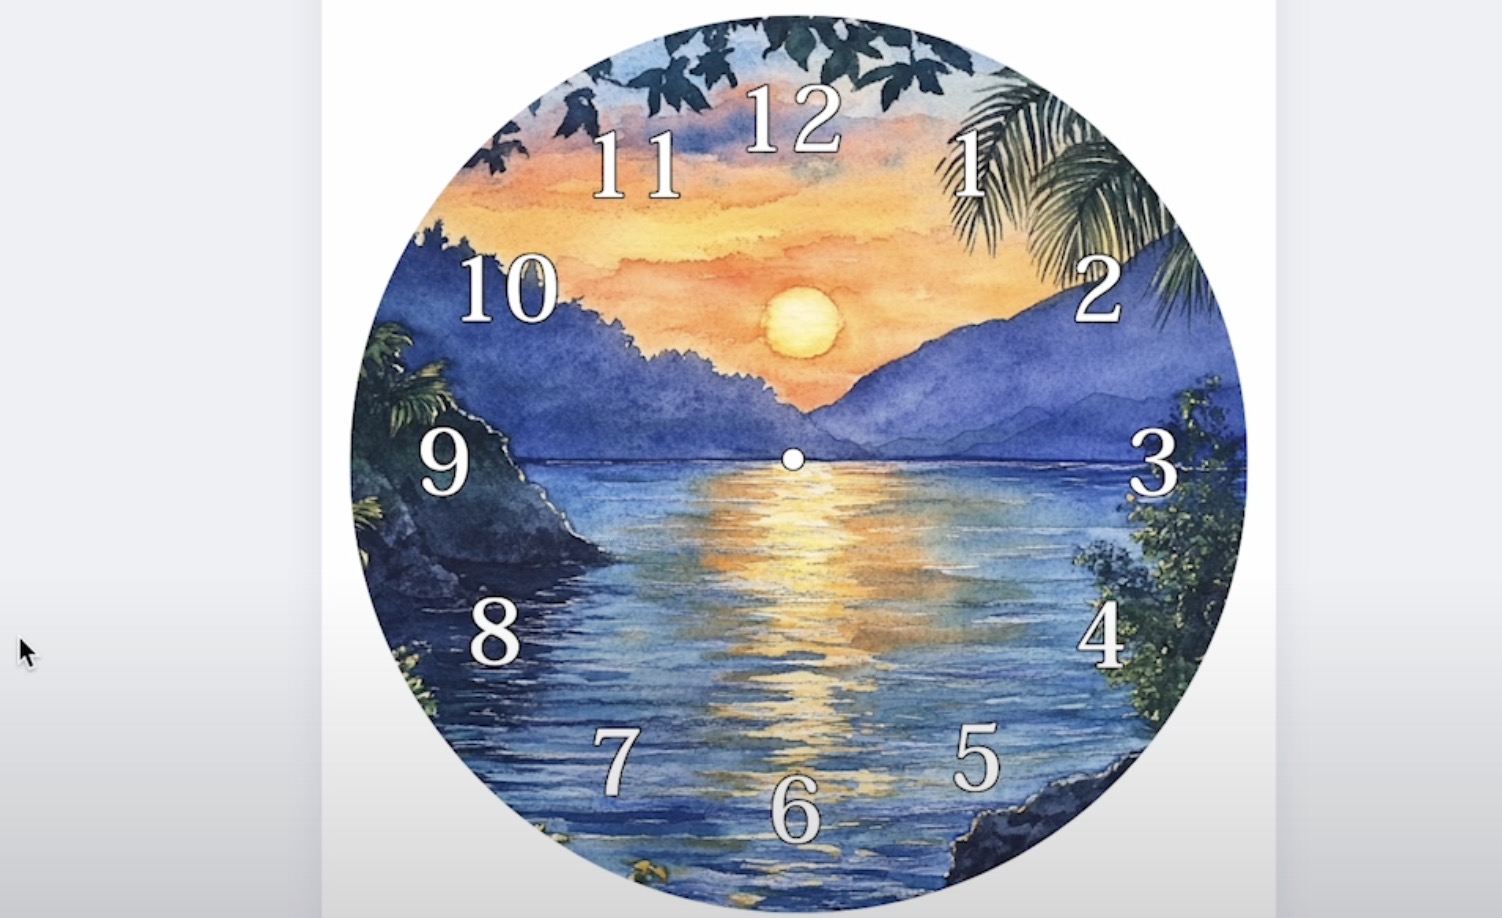
I am going to add an outline to my text. Click Edit, and then go into the Shadows section. I added a 5 outline in black to my clock numbers, and this makes the numbers really pop off the surface.
The clock numbers have a hole in the center, so things can easily be lined up, and you can make sure your image is aligned so that the hole doesn't cover a part you don't want it to.
Create a Square Clock Face Design
To create a square clock face design, we'll follow the same steps we did before. Choose a square frame and resize it to match the size of your square clock.
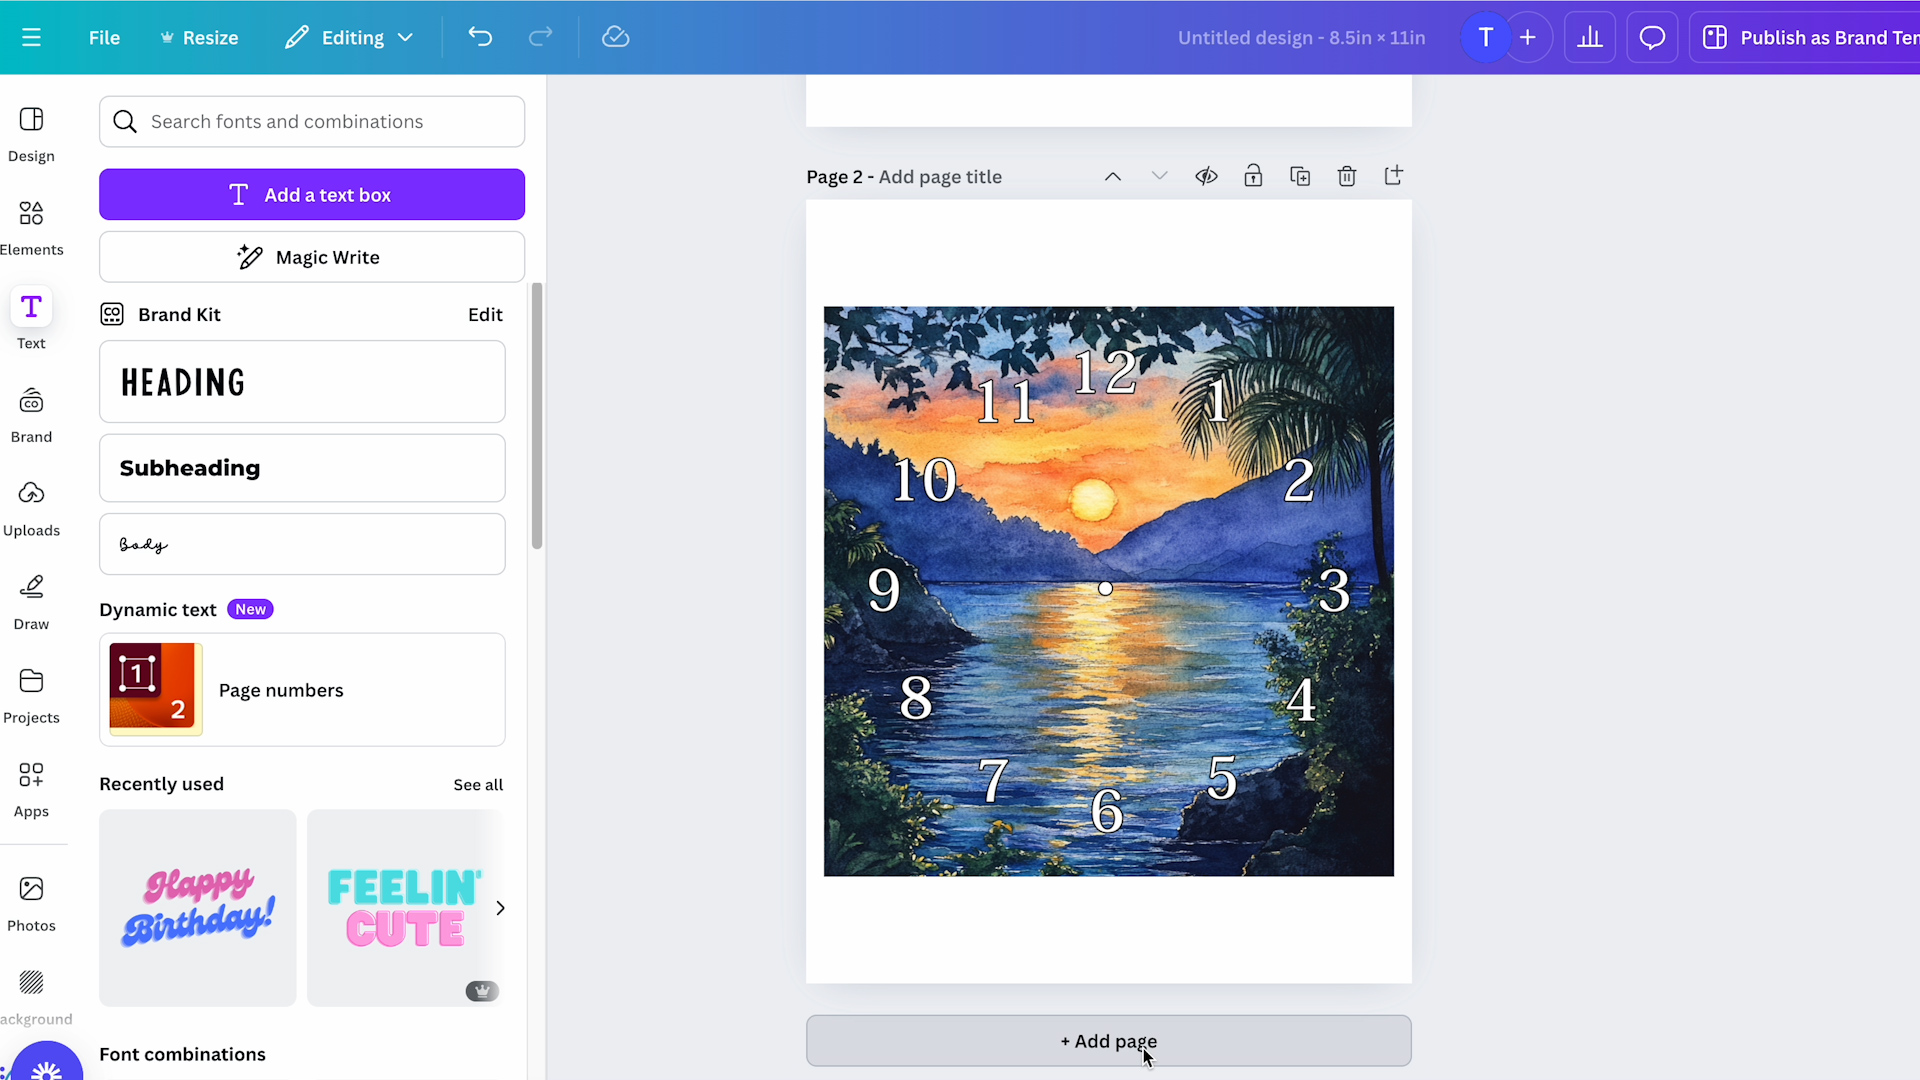
Add the image you want to use and resize it to fit your frame. I am using the same design and clock face design that I used on the round clock for the square clock.
If you're creating more than one design for a sublimation clock, you can easily use the same designs by clicking on the element and duplicating it, and then dragging it to the next page.
On the square clock blank, there is a hole in the bottom right corner of the blank. Make sure you don't have any important design elements in that area.
Rearrange and resize the image and the clock face as needed to fit the clock blank you're using.
Create Alarm Clock Sublimation Designs
The next sublimation clock I'm customizing is the block alarm clock. This one is different than the others because it doesn't require creating a clock face.
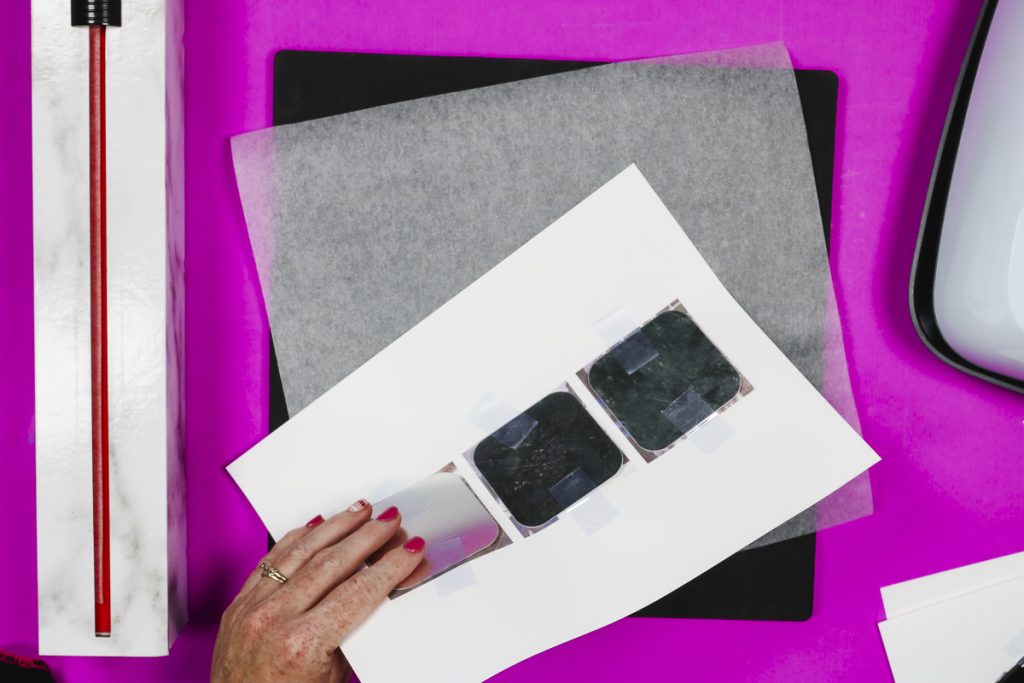
This clock has little sublimation panels that you sublimate and then add to the sides of the clock. There are three panels, so this time I am going to add three square frames to my canvas.
For my clock, I need the frames to be 2.75 inches square.

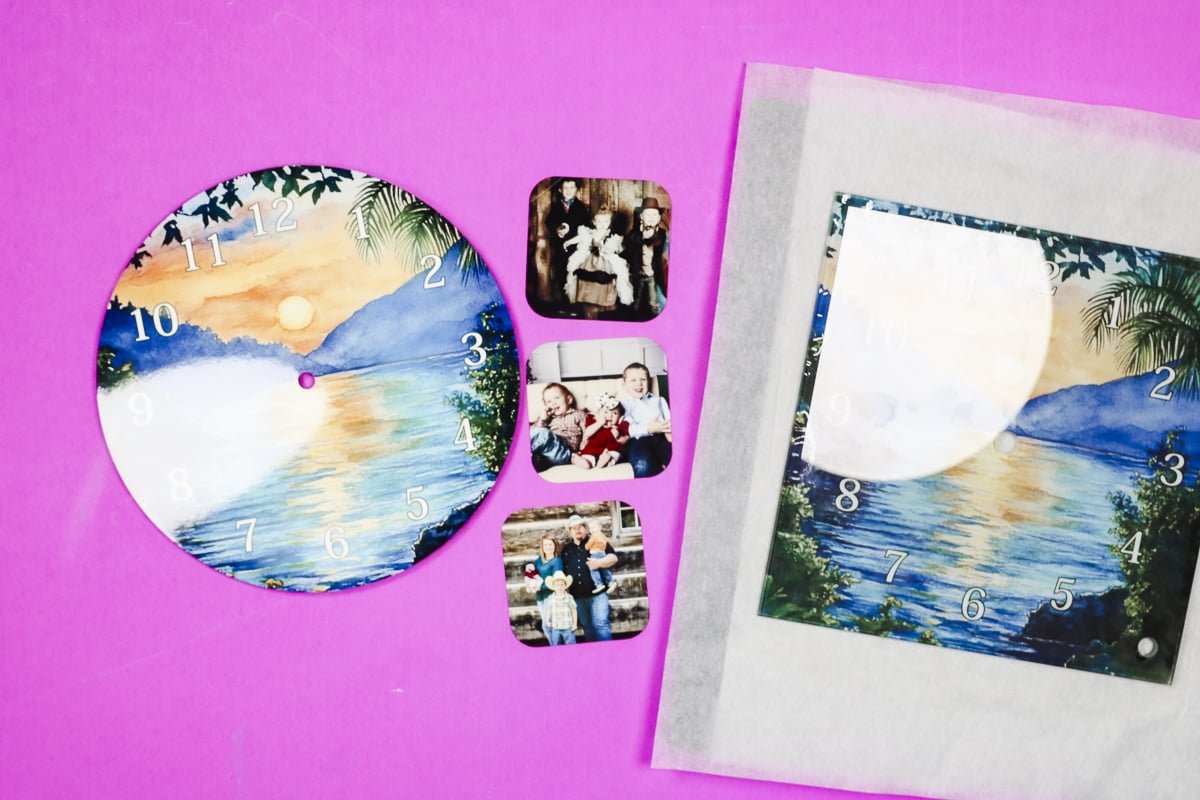
With the frames added to the canvas, I can upload the designs I want to use and drag them to the frames. I am using photos for this project, you can use any designs you want.
There are no holes for hands or anything we need to worry about with this blank.

Step 2: Print Sublimation Clock Designs
You cannot print directly from Canva, we need to download our designs.
Click Share and then Download. I choose PDF for Print and use CMYK. Click Download, and it will save to your device.
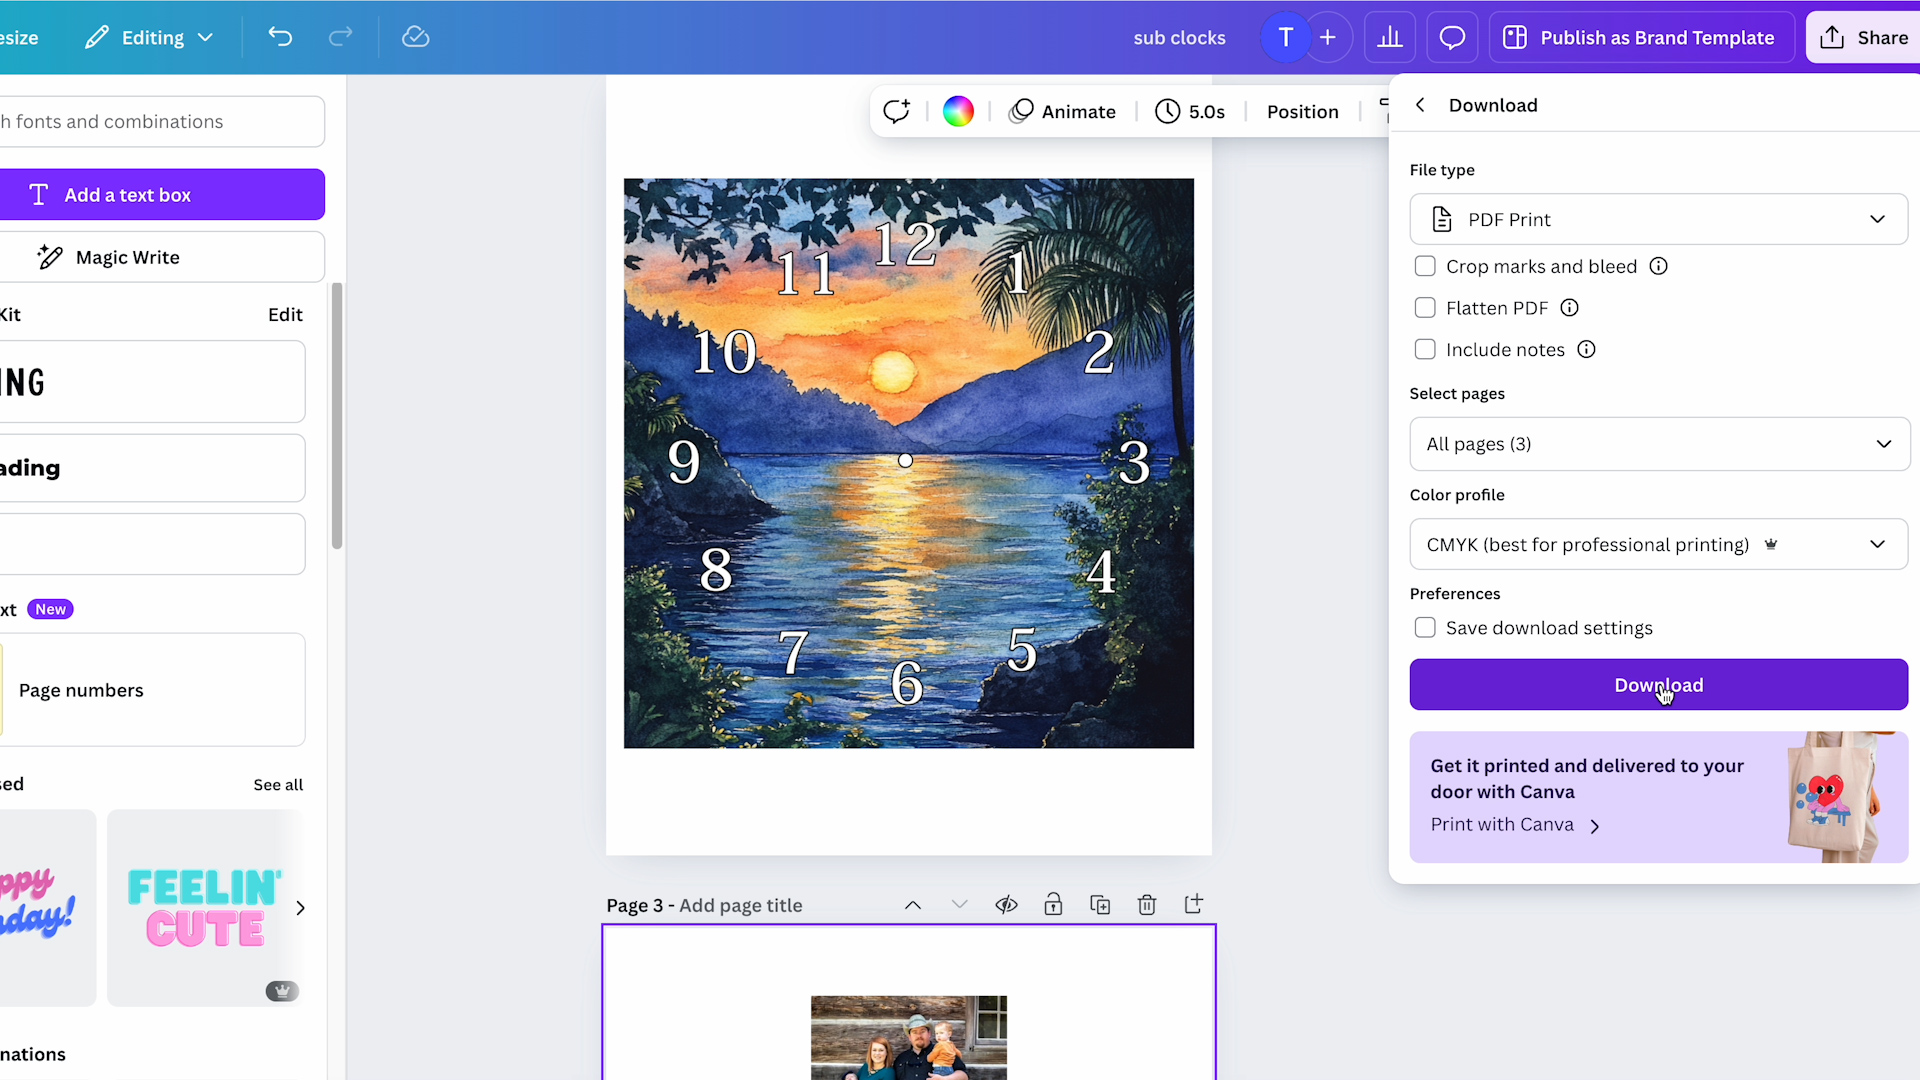
Open the design and print to your sublimation printer like you would any other project.
Make sure you're using sublimation ink in a sublimation printer and that you print onto sublimation paper.
Note – Make sure you know I your print needs to be mirrored. For my blanks, the round clock and alarm clock designs need to be mirrored. The square clock is glass, and you actually add the print to the back, and it shows through the front, so it doesn't need to be mirrored.
Step 3: Locate the Prints on the Sublimation Clocks
Before adding the designs to the clocks, make sure you remove any protective film and then clean the surface using a lint-free cloth or lint roller.
Make sure you have the top of the clock pointed up. You may need to look at the back to ensure you know the top from the bottom.
For the panels and the round clock, your designs should be mirrored, and you'll place the prints face down on the surface. For the square, glass clock, the design is not mirrored, and you locate the design on the back.
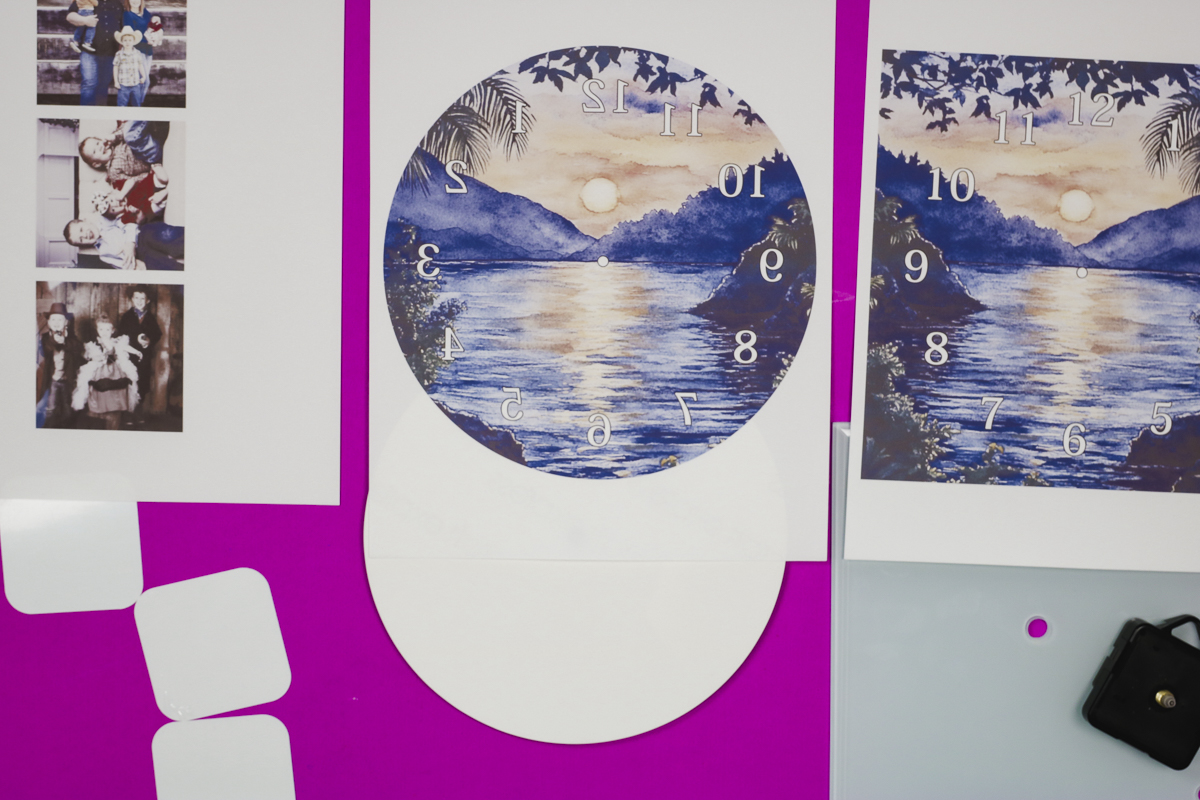
Center the print on the clock and secure it in place with heat-resistant tape.
Step 4: Press Sublimation Clocks
With the prints located correctly, they're ready to press.
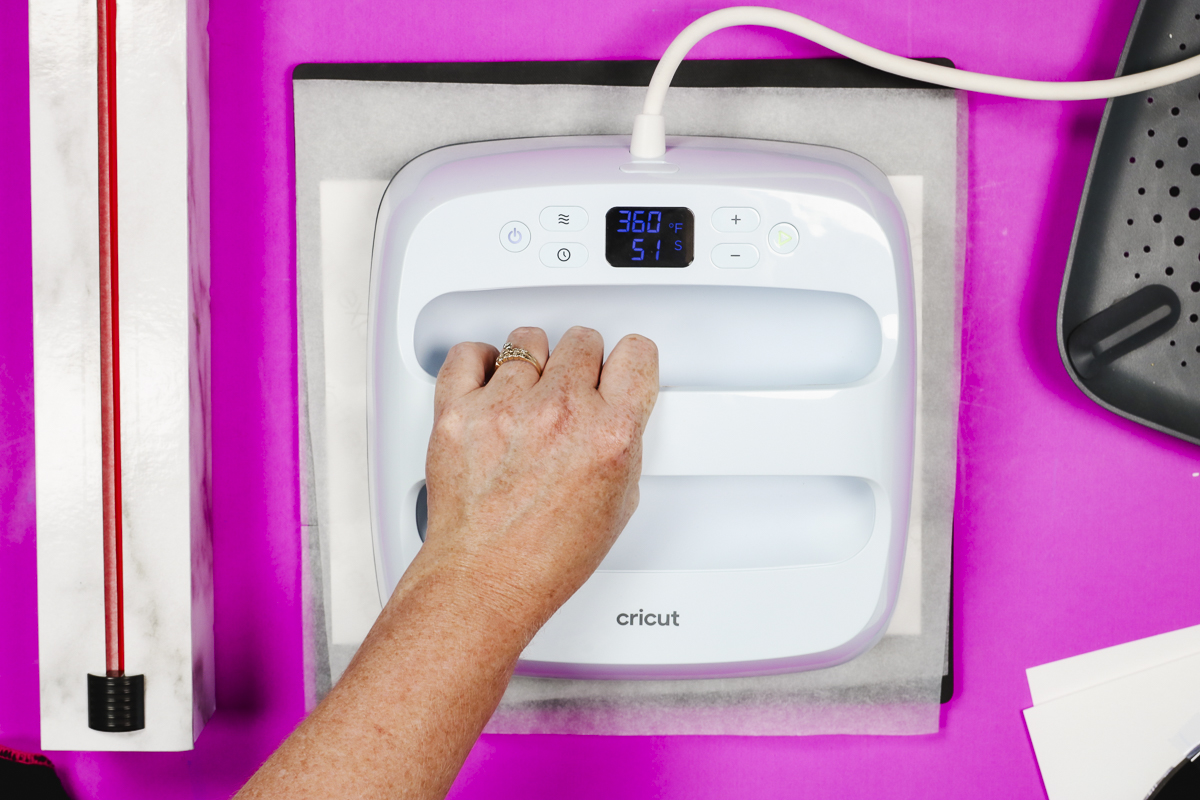
I am using an EasyPress, but you can use any heat press that gets hot enough for sublimation.
All of these blanks call for a temperature of 360 degrees, but they have different pressing times.
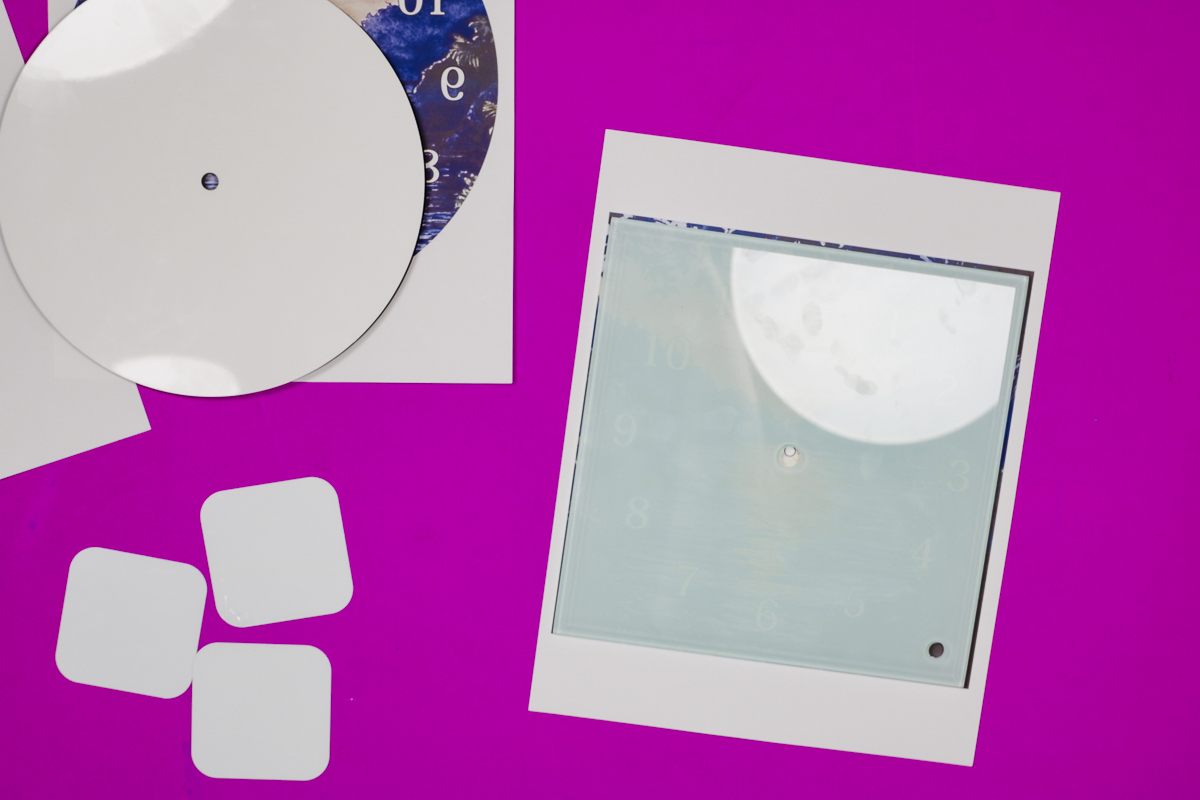
Place a sheet of protective paper on a heat-resistant mat and then place the clock on top with the print side up.
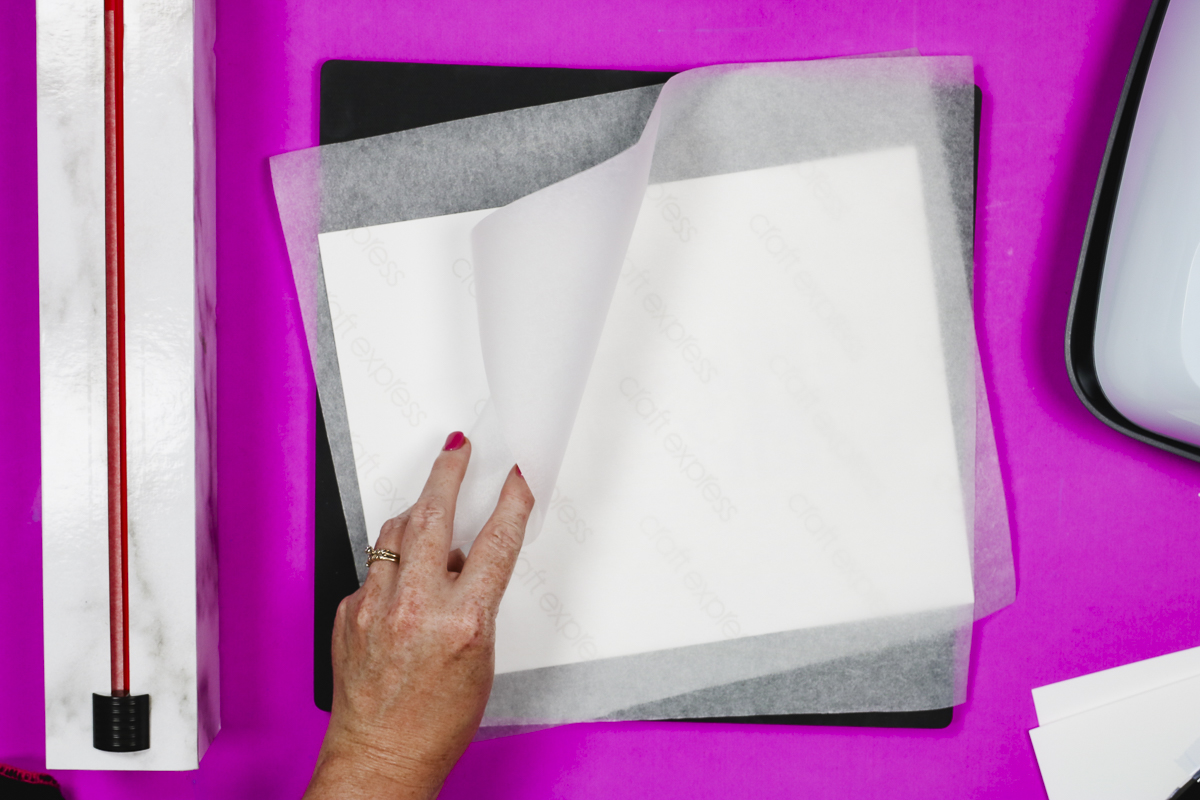
Cover with protective paper and press for the recommended time.
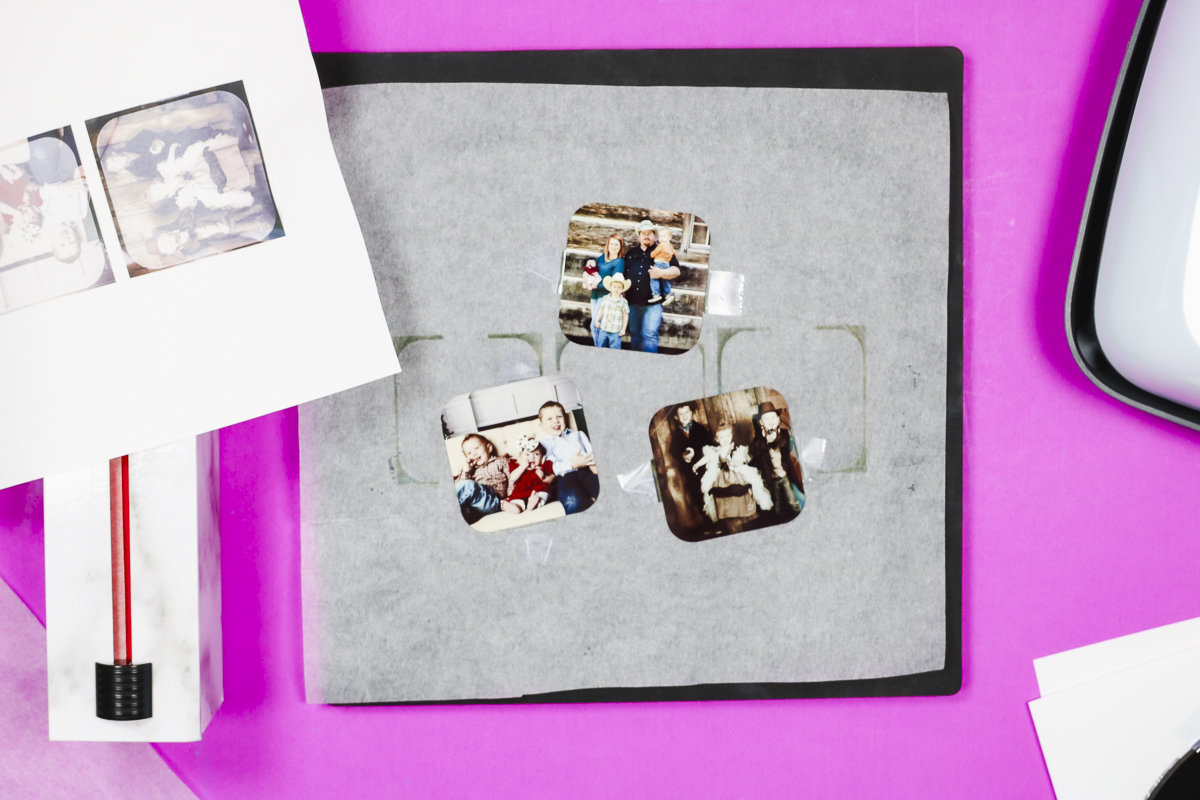
For the 3 alarm clock squares, the press time is 60 seconds. When the time is up, do a peek test to make sure the print has transferred. If it has, remove the protective paper and the print, and allow them to cool.
The round clock has a press time of 70 seconds, and the process was the same as the squares.
The square, glass clock has a press time of 140 seconds. I did have to press the corners of the glass clock for additional time because the EasyPress is rounded and didn't get the corners as well as I would have liked. I pressed each corner for an additional 70 seconds, and that time worked well for me.
The great thing about the glass sublimation blanks is that you can look through the glass without removing the print to see if it has transferred. If it hasn't, you can press for additional time.
Allow the blanks to cool, and then we're ready to assemble the clocks.
Step 5: Assemble Sublimation Clocks
Now that we have everything sublimated, we're ready to assemble each of the clocks.
Assemble Alarm Clock
Assembling the alarm clock is very easy. Three sides have an adhesive sticker on them. Decide which design you want where, and then peel back the sticker cover.
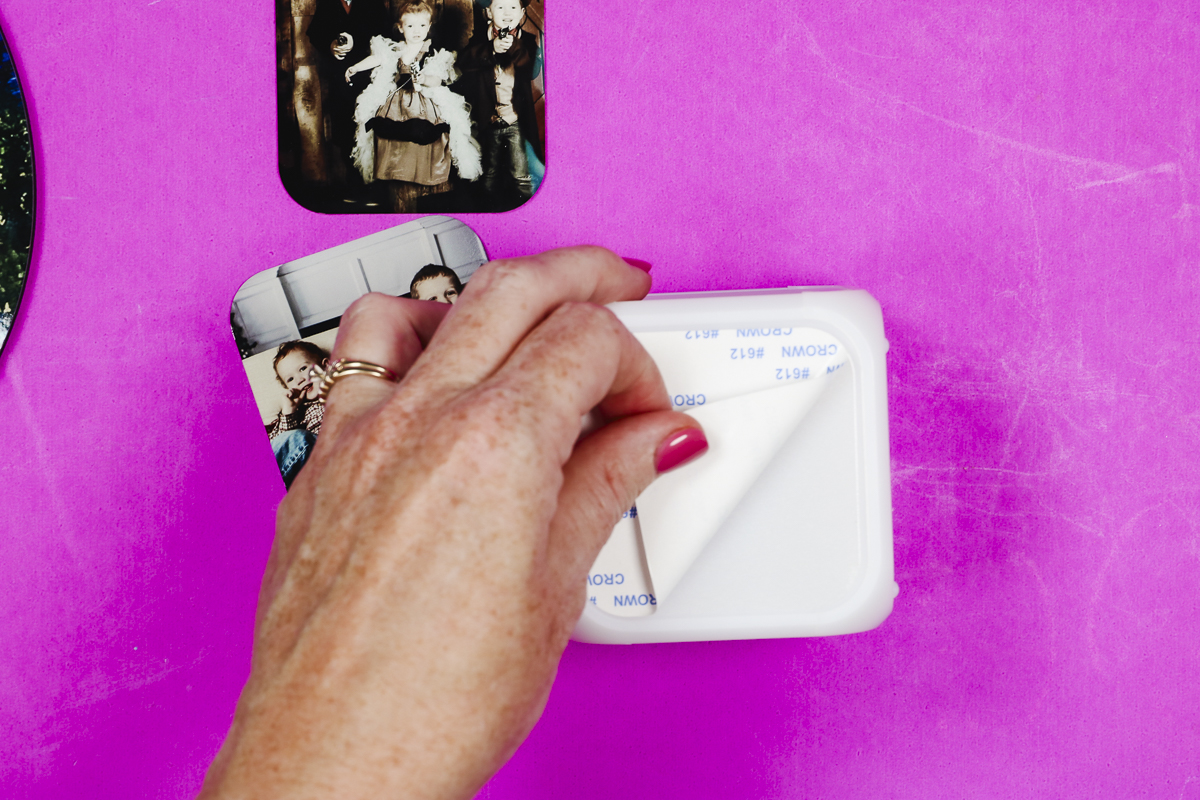
The photo panel will fit down on top of the sticker, and you just need to press it down across the surface.
You can orient the designs whichever way you want, but make sure you know where the bottom is before you stick anything down.

Repeat the process for all three sides, and this one is complete. My alarm clock is powered by batteries, so I can add those and set the time, and I have a cute alarm clock to use or to gift.
Assemble Round Sublimation Clock
To assemble the round sublimation clock, we need to assemble the hands.
Follow the instructions for your clock assembly. Make sure you know which end is the top so you can orient the hands correctly.
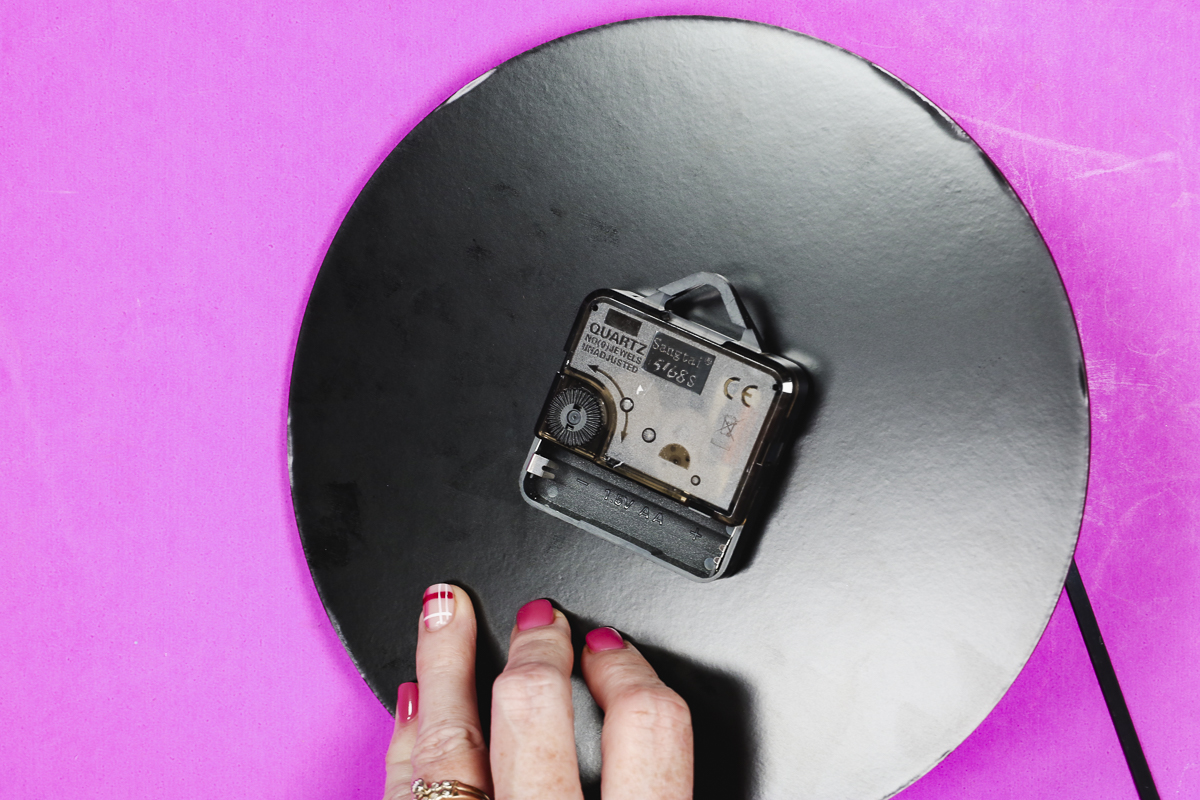
Push the clock assembly in place from the back, and add the nut to hold the assembly in place. If needed, you can use pliers if needed to tighten the nut.
Make sure the top of the assembly is pointed toward the 12 before you tighten it all the way.
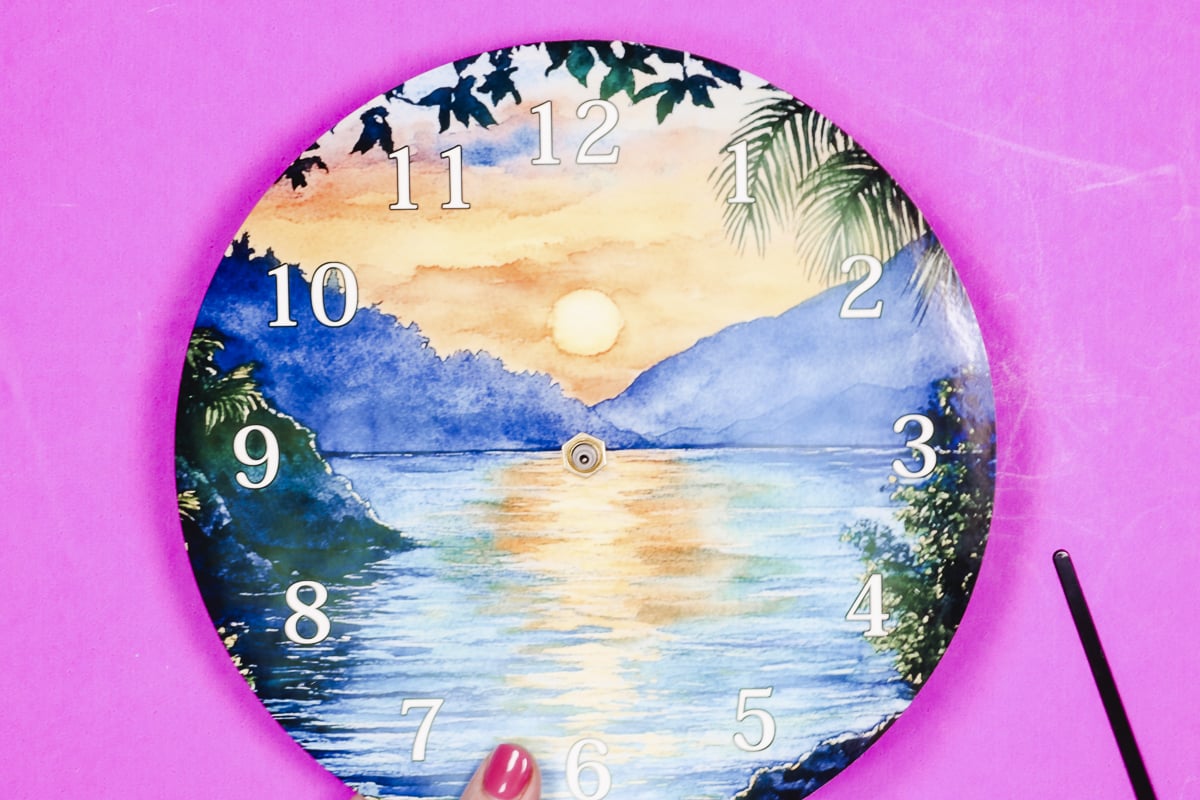
Look at the hands, and the one with the largest hole goes on first. That is the hour hand, and you simply press it into place. Next, place the minute hand and finally the second hand.
With all the hands in place, you can add batteries to your clock and set the time.
Assemble Square Sublimation Clock
The assembly process for the square sublimation clock is the same as the round clock.
The only difference is that there is an additional hole in the bottom right corner for the stand piece.
If you want the clock to stand versus hanging on the wall, add the stand to the corner. It is a 2-piece assembly and you just screw the pieces together with the clock standwiched between it.
With the stand in place, you can set the clock on a table or desk, and it will stand on its own.
Which of These Sublimation Clocks Should You Make?
Now that we have all the clocks assembled, which one do I like best?
I feel like the round MDF board clock is a higher quality than the others. If I had to pick a favorite, that one wins.
The alarm clock is really cute and very easy to assemble, but I'm not sure how long it will last. It's not very sturdy.
The glass one is really nice and high quality, except for the stand. If you plan to hang it, I think it's a great option. If you want to put it somewhere further back on a shelf that won't be bumped, it would probably do okay.
I do not feel like the single stand is going to keep the clock from getting knocked over, and since it's glass, it will likely break.
I found all three easy to assemble, and they sublimated really well. Without any alterations, I liked the traditional round clock the best.
I hope I've answered any questions you have about making sublimation clocks. If you have any additional questions, leave them in the comments, and I'll be happy to answer them for you.