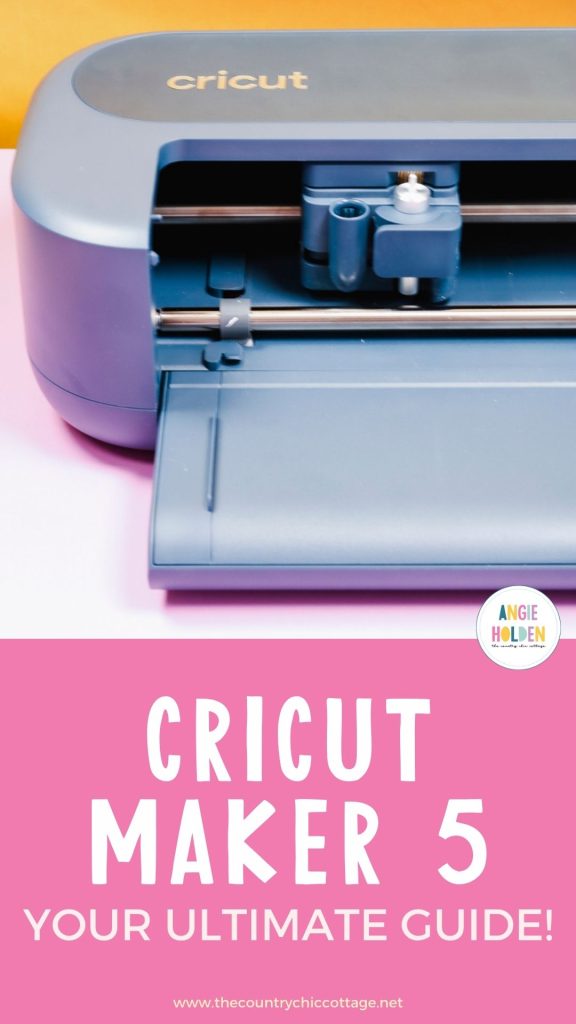
I'm excited to introduce you to the brand-new Cricut Maker 5. The upgrade to the Maker 5 from previous versions has me very excited. We're not just talking about being faster or load-and-go. We're talking thicker materials, an entirely new look, and actual differences from previous Maker machines.
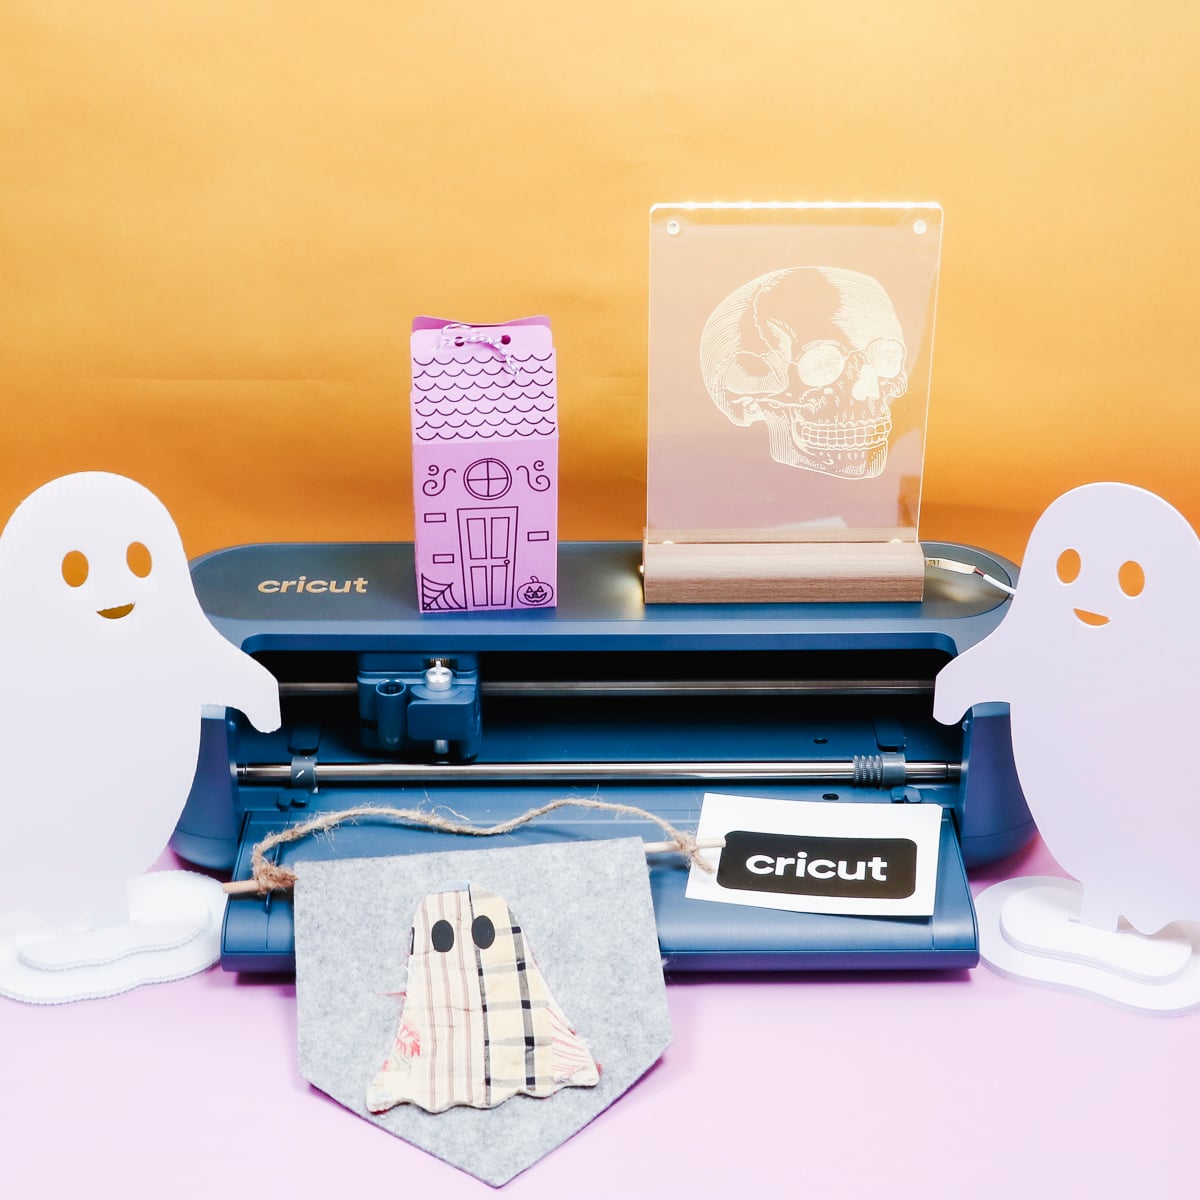
In this review, I'm going to test a variety of new materials; I'm going to test the two new tools; I'm going to make projects that weren't possible before with a Cricut.
I'll share my experiences, pros and cons, and, of course, who this machine might be for.
Cricut Maker 5
As someone who has owned every Cricut machine since the first Explore was released, I was thrilled to hear about the changes to the Maker 5. I've been waiting on some of these features for years.
The Cricut Machine Line
If you're new to Cricut machines, the Maker line is the top of the line for Cricut machines.
Joy machines, Explore machines, and Venture machines all cut thinner materials like paper, cardstock, vinyl, HTV, and more. Joy machines are the smallest machines and have size restraints you'll want to be aware of.
Explore machines can cut all the same materials as the Joy machines, but they are larger and can cut wider materials.
The Venture machine is the largest Cricut machine. It can cut very large materials, but the types of materials are the same as the Joy and Explore machines.
What Does a Cricut Maker Do?
Maker machines are similar in size to the Explore machines, but they have more force and many more tools. They can cut all the materials you can cut with other machines.
With a Maker machine, you can cut, engrave, foil, deboss, score, perf cuts, wavy cuts, rotary cuts, and draw over 300 materials, all in one machine.
Where to purchase the Cricut Maker 5
The new Cricut Maker 5 will be available exclusively at Michaels through September 17th, 2026, in a Teal color. After the 17th, you'll be able to purchase it at other retailers, including Cricut.com in the Slate Blue color.
How is the Maker 5 Different From Previous Maker Machines?
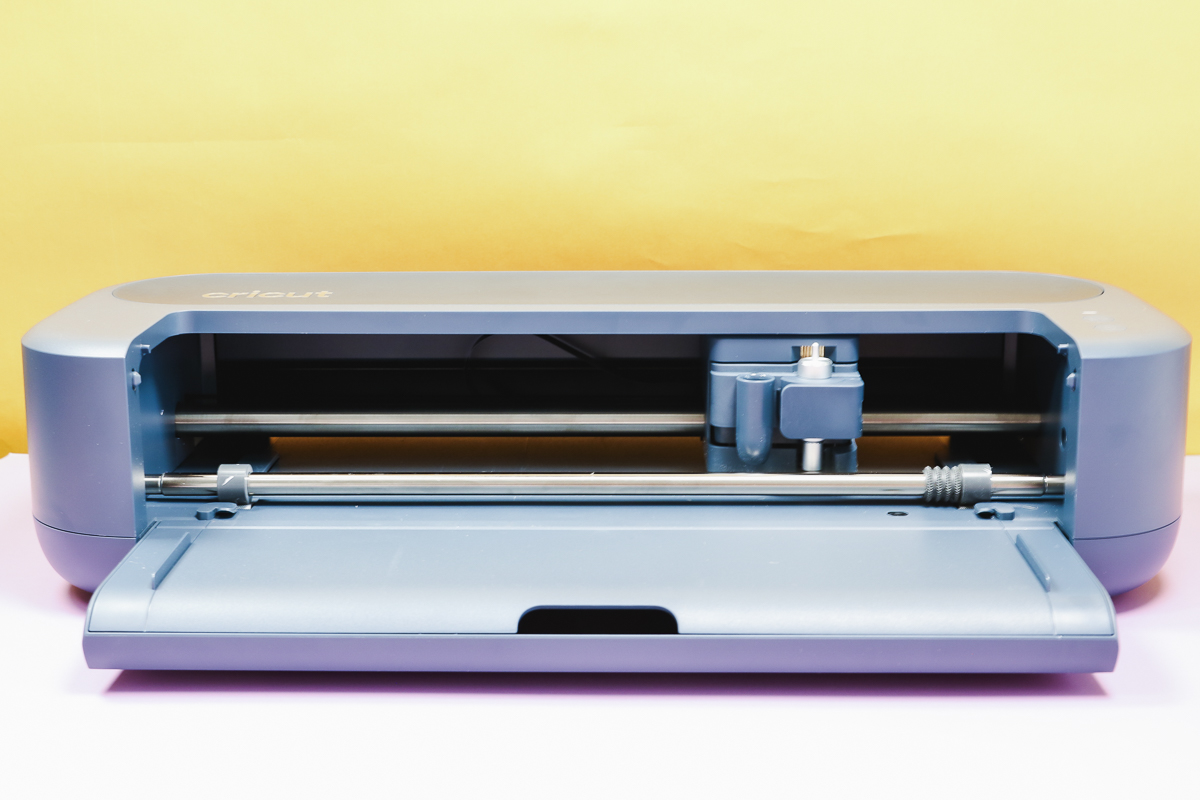
At a glance, the Maker 5 is smaller and looks different. It no longer has a top lid or a storage cup. The Maker 5 is smaller in both width and height compared to other Maker machines.
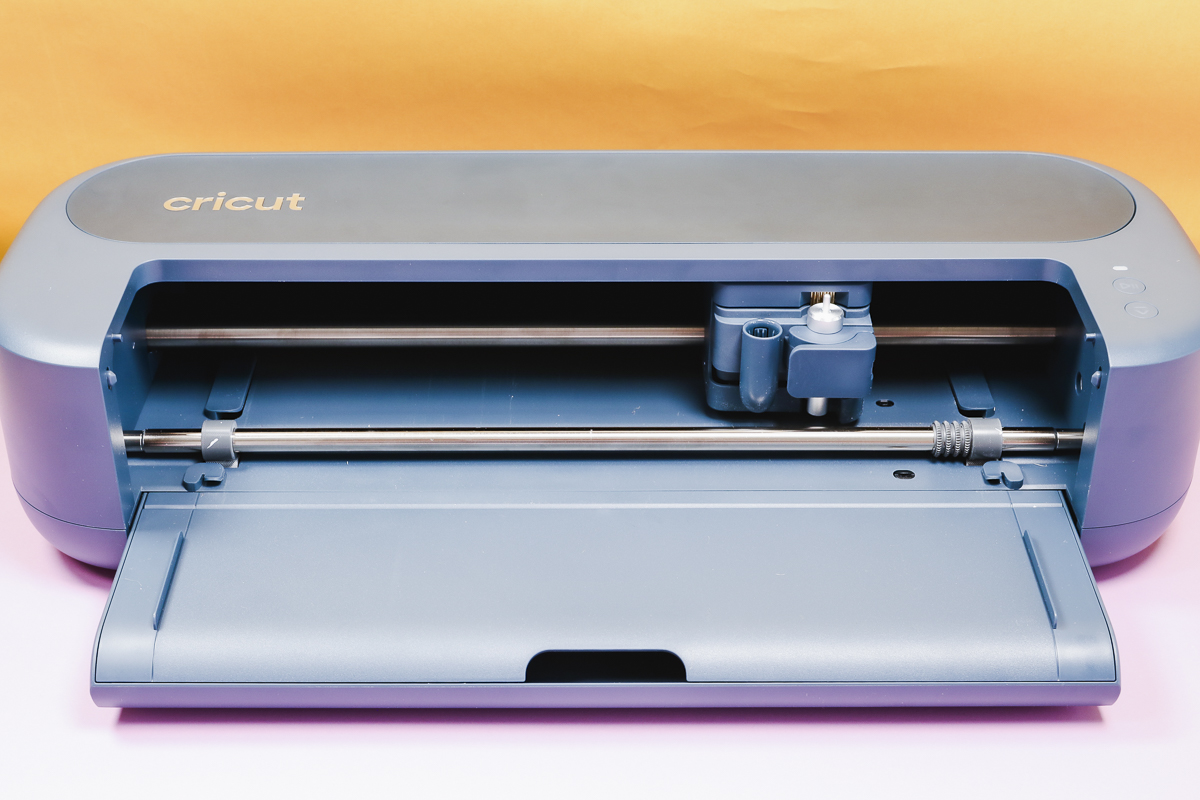
It can also cut thicker materials than ever. Previous generations of Maker machines could only cut materials up to 2.4 mm thick. Maker 5 can cut materials up to 3 mm thick; this opens the door to a lot more materials.
The blade and pen holders have changed and are now very similar to the Explore 5.
Cricut Maker 5 is also equipped with the Load and Go feature. Instead of loading the material and then having to press Go, you now load the material into the machine, and then it will cut automatically. This feature was first released with the Explore 5, and I wasn't sure what I thought of it. In time, I've come to really like it.
Blades for the Maker 5
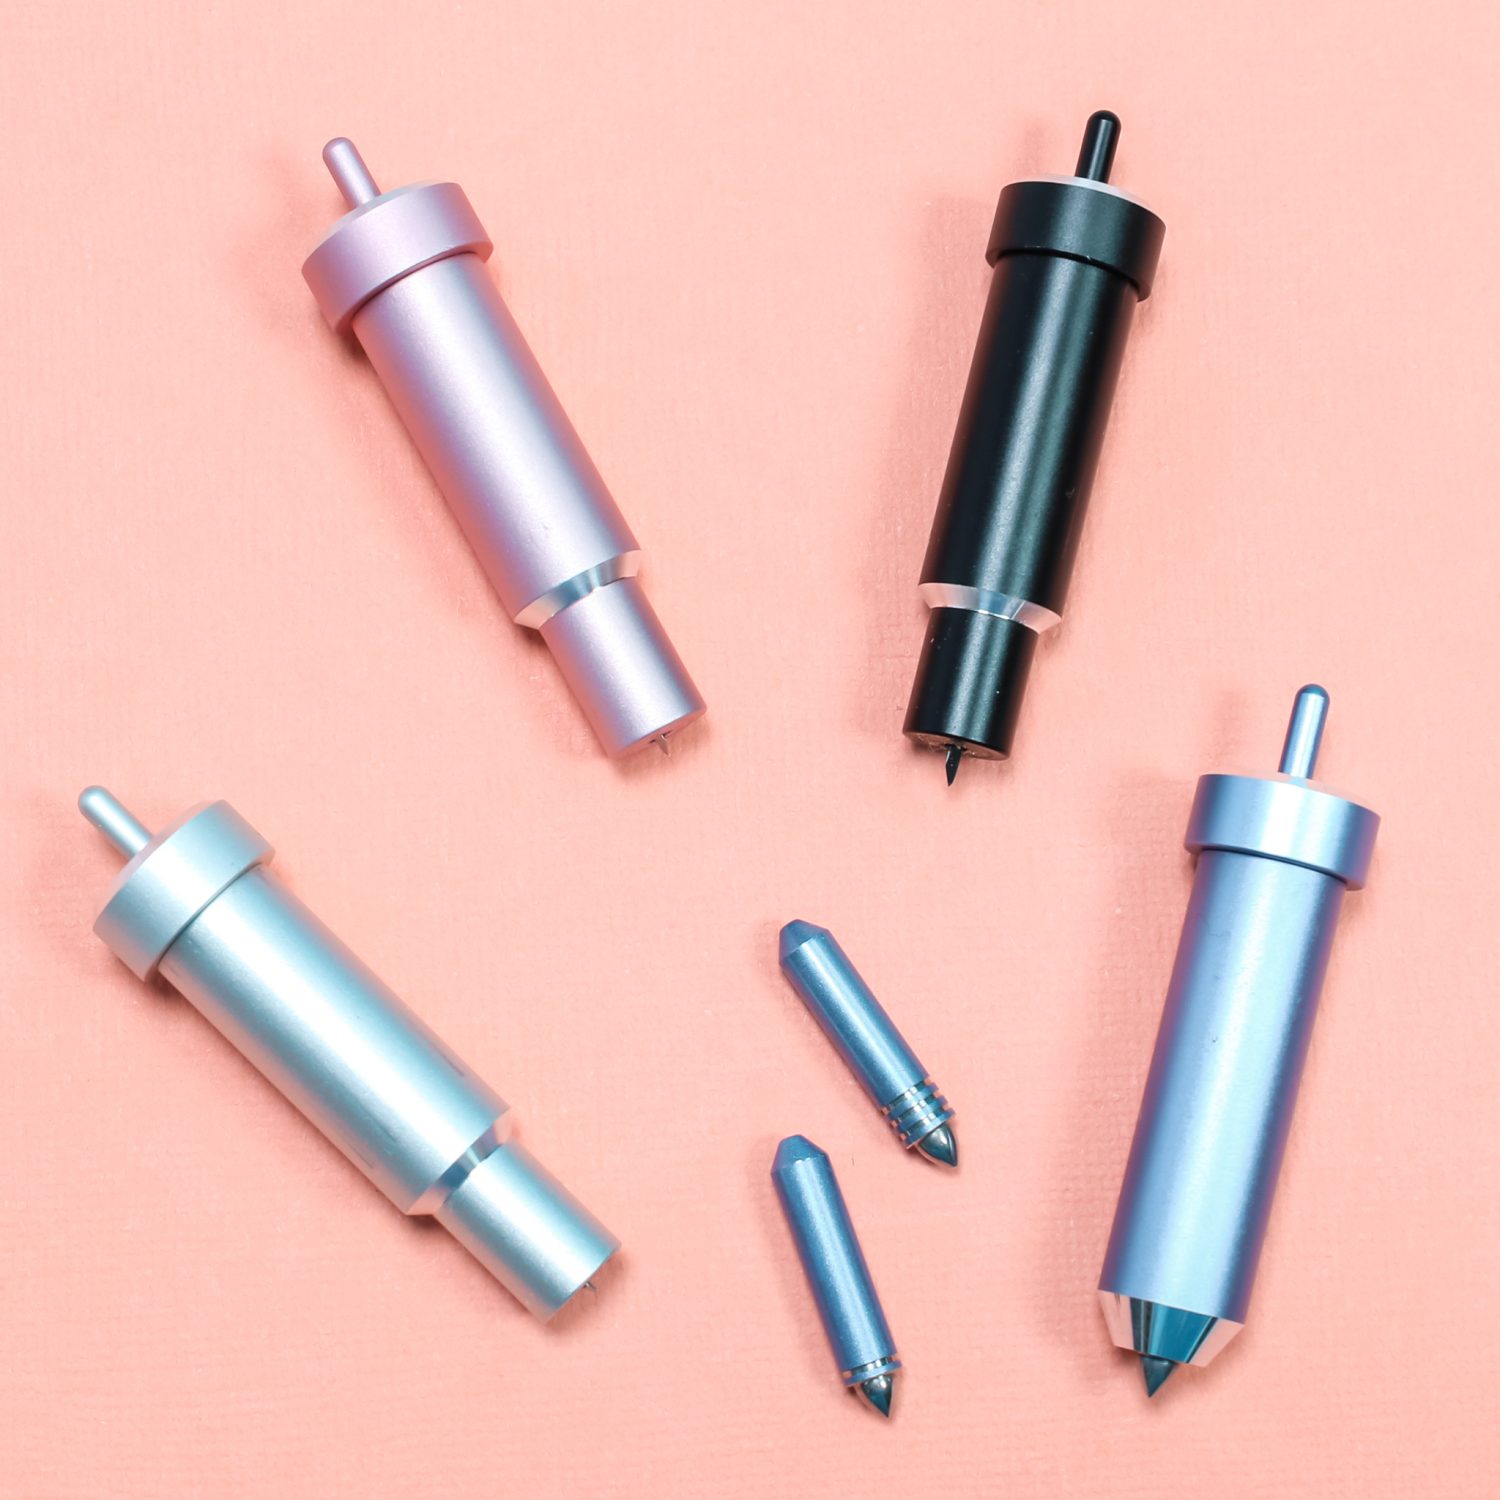
The pen and blade housing have changed in this machine. That means some tools will not work and some will.
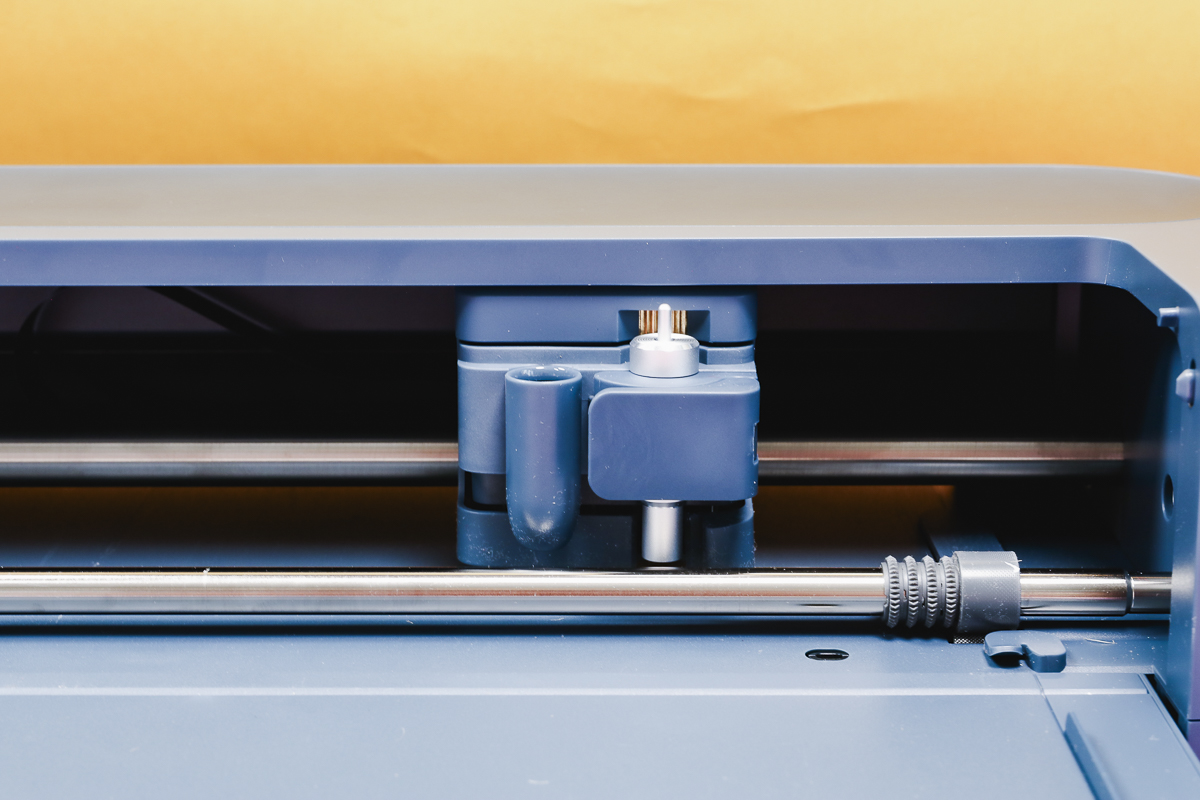
The Scoring Stylus and previous pens will not work in the accessory holder because it is now just a pen holder.
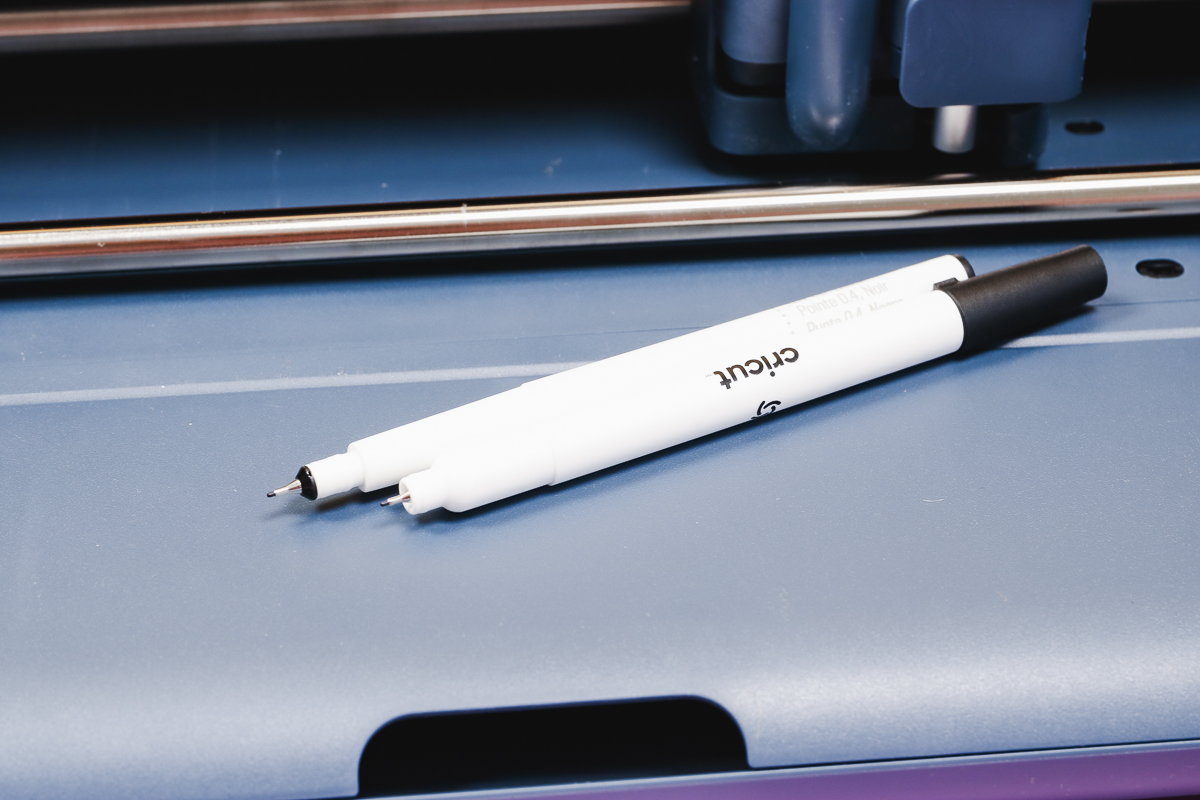
There are new universal pens that work in the Maker 5 and Explore 5 machines, and a black double-ended pen comes with the Maker 5.
The newer pens are a little more rounded and look very similar to the Joy pens.
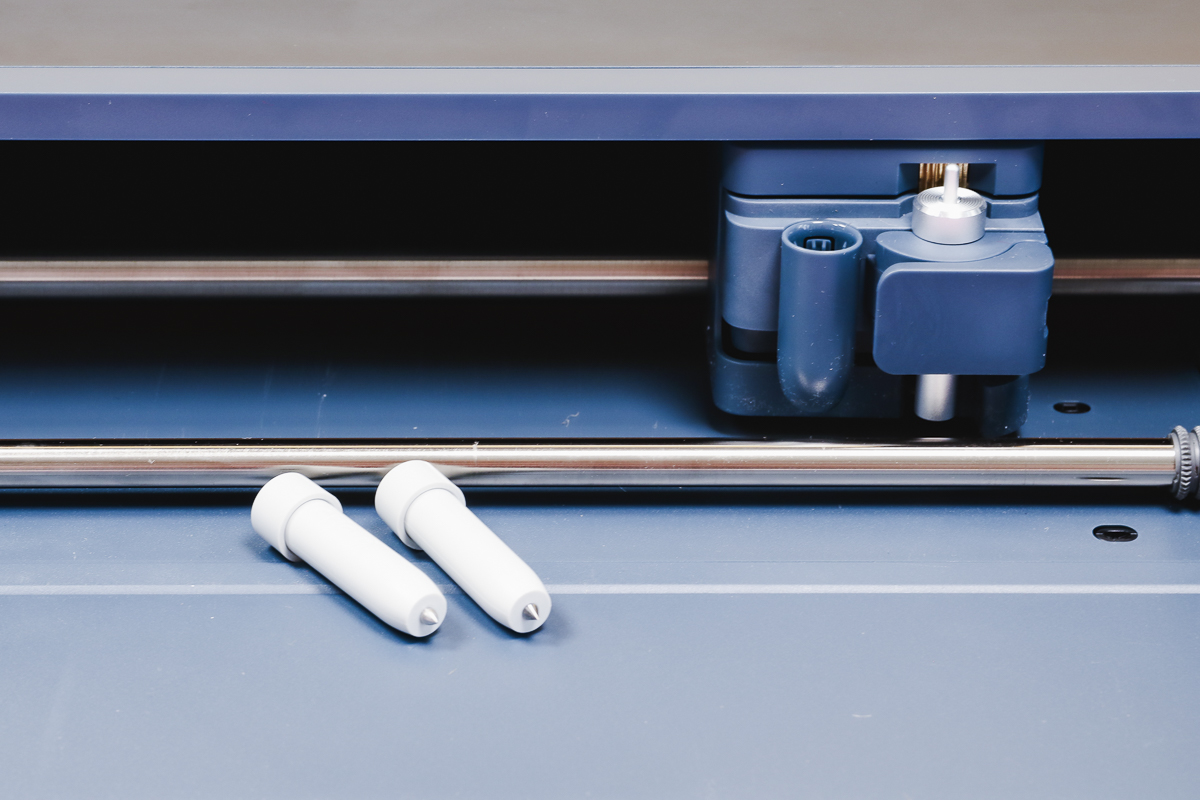
Instead of the Scoring Stylus, there is a new Scoring Tool, and it comes with the Maker 5. There is also a new Engraving Tool.
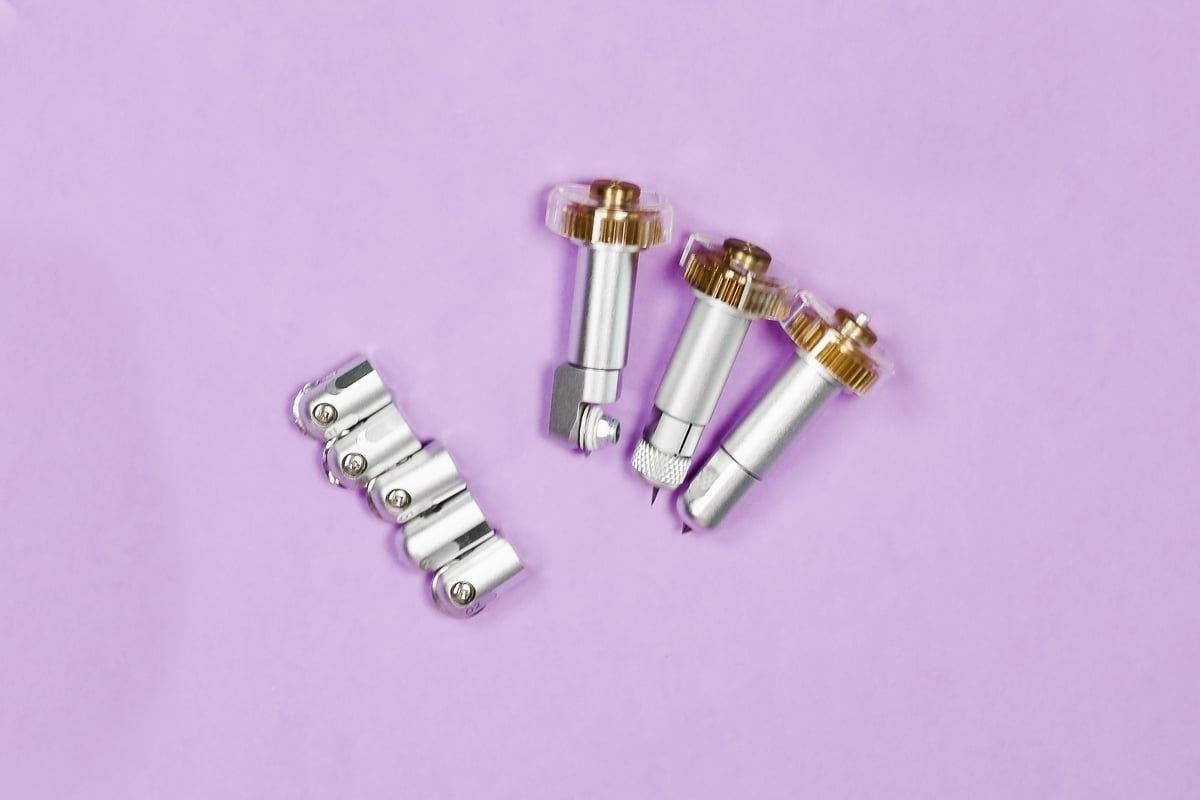
The Maker 5 still has the Adaptive Tool System. If you have any of the previous tools, they will work in the Maker 5. Those include:
- Engraving Tool
- Rotary Blade
- Debossing Tool
- Wavy Blade
- Perforation Blade
- Knife Blade
- Single and Double Scoring Wheel
Other previous tools and blades that will work with the Maker 5 are:
- Foiling Tool – Thin, Medium, and Bold
- Fine Point Blade
- Bonded Fabric Blade
- Deep Point Blade
Mats for the Maker 5?
Yes, all of the previous Cricut mats work with the Maker 5. Those include both 12×12 mats and 12×24 mats in:
- LightGrip – Blue
- StandardGrip – Green
- FabricGrip – Pink
- StrongGrip – Purple
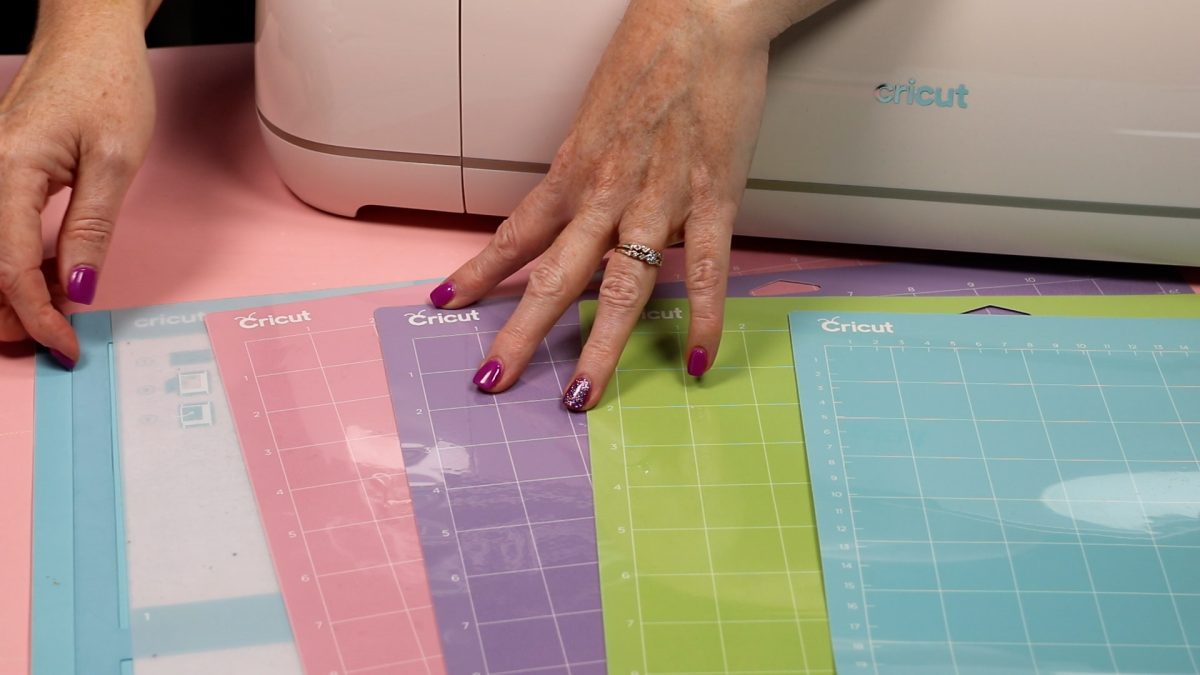
It also includes the Cricut Card Mats.
You can also use previous Cricut Smart Materials without a mat in the Maker 5.
What Comes with the Cricut Maker 5?
What comes with the machine will depend on the bundle you purchase. I have the Essentials Bundle, and it includes:
- Cricut Maker 5 Machine
- Power Cord
- Cord to Connect the Maker to a Computer or Printer
- Fine Point Blade
- Envelope of Cricut Materials including Cricut Smart Vinyl, Transfer Tape, Smart Iron-on, Cardstock, Insert Card Set, and Printable Vinyl
- Tools and Accessory Box including Scoring Tool, Engraving Tool, Double-sided Pen, LightGrip Mat, Card Mat, Weeder, Scraper, Spatula, Paper Ruler, and Paper Trimmer
- Quick Start Guide
- Paper with information on how to set up your machine
Regardless of what type of bundle you purchase, even the most basic bundle includes everything you need to start making projects right out of the box.
Cricut Maker 5 Setup
Head to Cricut.com/setup and follow the process for setting up your machine.
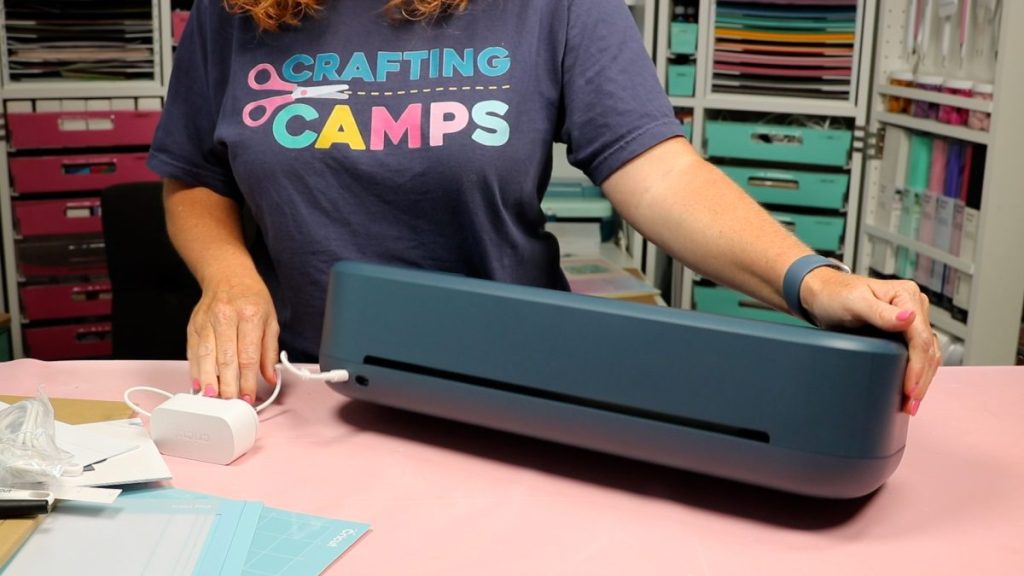
Plug the power cord into the back of the machine and into a power outlet.
If you haven't already installed Cricut Design Space, do that now.
You may need to update the Firmware for your machine. This can take a little bit of time. Make sure to allow it to update completely.
Make Your First Project
Toward the end of your setup, you'll be prompted to do a test project.
I highly recommend doing the test project. You'll be walked through a project cutting Smart Vinyl, and this will help ensure that your Cricut machine is cutting correctly.
There is a piece of Smart Vinyl in the supplies included with your machine, and it is labeled Practice Sheet.
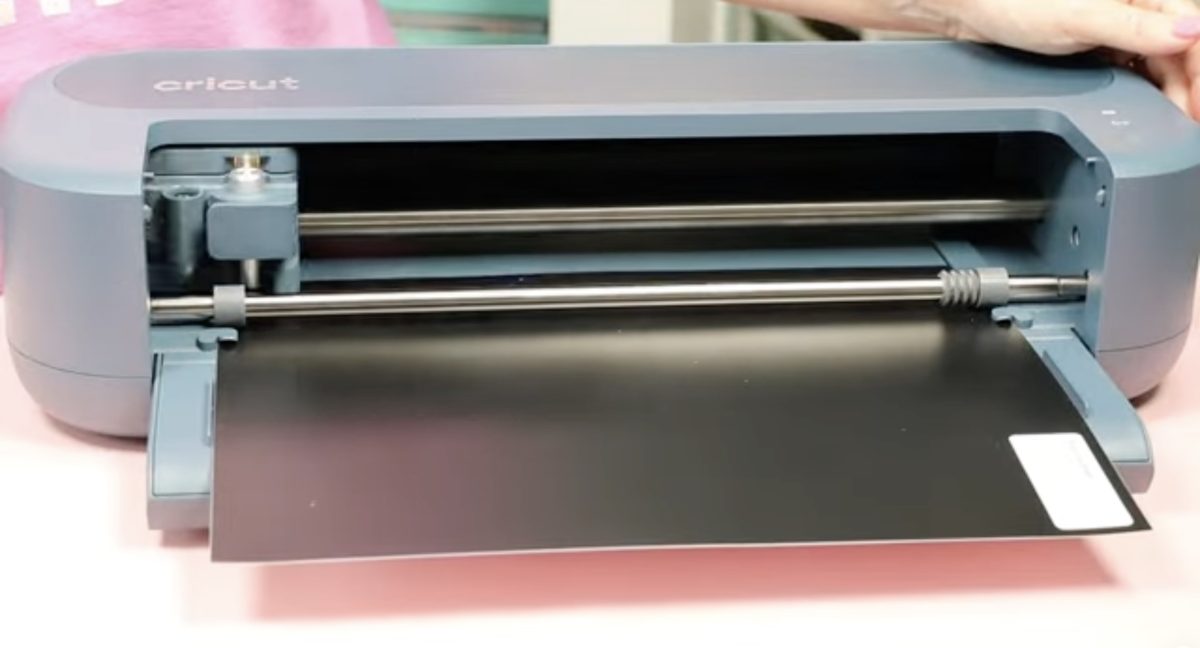
When the machine is done cutting, weed away the excess, and you're left with a vinyl decal that says Cricut.
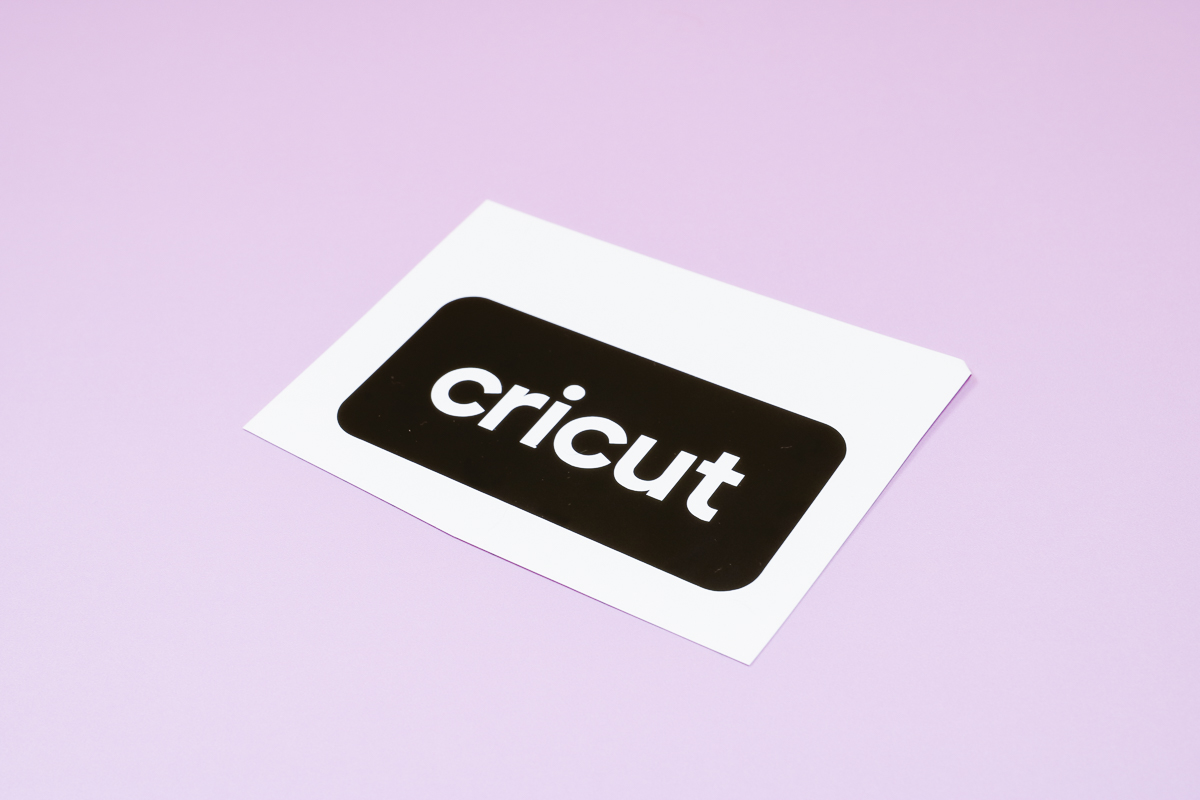
Completing this easy test project is a great way to start learning your new Cricut machine, and my machine cut the material beautifully.
Testing the Cricut Maker 5
Now I am going to put the machine to the test with a few projects.
Supplies Used
- Standing Ghost File
- 3mm Foam Board
- 3mm Corrugated Plastic
- 3mm Acrylic Sign
- Vintage Quilt Square
- Thick Felt
Cut, Draw, and Score Paper
Since I've tested cutting vinyl during the test project, for my first project, I'm going to do a project that includes cutting with the fine point blade, drawing with a pen, and scoring with the new scoring tool.
Step 1: Design Project
Open Cricut Design Space, open a blank canvas, and then click on Images. I searched “Halloween Box” and then sorted it for Cut + Draw.
The project I chose is a Halloween House Box, and it will cut, draw, and score all in one project.
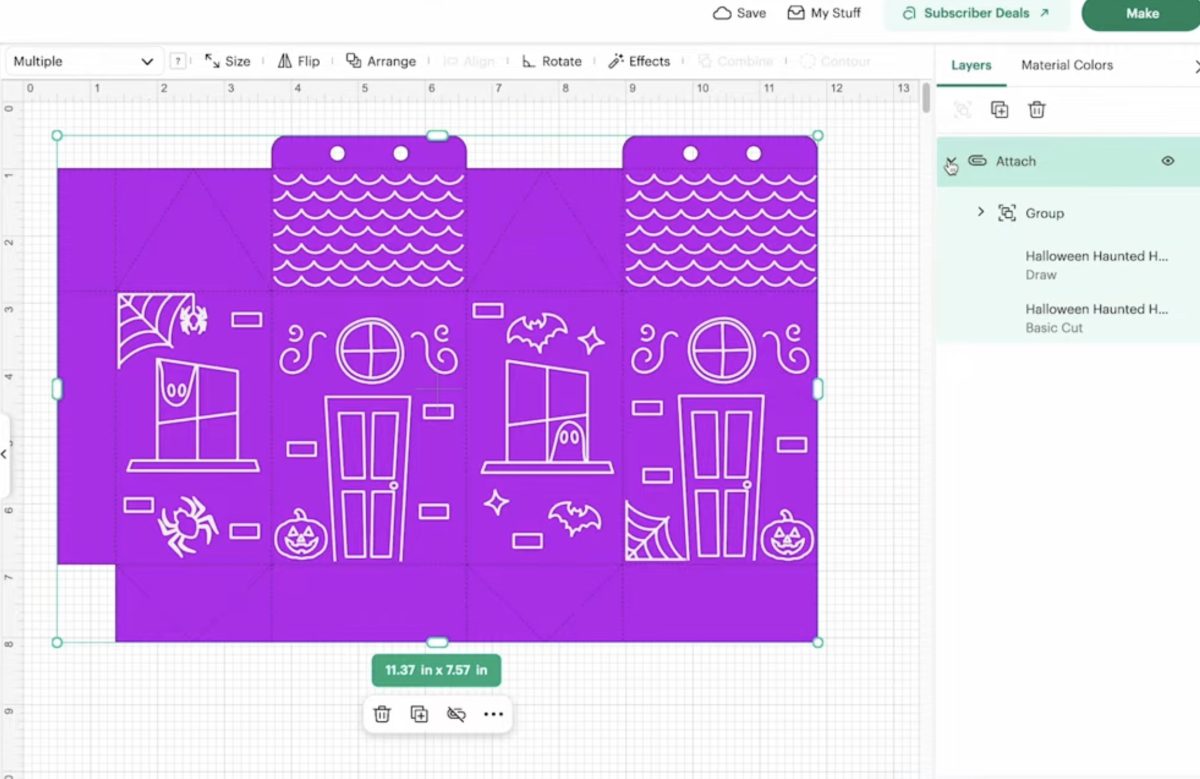
Make sure the project isn't too big for your mat or material, and then click Make.
Click Continue and choose Medium Cardstock for the material.
I always recommend following the prompts on the screen. Before I can even load the mat into the machine, a screen pops up with Pen Loading Instructions and a reminder that you need to use the universal pens in this machine.
Step 2: Load the Pen into the Machine
To load the pen into the machine, remove the cap from the end you want to use and drop it into the pen holder. Place your finger under the housing to hold it up and press the pen down until it snaps in place. You need to make sure you hear it click into place.
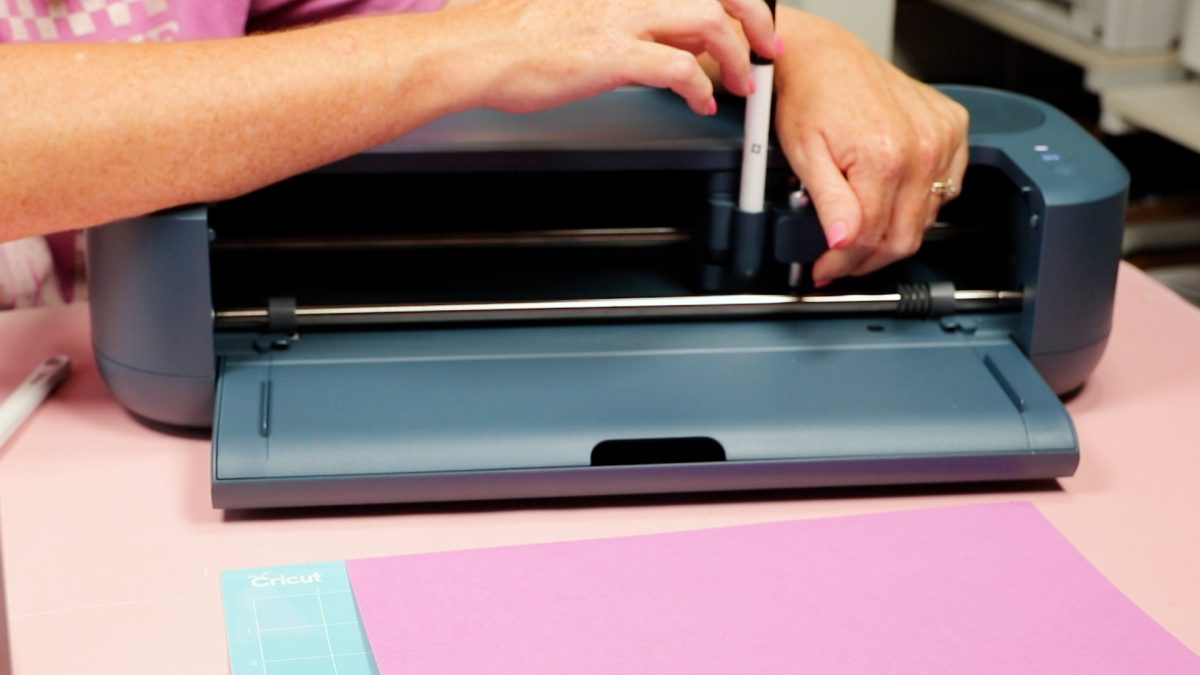
Design Space says I can leave the blade in place while the machine draws. I want to check that the blade doesn't drag, so I'm going to leave it loaded. If the blade drags, you'll want to remove it while the machine is drawing.
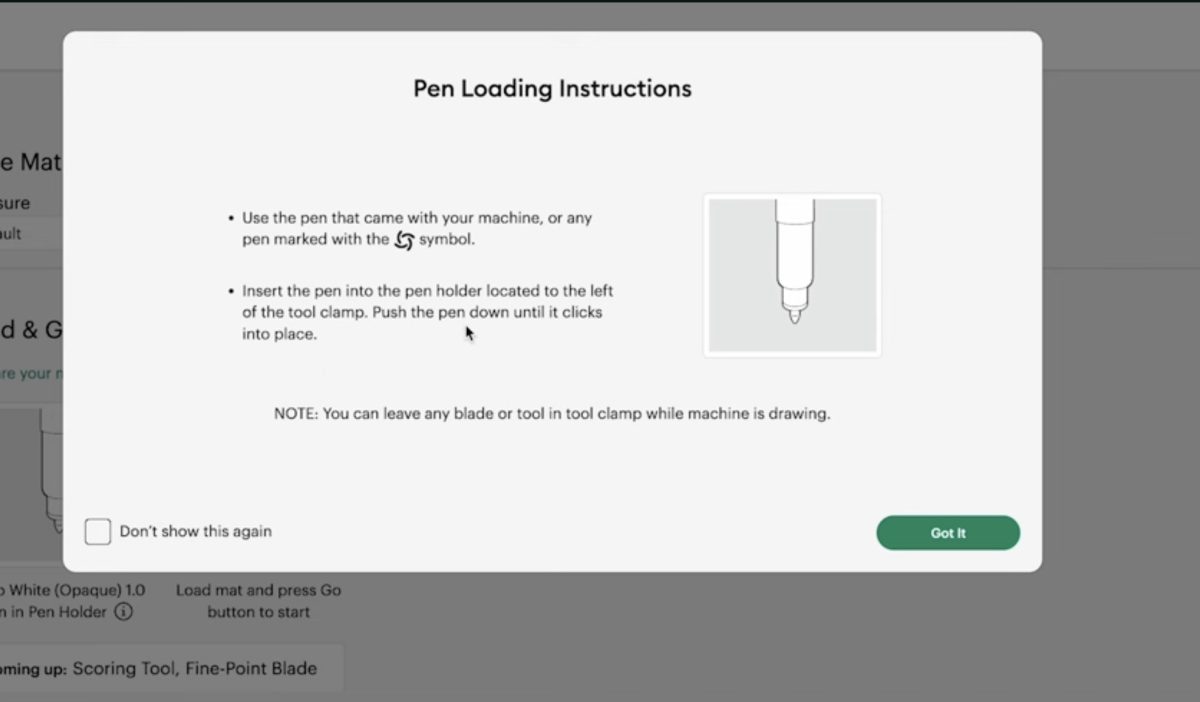
Design Space will tell you what color of pen to load into the machine. This will be dictated by the color you have the pen set to in Design Space. You can load any color pen into the machine, and it will draw when prompted.
Step 3: Load the Material
Place the cardstock on a LightGrip mat and make sure it's stuck down everywhere.
Load the mat, making sure both sides of the mat are under the guides on the machine.
Press the flashing button on the machine to load the mat.
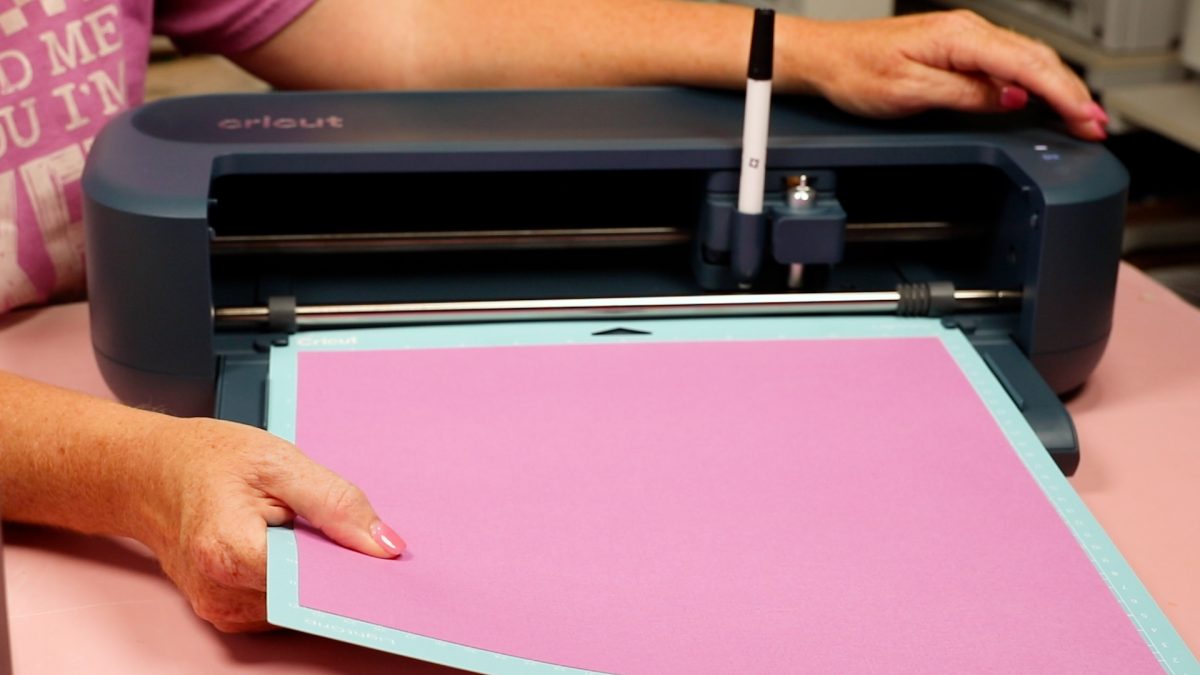
Step 4: Cut with Load and Go
Once the mat is loaded, it will automatically start the project. For this project, it's going to draw first.
If you've owned a previous Cricut machine, you'll be used to loading the mat and then pressing Go on the machine for it to start.
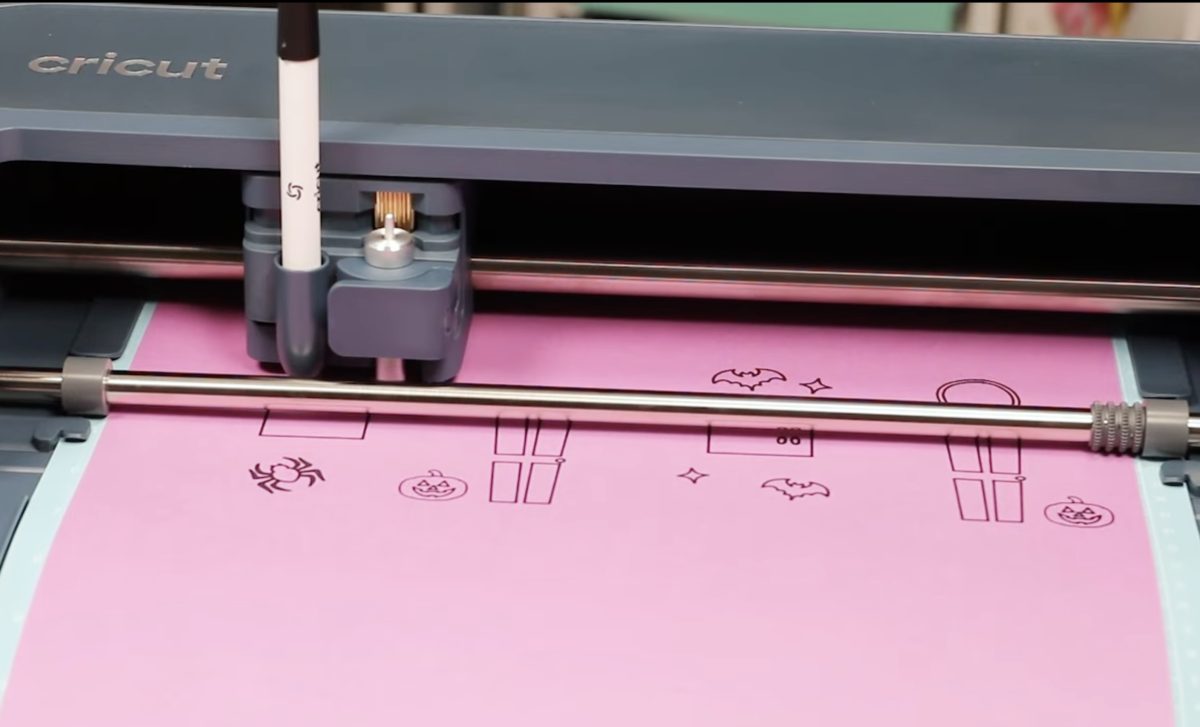
When using the Maker 5, make sure you have the correct tools and materials loaded because as soon as it is loaded, it is going to start.
It will still check the blade, but it won't know if you have the right material on the mat or the right color of pen loaded.
Step 5: Change the Tools When Prompted
When the machine is done drawing, Design Space will prompt you to remove the pen and install the scoring tool. Do not unload the mat at this point.
Because I left the blade in the machine, I need to remove it first.
If you want to use one of the scoring wheels, you can click Edit Tools and select the tool you want to use.
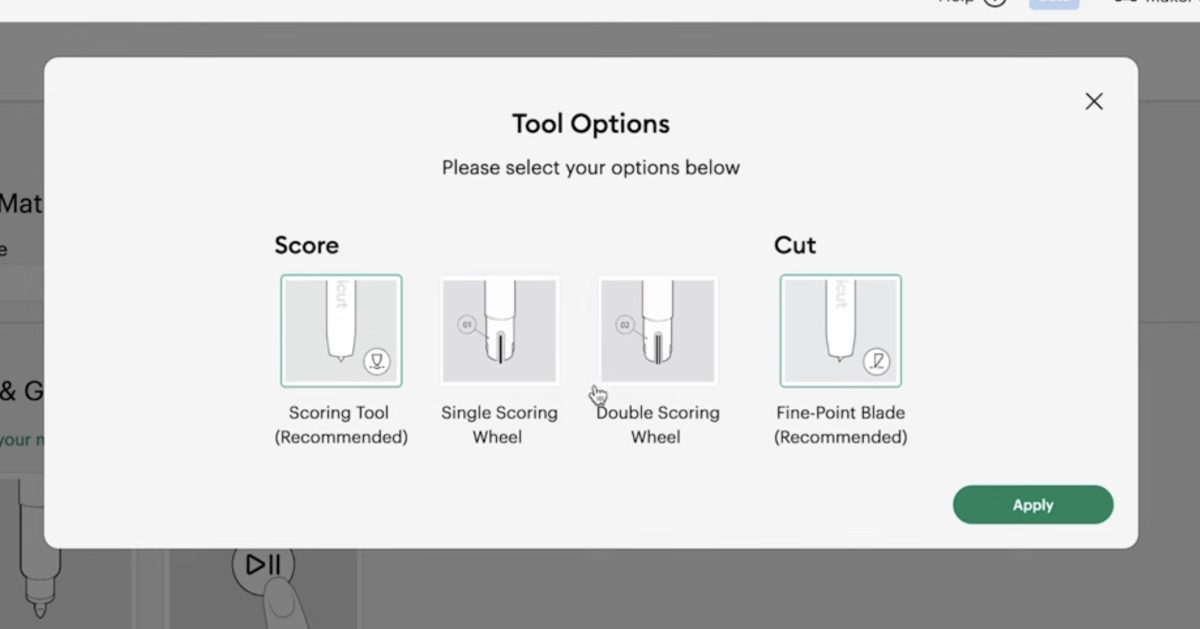
If you have both the new scoring tool and the new engraving tool, make sure you have the right one loaded. There is an image on the screen to help ensure you use the correct tool.
Press the flashing button, and the machine will automatically start scoring after it confirms the correct tool is loaded.
When the scoring is done, you'll be prompted to remove that tool and install the fine point blade.
Press the flashing button again, and it will cut out the design.
Step 6: Assemble the Halloween House 3D Box
When the machine is done cutting, unload the mat and remove the cardstock.
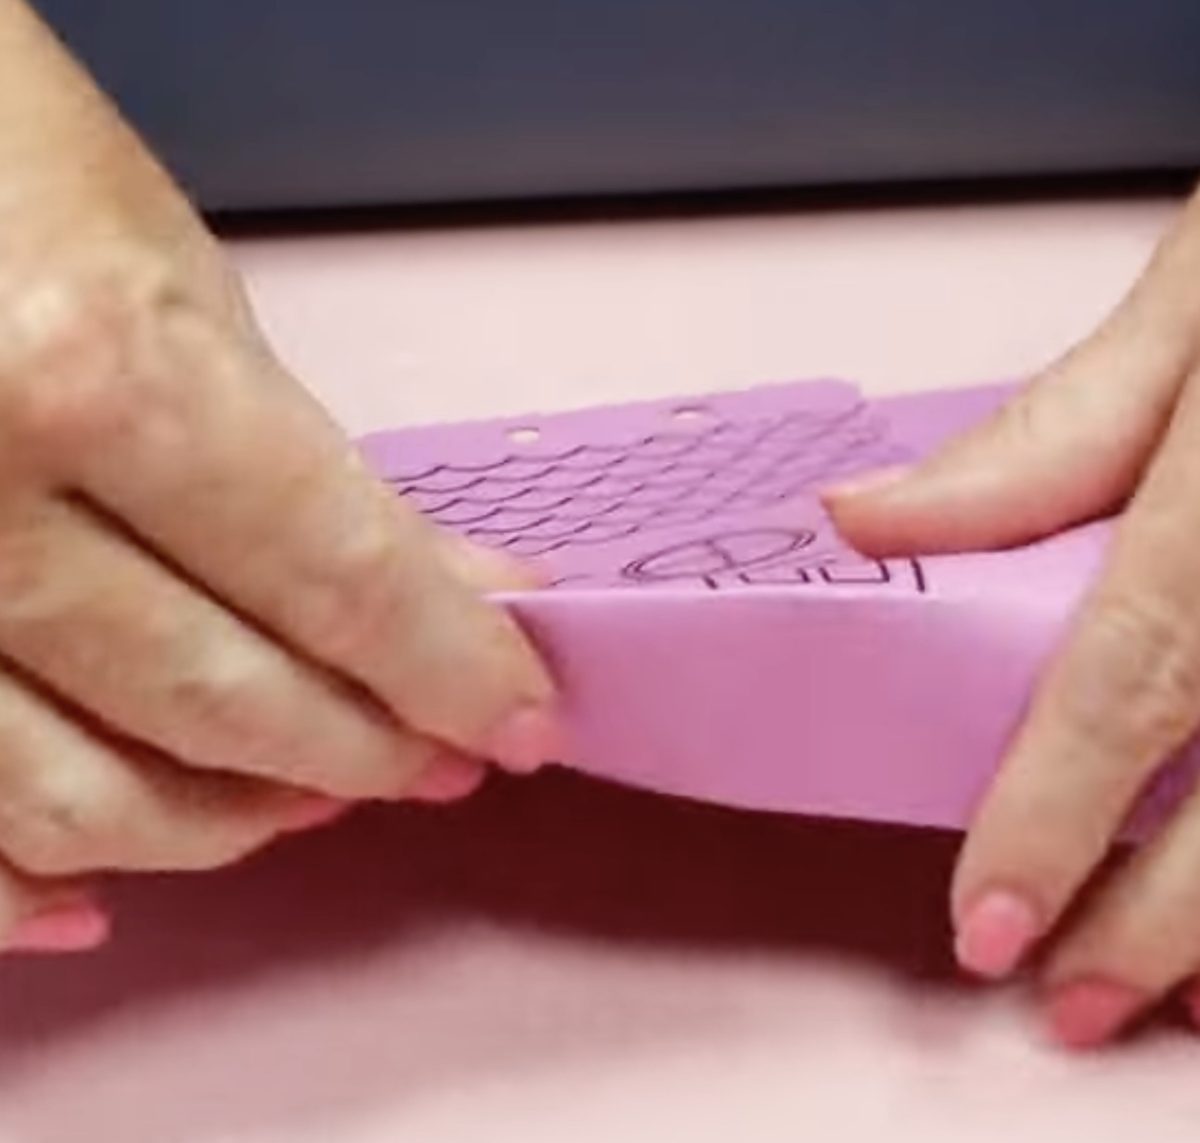
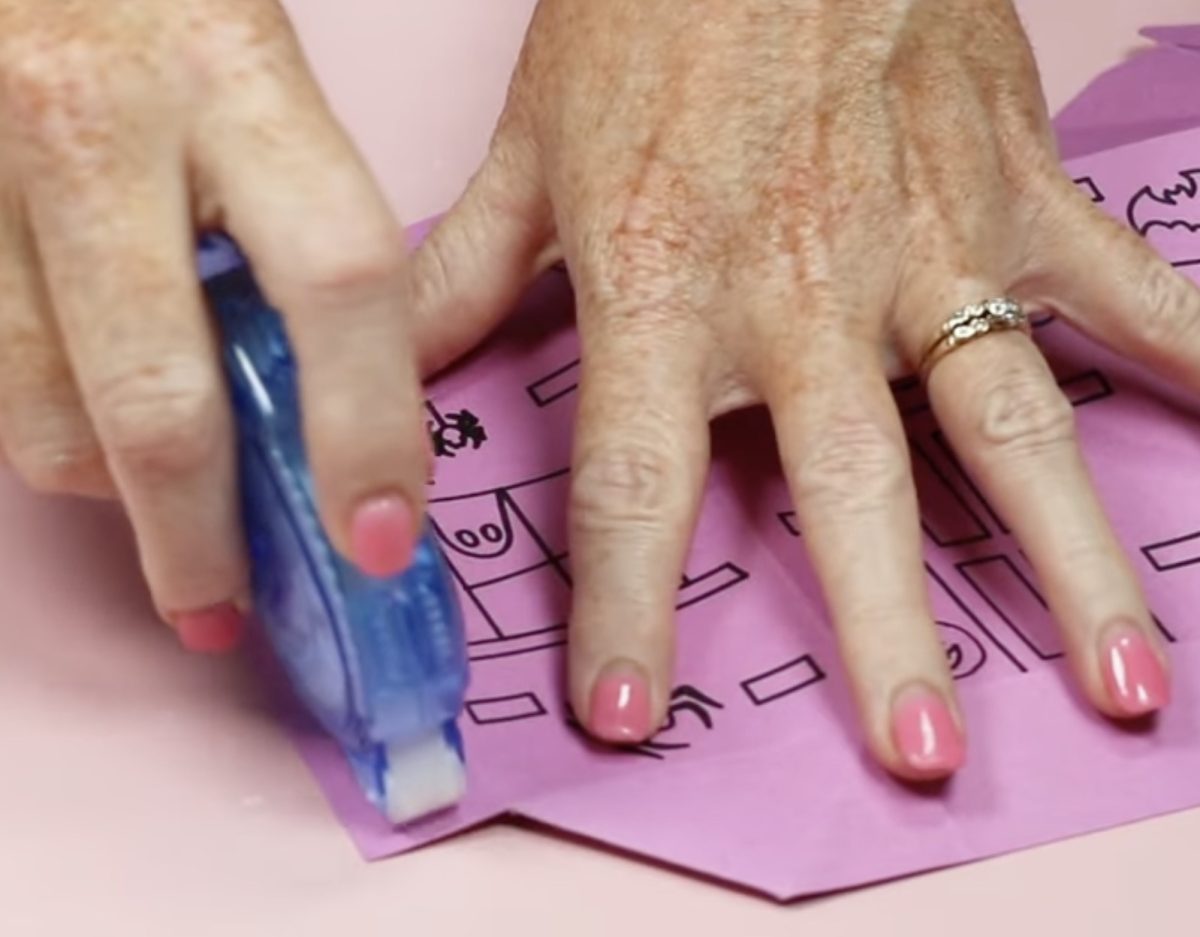
To assemble the box, fold along all the score lines and use adhesive on the tabs to secure the cardstock to itself.
Fill the box with treats or goodies and use twine or ribbon to close the top.
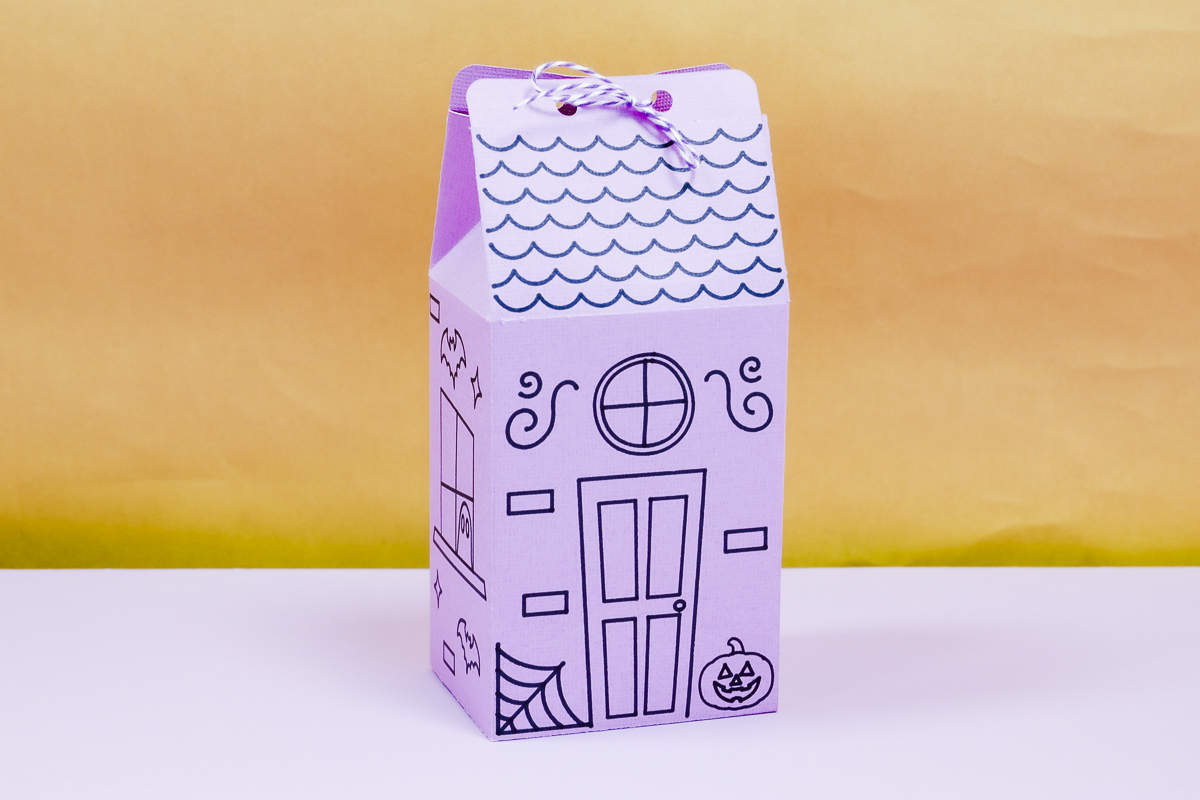
This project was really easy to assemble because the Maker 5 cut, scored, and drew really well. I didn't notice any drag marks when the blade was installed while it was drawing.
Cutting and Engraving 3 mm Thick Materials
Now that we've tested a few thinner materials and a couple of tools, I want to really put the Maker 5 to the test.
I'm going to test 3mm thick foam core board, 3mm thick plastic corrugated board, and 3mm thick acrylic. These materials are thicker than what could be used in any previous machine.
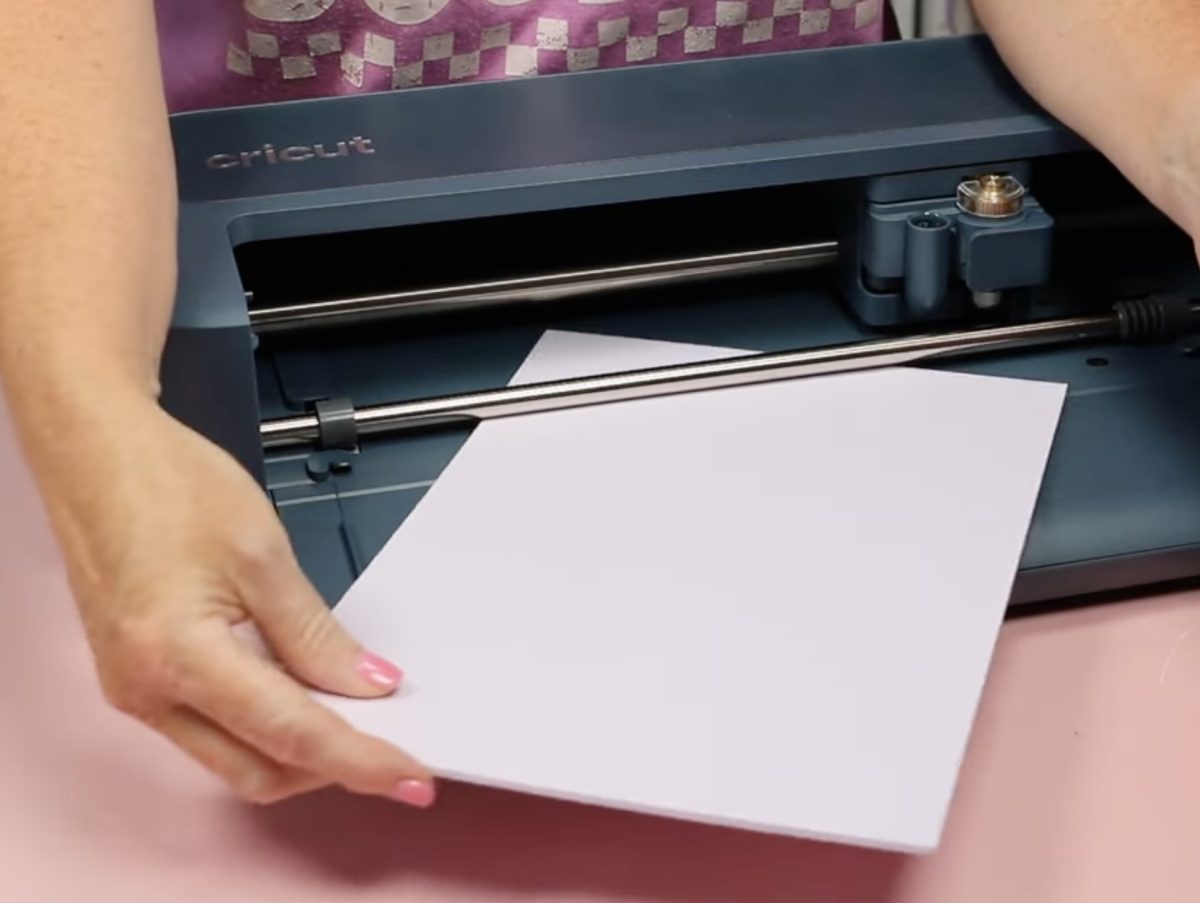
To test if a material will work in your machine, push the roller wheels all the way to the left side of the bar (you're right, if you're facing the machine) and slide the material under the bar. If it will fit, you can try using it.
Foam Core Board Standing Ghost
You do need to pay attention to the thickness of the material you purchase. Foam core board from the dollar store is thicker than 3mm. I ordered this material online to ensure it was the correct thickness.
I did test the material, and it fit under the roller bar. This same material does not fit under the roller bar in the Maker 4.
Step 1: Choose a Design
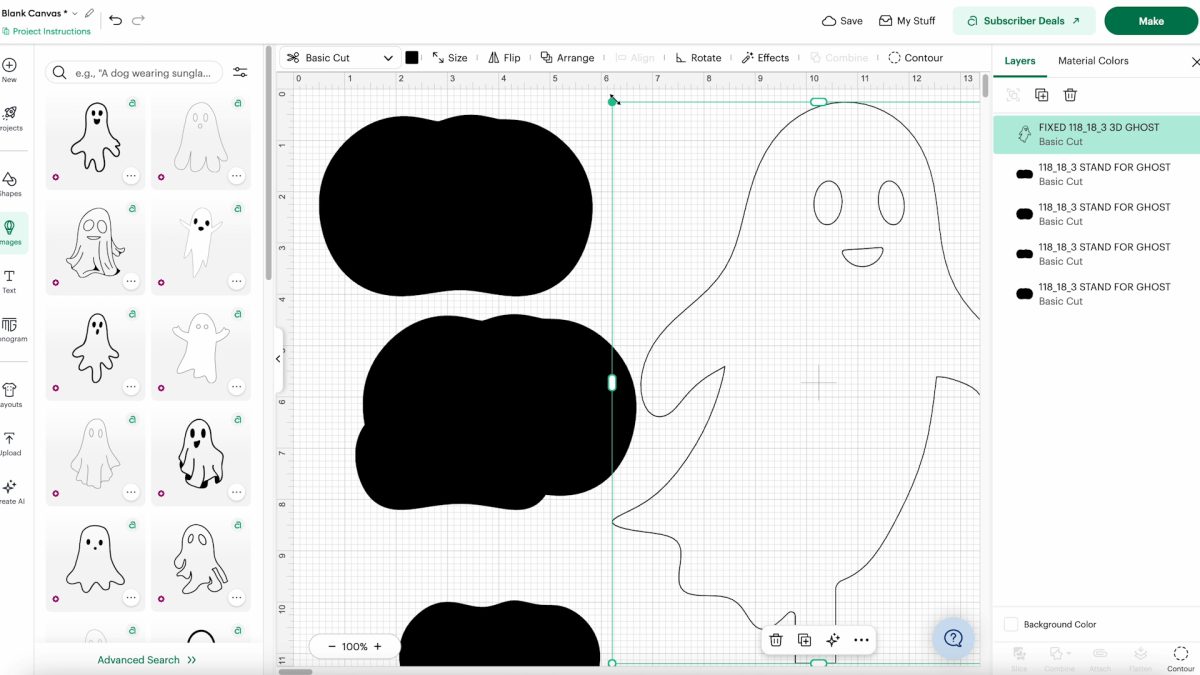
For this project, I am using an uploaded project file. Click Upload, find the file on your device, upload it into Design Space, and depending on the type of file you use, there may be additional steps. My project is already an SVG file, so it is ready to go.
Step 2: Resize the Design
My material is 9 inches by 12 inches, so I need to make sure the project will fit on that material. Click on the different elements and resize as needed to fit on your material. If your project has multiple pieces, resize them together so the pieces stay proportional.
Step 3: Cut Out the Foam Core Board
Now we're ready to cut out the project. Select the material Foam Core 1/8″ (3mm). That setting will prompt you to load the Knife Blade.
Note: This project uses the Knife Blade. If this is the first time you're using the knife blade in this machine, you will be prompted to calibrate the blade. I highly recommend doing that calibration. Follow the prompts on the screen to ensure your blade cuts correctly.
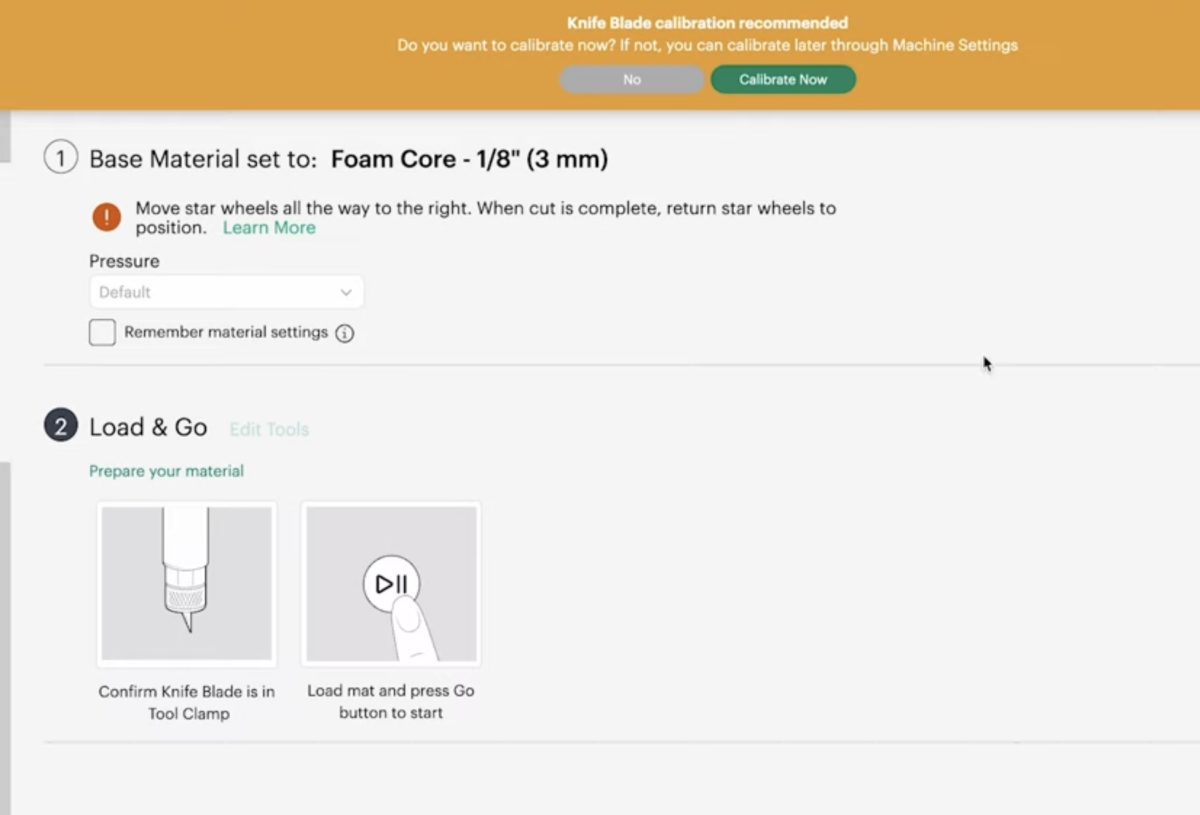
Place the foam core on a StrongGrip cutting mat, confirm that the star wheels are moved all the way to the side, and load the mat into the machine.
Press Go, and it will load and then cut.
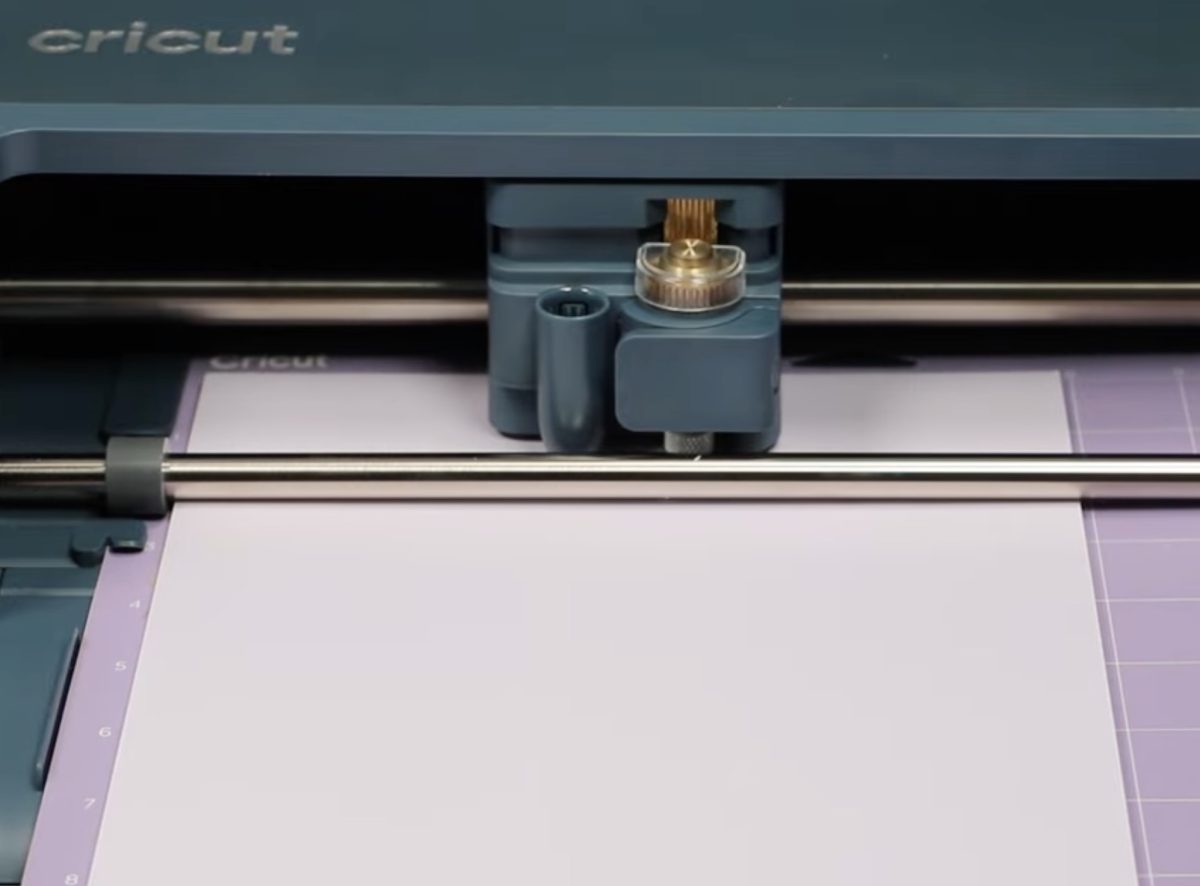
When it's done, Design Space will prompt you to check the cut before you unload the mat. If it did not cut all the way through, you can press Go, and it will cut again.
Mine cut all the way through with no problem.
Step 4: Assemble the Ghost
Remove the mat from the machine and remove the material from the mat. My project had a few different pieces, so I cut them all out, and now I can assemble the standing ghost.
This cute little standing ghost is assembled by stacking the base and then inserting the base of the ghost into the base.
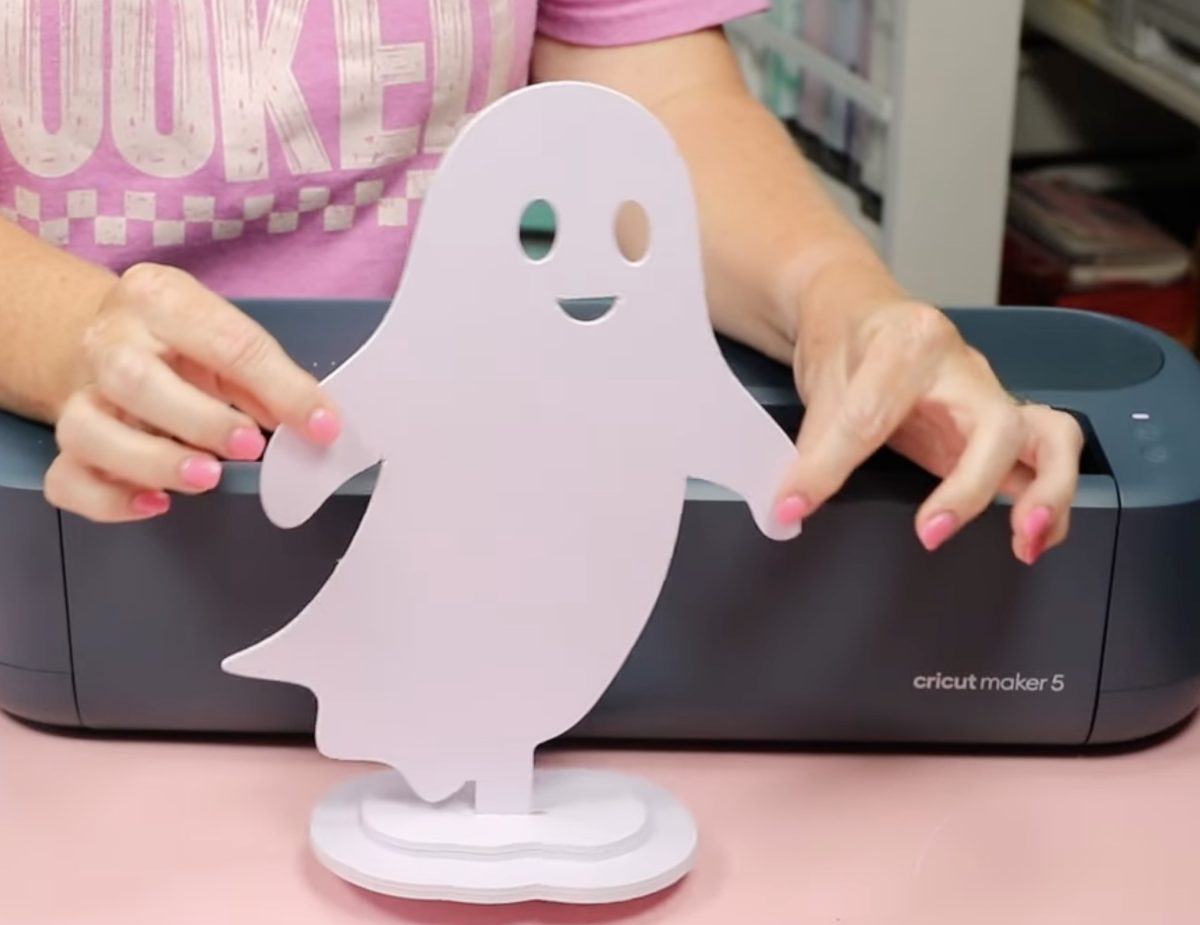
This project turned out so cute, and the material cut out perfectly with the settings in Design Space.

3mm Plastic Corrugated Board Standing Ghost
Next, I wanted to test another thick material, so I'm testing 3mm thick plastic corrugated board. This is the type of board you often see as yard signs. It's durable and really fun for projects like this.
The process for cutting and assembling the plastic corrugated board is the same as for foam core board. It uses the Knife Blade and the StrongGrip mat.

There is a 3mm Plastic Corrugated Board setting in Design Space, and it cuts out perfectly with that setting.

Engraving 3mm Clear Acrylic
I am really excited about using Acrylic in the Maker 5!
3mm is a standard size for acrylic, so finding acrylic that would fit in previous machines was more difficult. This machine having clearance for 3mm materials makes it much easier to find materials that will work.
Step 1: Create the Design
I am going to engrave this acrylic, so I searched Design Space for a Spooky image and then used the filter to search for only drawing images.
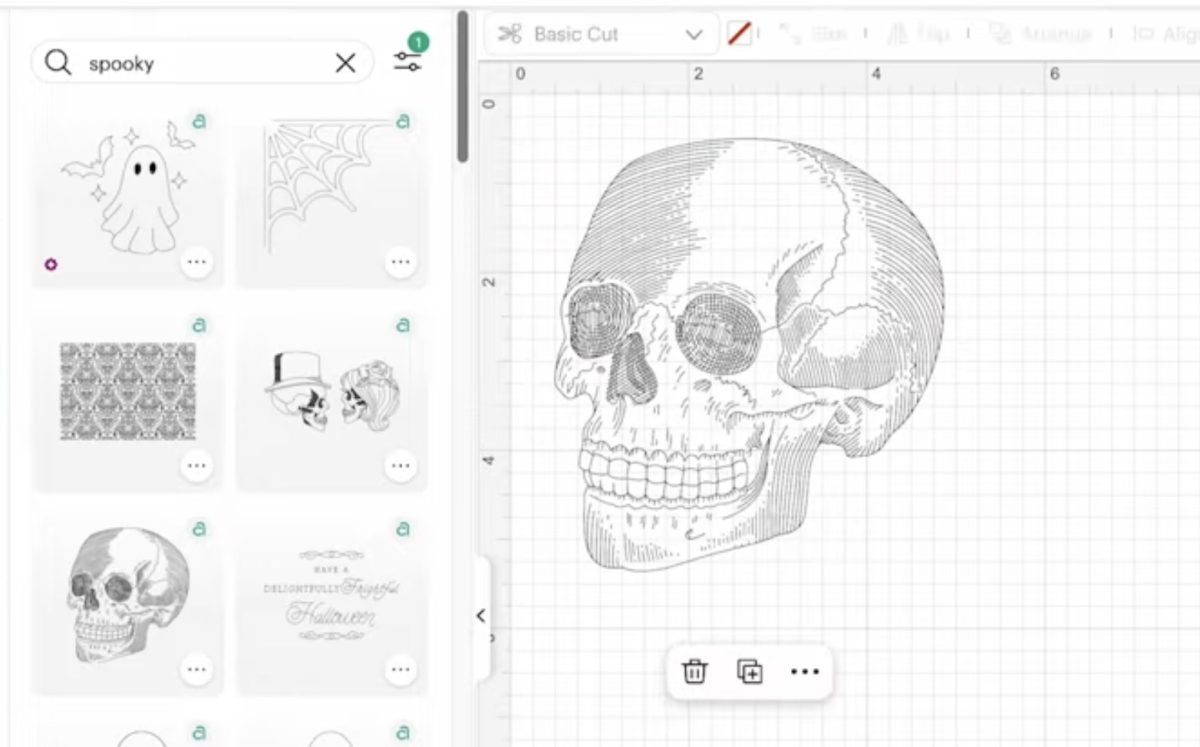
I found a really cool skull image and resized it to fit the acrylic blank I'm using.
When it's sized correctly, select the entire image and change the Operation Type to Engrave.
Step 2: Locate the Acrylic on the Cutting Mat
I am using a purple StrongGrip cutting mat for the acrylic. Remove the protective film from the top side of the acrylic and locate it in the upper left corner.
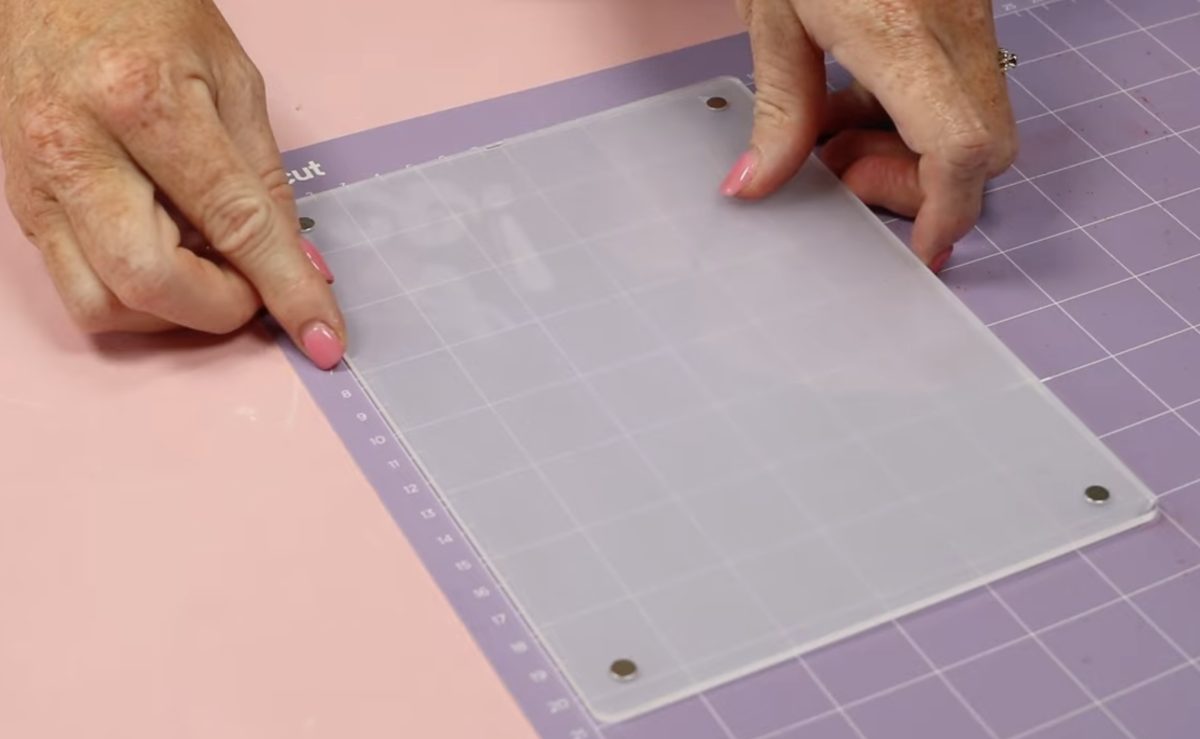
Secure it in place with masking tape on all 4 sides.
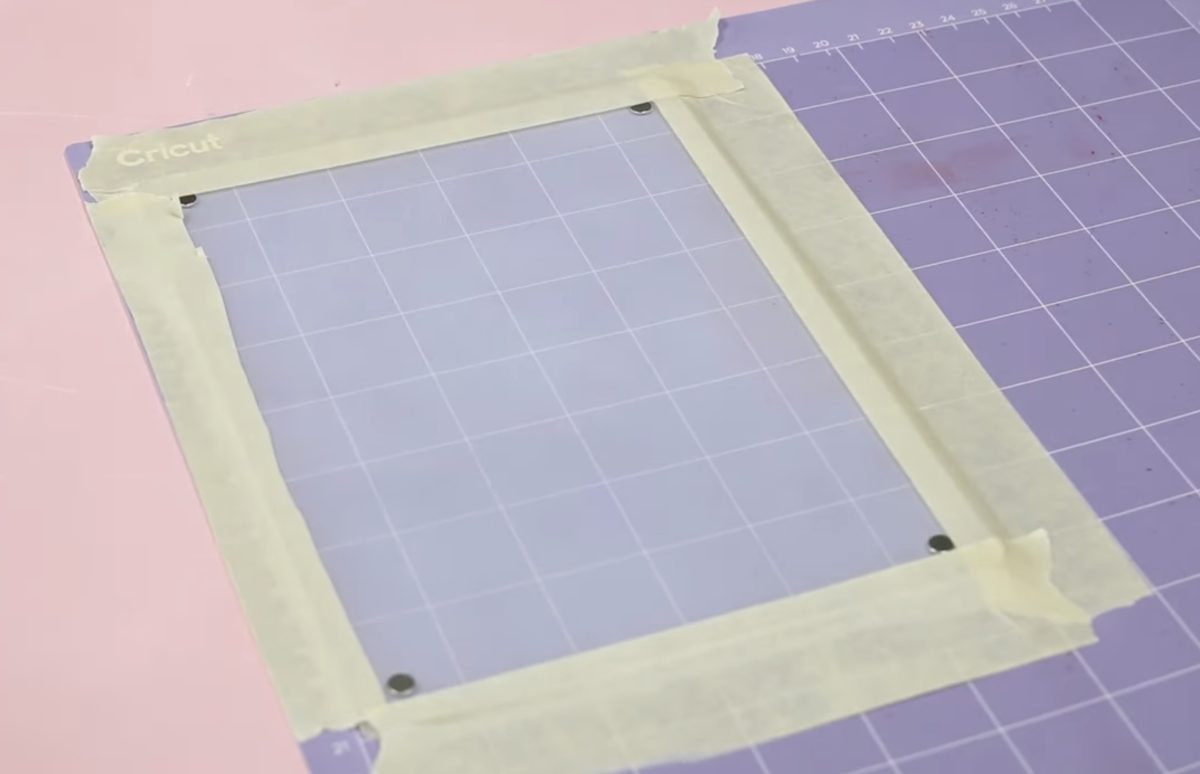
Step 3: Engrave the Acrylic
Press Make and ensure the design is located in the same place as the acrylic is on the mat. On the mat screen, you can move the design around if needed.
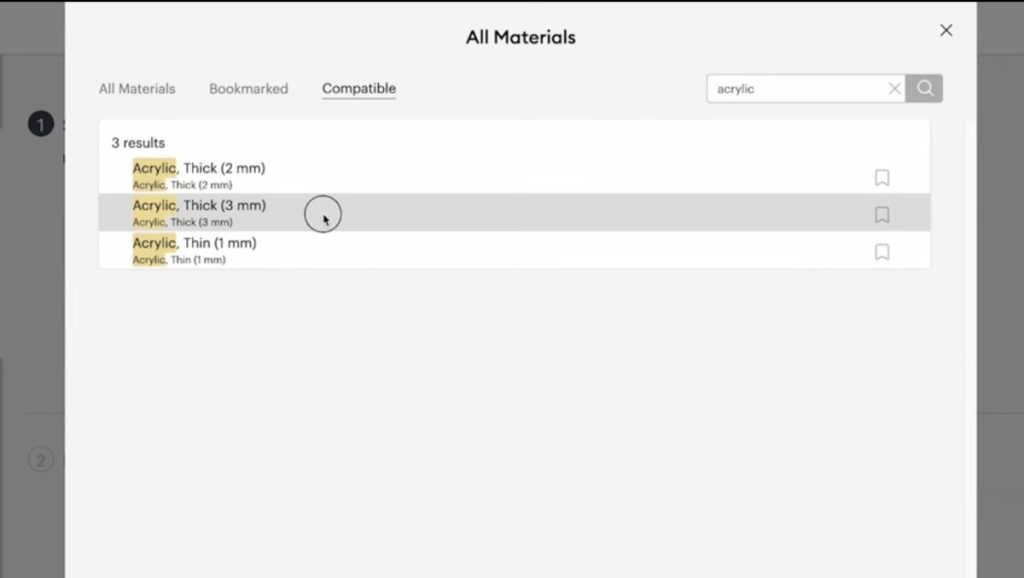
Select the Acrylic 3mm setting and the engraving tool you're going to use. I am using the new Engrave Tool to see how it does. You can click Edit Tools and choose the other Engraving Tool if that is the tool you have.
Load the mat into the machine and press the Load and Go button.
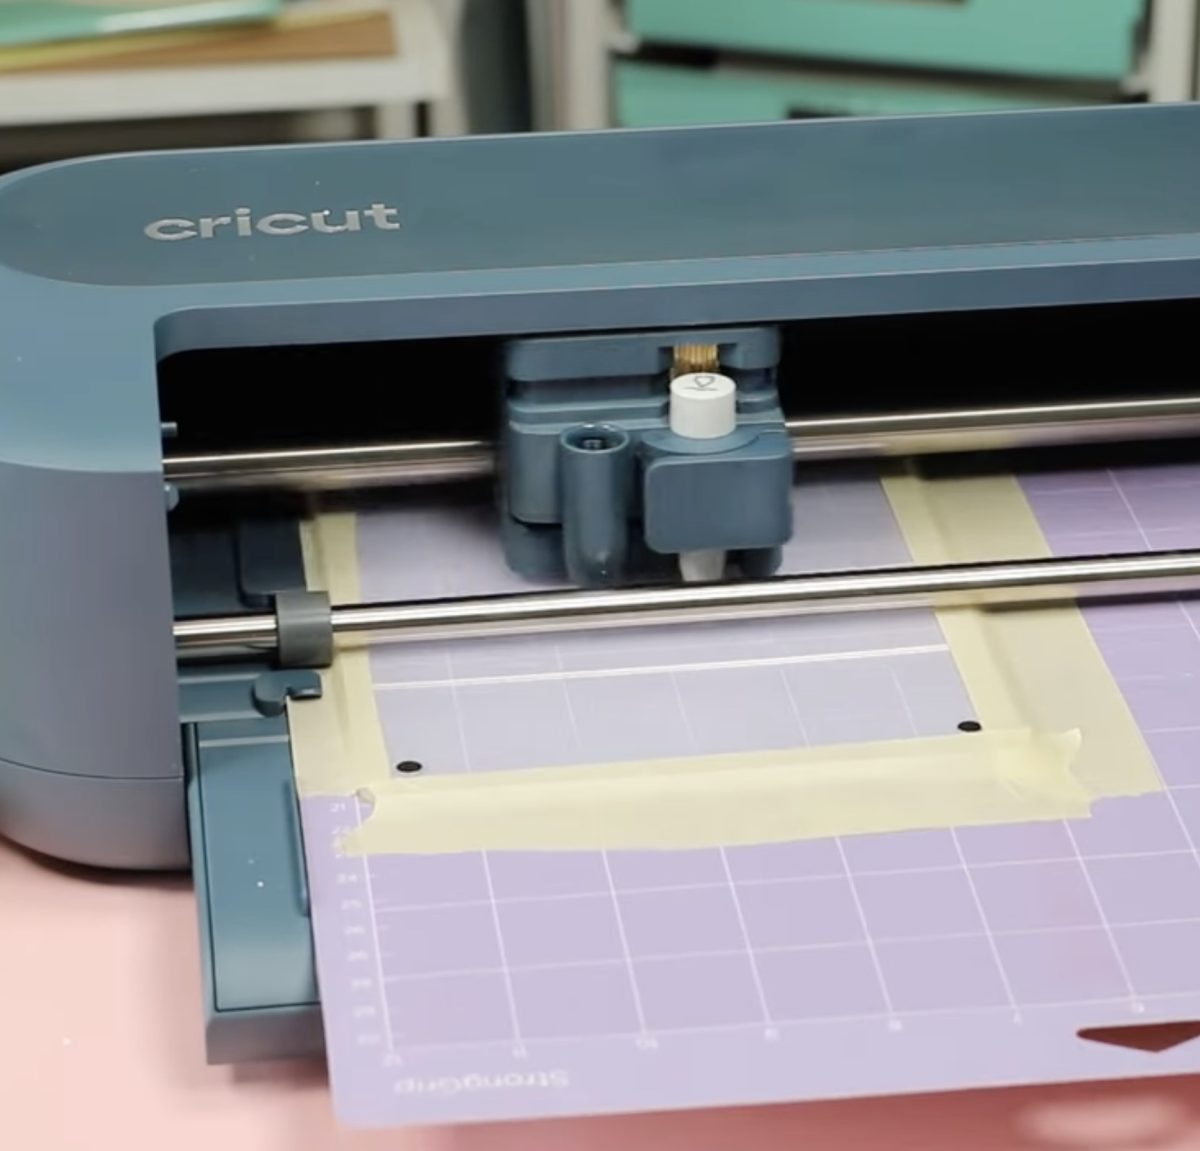
Step 4: Assemble the Acrylic Sign
Unload the mat, remove the acrylic from the mat, and remove the protective film from the other side of the acrylic.
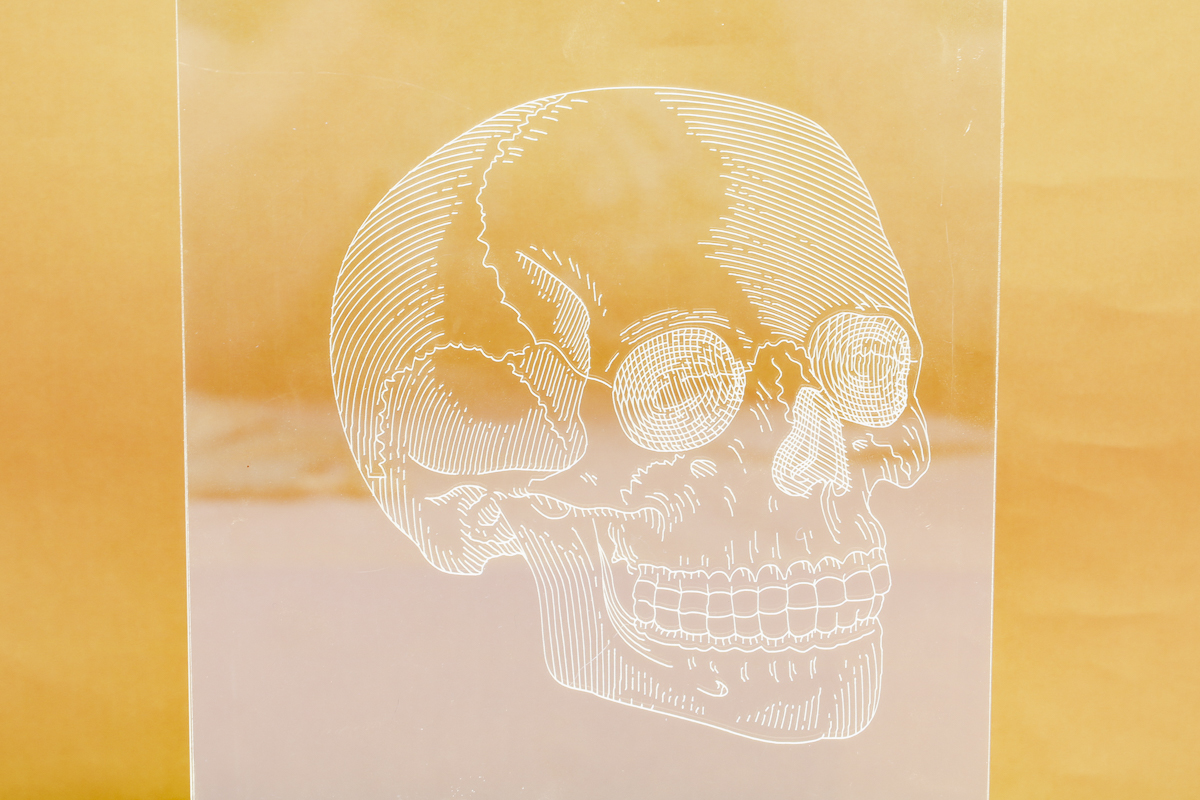
Dust off any debris from the engraving and assemble the two pieces.
Because this acrylic blank has two pieces of acrylic, the engraved side sits sandwiched between the two pieces, so you don't feel the engraving at all. If you've engraved with a Cricut before, you know the engraving tool scratches the surface. Having it sandwiched between the two pieces really elevates how professional it looks.
I am really impressed with how well the new engraving tool worked on this thicker acrylic material.
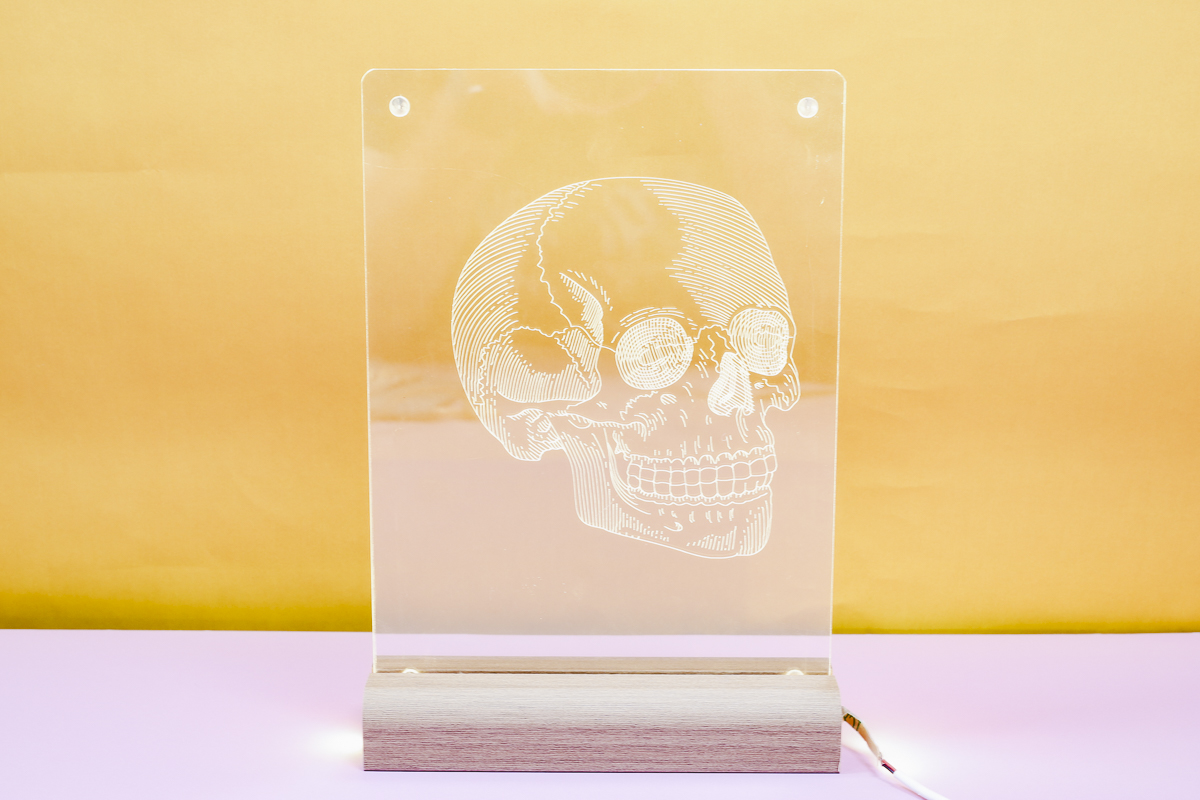
Displayed on the light-up base, this looks fantastic.
Cutting Thicker Fabric Materials
Next, I really wanted to test some thicker materials that I couldn't cut with the previous Maker machines.
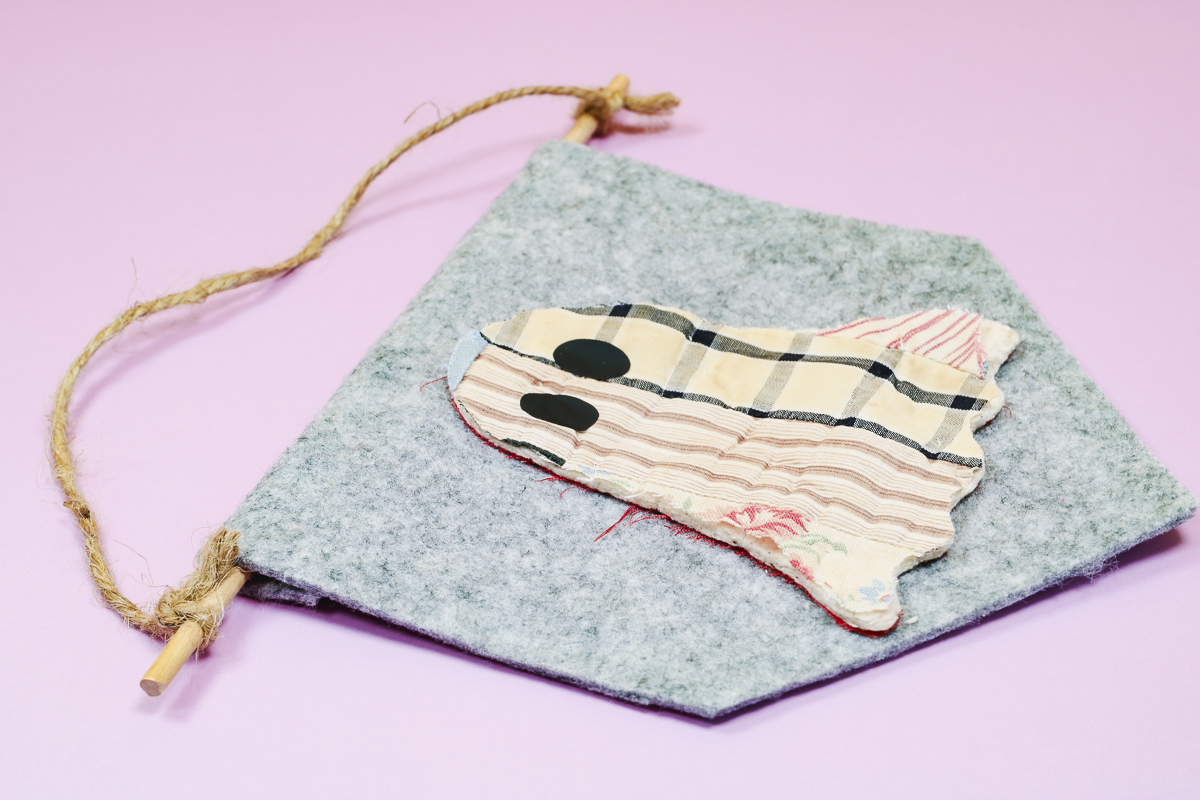
I am going to make a cute ghost flag using really thick felt and a piece of a vintage quilt square.
Step 1: Make Design in Cricut Design Space
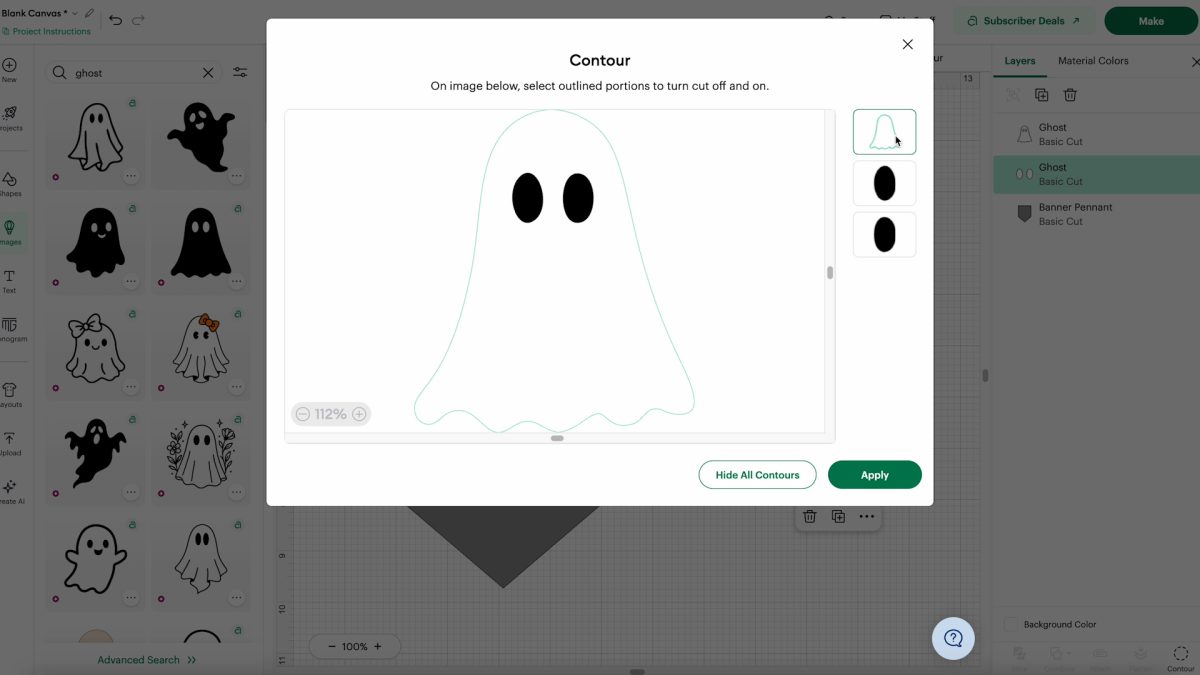
I added a banner shape with the shape tool then searched Cricut Design Space images for a ghost shape. I did use the contour tool to separate the eyes from the ghost.
Step 2: Add Felt to Mat
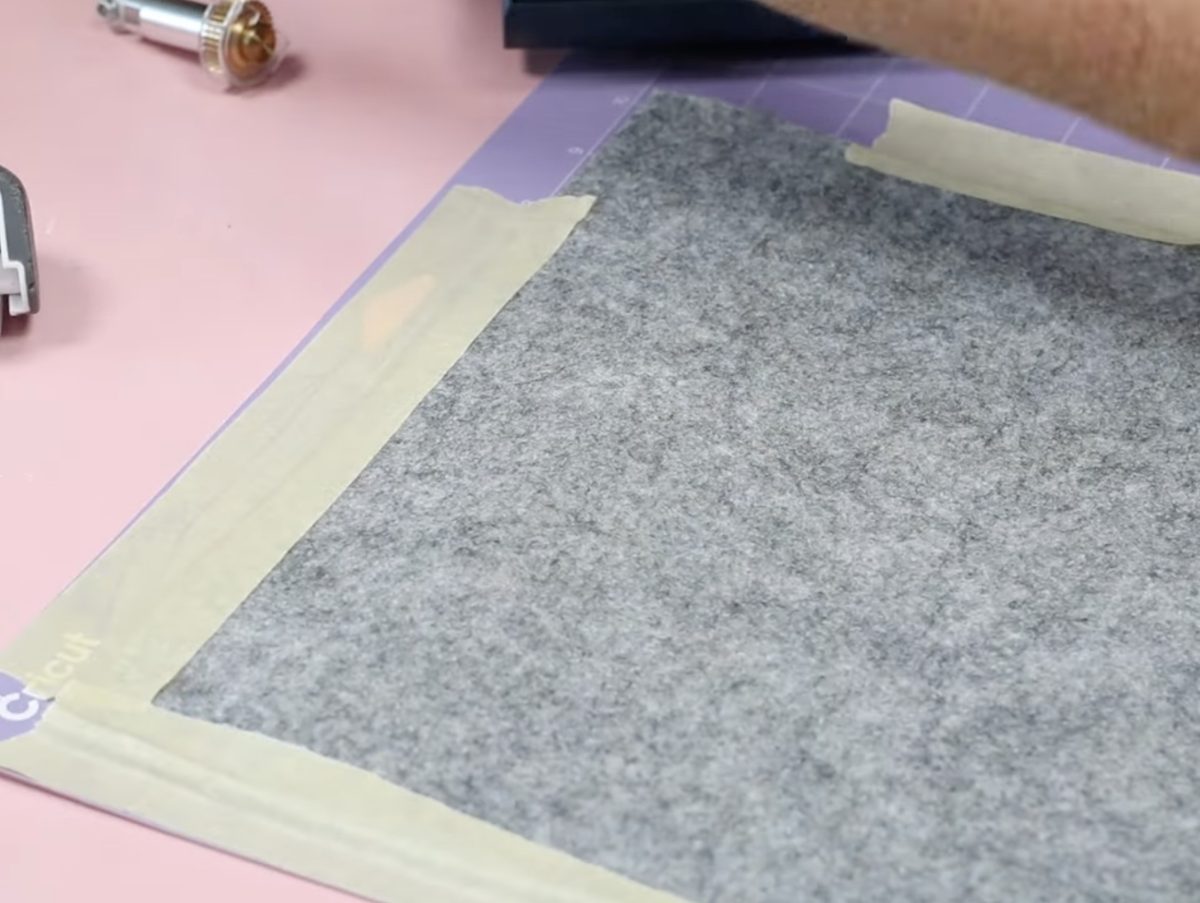
First, I'm cutting a really thick and dense felt material. Using a StrongGrip mat, I had to tape the sides because the material didn't want to stick to anything. I've used this felt in previous Maker machines, but it barely fit under the bar, resulting in some issues with the final cut.
Step 3: Cut Felt
I chose a heavy felt setting in Design Space. Depending on the felt setting you choose, it may prompt you to use the fine point blade. I prefer to use the Rotary Blade to cut felt, so I clicked on Edit Tools and selected the Rotary Blade.
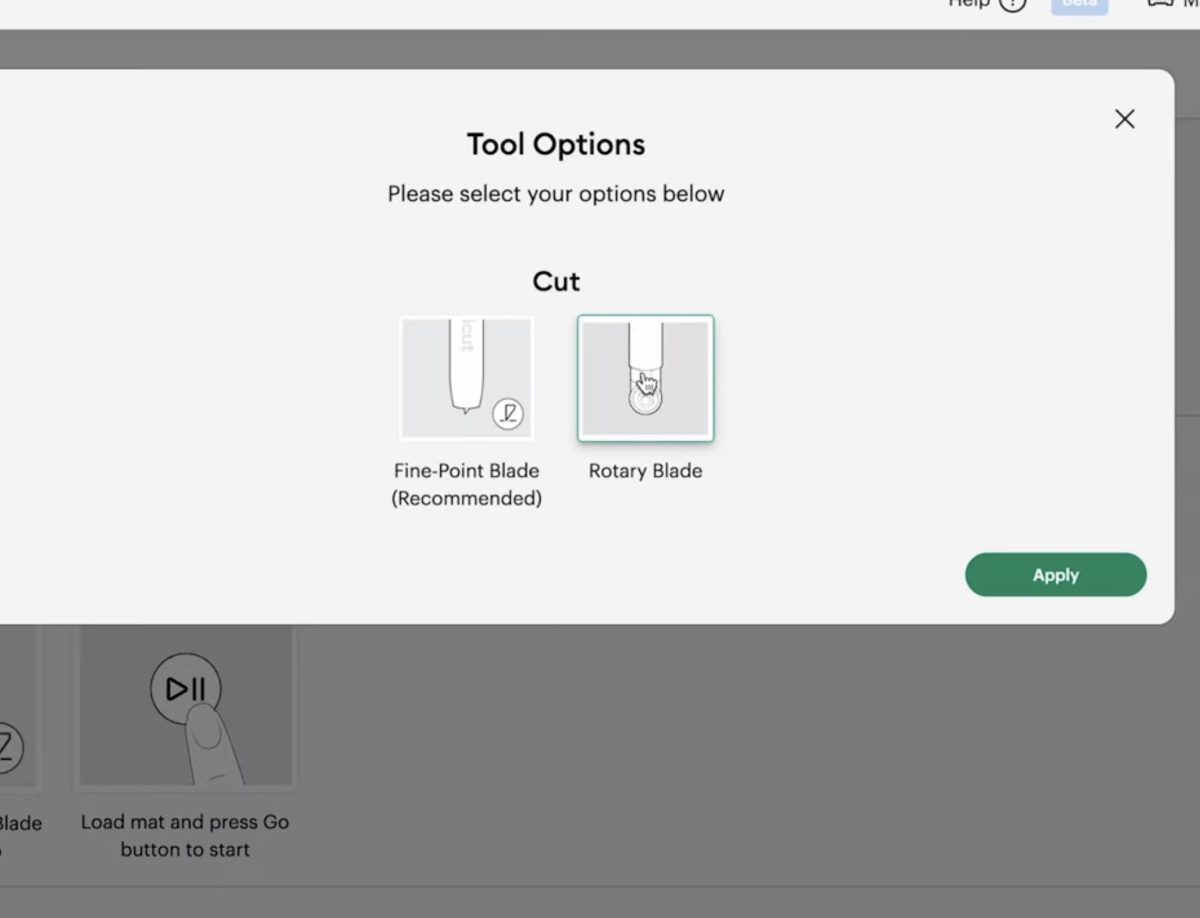
Note: If this is your first time using the Rotary Blade in the Maker 5, you will be prompted to do a calibration. I highly suggest doing the calibration before you begin.
Press the Load and Go button on the Maker 5, and the machine will cut out the felt.
Without unloading the mat, check to see if the material has been cut all the way through. If it has not, press Go so it will cut again.
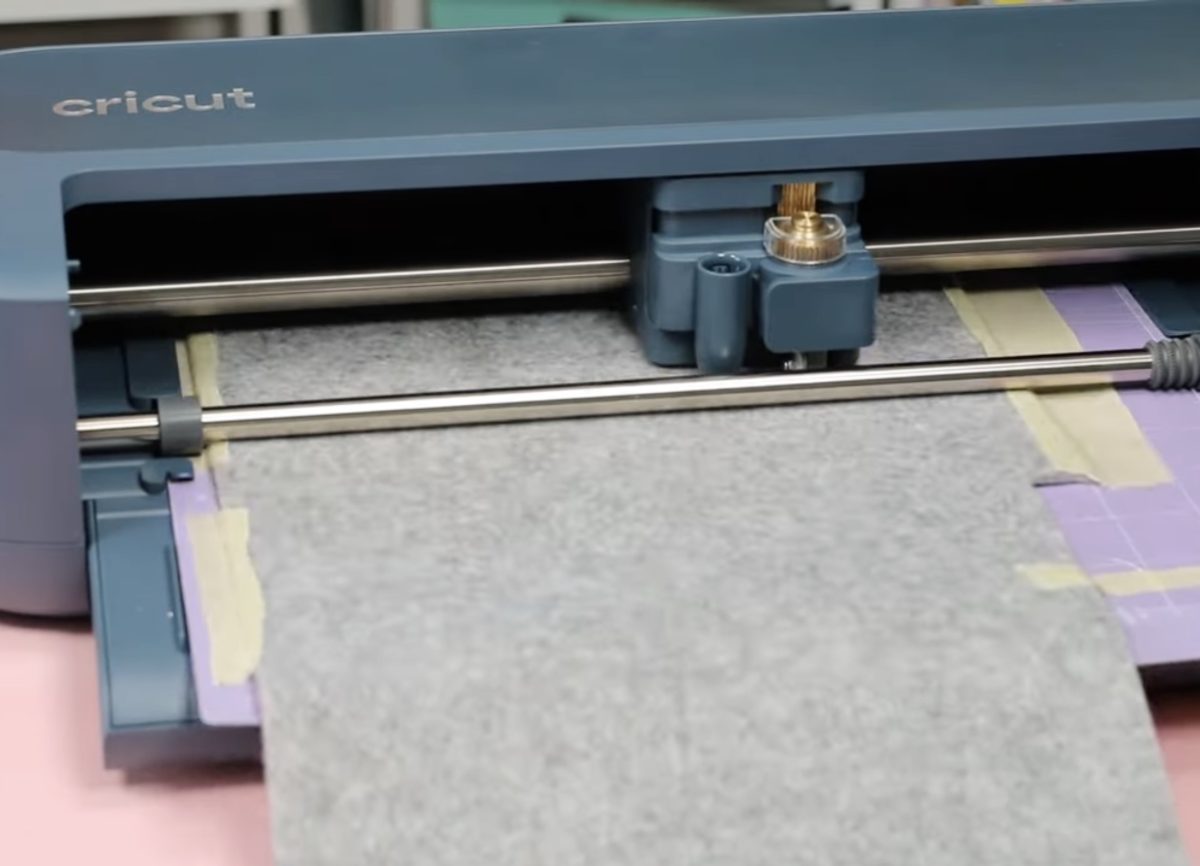
There was no exact setting for this felt material, so I had to cut it multiple times to get it cut all the way through. When it was done, the cut looked clean on all sides and edges.
Step 4: Cut Vintage Quilt Square
I have really wanted to use some of the vintage quilt squares I have to make projects for my home.
Because this is a quilt square, it has multiple layers of fabric, thicker seam areas, and batting. I was not able to cut these with my previous Cricut machines.
I loaded the fabric onto a StrongGrip mat and used tape to secure it in place on all 4 sides.
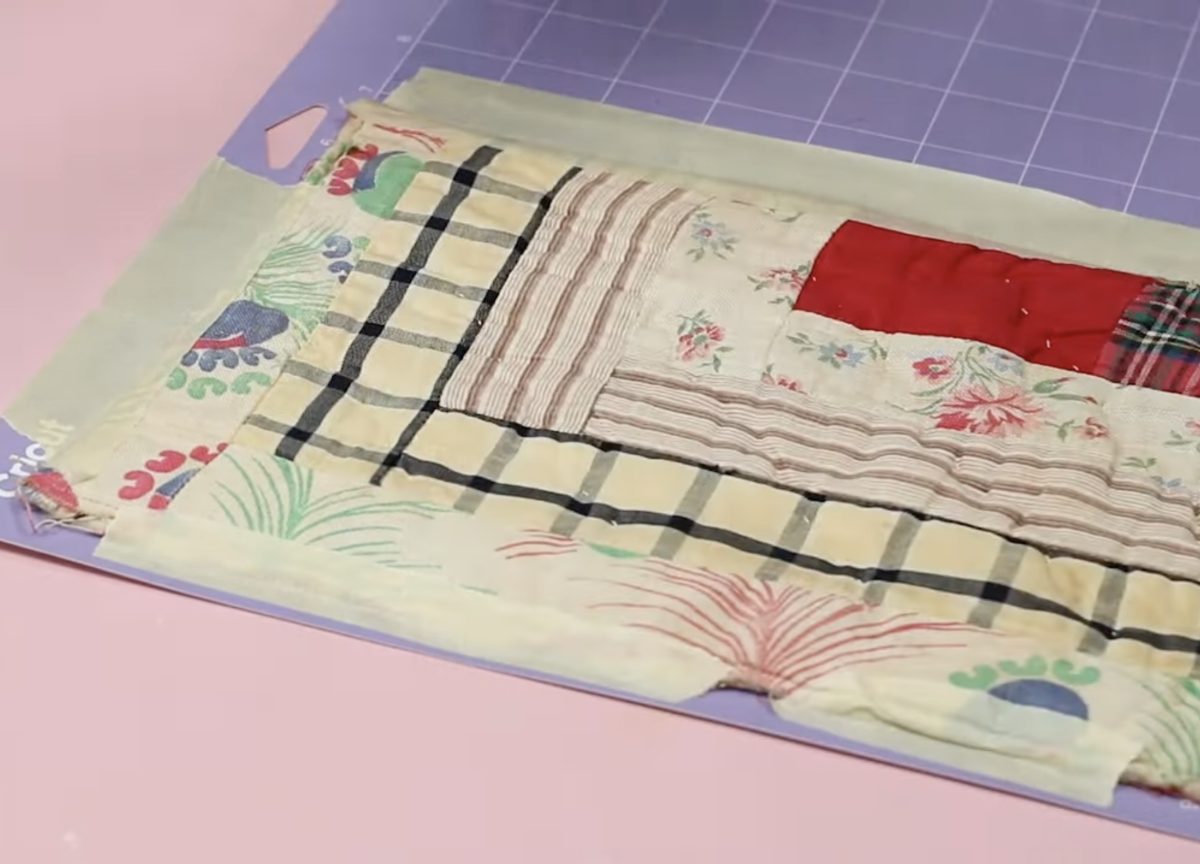
There is no quilt square cut setting in Design Space, so I selected a heavy denim cut setting and made sure the Rotary Blade was selected.
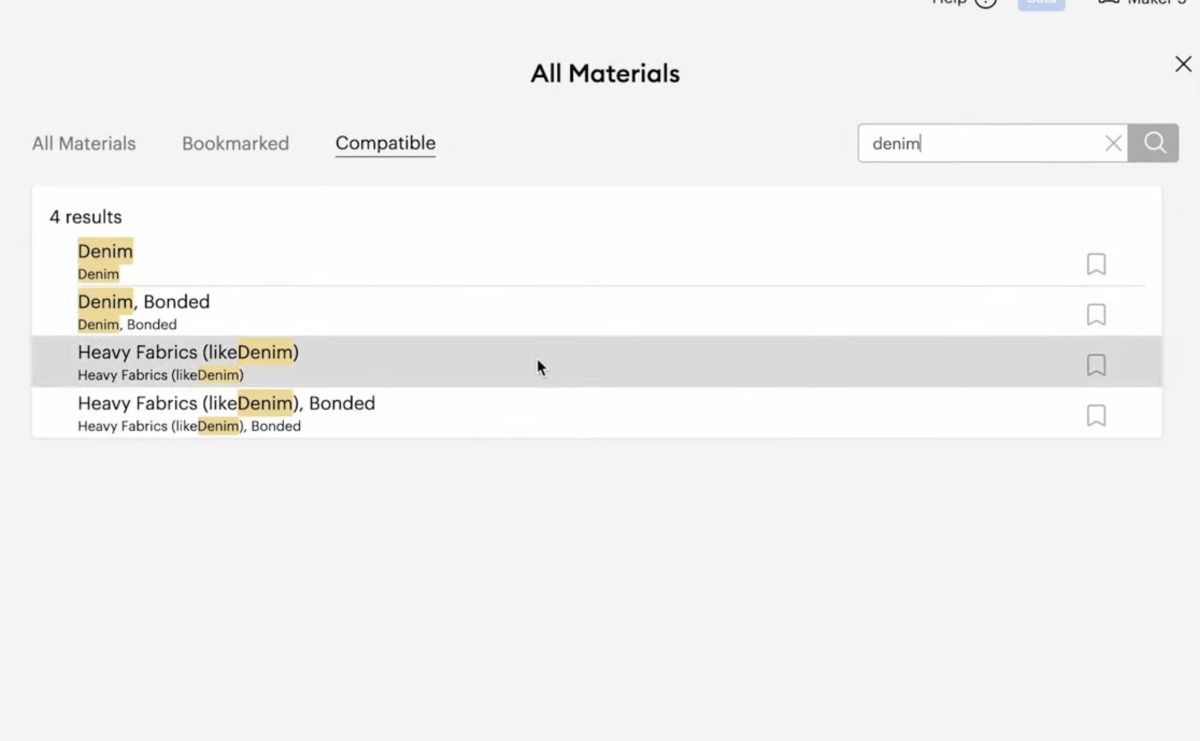
Press the Load and Go button and let the machine cut out the design.
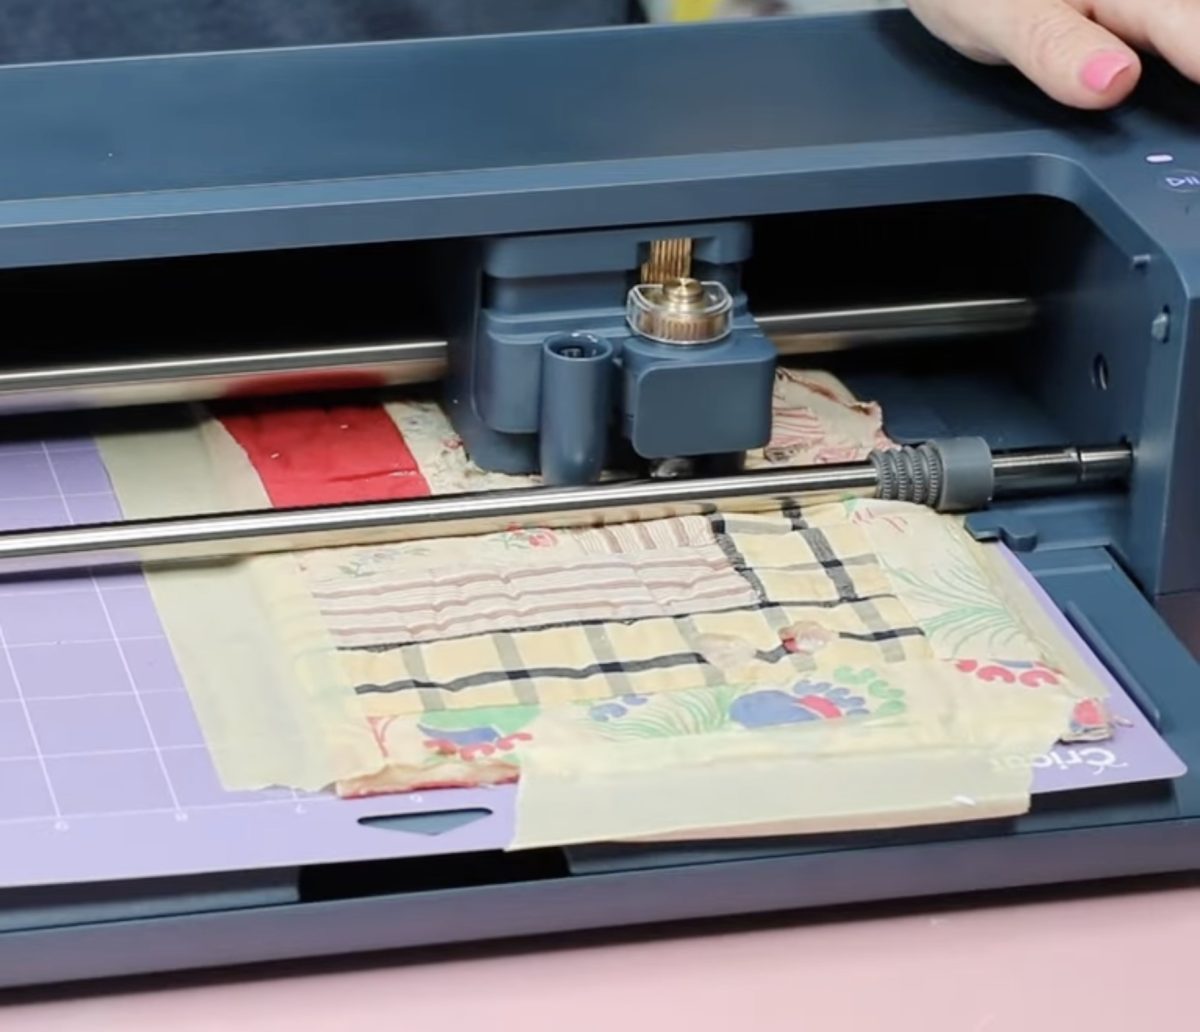
Again, I made sure to check the cut before unloading the mat. I had to cut this fabric several times to get it cut all the way through everywhere, but when it was done, it was perfect.
Step 5: Cut HTV for Ghost Eyes
The last thing I'm cutting with the Maker 5 today is HTV. These little pieces will be the eyes for my vintage quilt ghost flag.
A new feature in Design Space automatically mirrors your design when you choose an Iron-on setting. It didn't really matter for these eyes, but it is a great feature if you're someone who often forgets to mirror the design before cutting.
I'm using the Smart Iron-on that came with the Maker 5. Load it into the machine with the shiny side down and press the Load and Go button to start the cutting process.
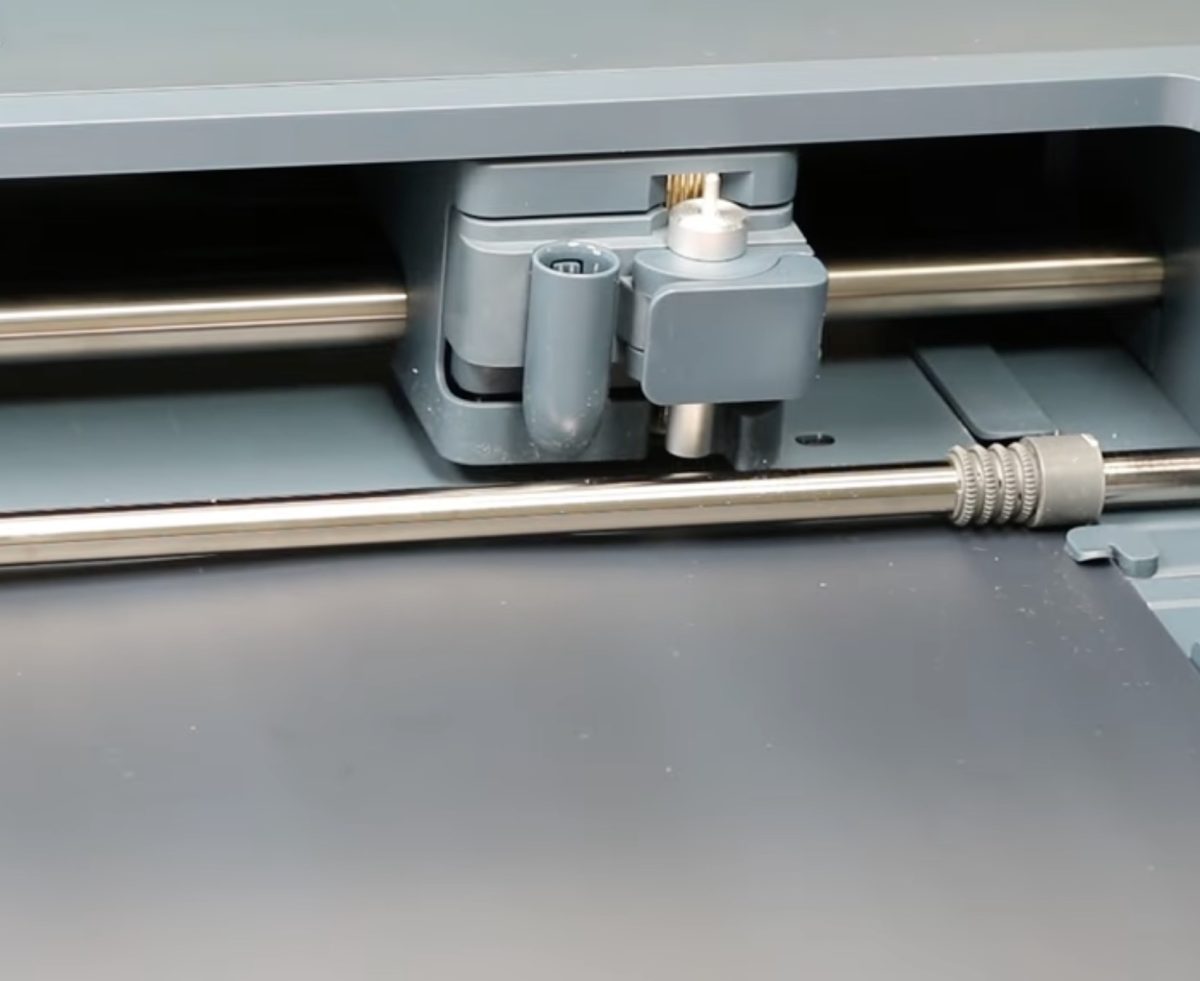
When it's done, unload the mat, remove the material from the mat, and weed away the excess material.
Step 6: Assemble the Vintage Quilt Ghost Flag
To assemble the ghost flag, I did the following:
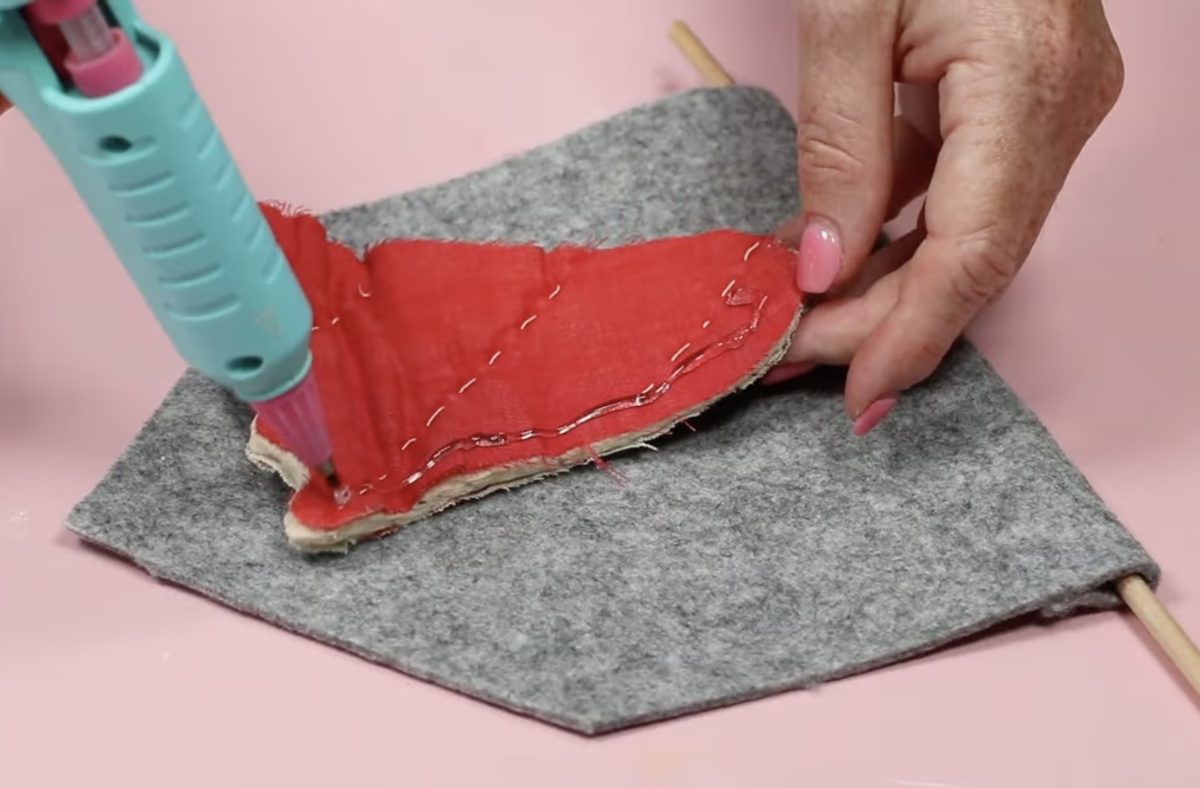
- Using an EasyPress Mini, press the HTV eyes onto the quilted ghost.
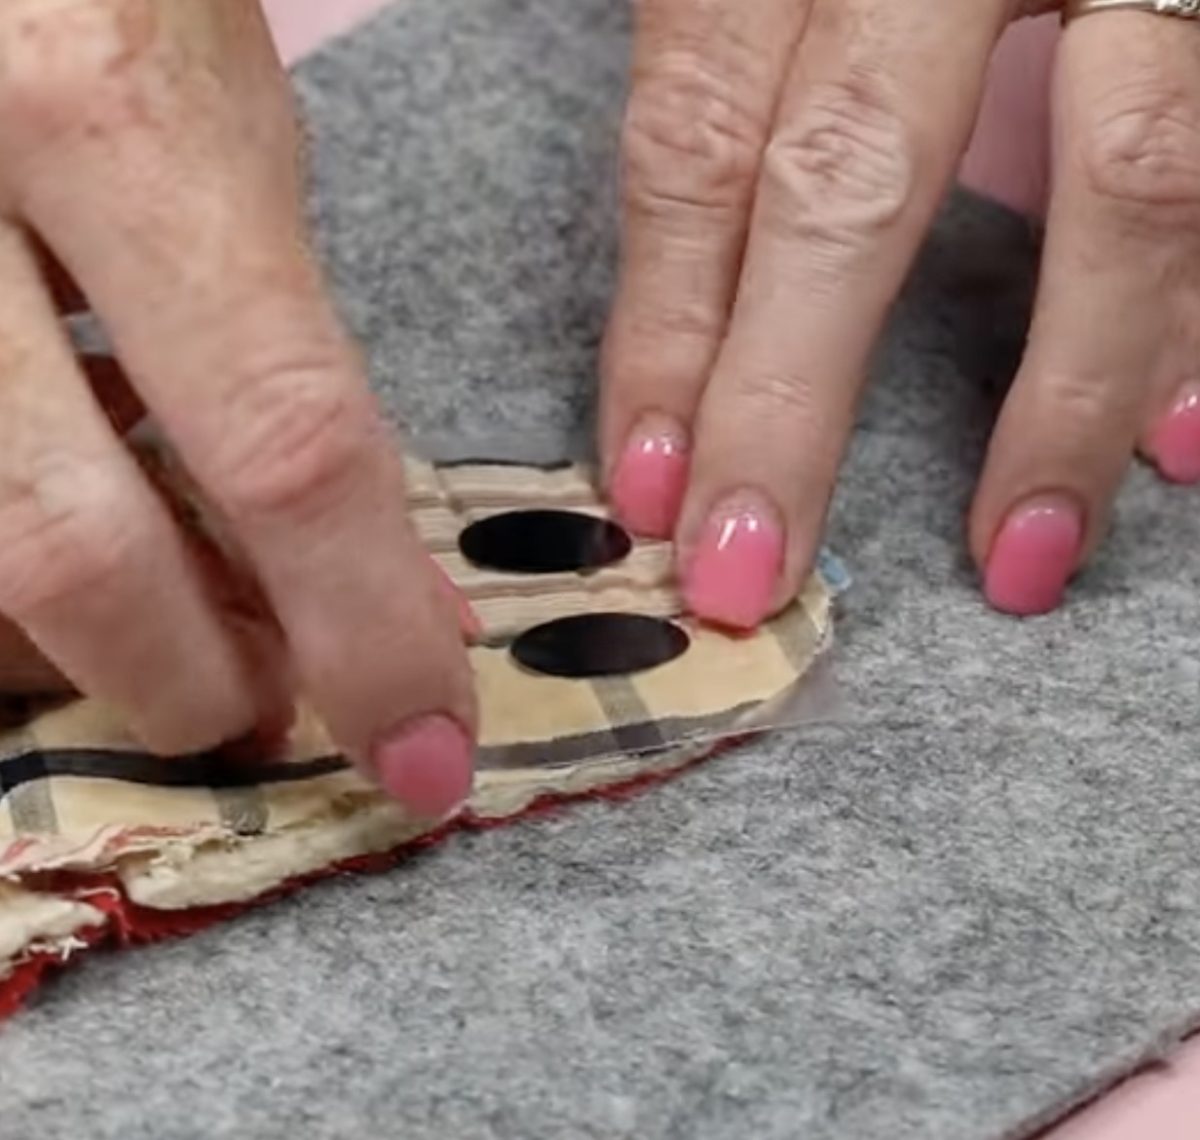
- Use hot glue to fold the felt over a wooden dowel and secure it to itself.
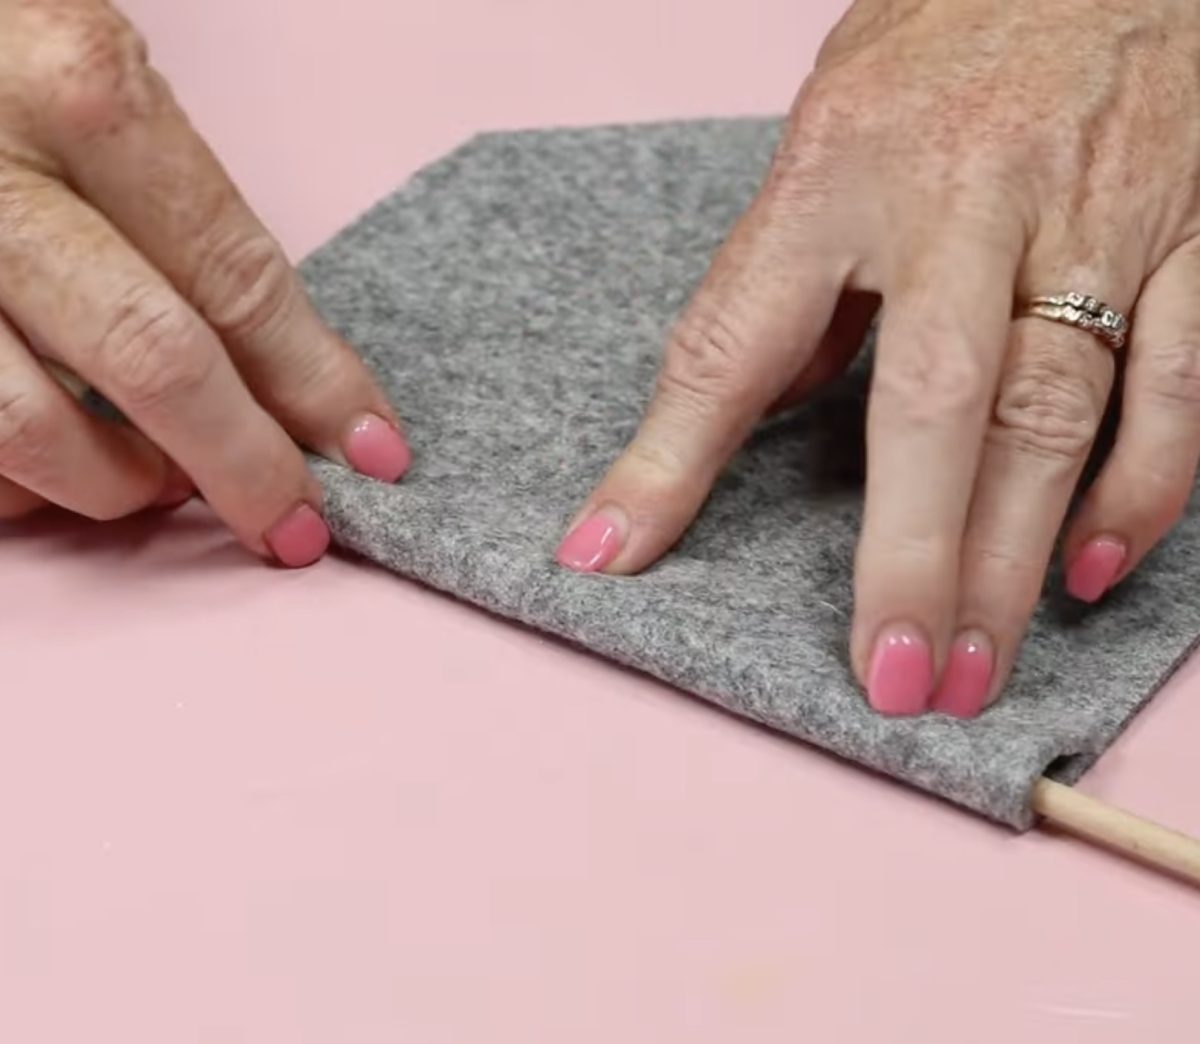
- Use hot glue to secure the quilt square to the felt flag. (You could use a fabric adhesive if you prefer.)
- Tie a long piece of twine to each end of the wooden dowel to create a hanging piece.
I have been dreaming of using vintage quilt squares in my home decor, and I love how this turned out.
Cricut Maker 5 Final Review
Now that I've made a wide variety of projects and tested different blades and materials, let's talk about the Cricut Maker 5.
Projects that can only be made with the Cricut Maker 5
First, I wanted to call out the projects I made today that could only be made with the Cricut Maker 5.
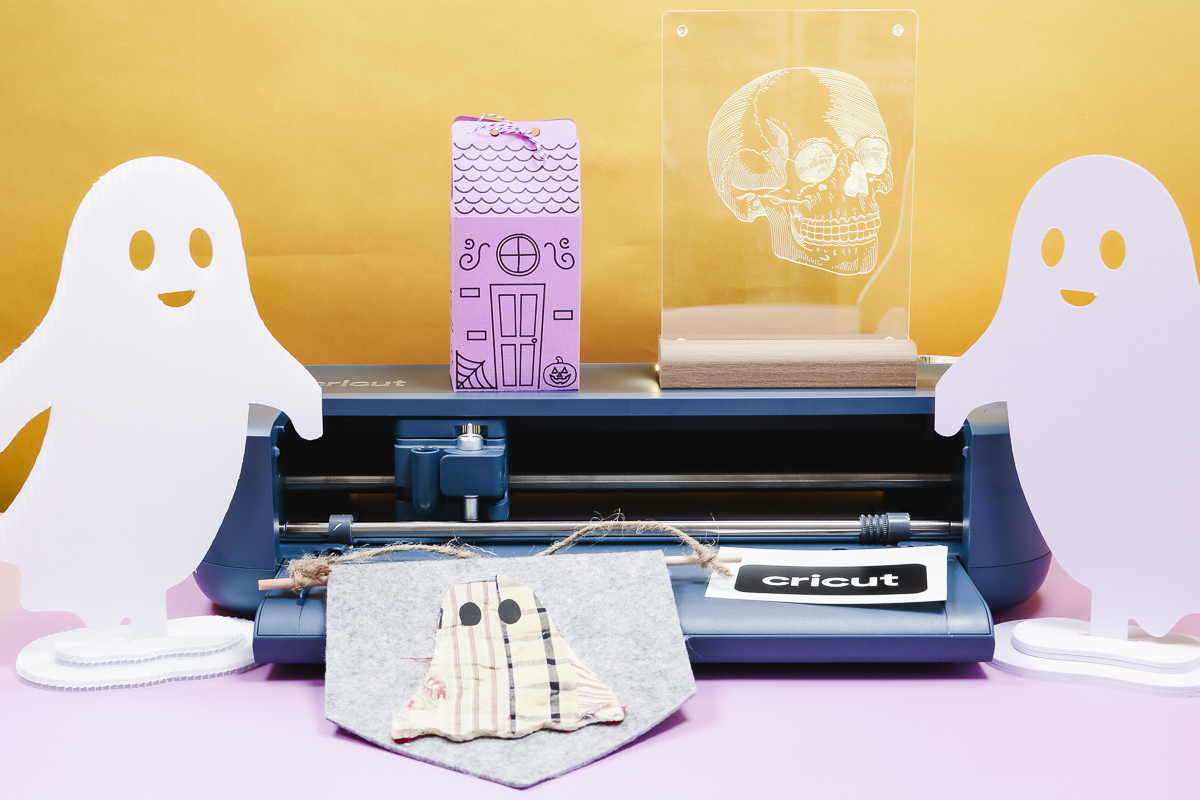
Both of the standing ghosts can only be made with a Maker 5 machine. The material is too thick to work with other Maker machines, and the Maker 5 did a fantastic job with both, using the settings in Design Space.
The engraved acrylic image I made today can only be made in the Maker 5. Yes, you can engrave with other Maker machines, but this blank was 3mm thick, and that can only be done in the Maker 5.
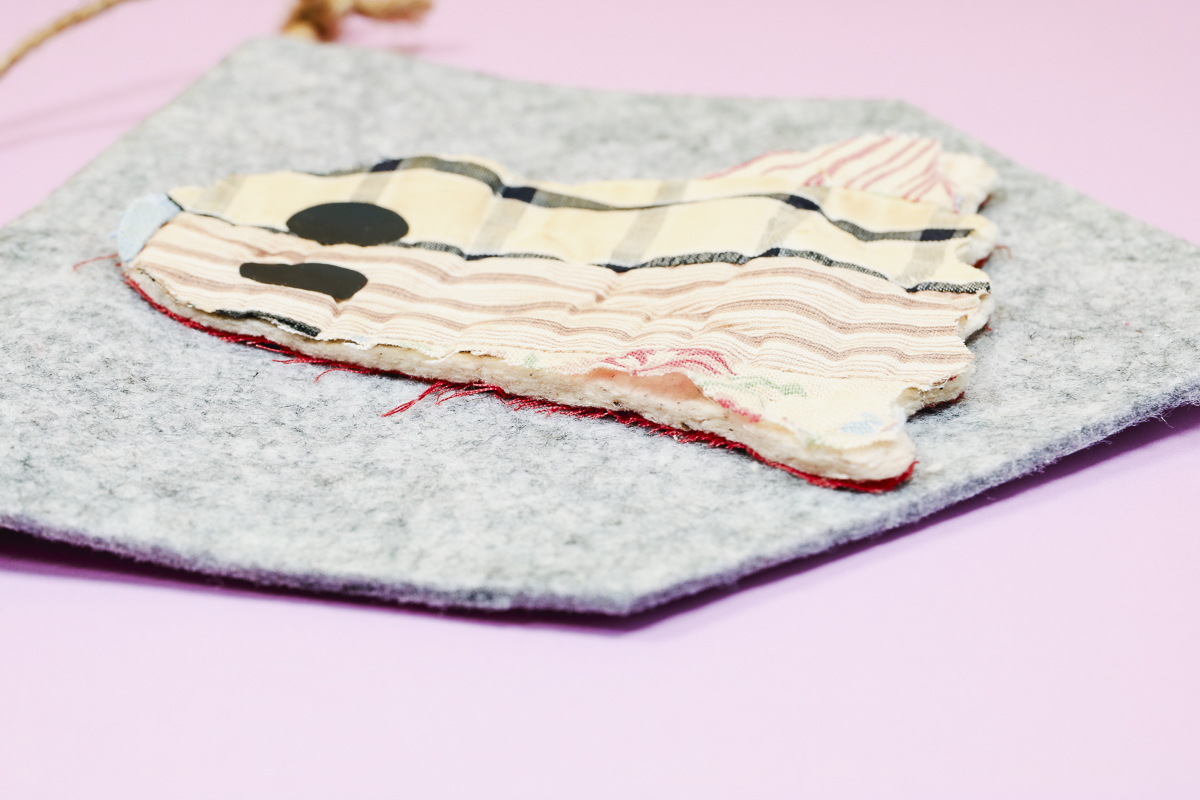
The vintage quilted ghost can only be cut on the Maker 5. The felt I have cut in previous Maker machines, but it barely fit under the roller bar and was more difficult.
The quilt piece barely fit under the bar of the Maker 5, so it definitely wouldn't fit in older machines.
Cricut Maker 5 Pros and Cons
Every machine has both pros and cons, so let's look at those for the Maker 5.
Pros
- I love that it can cut thicker materials. Not everyone will be excited about these materials, but I have been waiting for years for a machine that could cut these specific materials.
- When the original Maker came out, it was hard to find acrylic materials that would work with it because 3mm is a standard acrylic thickness, and it wouldn't fit in those earlier machines. I love that I can now use this standard size.
- I'm happy that the adaptive tools from earlier Maker machines and all the other Cricut mats can work in the Maker 5; that is a big bonus.
- Everything I cut and made today impressed me. The settings all worked well, the tools worked as expected, and it was an easy process from start to finish.
- I'm a fan of Load and Go. When I first got the Explore 5, I was sure I was going to hate this feature. I can admit when I'm wrong; I actually love it, and I'm happy that the Maker 5 has it as well.
- I really like that everything you need to start making is included in the box. Even if you purchase the machine not in a bundle, you will get the fine point blade, scoring tool, a double-sided pen, a mat, and some materials to start with. This is big to me, and I think it will help people get more comfortable with their machine. I know a lot of people are really excited when they purchase a Cricut but don't know where to start. Having everything in the box to start the same day will be a big help with this roadblock.
- I also think, for a lot of people, the more compact size is going to be a pro. Not having the top that has to open and the side cup will allow you to put the Maker 5 on a shelf or other space and still use it more easily.
Cons
- A con for me is that all of the Cricut pens I own for earlier machines will not work in the Maker 5. While I'm glad they're moving to a universal pen, I knew that we'd have to transition eventually, but I was hoping there would be a way to introduce the universal pens and still use the earlier pens.
- I also do not like that I can't use the Scoring Stylus in the Maker 5. It's the same complaint I had about the Explore 5. There are other scoring tools available, and the Explore 5 and Maker 5 come with the new scoring tool, but I hate that I have to take out the blade to score and then take out the scoring tool to cut. I was a big fan of loading the scoring stylus in the pen side and having the blade in the blade side.
- Still not a fan of the open spot at the top when the machine is completely closed. I live on a farm, and I have 3 dogs. This opening allows a lot of dust, pet hair, and other debris to get into the machine, especially compared to machines that had a top that closed.
- As someone who always placed the pens and tools she was using in the storage cup on the machine, I miss that. If you've never had a Cricut machine before, you probably won't even notice it, but with years of Cricut use behind me, I miss it. I will say that the top of the Maker 5 has a bit of a dip to it that the Explore 5 doesn't have. This allows me to set those tools and blades on top of the machine, and they don't roll away. I think I can get used to this in time, and I definitely like it better than the Explore 5 that doesn't have that dip.
Who is the Maker 5 For?
Before I get into this section, I want to remind you that if you are happy with the current Cricut machine you own, you do not need to upgrade to the Maker 5 just because I said I like it.
Your previous Explore machines, Joy machines, Venture machine, and Maker machines will all continue to work and be supported. If they are doing everything you could want them to do, there is no reason to purchase the Maker 5.
If you are looking for your first Cricut machine and you have no desire to cut thick materials or fabric, you probably don't need the Maker 5.
The Maker 5 is for people like me, who have been waiting for years for a machine that could cut foam core boards and plastic corrugated boards.
Even though I own the Maker 4, the Maker 5 can use materials I have been waiting a long time for. That means the Maker 5 is a machine I want to have in my craft room.
If you don't already own a Maker machine and have been wanting one, I would purchase the Maker 5 over a Maker 4. There are enough changes to make it worth getting the newest machine on the market; it comes with more right out of the box than the Maker 4, and I think it has a great starting price point.
Is the Maker 5 the Right Cricut Machine for You?
Now that you've seen some of what the Maker 5 can do, is it the right machine for you?
That is a question only you can answer, because only you know the types of crafts you currently make and the types of crafts you're dreaming of making.
I want to help you decide if it's right for you. If there is a project you'd like to see me make, or if there is something you want to know if you can make, please leave a comment and tell me about it.
I'd love to hear what you want to see made with the Cricut Maker 5. I've tried to answer any questions I think you might have in this tutorial. If you have additional questions, comments, or ideas, leave them in the comments, and I'll be happy to answer those questions and maybe even add your project idea to my to-do list!
Frequently Asked Questions
Can I use old Cricut pens in the Maker 5 machine?
No, you cannot use older versions of Cricut pens in the Cricut Maker 5. Only the new Universal Pens will work in the Maker 5.
If you have an older Cricut machine and want to use the new Universal Pens, there is an adaptor you can use in the older machines.
Can I cut thicker wood materials with the Maker 5?
I do not believe you can cut thicker wood materials with the new Maker 5. I have not tested this because I am not a fan of cutting wood with the Knife Blade. It does not do well on turns, and often the settings are too much or not enough.
Even though you could cut materials up to 2.4mm thick with earlier Maker machines, you couldn't cut wood materials that were 2.4mm thick.