
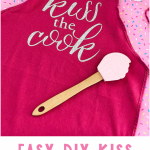
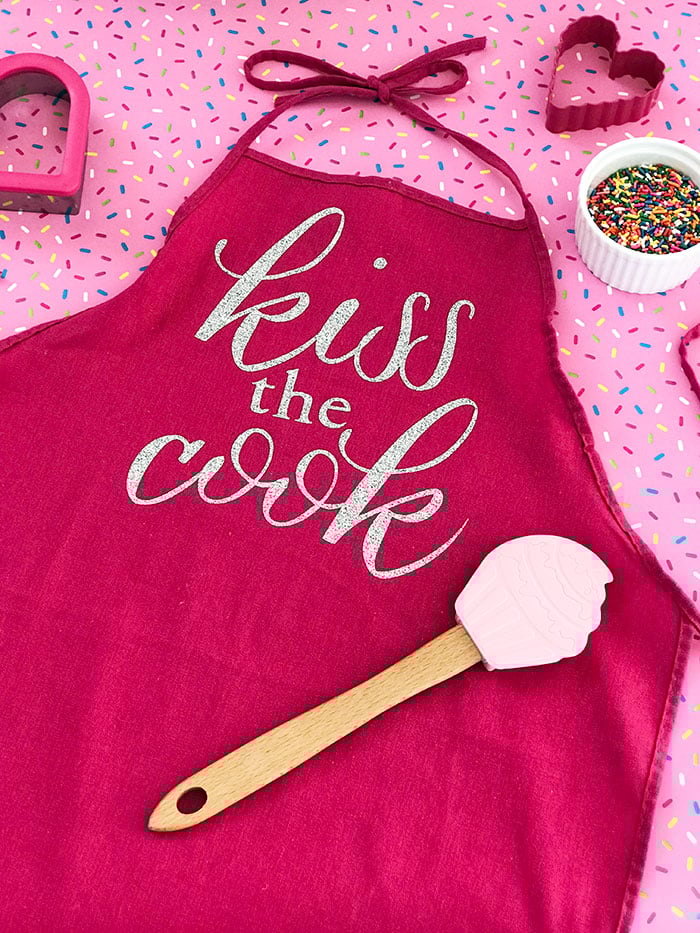
Iron-on vinyl is one of my favorite materials to work with because it's easy to use and lets me create fun designs quickly. In today's tutorial, I'll show you how to make a simple DIY “Kiss the Cook” apron! Wearing an apron while cooking became popular many decades ago, and while it may not be as frequently discussed today, I still enjoy wearing one to add a touch of style while protecting my clothes from those inevitable splatters.
Wearing an apron while cooking was made popular decades ago. Although we don't seem to hear about it as often as we once did, I still love wearing an apron to keep those inevitable splatters off my clothes.
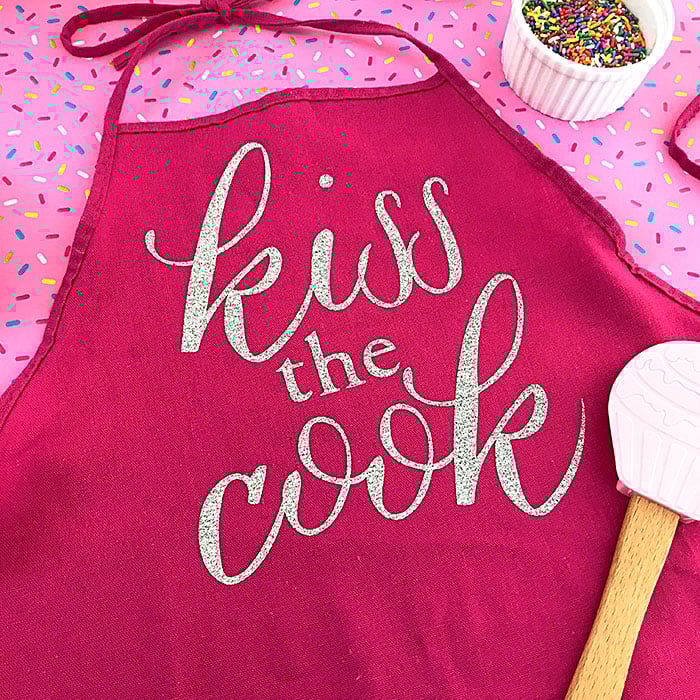
Today, my friend Jen Goode is back with an awesome apron project. She uses iron-on vinyl to create a Kiss the Cook apron that you'll love to wear yourself or to gift to your favorite chef. Plus, the best part is that this apron can be made in just three easy steps!
Let's get started on today's craft!
NOTE: If you want even more iron-on vinyl inspiration, I've got you covered! I love using this crafting material for all types of projects, including our Iron-On Shirts, Custom Notebook Gift Idea, and Make a Farmhouse Wreath with Iron-on project ideas.
How To Make Kiss The Cook Apron
You can make this Kiss the Cook apron in minutes, seriously, maybe 10 minutes (at the most)! I've already set up a Cricut Design Space canvas to help you get started. Grab your favorite iron-on vinyl and a blank apron. Then let's make this fun project together!
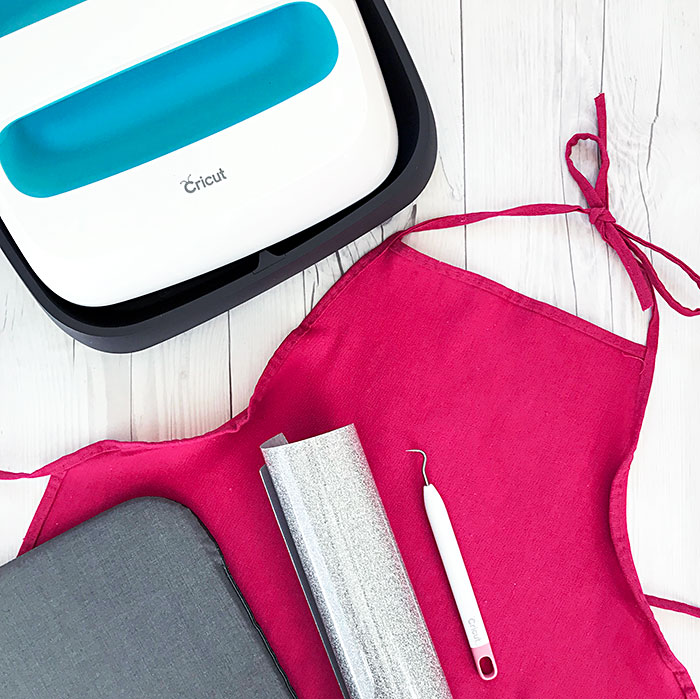
Supplies Needed To Make Kiss The Cook Apron
- Blank cotton apron
- Cricut machine (click here to see which one to buy)
- Cricut Design Space
- Kiss the Cook text layout
- Silver glitter iron-on vinyl
- Weeding tool
- EasyPress or iron (here's why you should try the EasyPress)
Step 1: Cut Design
Using your Cricut machine and Cricut Design Space, follow the on-screen instructions to cut the text design from the vinyl.
NOTE: Don't forget to set the cutting mat to “mirror” before you cut the vinyl. This will reverse the letters so they iron on correctly.
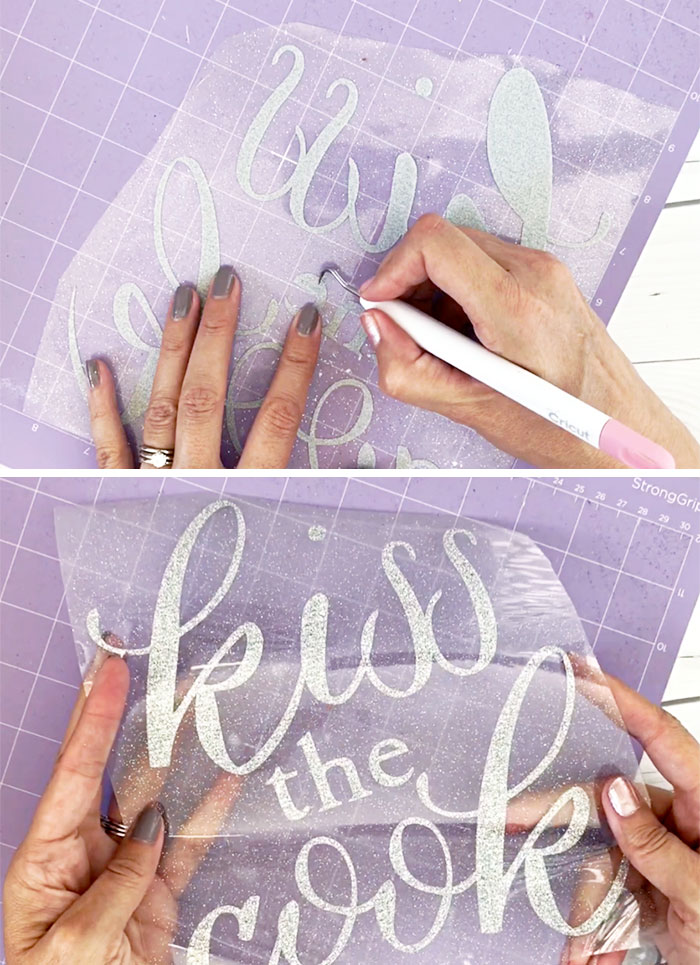
Step 2: Weed Design
Once cut, use your weeding tool to remove the vinyl from the loops and closed insides of letters.
Step 3: Add Design To Apron
Using your iron or an EasyPress, press the text design onto the apron.
That's it. It doesn't get much simpler than three little steps.
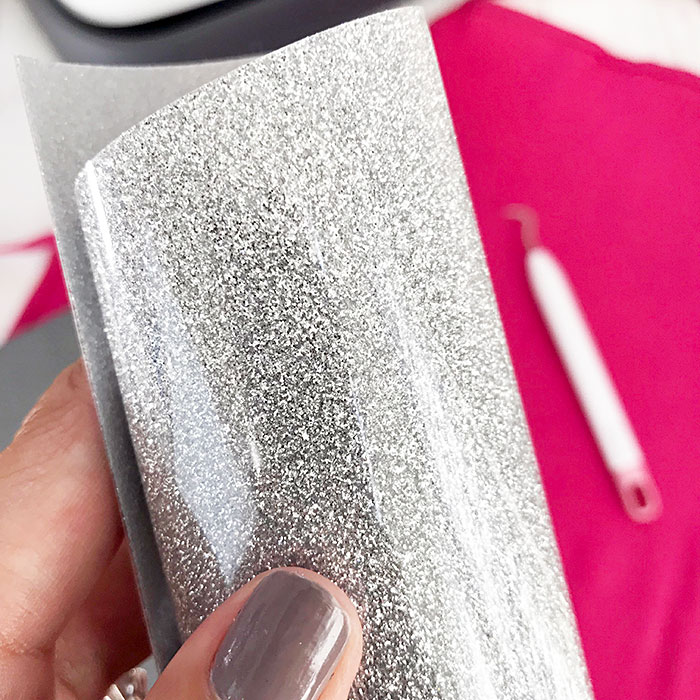
This silver iron-on glitter is fantastic. It's thick enough to make it really easy to work with and displays a ton of sparkly glitter. Look at how pretty this is!
FAQs About Kiss The Cook Apron
Here are a couple of questions that I see readers ask about making this Kiss the Cook apron. If you have a question, please check whether I’ve already answered it below. Don’t see your question? Leave it for me in the comments!
What Cricut Machine Can I Use To Make This Kiss The Cook Apron?
All of them! The Cricut Maker, Cricut Explore series, Cricut Joy, Cricut Joy Xtra, and Cricut Venture can all cut iron-on vinyl!
The only thing to keep in mind is that each Cricut machine differs in terms of project size capabilities and the materials it can cut. As a result, you may need to resize the ”Kiss the Cook” cut file to fit the size of the Cricut mat/machine you are using for this project.
Where Can I Find The Cut File For This Apron?
You can find the Kiss the Cook apron cut file by clicking here!
How Can I Personalize This Design For My Cook?
I used this amazing, super sparkly glitter iron-on vinyl. You can do the same or pick a different favorite color. Have fun playing around with colors – including colors for the apron! You can also use this design to create a cute, personalized t-shirt.
If you want to get fancier with your apron design, you can “detach” all the words from each other in Cricut Design Space and set them to different materials or colors. Or, position them with different spacing. You can also add extra embellishments to the apron for a fun, personalized look!
Can I Use An Iron If I Don’t Have An EasyPress?
Yep, you sure can. It is worth noting that I’ve worked with both products for many years and have found that at some point, irons stop heating evenly.
The thing that I love the most about the EasyPress is that it combines the speed of a heat press with the convenience of an iron. Once you set your time and temperature on the EasyPress, all you have to do is apply light pressure as the machine counts down. Then, sit back and enjoy the professional results you receive every time!
NOTE: If you want to learn more about the differences between the EasyPress and iron, check out our blog post titled ”Cricut EasyPress Versus Iron: Which is Better?”.
A Fun Gift Idea For Your Favorite Cook
You can make this customized Kiss the Cook apron for your favorite chef and include a few other goodies to make the perfect gift!
It would also make a great addition to a gift basket! Think about adding a selection of gourmet spices or fancy baking supplies. Add in a couple of mixing spoons or a spatula, and then wrap it all up with baker's twine and a bow. Your kitchen guru will love it!
Check out these other cute Cricut crafts for the cook or the kitchen:
- DIY Watermelon Hand Towel
- Easy Mason Jar Tea Towel
- Pretty Flower Place Settings
- DIY Stenciled Flour Sack Towel
- Make a Magnetic Knife Block for Your Kitchen
- Kitchen Chalkboard Art Free Printable
I hope you have fun making this Kiss the Cook apron. It's such a cute gift idea, you'll want to make one for yourself! Plus, it makes a great gift for your favorite cook or a special treat for yourself.
60+ More Handmade Cricut Gifts
Did you love this kiss the cook apron, and are looking for even more handmade Cricut gifts? Then check out the projects below!
- 10 Cricut Personalized Gifts Everyone Will Love
- 25 Personalized Cricut Gift Ideas
- Watco Food Safe Sealer with Handwritten Recipe Project Idea
- 25+ DIY Neighbor Gifts with Cricut
- Make Custom Stuffed Animals Three Ways!


nice post
nice idea to handmade dresses
Congratulations! Your post was my feature pick at #ThursdayFavoriteThings this week. Visit me at https://www.marilynstreats.com on thursday morning to see your feature! All hosts choose their own features from the comments left on their blog so be sure to return to my blog to see your feature. I invite you to leave more links to be shared and commented upon. Please don’t forget to add your link numbers or post title so we can be sure to visit!