I am testing the new Cricut Joy 2 to help you decide if it's the right Cricut machine for you.
The Joy 2 is the newest Cricut in the Joy line of machines, and it now offers Print Then Cut. If you like the size of the original Joy but wanted the Print Then Cut feature, this may be exactly what you've been looking for.
By adding the ability to Print Then Cut, the Joy 2 can cut over 75 materials. When thinking about the materials you can cut with this machine, think of thin materials like vinyl, HTV, cardstock, etc.
You can watch me unbox the Joy 2 and make a few projects with it, including Print Then Cut projects by pressing play on the video below.
Closer Look at Cricut Joy 2
I have owned all of the different Cricut machines, and when the Cricut Joy 2 announcement was made, I knew I had to purchase it.
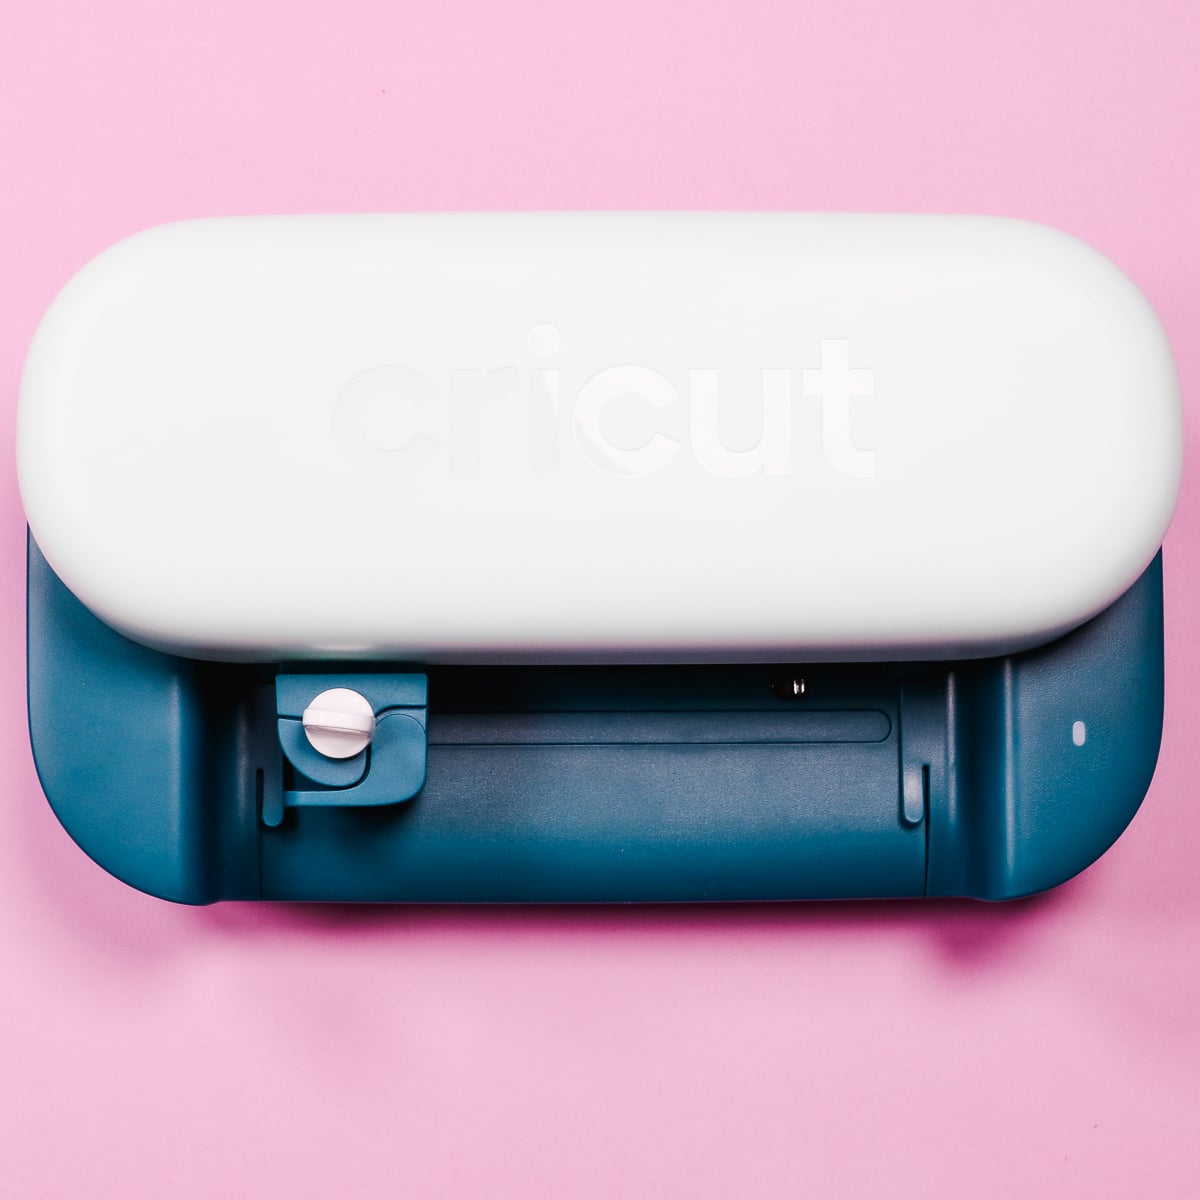
The Joy 2 looks significantly different from previous Cricut machines. The lack of a door creates a machine that is always open, and I was curious to see what else has changed.
I will say, after using it, I do like this machine. Do you need to run out and get it today? I think that will depend on your Cricut needs.
Let's unbox it, test it out, and see if it has everything you're looking for.
Unboxing Cricut Joy 2
First, I want to say that what comes with your Joy 2 will depend on how you purchase the machine. There are multiple options on the market, including different machine colors.
- Machine Only available in Blue
- Machine + Essentials Bundle available in Blue and Coral (and Jade at Michaels)
- Machine + Ultimate Plus Bundle available in Blue and Coral
I purchased the Machine + Essentials Bundle in Jade from Michaels. Most of the projects I make today will only use materials included if you purchase just the machine. I will clarify anything that is a separate purchase.
Inside the box you'll find:
- Cricut Joy 2
- Premium Fine Point Cutting Blade
- Mini Weeder & Paper Ruler
- Scoring Tool
- Dual-Sided Marker in Black
- Smart Iron-On
- Smart Vinyl
- Transfer Tape
- Light Grip Machine Mat
- Value Cardstock
The additional items included in the Essentials Bundle are:
- Tool Kit (Scraper, Full-Sized Weeder, Spatula, Portable Trimmer)
- Additional Smart Iron-On
- Additional Smart Vinyl
- Additional Value Cardstock
- Insert Card Set
- Additional Transfer Tape
- Card Mat
- Printable Vinyl
Cricut Joy 2 Set Up
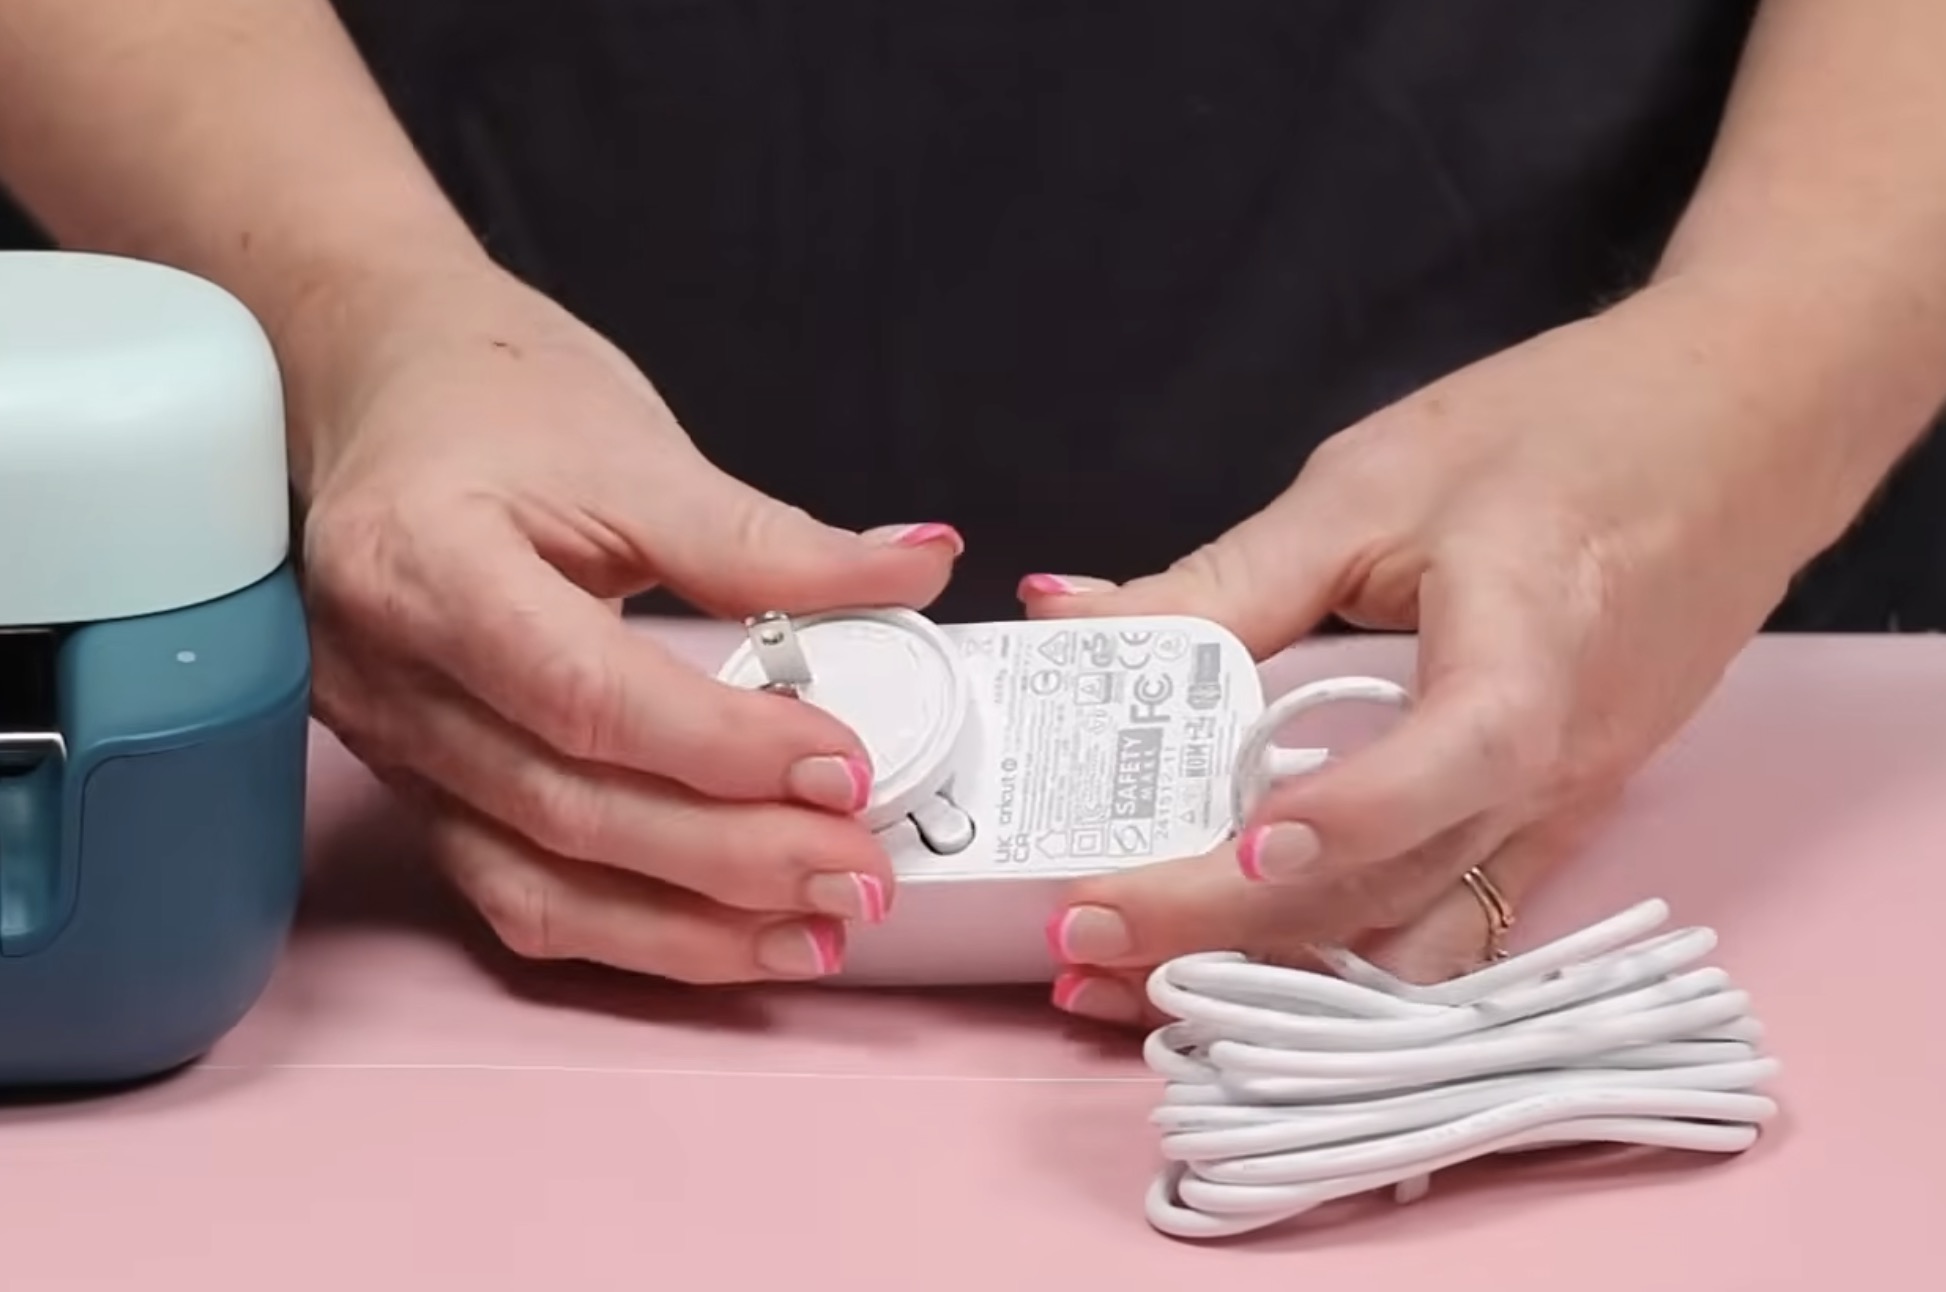
First, assemble the plug to the adaptor and then plug in the machine.
Head to cricut.com/setup and follow the instructions. This will walk you through the setup process, including checking to see if there are any Firmware updates.
There is an option to make a first project during the setup process. I am going to save the material to make a different first project.
If you are brand new to Cricut machines and Design Space, I would go through the first project in the setup process to get a good first look at everything.
What has Changed From Original Cricut Joy?
Let's chat about both of these machines side by side.
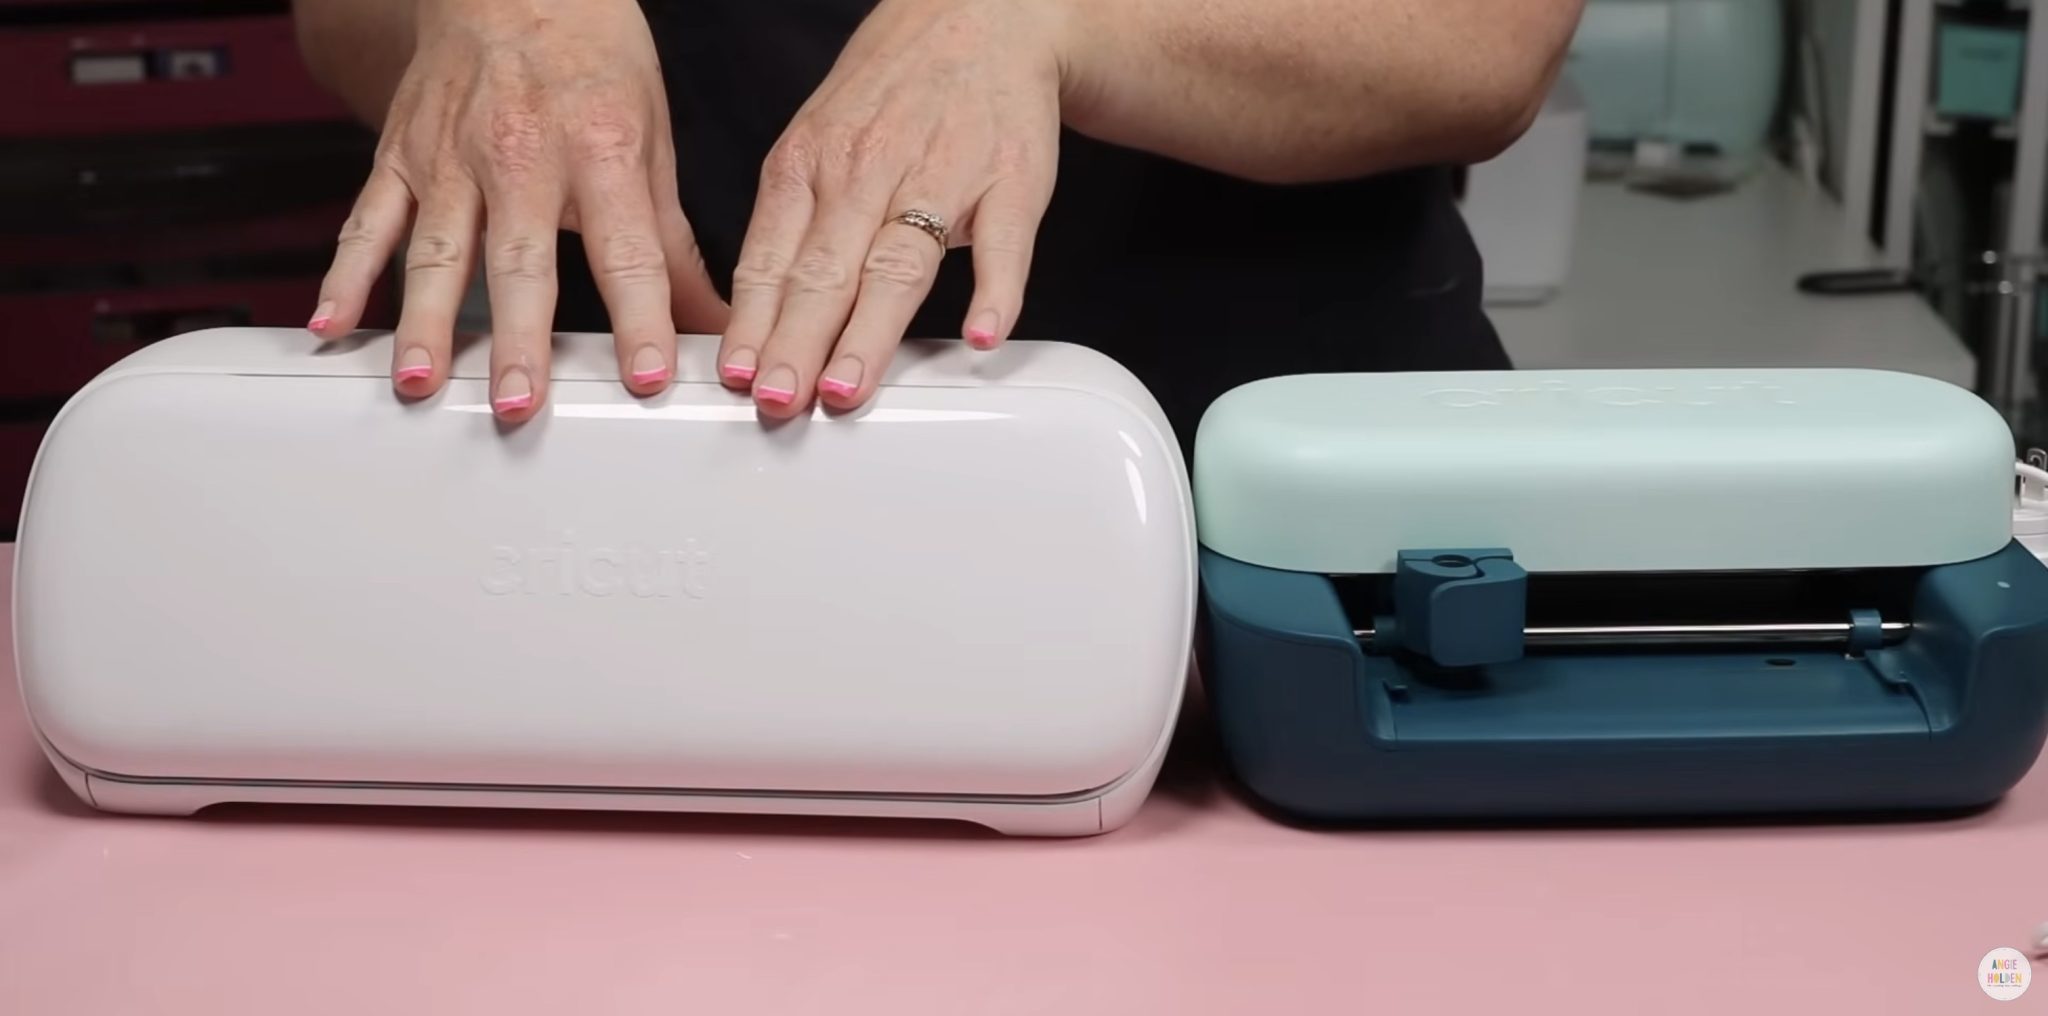
Difference in Appearance
At a glance, you can see that the Joy 2 looks very different from the original Cricut Joy.
Joy 2 doesn't have a door and has a nice 2-tone monochromatic look. The size is very similar, unless you count the extra space of having the door on the original Joy open.
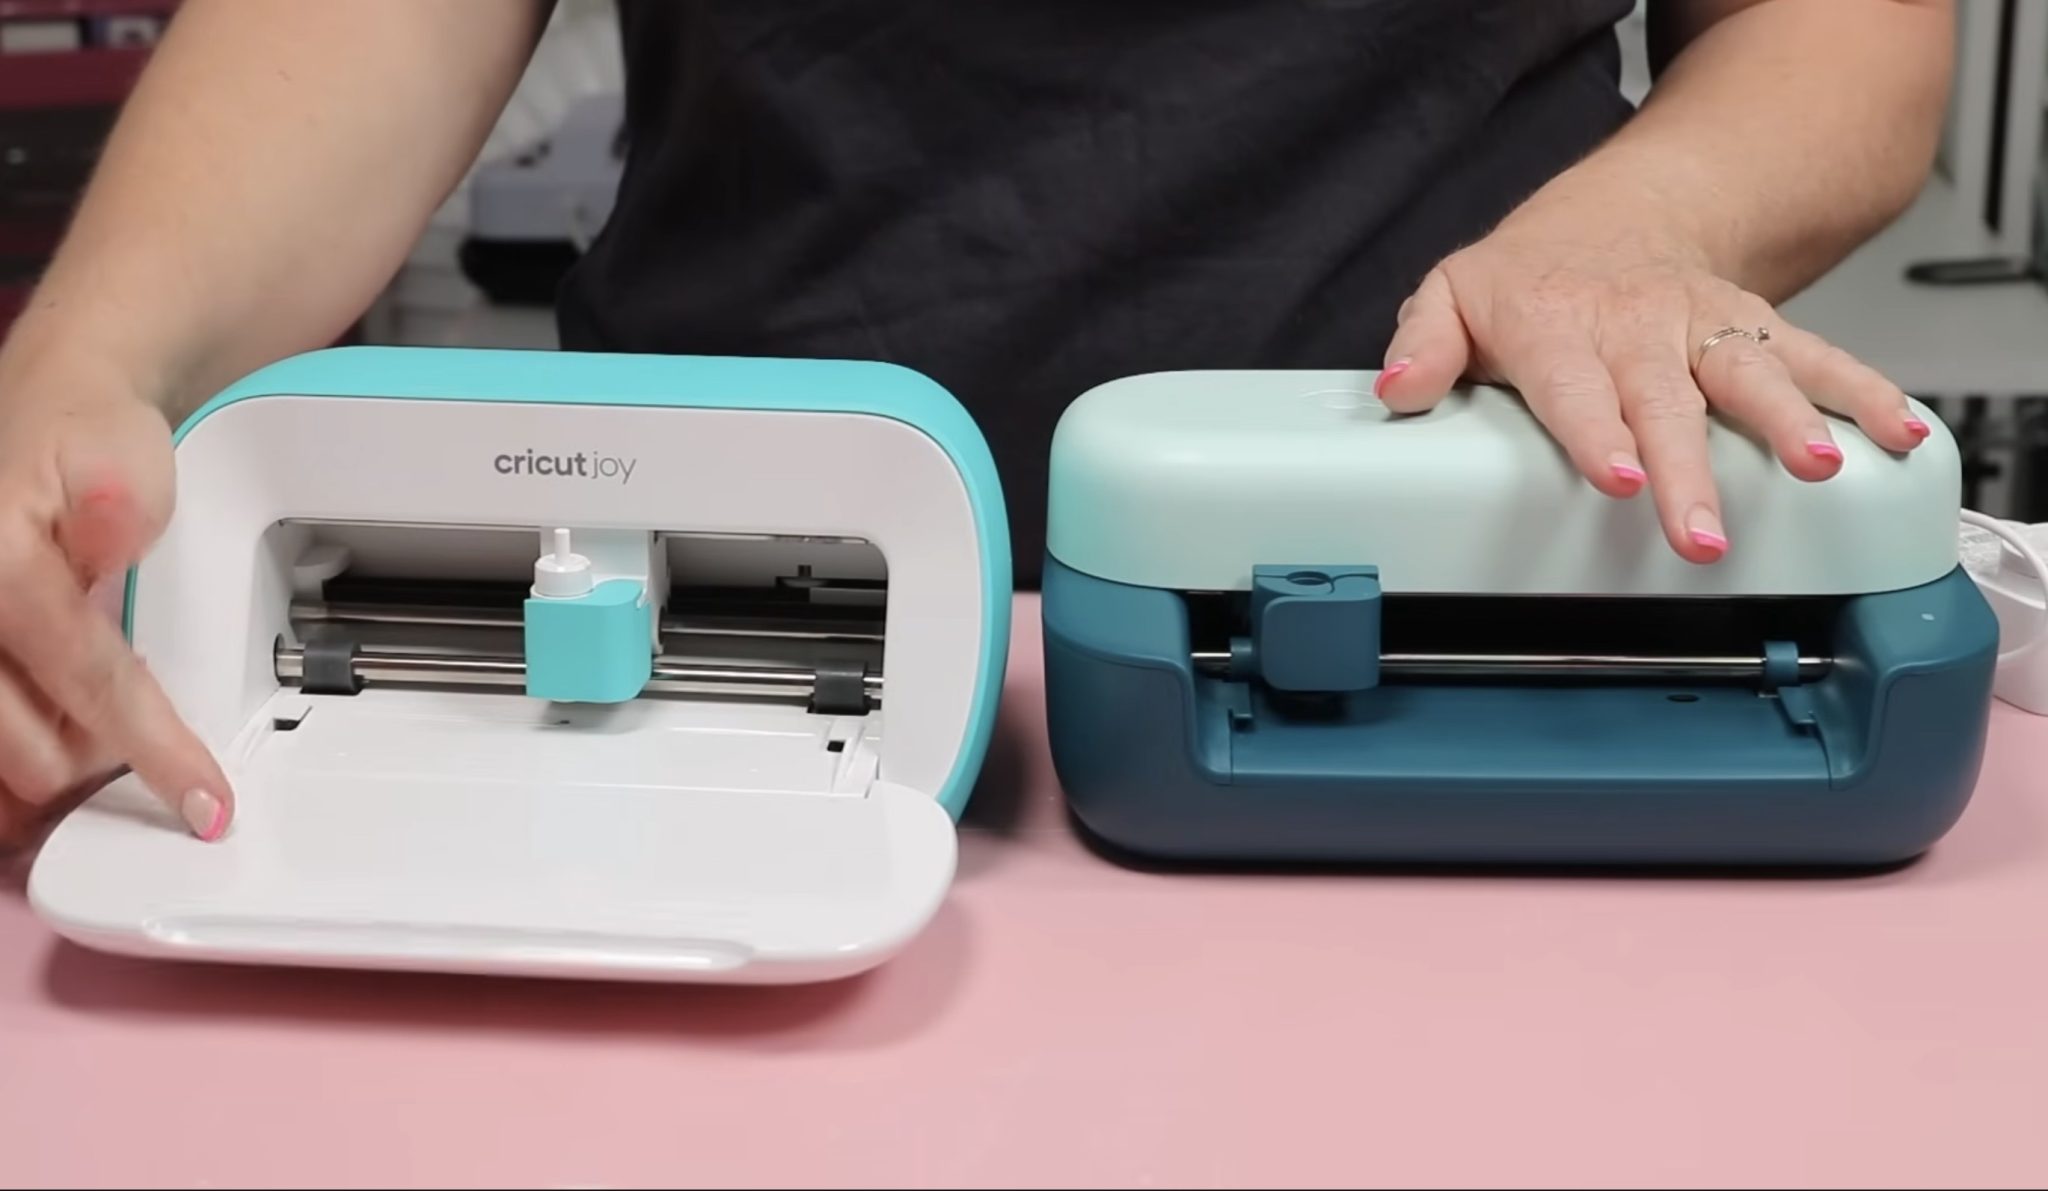
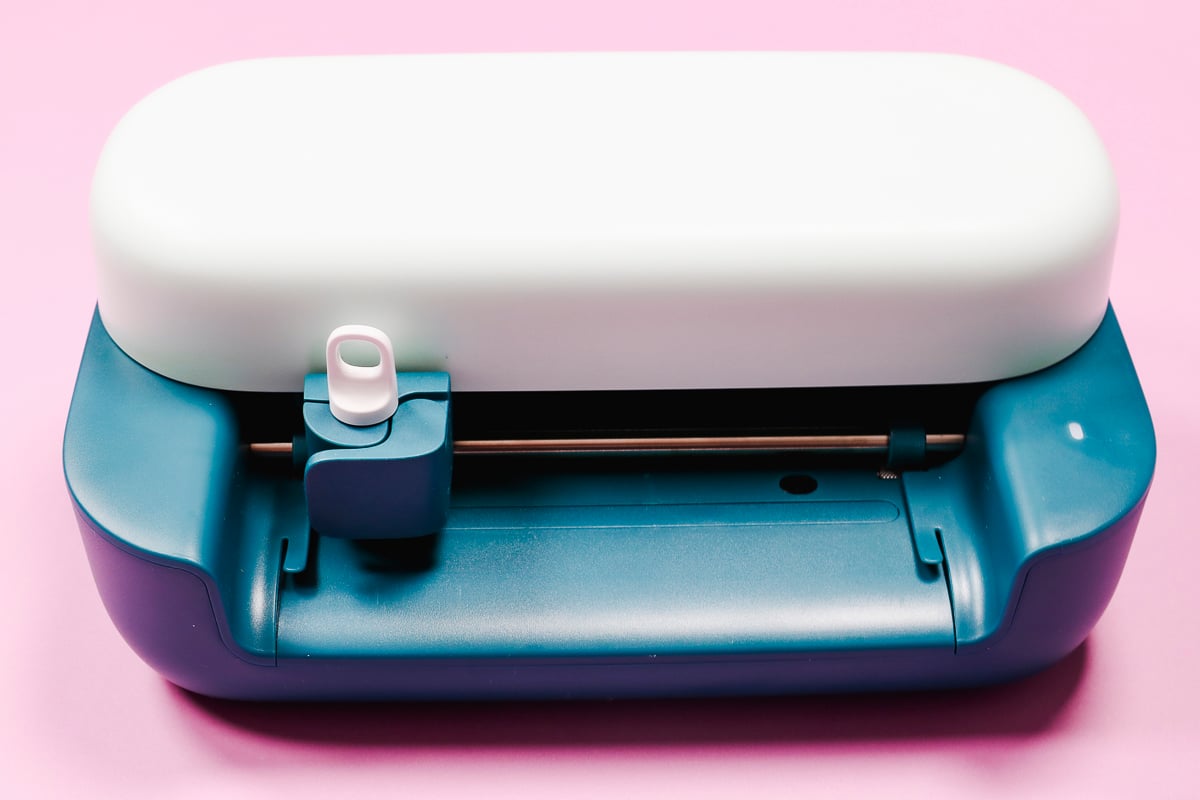
The clamp looks and feels the same as well.
The cord is different. I do not know if the new cord will work with the old machine or if the old cord will work with the new machine, because I don't want to risk ruining either machine by trying it.
Cut Size
Both machines have an approximate max width of 4.5 inches. The total cut width will depend on whether you're using a mat or cutting matless.
When using a mat, the maximum length is 11.75 inches. If you're using Smart materials, the maximum length is 12 feet.
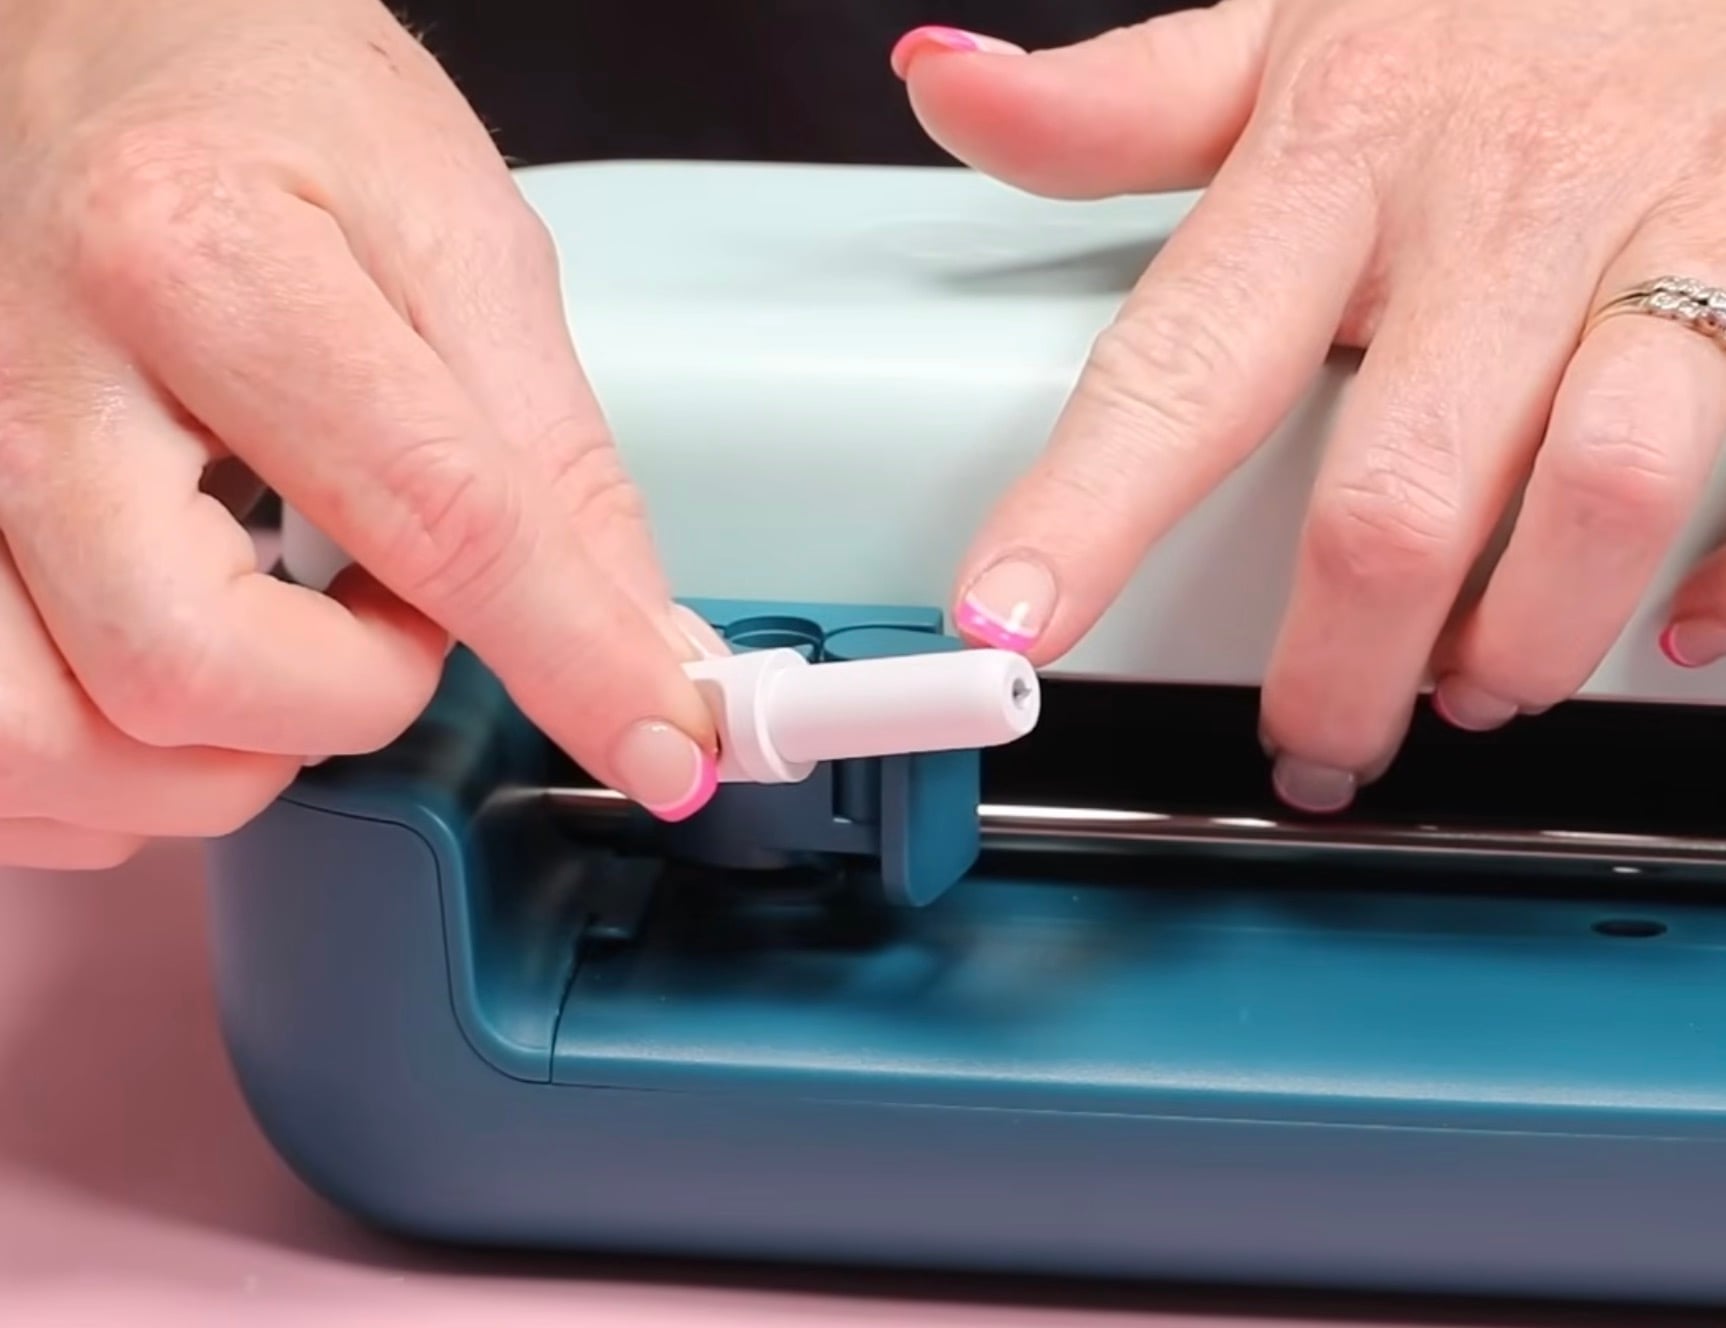
Blades and Accessories
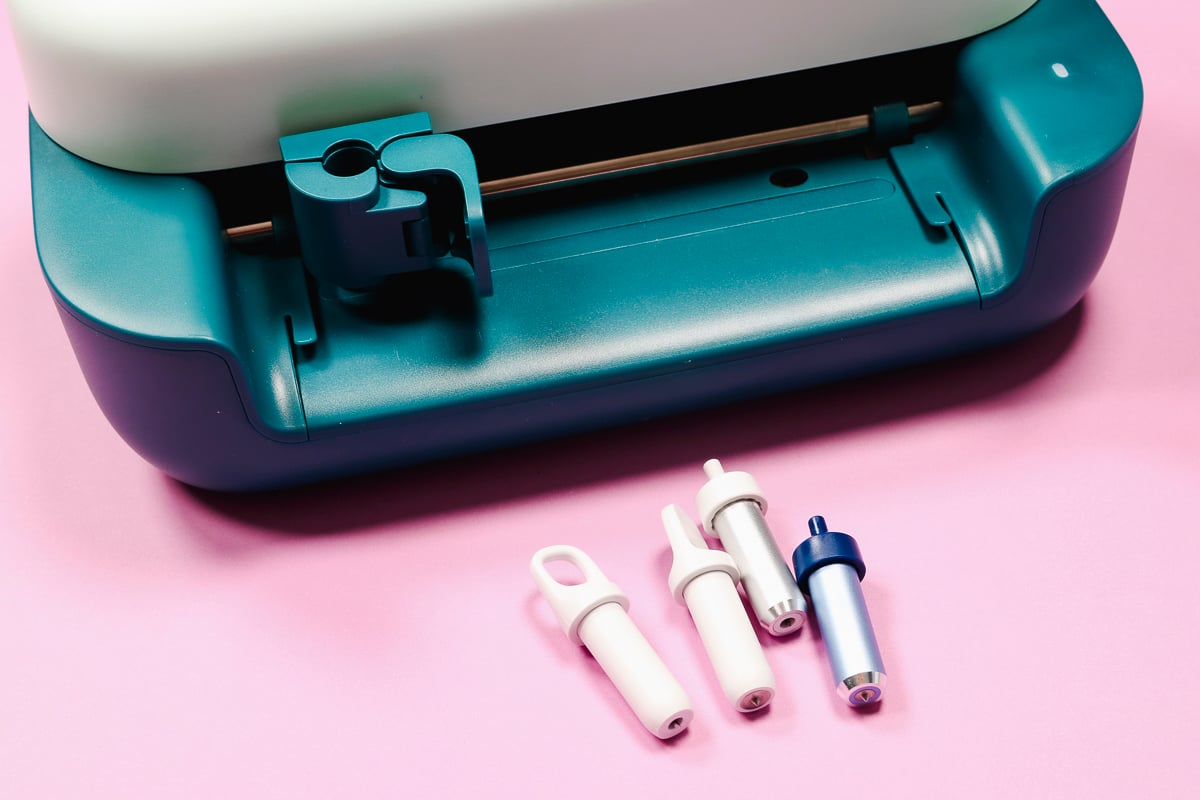
Cricut Joy 2 has a new fine-point blade/housing. With the original Joy, the blades could be changed in the housing. Now, the blade and housing are one piece. When you need to change the blade, you'll swap the whole housing.
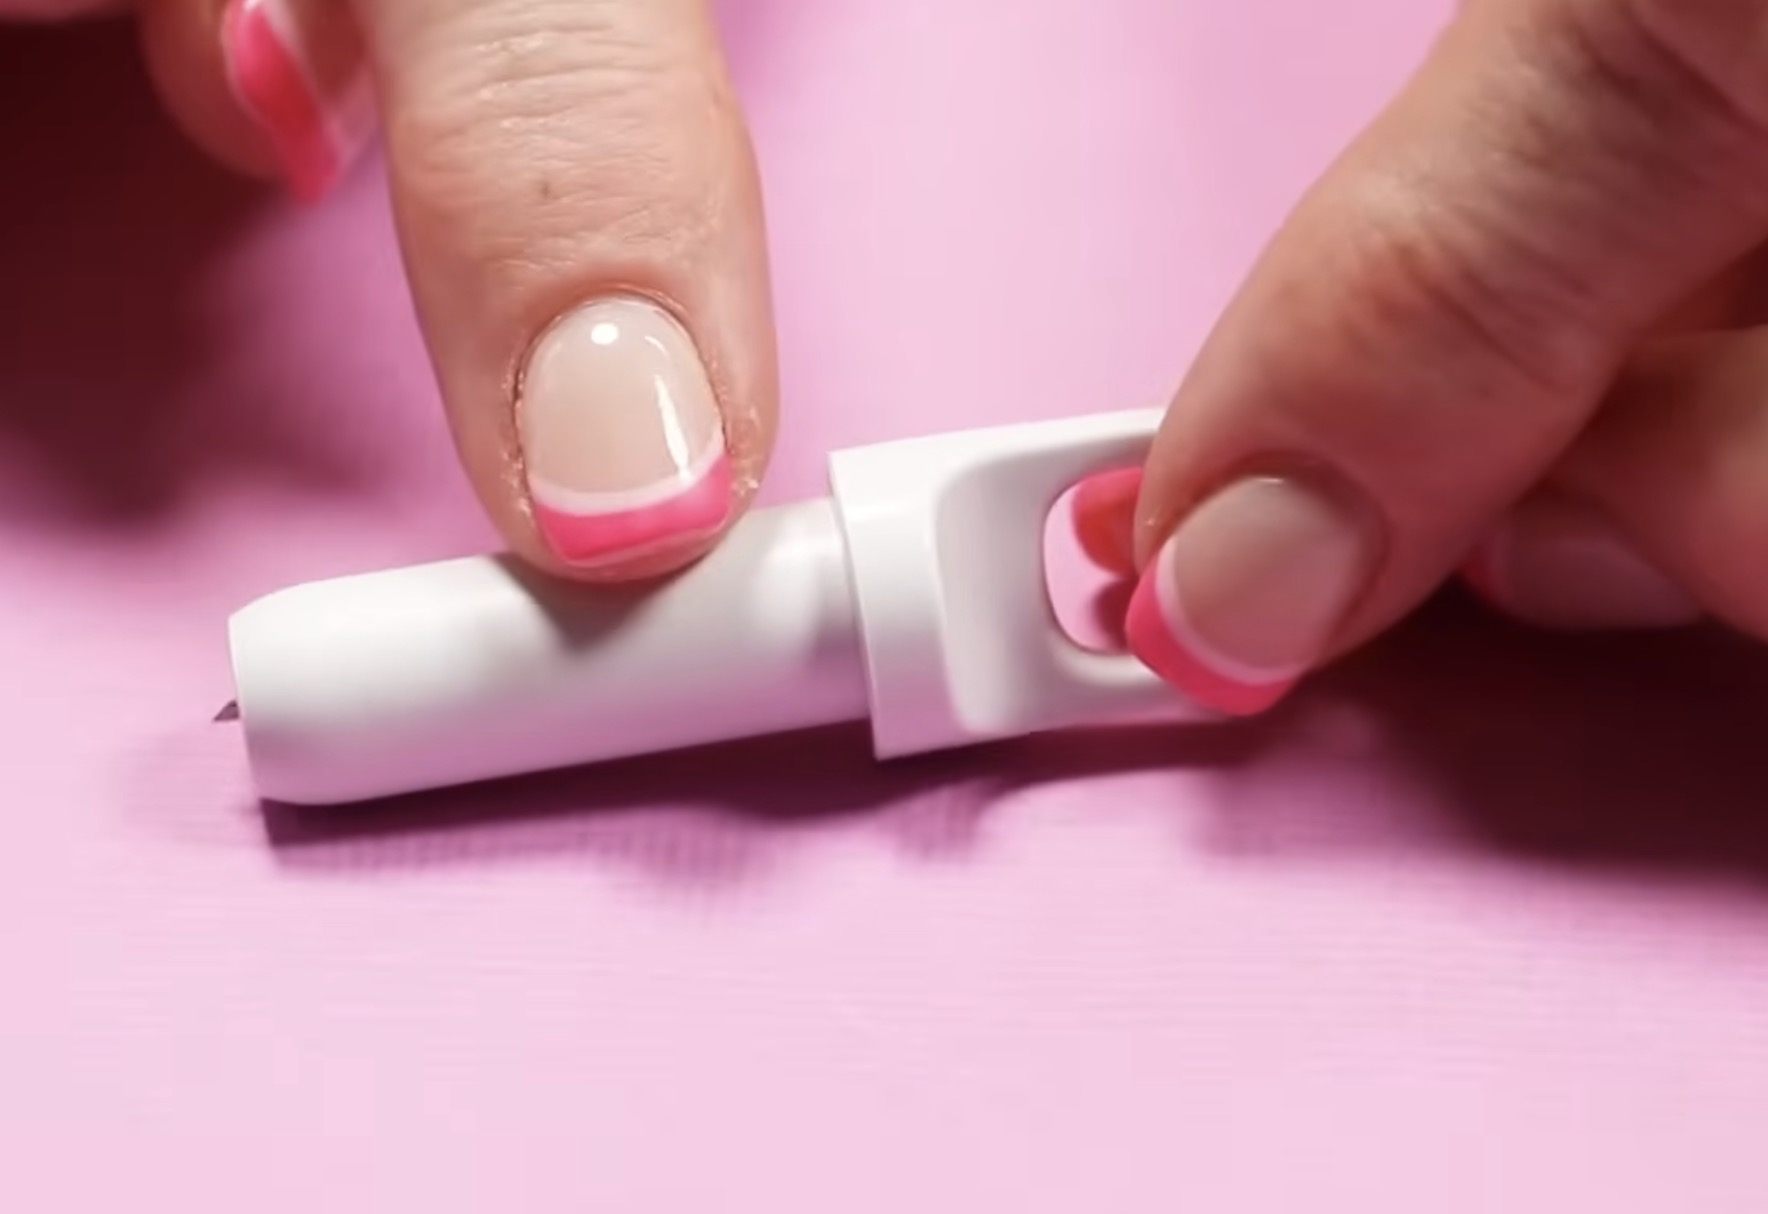
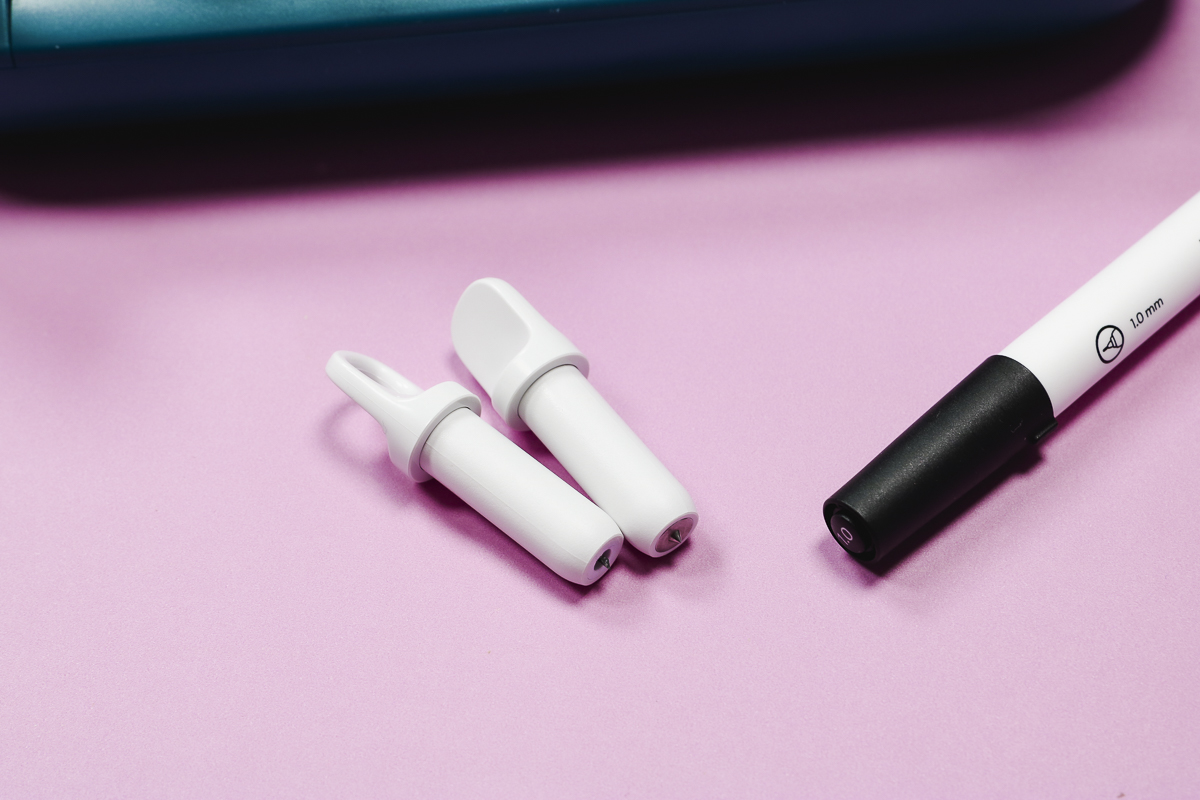
The new housing has an open loop on top, making it easy to tell it apart from the new scoring tool.
There is a new scoring tool that comes with the Joy 2. This tool looks similar to the fine-point blade, but the top is solid instead of open.
Can I Use Original Joy Tools and Accessories in Cricut Joy 2?
Yes! If you own an original Joy or Joy Xtra, the pens, blades, and Foiling tool that fit those machines will work in the Joy 2. The new Joy 2 blades and scoring tool will also all fit in the older machines.
The Cricut Joy Xtra and Joy 2 are not the same size, and not all tools and materials can be interchanged between the two.
Cricut Joy Xtra has its own size cutting mats and smart materials. Those will not work with the Joy 2, but the cutting mats and smart materials that fit the original Joy will work with the Joy 2.
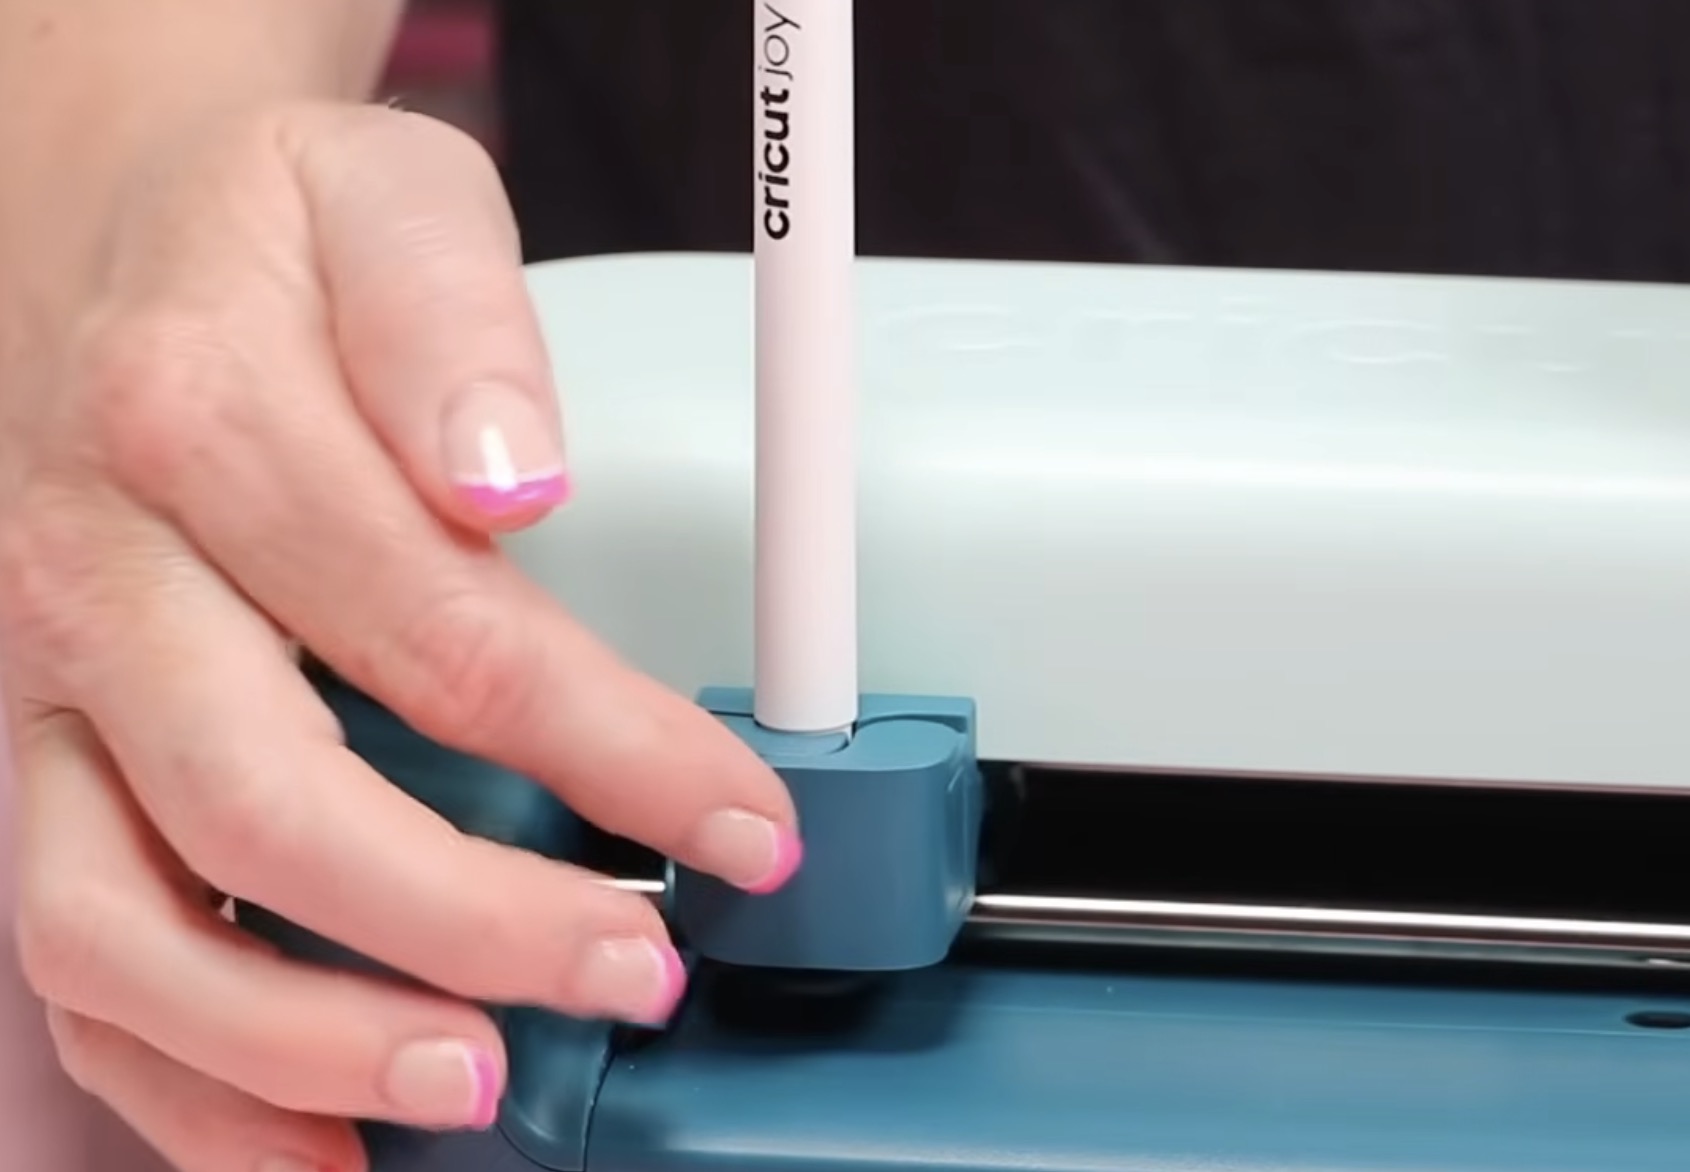
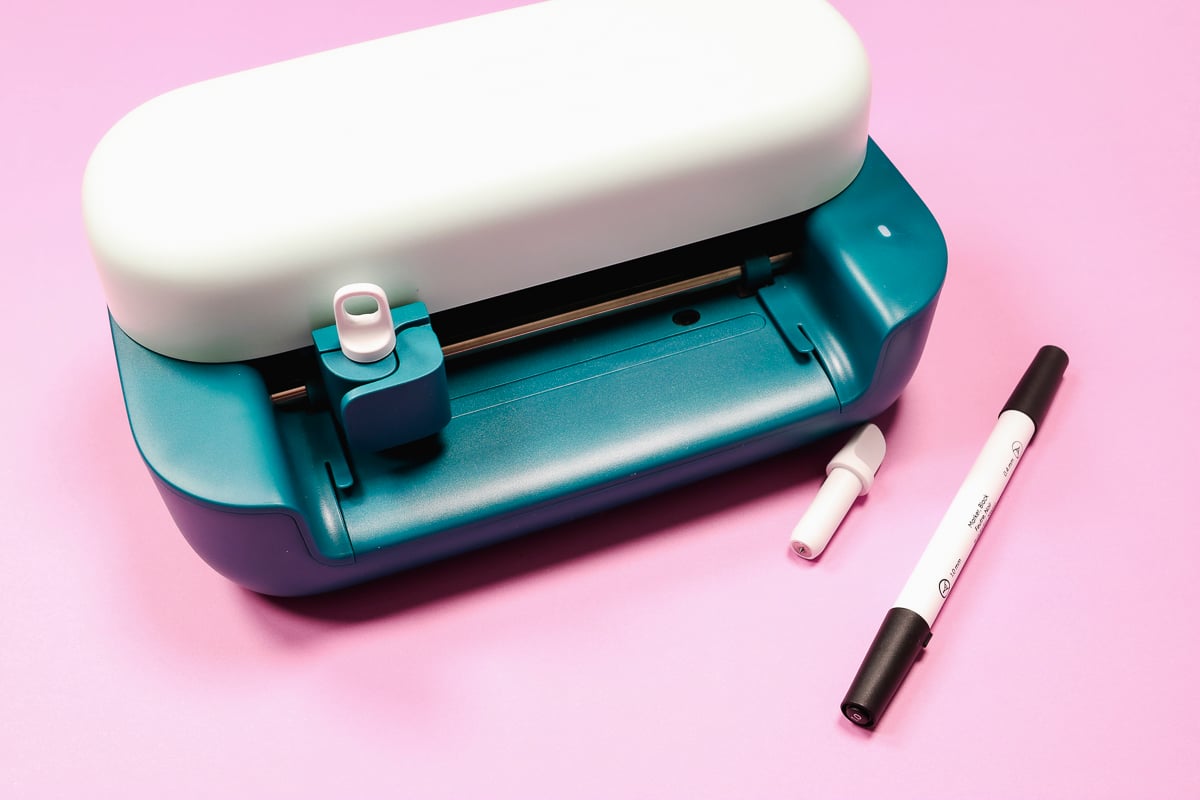
The Cricut Joy 2 comes with a new dual-sided marker. One side is .4mm, and the other is 1mm. This pen fits in all Joy machines, and you can use the old Joy pens in the new Joy 2.
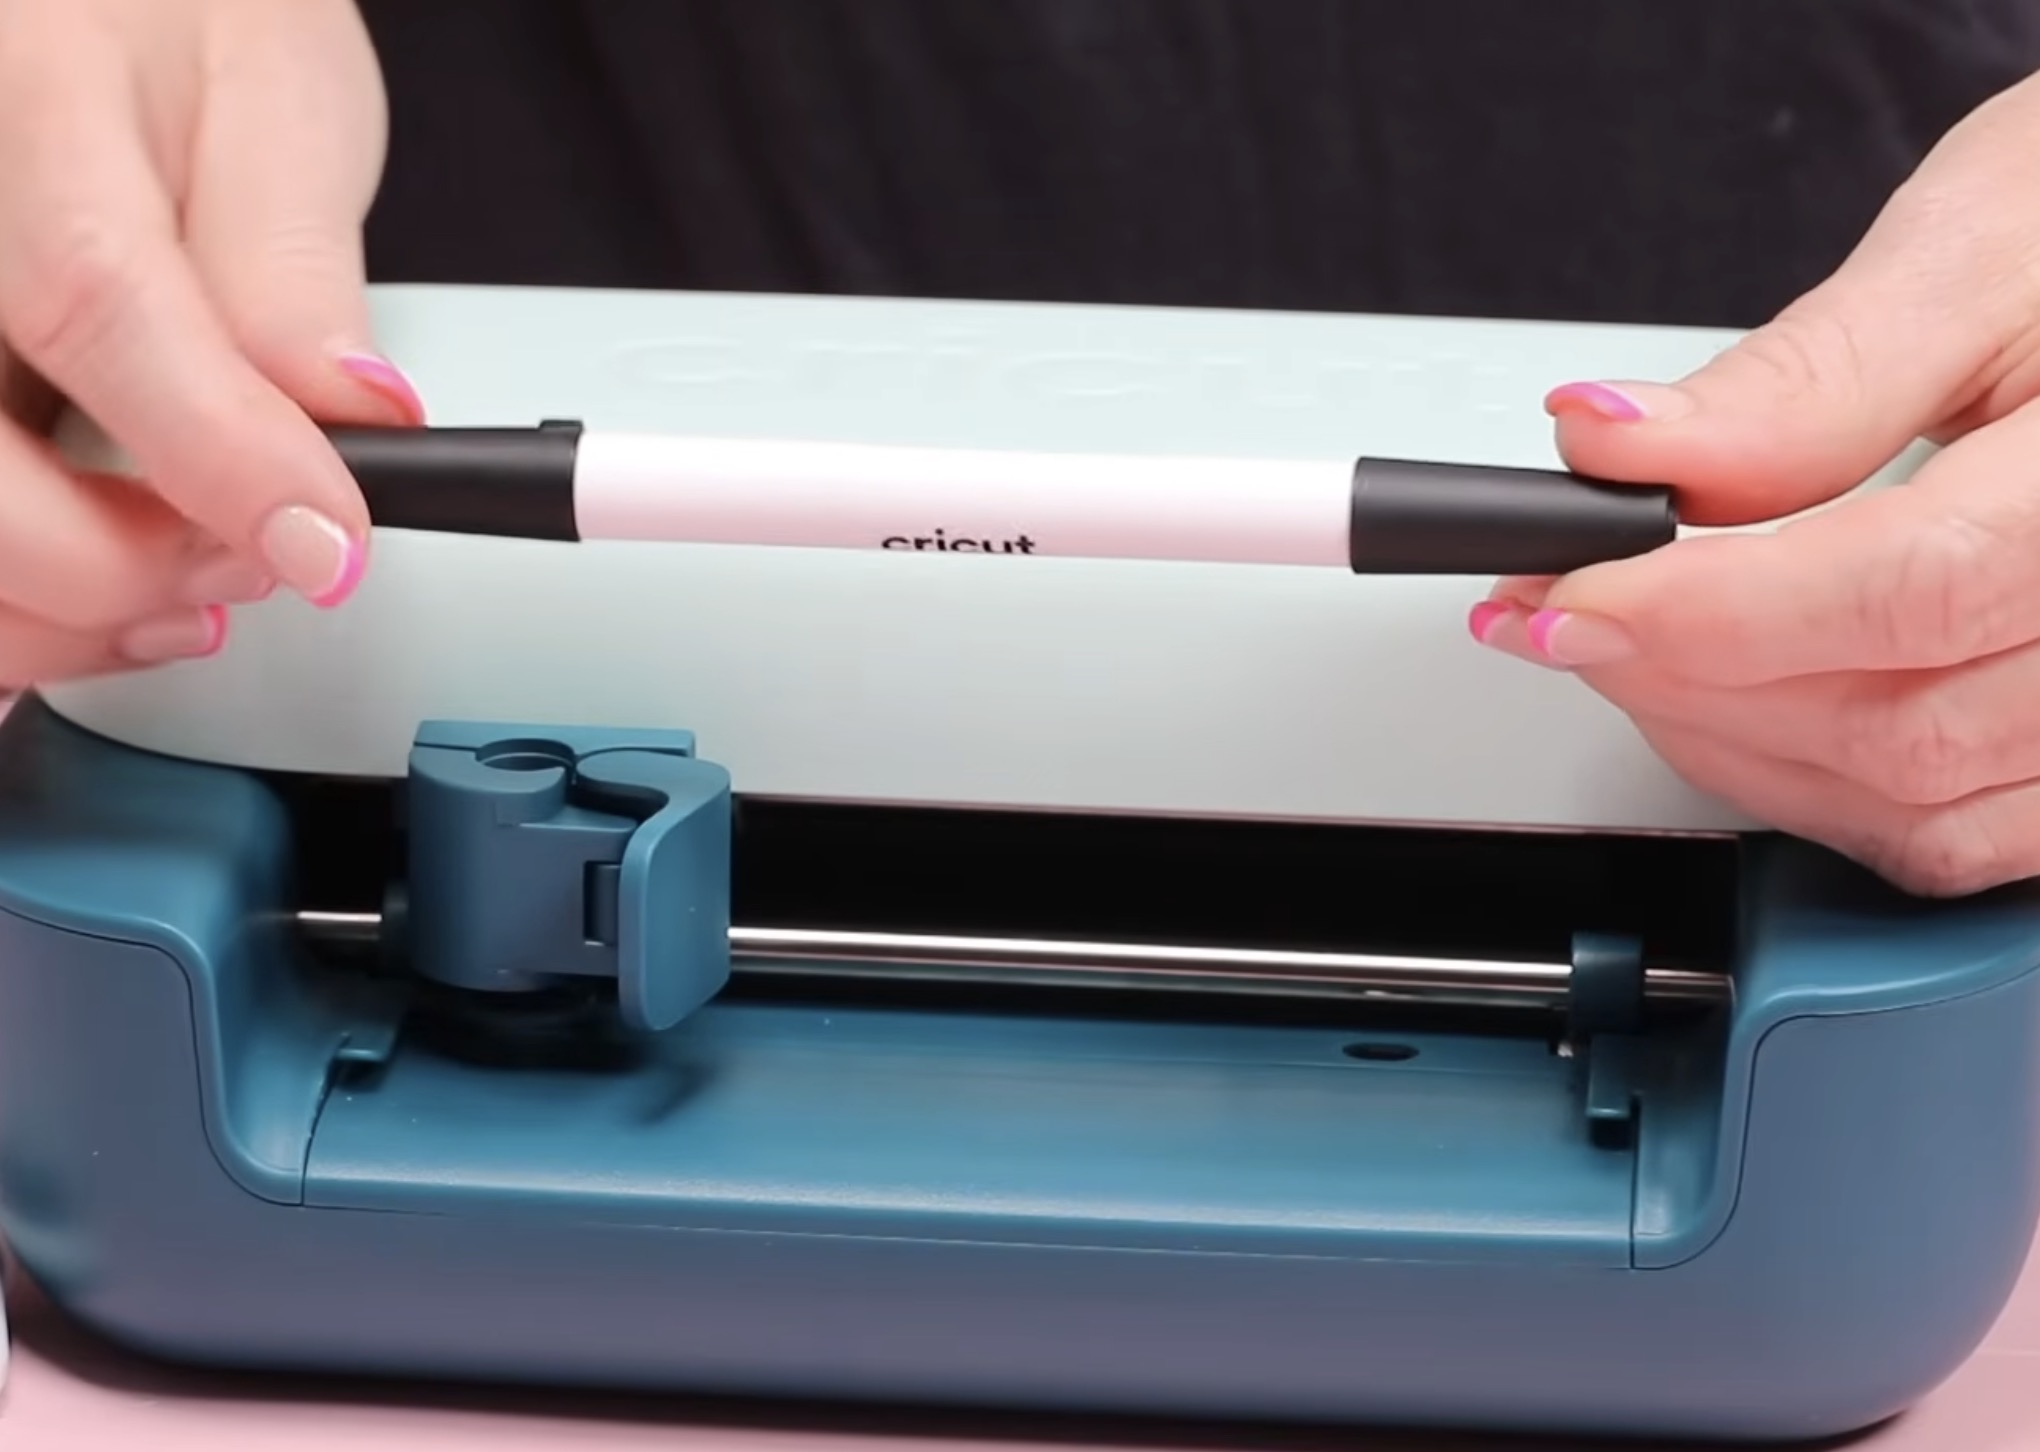
I feel like the pens fit in the clamp of the Joy 2 a little more firmly than they do in the original Joy, which makes it feel like they'll get a more consistent draw line with the Joy 2.
Print Then Cut
The biggest difference between the Cricut Joy and Joy 2 is that the new machine has Print Then Cut abilities.
This was the biggest complaint about the original Joy and the most requested change. We'll look more closely at how to Print Then Cut with Joy 2 below.
How to Use the Cricut Joy 2
I made a few projects to test out my machine.
Because I have used Cricut machines before and know Design Space well, I am using the materials that came in the box to make different projects.
How to Make a Smart Vinyl Bookmark
For my first project, I am going to cut Smart Vinyl to create a bookmark.
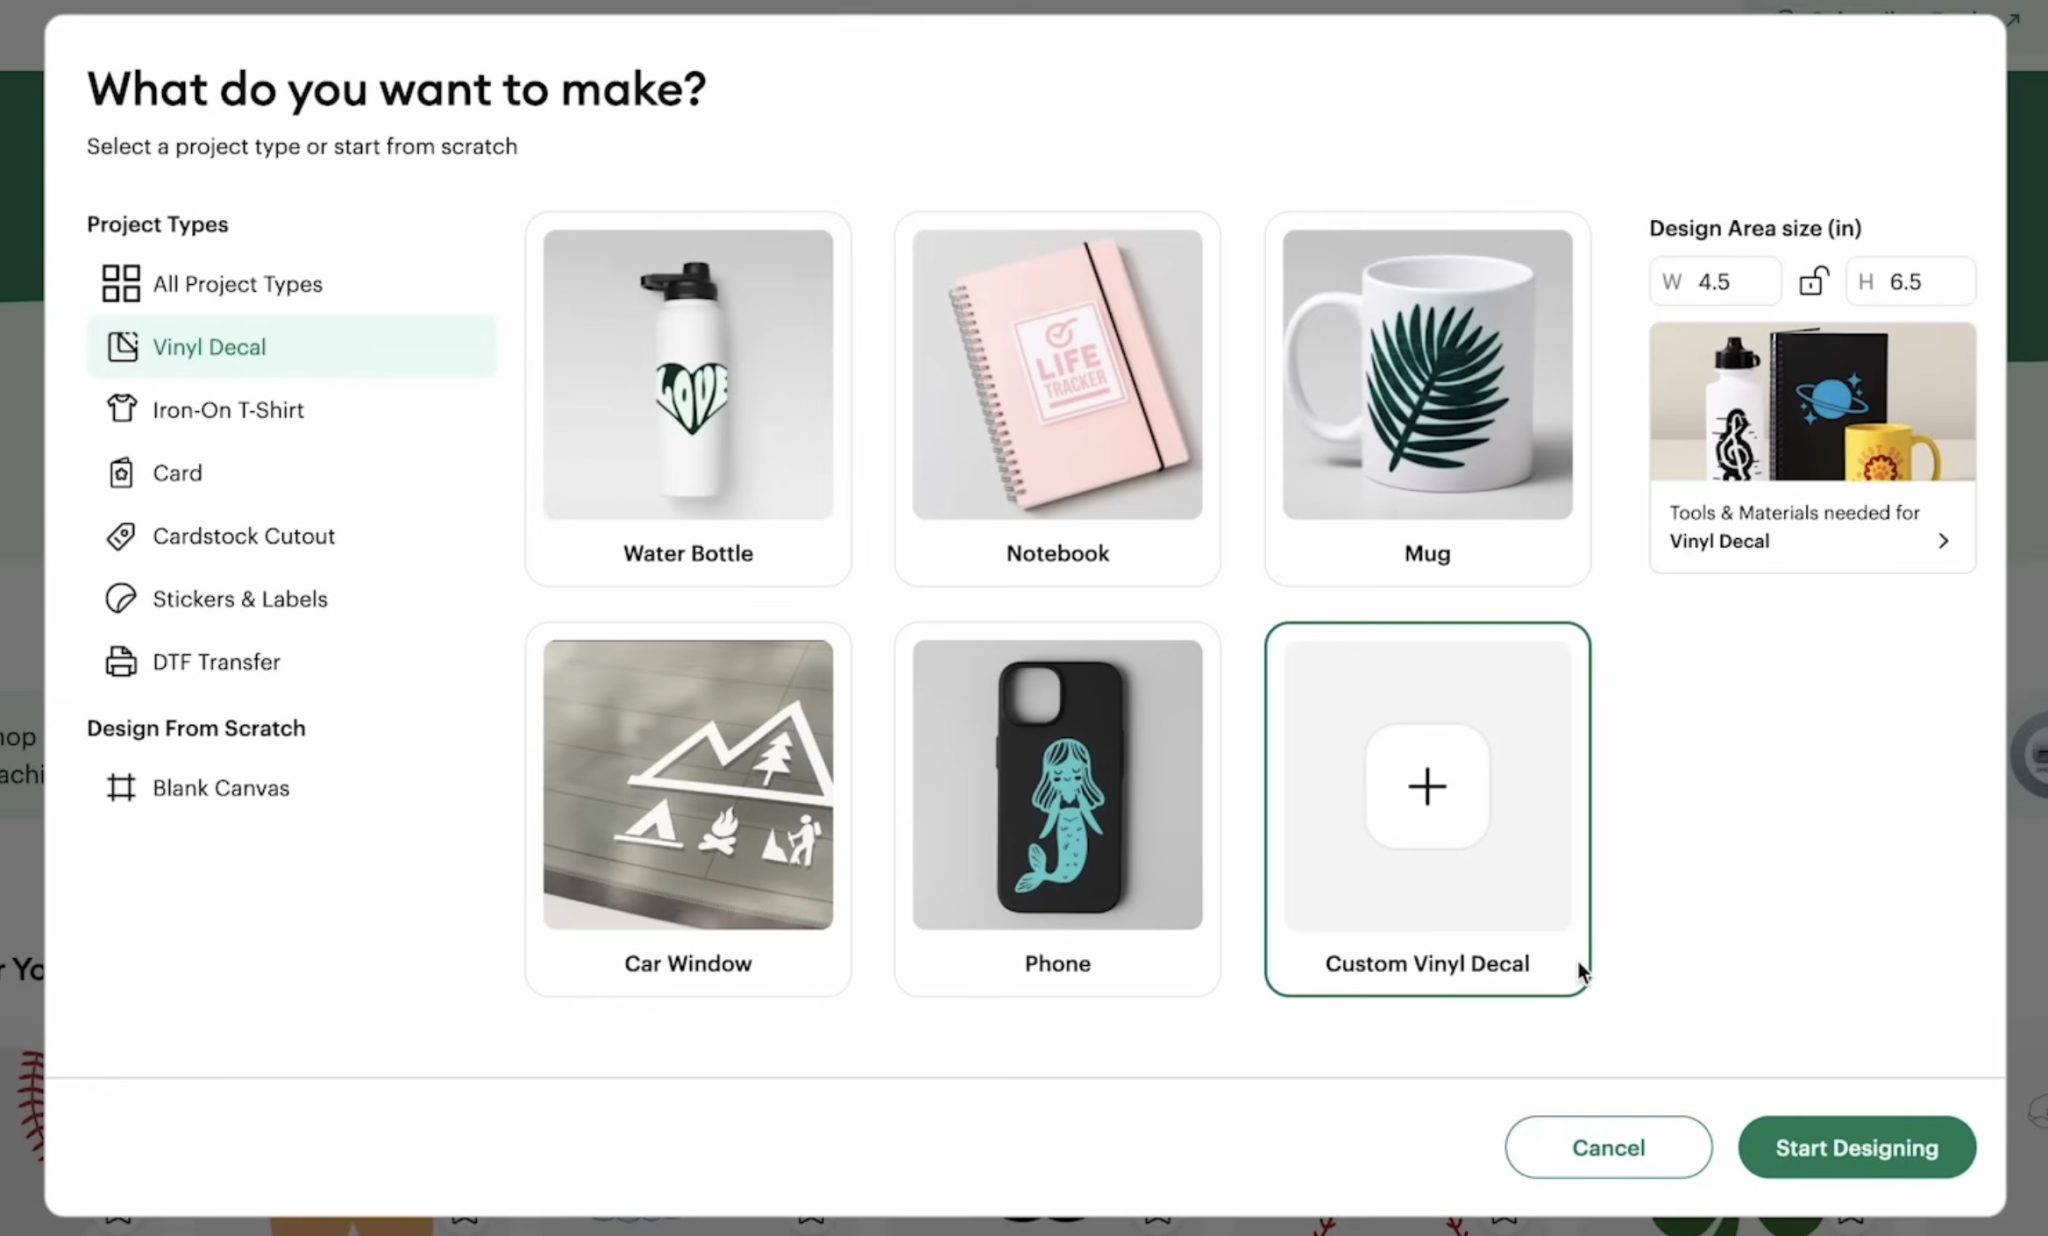
Step 1: Find a Design and Resize
Open Design Space and then click on New Project. Choose Vinyl Decal and then Custom Vinyl Decal. This will allow you to set the canvas size to the exact same size as your blank.
When you purchase a new Cricut machine, you get a free trial to Cricut Access. This is a great opportunity to see what they have, and I am going to use Cricut Access images for my projects today.
If you are reading this and do not have a Cricut Access subscription, you can upload your own designs or filter within Design Space to see the free images they have available.
I found a dragon design that I like that will work really well on the bookmarks I have.
One of the great things about being able to set your canvas size is that when you resize your design, if part of the design runs off the canvas, it will automatically cut that part of the design off. It doesn't resize your design to fit the blank.
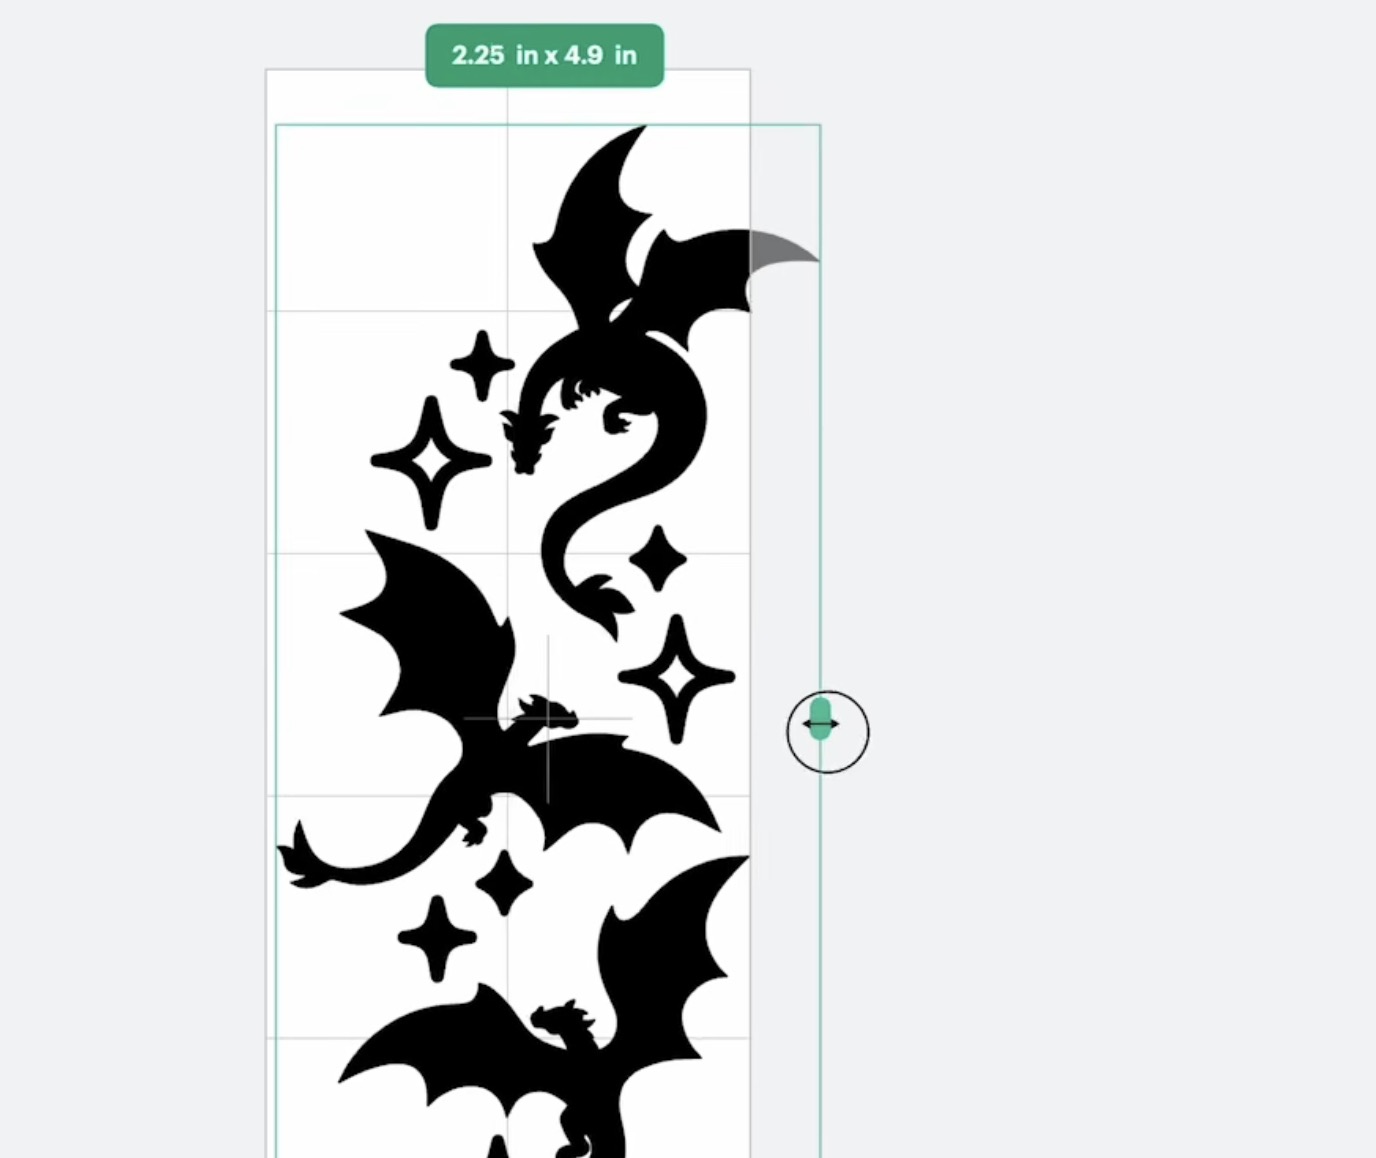
I want to take up as much of the length of my bookmark as possible, and I'm okay with part of the design being trimmed off, so I am going to proceed with this size.
Step 2: Cut Vinyl
When you have your design the size you want it make sure you have the Cricut Joy 2 selected as your machine and click Make.
If you've used a Cricut machine before, this process is the same. I am using the black Smart Vinyl practice sheet that was included in the box.
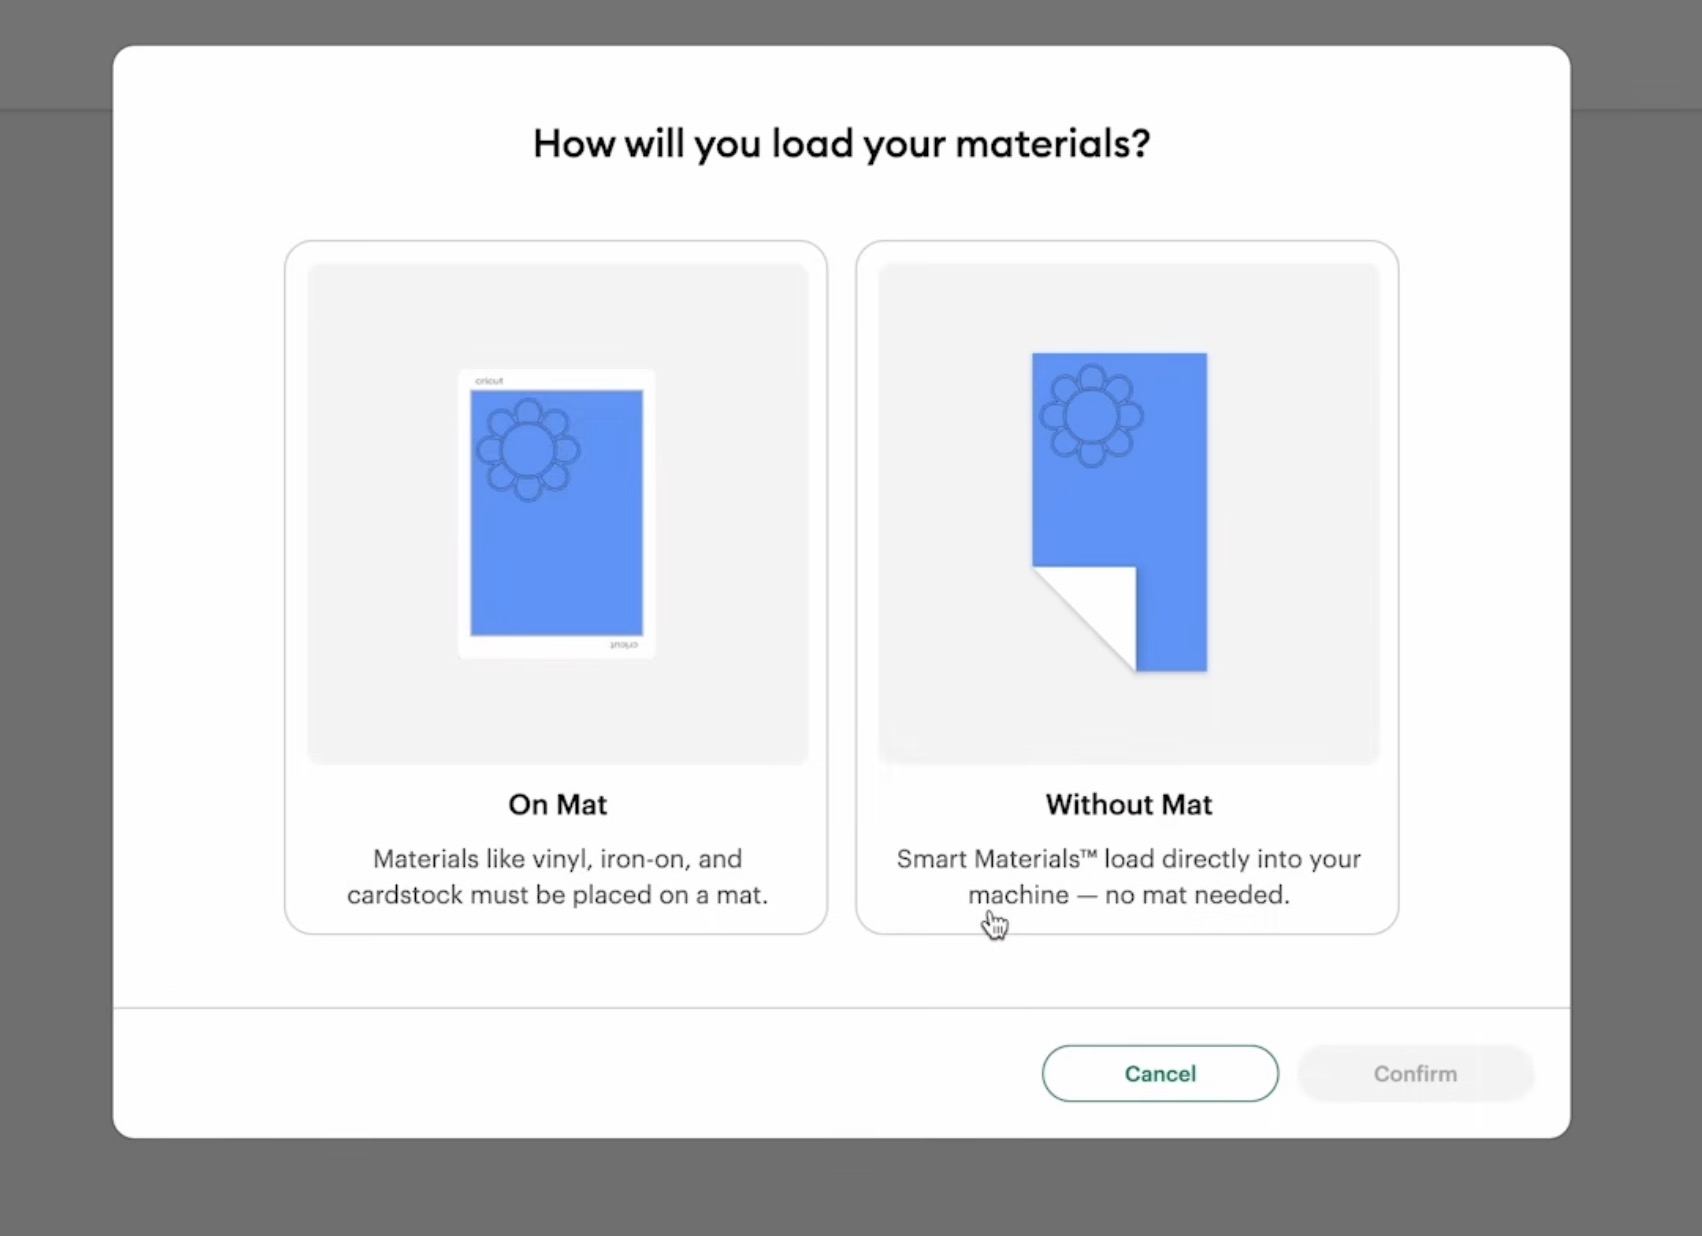
I selected Matless, and here you can see how the design will be cut on the material. It shows you how much smart material you need to have to be able to cut this design.
From this screen, you can move the design around if needed. You can also change how many copies you'd like to cut.
I am often asked about wasted material when using Smart Vinyl. This is not something I worry about because any scrap material can be used later on a mat, just like regular vinyl scraps.
I am going to go ahead and cut 2 copies of this design.
Because I chose to cut matless on a previous screen, you'll see that Design Space is showing me materials that are compatible for cutting without a mat.
I'm selecting Smart Vinyl, and now we're ready to go.
Step 3: Load and Go
Cricut Joy 2 has a new process called Load and Go. Slide the material under the guides, and the machine will grab it and load it.
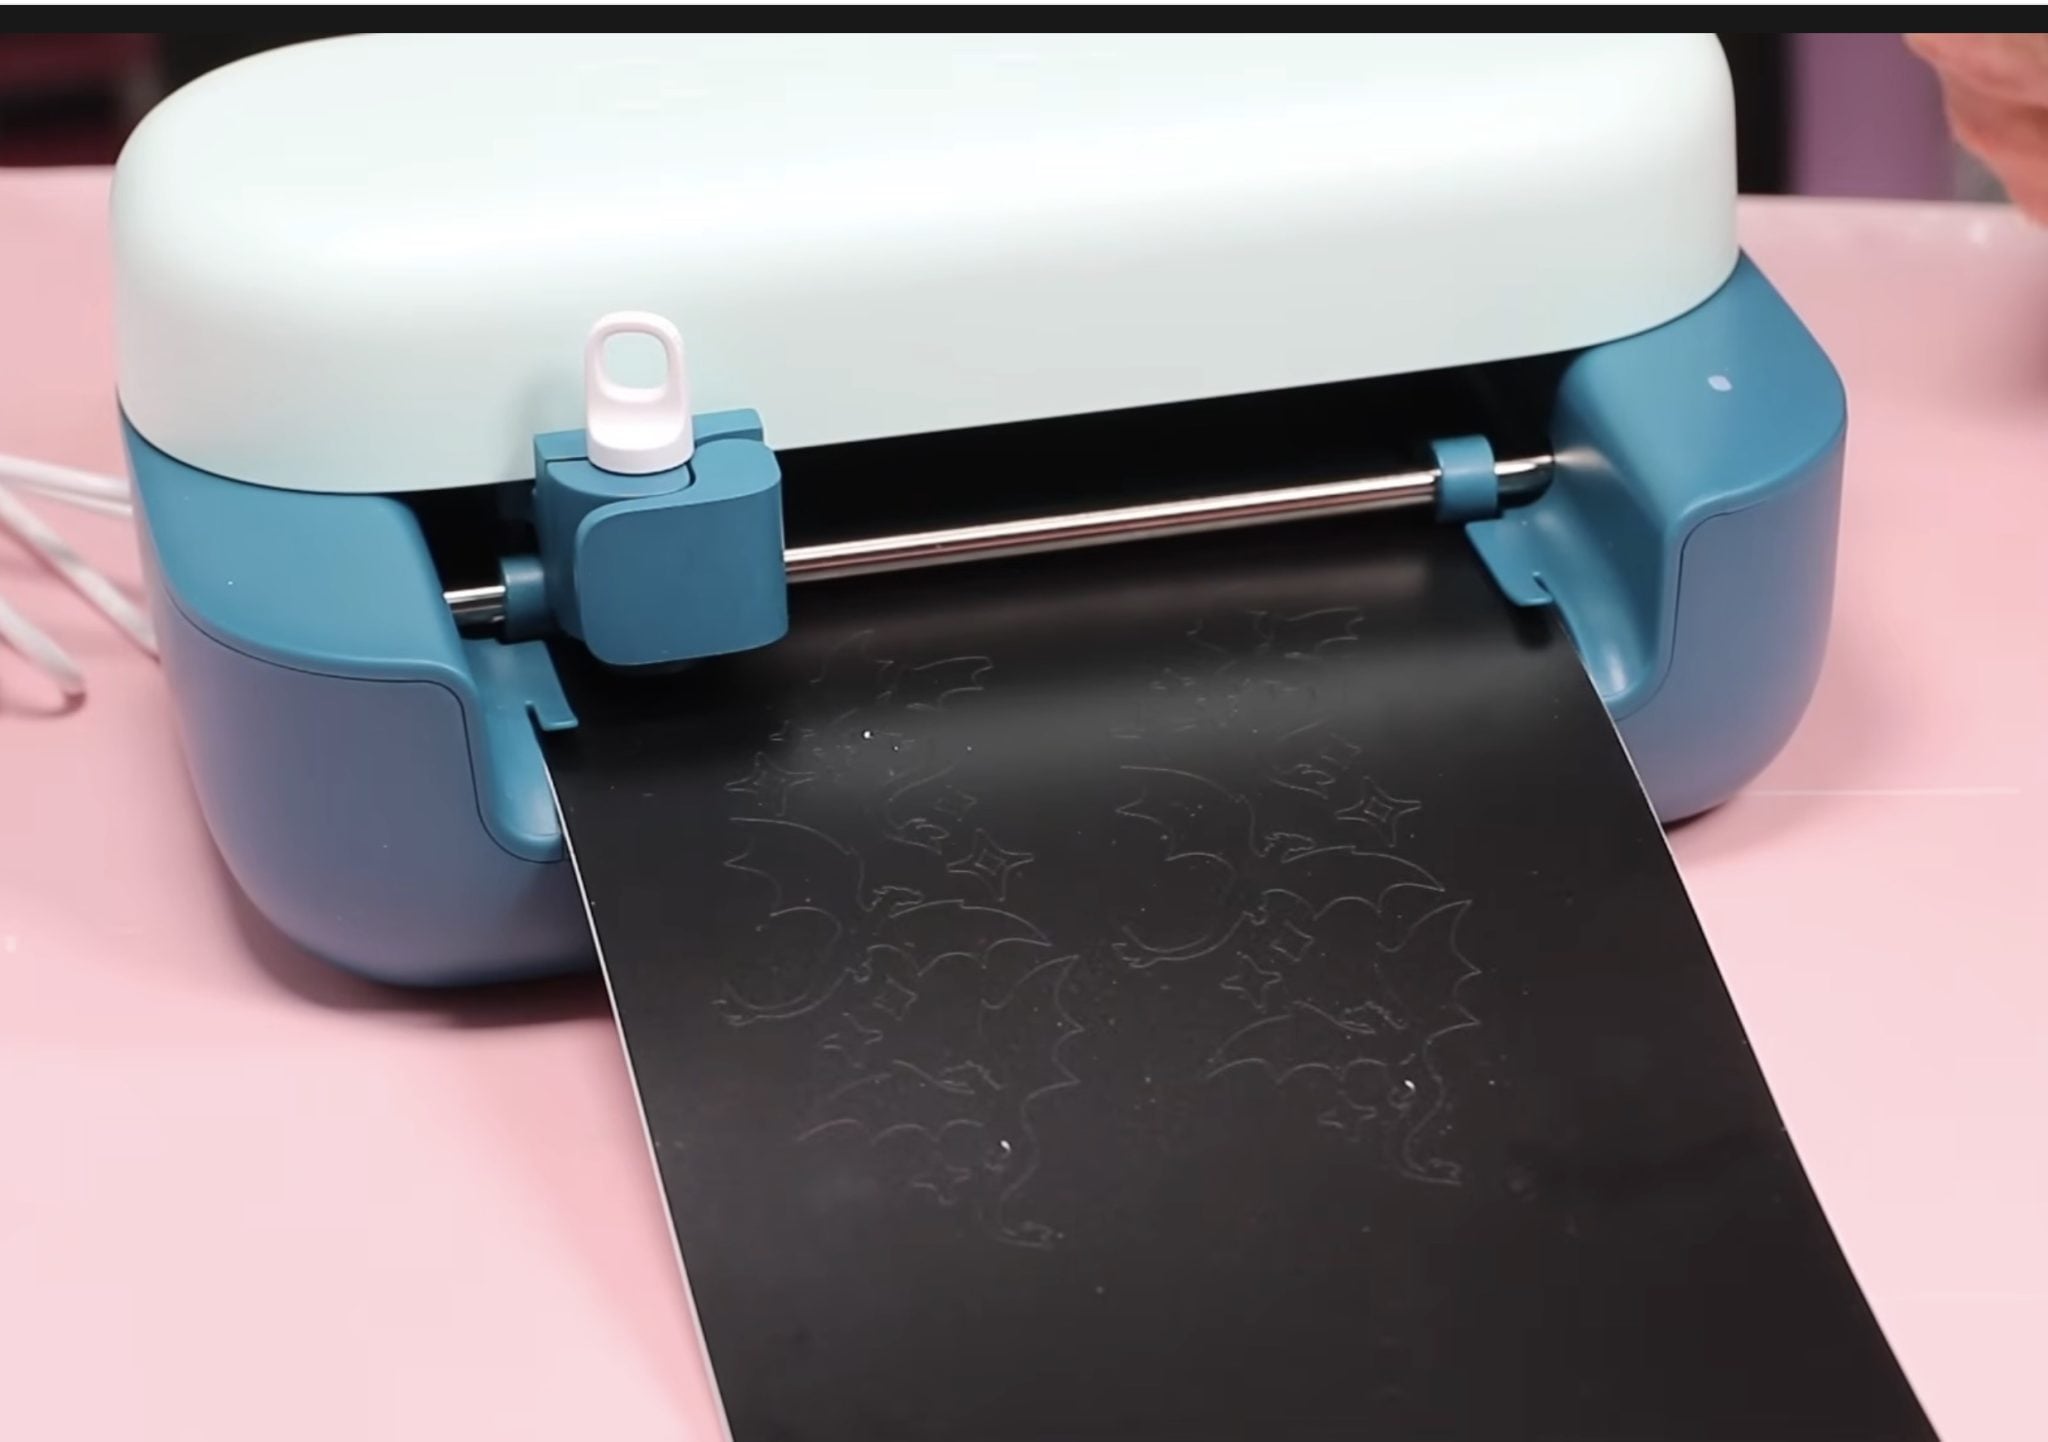
Once it measures that you have enough material, it will automatically start cutting. You no longer press Go on the computer, so make sure your blade is installed before you load the material.
When the machine is done cutting, click Unload in Design Space, and we're ready to weed.
Step 4: Weed Vinyl Decal
No matter how you purchase the Cricut Joy 2, it will include a weeding tool. The machine-only bundle comes with a mini weeder, and the other bundles include a full-sized weeding tool.
I am not a fan of the mini weeder, so I am going to use the full-sized weeding tool.
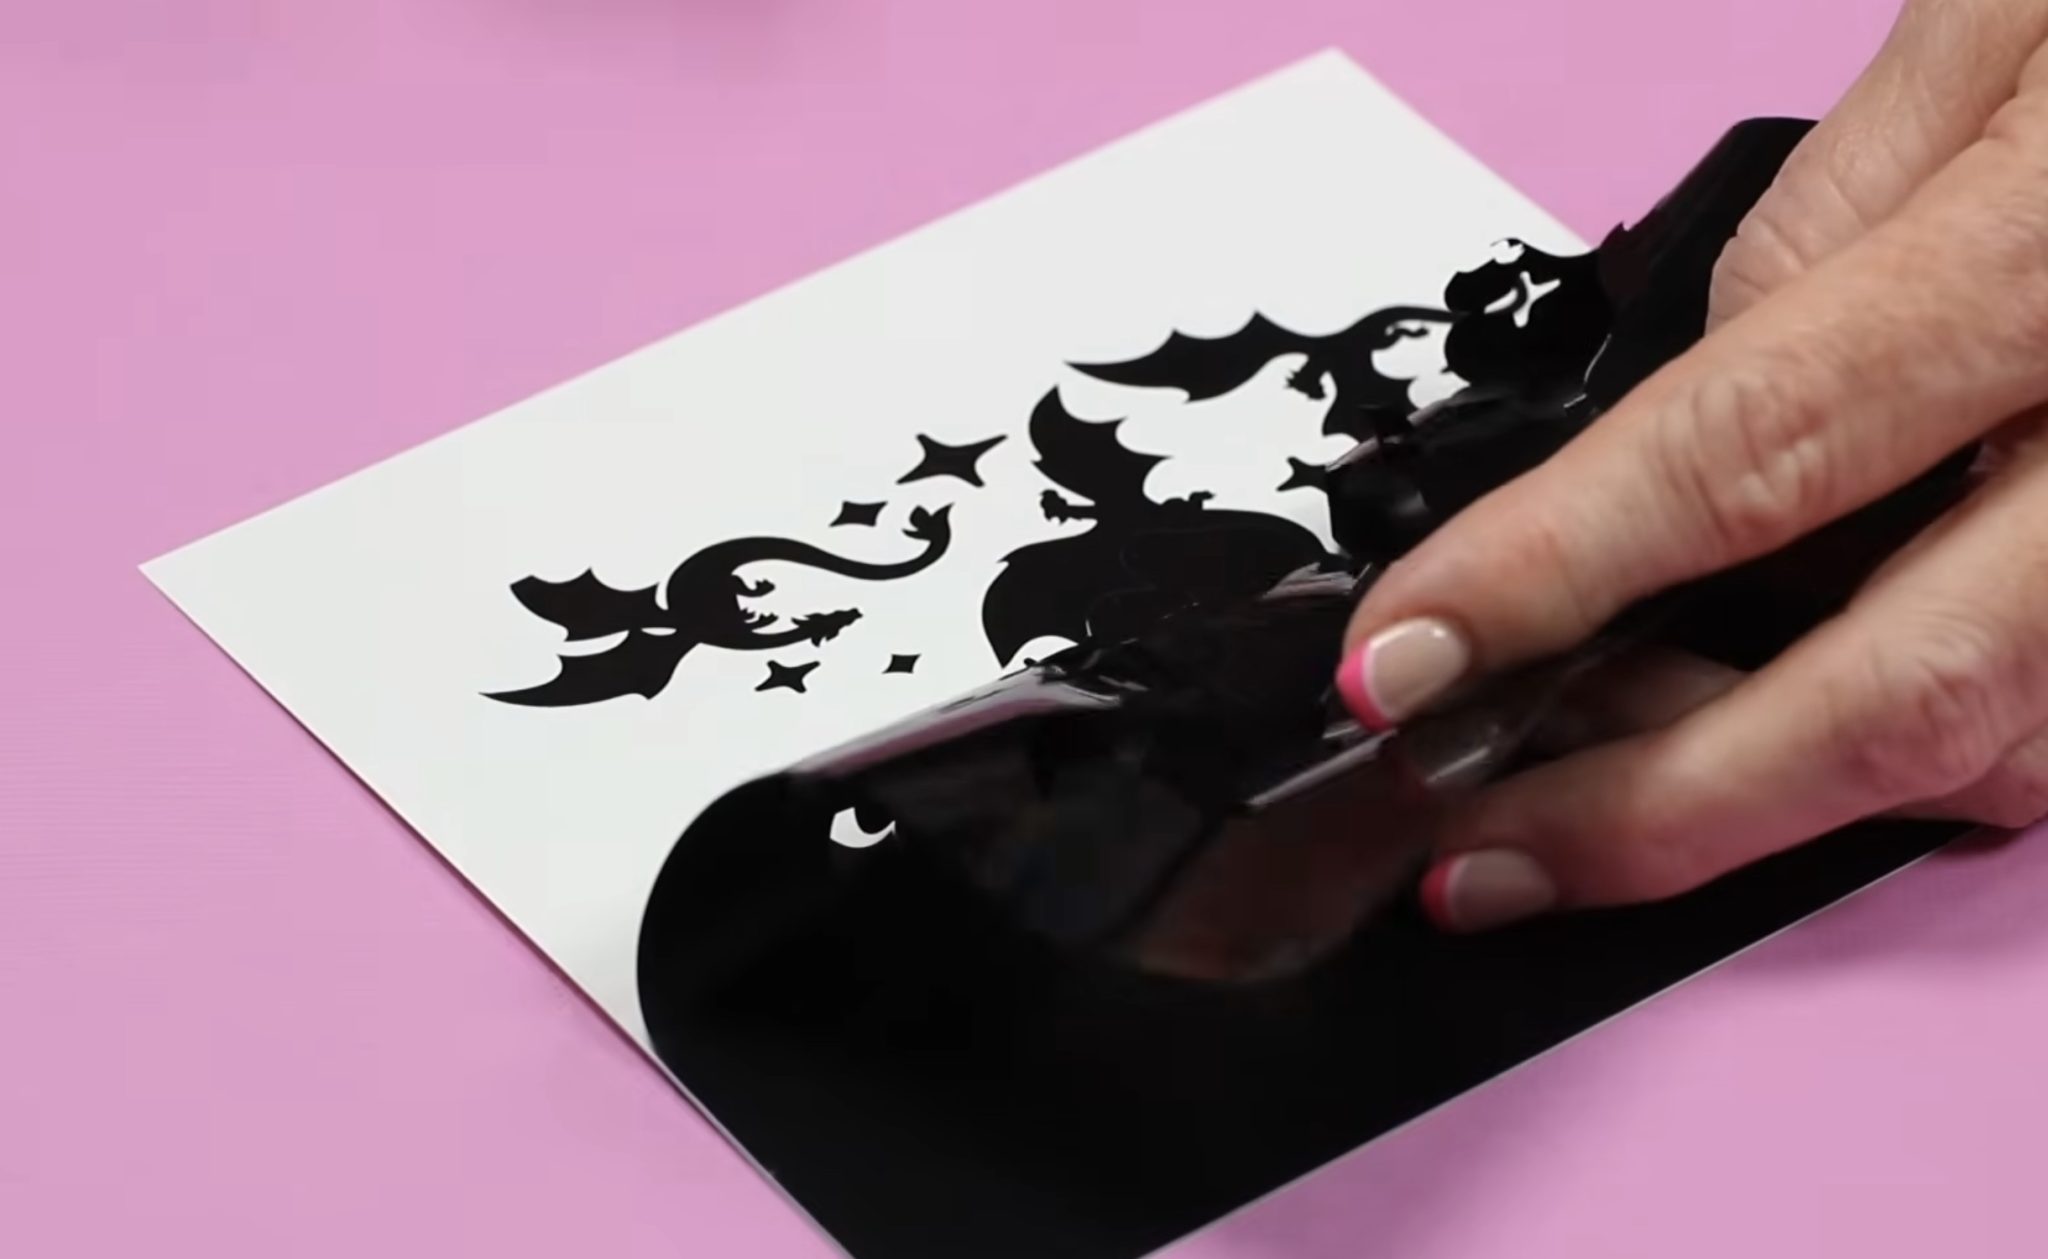
Before I begin to weed, I cut away all the extra vinyl while it's still on the backing. Even though this is a smart material, I can cut the scraps on a mat like regular vinyl.
When weeding, you want to remove everything you don't want transferred to the bookmark. With this design, I am removing everything around the dragons. If your design has any text, make sure you remove any insides of letters/numbers.
I really like how Design Space trims the design to fit the size of my blank without having to slice away part of the image.
Step 5: Add Vinyl Decal to Bookmark
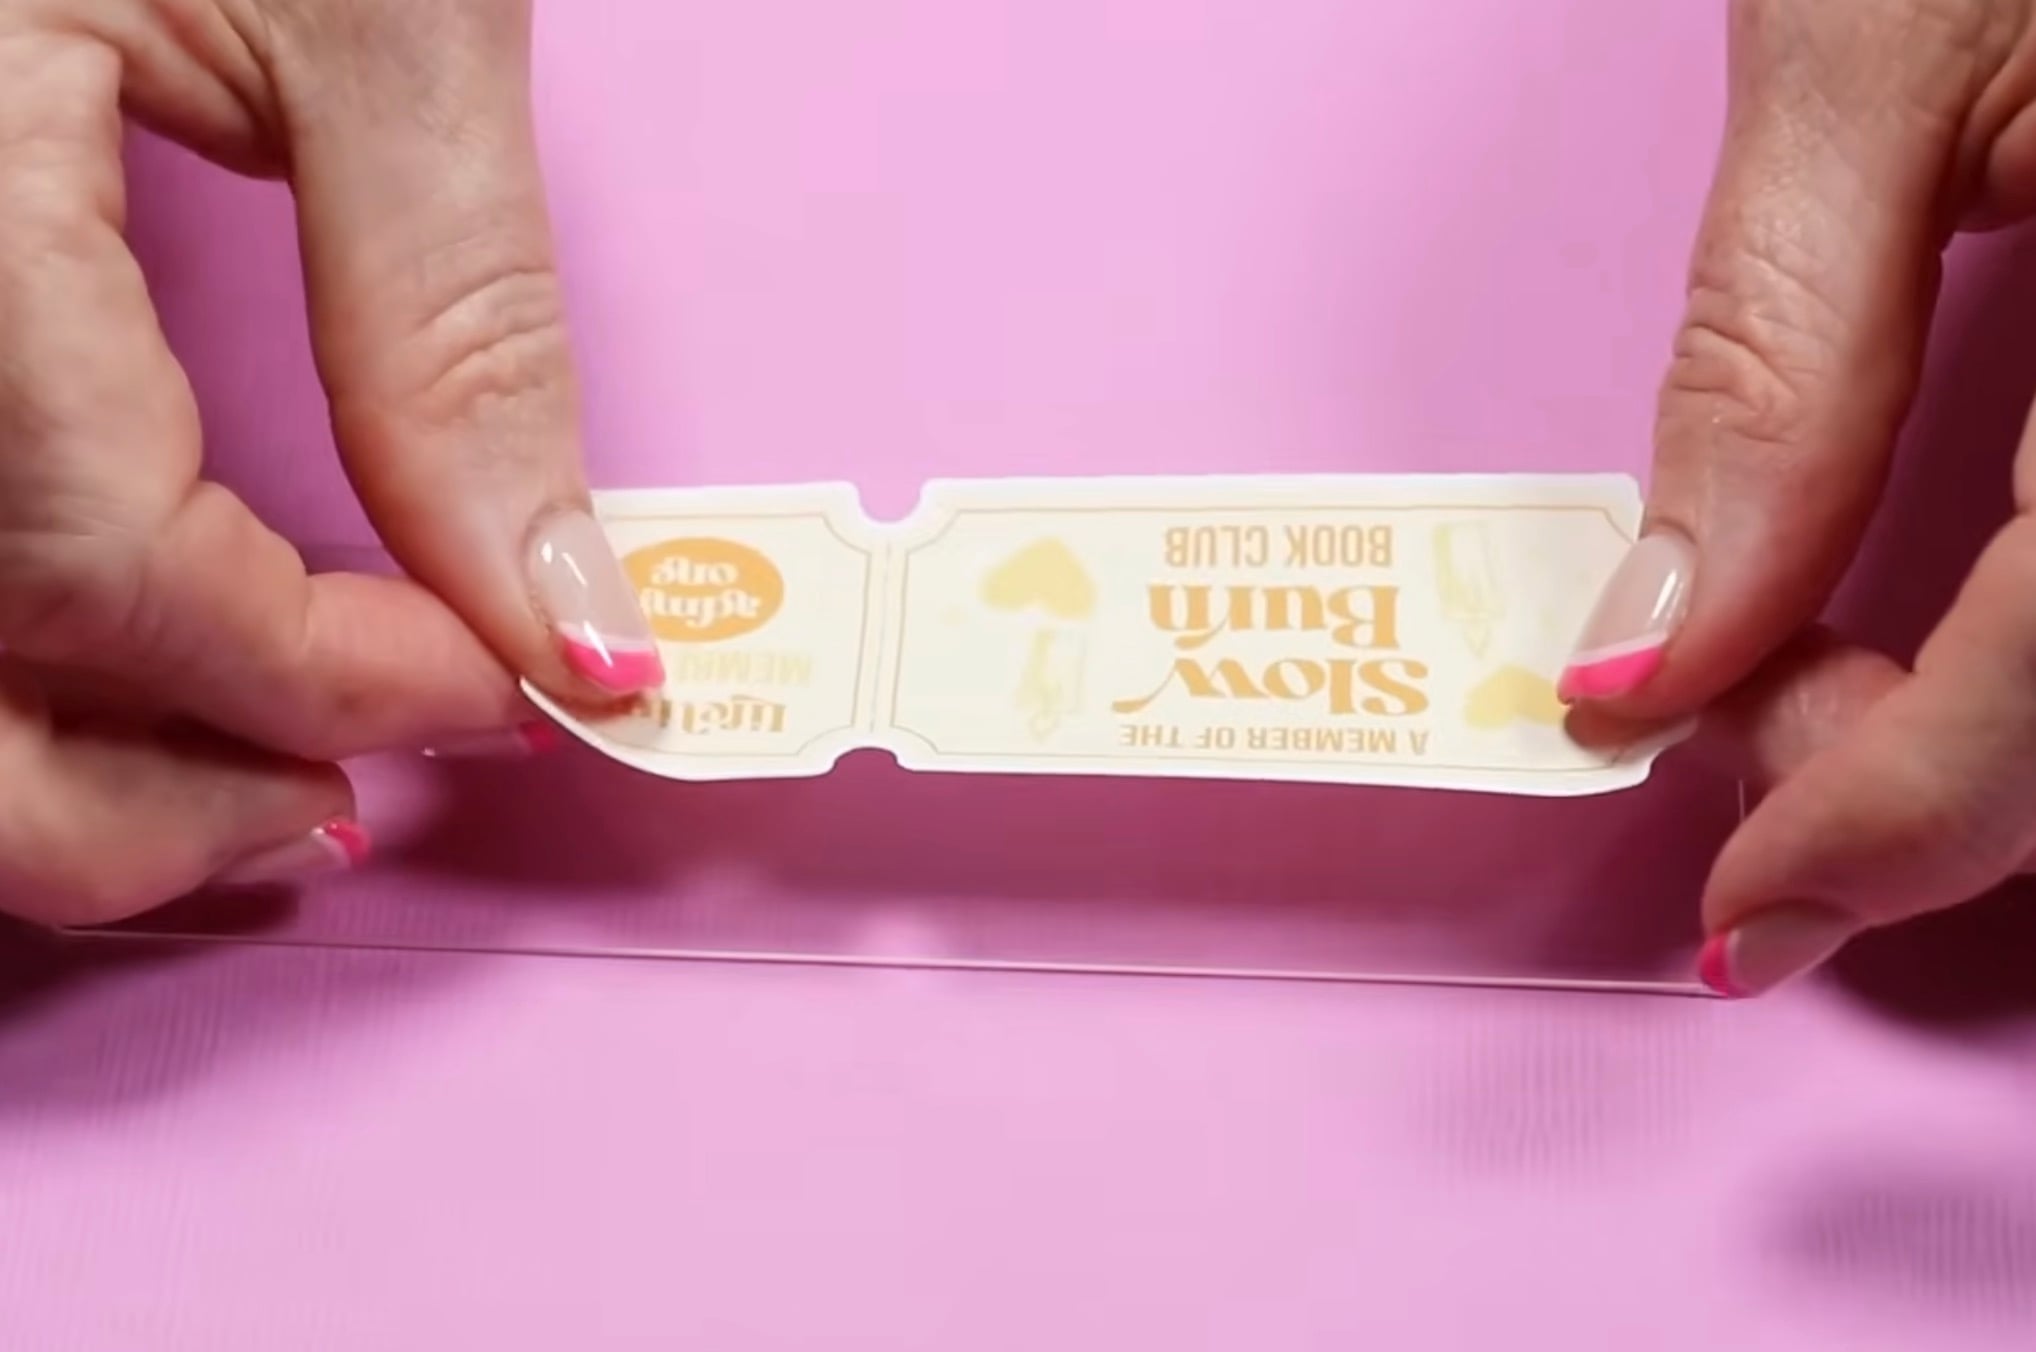
I am using clear acrylic bookmarks, and there is a protective film on both sides that needs to be removed.
Cut a piece of transfer tape slightly larger than the vinyl design and place it on top.
Burnish the transfer tape with a scraper tool and then flip it over and burnish from the back of the vinyl. This will help push the vinyl onto the transfer tape.
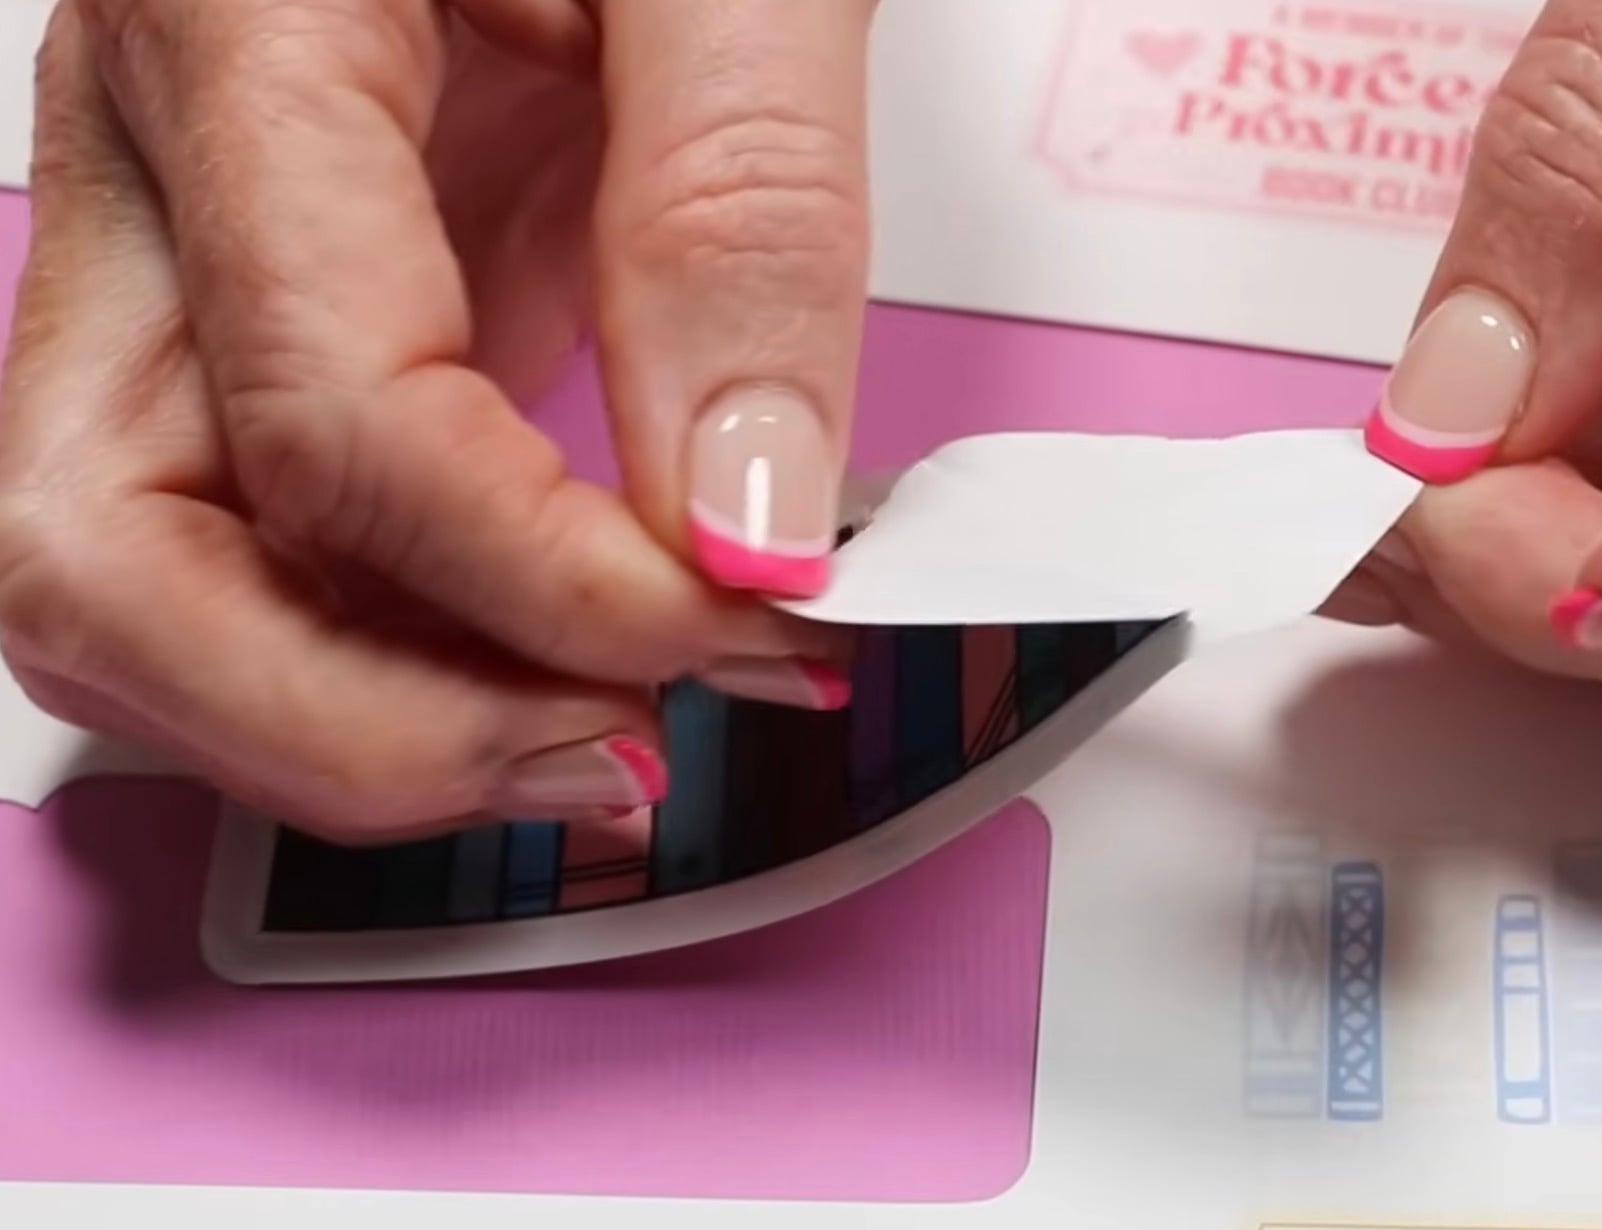
Peel away the vinyl backing and locate the vinyl on the bookmark.
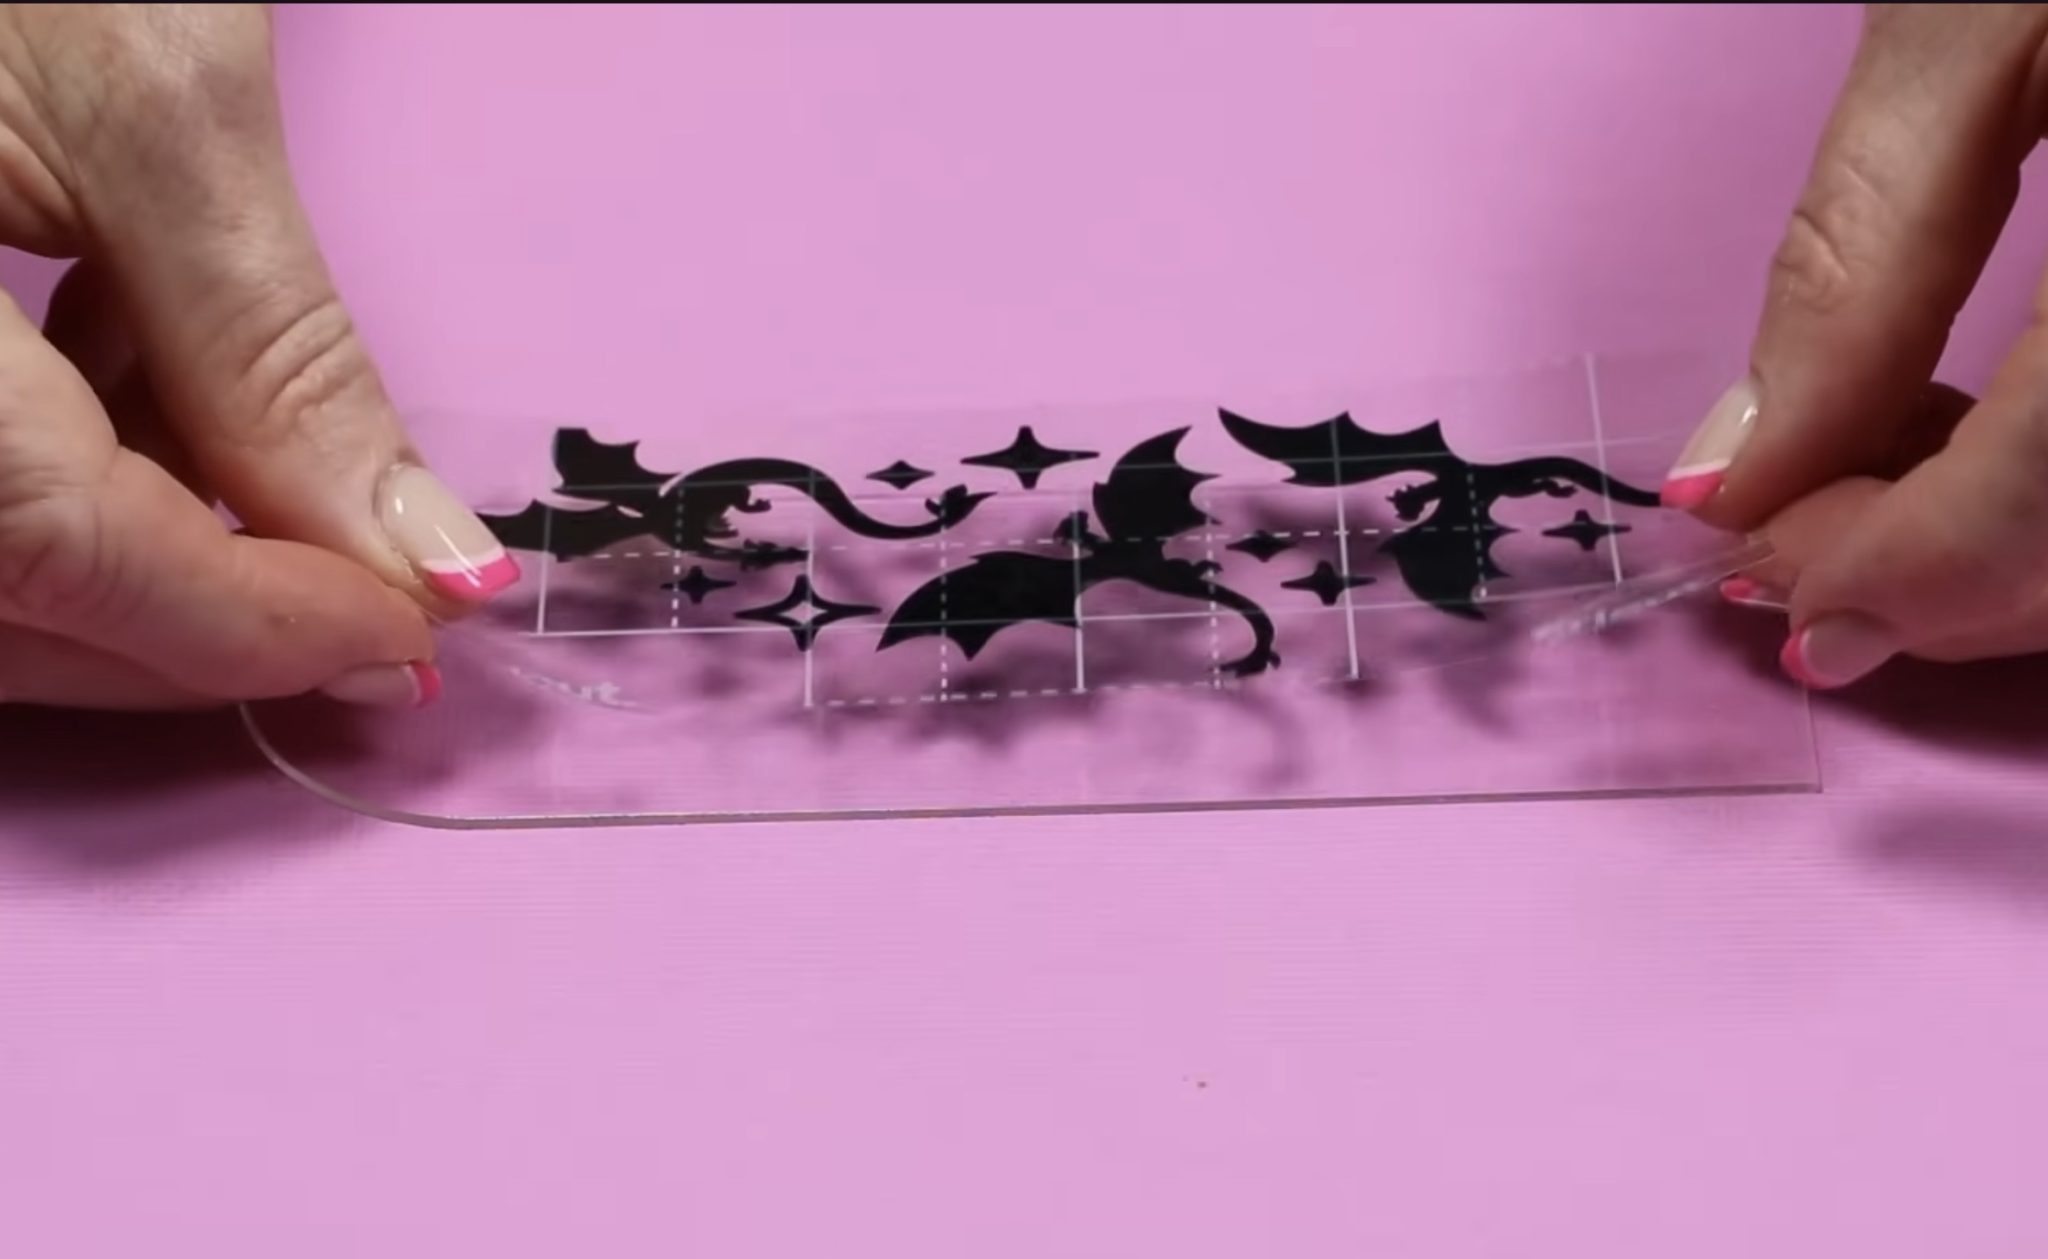
Use the scraper tool to burnish the vinyl onto the bookmark and then remove the transfer tape.
Step 6: Finish Bookmark
Now, all that's left to do is add a tassel, ribbon, or whatever else you want to the bookmark, and it is finished.
This is a permanent vinyl, so there is no need to add any type of sealer. You should allow it to sit for 24-72 hours before handing it to allow the adhesive to really adhere to the bookmark.
If you're using permanent vinyl on a project that will be placed outside in the elements, you may want to add a spray sealer over the top.
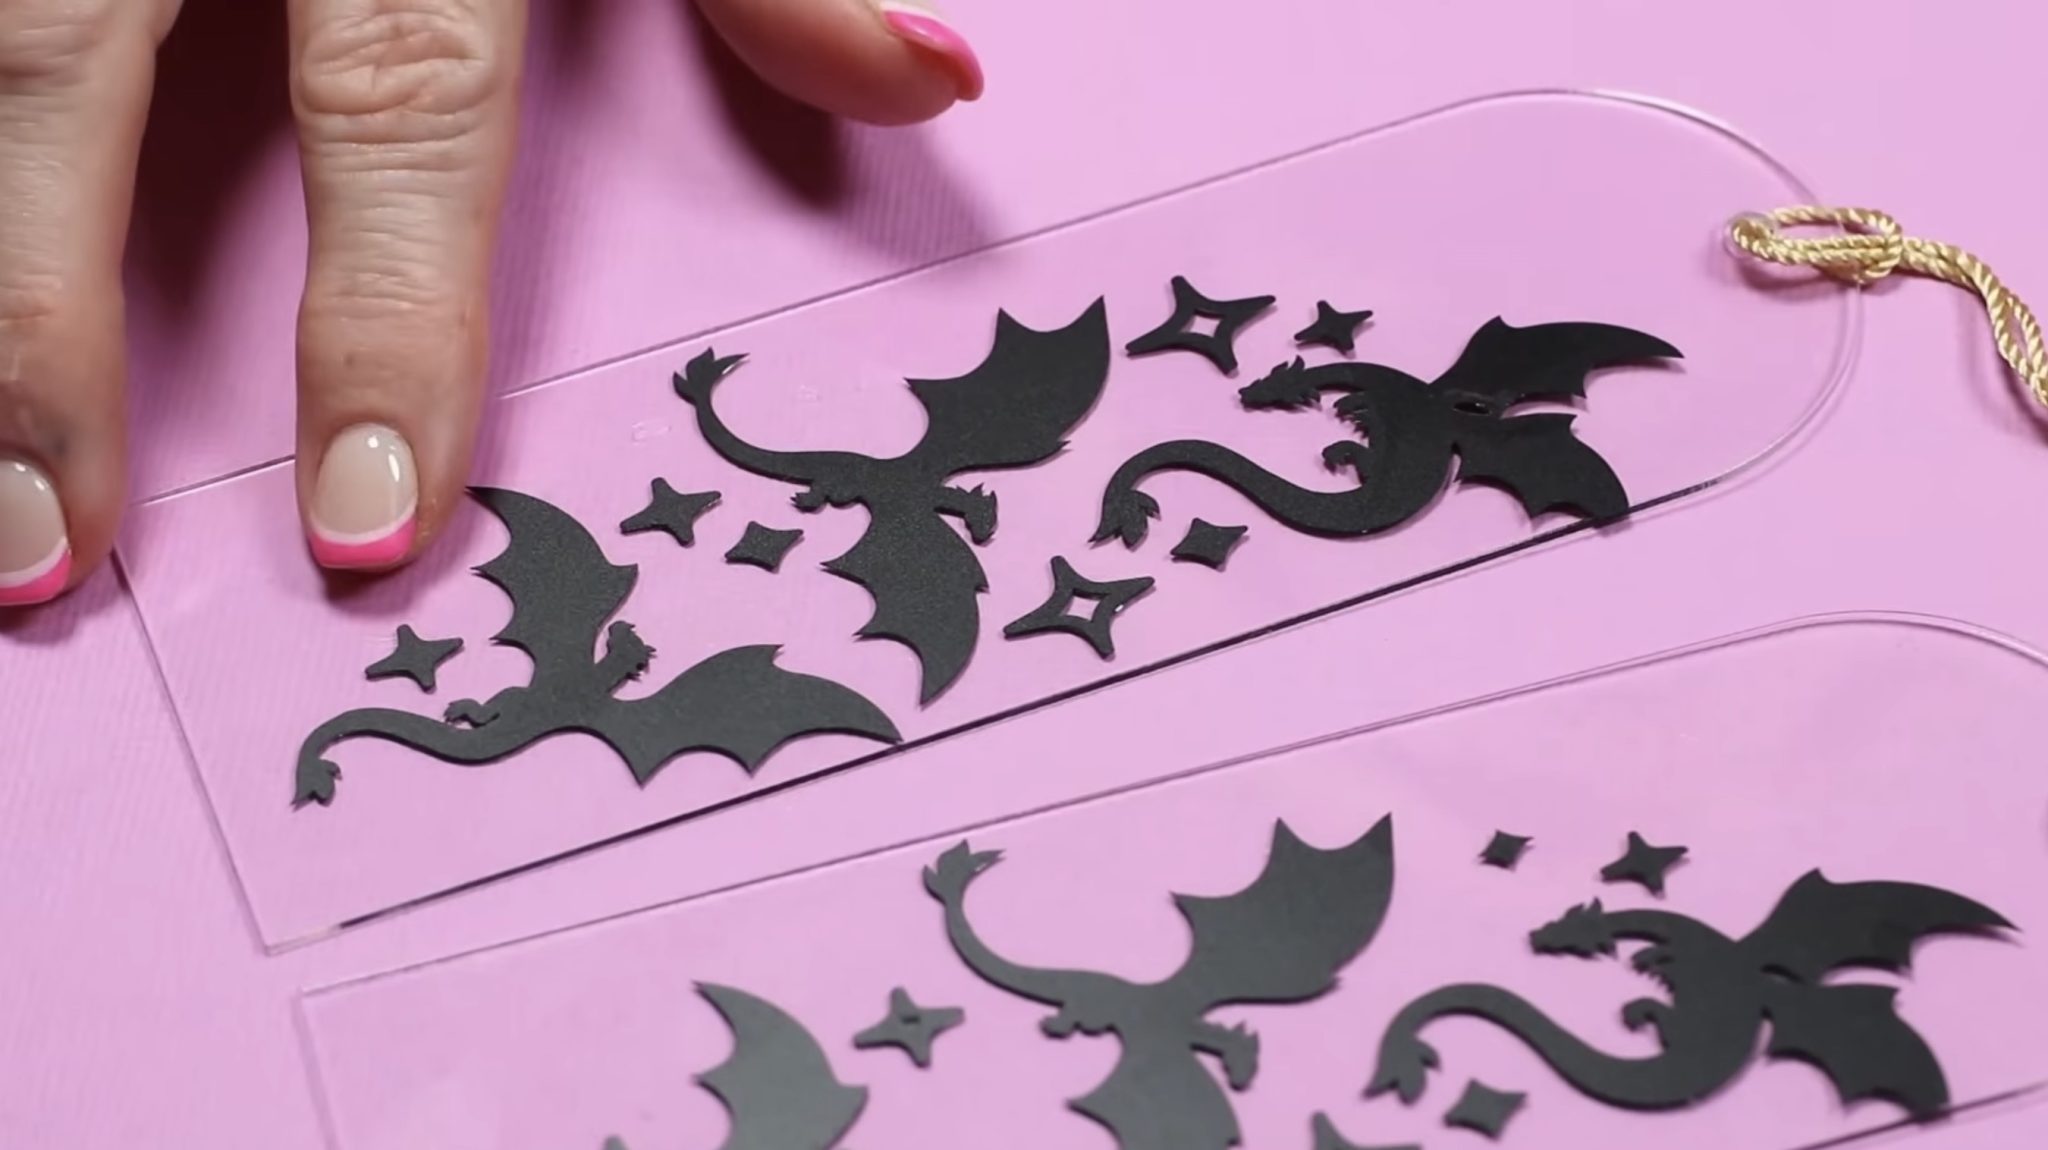
I really like the way this vinyl looks on the acrylic bookmark, and they're so easy to make, you're going to love them.
How to Make an Insert Card with Joy 2
For my next project, I am going to make an insert card.
If you get the essentials bundle, it includes the Cricut Card Mat and a couple of insert cards.
I am also going to test the Foil Transfer Tool to see how it works in this new machine.
If you buy just the machine, you can purchase insert cards, a Cricut Card Mat, and the Foil Transfer Tool separately.
Step 1: Create Insert Card Design
Open Design Space, click New Project, select Card, and then choose Insert Card.
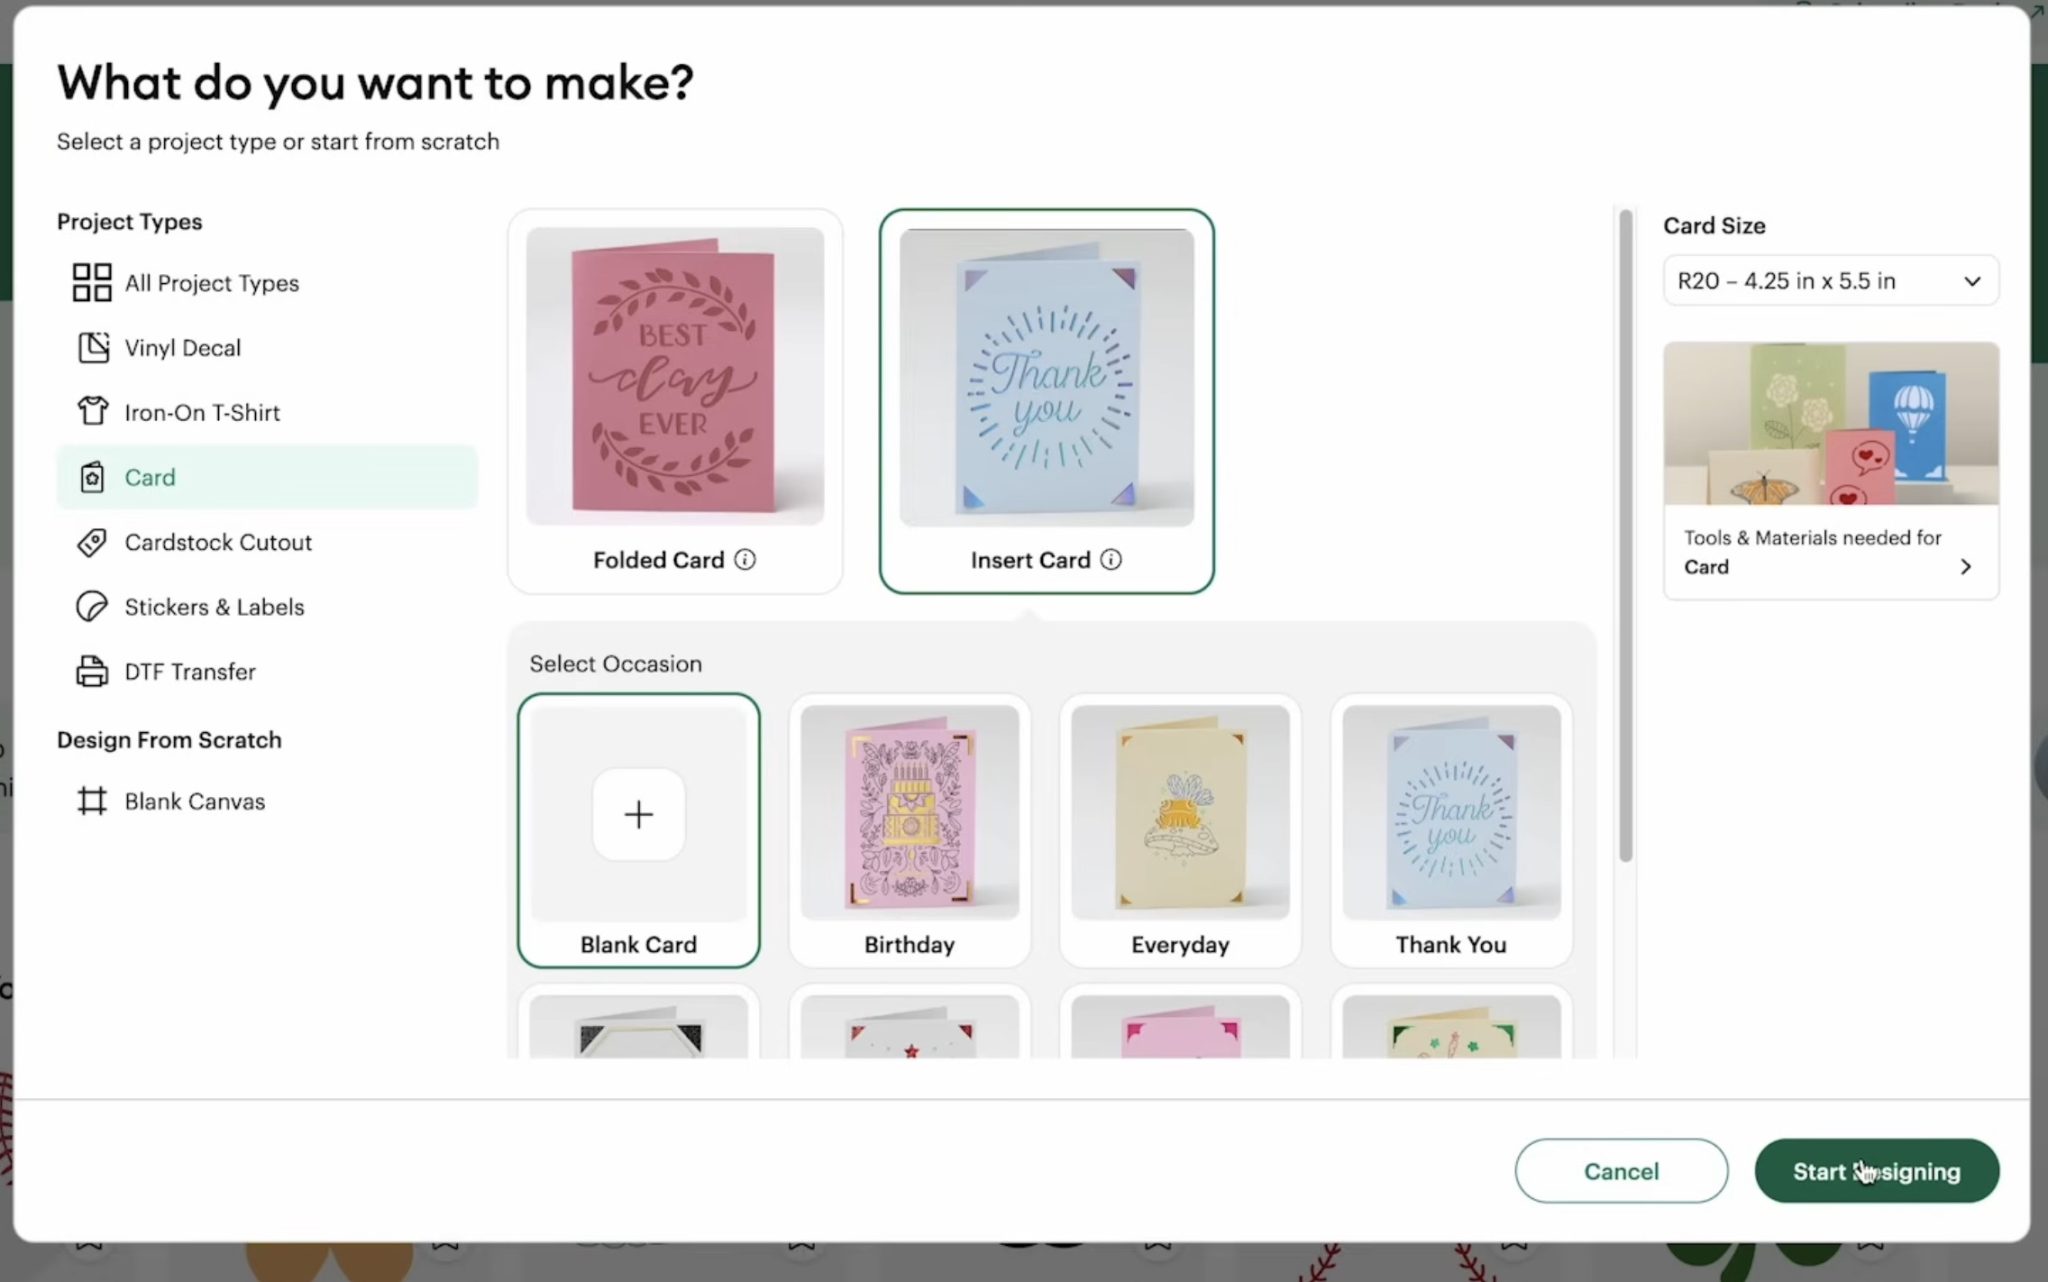
I chose a birthday design, and the size of the insert cards that work with the Joy 2 are the smaller sized cards. I am using the R20.
Just like with the bookmark, when you choose a specific project type/size, the canvas is created that size.
This canvas looks like the Insert Card.
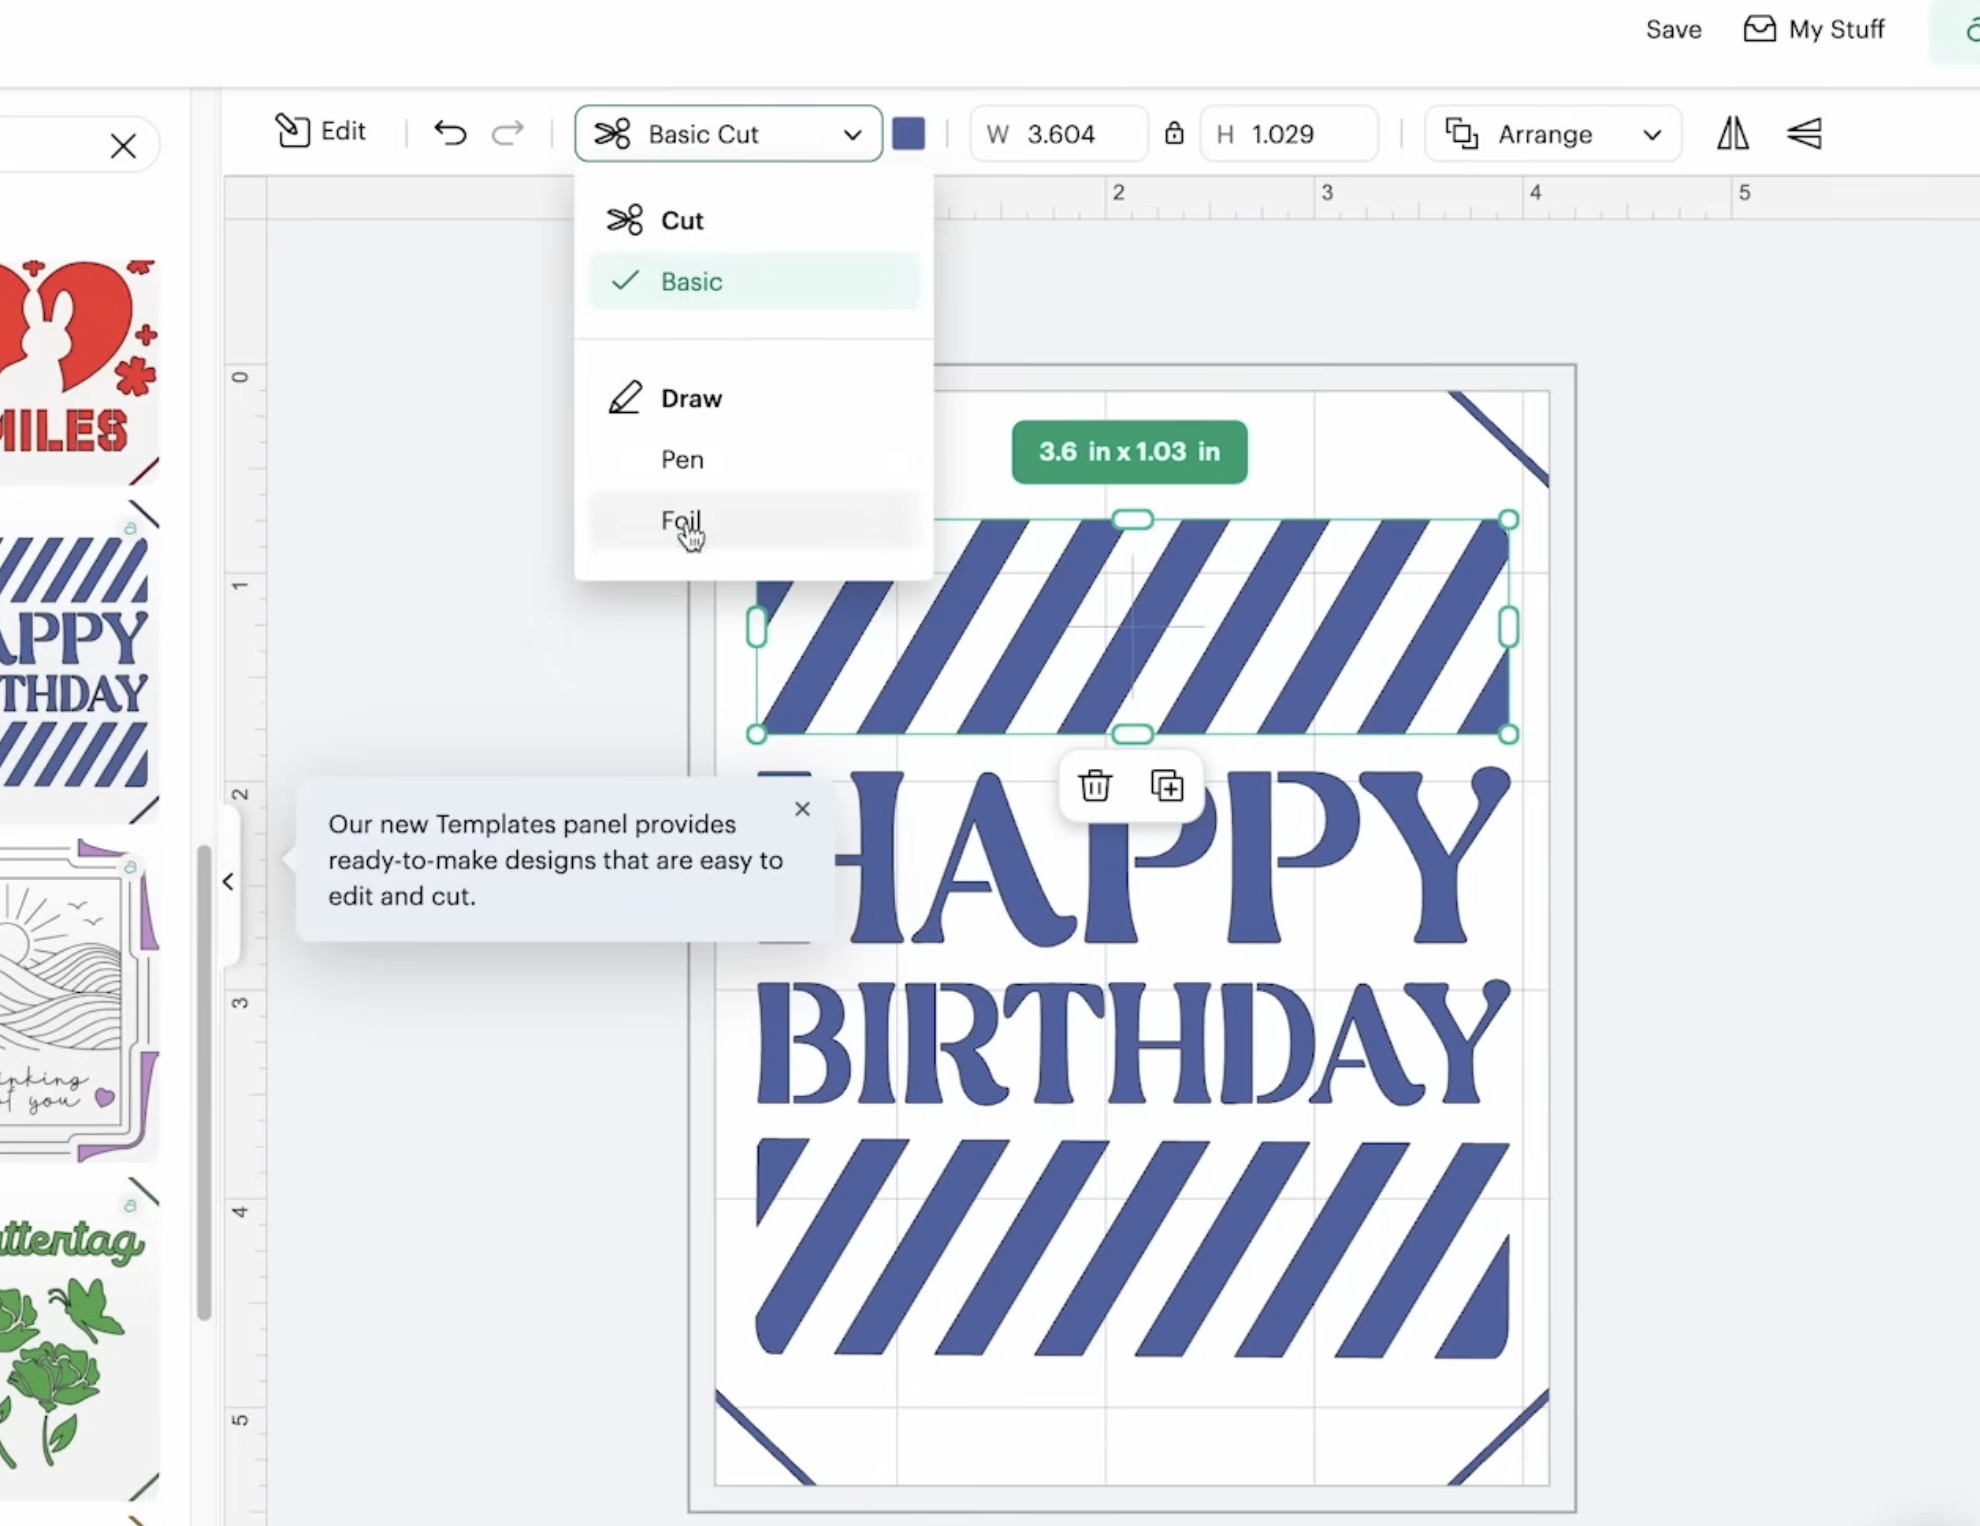
I want to test the foil transfer tool, so I am going to select these sections, and then up at the top in the Operation Type menu, I am going to change the Pen to Foil.
Step 2: Foil and Cut Insert Card
Click Make and follow the prompts in Design Space.
If you follow the prompts in Design Space, you'll know what to load in the machine and when.
Design Space shows you how to load the card into the card mat and also tells you to load the foil tool into the machine first.
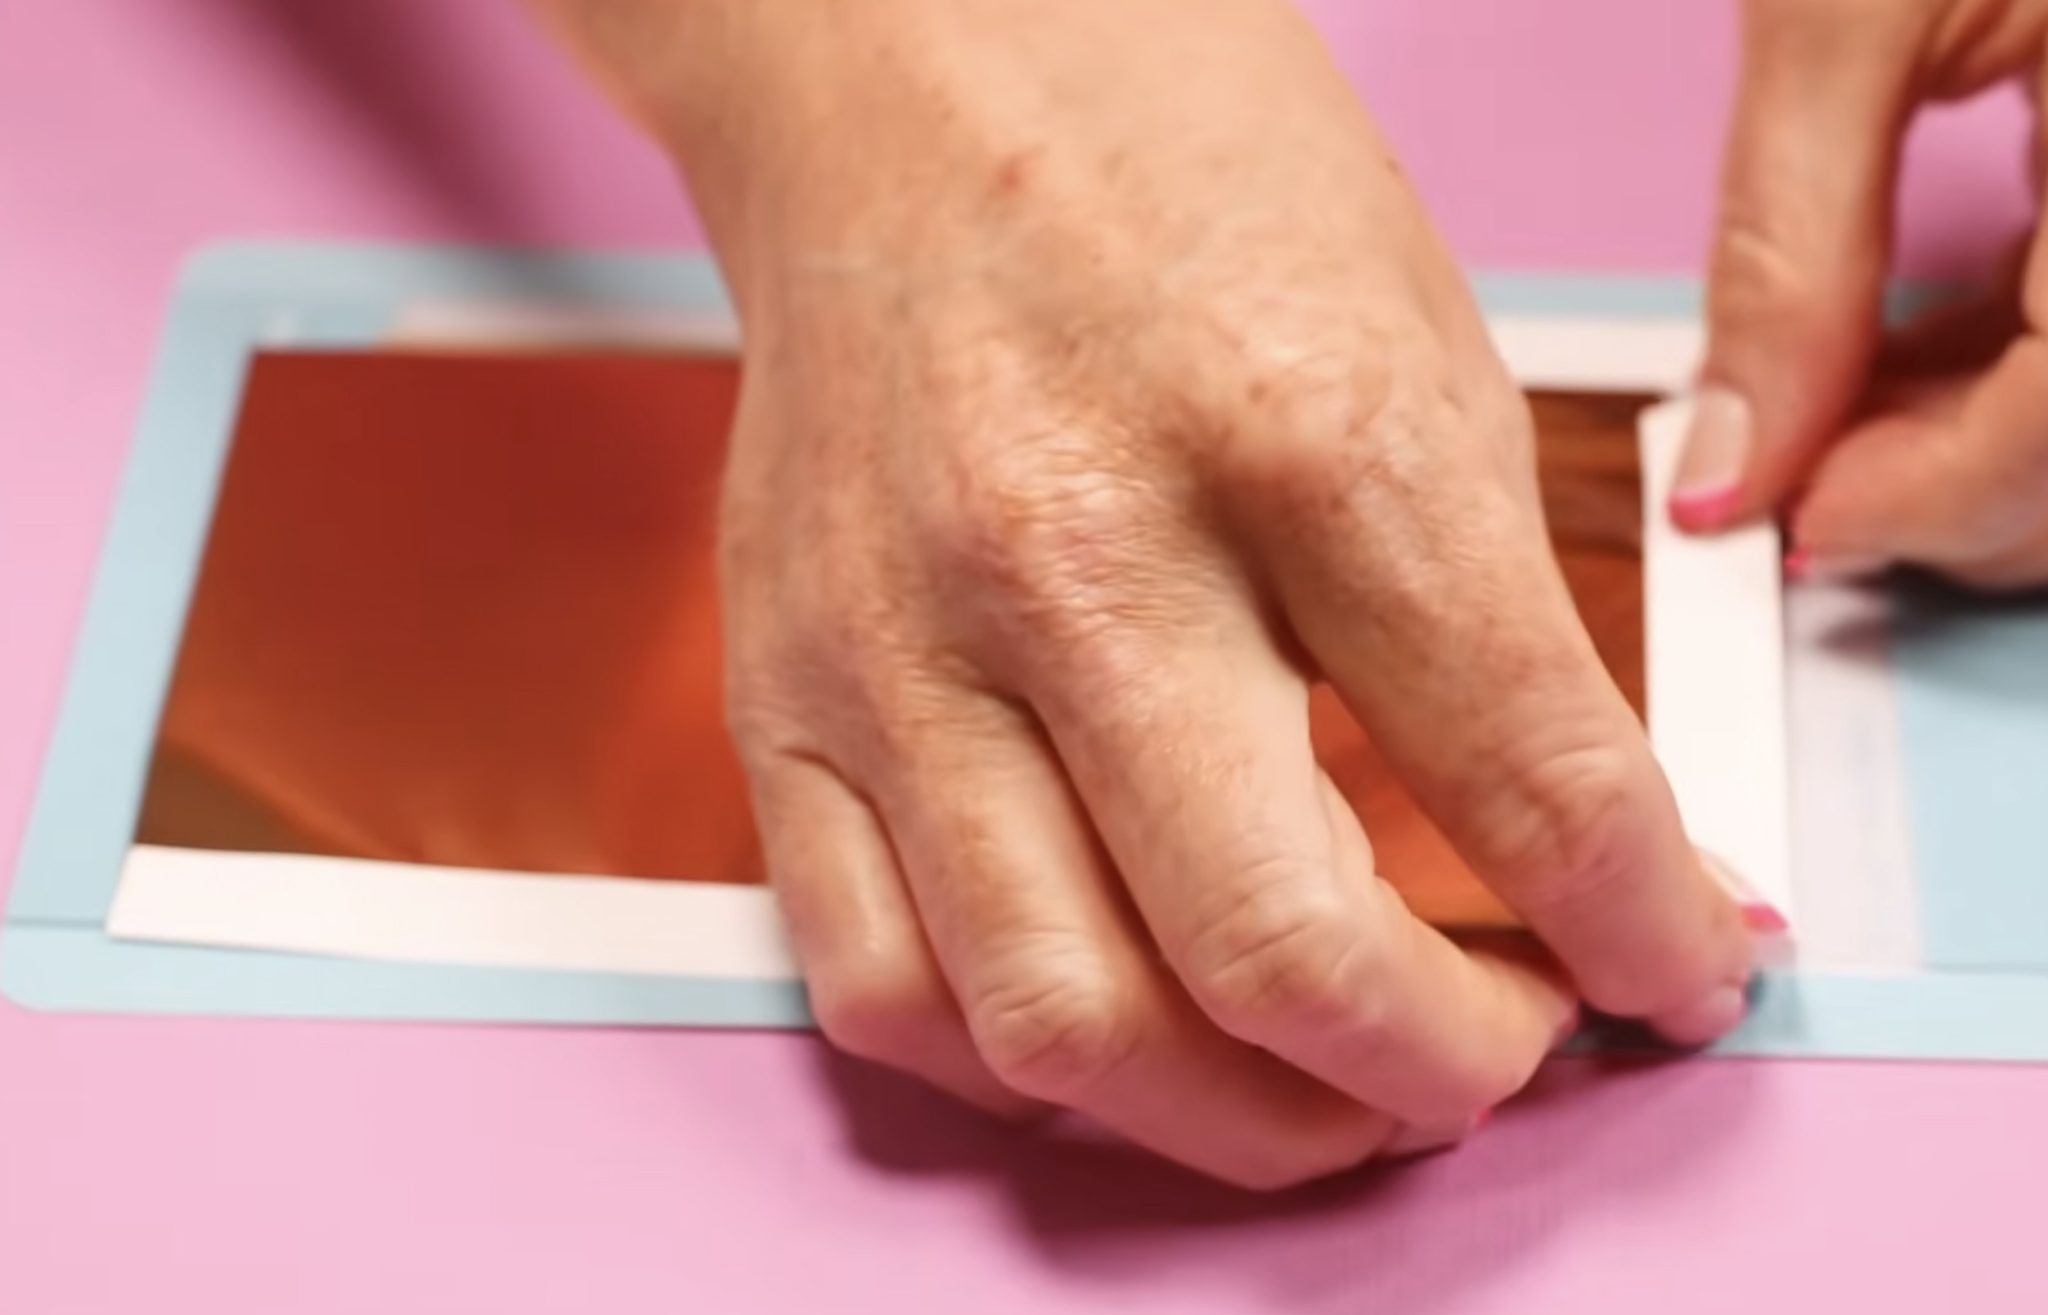
Slide the insert card into the card mat and press it down well. Add a piece of foil to the top with the shiny side up. Avoid touching the foil to the adhesive mat.
Secure the foil with the included adhesive and load the card mat into the machine.
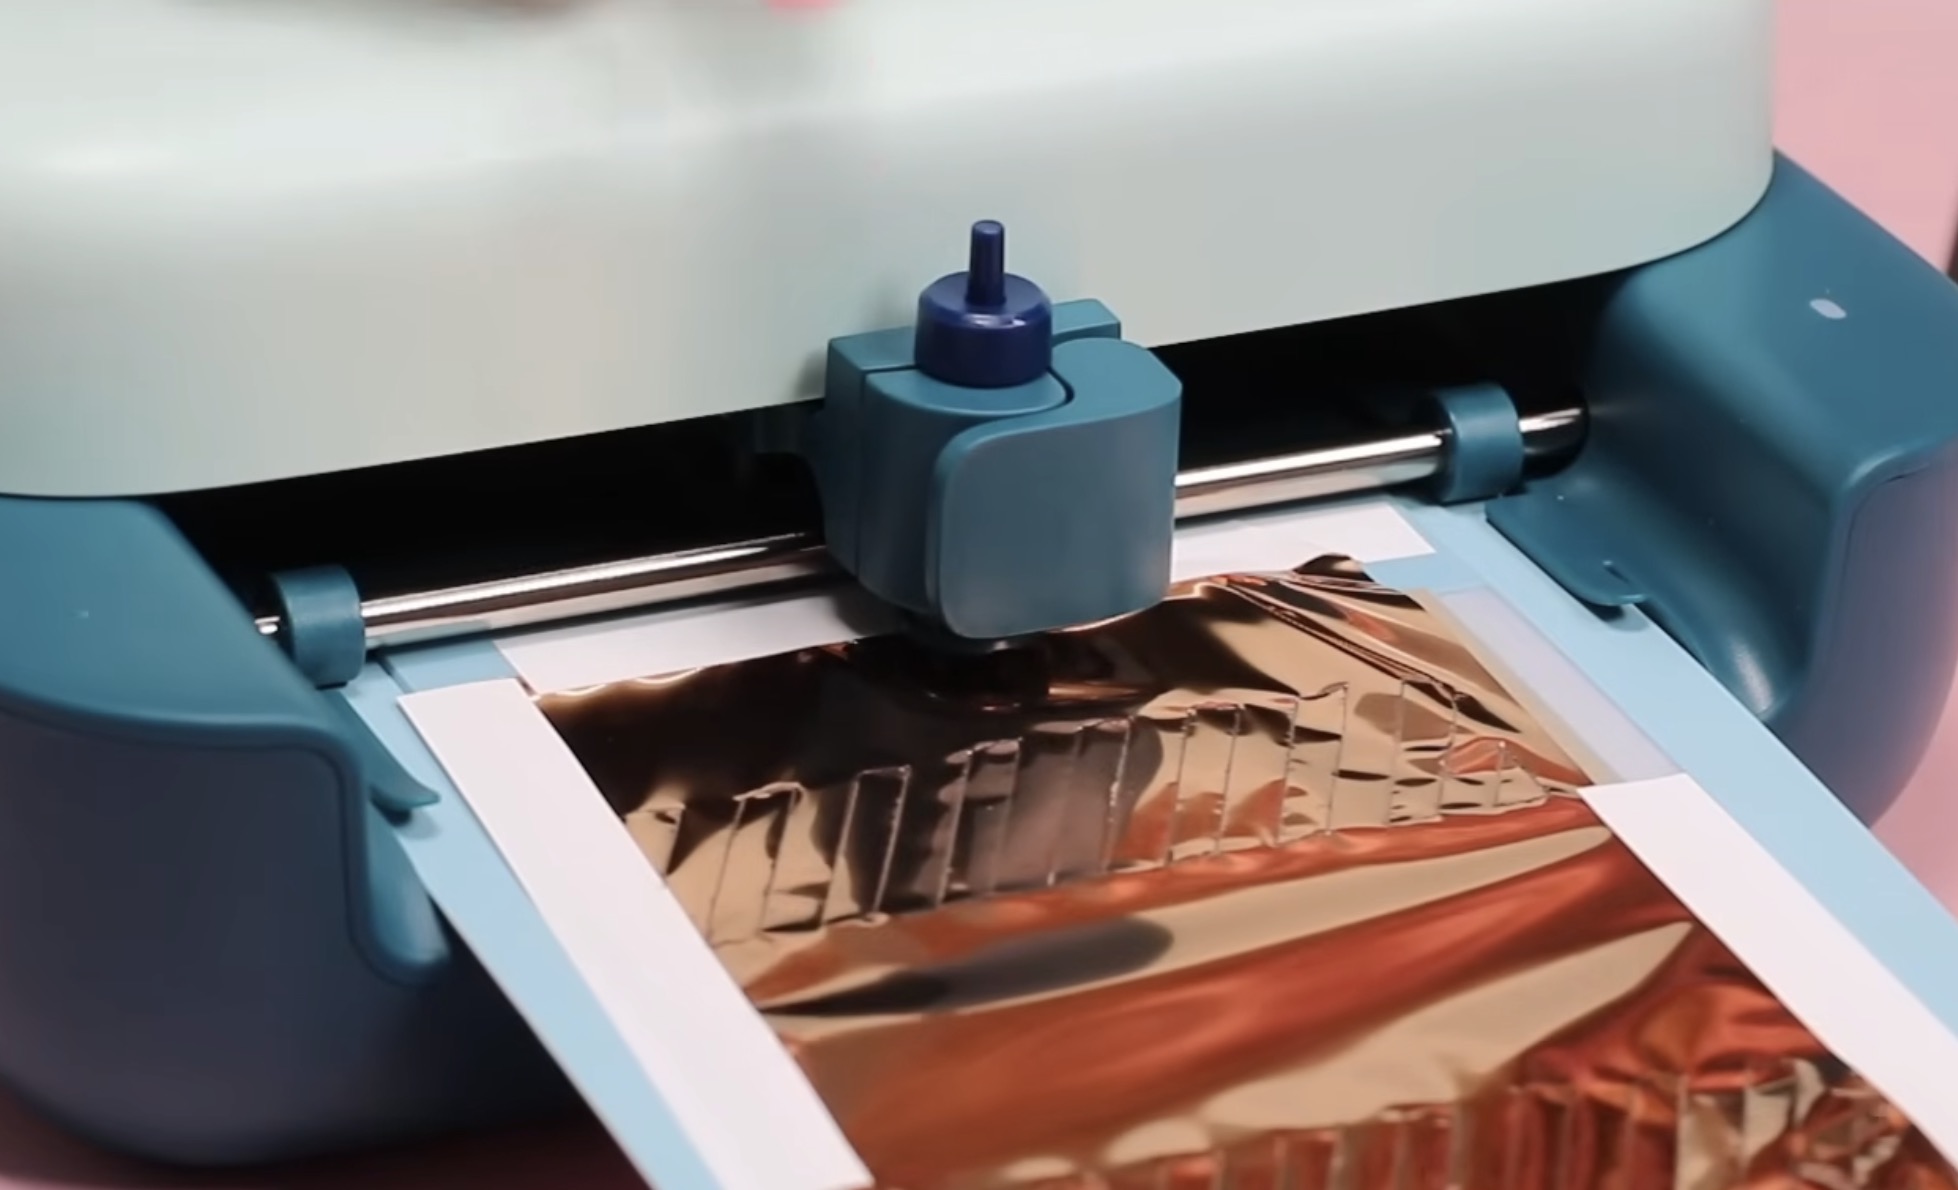
Remember, this is Load and Go, so make sure you have the foil tool installed before loading the mat.
When the machine is done foiling, it will stop, and Design Space will prompt you to remove the foil sheet and swap the foil tool for the fine point blade without unloading the mat.
Step 3: Finish Insert Card
Click Go, and the machine will cut out the rest of the design. Click Unload when it's done.
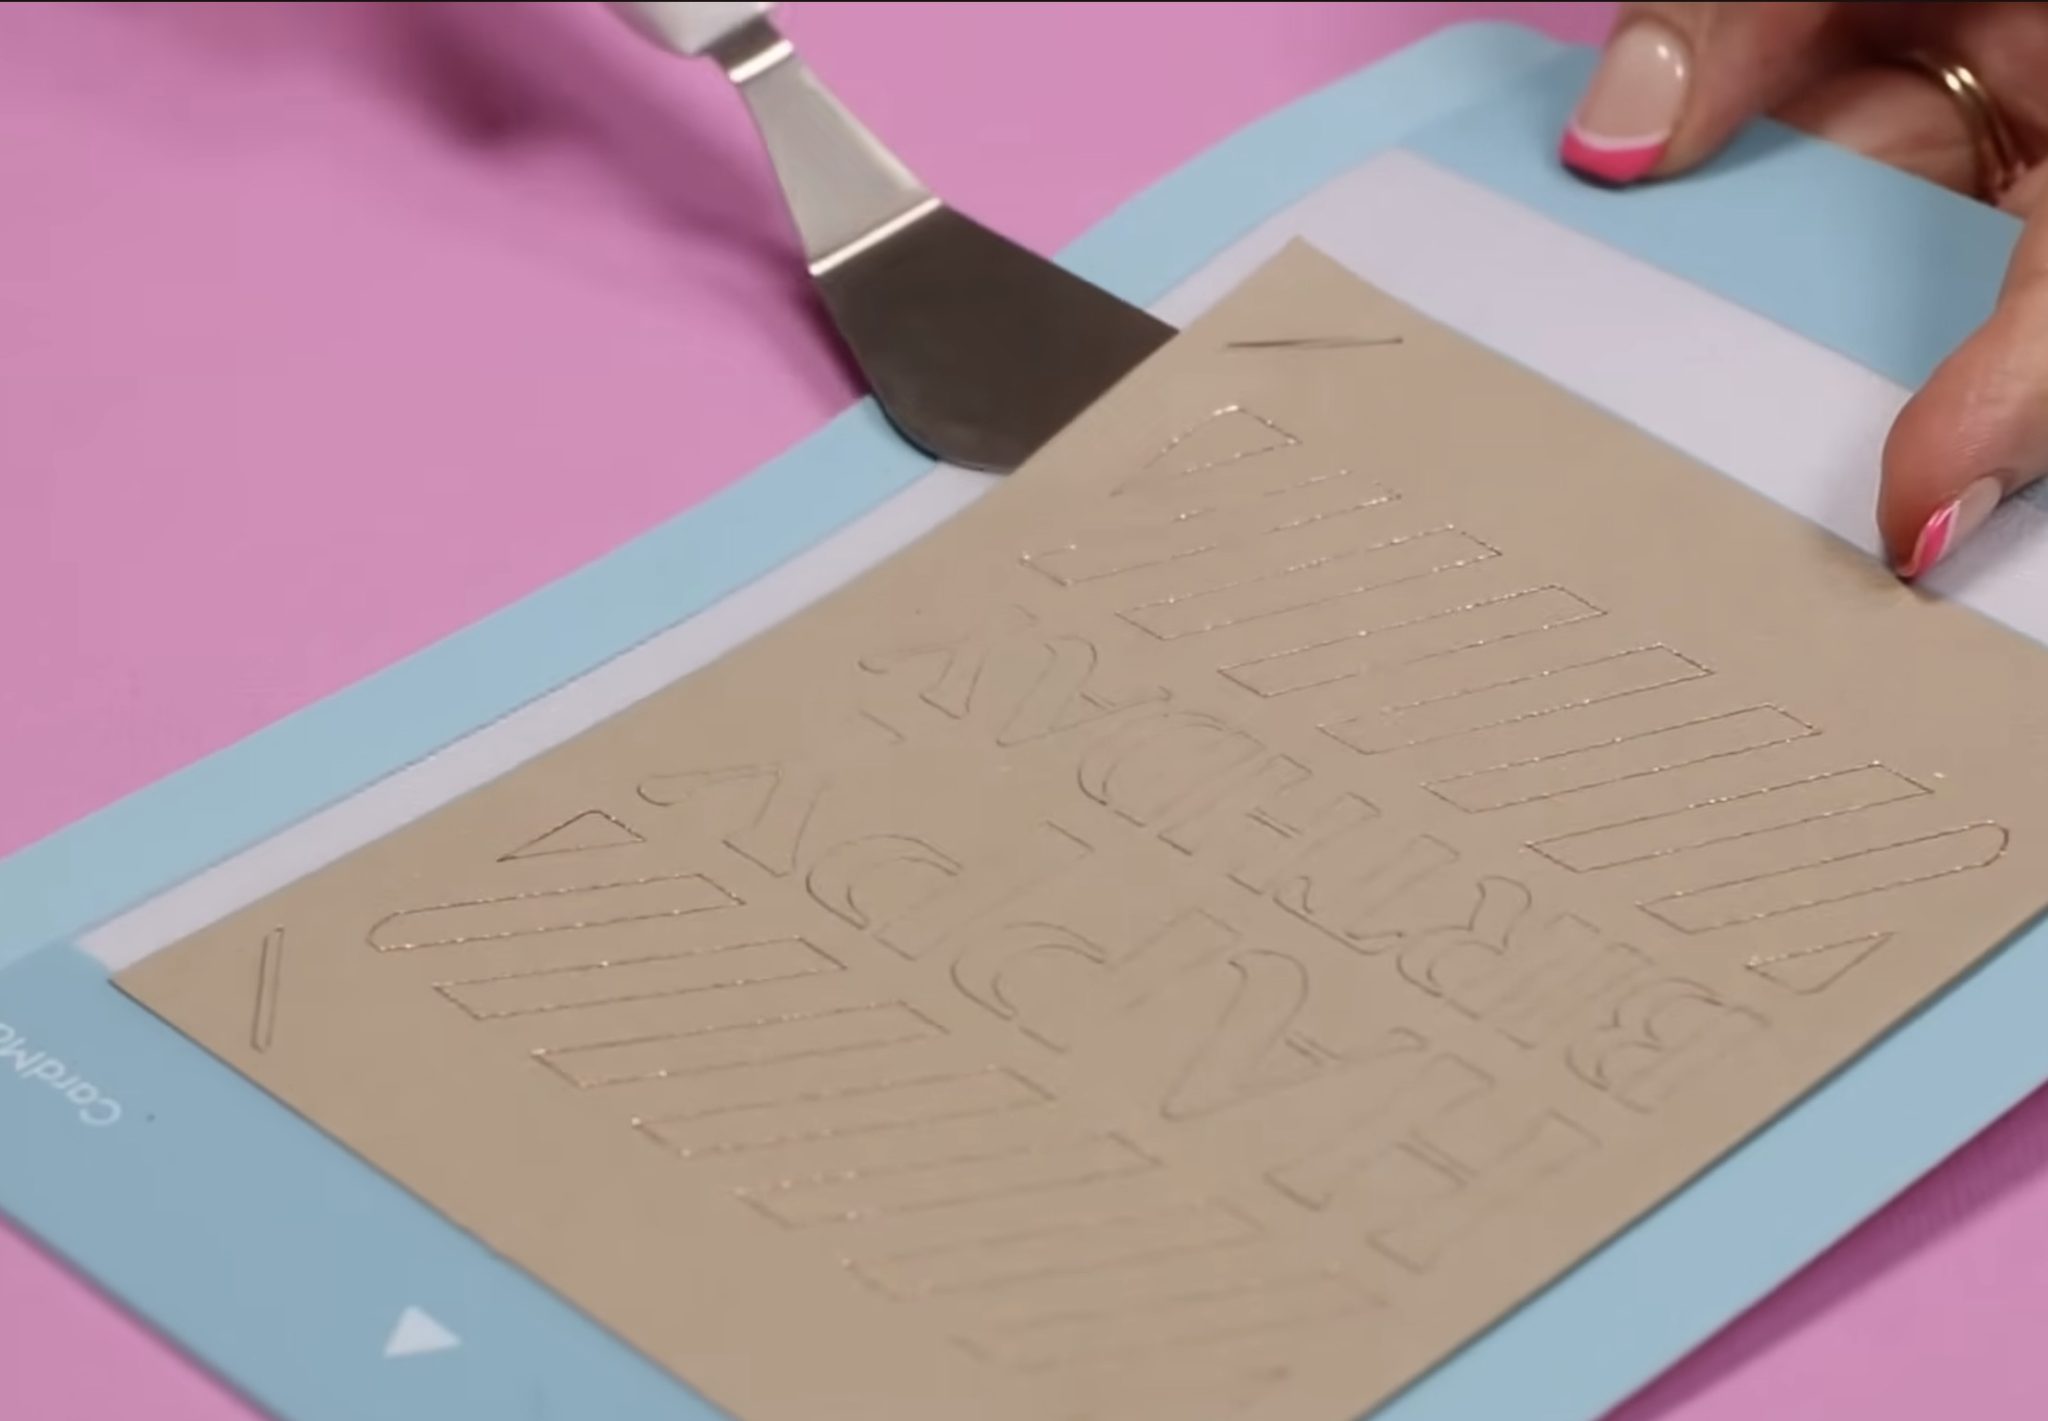
With insert cards, I like to use the spatula to get under the edge to help lift it a little bit. Be careful around the corner cuts. They can be delicate, and you don't want to rip them.
Remove the card from the mat and slide the insert piece into the inside of the card.
Use the spatula to remove any cardstock pieces left on the mat and replace the protective cover to keep it clean.
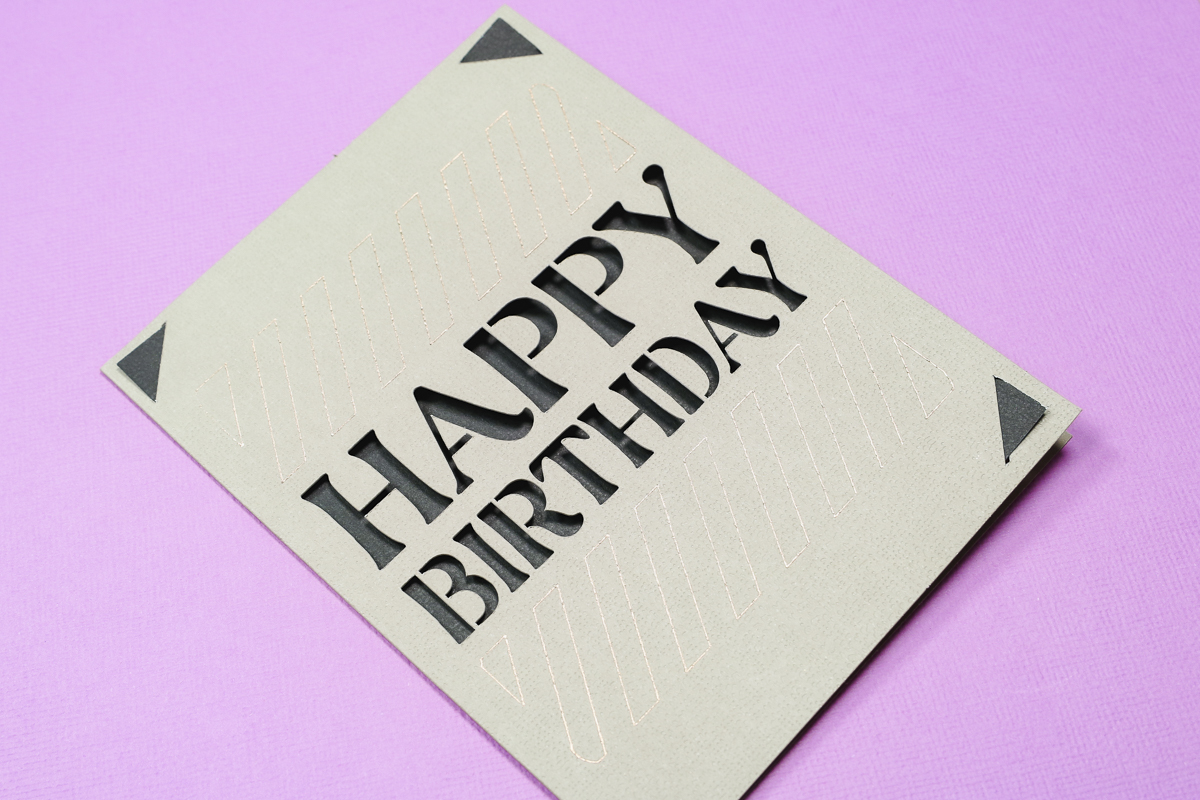
I am a big fan of insert cards and the Cricut Card Mat. With the card mat, you can make full-size cards even with the small Cricut Joy 2. Cards can be made quickly and easily for all occasions with the card mat.
How to Create a Card with Scoring Tool
Along with Print Then Cut, a lot of people wanted the ability to score using the original Cricut Joy. With the Joy 2, they included a scoring tool, so I want to test it by making a card without the card mat.
Step 1: Create Design
Click New Project and then Card and Folded Card. I am using the Scoring Tool, so I clicked the Use a Cricut Scoring Tool option.
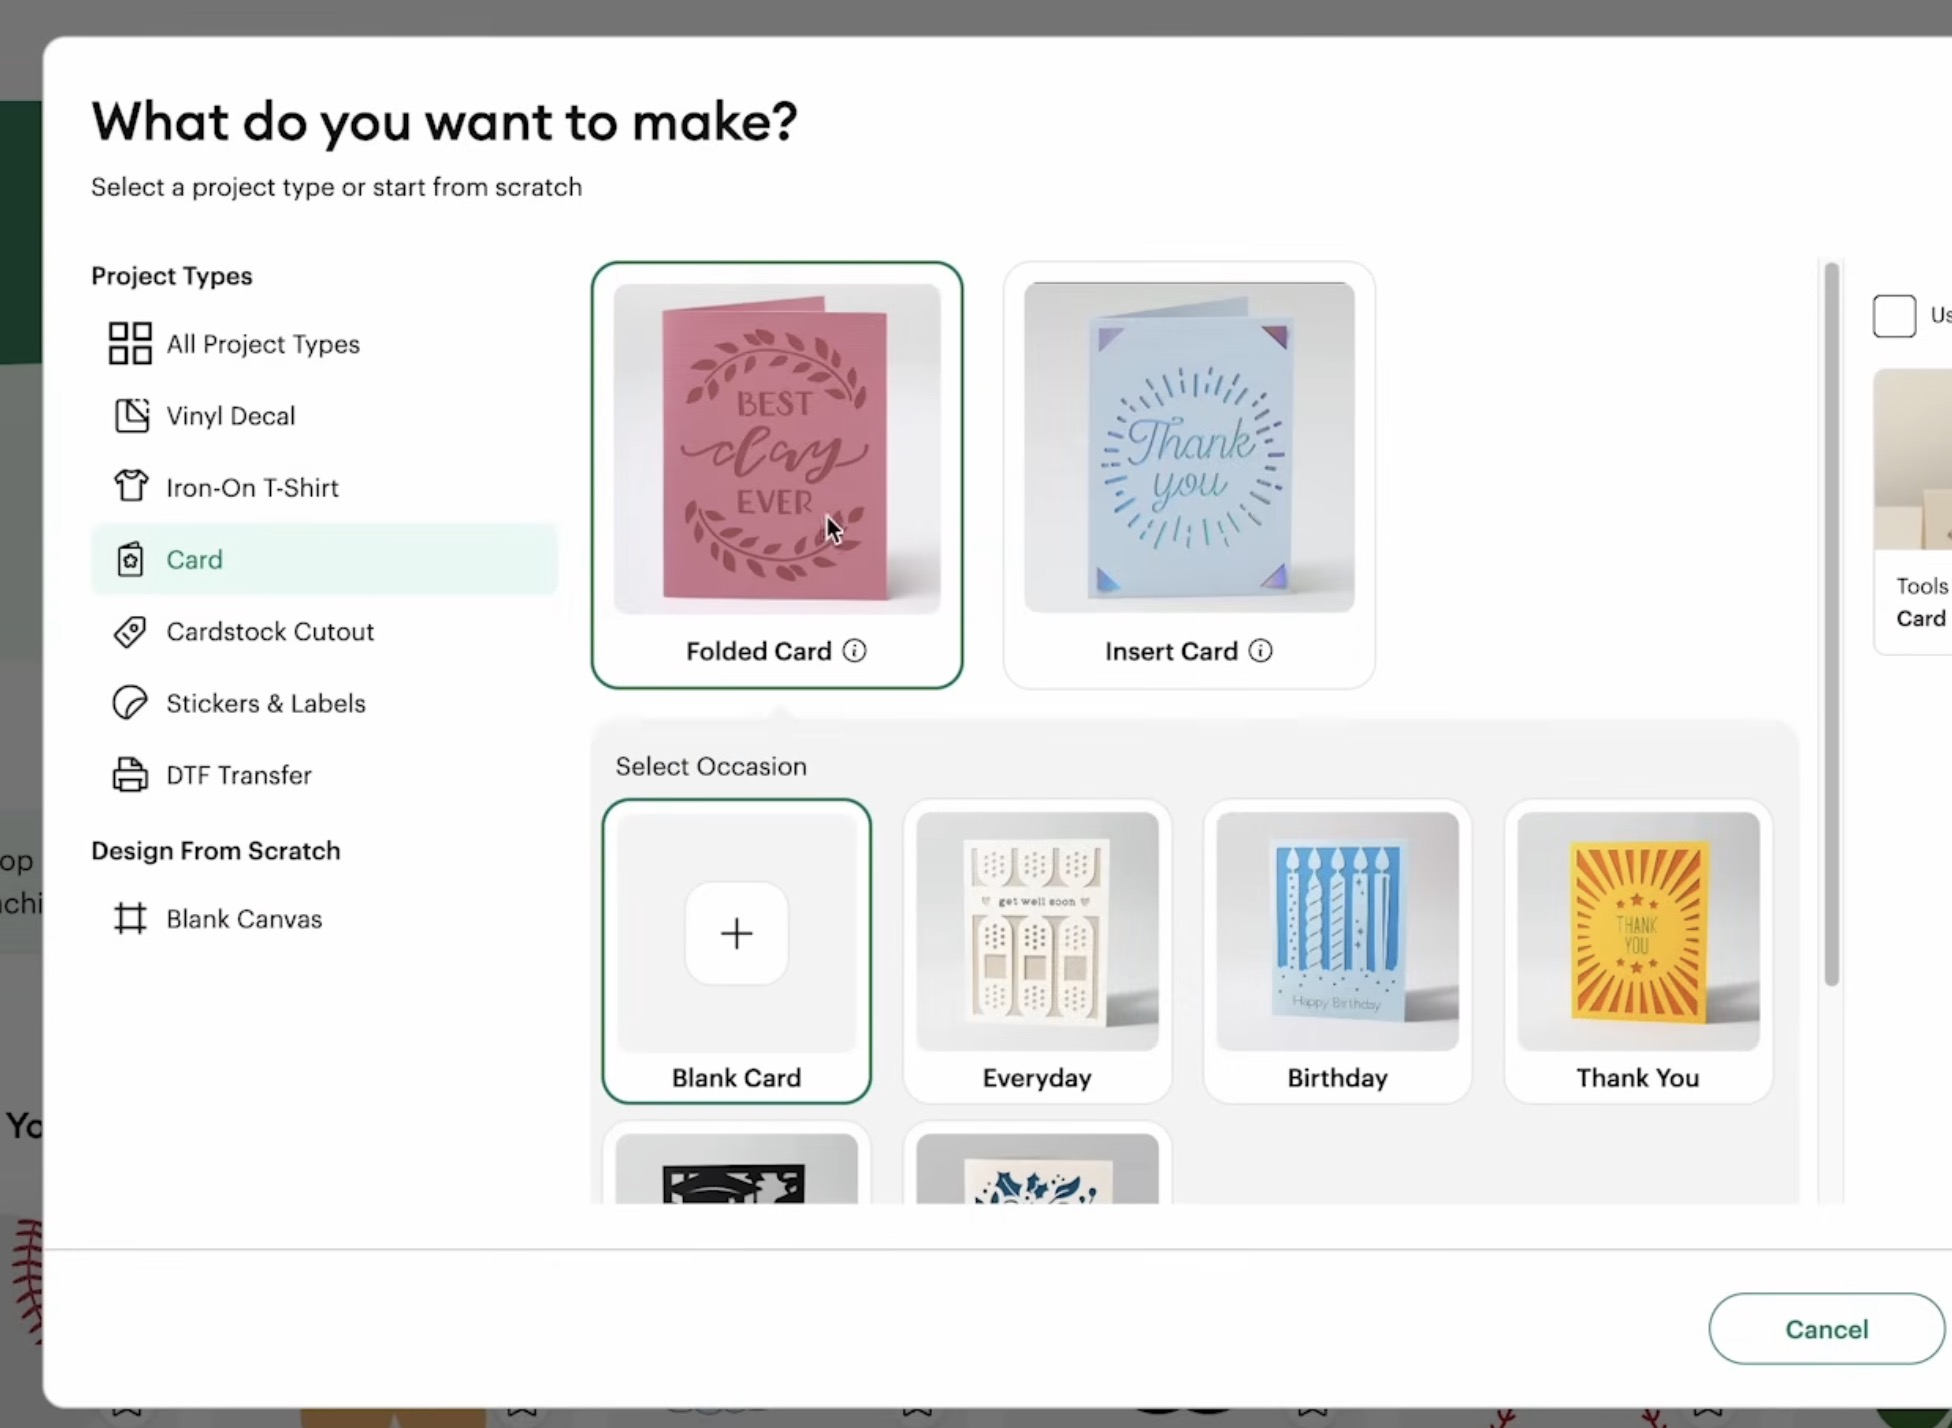
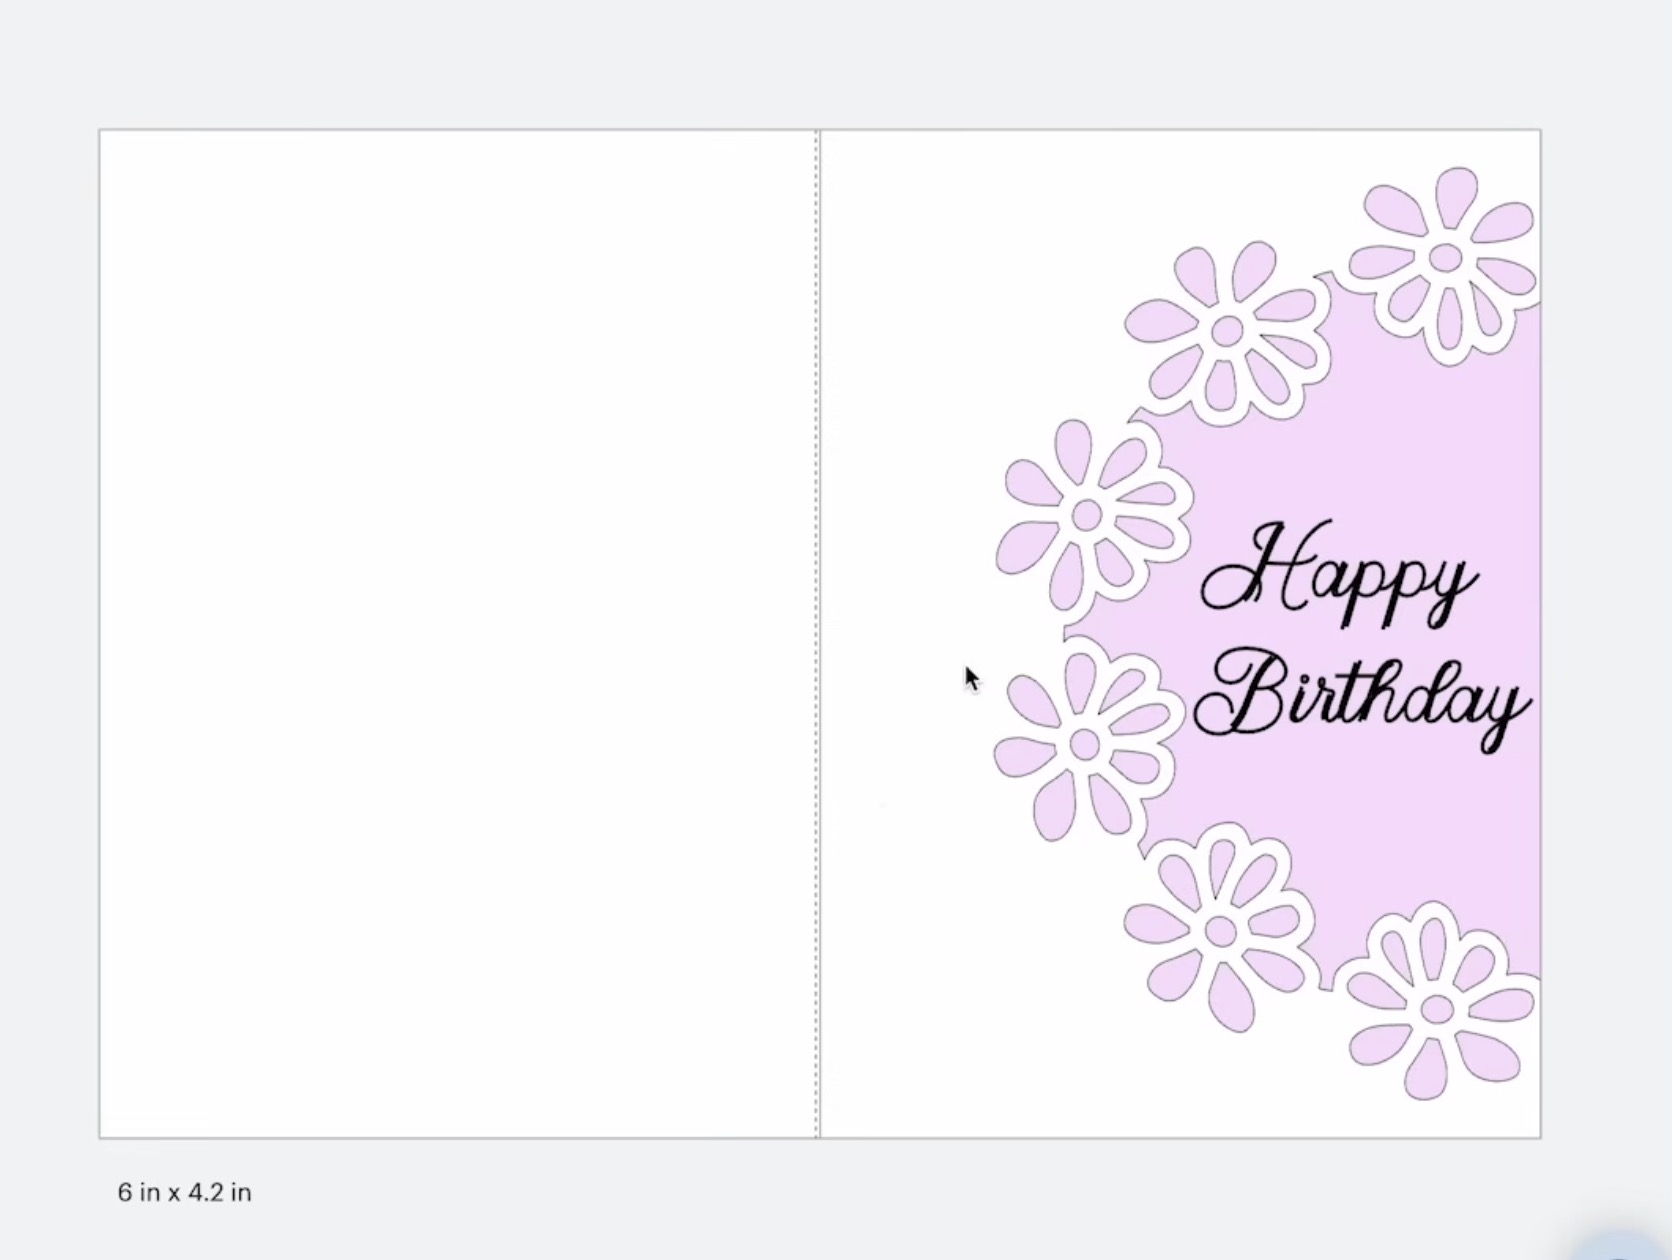
Click Start Designing, and you'll see it automatically creates a canvas with a rectangle that is 4.2″ by 6″. The score line is placed right in the middle.
I can resize the rectangle smaller if I wanted but I cannot make it any larger.
If you choose to resize the shape, if you want to fold it right down the middle, you'll need to relocate the rectangle or the score line so they are centered on each other.
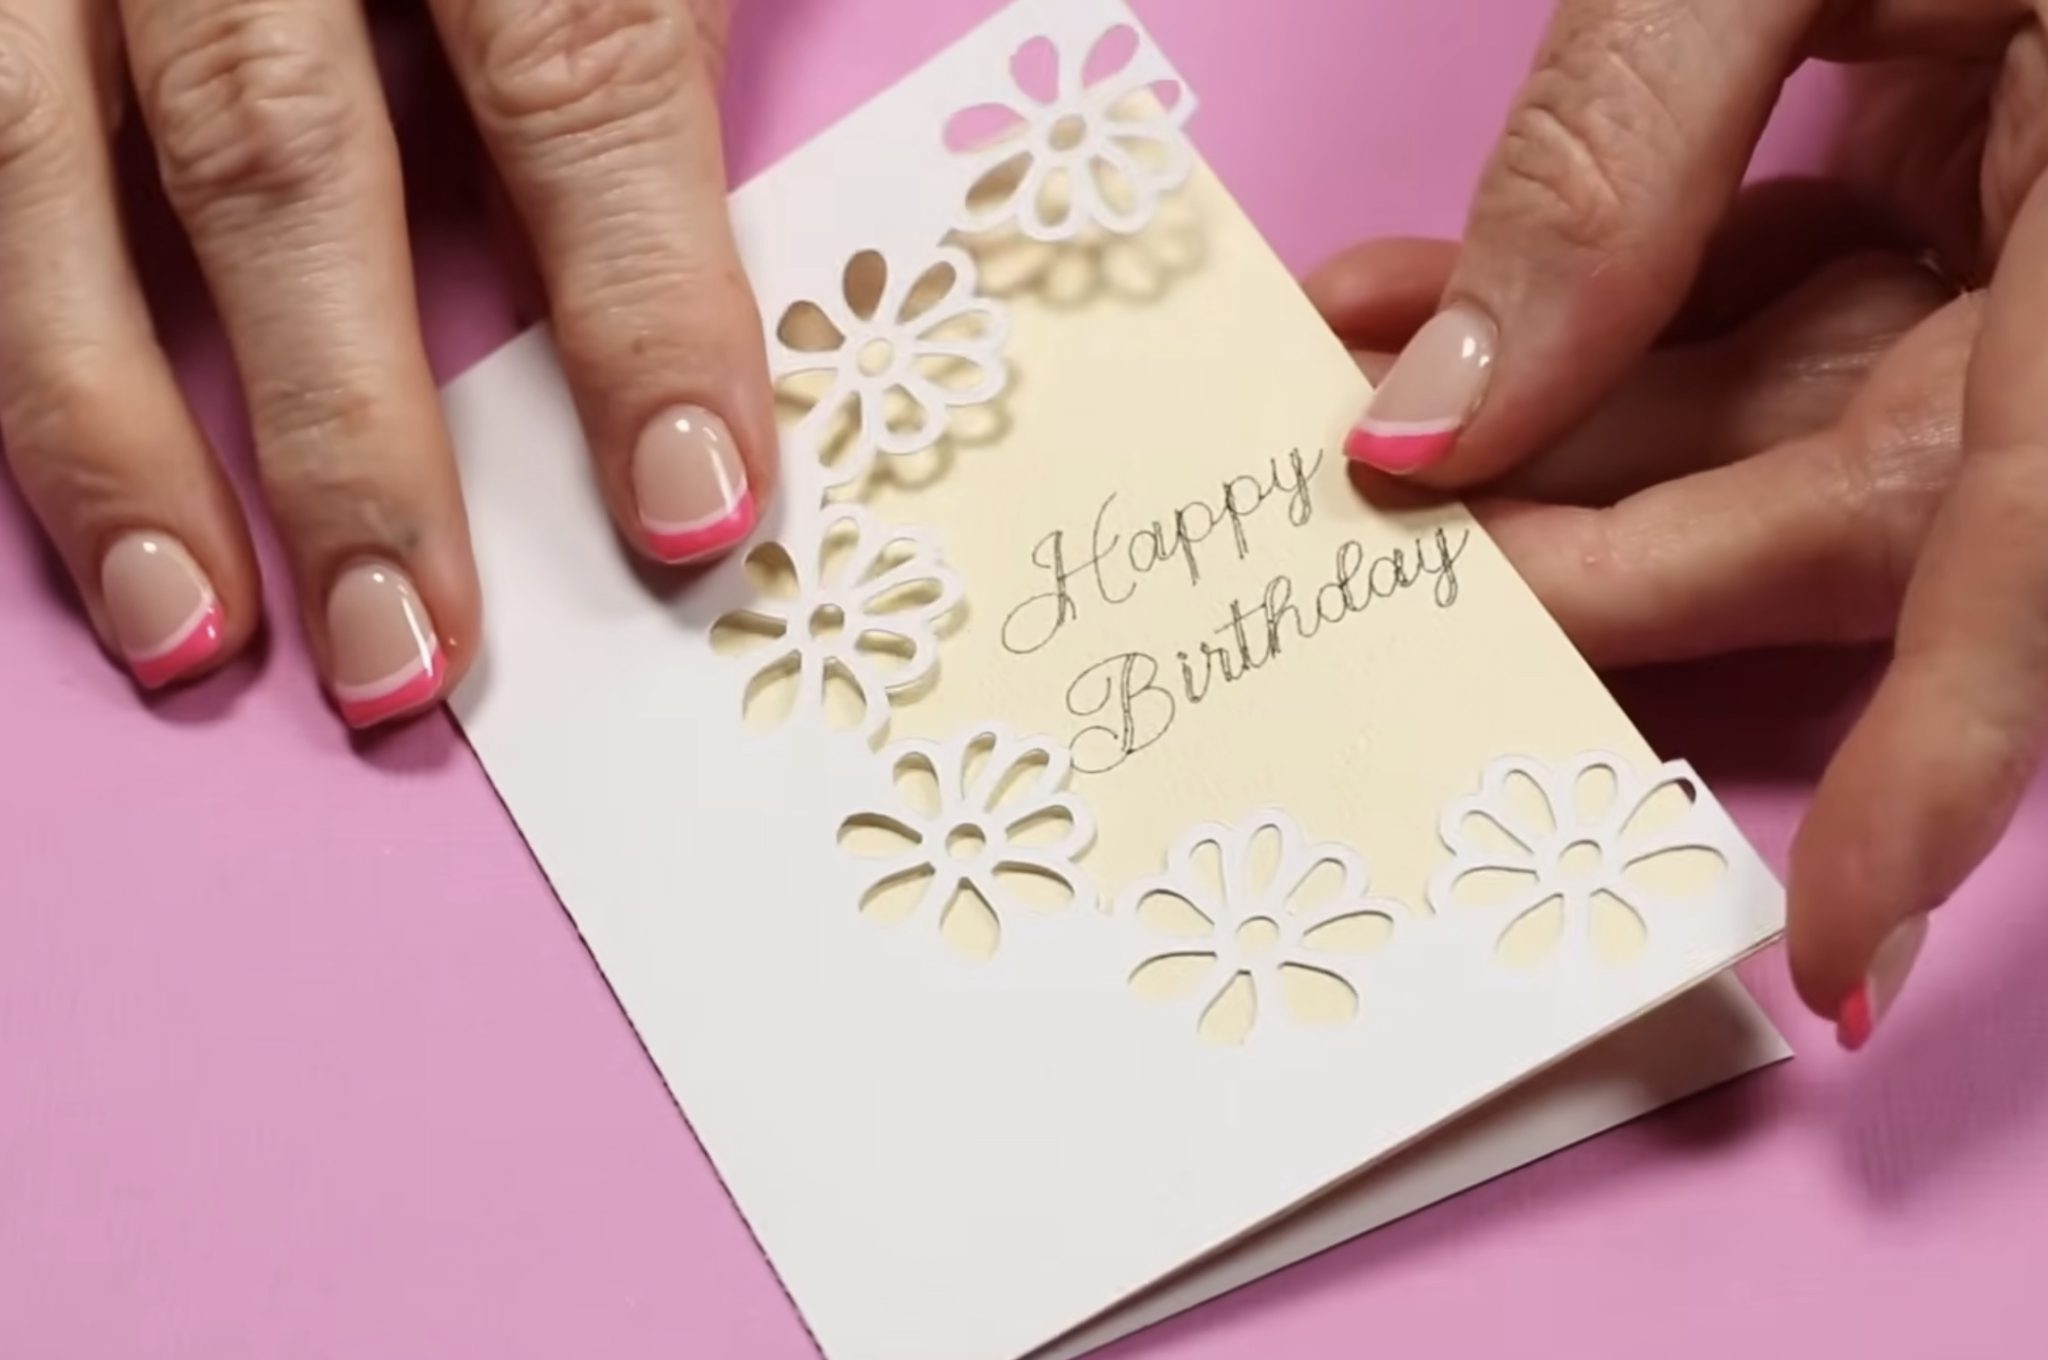
I chose a fun card design that is 2 layers, and it also uses the pen.
Step 2: Set Up Mats to Make a Folded Card
I am using the Value Cardstock that was included with my machine.
I trimmed the cardstock to 4.5 inches and placed it on the cutting mat.
For the inside piece, I am using an insert from one of the insert cards. You can use any cardstock for both pieces.
Step 3: Cut Out Folded Card
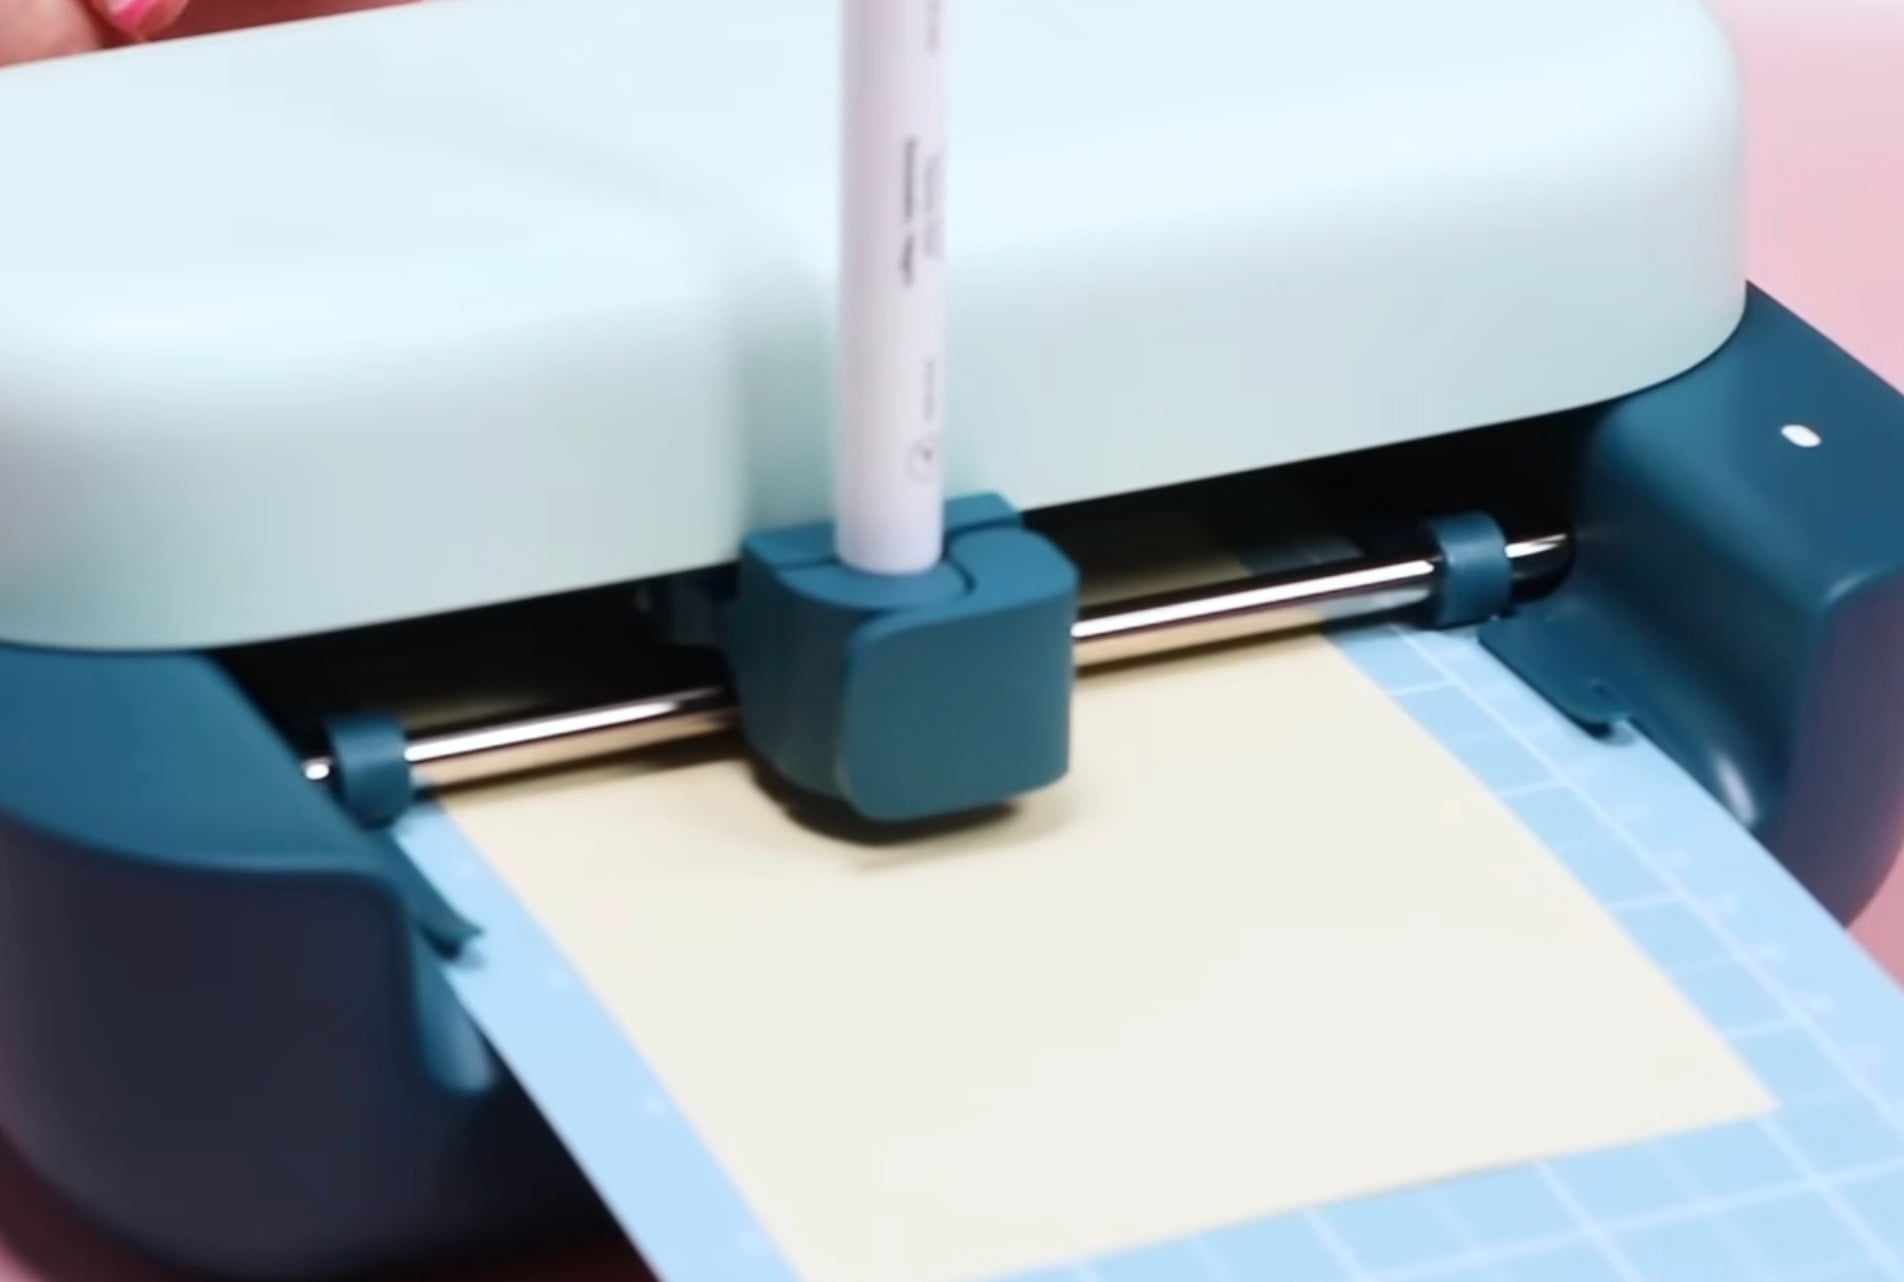
Design Space tells us to load the Scoring Tool first and then load the mat. The machine will measure the material and then do the score line.
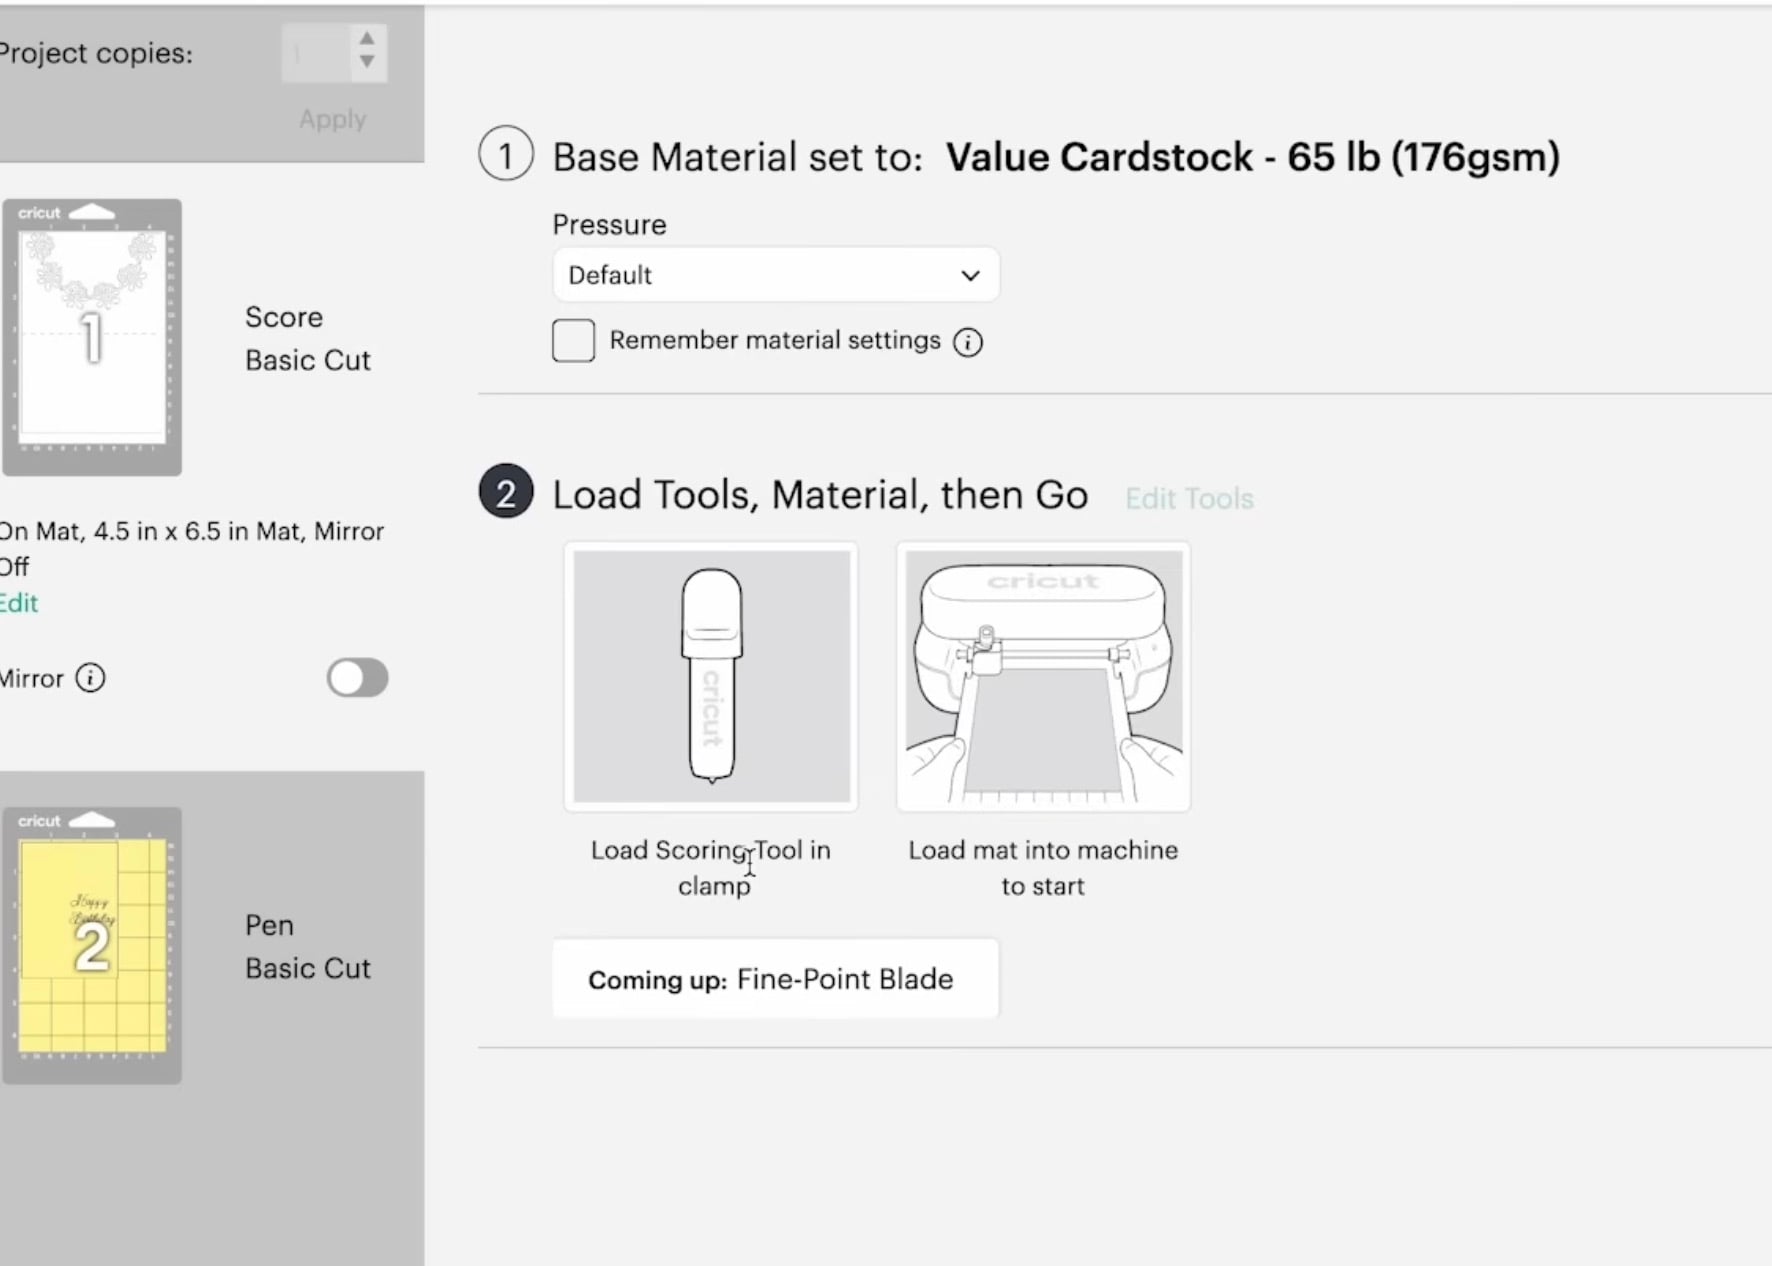
After it scores, Design Space will prompt you to change the Scoring Tool to the Fine Point Blade.
Load the blade and press Go in Design Space.
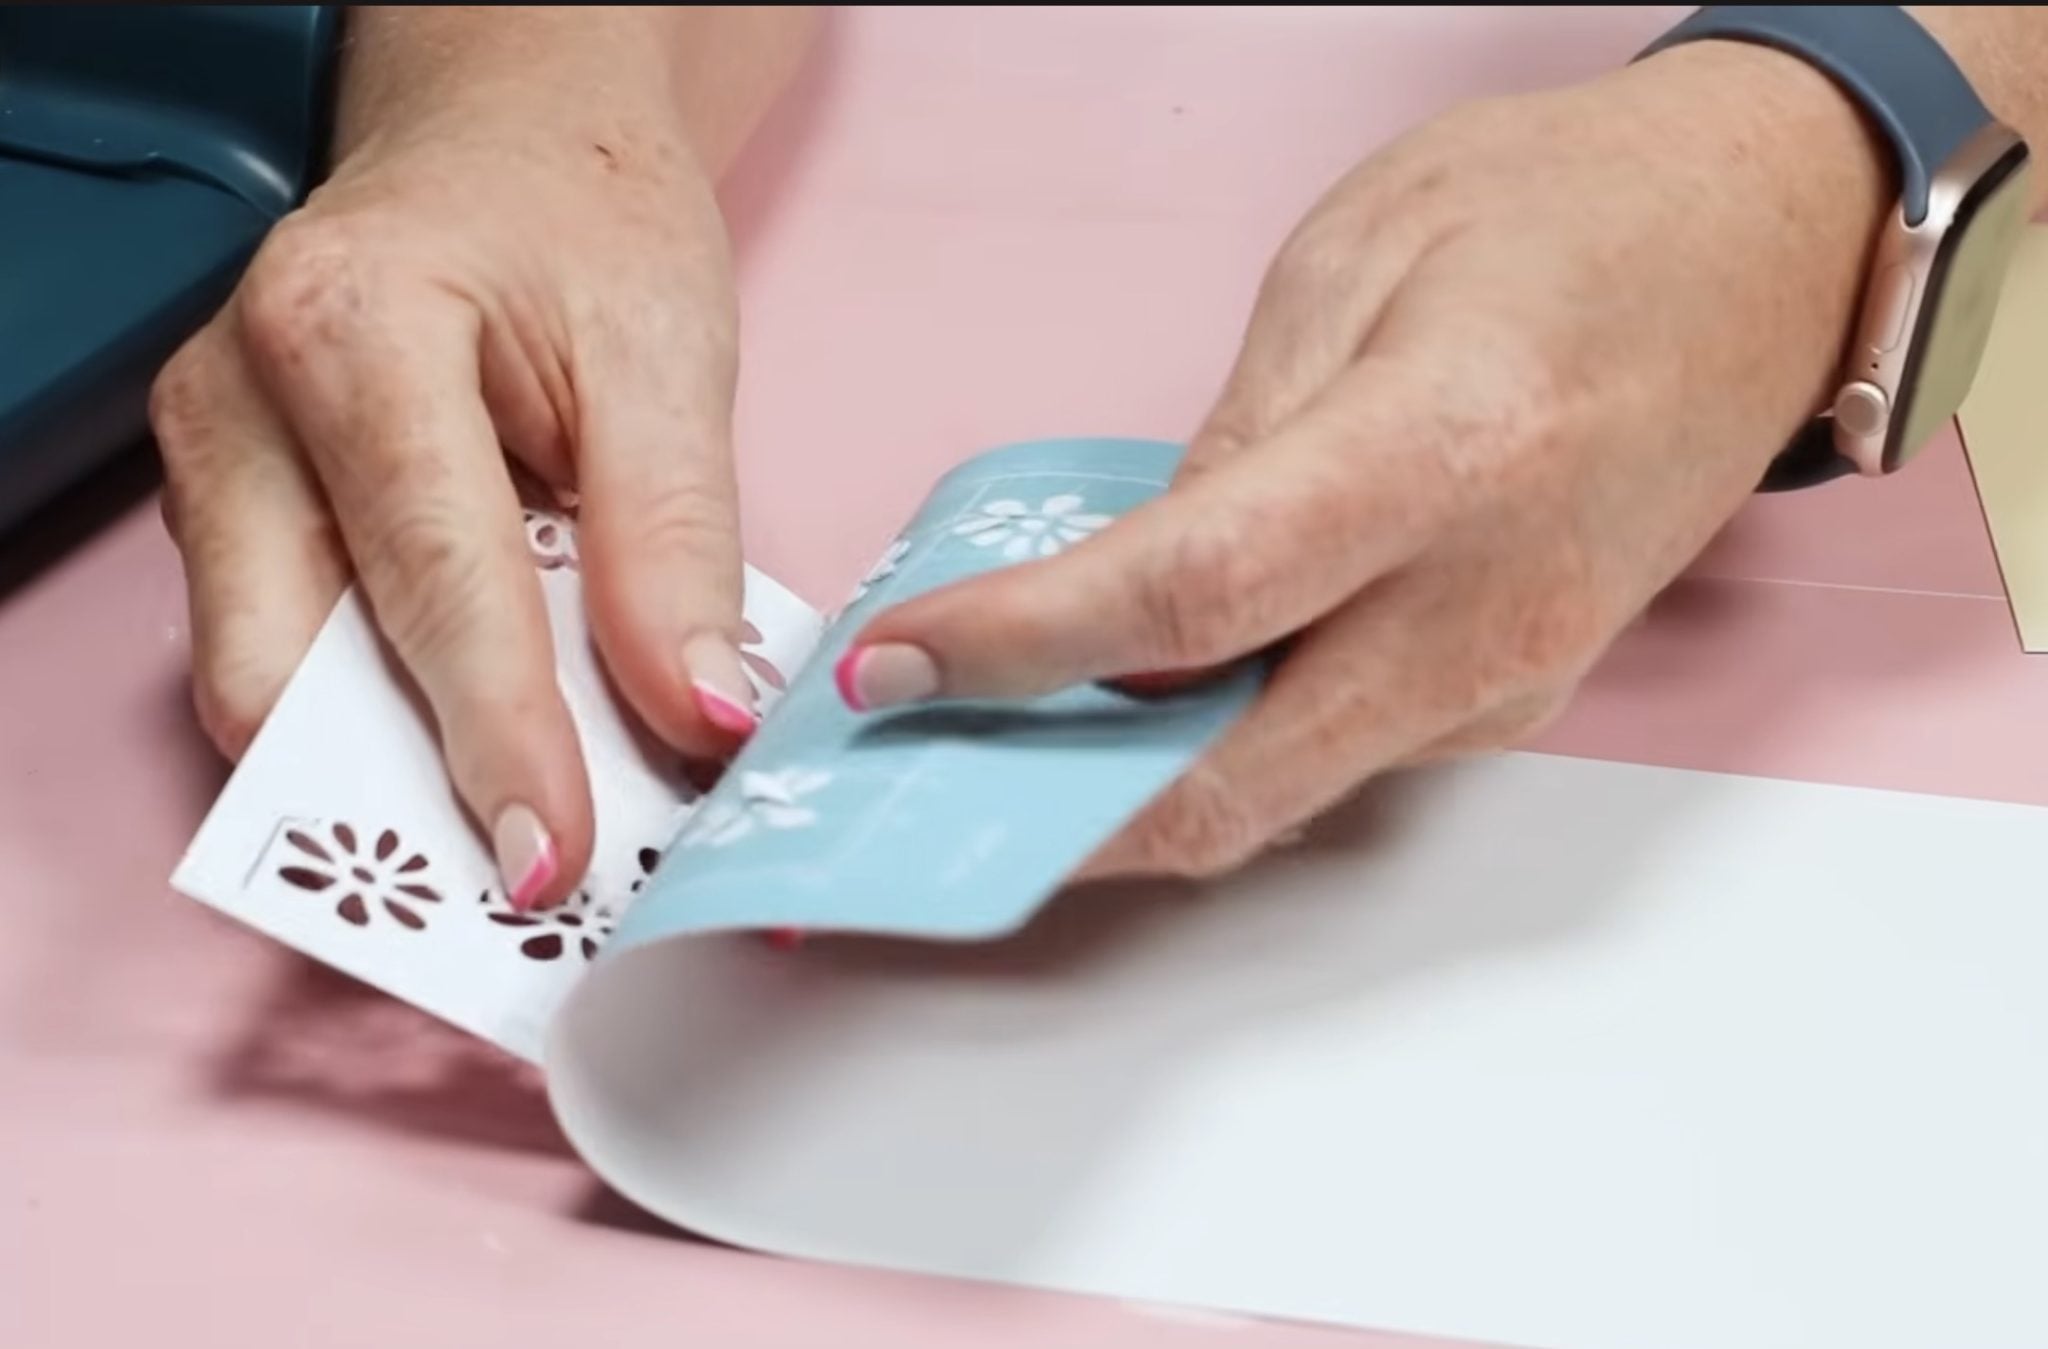
When it's done, unload the mat and remove the cardstock. When working with cardstock, flip the mat over and gently roll it away from the cardstock. This will prevent curling the cardstock.
Add the other piece of the cardstock to the mat.
Design Space will tell you to load the .4mm side of the pen into the machine.
Load the mat into the machine and click Go in Design Space. When it's done, you'll be prompted to change the pen for the Fine Point Blade.
Press Go, and when it's done, unload the mat and remove the cardstock.
Clean off the mat and replace the plastic mat cover.
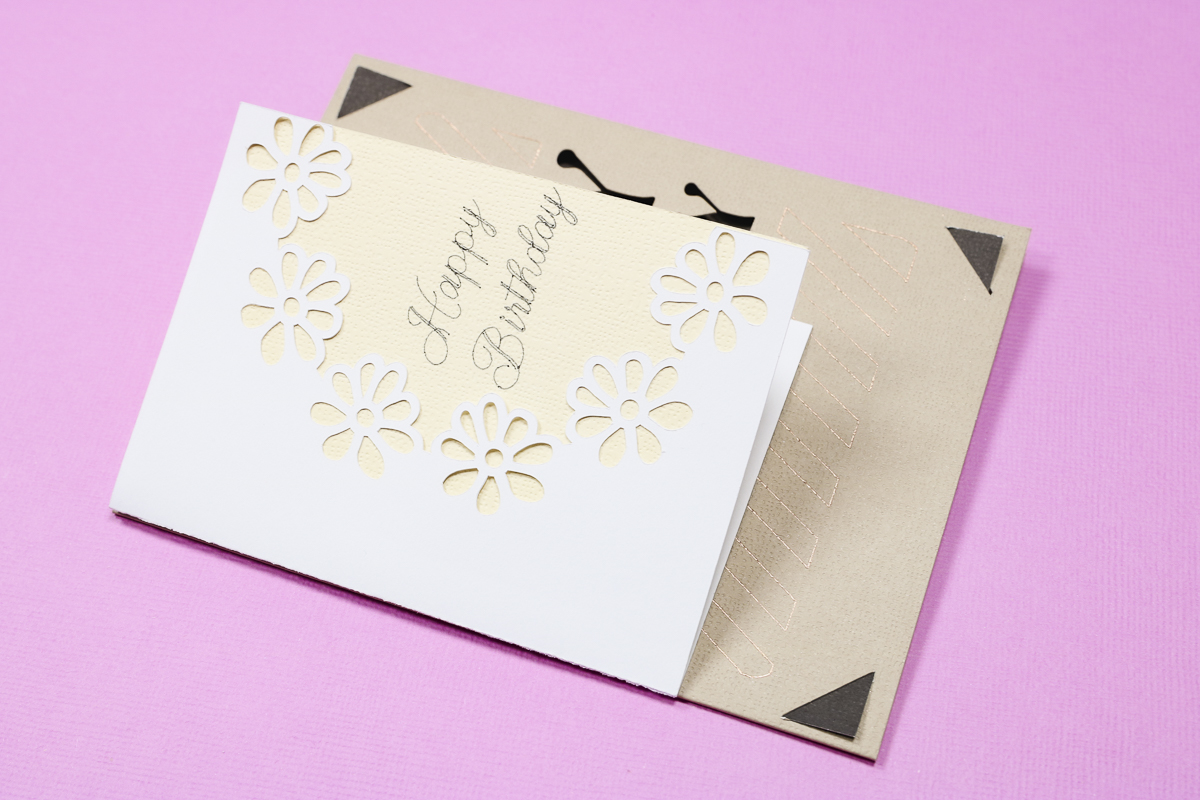
Step 4: Assemble Folded Card
Now we're ready to assemble the card.
Fold the cardstock along the score line. I like to use a bone folder to get a nice crisp fold line.
Attach the inside piece using a double-sided adhesive, and your card is done.
IMPORTANT: Size Difference Between the Insert Card and the Folded Card
First, I want to say I am really happy with both of these cards. Both look really good and were easy to make with the Joy 2.
There is a big difference in the card sizes.
With the Card Mat, you can make full-sized cards. The largest card you can make using the Scoring Tool and machine mat would be 4.25 tall.
The machine mat is 12 inches, so the maximum cut length is 11.75. You could make a card that is 4.25 inches tall by 11.75 inches long, resulting in a folded card that is 4.25 by 5.875 inches if you're okay with the folded width being larger than the height.
This could work well for a top-folding card; you'd just want to choose a design that works well with that orientation.
How to Make Print Then Cut Stickers with Cricut Joy 2
Since print then cut is new to the Cricut Joy 2, I had to test it out and see how it works!
OPTIONAL: Calibrate Print Then Cut
NOTE: Before you begin the Print Then Cut process for the first time, you'll want to calibrate your machine.
In Design Space, click your image in the upper right-hand corner and then click Settings. Scroll down to Machines, select Joy 2, and then Machine Calibration.
Follow the steps in Design Space to calibrate your machine. This calibration process is a little different from what it was previously, and I really liked it. I hope they use it for all machines moving forward.
Step 1: Set Up Sticker Design in Design Space
Now that the machine is calibrated, click New Project, Print Then Cut, and then choose Stickers and Labels.
From here, you can see it says Auto-sticker Settings, which lets you know that any design you add to the canvas will be set up as a sticker. This page also shows how the page will be split when using the Joy 2.
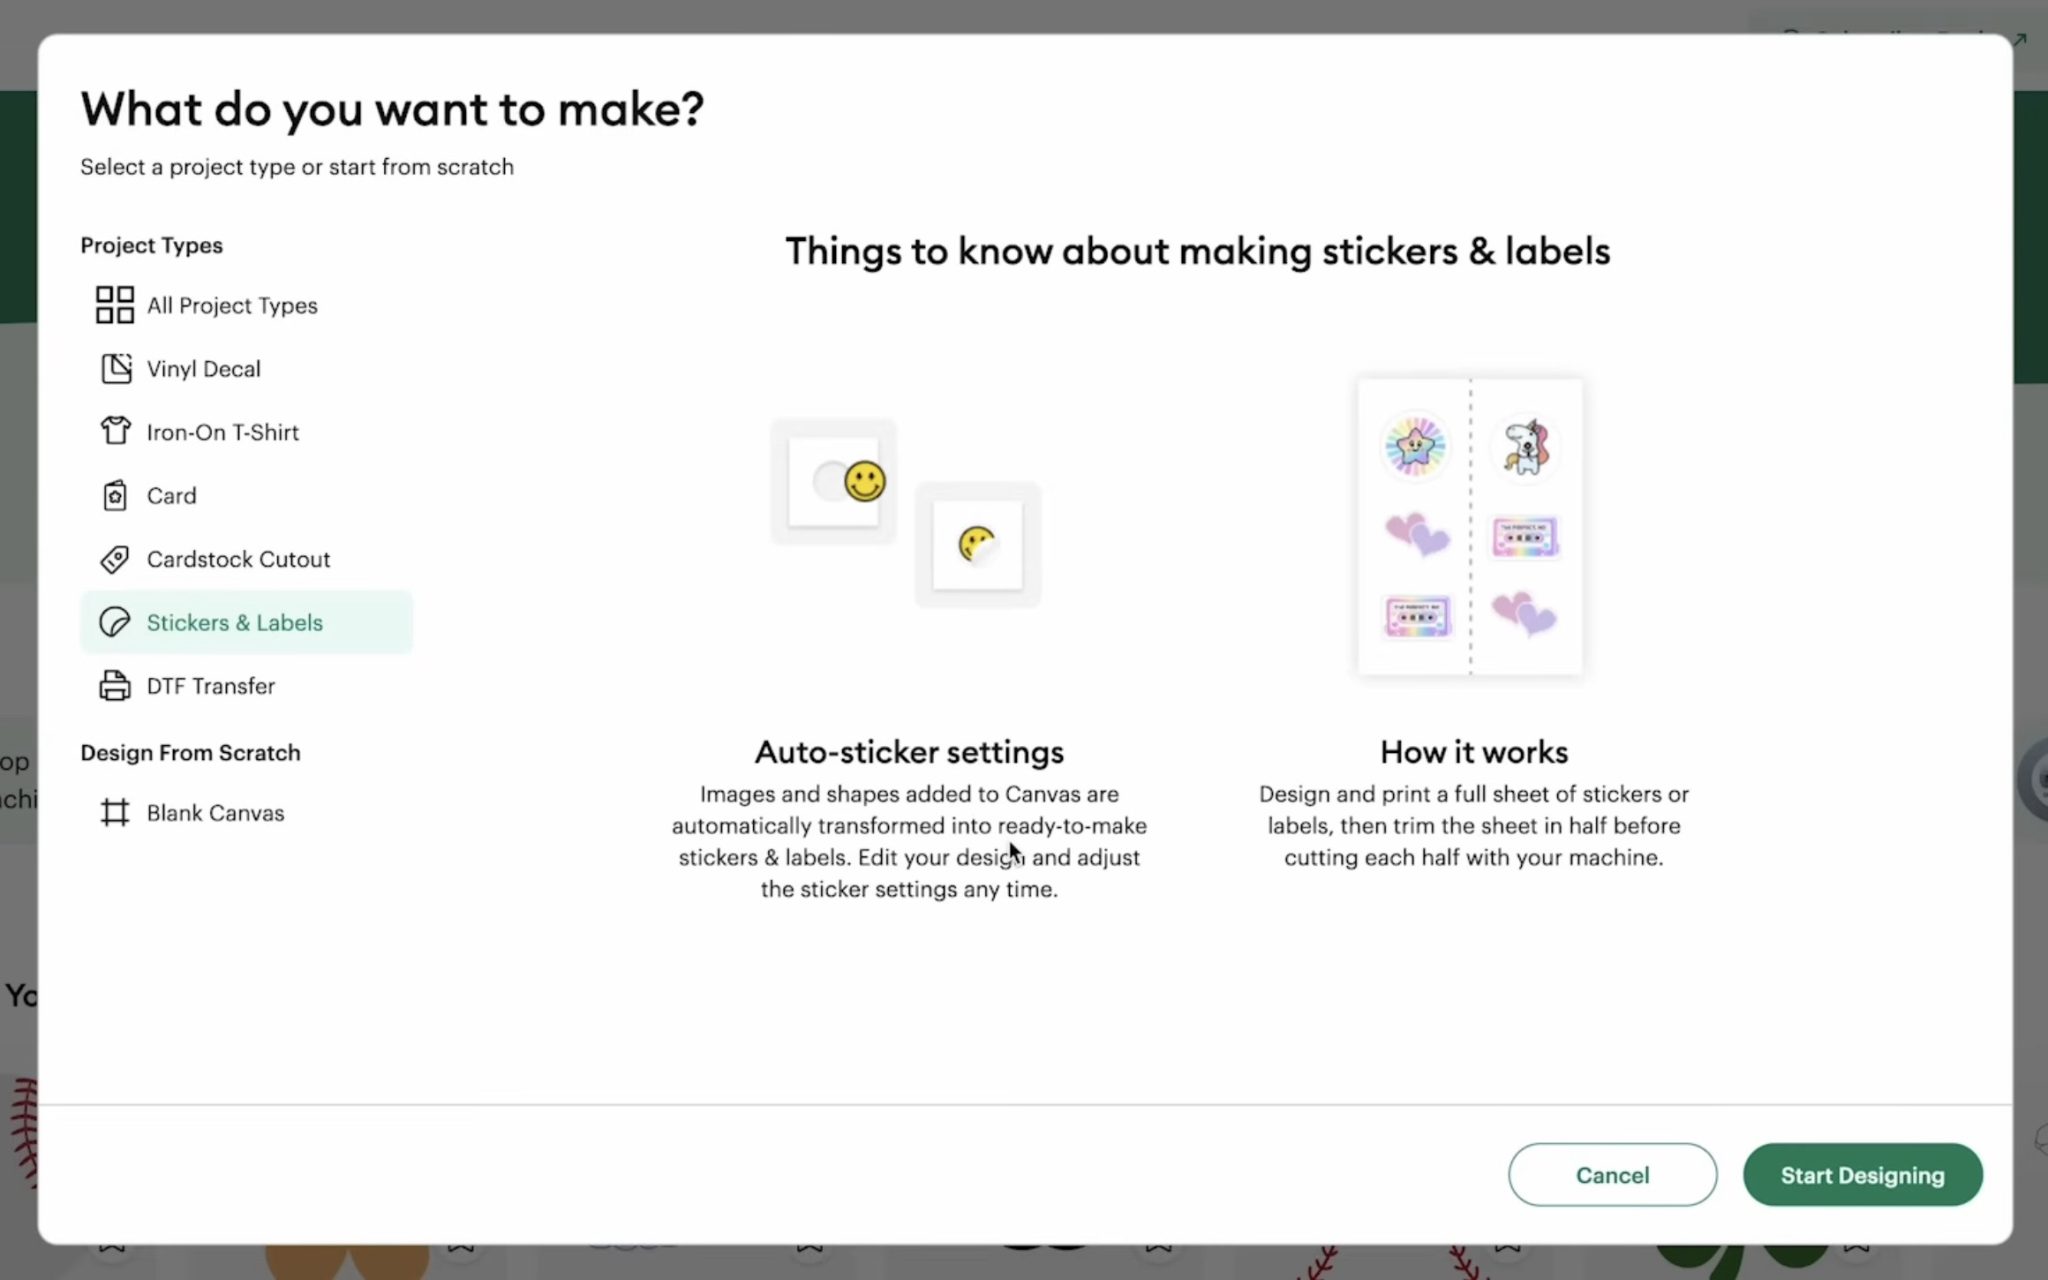
Click Start Designing, and your canvas will be automatically set up to make stickers.
Here you can add a design and resize it to whatever size you want it to be, making sure to stay within the size restrictions of Cricut Joy 2 Print Then Cut.
I want to add this shelf of books to a bookmark, so I have resized it to 1.5 inches tall, and I don't love the thick offset, so I clicked Edit and Sticker and changed the offset to thin.
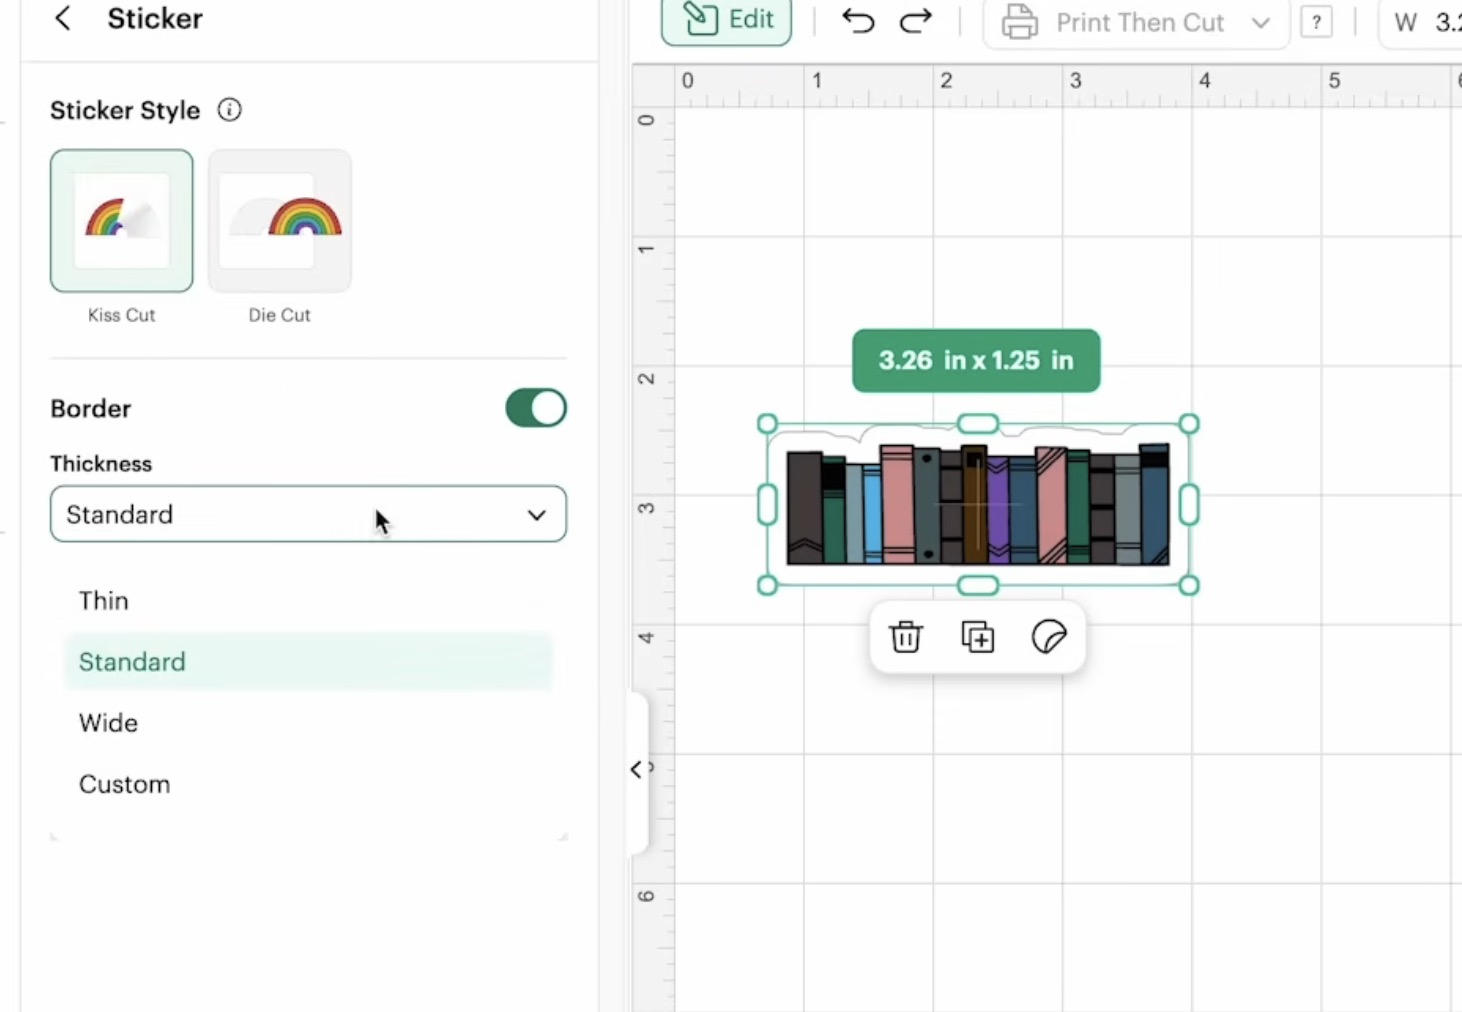
If you change the offset thickness, double-check the size; you may need to adjust it because the size will have changed.
For my test, I am going to duplicate the image and test both the Die Cut and Kiss Cut settings. I also added more designs, so I can try to fill as much of the sheet as I can.
I am worried about how much wasted material there may be with the Joy 2, so I want to reduce that as much as I can.
When you have all the designs you want on the canvas, click Make, and from here, I have another trick to show you.
Step 2: Move Designs from One Mat to Another
Unfortunately, Design Space doesn't always do the best job at laying designs out on the mats. For the designs on my canvas it split them onto 4 different mats.
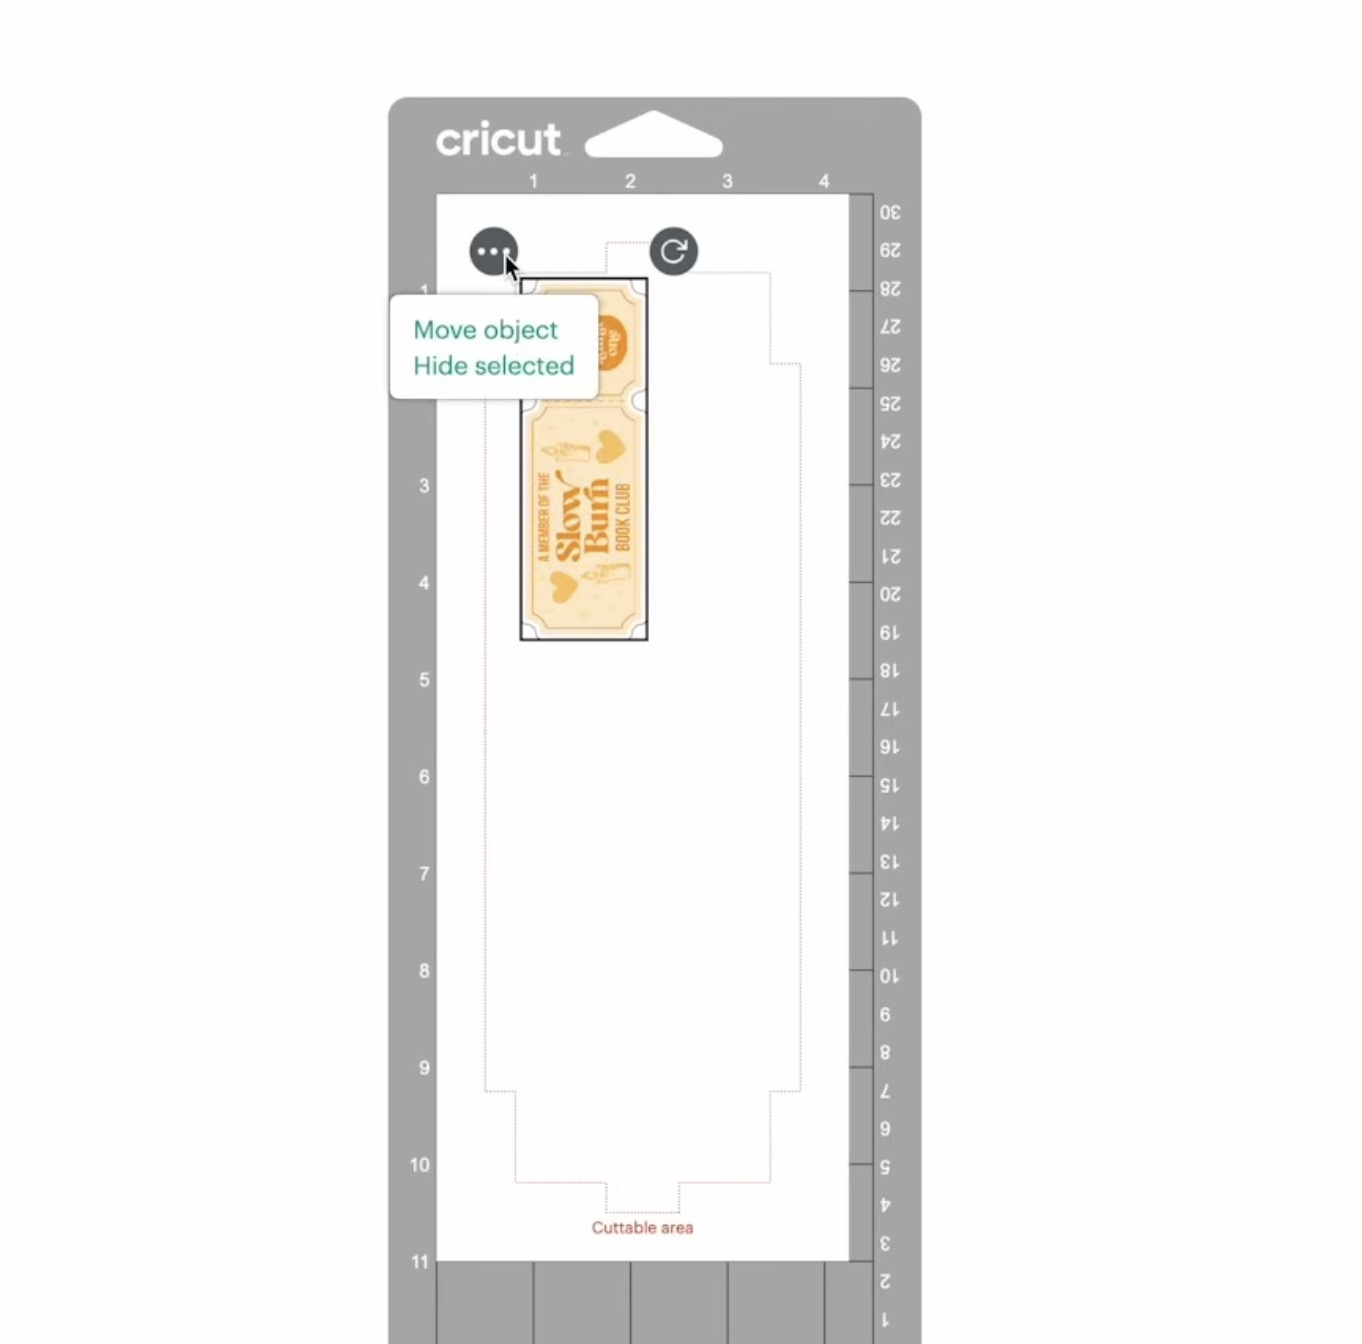
There is room on the sheets to move things around. Click the design and then click on the three dots. Select Move Object, and you can click on a different mat, and it will move the design there.
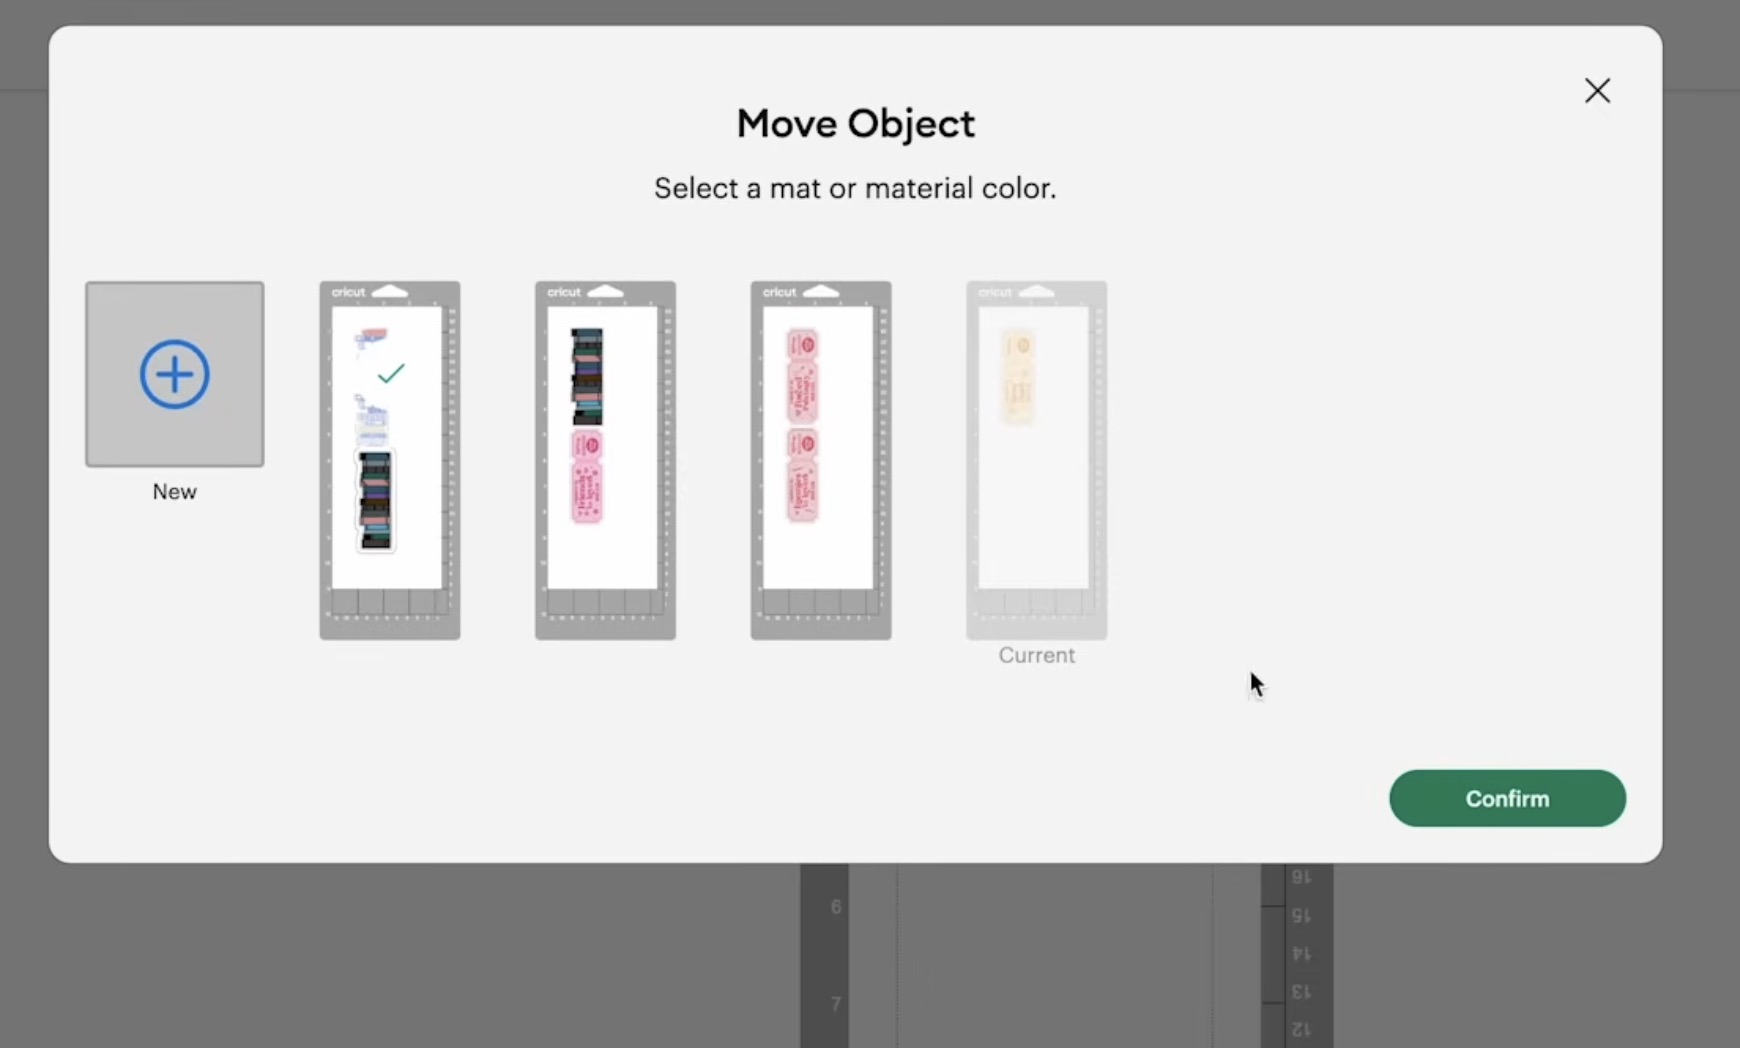
Now, I can move the designs around, and as long as they don't overlap, and I stay within the red lines, they will print and cut perfectly.
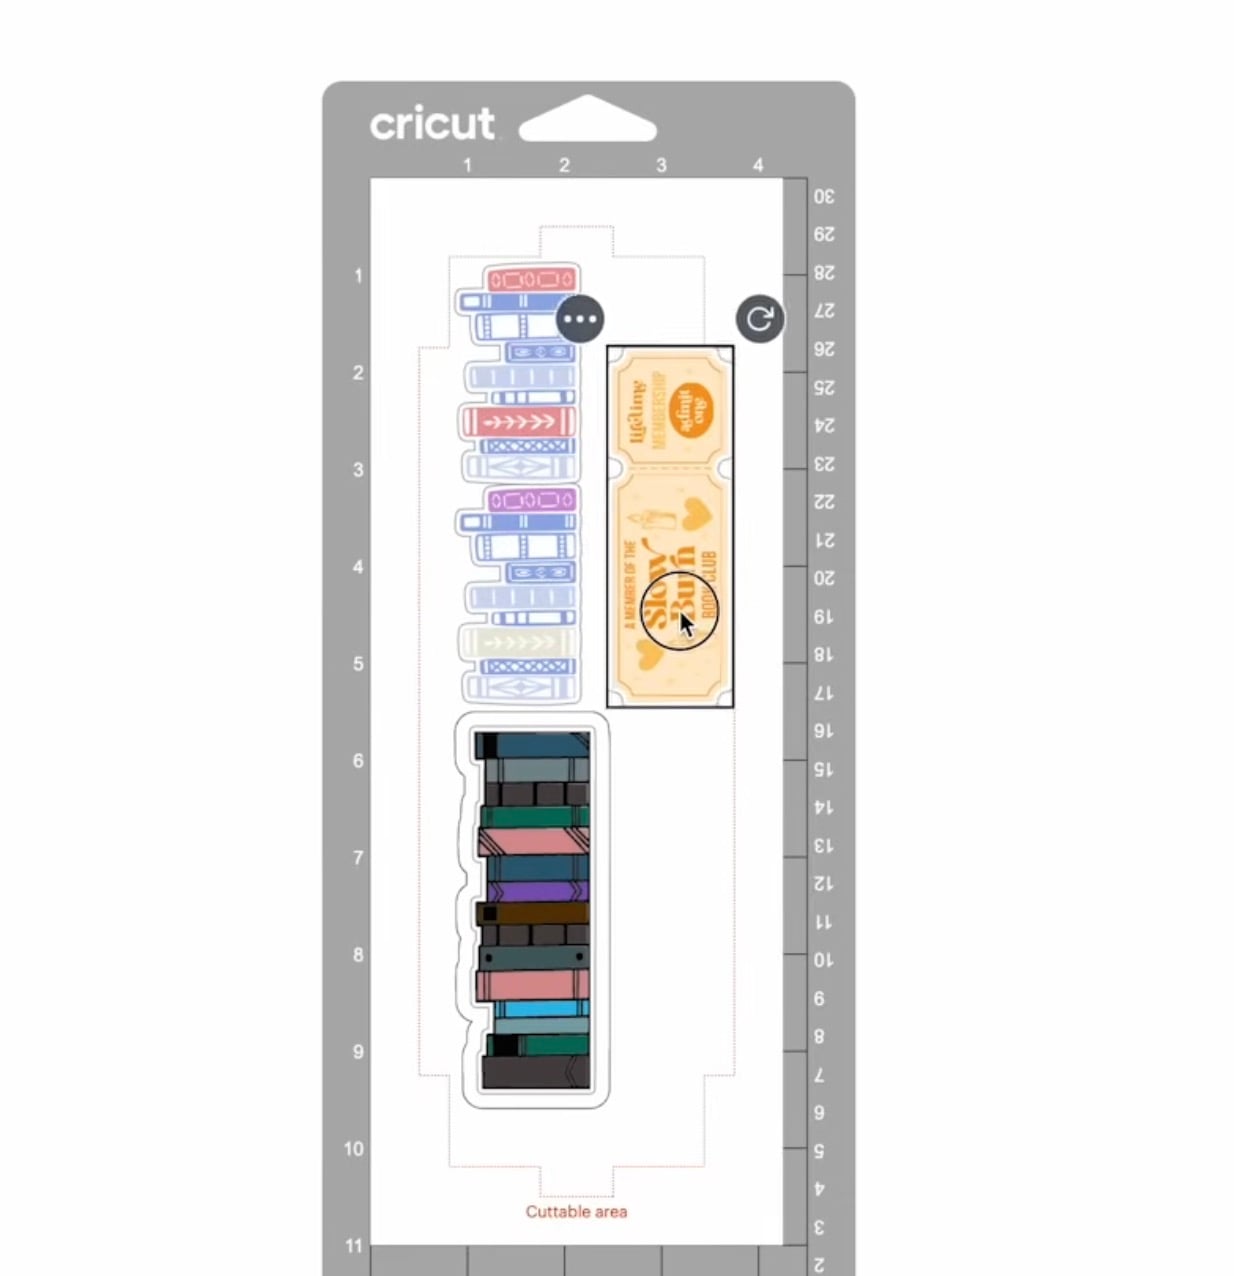
Make sure, for each mat, the Material Size is set to 8.5 by 11 inches
Step 3: Send the Design to the Printer
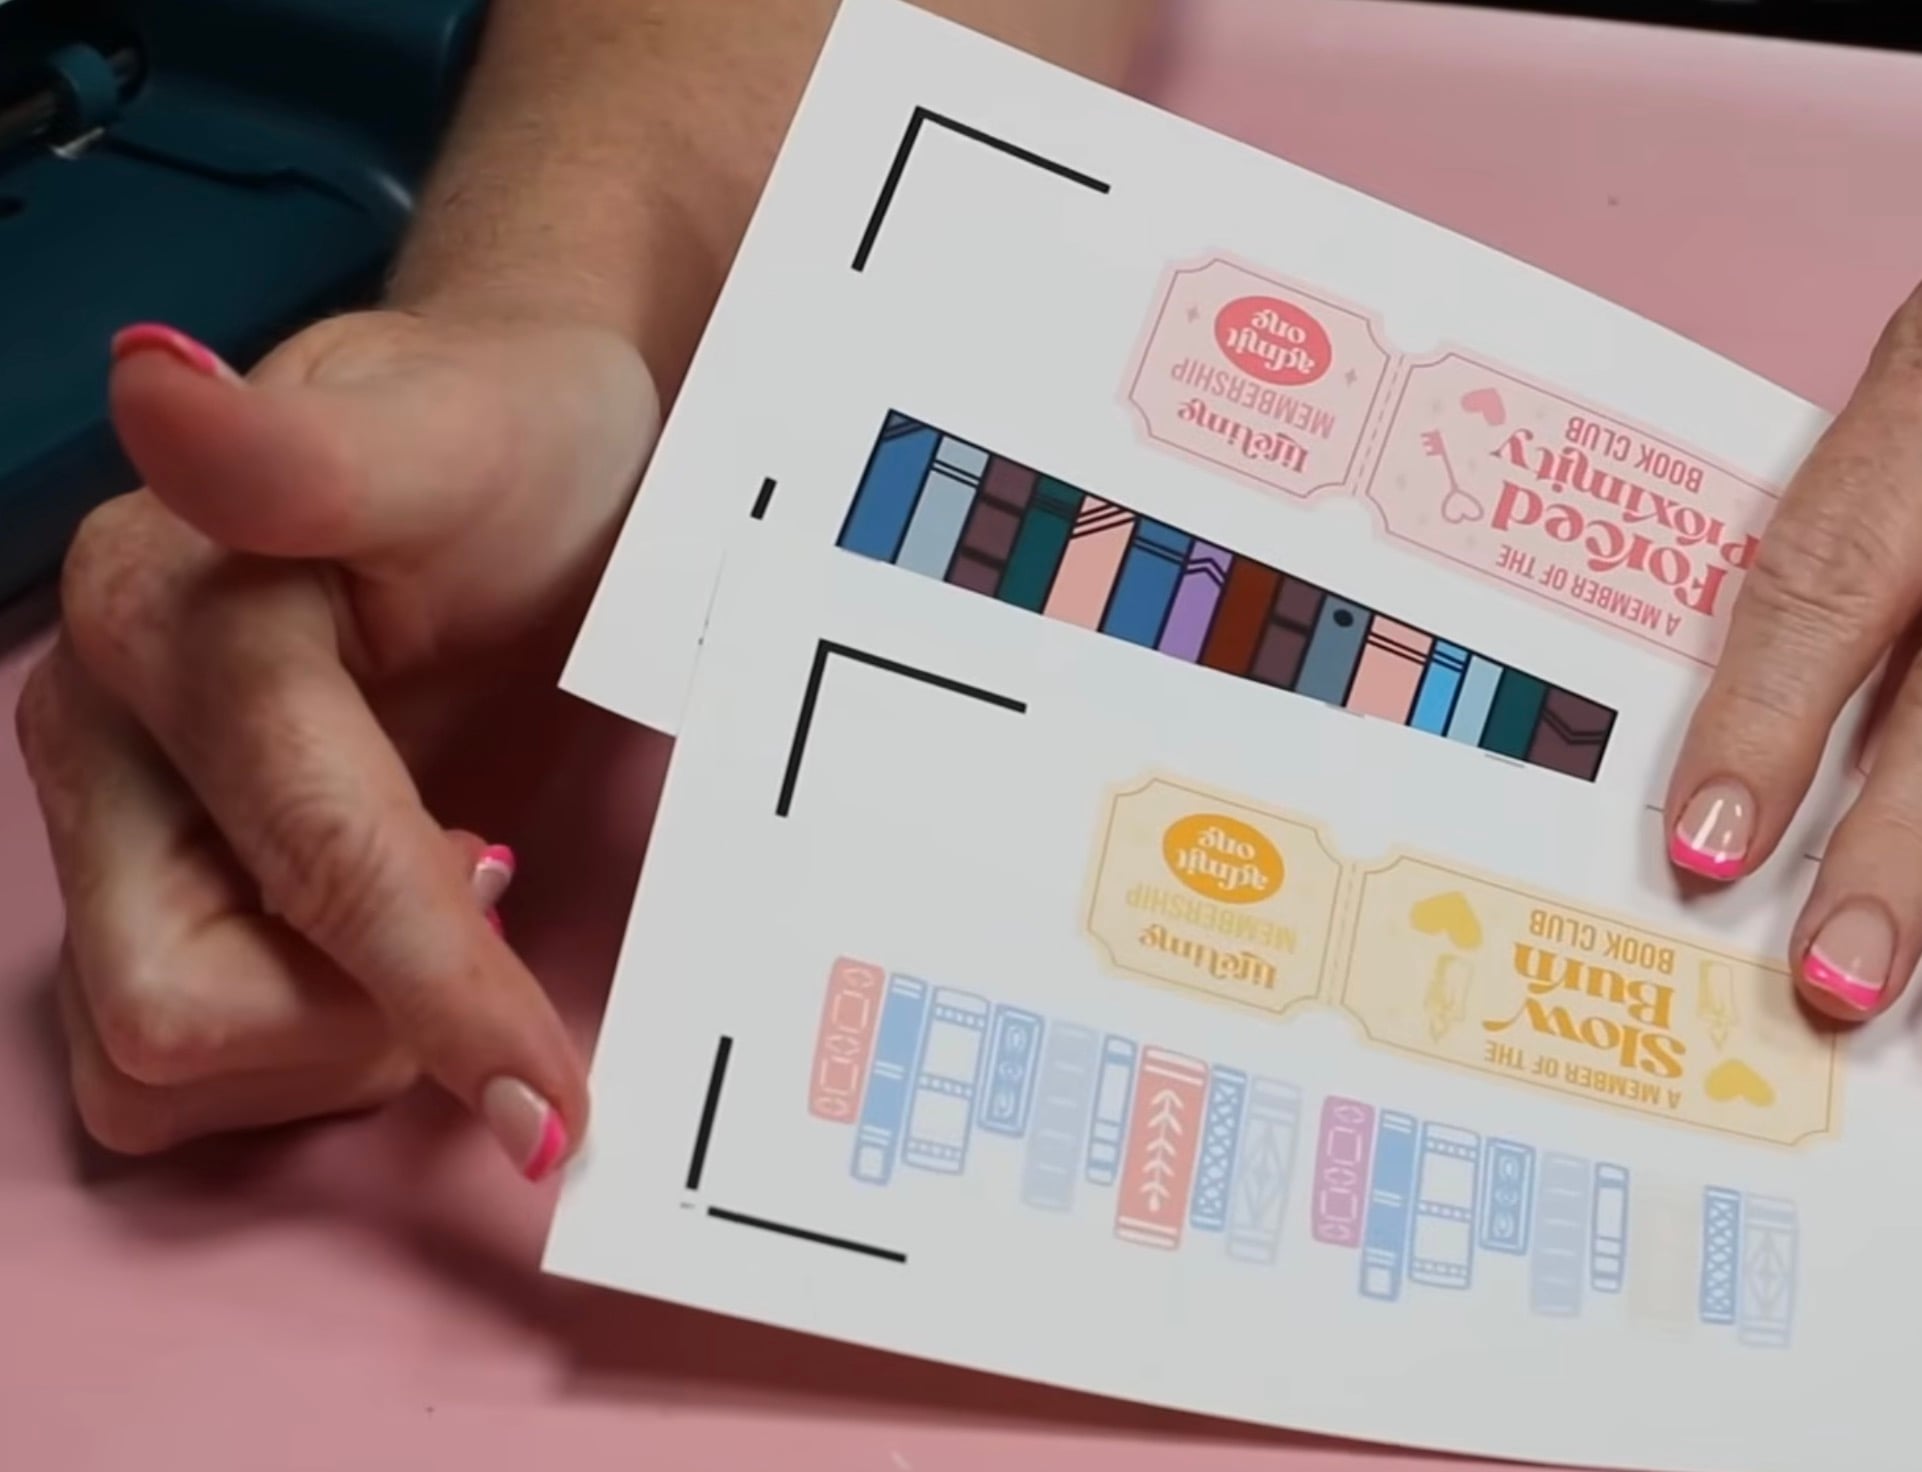
Click Continue and Send to Printer. My bundle came with 8.5 by 11 Printable Vinyl, so I am going to use that, and it is going to print both mats on one sheet. It will print with a dotted line down the middle where you'll cut the print apart. There are 4 sensor marks in the corners of each print.
Click Next, and select the printer you want to print to. All of these designs have a white outline, so I am going to turn Bleed off.
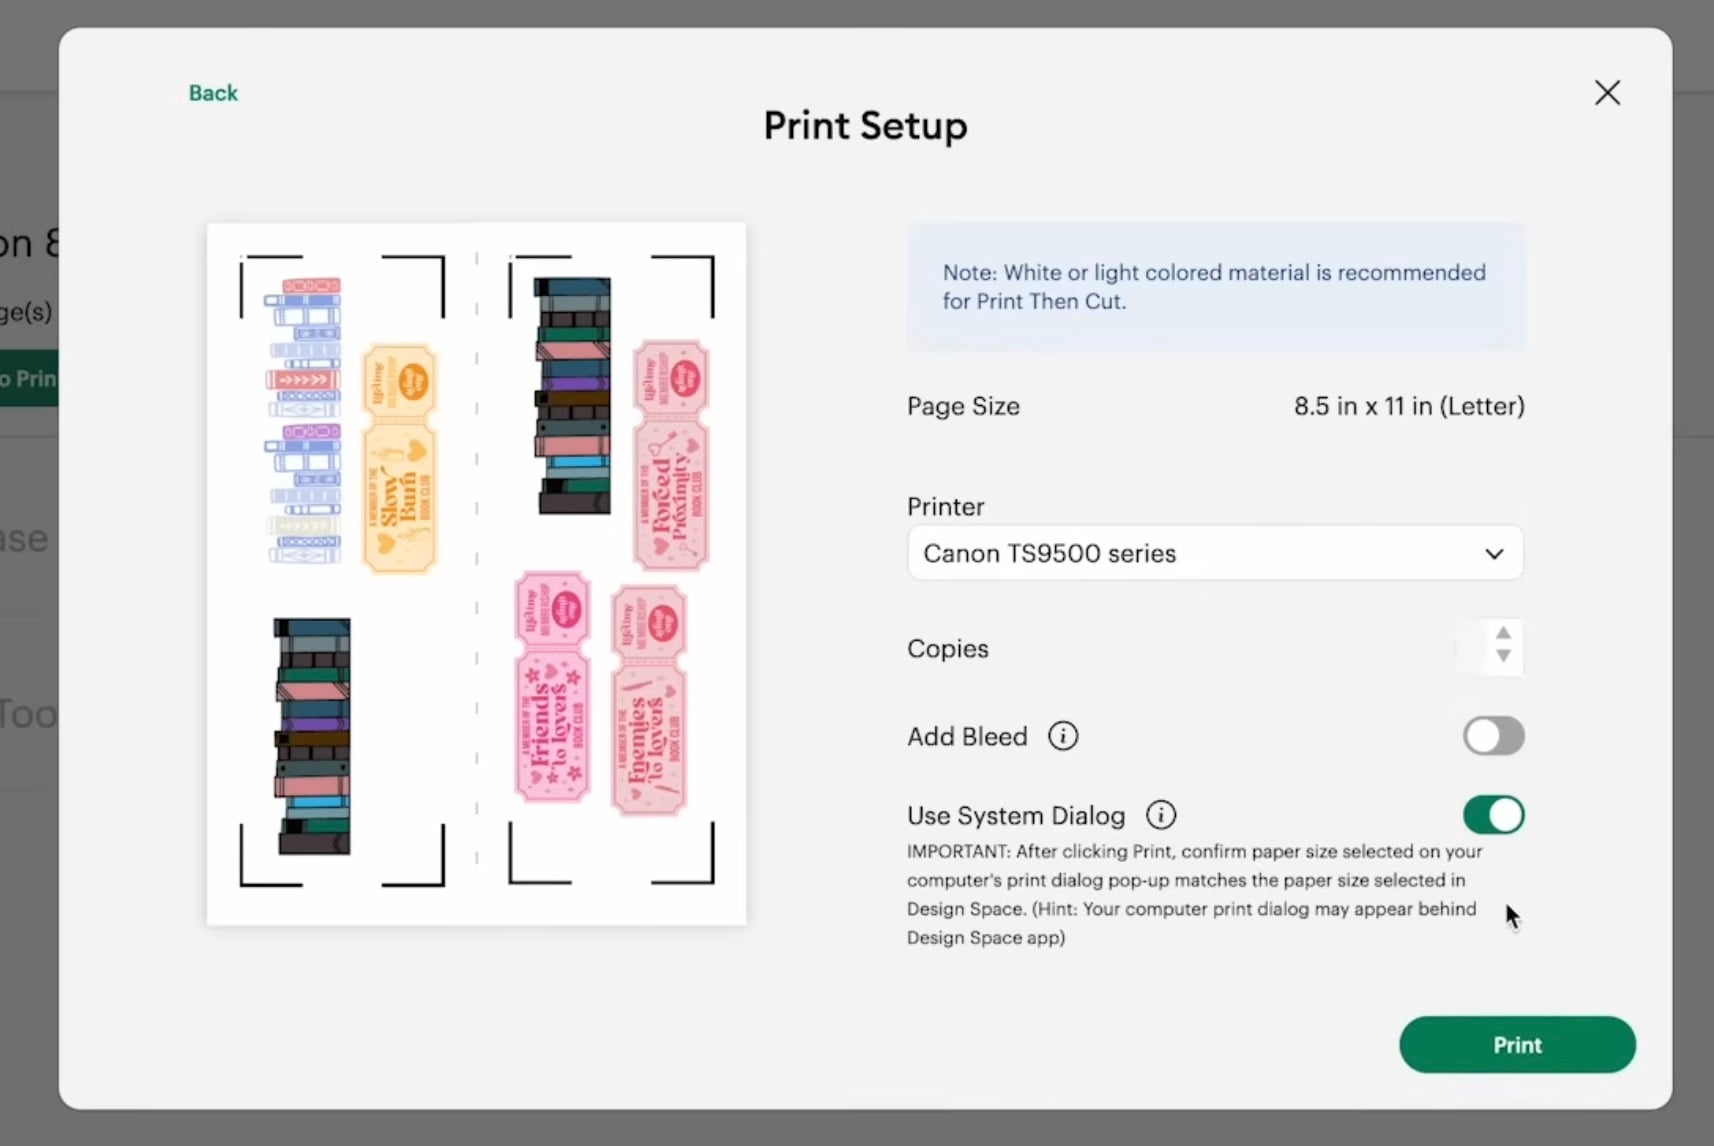
I always like to use the System Dialog, so I toggle that on and then click Print.
If you don't see your system dialog box, try minimizing Design Space. Mine always pops up behind the Design Space window.
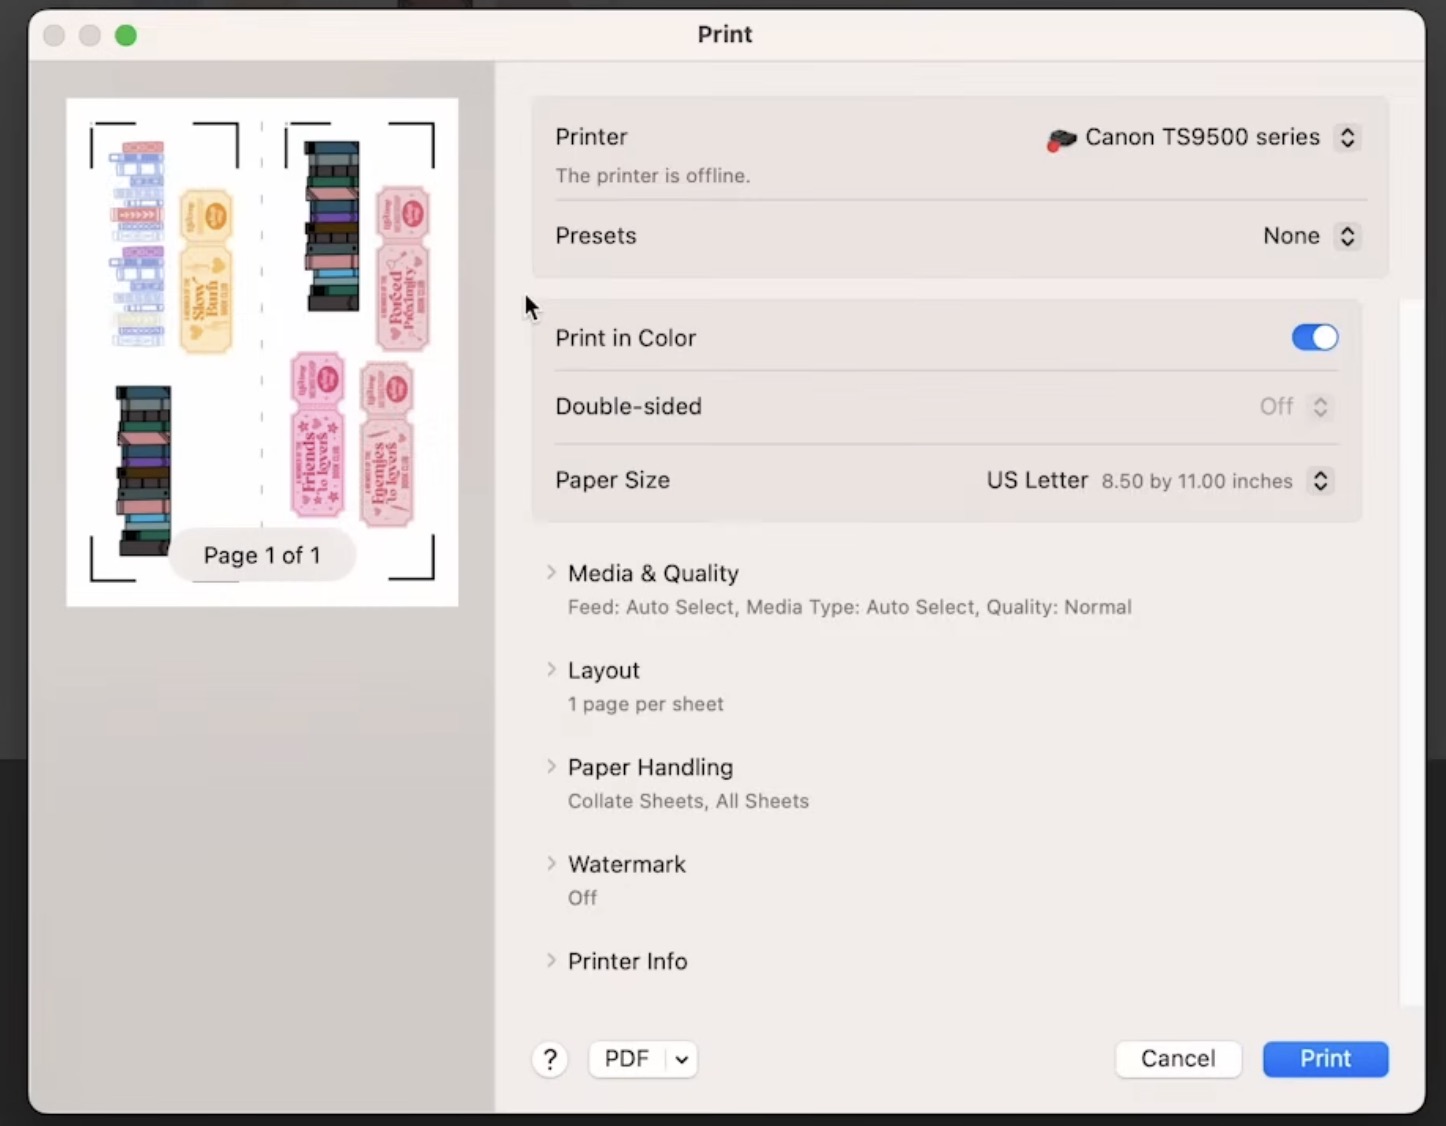
I always choose Best Quality for my print setting and then click Print.
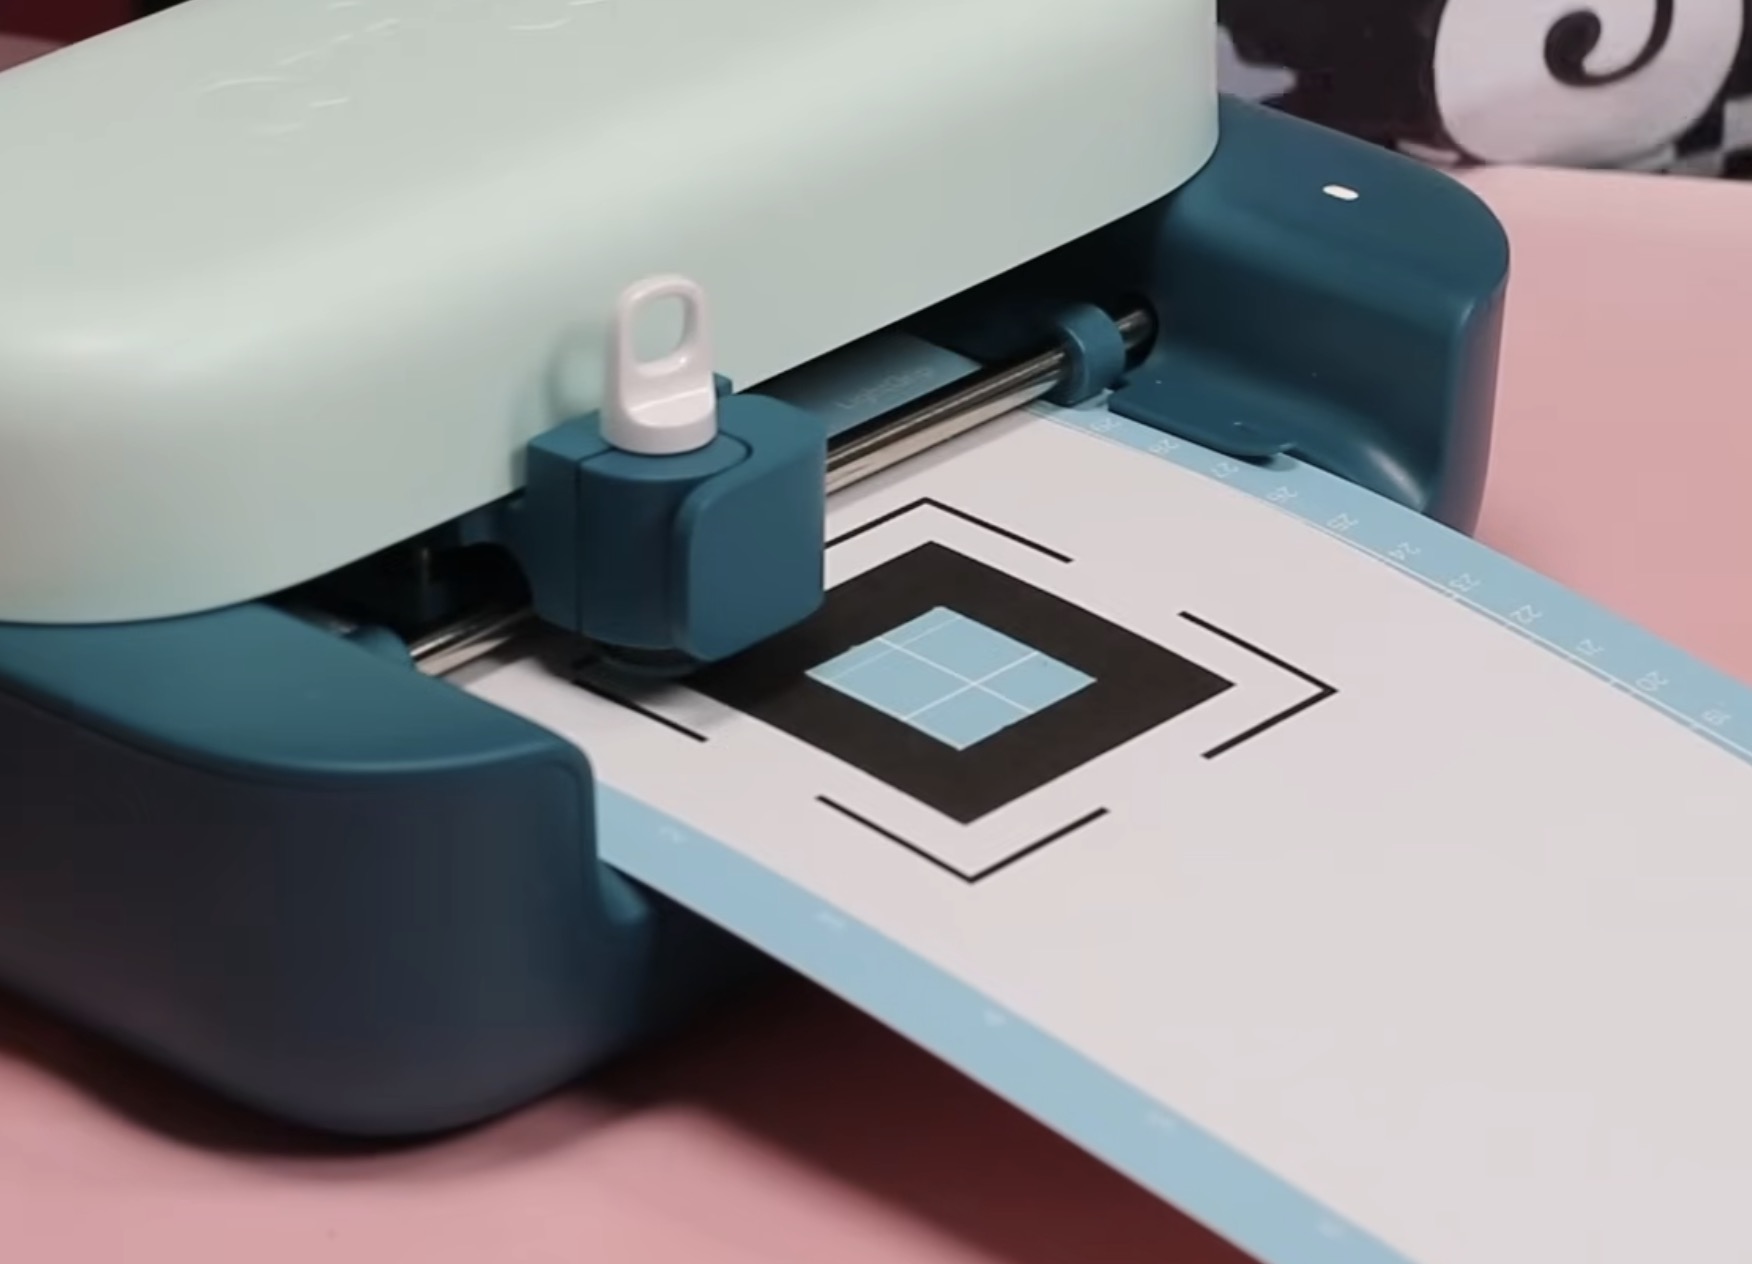
Step 4: Prepare Print for Cutting
My print looks really good. The page has the middle cut line, and so you know which mat to load first, there is a 1 in the upper left corner of the first mat and a 2 in the upper corner of the second mat.
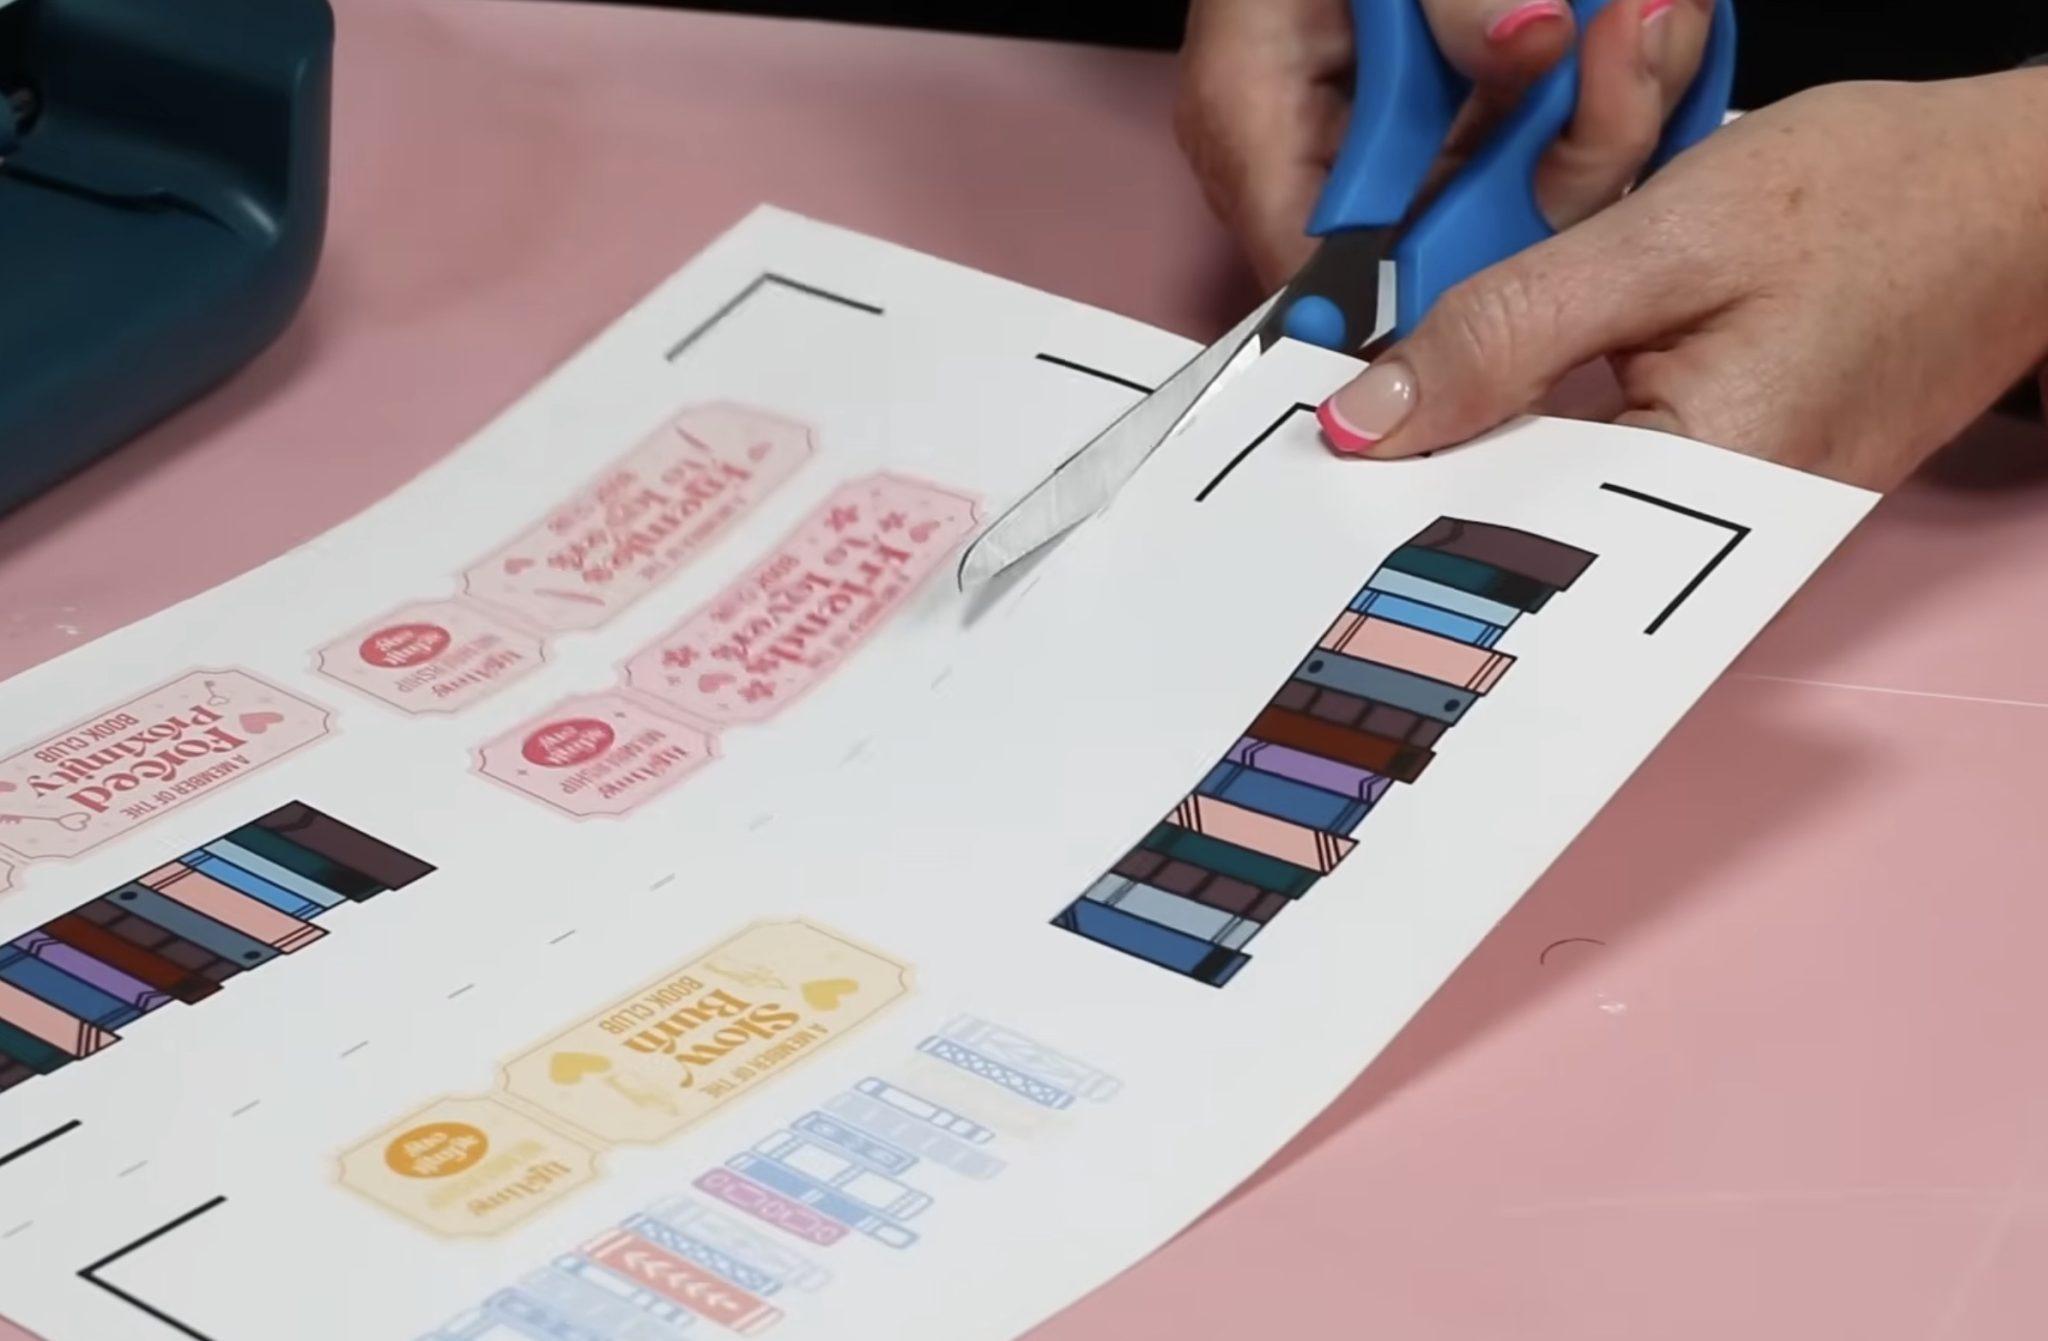
Cut the print apart and place the page with the number 1 on the mat with the 1 in the upper left-hand corner.
I chose the setting for Printable Vinyl White with the green liner, and I have the fine-point blade loaded into the machine.
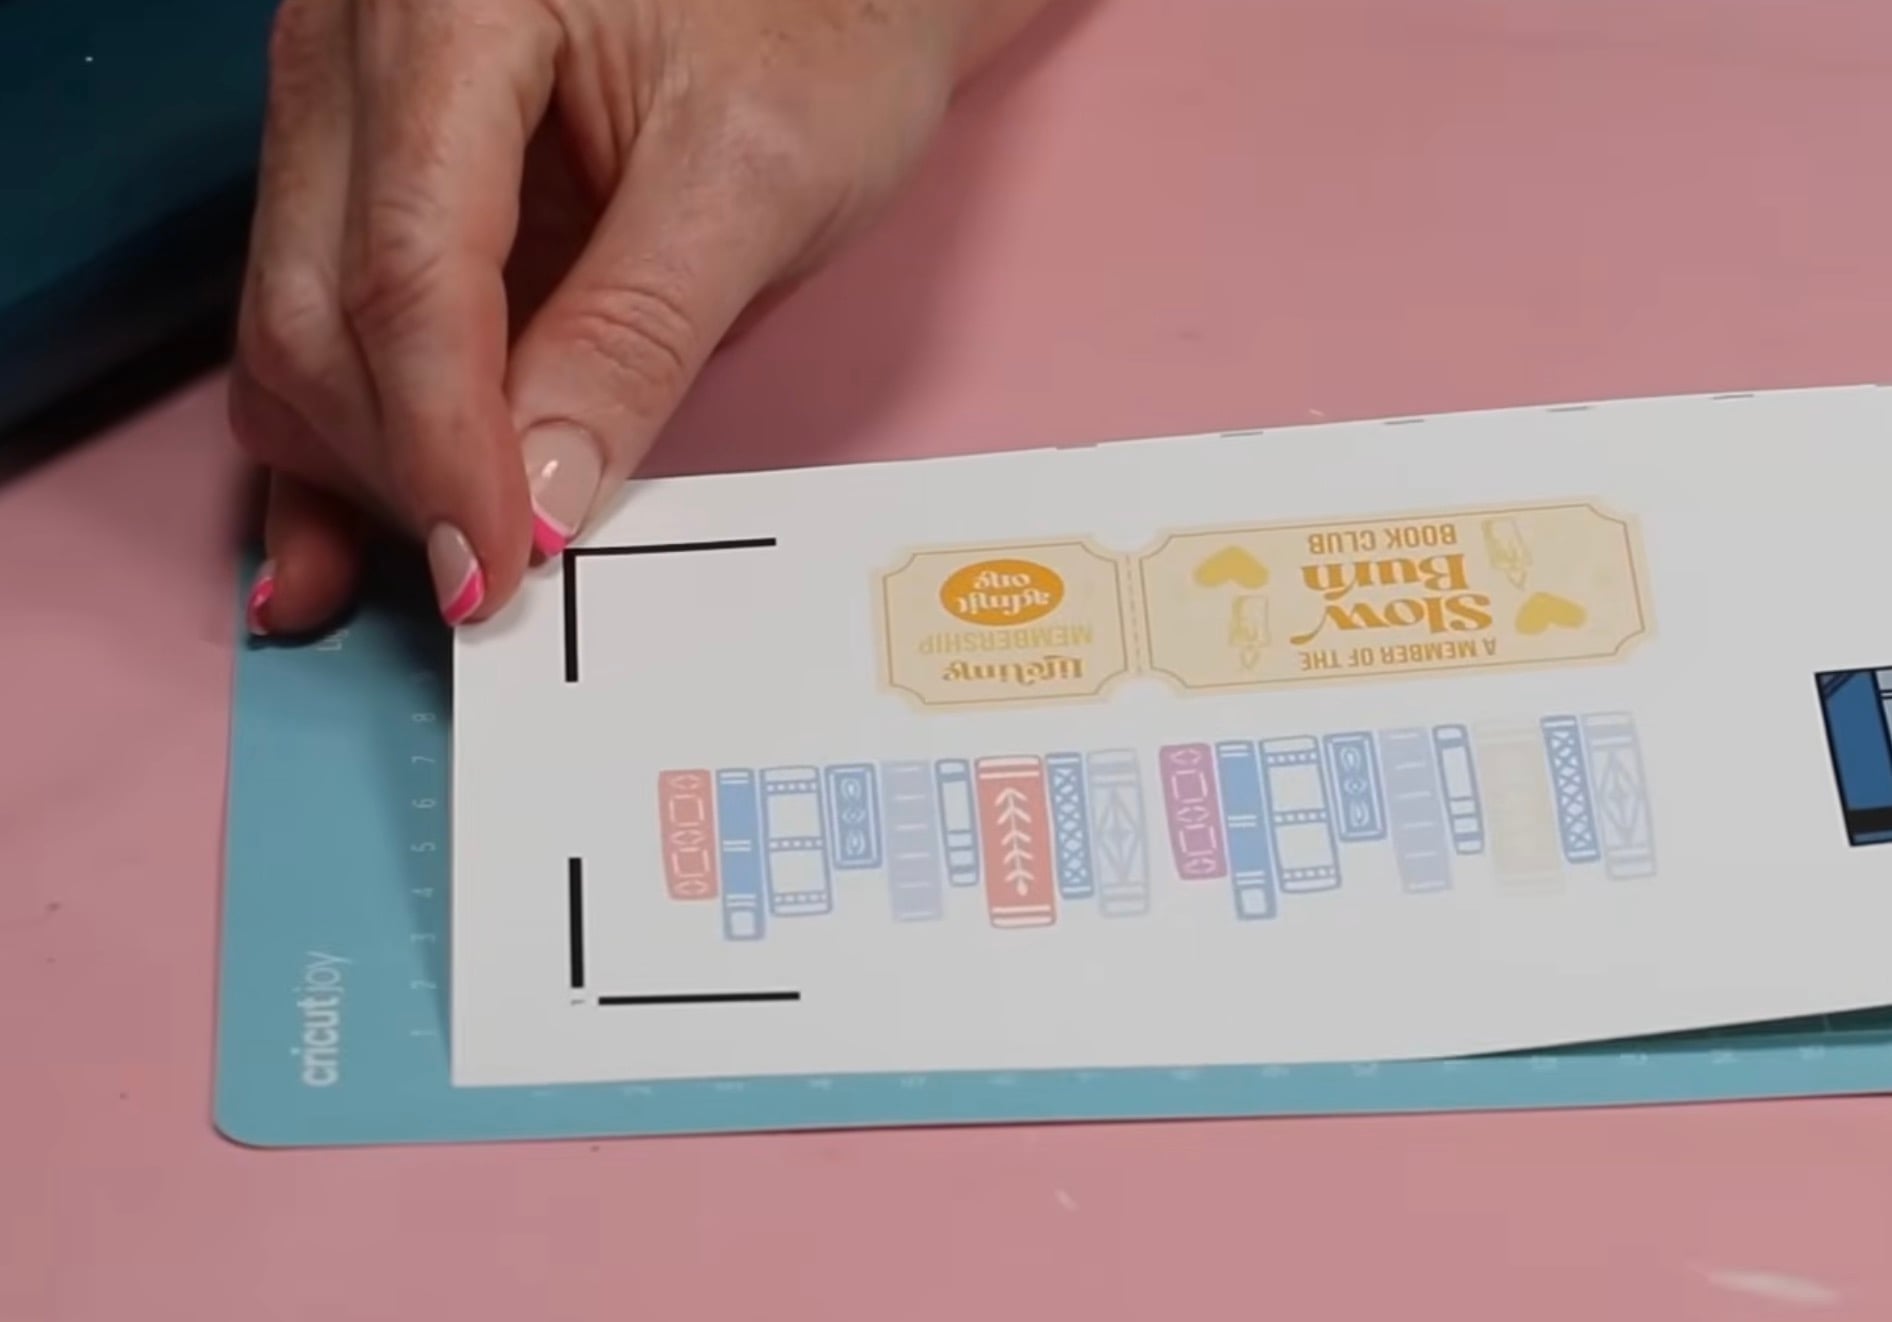
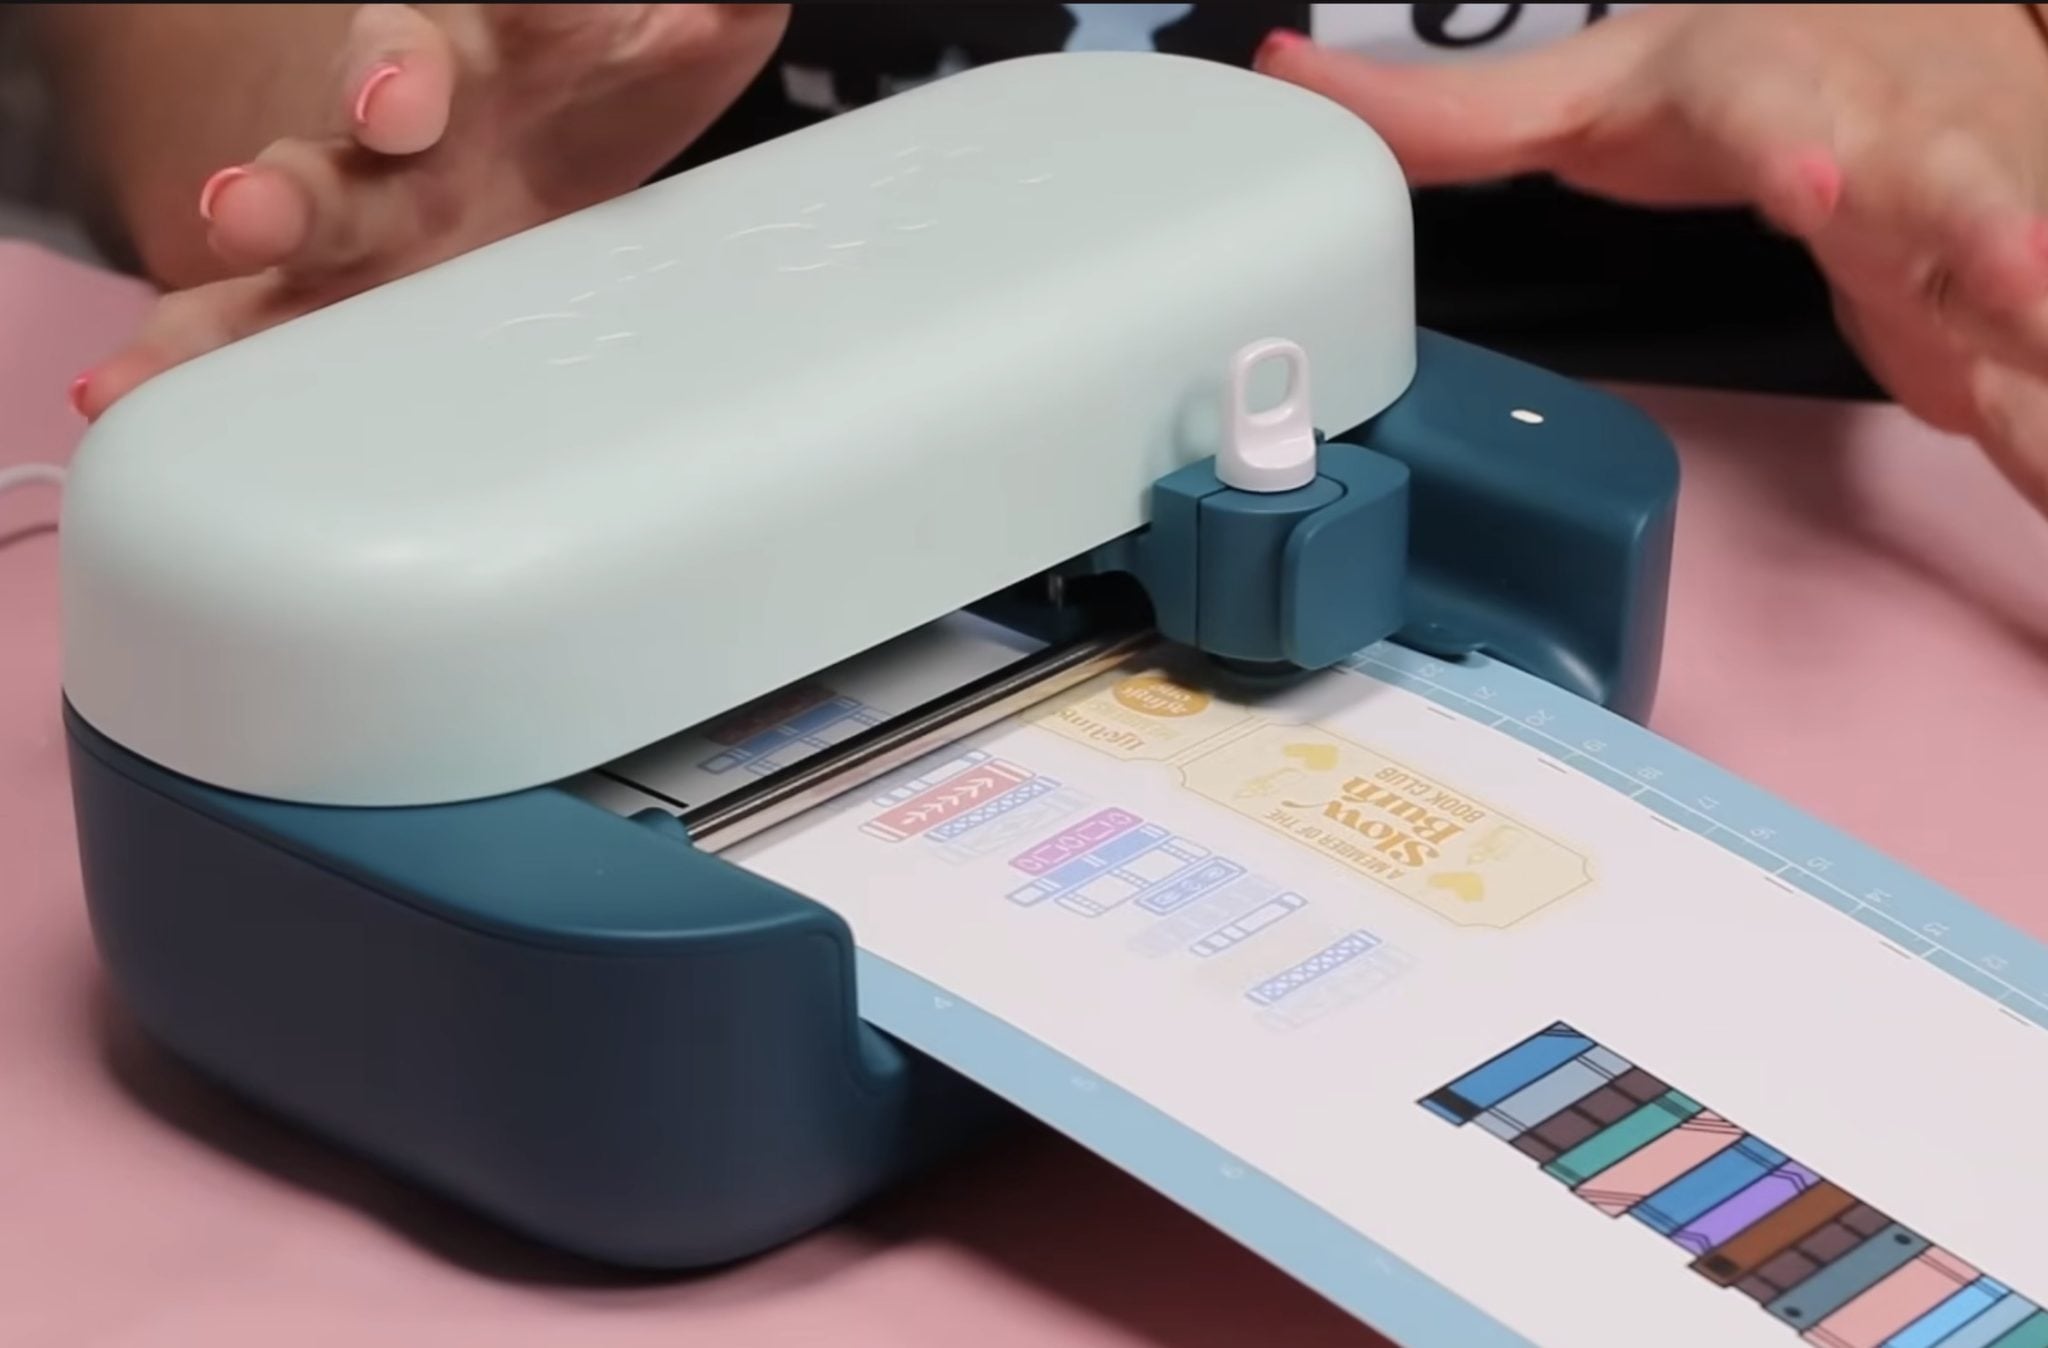
Load the mat under the guides, and it will do the same Load and Go process.
First, the sensor will scan the registration marks, and then it will cut out the stickers.
When the first sheet is done, unload the mat, remove the print, and add the second print. Repeat the process to cut out the stickers.
When they're done, unload the mat and let's look at our stickers.
What is the Difference Between Kiss Cut and Die Cut?
I tested both the Die Cut and Kiss Cut options, so let's look at how they're different.
The Kiss Cut option cuts around the offset and cuts through the vinyl but not the backing.
This is a great option if you're creating sticker sheets for yourself or to gift/sell. This is not a good option if you want to sell individual stickers.
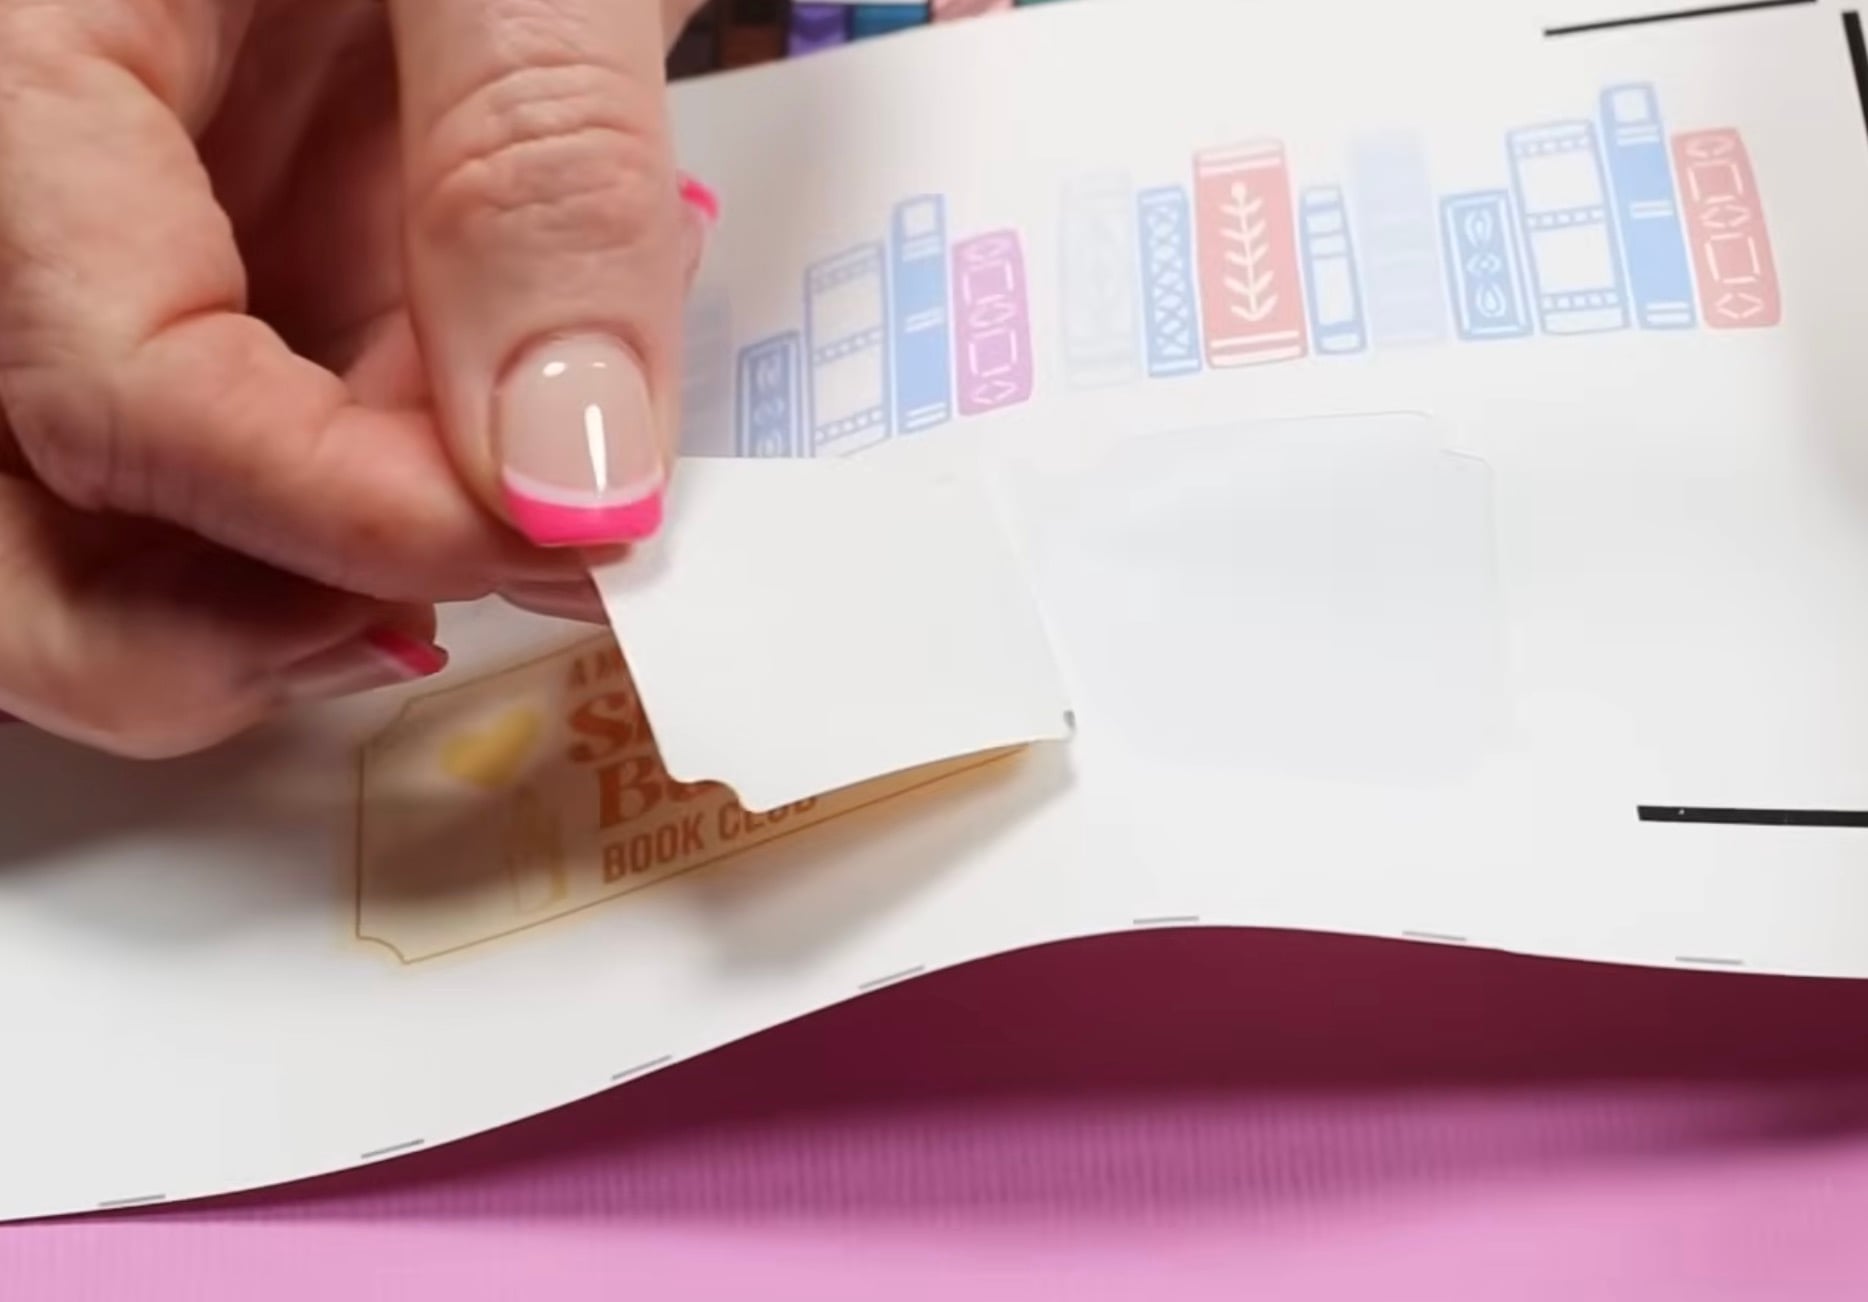
The Die Cut option will do a Kiss Cut around the offset, and then it will do another cut further out, following the same path. This cut will go through the vinyl and through the backer.
With the Die Cut, you can remove the vinyl between the Kiss Cut line and the edge. This will make it easy to remove the sticker itself, and it looks very professional.
The Die Cut option is what I would select if I were selling individual stickers.
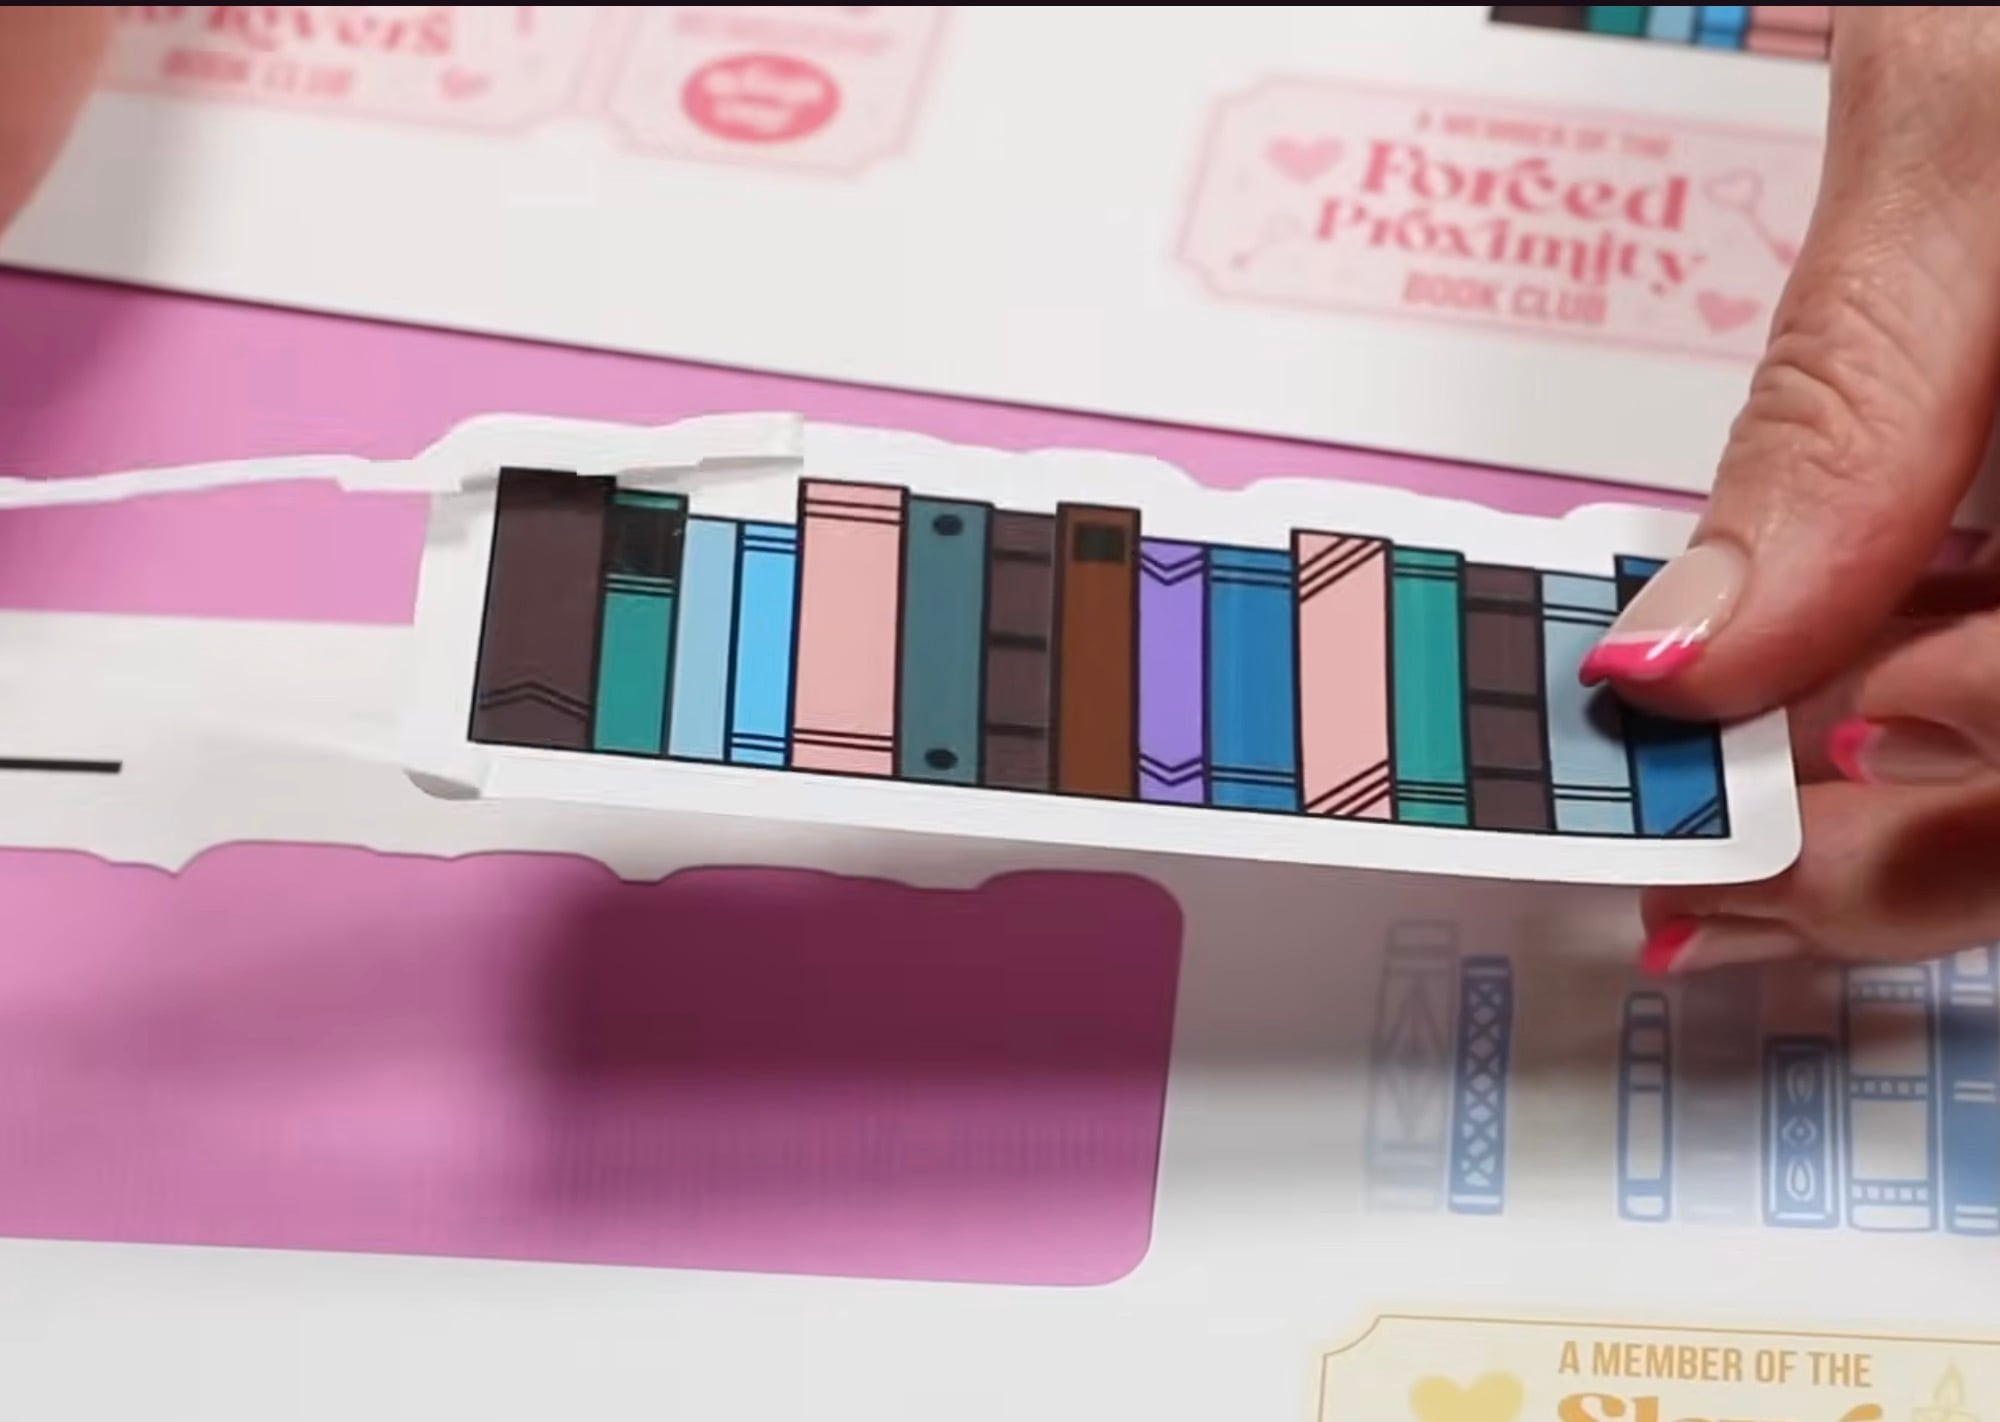
Close Up of Finished Print Then Cut Bookmarks
These stickers look really good, and adding them to the acrylic bookmarks worked really well. This could be a fun project to do at a book club or to gift.
There is more wasted material when doing Print Then Cut with the Cricut Joy 2. I don't know if there is any way around this unless Cricut changes its Print Then Cut settings.

Cricut Joy 2 Pros and Cons
Now that we've made a few projects, let's look at the Pros and Cons of the Cricut Joy 2.
First, let's talk about the pros. I am a fan of the compact size. If you are limited in space or want to be able to craft on the go, you're going to love the Joy 2.
If you're brand new to Cricut, this machine is very beginner-friendly. Even if you buy the machine not in a bundle, there are materials and supplies included, so you can make multiple projects right out of the box.
I like that the tools that work with the original Joy and Joy Xtra will also work in the Joy 2.
With the addition of a scoring tool and the ability to Print Then Cut, the projects you can make expand a lot.
Another pro is the price point. I don't normally talk about pricing, but the price point of the Joy 2 and what is included is definitely a pro.
For me, the cons are all tied to the size. Because of the small size, you're restricted in the projects you can make.
You can try making larger projects, but they will involve a lot of thought and probably more time because you'll have to do them in multiple steps.
I am glad there is a Print Then Cut option, but with that, there is also wasted material, so keep that in mind as well.
Who Should Buy a Cricut Joy 2?
Every time a new Cricut machine comes out, people can feel like they need to rush out and get it. I want to talk to you about who should actually consider purchasing the Joy 2.
The Joy 2 is a great beginner machine, and it has a lot of things included so you can get making right out of the box.
There is nothing you can do with a Joy 2 that you can't do on another Cricut machine. If you own a different Cricut machine, it's unlikely you need the Joy 2.
If you want it or you need a machine that is easy to travel with and can do Print Then Cut, the Joy 2 is a great option.
I would not recommend the Joy 2 for small business owners or people who want to make larger projects regularly.
If you have the original Joy and are happy with the size, but would like the ability to Print Then Cut the Joy 2 is a great option.
If you're only interested in the new Scoring Tool, you can purchase it and use it in the original Joy. No need to buy a new machine for scoring.
Do You Need the Cricut Joy 2?
I did go out and buy the Joy 2 the day it was released because I was interested in the new abilities, and I liked the two-tone look.
Personally, I don't need the Joy 2 for crafting. I have other Cricut machines that can do what it does, but my job is to review machines, and this one was different enough to make a full review beneficial.
If you're worried about the open design, you're not alone. I'm worried about dust and dog hair, but Cricut has stated that they tested the machine over time, and it is not an issue. I'll be keeping an eye on it and if it causes me any issues.
I did not list Load and Go as a pro or a con above because I do not see it as either. With time, it's something I will get used to, and I won't be surprised if it becomes the standard moving forward.
I really liked the new Print Then Cut calibration, and I hope it's something that we see with other machines soon.
I hope I've answered any questions you have about the Cricut Joy 2. If you have any additional questions, leave them in the comments, and I'll be happy to answer them for you.