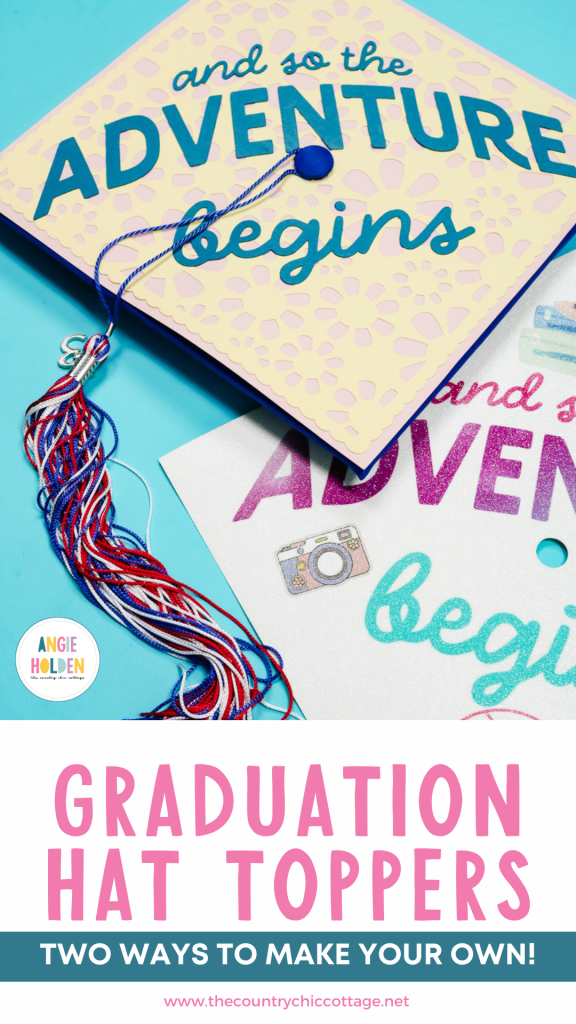
Are you ready to learn how to create custom graduation cap toppers? This is a great way to show your personality without having to alter your actual graduation hat.
I'll show you how to do this two different ways. We'll use regular cardstock for one example and sublimation for the other. No matter what type of crafter you are, you can customize your graduation cap.
I've been looking forward to making this tutorial for a while. I've made several custom graduation caps over the years, and it feels like a lot of people make the process really complicated.
You can watch me make both of these graduation cap toppers by pressing play on the video below.
How to Make Custom Graduation Cap Toppers
My process for creating custom graduation cap toppers is to create the topper on a sheet of cardstock that you then add to the graduation cap.
I believe graduation caps are specific to the graduate. I am including the design I used, but I will also show you the steps for creating your own custom design.
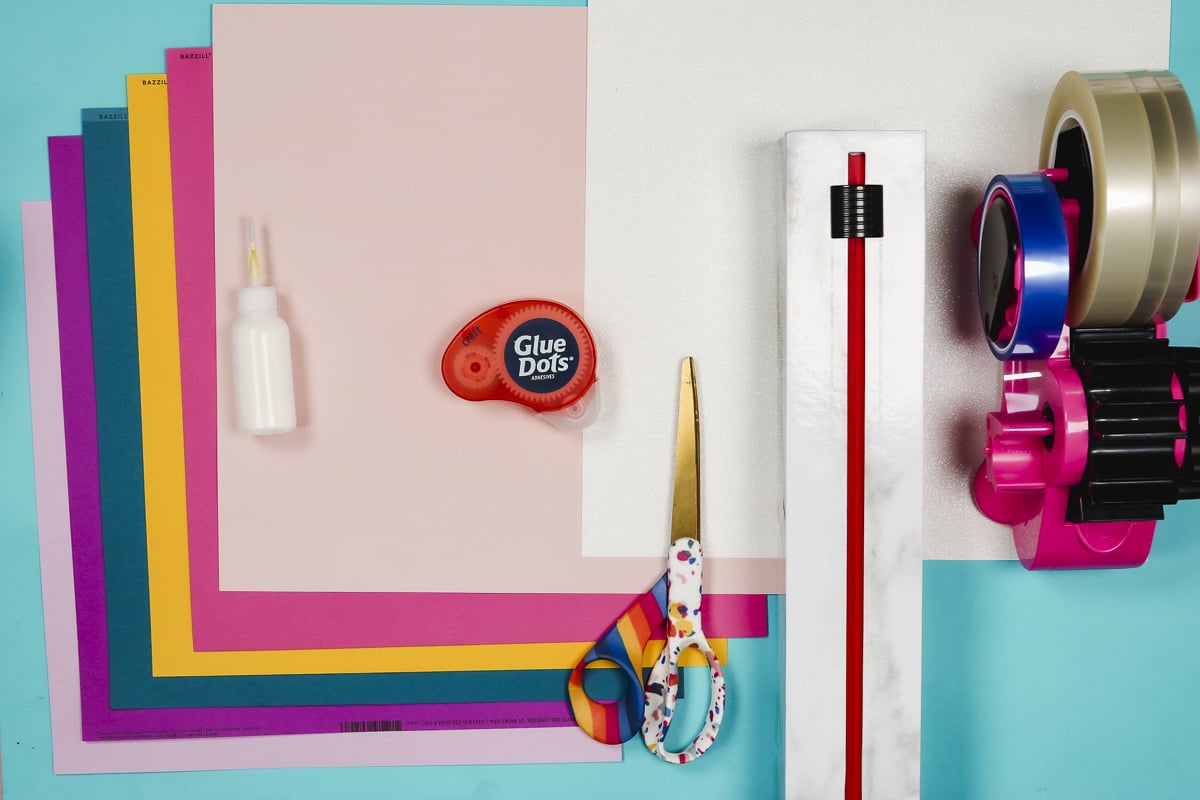
Supplies Used
The supplies you need will depend on the type of graduation cap topper you're making. You do not need all of these supplies for one topper.
- Graduation Cap Template and Printable Files
- Grand Holiday Font
- Cardstock
- Cricut Machine
- Bearly Arts Glue
- Glue Dots
- Scissors
- Glitter Cardstock (for sublimation)
- Brother Sublimation Printer
- Sublimation Paper
- Heat Resistant Tape
- Heat Resistant Gloves
- Heat Resistant Mat
- Tape Dispenser
- Protective Paper
- Cricut EasyPress
How to Make a Cardstock Graduation Hat Topper
First, let's make the cardstock version. The instructions for the sublimation version are below.
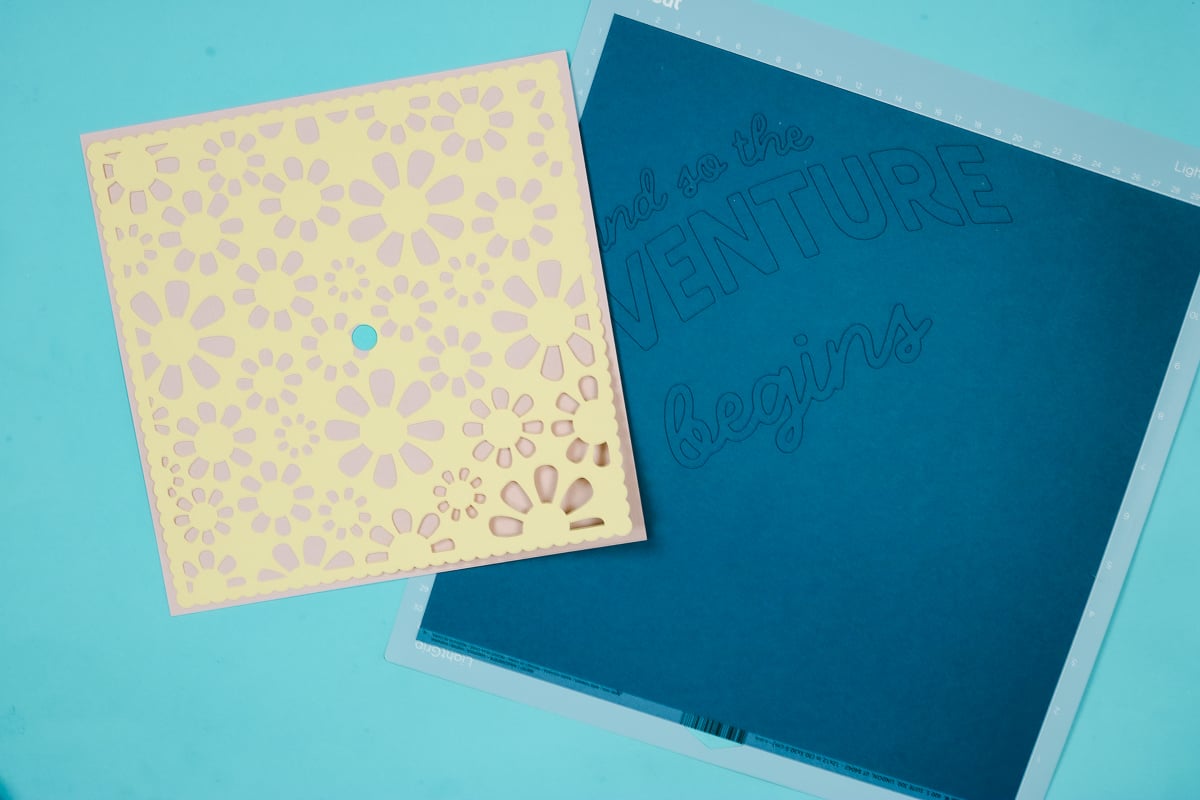
Step 1. Upload Graduation Cap Topper Template
For both the sublimation graduation cap topper and the cardstock version, we're going to start in Cricut Design Space.
Download the file here and then upload the SVG version into Design Space.
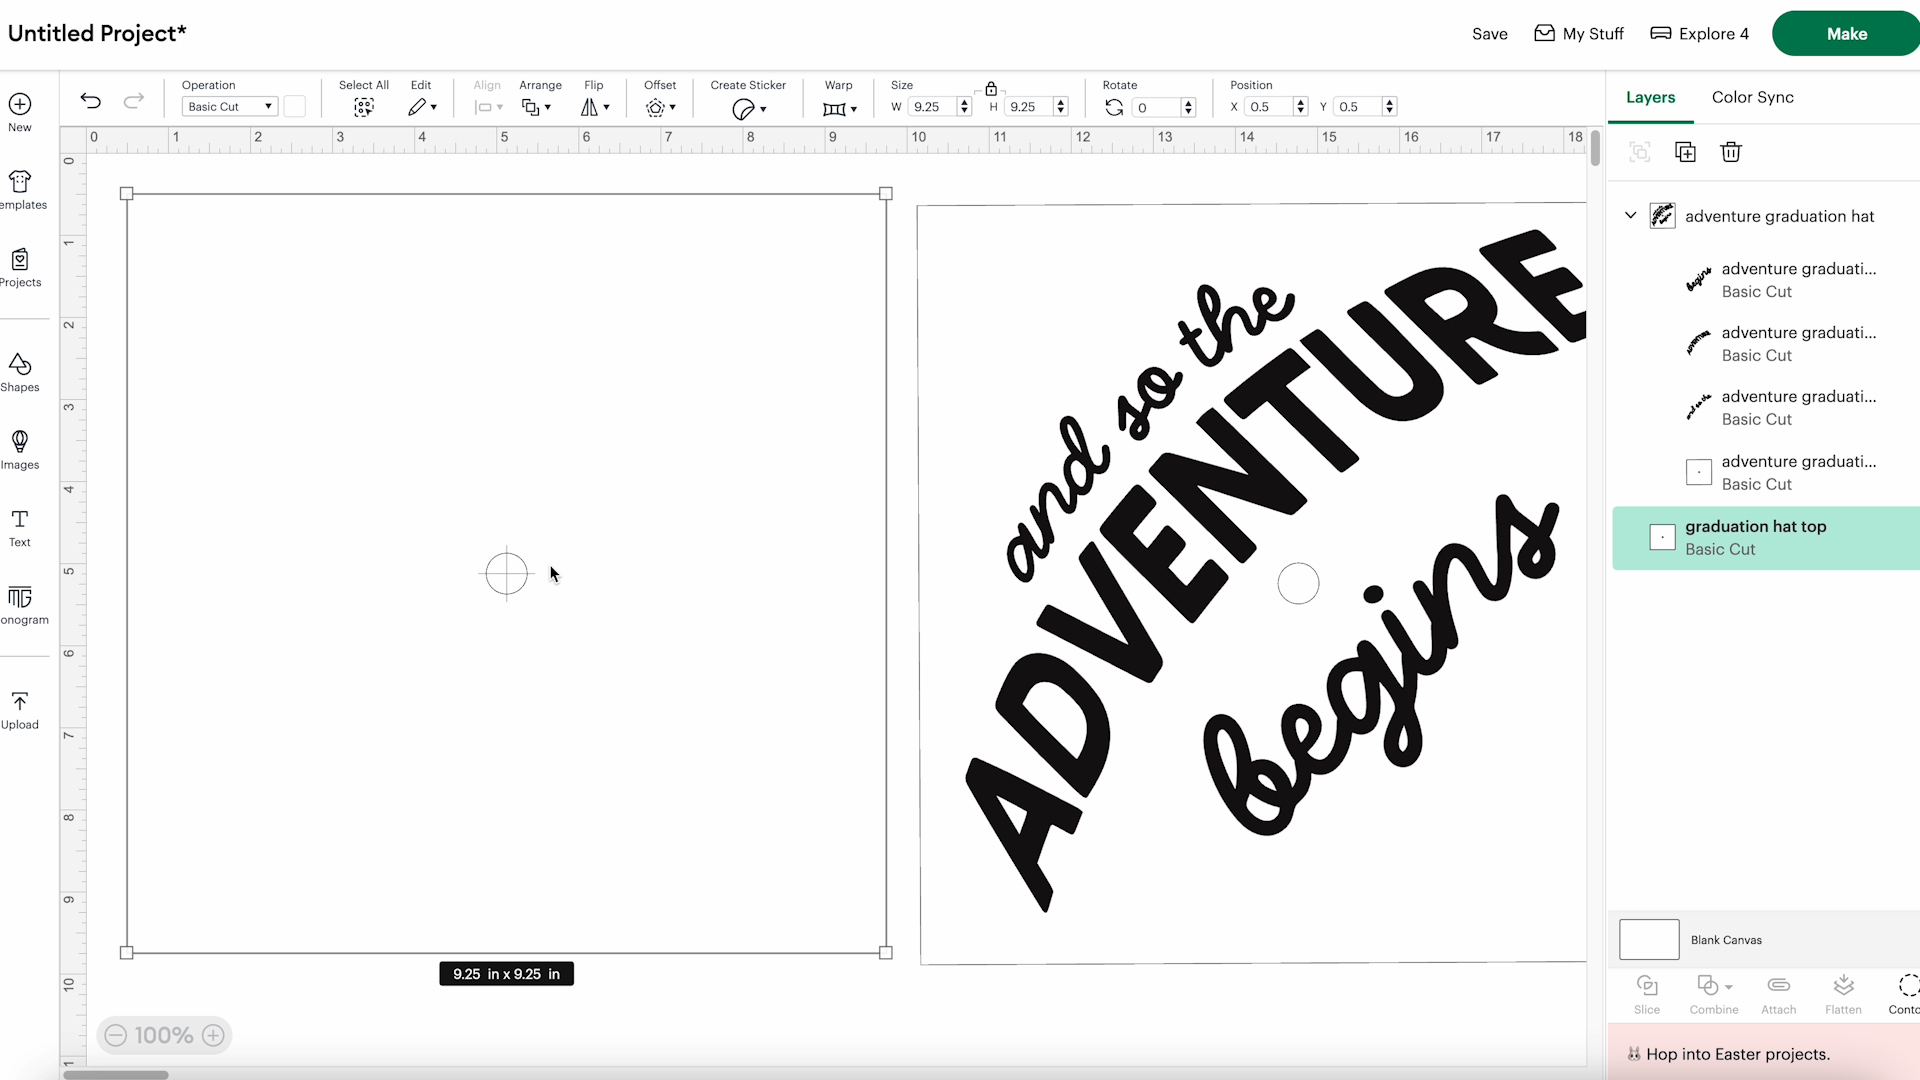
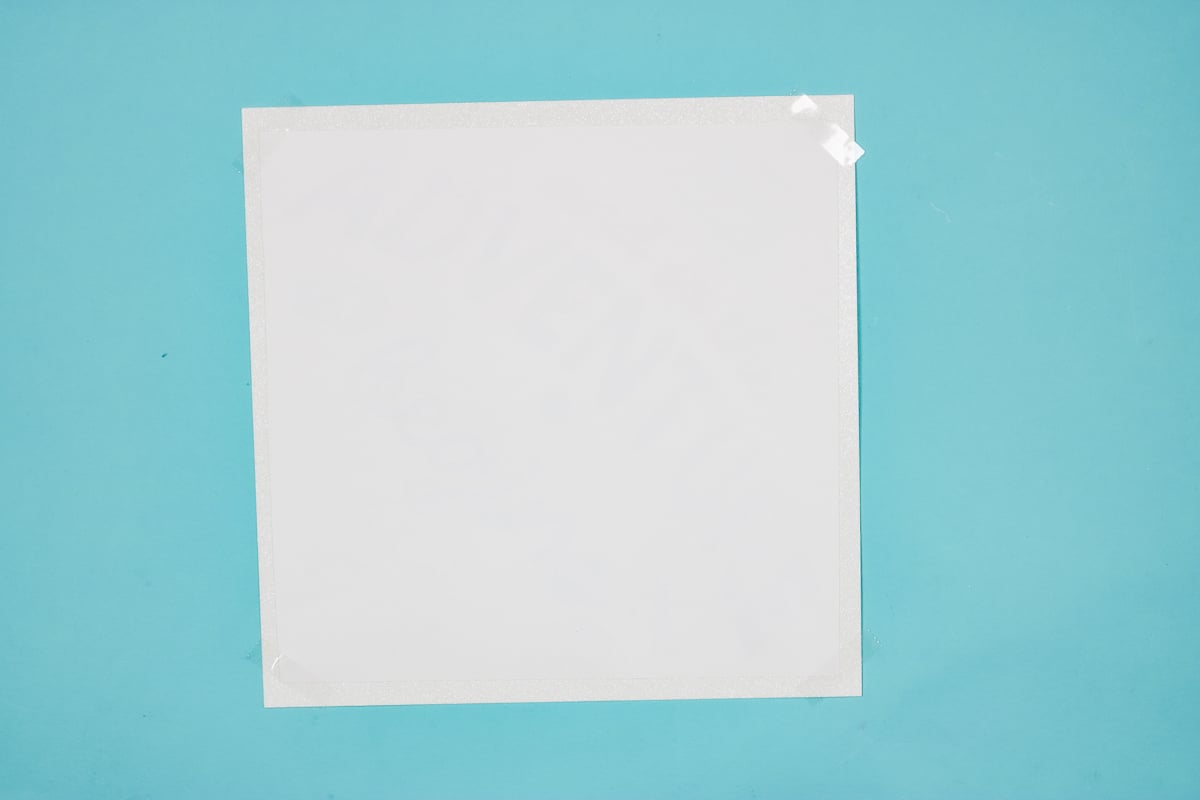
Add the design to the canvas and make sure the dimensions match your graduation cap. My cap measures 9.25 inches by 9.25 inches.
I added a hole to the middle of the square, and that is for the button on the top of the grad cap.
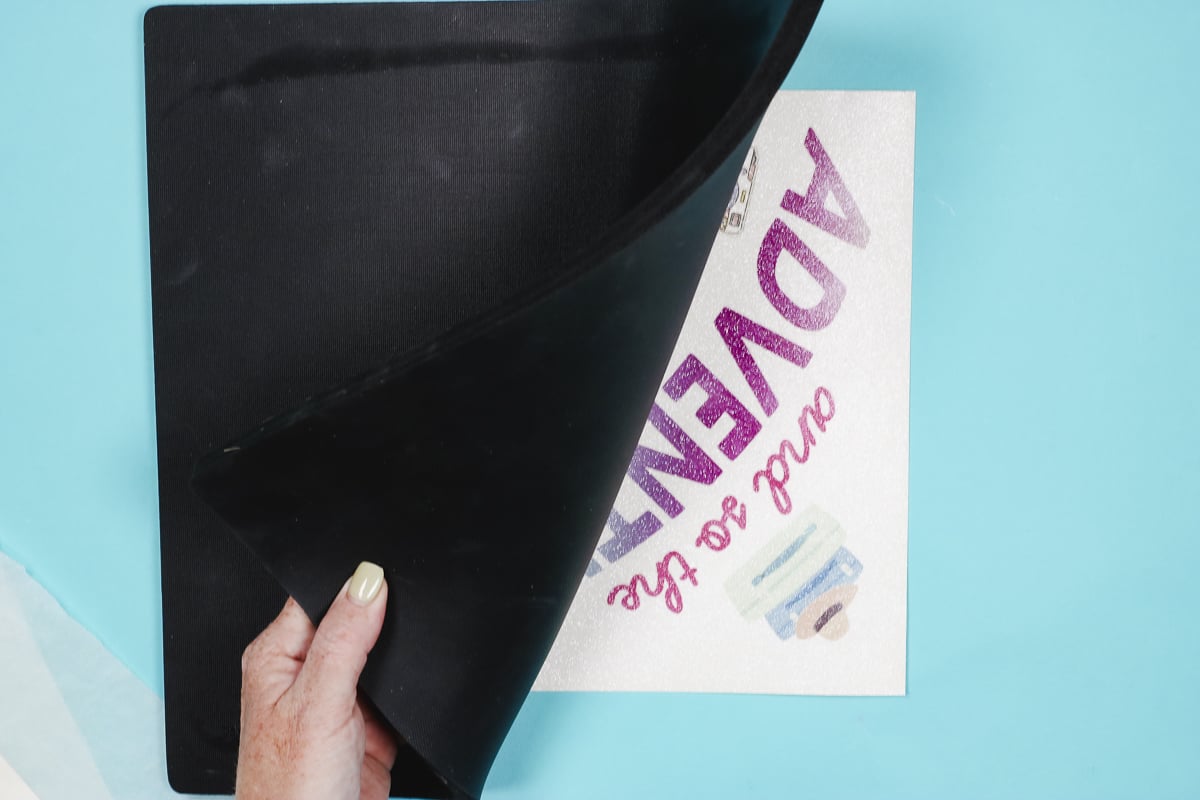
NOTE: If you are doing the sublimation version, you only need to cut the blank design out of glitter cardstock. The rest will be done in Canva.
Step 2. Design Graduation Hat Topper (for paper version)
Now that we have the base of the graduation cap topper set up, we can work on the cardstock cap design.
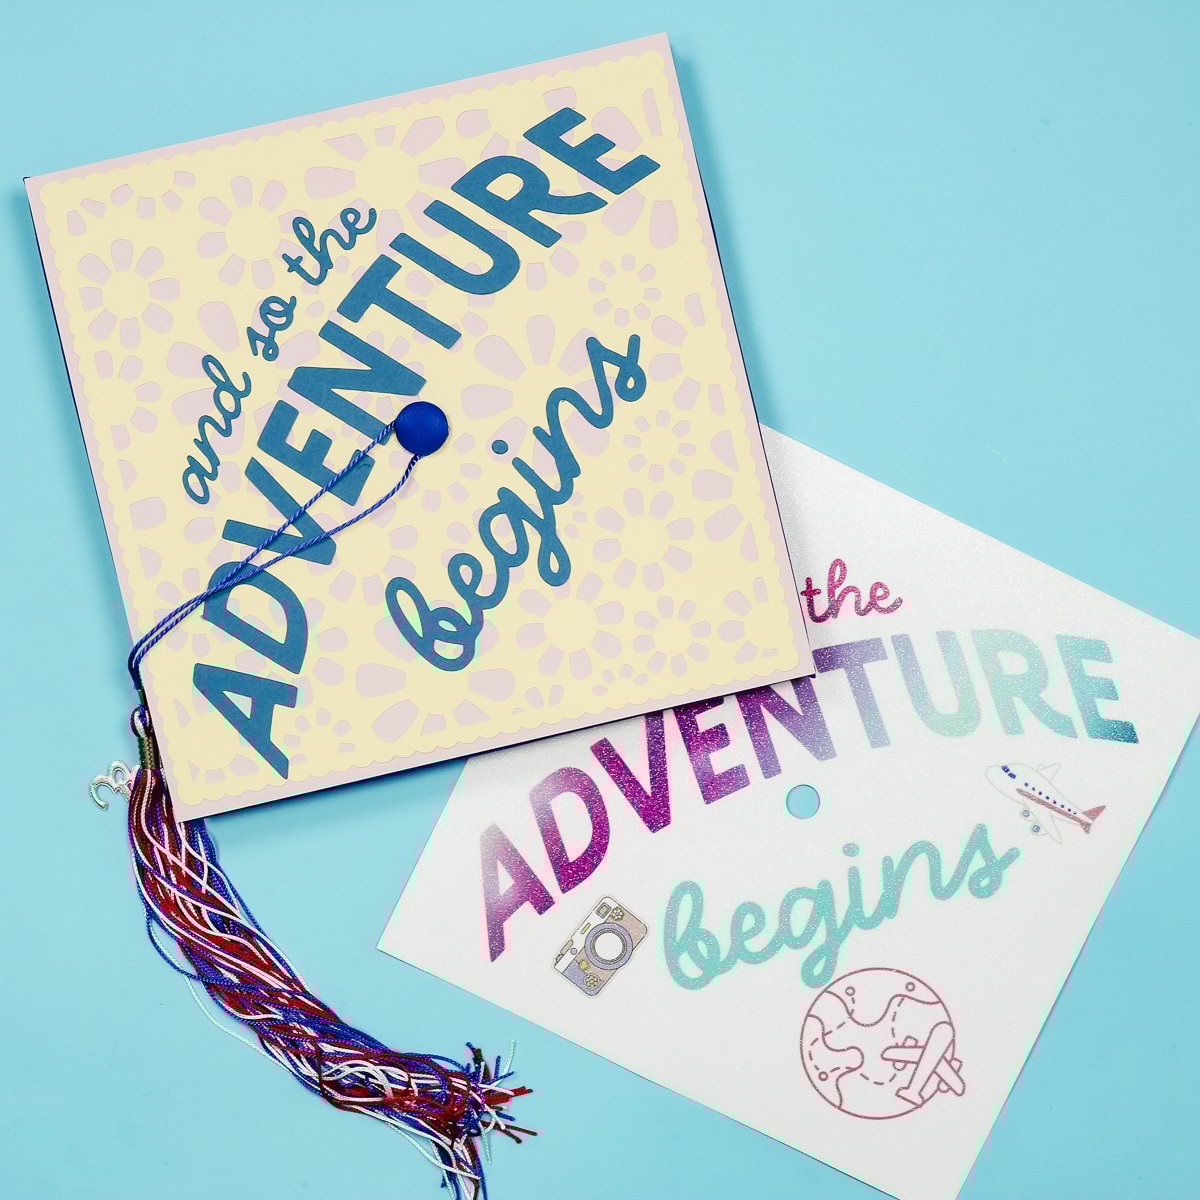
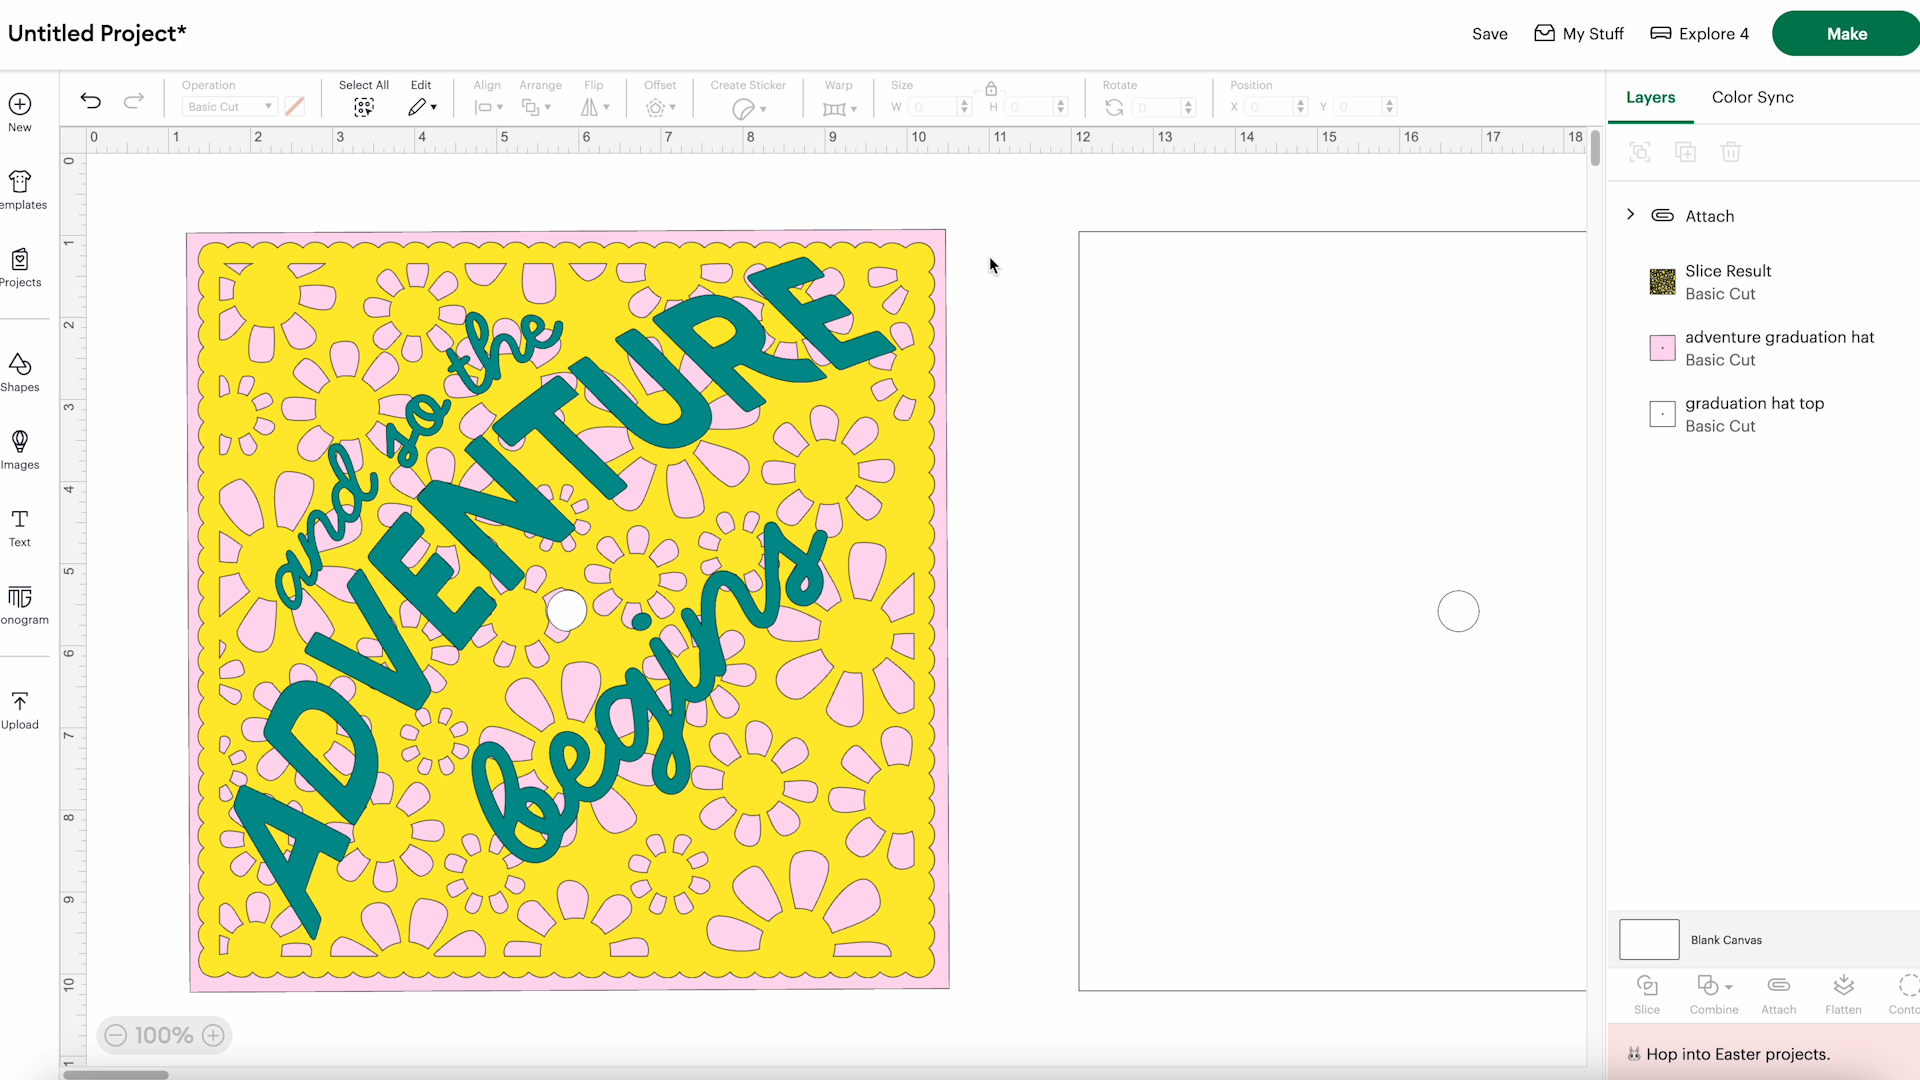
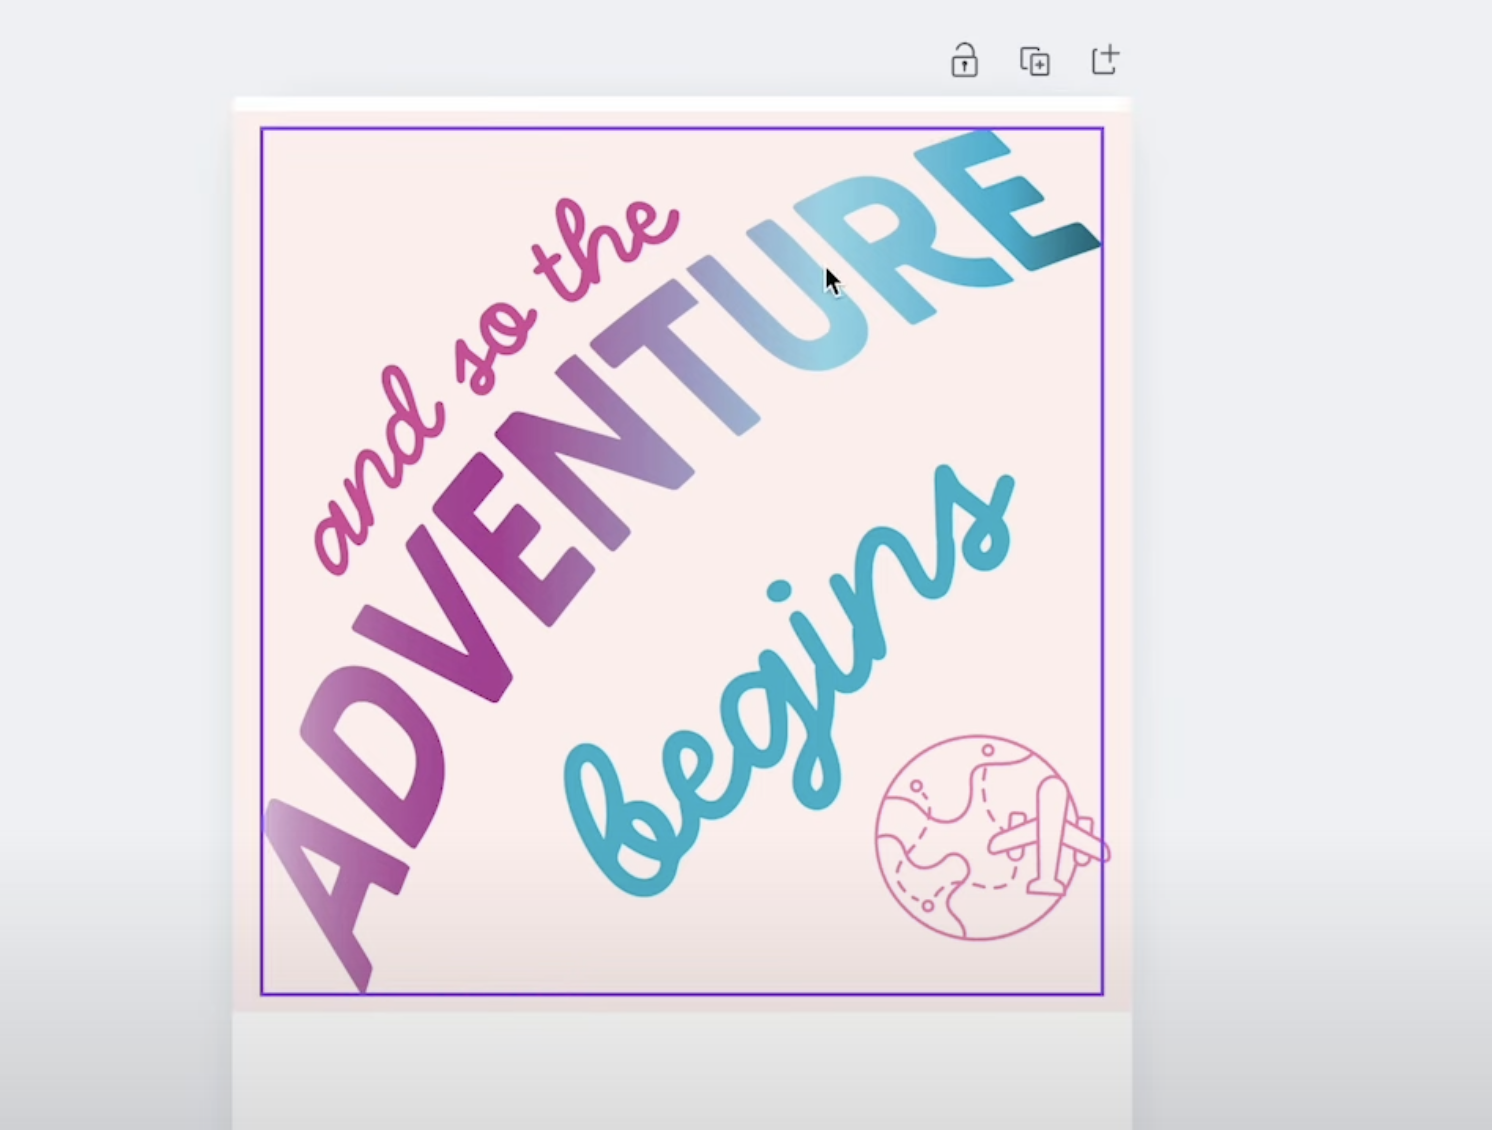
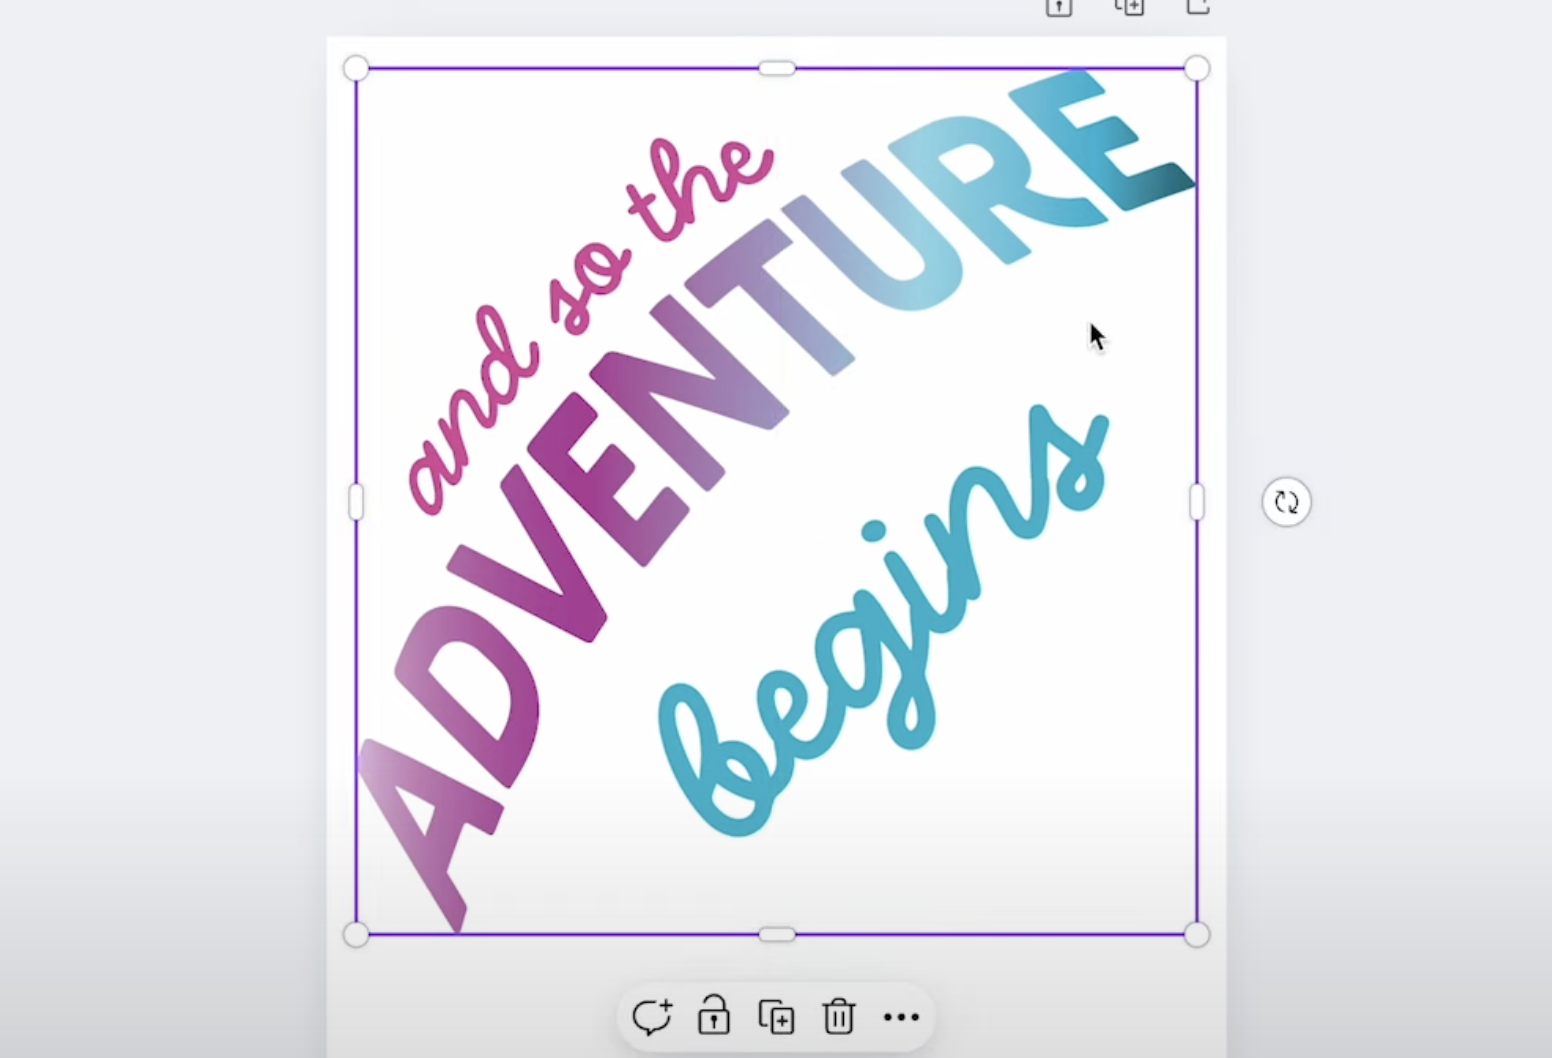
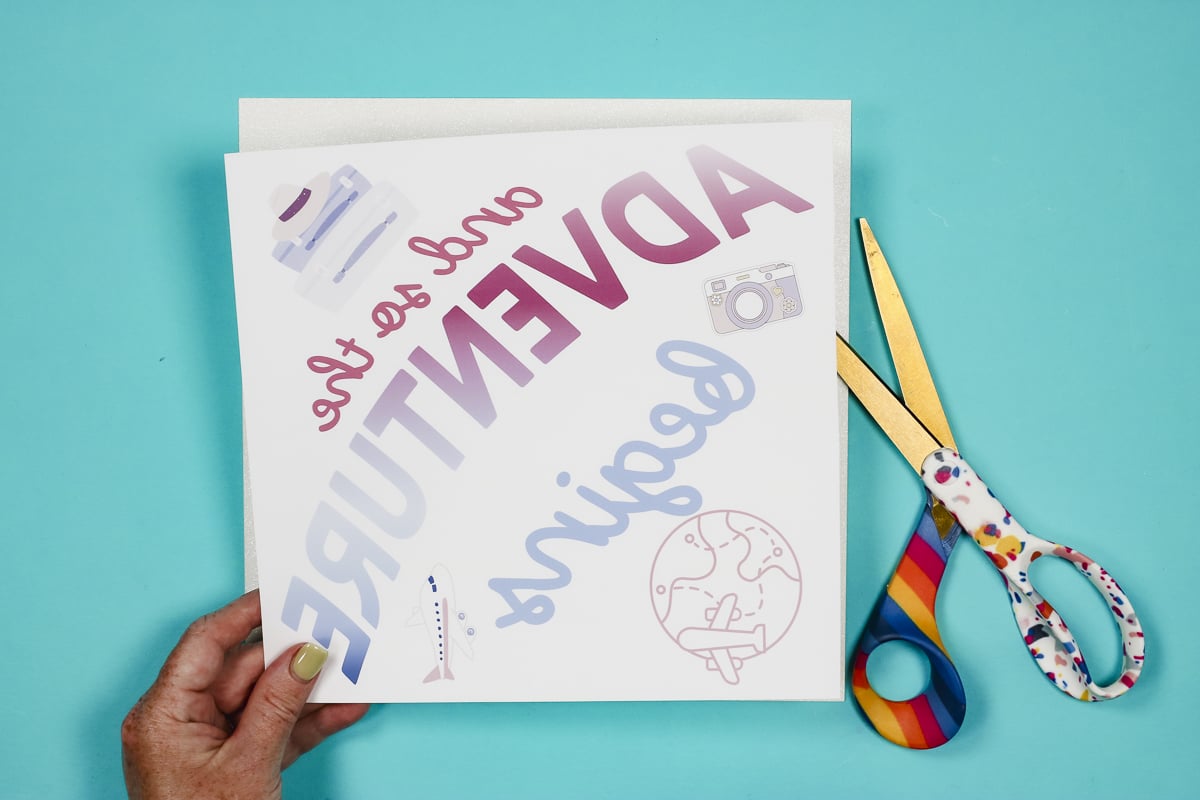
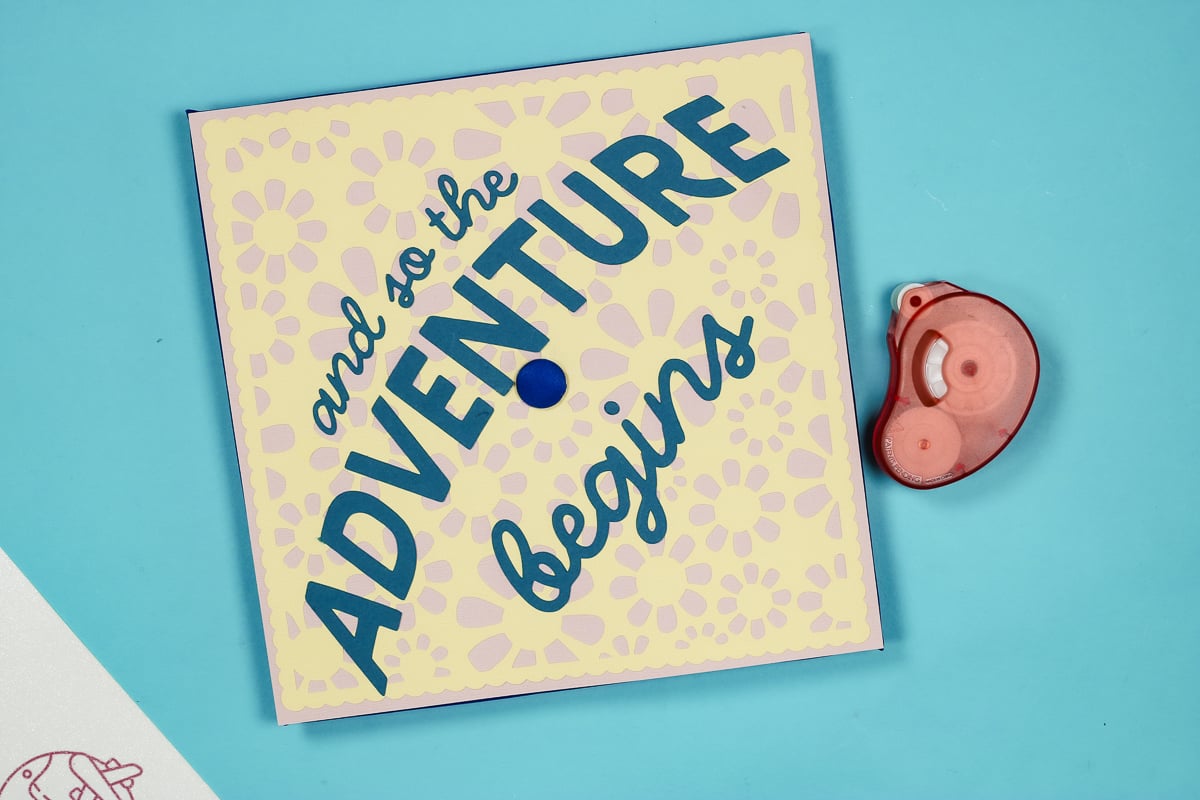
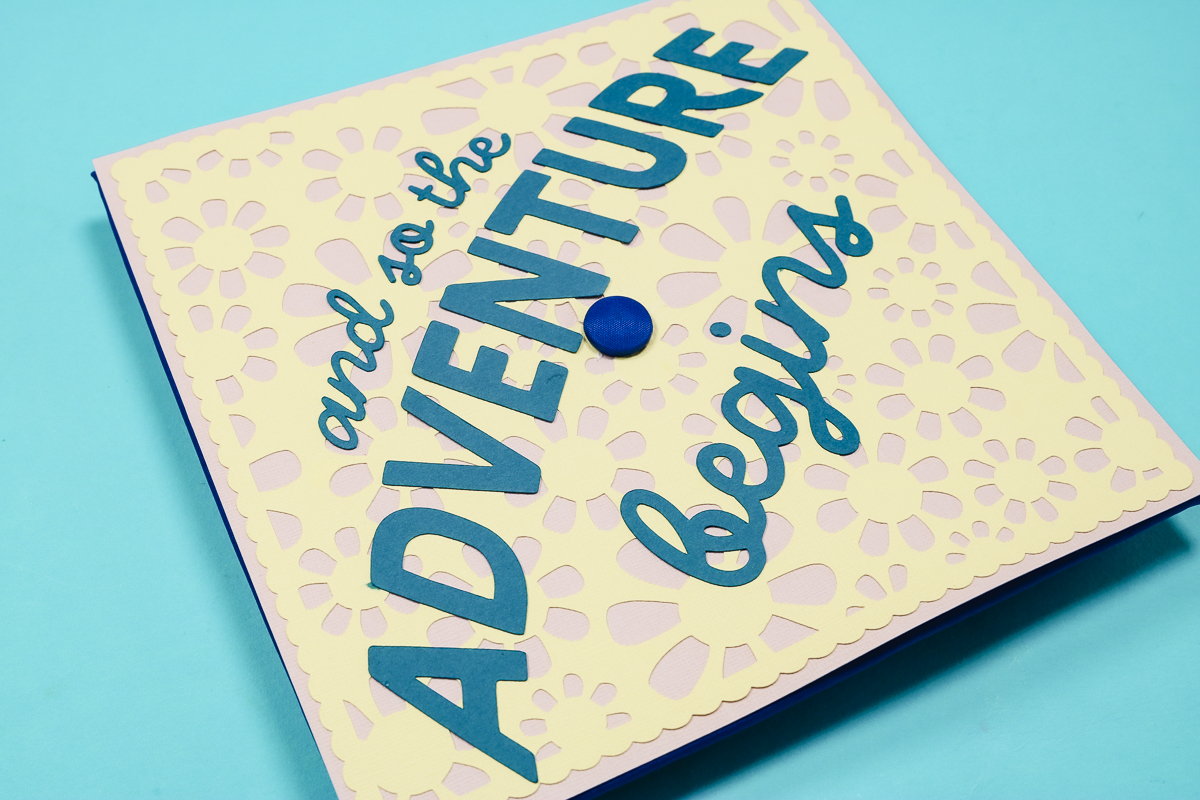
My design says And So The Adventure Begins. You can use the design I created or create your own design.
If you want to add to this design or create your own using this font, you can get the font from Creative Fabrica and called Grand Holiday. It includes both a script option and a Sans option.
You can ungroup the design to change the size or colors of the text.
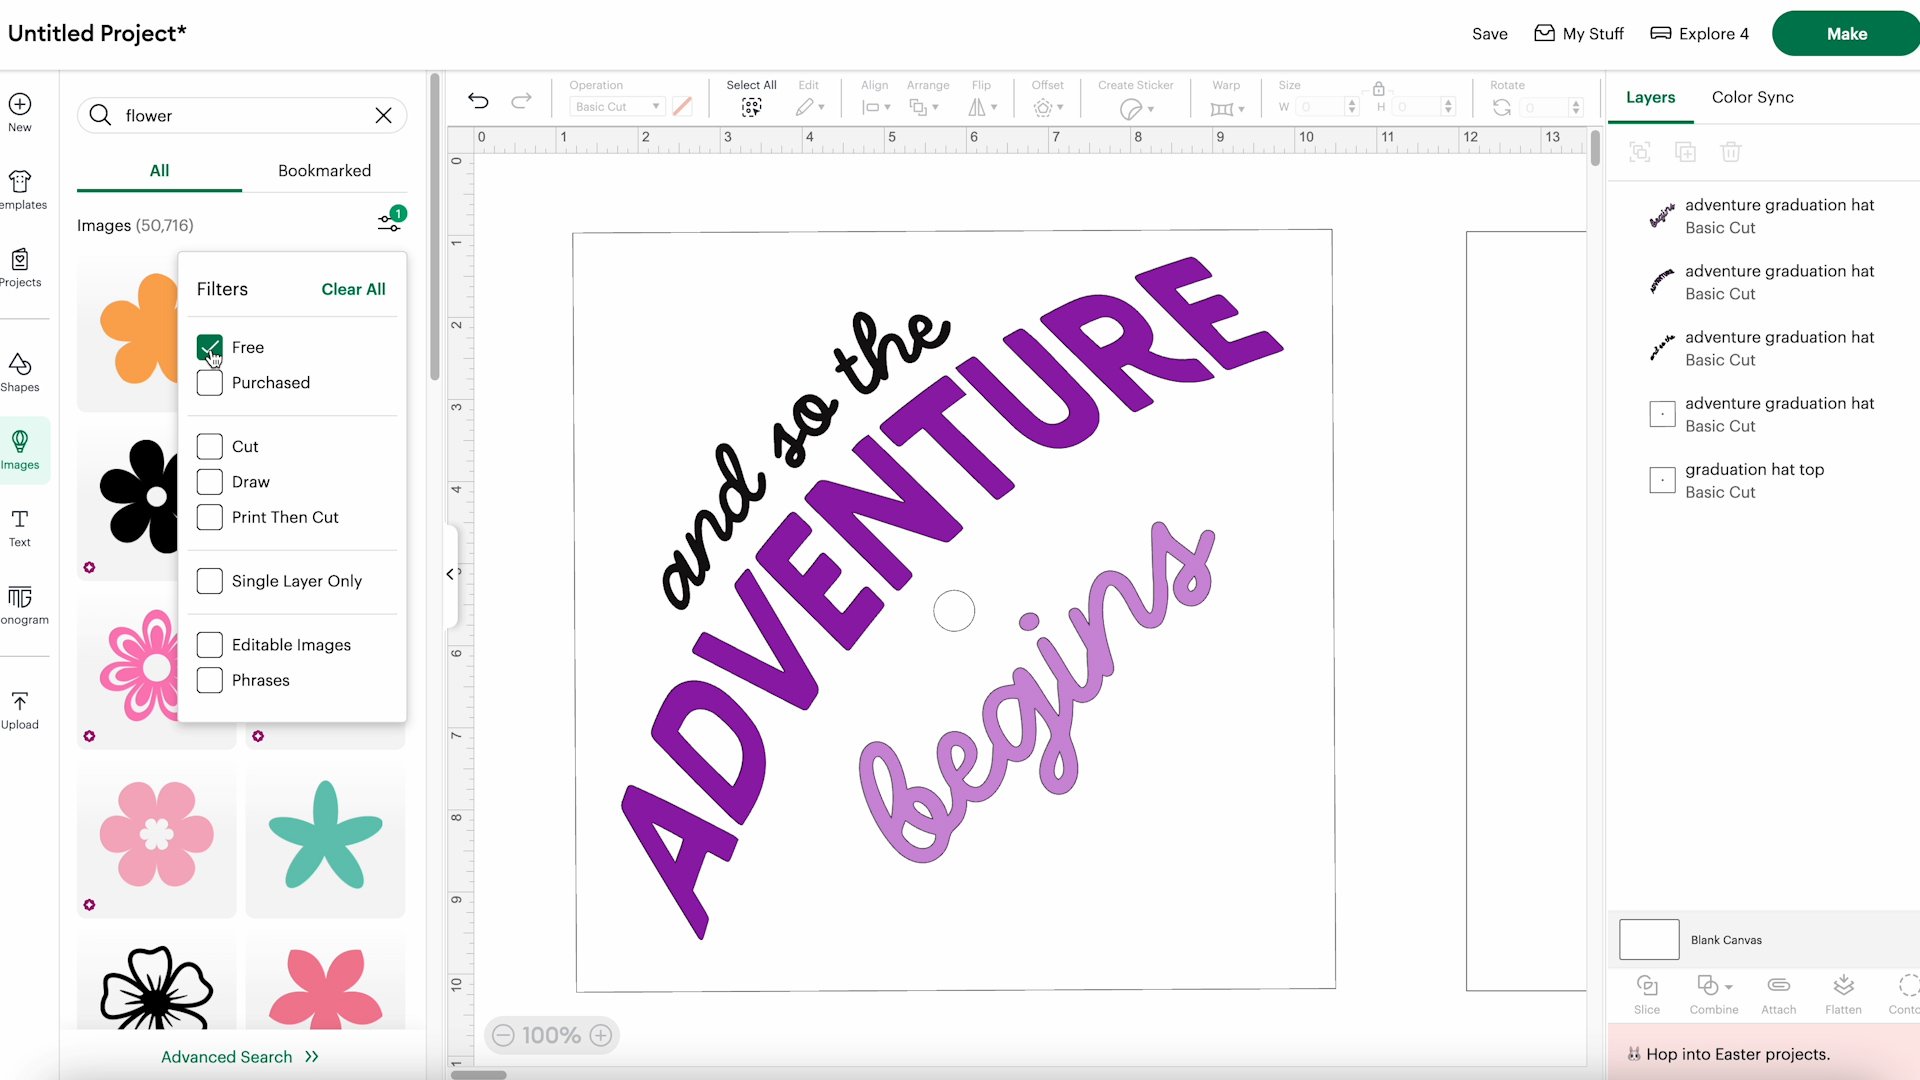
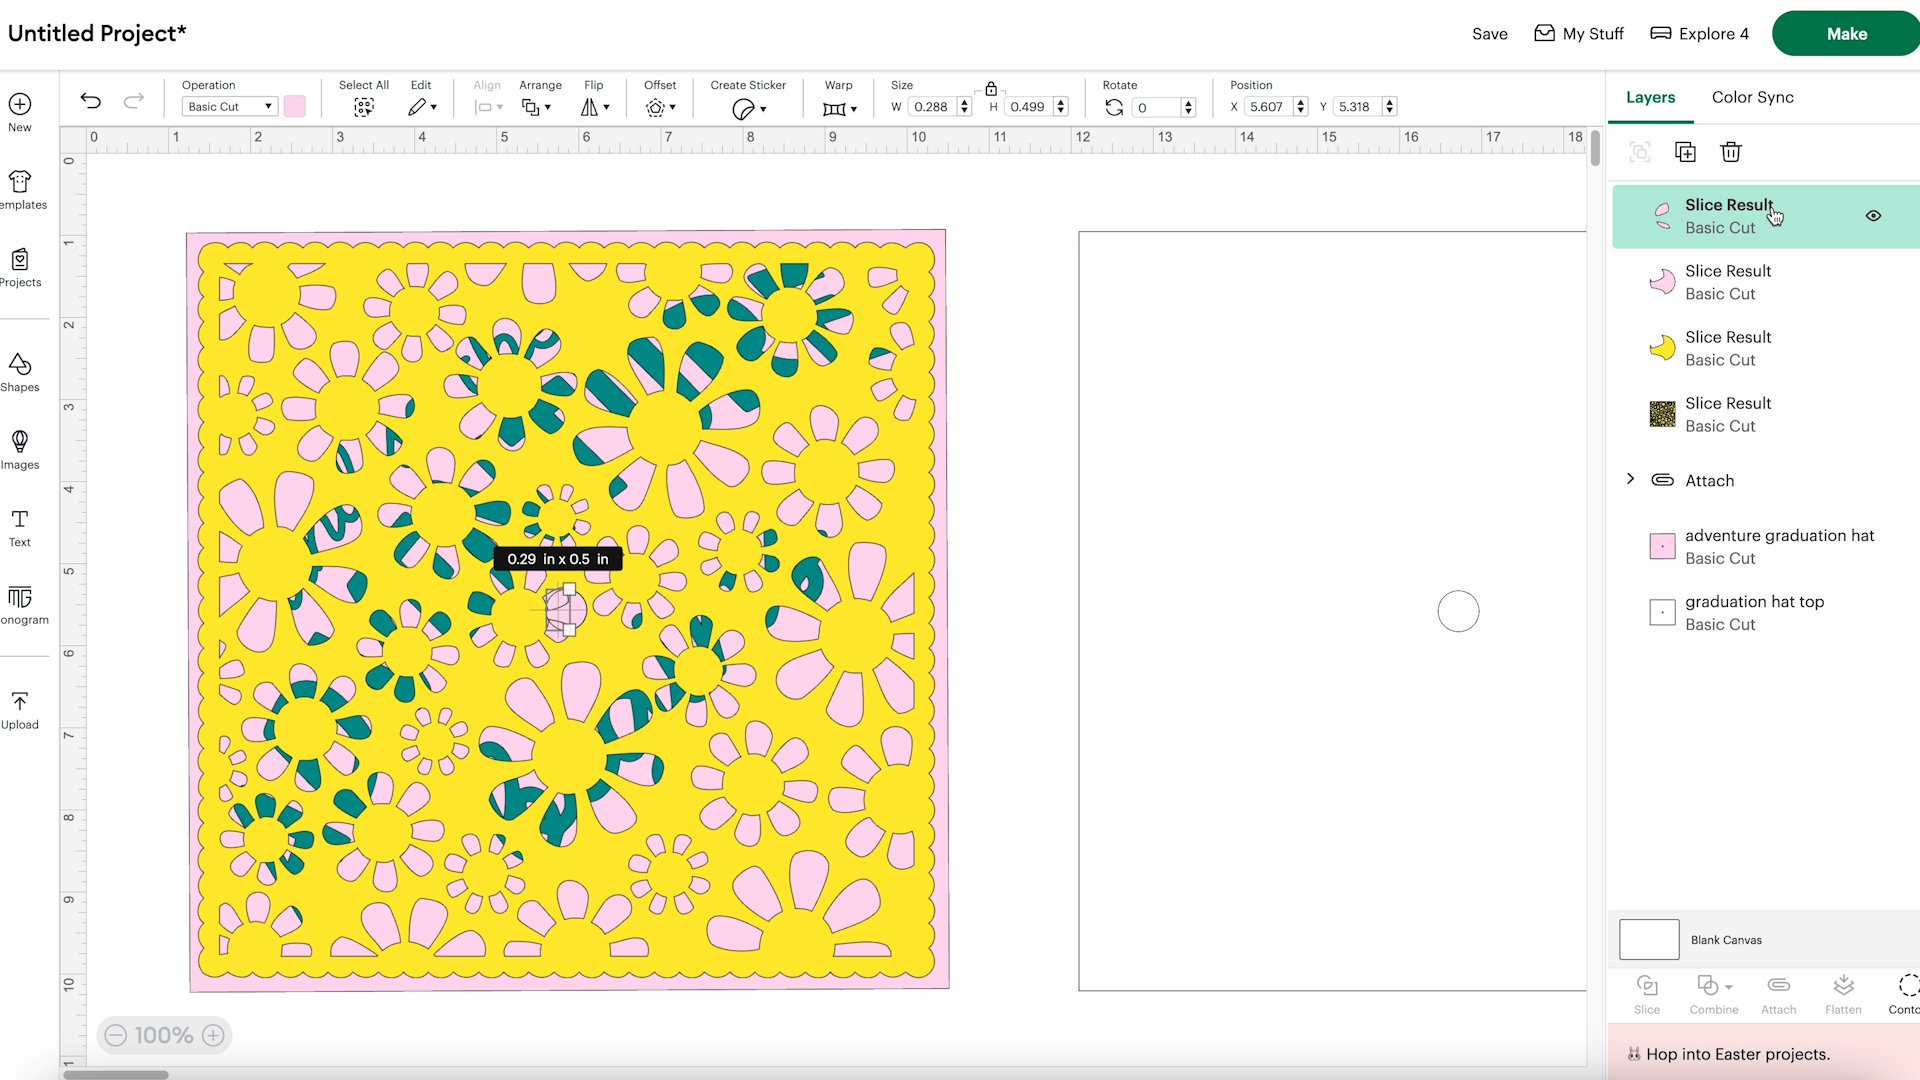
For my cardstock topper, I am going to create another layer. I found a free design in Design Space that is a square with large flower cutouts.
For images, you can click on the filters and filter for free images if you want to make this project budget friendly. Add whatever elements you graduate would like at this stage.
Step 3. Add a Button Hole to Any Layers
I resized the flower square to be almost the same size as the base layer.
For any added layers that cover the middle, you will want to add the button hole in the middle for the graduation cap button. To add the button hole, select the base layer and duplicate it.
Use the Contour Tool and hide the outside piece.
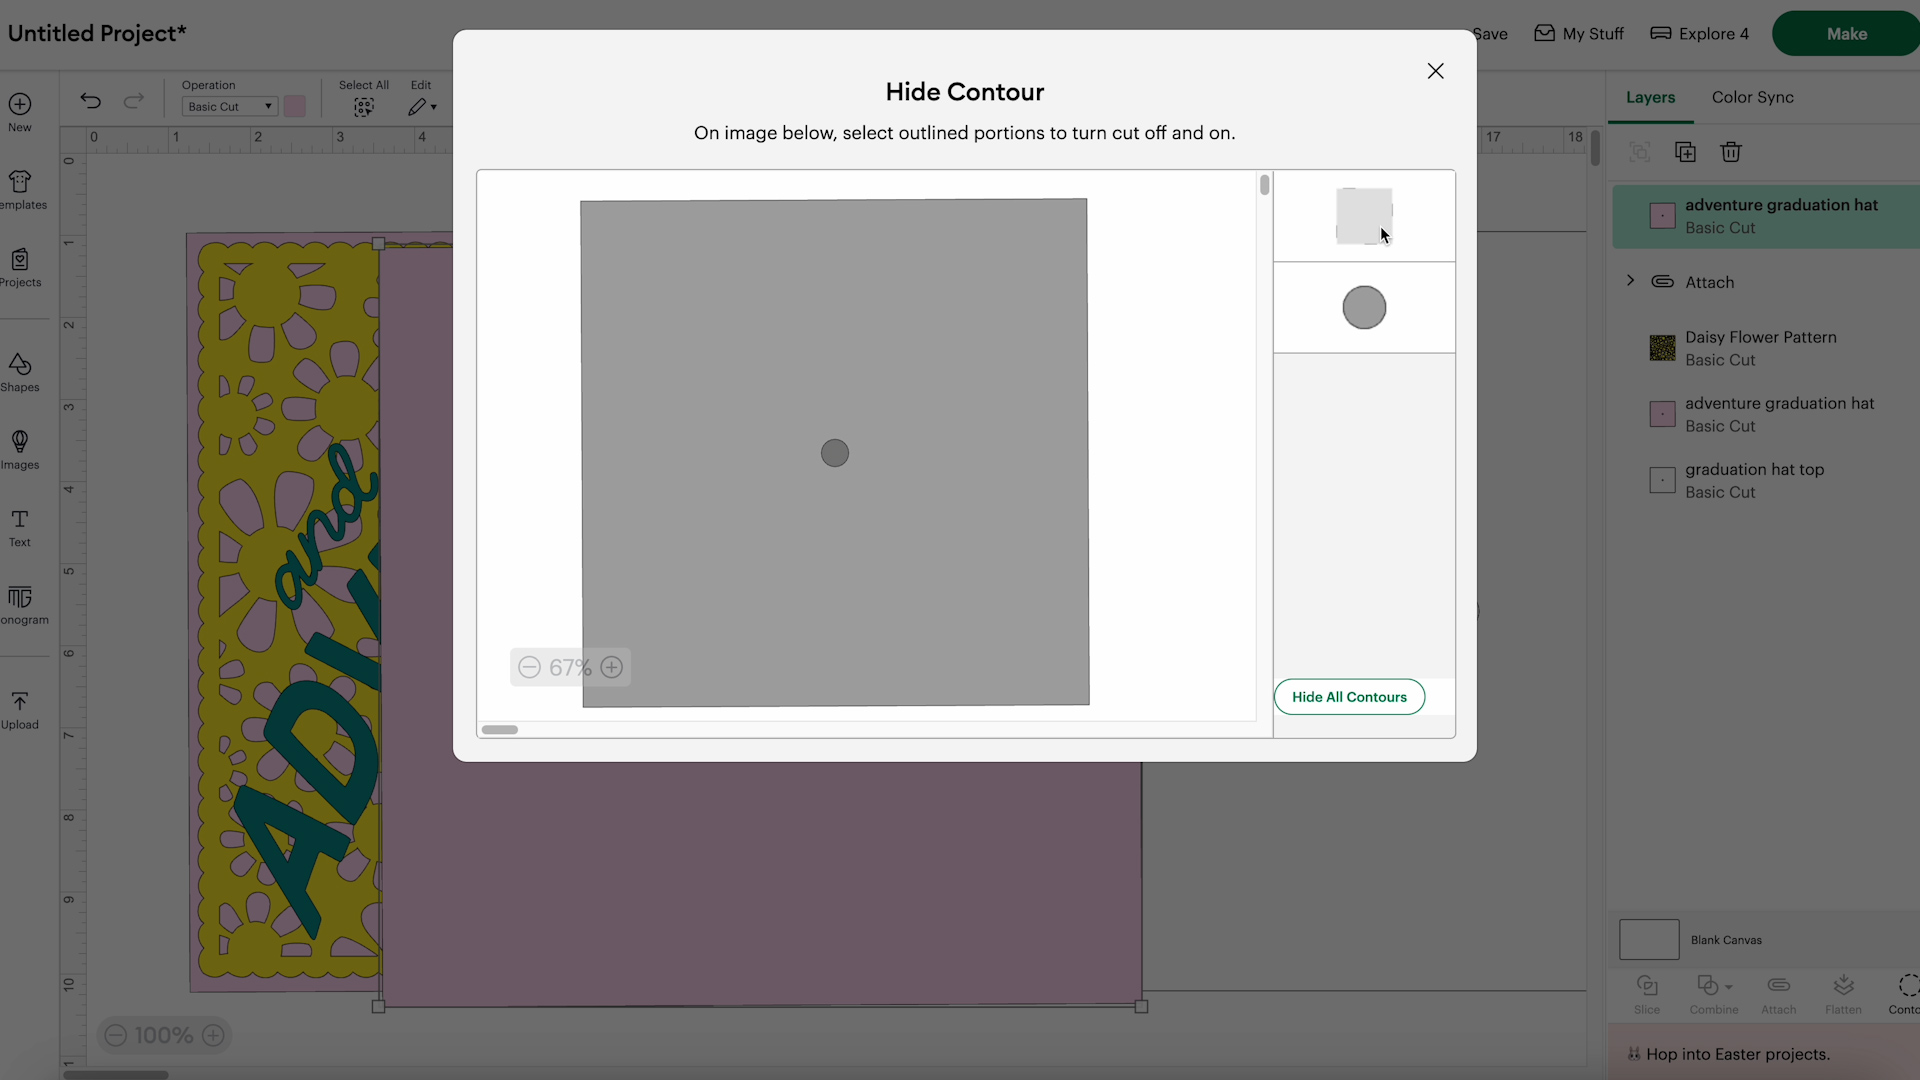
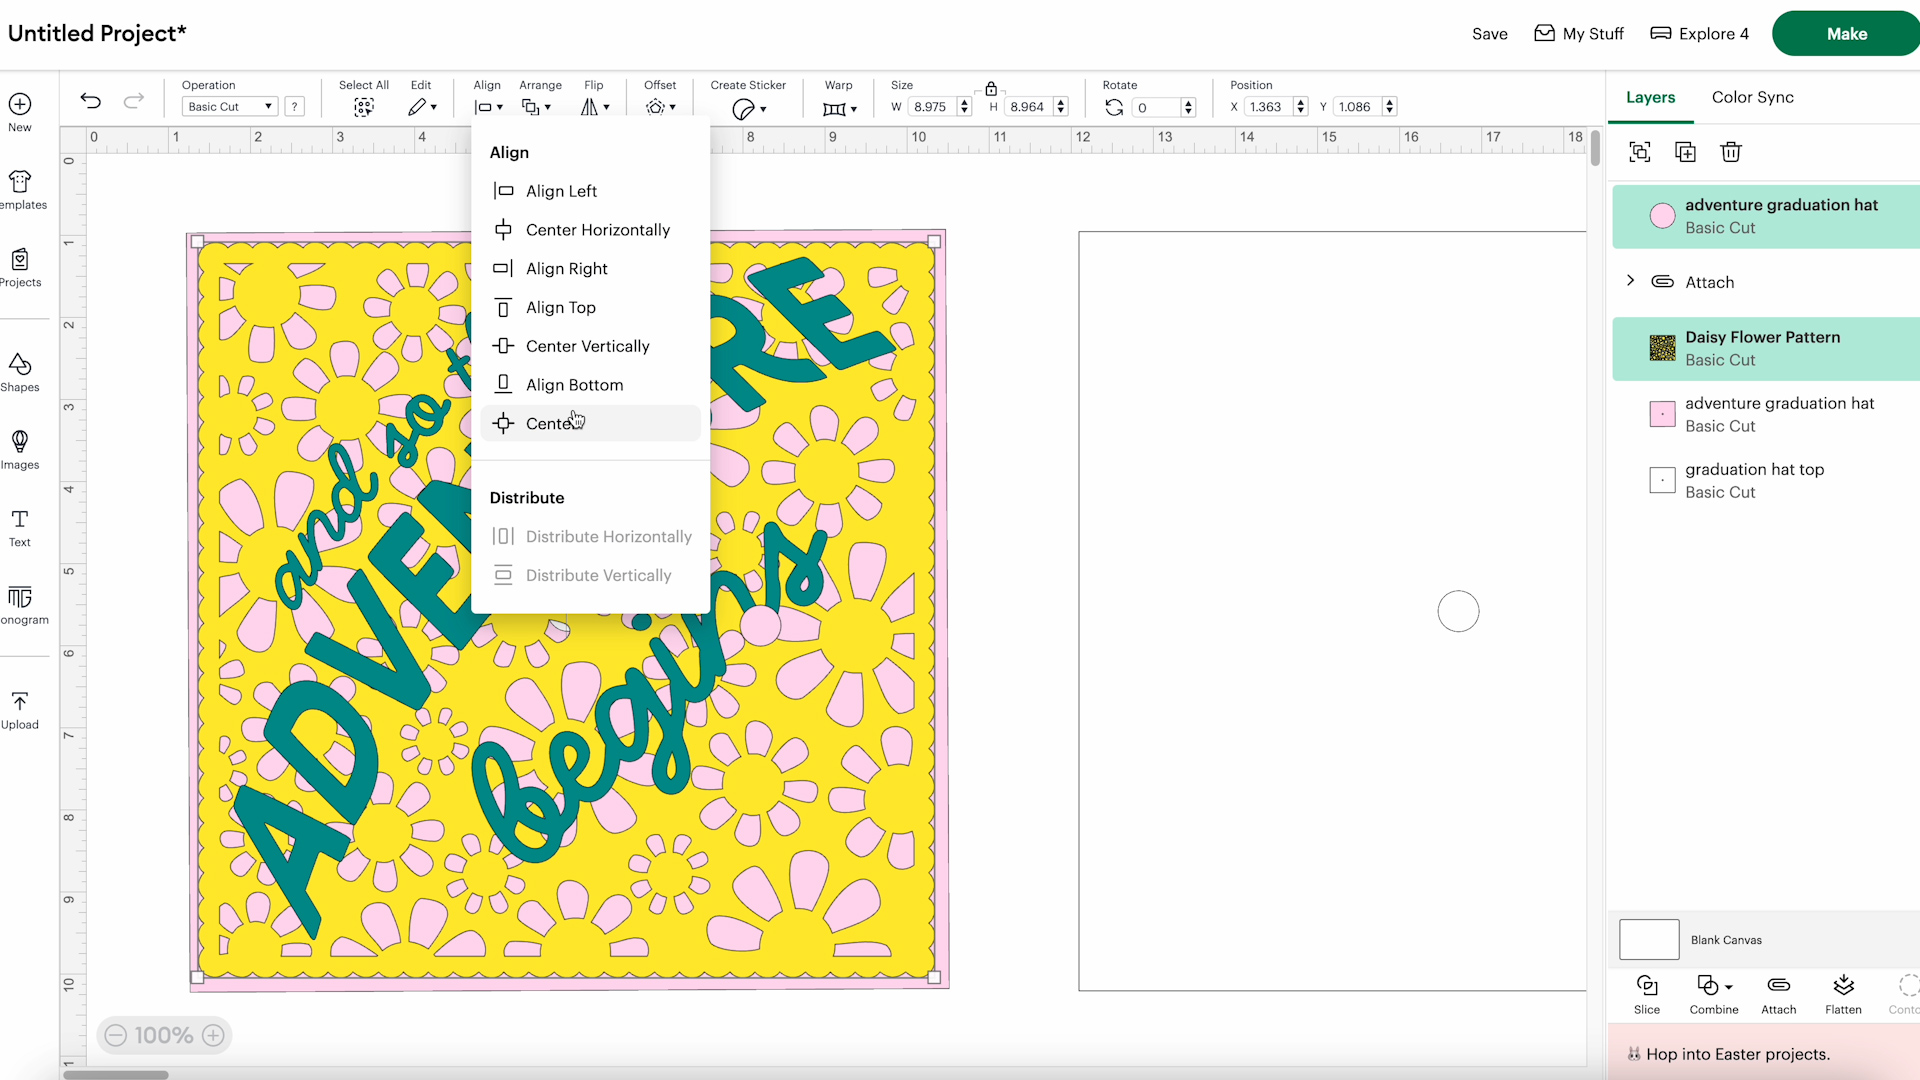
Select the floral layer and the hole layer and click Align, Center.
This will put the hole directly in the middle of the floral layer.
Next, click Slice and then remove the interior sliced pieces. This will leave you with a floral layer with a hole in the middle.
Step 4. Prepare the Design to be Cut Out
Rearrange the layers so you can see everything laid out correctly.
You can change the colors to match the materials you're using. The colors on the Design Space canvas will not impact the finished project. The final colors will be determined by the material you put on the cutting mat.
For the text layer, I am cutting everything out in one color. To make sure they cut out correctly, select all the text and click Attach.
Step 5. Select Material Type
This project is too large for the Cricut Joy machines, so I am using the Explore 4 today.
Click Make, and because I am using cardstock, I chose Cut on Mat and then clicked Continue.
With cardstock, you don't need to mirror anything. If you're using HTV, make sure you mirror that mat.

Click Continue and select the material you're using. If you haven't used your material before, make sure you do a test cut before cutting out an entire sheet.
I like the Cricut Medium Cardstock setting when cutting cardstock.
Note: When cutting glitter cardstock use the glitter cardstock setting.
Step 6. Cut the Cardstock
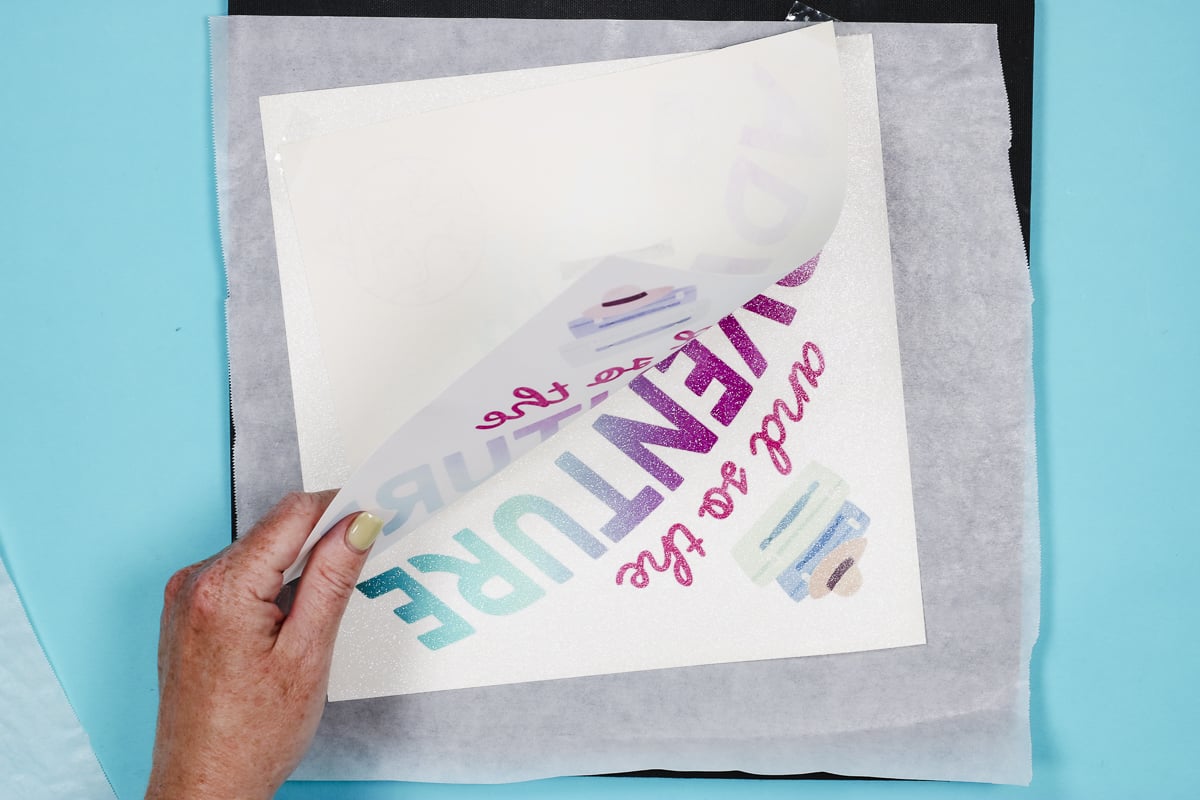
My finished design has 3 different colors. I am using cardstock for my entire project. You can use vinyl or HTV for the top layers if you want to.
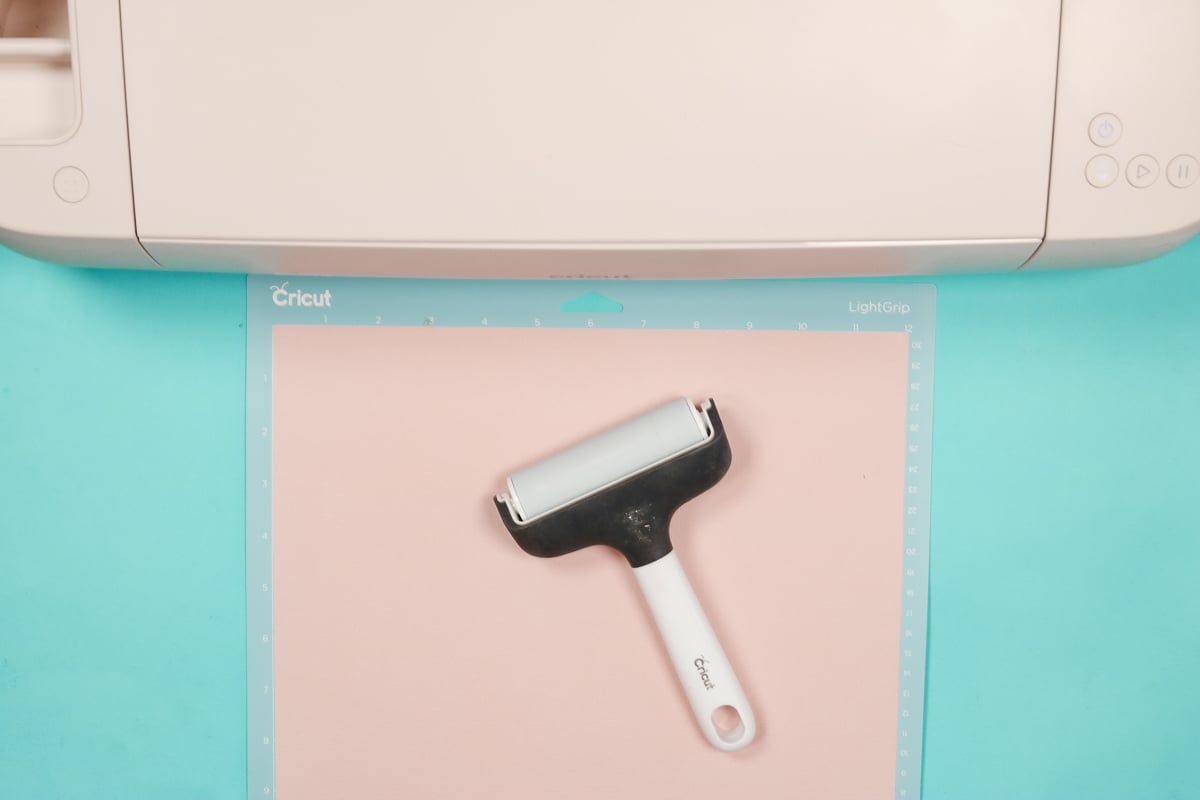
I use the blue LightGrip mat for cardstock materials. Use a Brayer to ensure the cardstock is stuck down to the mat really well.
The next step is cutting out the materials. Follow the prompts in Design Space. Make sure you're loading the mats in the right order.
Press Go, and when the machine is done cutting, unload the mat and repeat the process for each additional material.
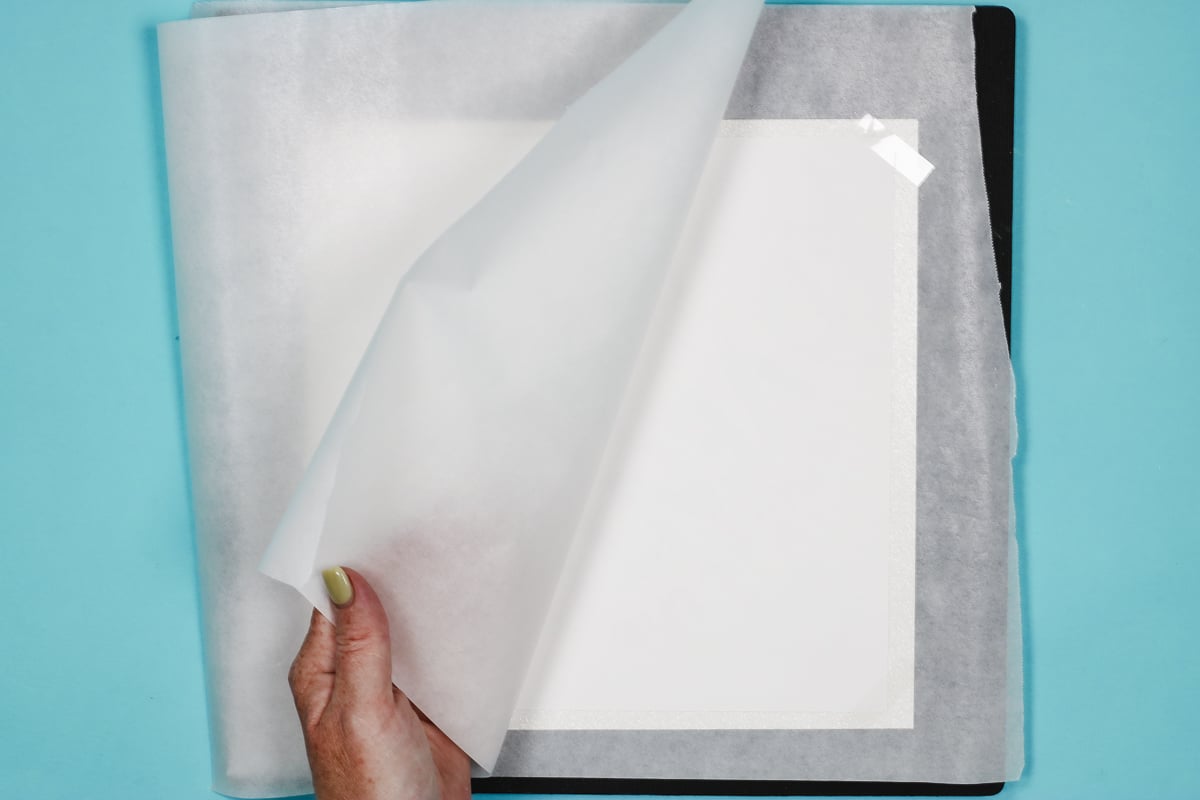
Step 7. Remove the Material from the Mat
My best tip for removing cardstock from the cutting mat is to flip the mat over to gently roll the mat away from the material.
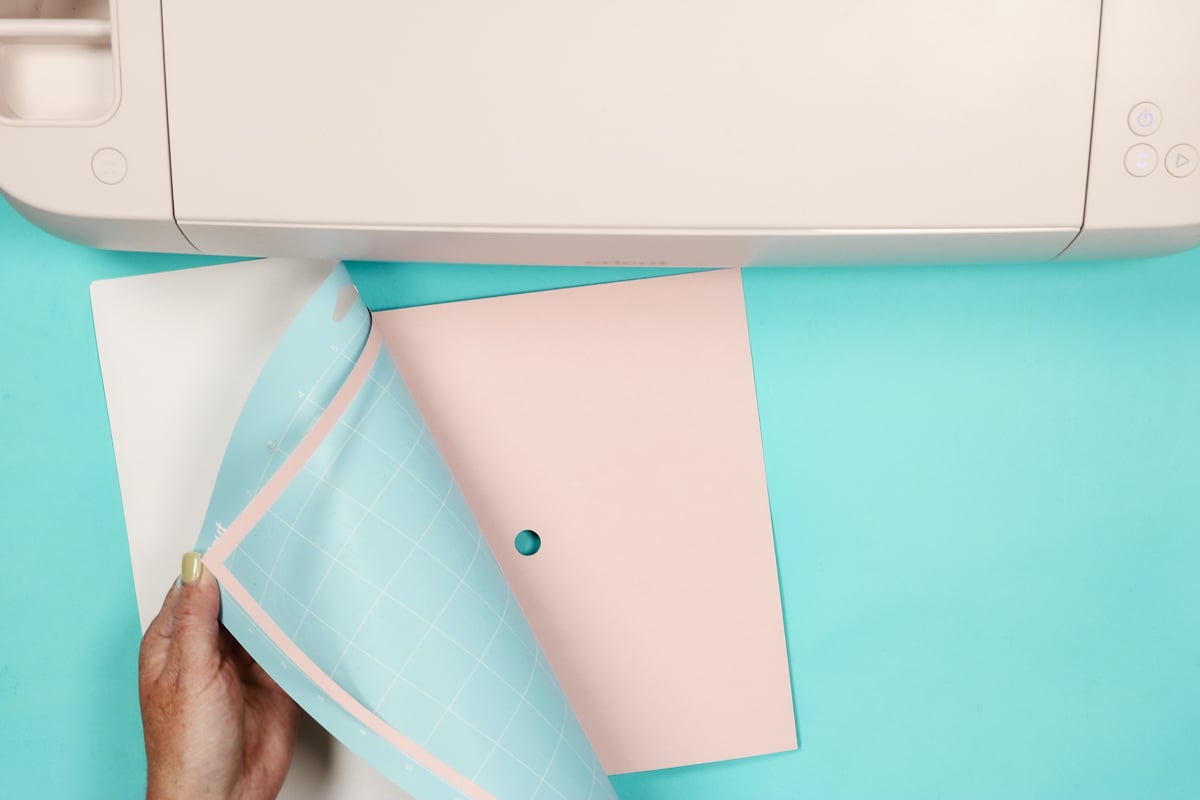
This will keep the cardstock from curling and ensure it's nice and flat on top of the graduation cap.
Repeat the process for all the different mats.
Step 8. Assemble the Custom Graduation Hat Topper
Place the bottom topper piece on a flat surface and flip the floral layer over so you can add glue to the back.
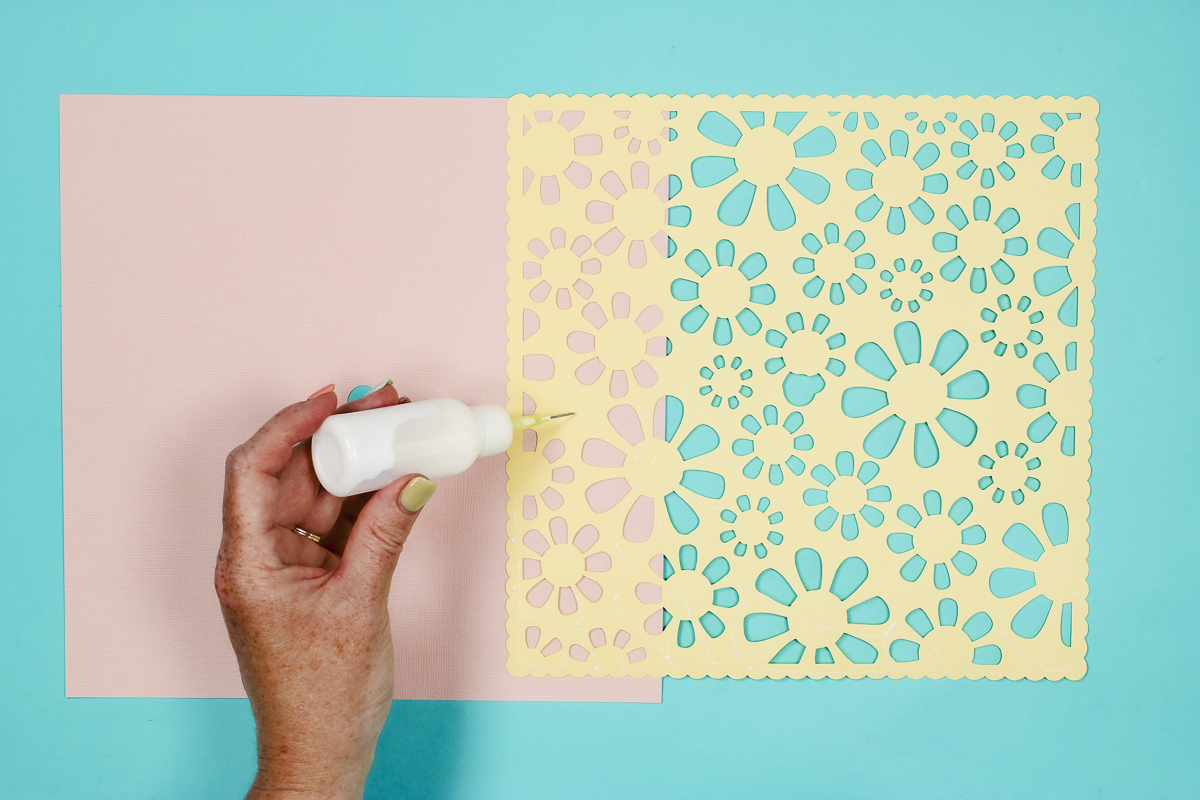
Place the floral layer on the bottom piece. The center hole should make it easy to align both pieces.
Step 9. Arrange Text on Graduation Cap Topper
Now we're ready to add the text. I cut my text out of cardstock, so I will need to add adhesive to the back of each piece.
If you used HTV or vinyl, you can use a transfer tape or the carrier sheet to locate the text.
My glue has a detail tip to help control the flow of the glue.
I found it helpful to use the cut piece of this cardstock to make sure the letters are located where they're supposed to be and spaced correctly.
I did not add the center hole to this layer; it would have been helpful to make sure everything is lined up, but lining it up this way did work.
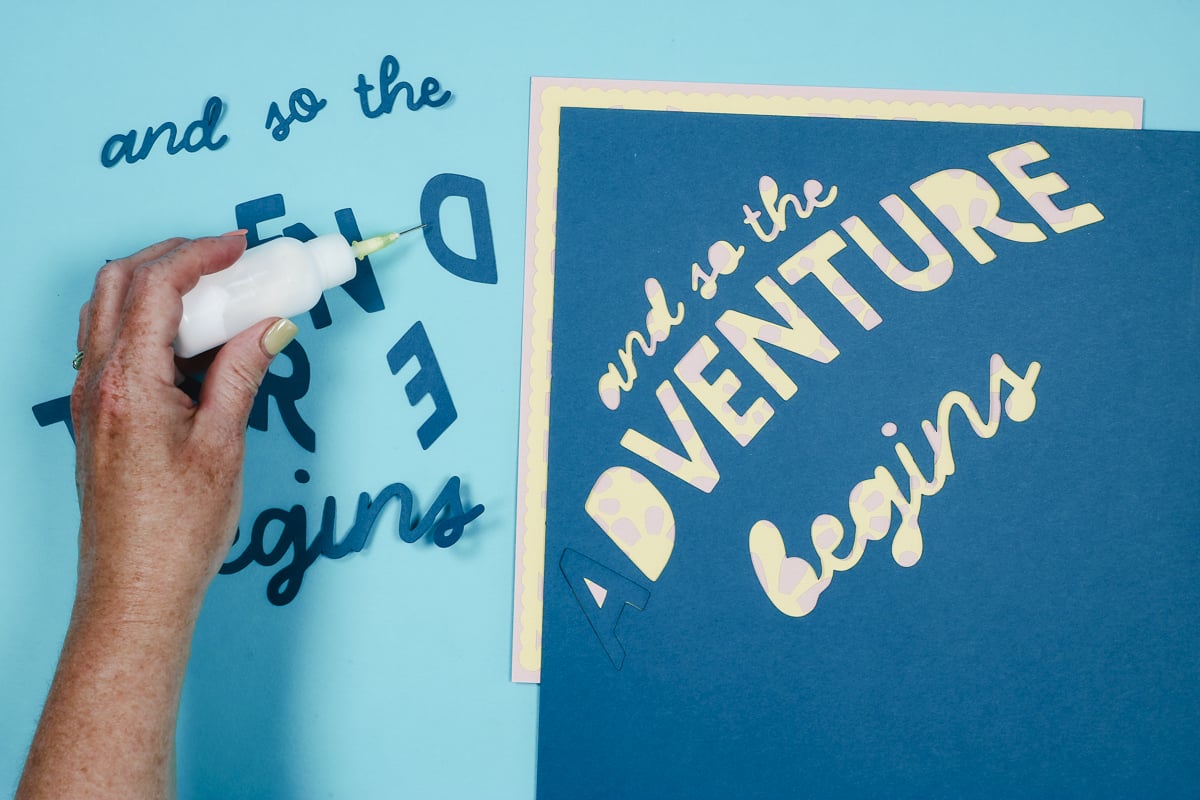
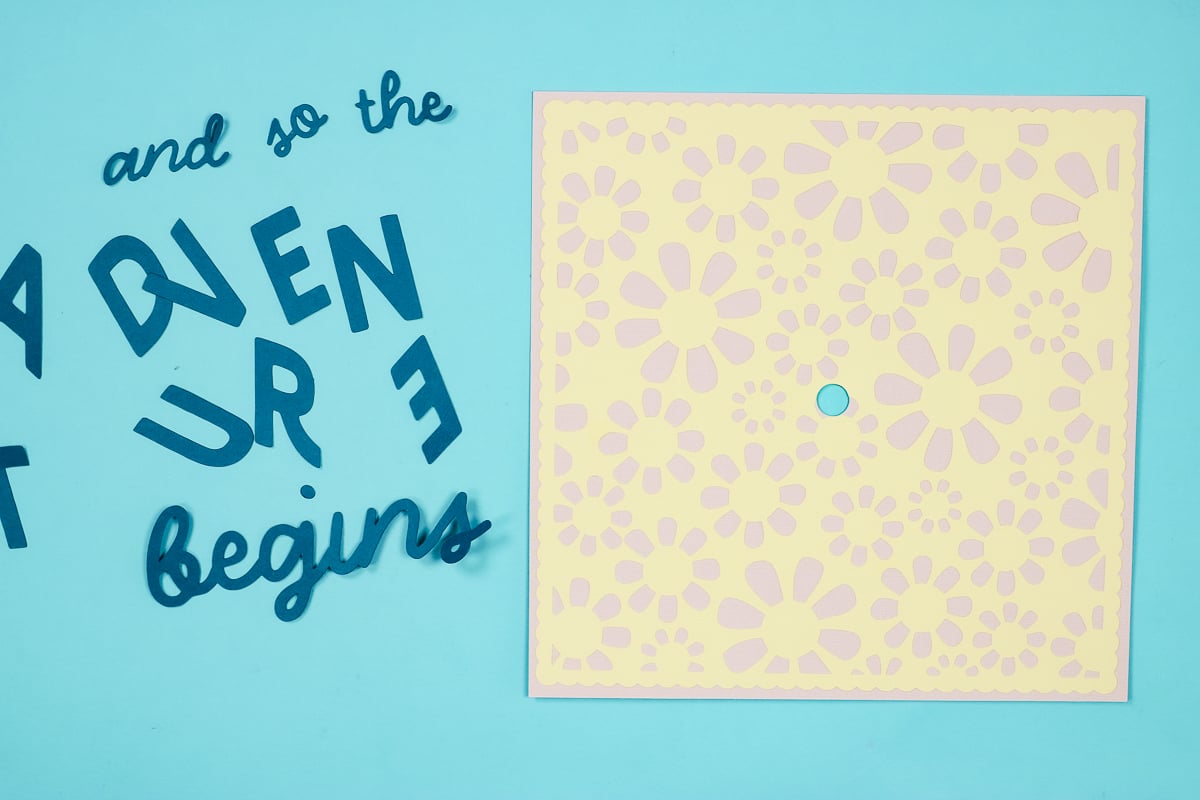
Continue adding each piece until everything is in place.
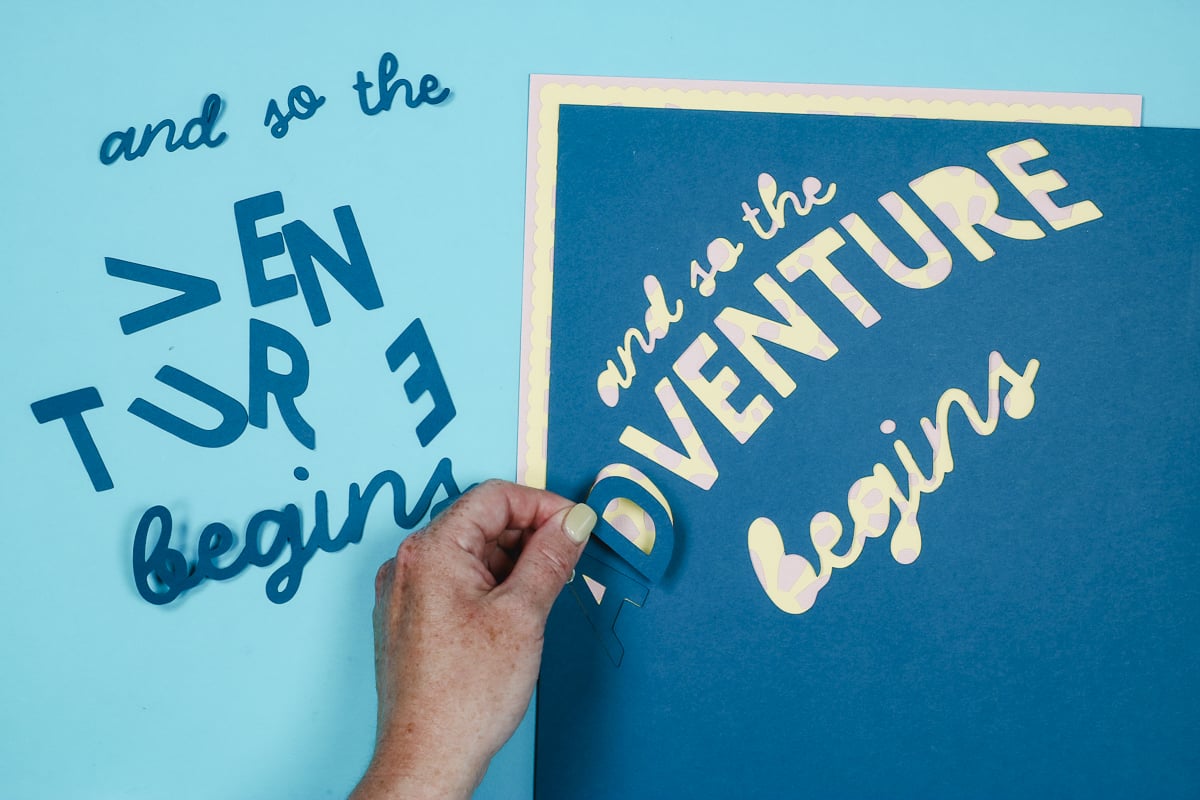
When all the letters and words are in place, gently remove the outside piece of cardstock.
The letters may lift a little bit when you remove that outside piece.
Don't let the glue dry completely before removing the outside piece because glue can bleed out onto that paper, and you don't want it to stick to the floral layer.
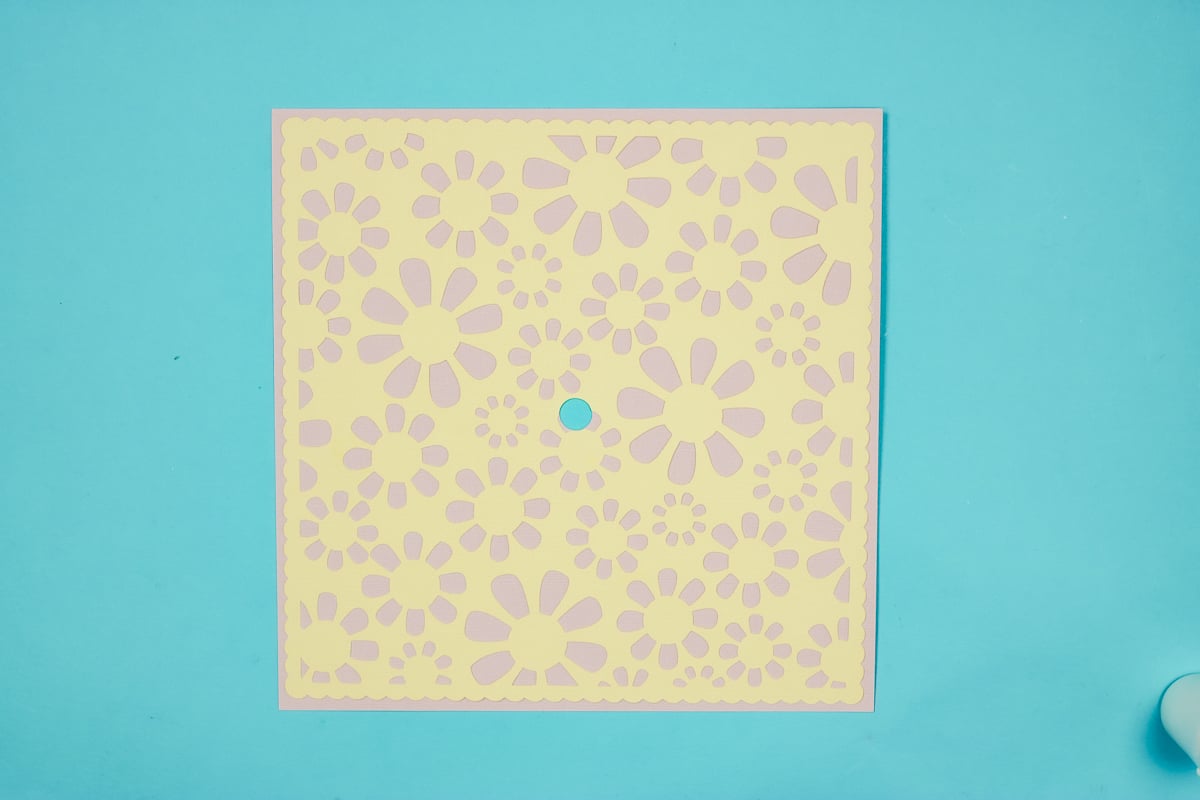
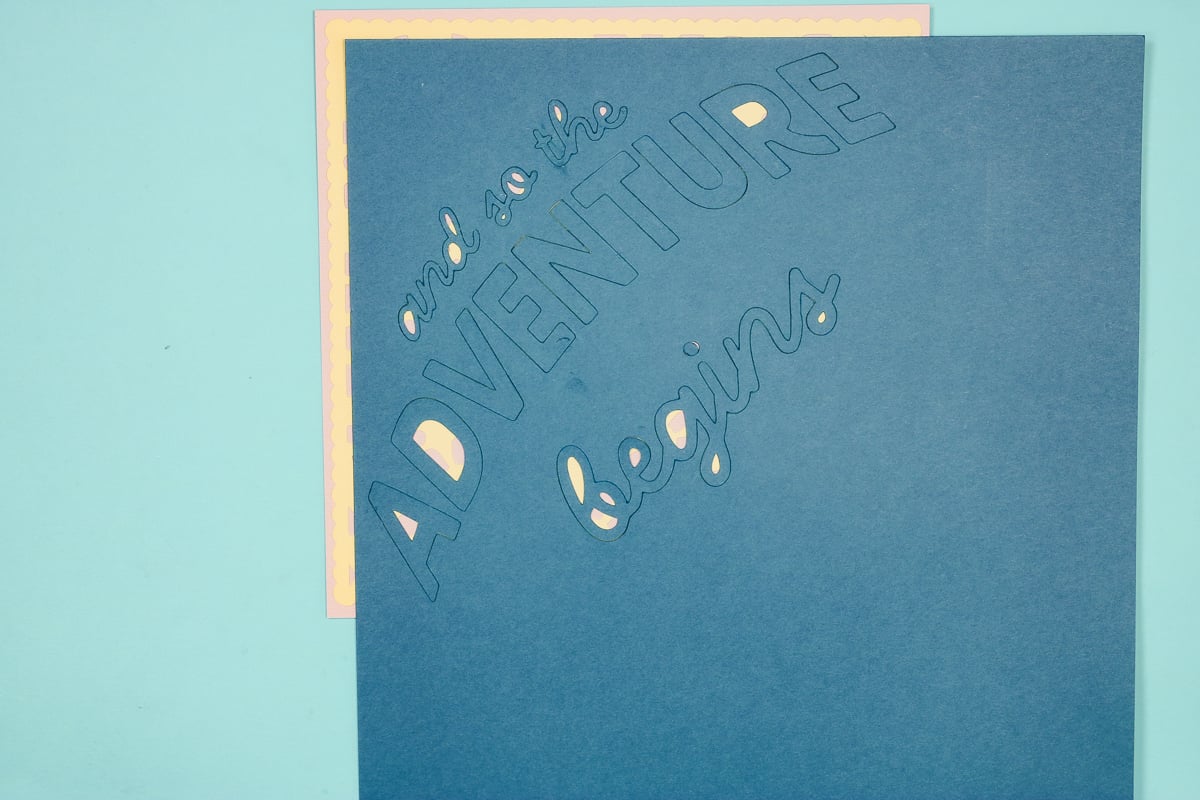
Here is the finished cardstock graduation cap topper. I love the way it turned out, and it was really simple to do.

To finish the custom graduation cap topper, it will be the same for this one and the sublimation topper, so we'll go through that later in this post.
How to Make a Sublimation Graduation Cap Topper
For this version, we need to cut the base out on a Cricut machine like the tutorial above.
For the sublimation print to transfer we need a paper that will work with sublimation. I am using white glitter cardstock.
Now, let's head to Canva to create the design.
Step 1. Create Sublimation Design in Canva
First, create a canvas the same size as the sublimation paper you're using. My paper is 8.5 x 11 inches.
The graduation cap I'm using is 9.25 x 9.25. My sublimation design won't go edge to edge, but by making it as large as I can, it will cover the majority, leaving a little blank space all the way around.
Click Upload, upload the design, and add it to the canvas.
If you're afraid of making your design too large in one direction, you can add a square to the canvas and make it 8.5″ square. That will give you a perfectly square design to add to the grad cap topper.
I resized the text to make it as large as I could and still fit inside the square.
Step 2. Customize the Design
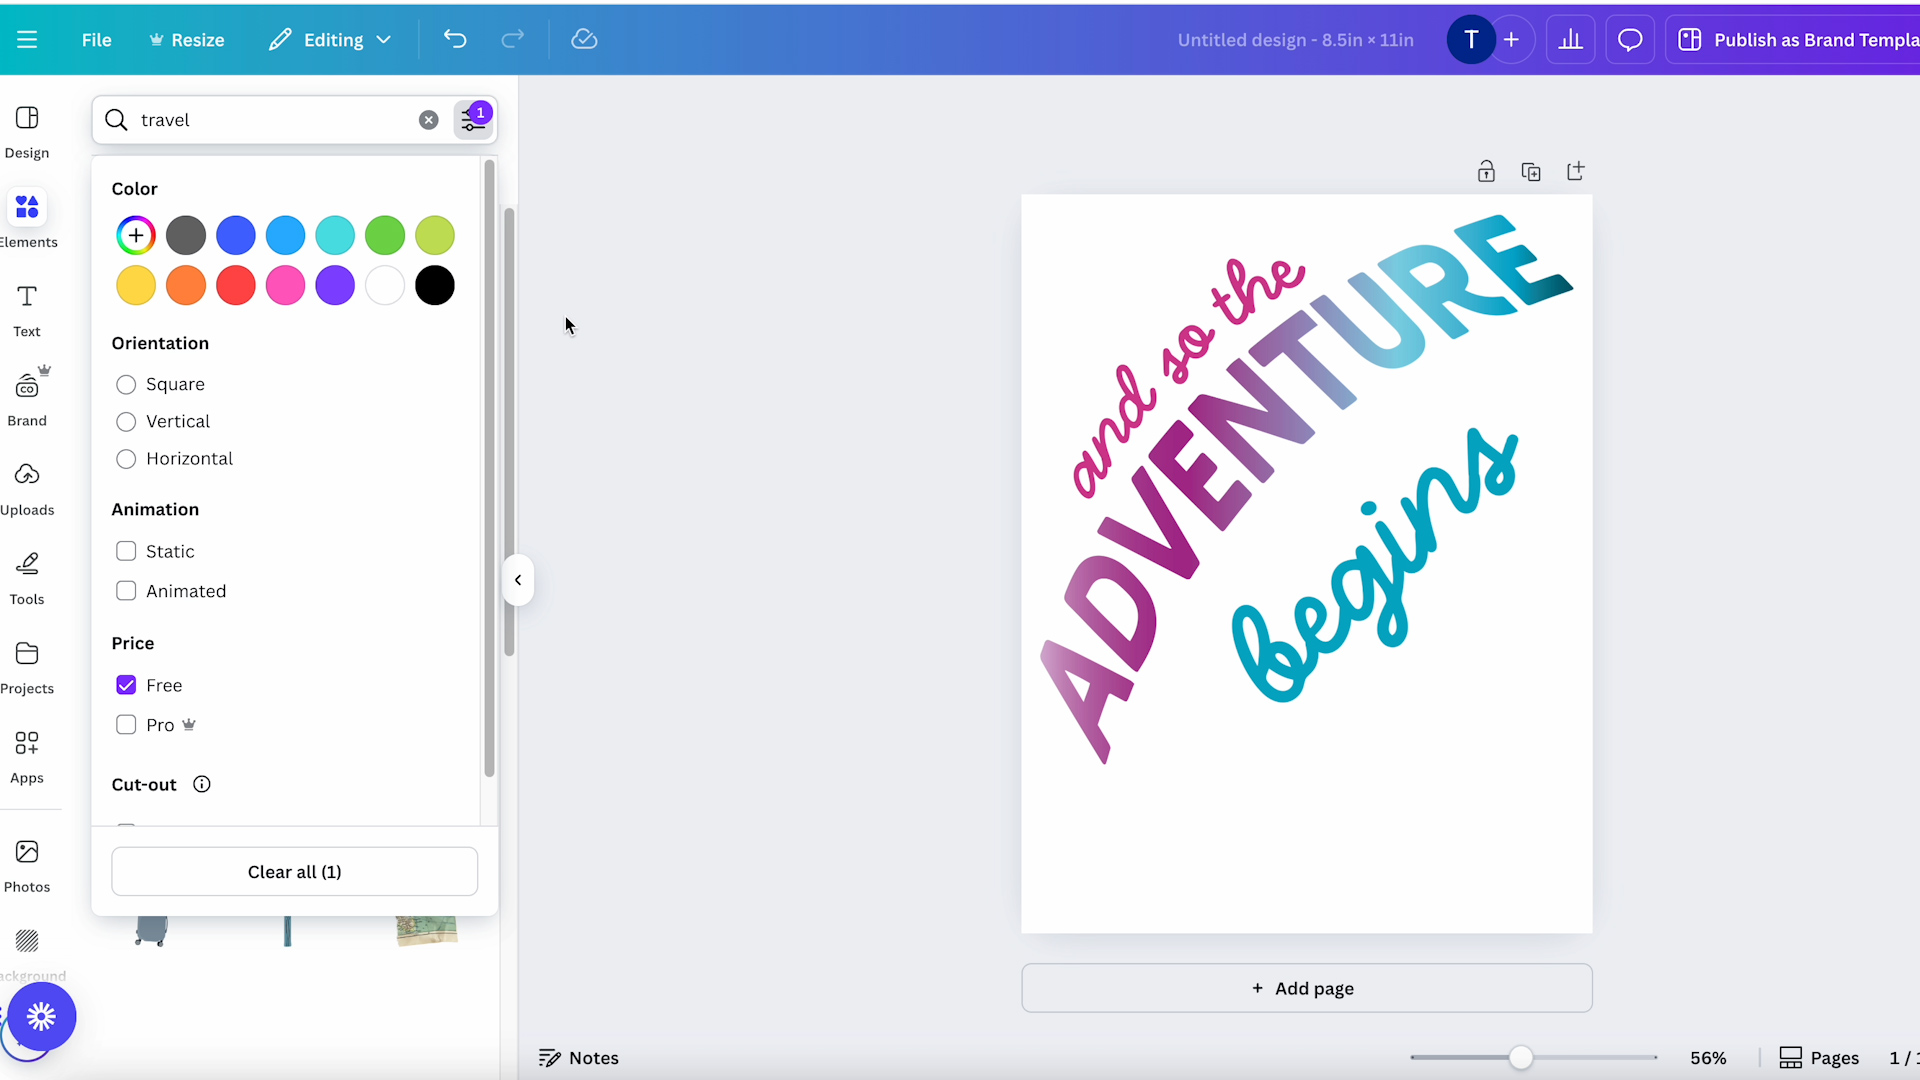
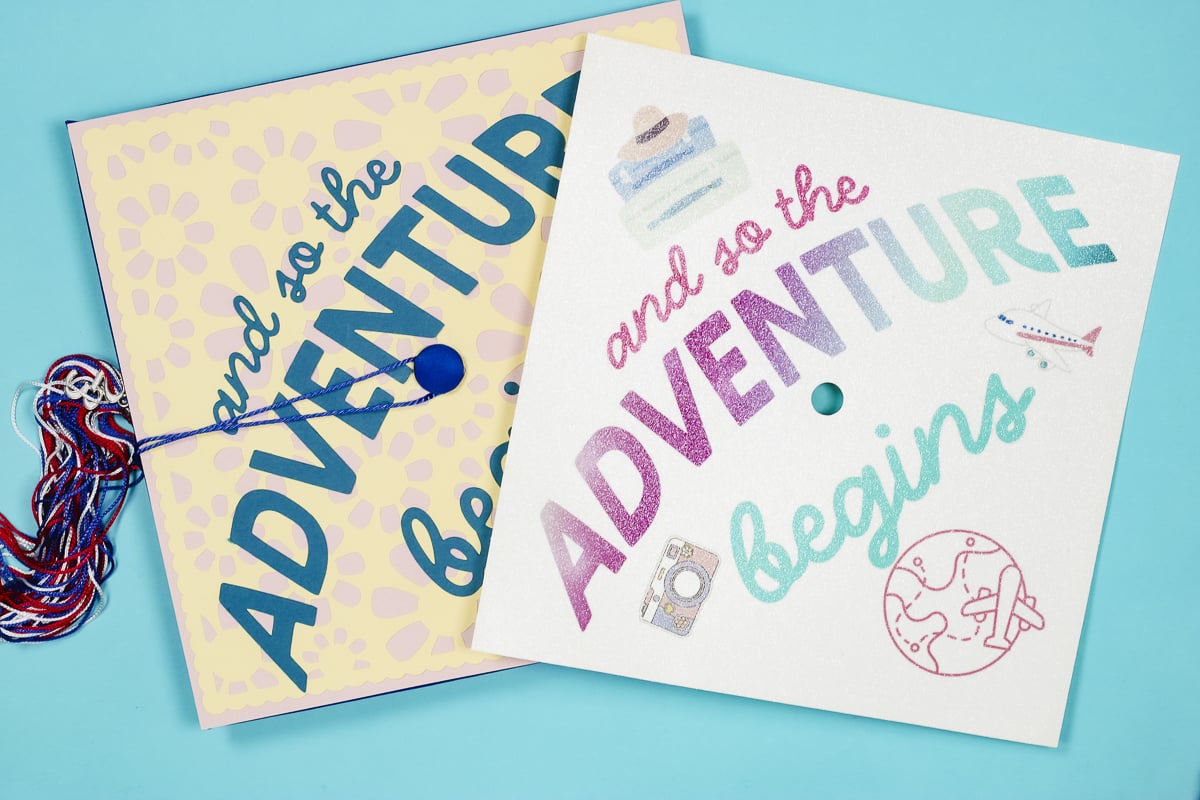
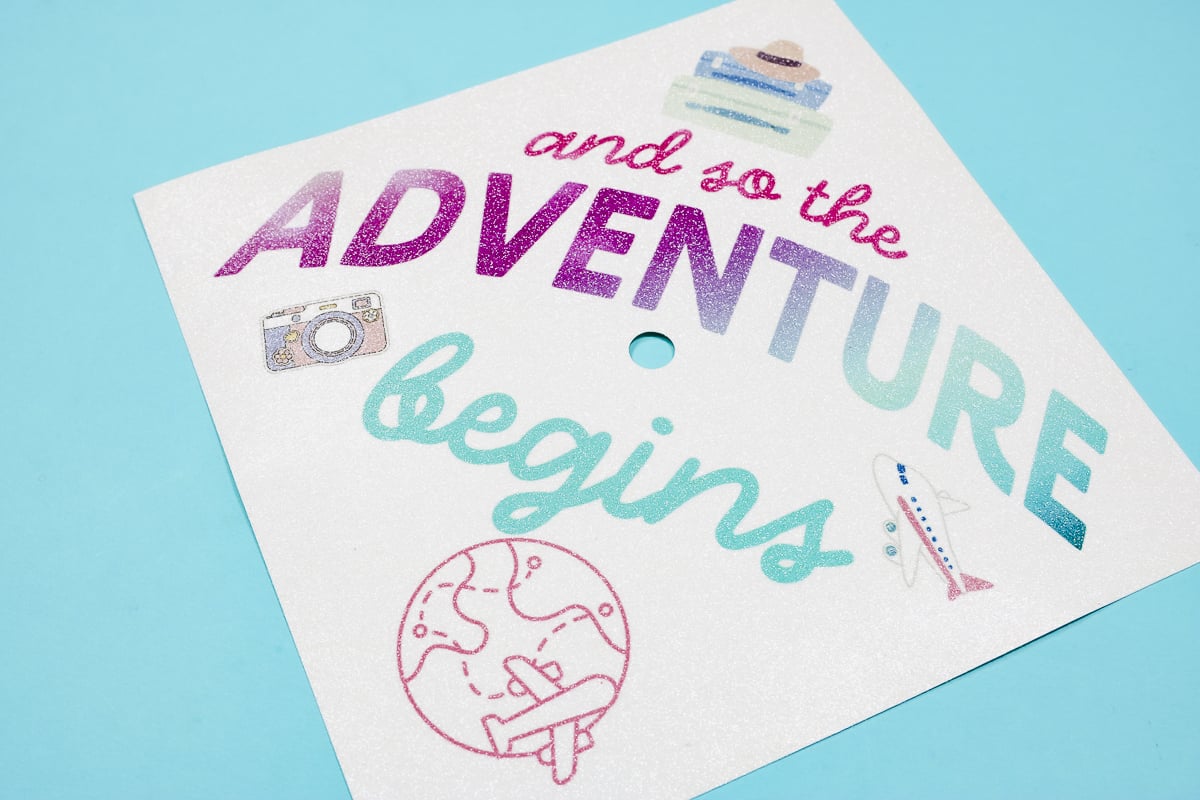
You could be done with the design here, but you can also add other elements. I'm going to add some travel elements to this design, but you can customize your topper to represent what your graduate is doing next.
For my design, I searched Travel and then selected Graphics. You can also filter those graphics for free elements to keep this budget friendly.
Graphics can be customized; you can resize them and/or change the colors. Add any elements you want and make sure they fit within that square.
When you're done with the design process, remove the background square (unless you want the entire thing to be a color).
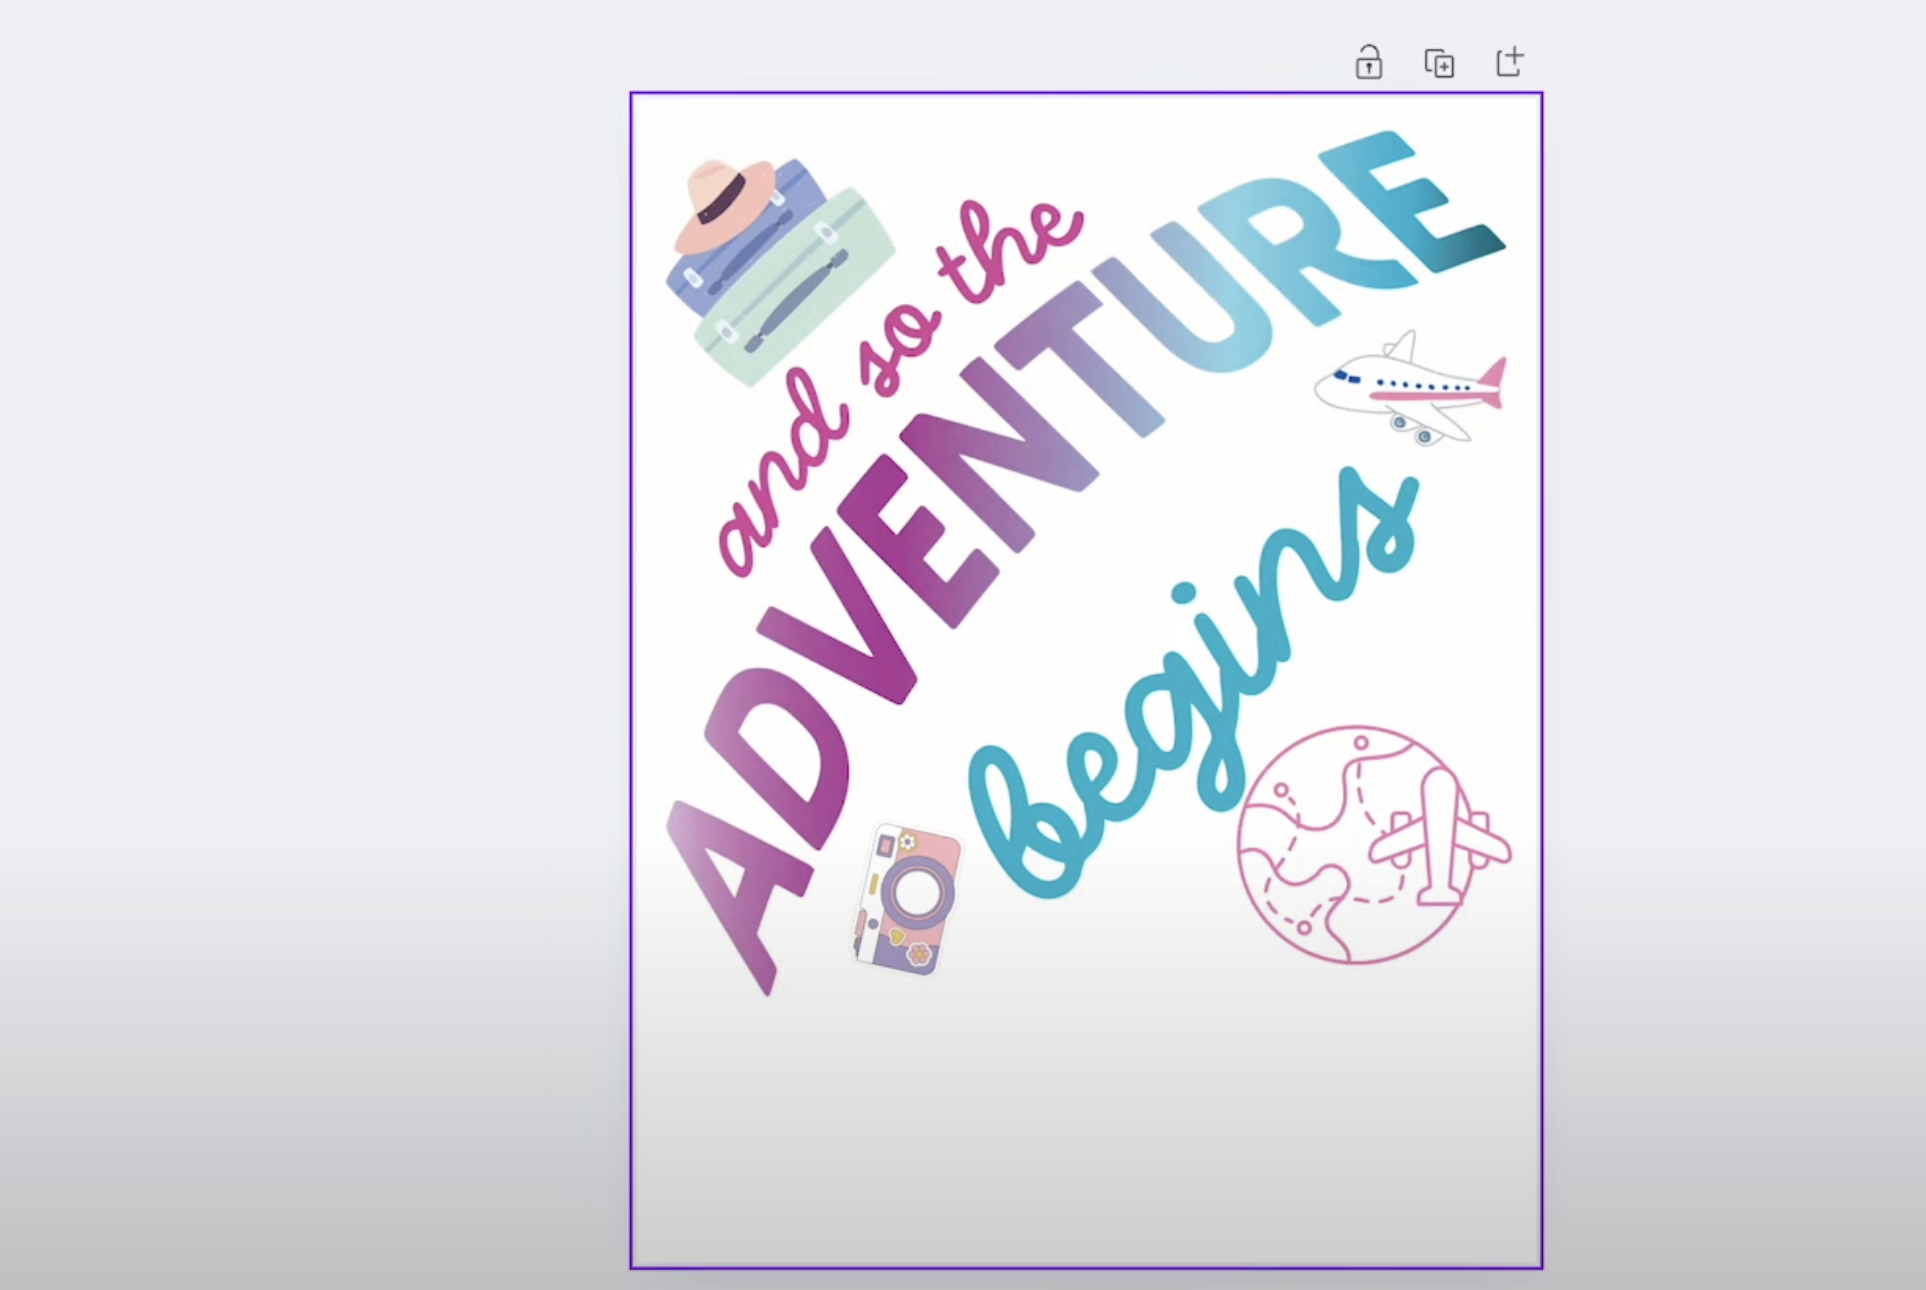
Here you can see the lettering and the travel designs I added.
Make sure you leave the space in the middle blank for the hole in the middle of the base.
Step 3. Print the Sublimation Design
You cannot print directly from Canva. Click Download, and I like to download a PDF for Print and chose CMYK.
Ensure the design is mirrored before sending to the printer. Make sure you are printing to a sublimation printer on sublimation paper with sublimation ink.
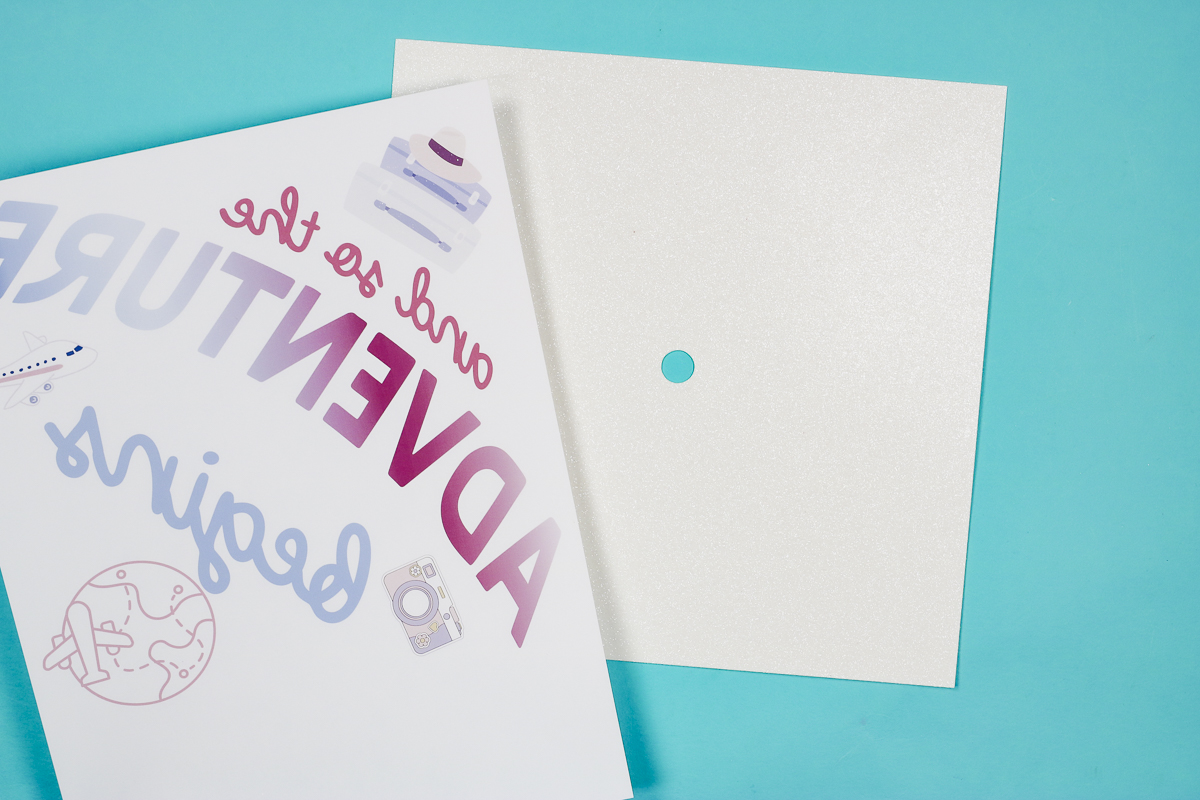
Step 4. Press Sublimation Print onto Glitter Cardstock
I already have my graduation cap topper cut out. This is glitter cardstock. You need glitter cardstock to make the sublimation process possible.
Trim the design so it is the same length on all sides. This will make it easy to center the design on the glitter cardstock.
If needed, hold both pages up to the light to make sure the hole isn't overlapping any of the text.
Secure the print in place with heat-resistant tape in each corner to make sure the design doesn't move during the sublimation process.
Place a piece of protective paper on a heat-resistant mat and add the glitter cardstock and sublimation print with the sublimation print on top.
Cover with protective paper and press at 400 degrees for 45 seconds.
I am using my larger EasyPress to make sure the entire design is pressed at one time.

When the time is up, remove the heat press, protective paper, and sublimation print.
The glitter cardstock may bow a little bit, so I placed it under the heat-resistant mat to cool to help flatten it out.
How to Add Toppers to the Graduation Hat
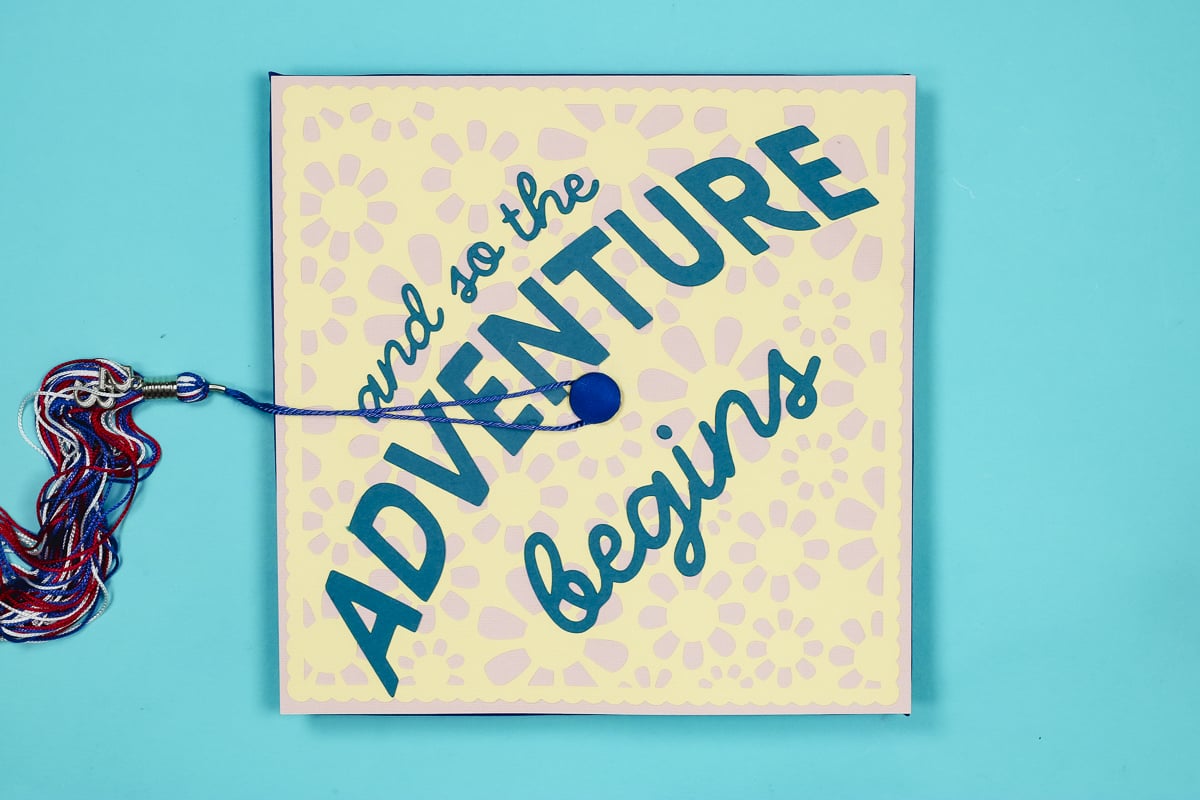
Now we're ready to add the toppers to the graduation caps. The process is the same regardless of how you made the topper.
Step 1. Cut Slits Around Hole
The button hole on these toppers is a little smaller than the button on the top of the cap. This is to ensure the topper doesn't come off and give it a more professional look.
Cut little slits around the hole. Depending on the thickness of the cardstock you may need to add more slits.
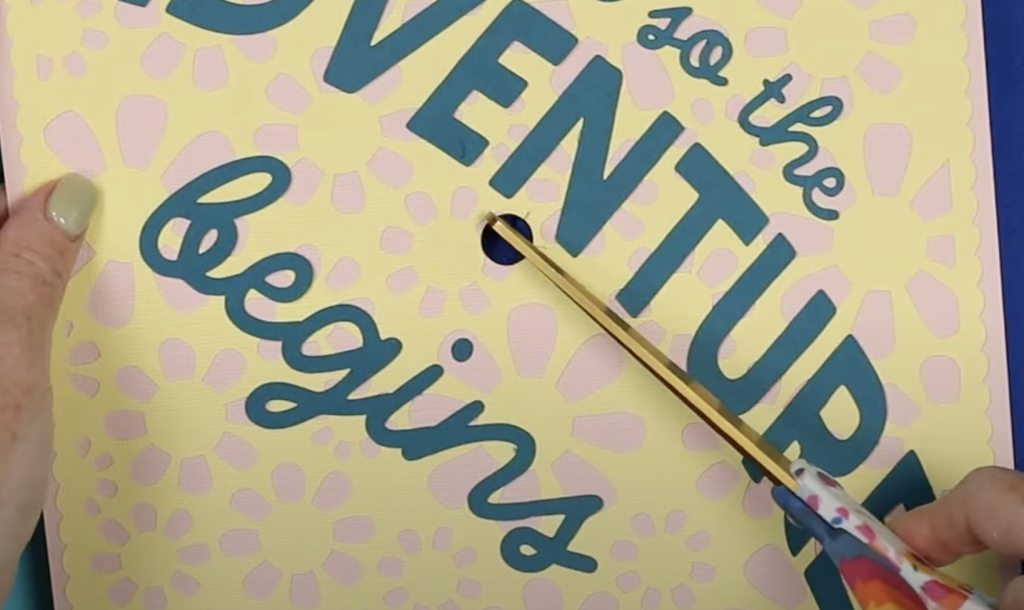
Line the hole in the topper up with the button and make sure it's oriented the way you want.
Step 2. Work the Cardstock Over the Graduation Cap Button
Gently work the hole around the button so all the edges sit under the button.
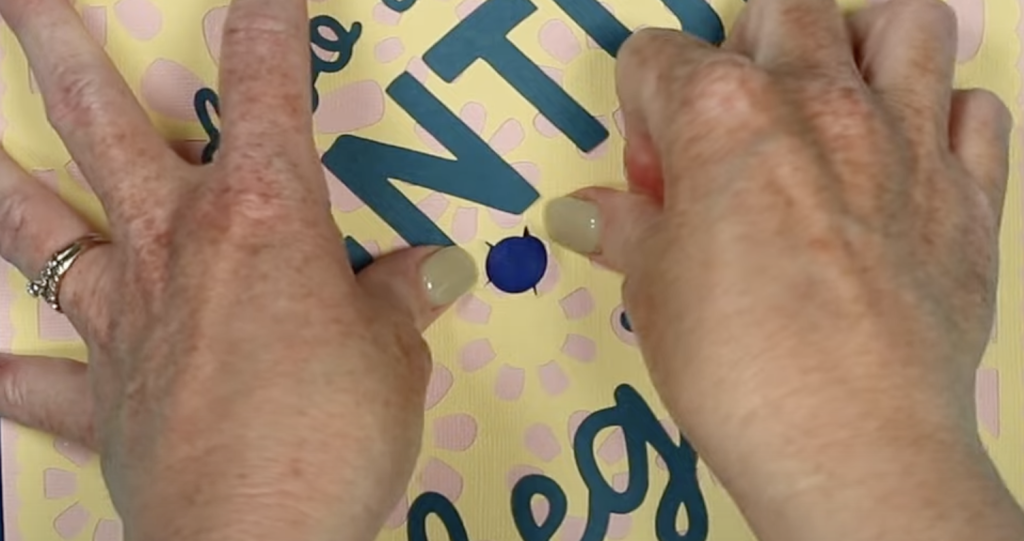
If needed, use a thin tool like the Cricut spatula to work the cardstock under the button.
If you need to adjust the placement, do that now. Make sure it's facing the direction you want it to be.
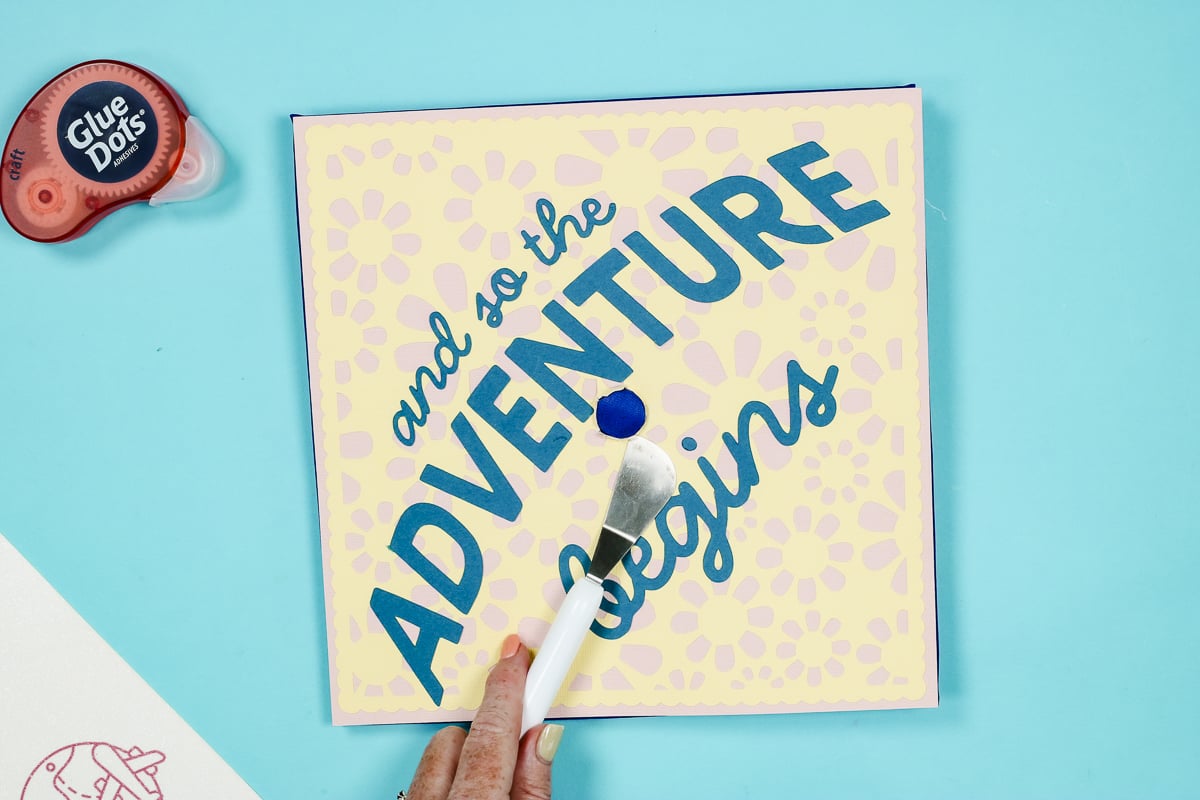
Step 3. Secure Topper to Hat
I like to use glue dots to secure the corners of the toppers to the graduation caps. The great thing about using glue dots is that you can remove them later without damaging the graduation cap.
Finish the cap by adding the graduation tassel.
I did not have any problem getting the tassel under the button, even with the cardstock under it.
Which Should You Make?
I love the way both of these toppers turned out, and you can make one whether you have a Cricut or a sublimation printer.
If you don't have a Cricut, you can create the sublimation version with a sublimation print, glitter cardstock, and a pair of scissors.
I think most glitter cardstock should work with sublimation, but at this point, I have only tried the brand I linked above, so that is the only type I can guarantee works.
If you try a different brand, make sure it is a glitter cardstock that has the glitter texture. It can't be the smooth surface glitter cardstock.
With a Cricut, you can choose to use all cardstock, as I did, or you can combine cardstock with HTV or vinyl. You can also add 3D elements like a rolled flower if you want.
Regardless of which option you choose, you can customize the design for your graduate. Whether your graduate is headed on a backpacking trip across Europe or is off to medical, beauty, or law school, you can find elements specific to them (and these are just a few examples).
I hope I've answered any questions you have about making custom graduation cap toppers. If you have any additional questions, leave them in the comments, and I'll be happy to answer them for you.