

Have you ever wanted to create a sublimation-style image using an InkJet printer? Today I’m testing Siser EasyColor DTV, a printable HTV, to see how vibrant the colors are and how well it holds up after washing. If you’ve been curious about printable HTV, this might be the perfect product for you!
New to printable HTV? Learn all about it in my Beginner's Guide!
Can’t watch the video or missed some of the information? You can also follow along below!
What Is Siser EasyColor DTV?
EasyColor DTV is a new printable HTV from Siser. It can be used with an inkjet printer and with the Print Then Cut function with your Cricut machine. EasyColor is different than sublimation. You need to use the DTV with a Cricut machine and the Print Then Cut function because, like regular HTV, it sits on your blank; it doesn't infuse into it. If you didn't cut out your design, you'd end up with a full sheet of EasyColor pressed to your shirt. Probably not the look you're going for.
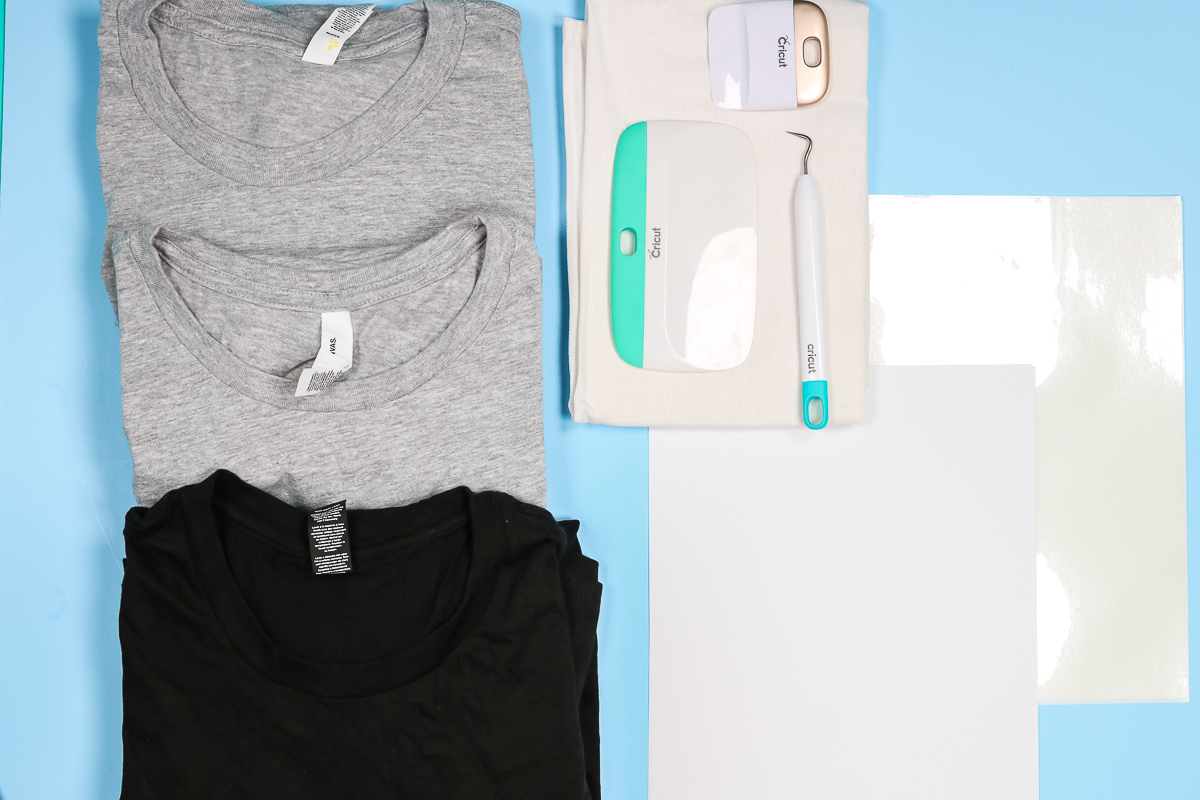
Supplies Needed For Siser EasyColor DTV Projects
- Cricut Machine (You will need an Explore, Maker, Joy Xtra, or Venture for Print Then Cut, as an original Cricut Joy will not work.)
- Siser Easycolor DTV
- Siser Heat Mask (a special transfer tape that withstands heat)
- Weeding Tools
- Scraper
- Brayer
- EasyPress (or any other heat press)
- Teflon Sheet
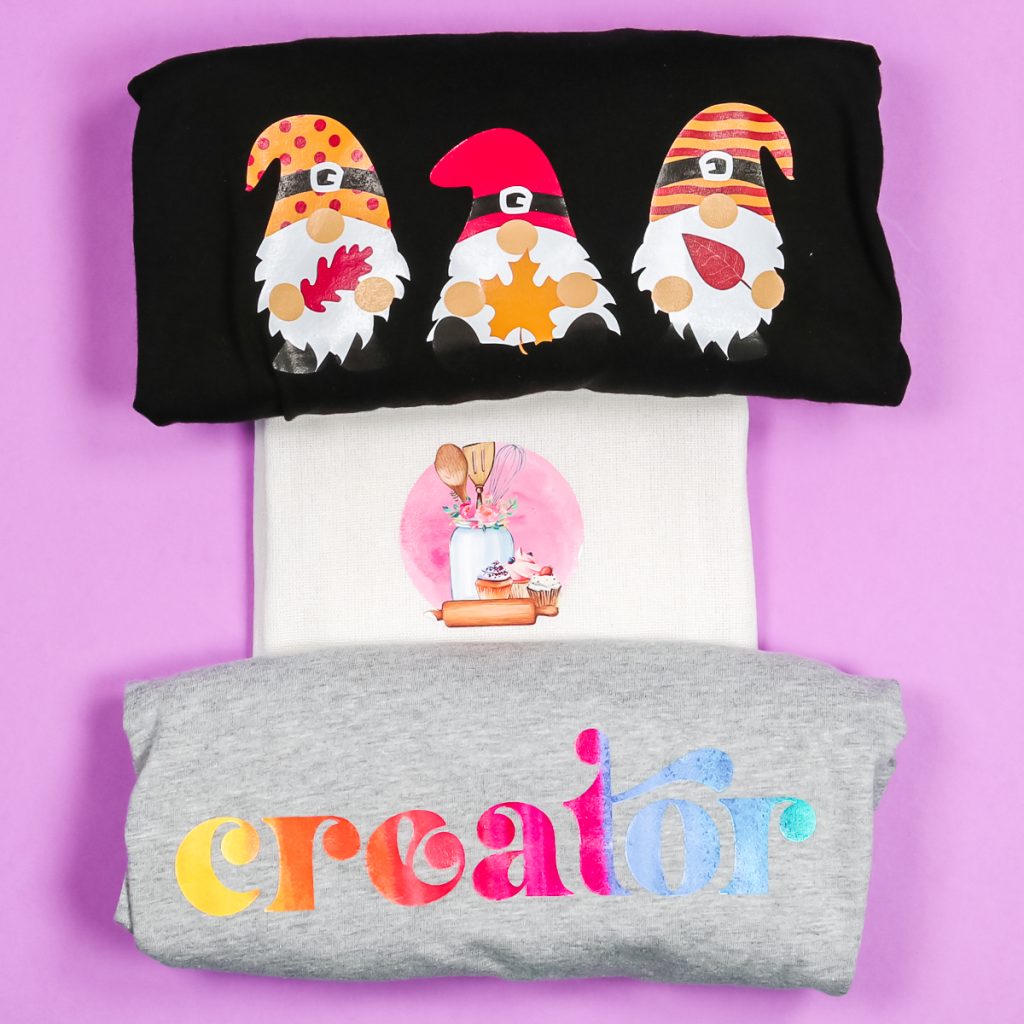
Designs Used
- Gnomes
- Kitchen Design
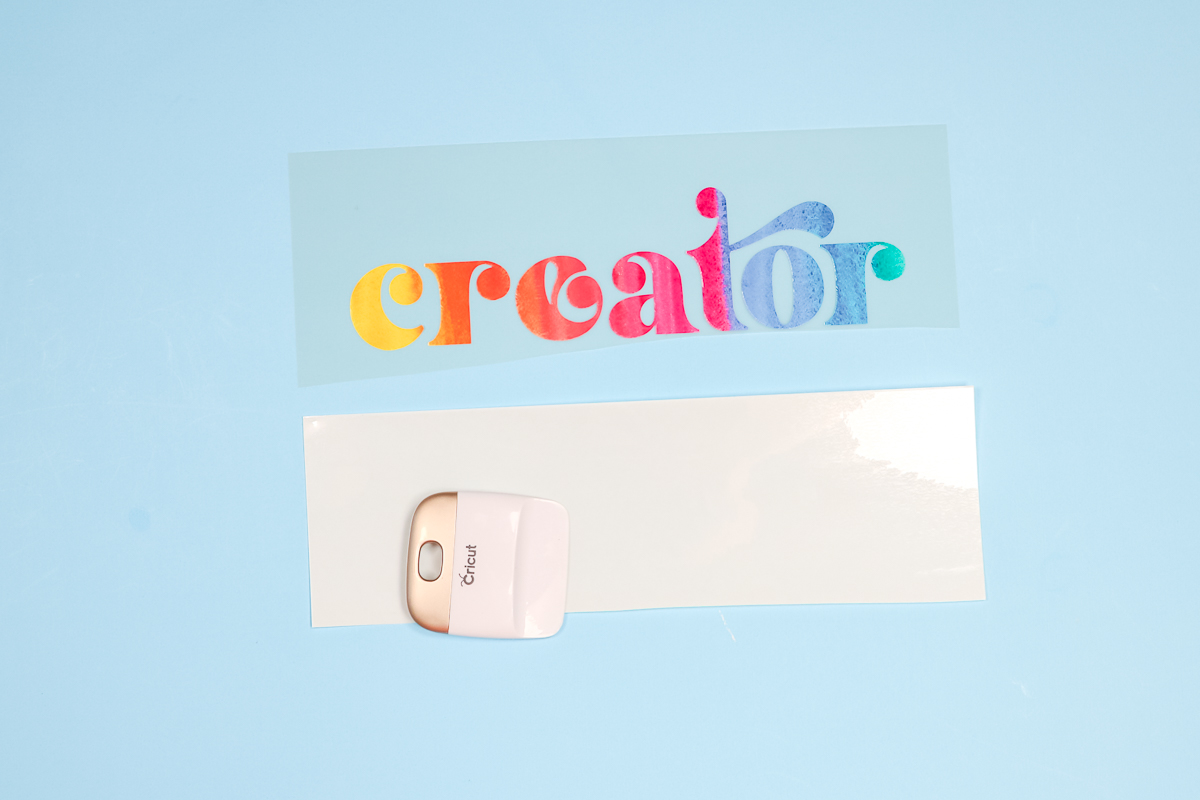
- Creator – Use code ANGIEHOLDEN for 10% off!
You'll also need a printer. If you're looking for a printer to use with your Cricut machine, check out my post here.
How To Print And Cut Siser EasyColor DTV
If you've ever used Printable HTV or Heat Transfer Paper, this is similar. You'll need to have EasyColor DTV, Heat Mask, a printer, and your Cricut machine.
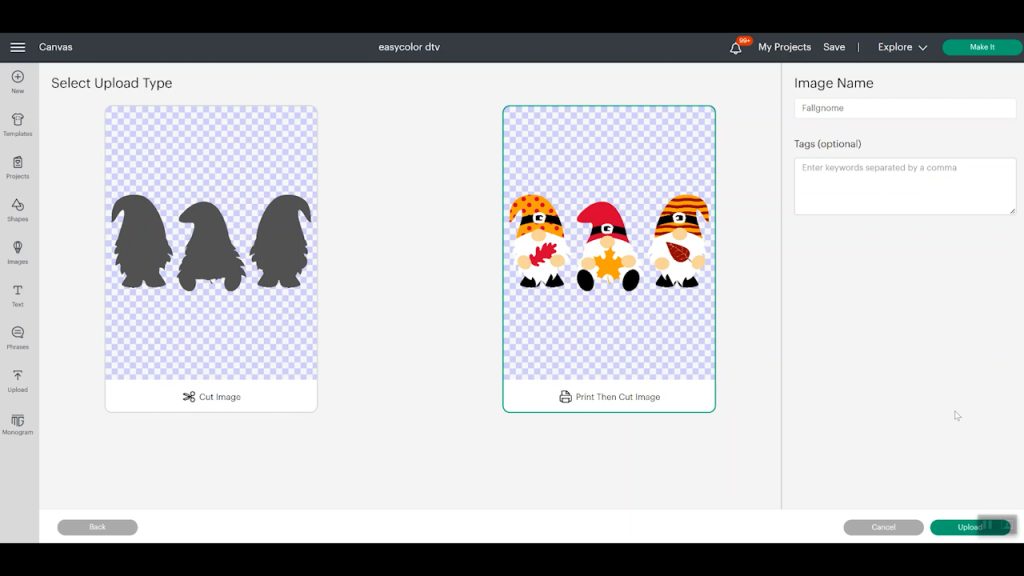
IMPORTANT: If you're uploading your own image to Cricut Design Space, make sure to upload it as a Print Then Cut image.
Uploading Print Then Cut Images
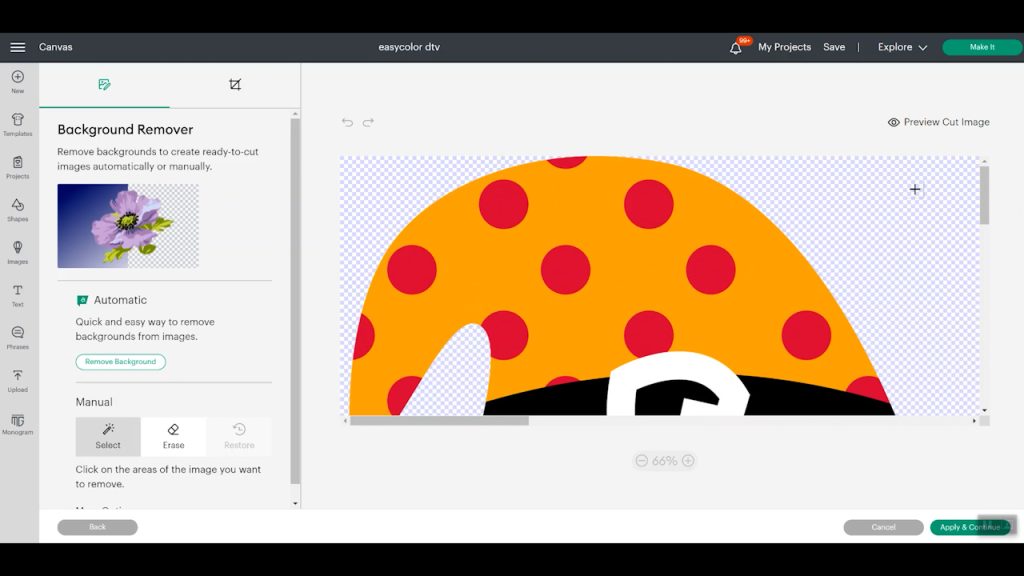
Click Upload in Cricut Design Space, then click Upload Image. Browse your computer files and find the image you want to upload. I usually pick Complex for print then cut, then select Continue.
Next, ensure the background of your images is a checkerboard pattern, as shown below. You can zoom in and see that it is checked. If it is not checked, use the selection tool to erase the background, then click Apply and Continue.
For this type of project, we will want to select Print Then Cut. From there, save your image and add it to your canvas.
Using An Image In Cricut Design Space
If you're using an image already in Design Space, make sure you select all the layers, and at the bottom of the layers panel, select Flatten. This will turn your cut image into a Print Then Cut image. If Flatten is greyed out, check which machine you have selected. The Print Then Cut feature is available only on Maker, Explore, Joy Xtra, and Venture machines. You can see more about using flatten here.
Sizing Your Image
Once your image is ready for printing, make sure it is sized correctly. Remember, for Print Then Cut, the maximum size is 7.44 by 9.94 inches. Click continue and proceed to the mat screen. From here, you can move or rearrange anything. You can often rearrange components and save on materials. You should see a black box around each of your images; that is what the Cricut sensor reads, indicating that it is a Print Then Cut image. Select continue, and we're ready to print.
IMPORTANT: Do not mirror your image.
Printing on Siser EasyColor DTV
Select “Send to Printer,” then choose the printer you're using.
NOTE: I'm using a regular inkjet printer, nothing special about the printer or the ink. This material is also thin, so it should feed through most printers.
Once the printer is selected, click “Add Bleed”. Bleed adds a thin color border around the image, so if the cut is slightly off, it won't be as noticeable. You shouldn't see any white around your design after it is cut. Select “Use System Dialogue” and click Print.
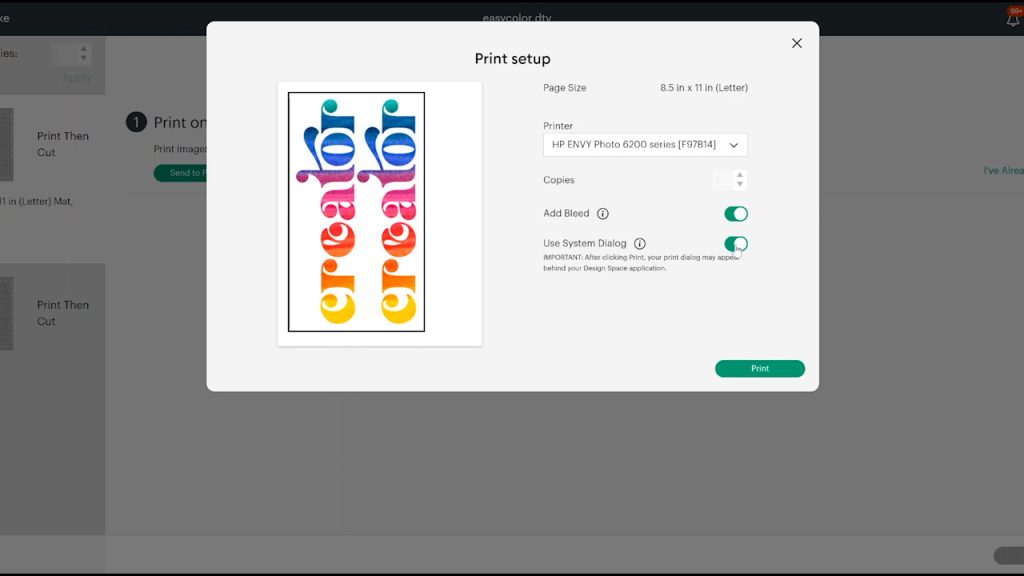
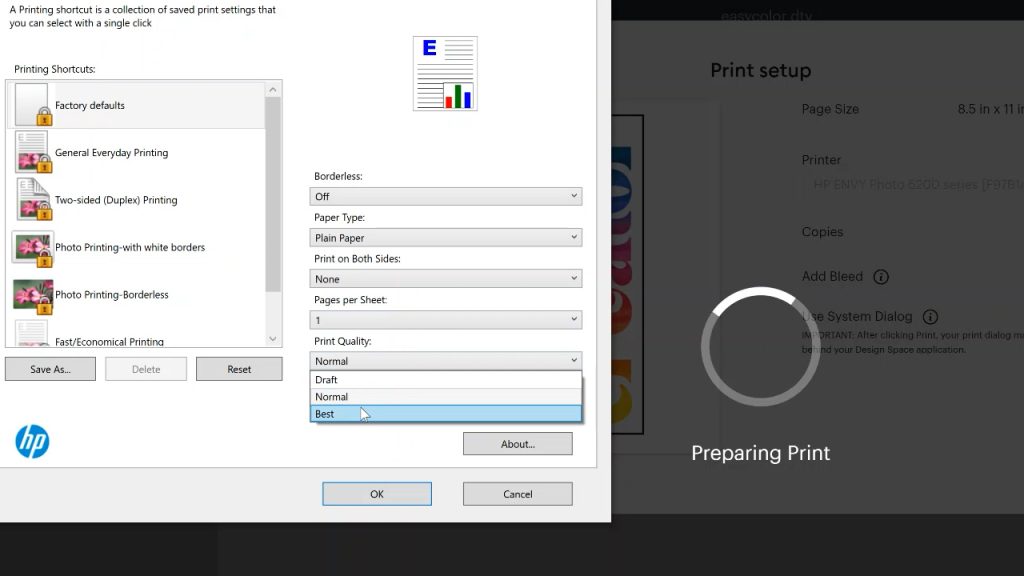
On the next screen, select the printer, then choose Preferences. Your preference screen will vary by printer brand/type. If your print dialogue offers print quality options, select the best setting, and EasyColor DTV recommends using plain paper as the paper type. Click Okay and print your design.
Siser EasyColor DTV has a white side and a greyish side. You want to print on the white side. I did find that EasyColor DTV came out of my printer completely dry, which was really nice.
Your package may include two different things. If it does, one of them will be EasyColor DTV, and the other is the Heat Mask you need to apply your printed image. The Heat Mask is shiny, and if you lift a corner slightly, it is sticky.
NOTE: Heat Mask is a specialized transfer tape designed to withstand heat. I have not used any other brands with this product. Regular transfer tape should not be exposed to heat or used.

Cutting EasyColor DTV
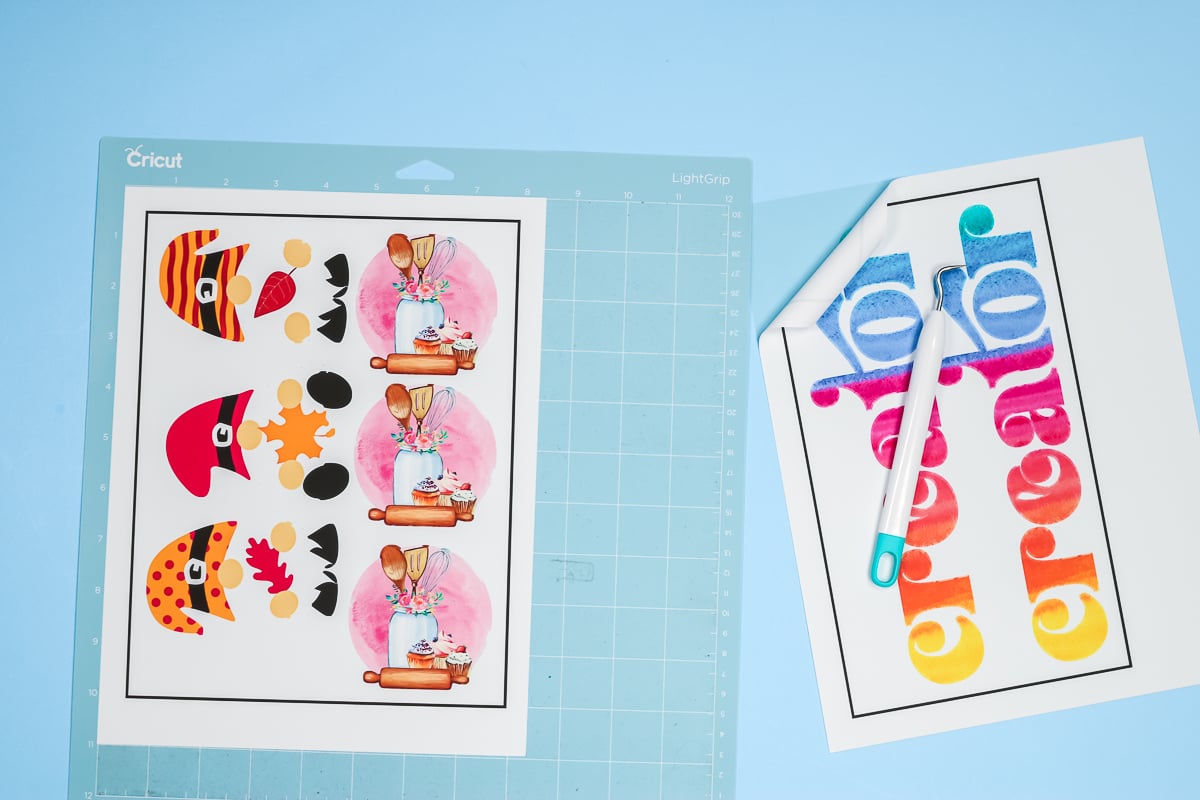
Now that we have our images printed, we're ready to cut. Place your image onto a Cricut cutting mat with the image side up. I am using a blue LightGrip mat.
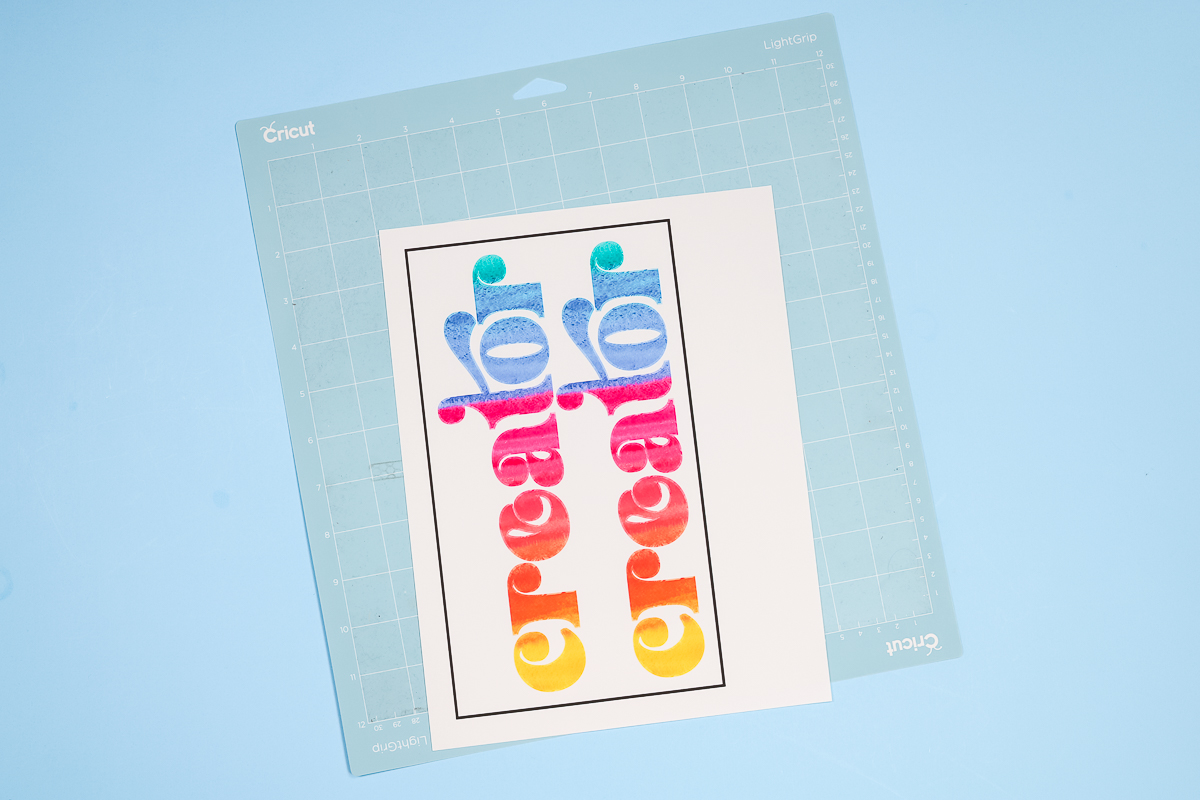
You can see in the photo above that my image appears slightly fuzzy around the edges. That's because the bleed is on; when it cuts, it will be nice and clean. Be sure to place your image onto the mat oriented the same way as it is on your screen. Make sure it's stuck onto your mat really well. I used a brayer to adhere it.
Siser recommends cutting this product on the vinyl setting at higher pressure. If you're using an Explore Air 2, use the vinyl plus setting on the dial. On any Cricut machine, open Design Space, select the vinyl setting, then increase the pressure.
If you've never used EasyColor DTV, I recommend running a small test cut to confirm the correct settings for your machine.
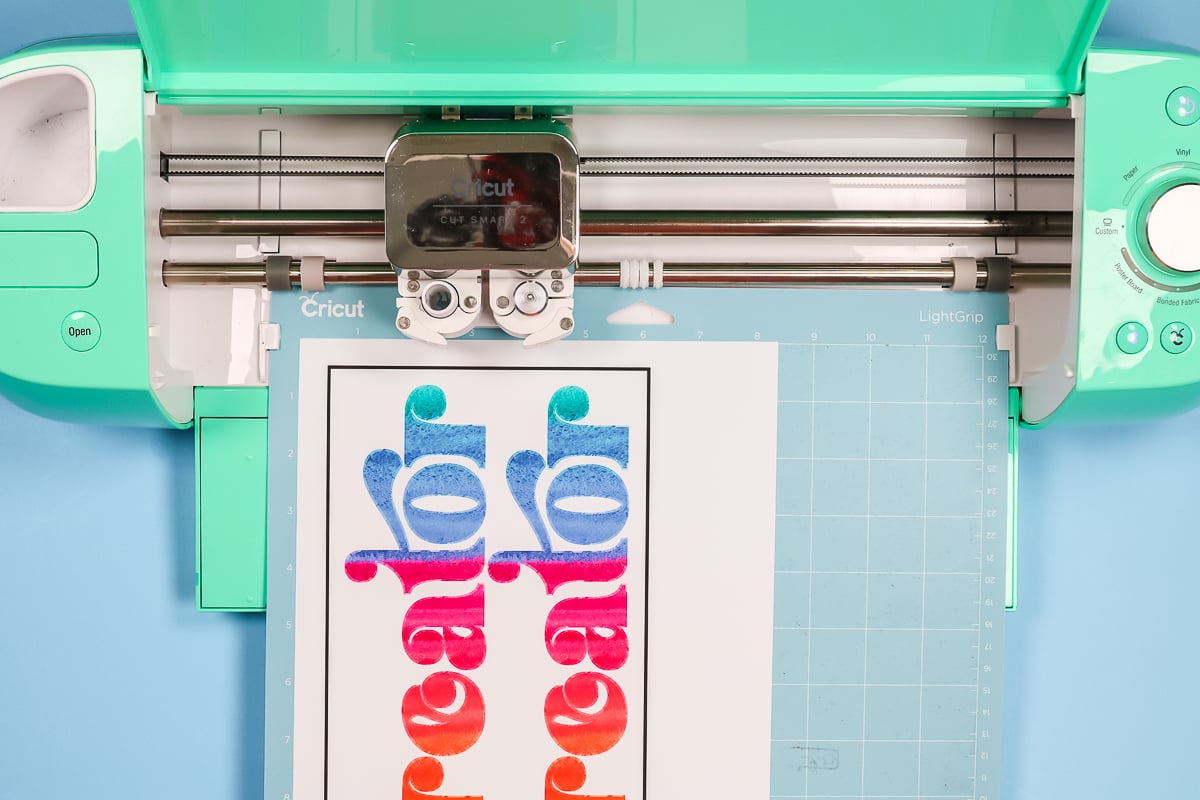
Load the mat into your machine and press Go. Your machine will read the black box around your design and then cut. When it's finished, unload the mat.
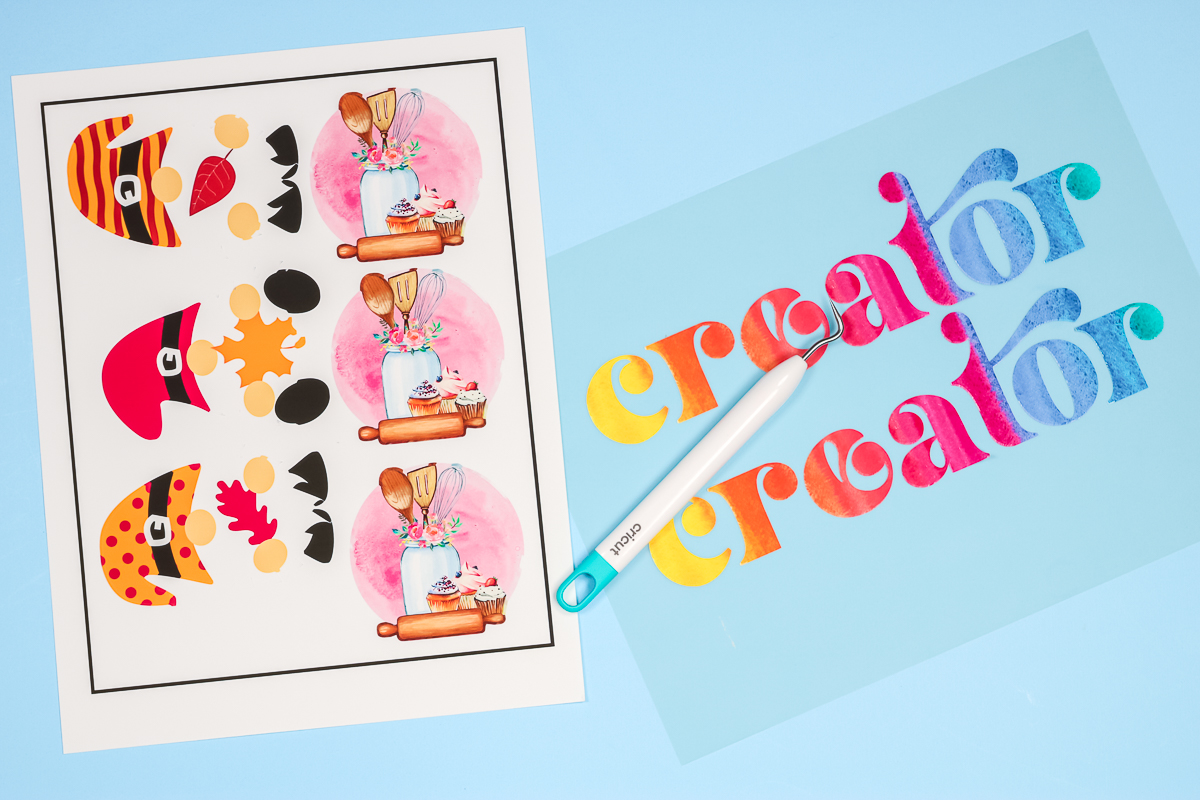
Weeding EasyColor DTV
Weeding EasyColor DTV is the same as weeding other HTV products. You'll start in the upper corner and remove all excess vinyl from the outside. Then, using a weeding tool, remove the insides of all letters.
Once the weeding is done, we're ready to apply the DTV to our shirts. This material is quite thin, but it weeds really easily. The vinyl-plus setting worked well on both sheets I cut.
How To Apply Siser Easycolor DTV
There are actually a couple of ways to apply EasyColor DTV. No matter how you apply your DTV, you'll want to always preheat the fabric first. Your preheat should be about 3 seconds to remove any moisture from your fabric.
EasyColor DTV Heat Settings
You can use an EasyPress at medium pressure (340 degrees) for 30 seconds, a regular heat press at 310 degrees for 15 seconds, or your household iron set as hot as it will go for 25-30 seconds.
How To Apply DTV Without Heat Mask
If your image is one single image, you don't need to use a heat mask. You can peel the image from the backer and place it on your fabric.
Because this material is thin, it may curl slightly when you peel it from the backing. Lay your image onto your preheated fabric where you want it and place a protective sheet over the top. Because this printable HTV doesn't include a carrier sheet, you need to use a sheet of paper between the DTV and your heat source. I am using a Teflon sheet, but you could also use butcher or parchment paper.
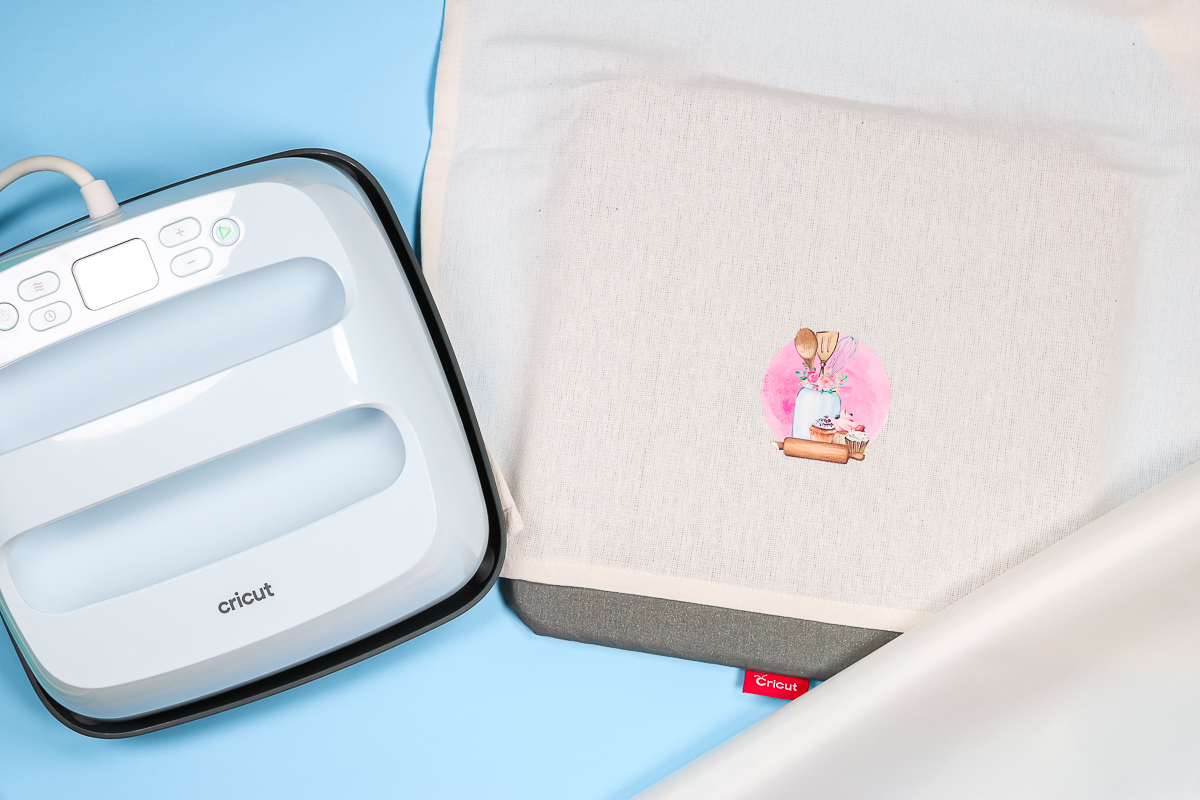
Make sure your design lies flat, with no wrinkles, under your protective sheet, then press.
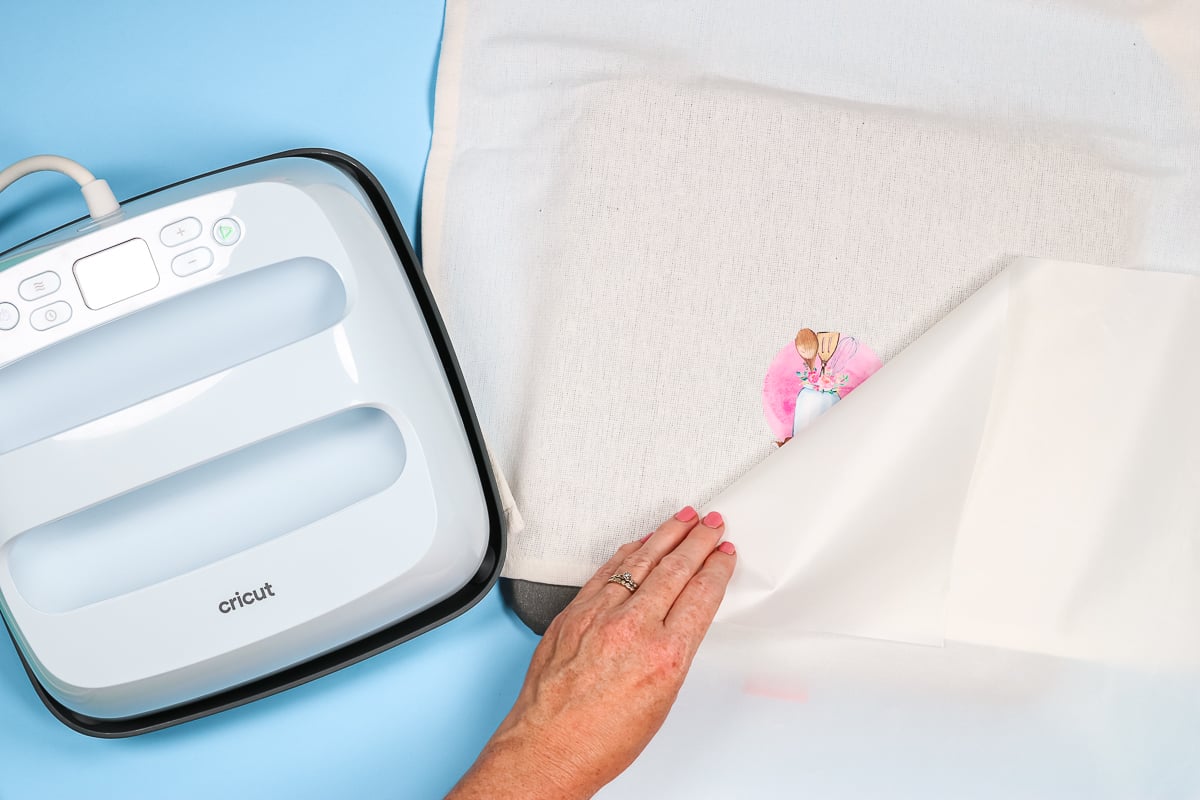
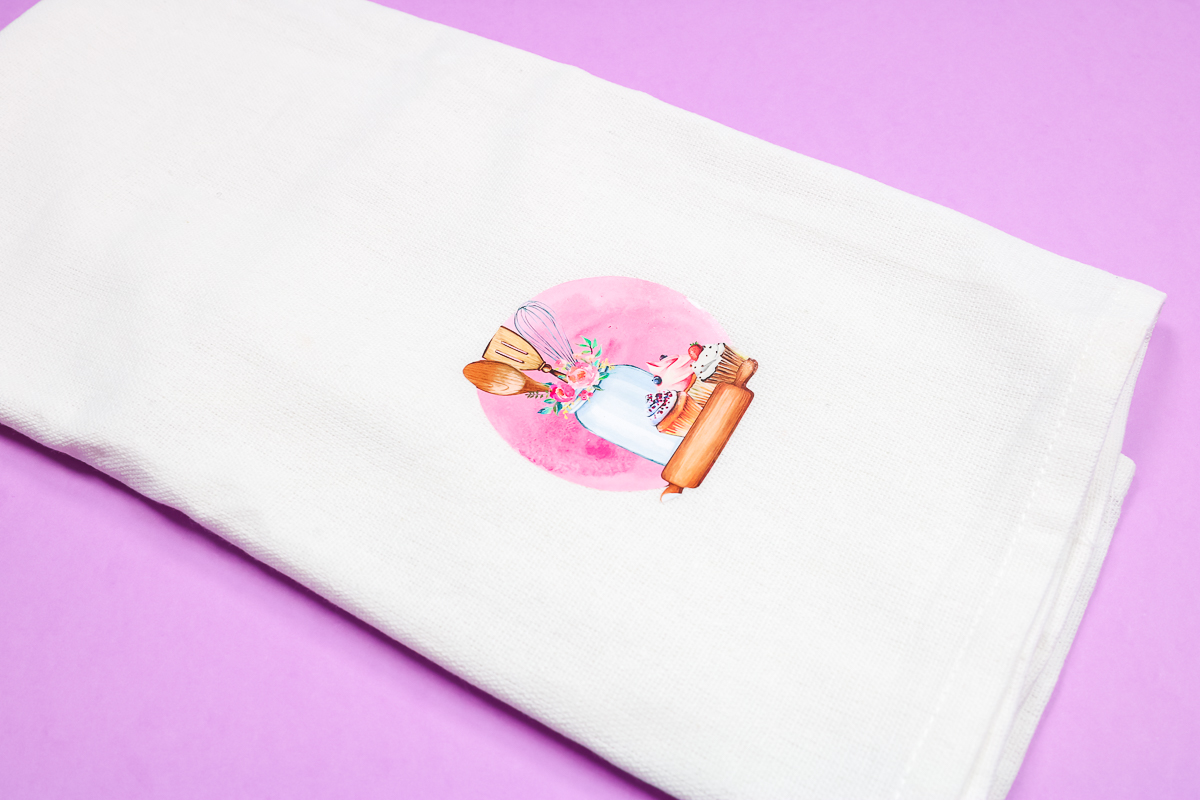
As soon as your time is up, remove your heat source and your protective paper. This material is a hot peel, so you don't want to leave the protective paper on top as it cools. This towel turned out perfectly. I am using a 100% cotton tea towel, and the EasyColor DTV looks vibrant and smooth from edge to edge.
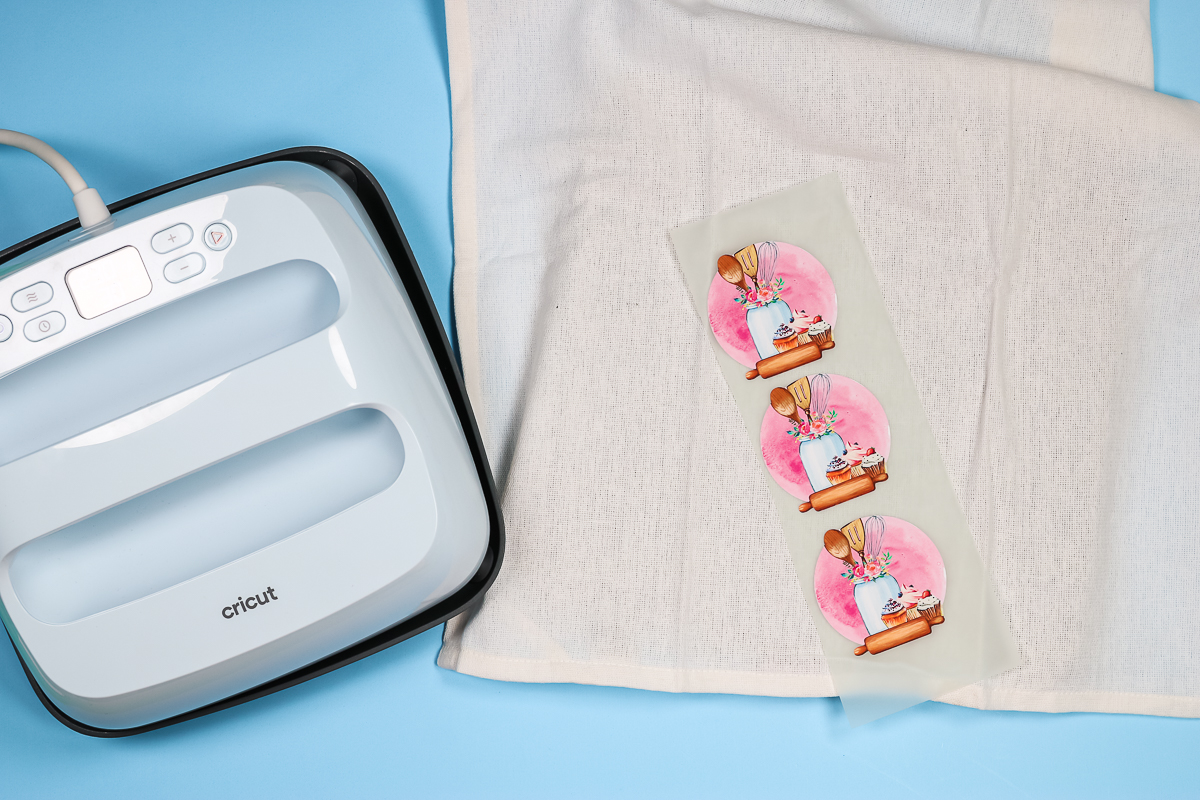
Applying Siser EasyColor DTV With Heat Mask
When your image has multiple pieces, you'll need to use a heat mask. A heat mask is similar to transfer tape; however, it can withstand the heat you will need to apply. Cut your heat mask large enough to cover your entire image.
Peel the backing from your heat mask and then lay it on top of the design. Use a scraper tool on both the front and back of the design to press the DTV design onto the heat mask.
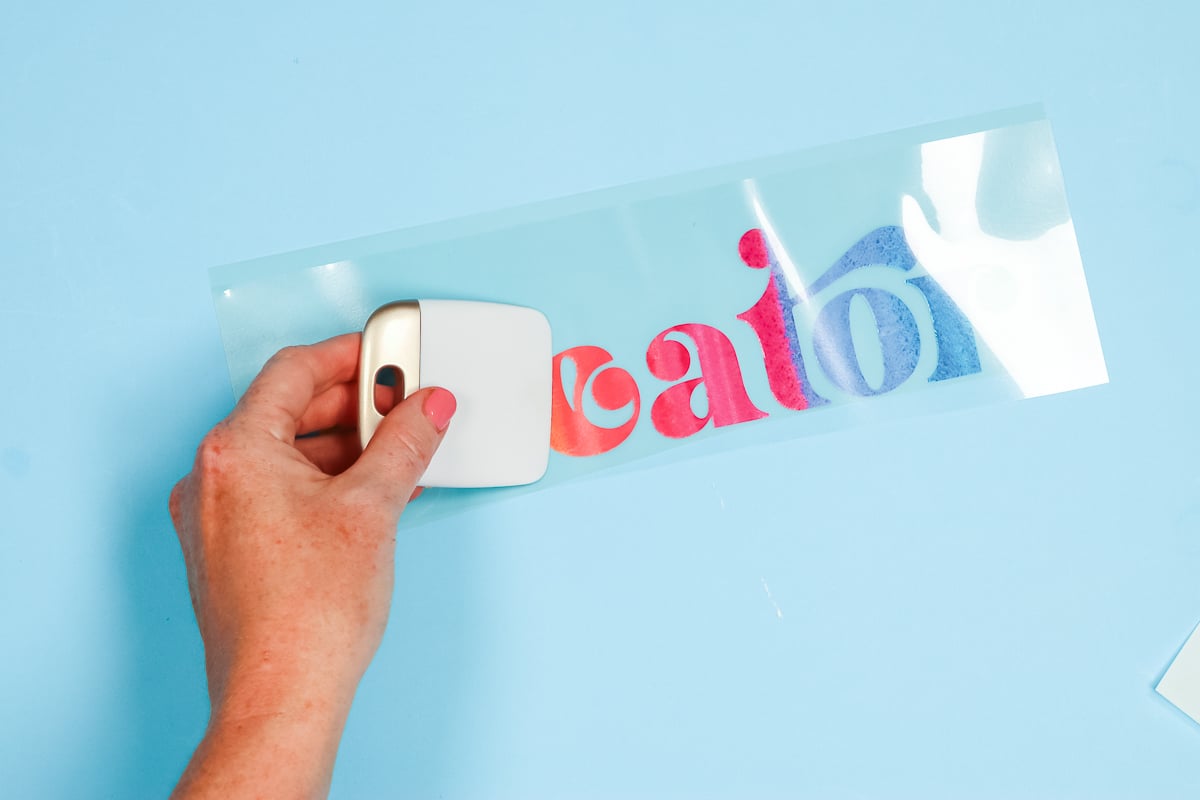
Flip the design, mask side down, and slowly peel the DTV backer from your design, leaving the image attached to the heat mask. I found the easiest way to do this was to peel the backing, fold it back onto itself at a 45-degree angle, and make sure the DTV is stuck to the heat mask well.
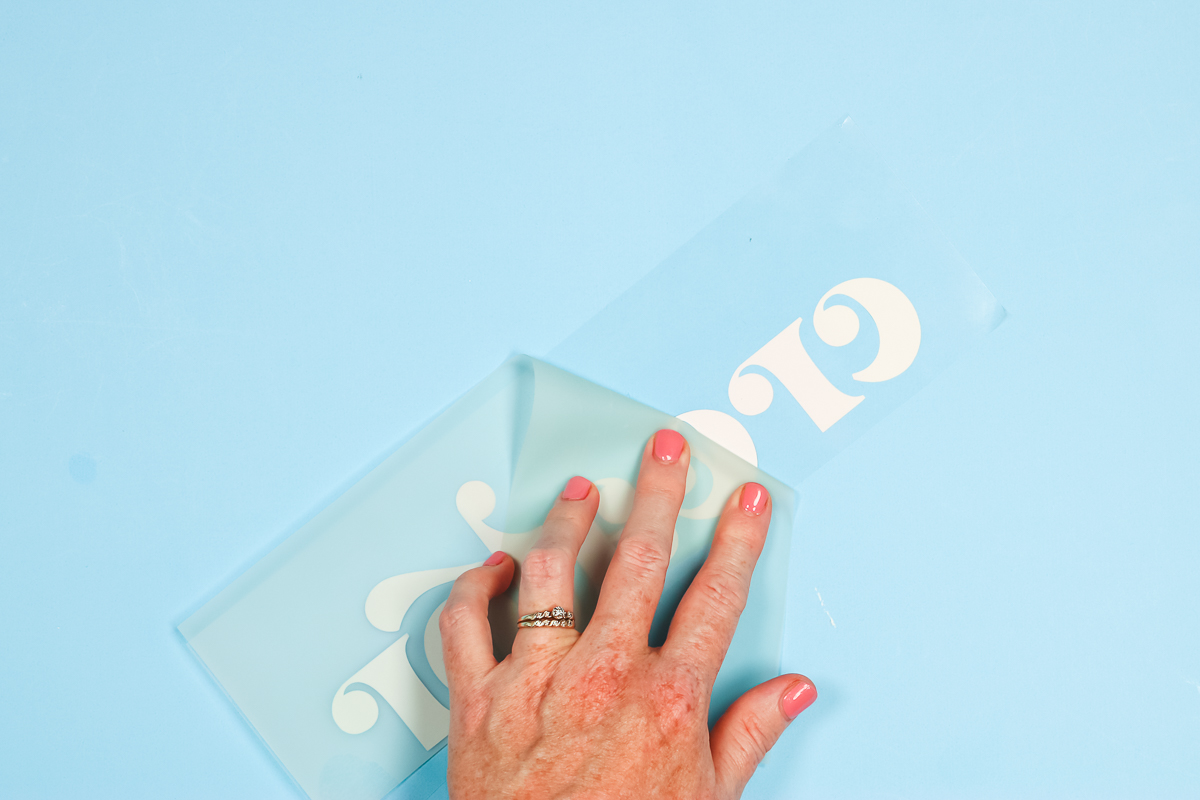
The heat mask acts as a protective sheet, so you don't need to add anything extra on top of the design. Press for the recommended time and temp, and remove the heat mask as soon as the time is up.
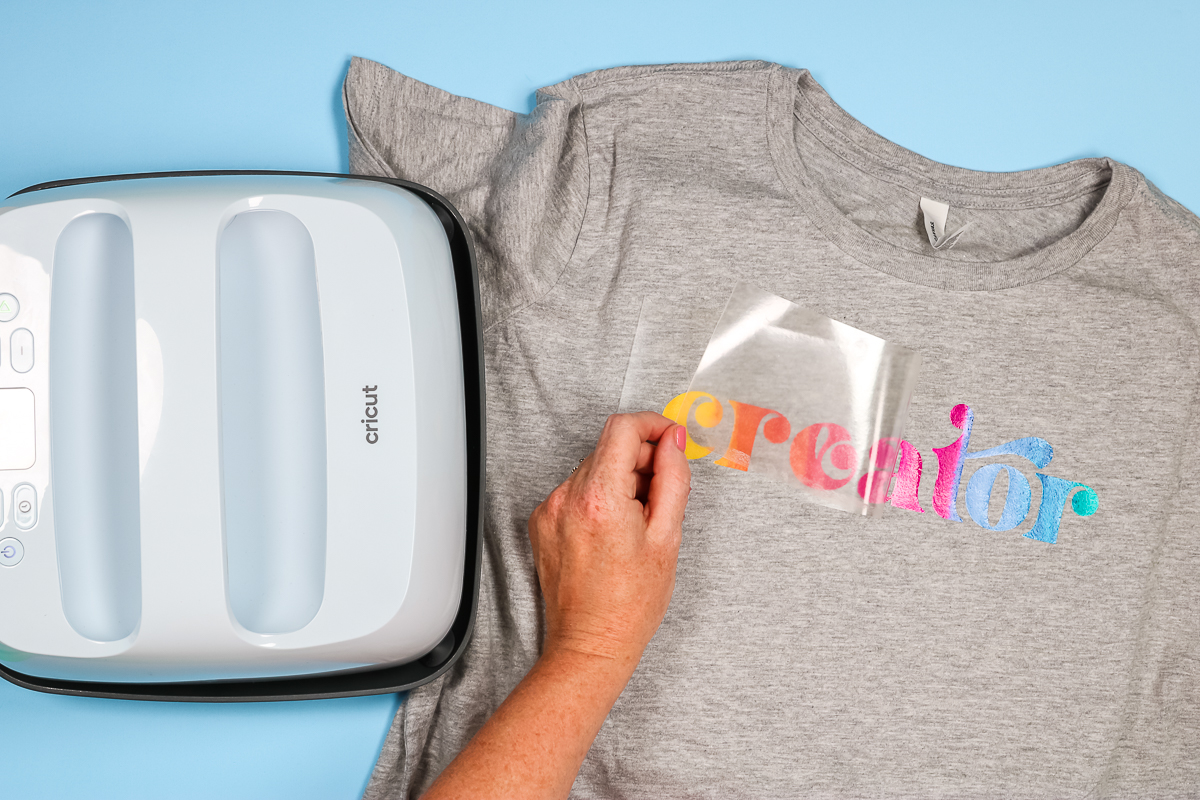
Peel the heat mask back carefully, ensuring the EasyColor DTV is securely adhered everywhere. This shirt is a cotton-poly blend. The recommended time was 25-35 seconds. I pressed for 30 seconds and noticed a little lifting along the edge of the letter. I pressed for 5 more seconds and removed the heat mask, and this time it looks beautiful.
To ensure the design is pressed down well, I remove the heat mask, place a protective sheet over the image, and press again for 5-10 seconds.

I love how vibrant the colors look, even on this grey shirt. Using a heat mask is perfect for images like this one. It would be hard to lay out each letter and keep them aligned because the back of DTV isn't sticky. Using the heat mask keeps everything in place exactly how it is cut.
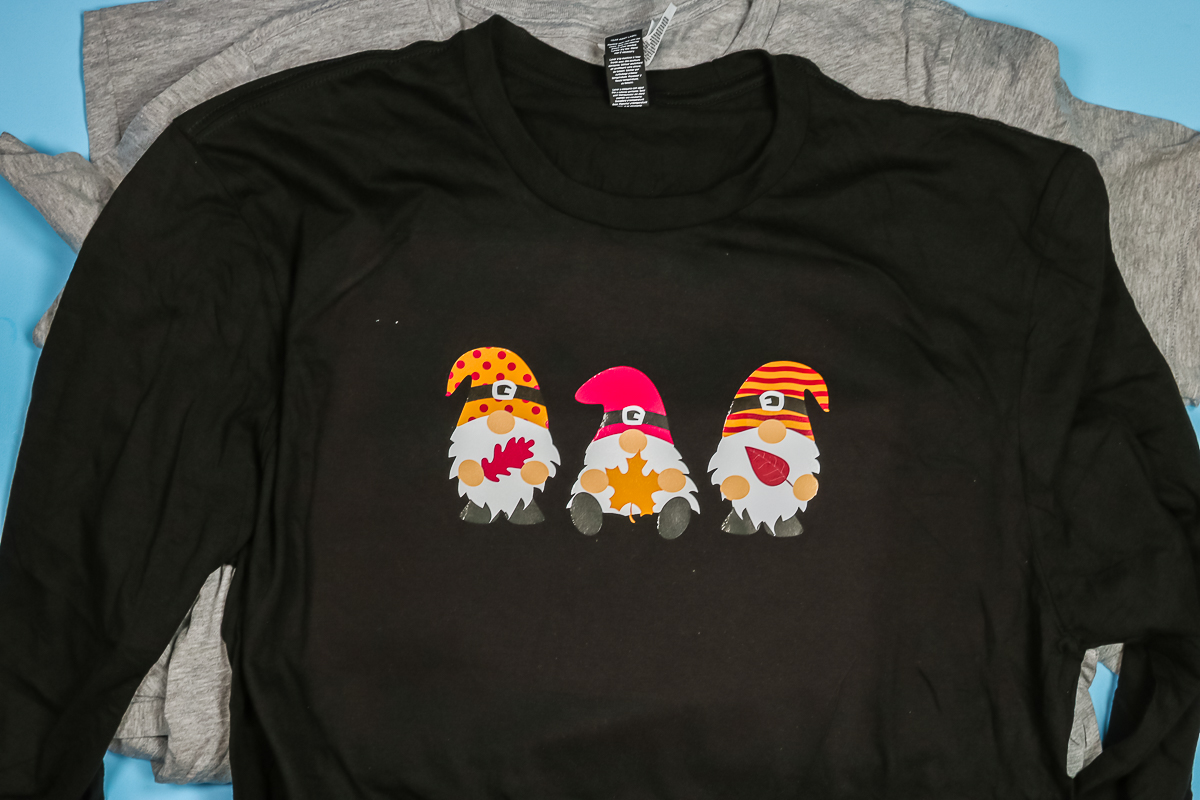
Applying EasyColor DTV On Dark Materials
Earlier, I said EasyColor DTV is great even for people who own a sublimation printer. Dark materials are a perfect example of why someone who owns a sublimation printer would want to use EasyColor DTV.
I love how these little fall gnomes look on this black shirt. The white is bright, and the colors are vibrant; none of the black from the shirt is showing through at all. If you want to use dark-colored fabrics for more complex images, try EasyColor DTV.
Final Thoughts On Siser EasyColor DTV
I really like this product! I love how it looks on light materials and dark materials. It is thin so it doesn't feel stiff or bulky. It's great that you can use it with any heat source. From a heat press to a household iron, if you have any of them, you can use this product. Another great feature is that you can use the printer you already own with the ink you already have. No special inks or printers are required!
Siser EasyColor DTV Recap
I know I just threw a ton of information at you about Siser EasyColor DTV. Below are the 7 most important takeaways from this post.
- Siser EasyColor DTV is different than sublimation. You need to use the DTV with a Cricut machine and the Print Then Cut function because, like regular HTV, it sits on your blank; it doesn’t infuse into it.
- Siser EasyColor DTV has a white side and a greyish side. You want to print on the white side.
- Your package may include two different things. If it does, one of them will be EasyColor DTV, and the other is the Heat Mask you need to apply your printed image. The Heat Mask is shiny, and if you lift a corner slightly, it is sticky.
- Heat Mask is a specialized transfer tape designed to withstand heat. I have not used any other brands with this product. Regular transfer tape should not be exposed to heat or used.
- Siser recommends cutting this product on the vinyl setting at higher pressure. If you’re using an Explore Air 2, use the vinyl plus setting on the dial. On any Cricut machine, open Design Space, select the vinyl setting, then increase the pressure.
- Weeding EasyColor DTV is the same as weeding other HTV products. You’ll start in the upper corner and remove all excess vinyl from the outside.
- There are 2 ways to apply EasyColor DTV to your projects. Below are your options:
- Without Heat Mask
- With Heat Mask
- No matter how you apply your DTV, you must always preheat the fabric first. Your preheat should be about 3 seconds to remove any moisture from your fabric.
FAQ About Siser EasyColor DTV
I know you probably have more questions about Siser's new product, and I am answering a few below. You can also ask any additional questions in the comment section.
Does EasyColor DTV Wash Well?
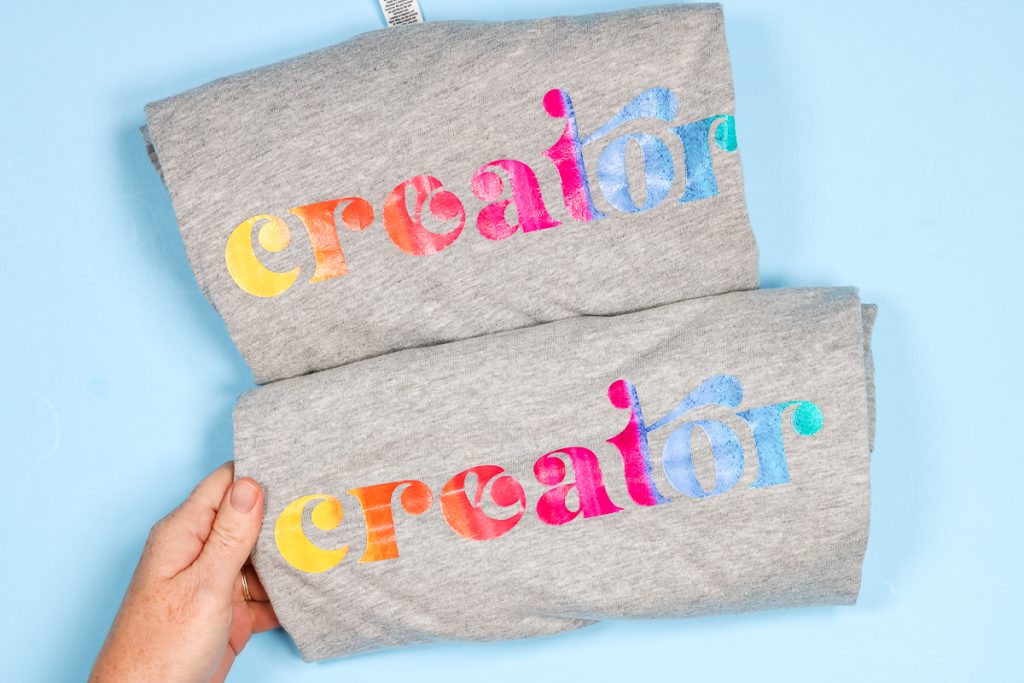
To test how EasyColor DTV washes, I made two identical shirts. Same image, same DTV, same shirts. I am going to wash one shirt several times so I can compare it with the brand-new shirt.
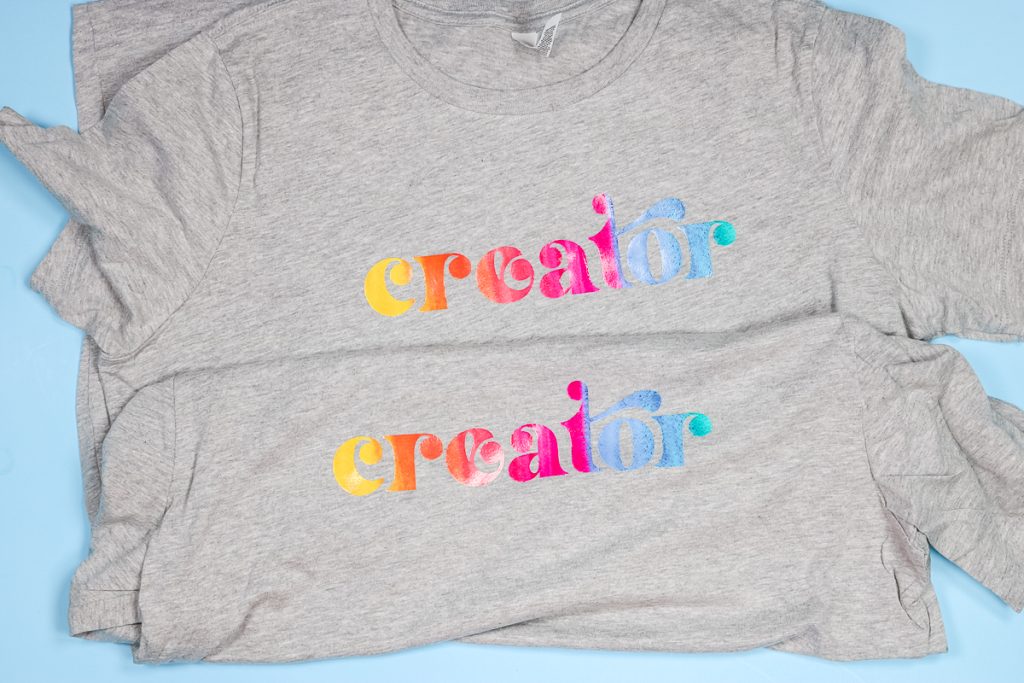
In the image below, I ran the top shirt through 15 laundry cycles. The bottom shirt hasn't been washed at all. If you look closely, you may notice some wrinkling and lifting along the edges of the letters.
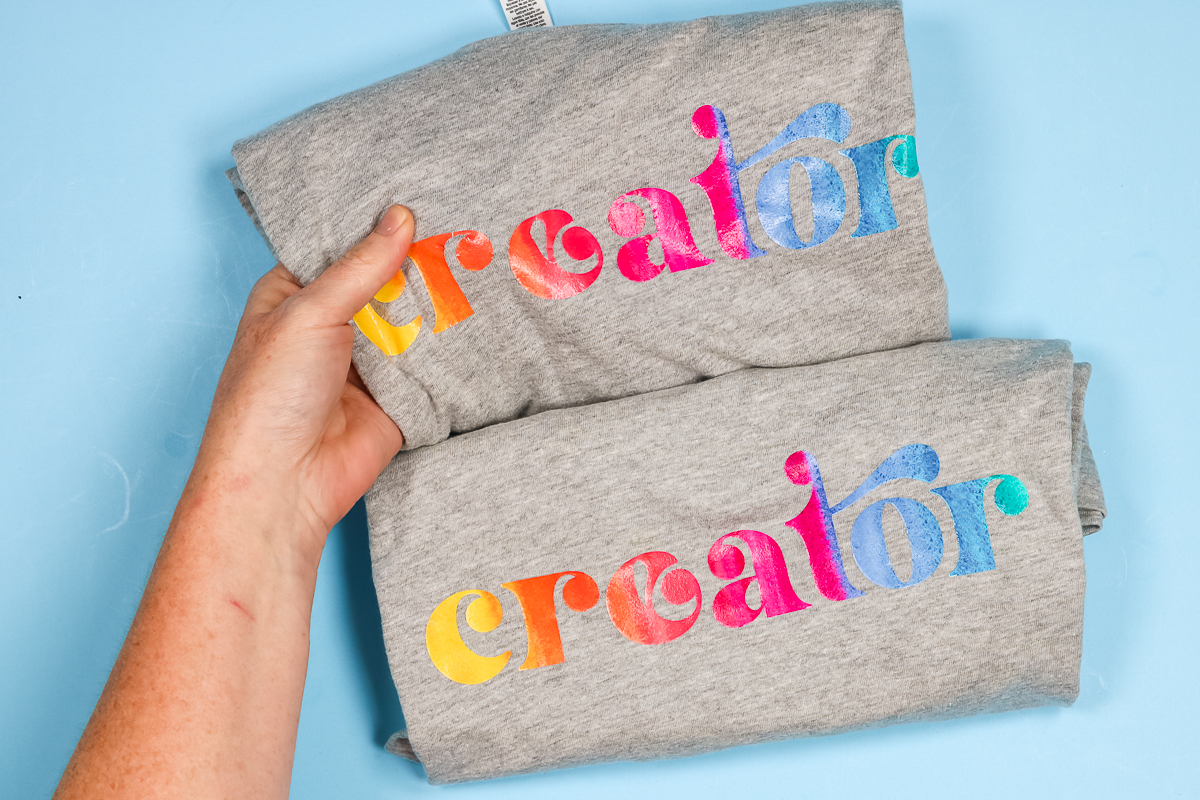
When the EasyColor DTV was first applied, it had some good stretch. After 15 washes, I can see some cracking in the thin sections of the R and A. When stretched, you can see some white in the break in the image above.
This tells me that at 15 laundry cycles, the material is starting to fail. After 15 laundry cycles, I would still wear this shirt, as the cracking and wrinkling are minimal. Siser EasyColor DTV states it will last 20 washes, and I think even with the little cracking at 15 washes, it would be wearable to 20 washes.
IMPORTANT CARE INSTRUCTIONS: You do want to wait 24 hours before you start any laundry cycles, and then you're going to machine wash cold, tumble dry low, no bleach, no dry cleaning.
Following those steps makes the product last as long as possible. Another factor that will help it last as long as possible is applying it correctly and following all instructions in the packaging.
Do I Need Siser EasyColor DTV If I Have A Sublimation Printer?
You don't need Siser EasyColor DTV if you have a sublimation printer, but you may want it. EasyColor DTV can be applied to dark materials, like my black shirt above. It can also be applied to cotton fabrics, as you don't need a high polyester count to use it.
Do I Need A Heat Press To Use EasyColor DTV?
You do not need to own a heat press to use EasyColor DTV. This is because it is not sublimation, so you don't need a really high temperature or heavy pressure. You can use an EasyPress or even your household iron. Learn more about using an iron for printable HTV here.
How Does EasyColor DTV Compare To Other Products?
I have done laundry tests like this on many products over the years. Let's see how they compare:
StarCraft Printable HTV for Light Fabrics – I did not like this at all and don't recommend it.
StarCraft Printable HTV for Dark Fabrics – I do like this product and recommend it. To compare it, however, it showed significant cracking after 13-14 laundry cycles. With EasyColor DTV, I noticed some cracking after 15 laundry cycles.
Heat Transfer Paper – I've tried several brands. Most of them, after 3-5 laundry cycles, looked horrible. I only recommend heat-transfer paper if you don't need anything long-term.
EasyColor DTV – Lasted longer than the other printable HTVs I've tried. It looks better after 15 laundry cycles than the other options I've tried. I do think it is a better product if you have an inkjet printer.
Where Can I Find A Product That Lasts Longer?
To me, the Siser EasyColor DTV was priced fairly. If you have a larger budget and want items to last longer, I have a comparison of Supacolor and a professionally printed HTV. This is where you send your file; someone else prints it, sends it back to you, and you put it on your blank.
For Supacolor and other professionally printed HTV, you need heavy, heavy pressure. I don't recommend an EasyPress or even the Cricut AutoPress to do those; you would need an actual heat press.
So, grab your Siser EasyColor DTV and give it a try for yourself! I really think you will love this product!
6 Siser Resources
If you loved learning about Siser EasyColor DTV and are looking for more Siser resources, check out the blog posts below!
- Siser Puff Vinyl: Is it the Best?
- How to Use Siser EasySubli TWO Ways
- Bright and Shimmery Projects with Siser Electric EasyWeed HTV
- Siser Brick HTV – Everything You Need to Know
- How to Layer Siser StripFlock Pro HTV
- Siser Juliet: Everything You Need to Know


Which vinyl setting is best for Cricut Maker 3? I have tried multiple settings on vinyl, and the machine destroyed the printout.
For cutting Siser EasyColor DTV?
My image is staying on the mask and not transferring to the fabric. Help!! Wasted 3 sheets of ftv so far. 🙁
I would make sure you are using the right side of everything.
I put the dtv on a 100% uv polyester shirt and put it in the wash and some of it was peeling up. I washed inside out in cold water and dried inside out on low temp. Did I iron it too high using the easy press 2 at 340*f for 15 seconds? I did scorch the shirt a bit.
It would depend on what the setting your fabric calls for. It calls for 340 degrees for 30 seconds using an EasyPress with medium pressure. I did not have any scorching on my shirt, which would tell me the temp may have been too high if you had scorching.
I can’t figure out how to get Cricut to cut out my design! I have a sublimation printer so everything is mirrored and my machine cuts where the image should be, not where it is.
Are you printing through Design Space? You can send the image to your sublimation printer from Design Space and it will put the bounding box that your Cricut will read so it cuts in the right place 🙂
Hi Angie,
Help!! I printed and pressed the DTV on a 50/50 blend shirt at 310 for 15 sec. I used butcher paper on top. The first press it was lifting. The second press the butcher paper wouldn’t come off and ruined it. Any suggestions?
Hmmm. You might try playing with the temperature you peel at. Hot or cold peel can make a difference.
How would you compare this to Cricut Printable Iron-on?
I did the same wash test with the new Cricut Printable Iron-on material and the Cricut material did not lift of crack at all after 15 washes. It faded just a little but as far as holding up I think the Cricut did better than the Siser EasyColor DTV.