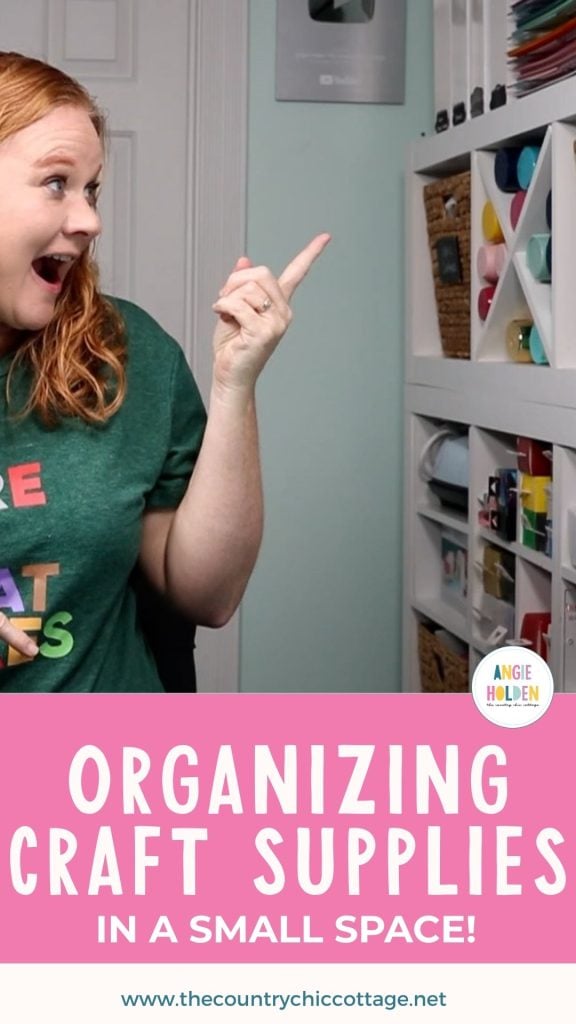
If you're a crafter with limited crafting space, you're going to love my small space craft organization tips and ideas. Staying organized while crafting in small spaces can be difficult, and these tips will help you get organized and stay organized.
Regardless of the size of your craft space and the type of crafting you do, staying organized can help make crafting easier and encourage you to craft more often.
Over the years, my craft space has evolved from the corner of our main living space to closets, and now it's in multiple spaces. I recently added a Create Room Dreambox 2 to one of my craft rooms, and if you've been considering one, make sure to check out my review.
Getting and staying organized can seem overwhelming, especially if you haven't organized your supplies in a while. I'm going to help you get started and finish the process in a way that doesn't feel impossible.
You can watch me go through all my tips and ideas by pressing play on the video below.
How to Organize Small Craft Spaces
I'm going to walk you through each step in the organizing process, emphasizing steps that make a big difference in small craft spaces.
I recommend reading through this whole process before you begin to ensure you know what's involved during each step, and you're prepared for the time commitment that may be required.
Step 1. Gather All the Craft Supplies You Own
The first step is easily the most time-consuming. Depending on how many craft supplies you own and how spread out over your space they are, this can take a bit of time. Make sure you're ready and have space for this step.
When I say gather all your craft supplies I mean all your craft supplies. Go through your entire home and get everything in one area. Check closets, under beds, in your car, etc.
The reason it's so important to get everything in one space is that you need to know what you have in comparison to the space you have.
It's important to be realistic during this process. Know the space you have to craft and any other storage areas, if you have those spaces outside your craft area.
For this step and the next step, you will need enough room to put all your craft supplies and room to sort them.
Step 2. Sort Craft Supplies
This step may require a good mood, a favorite snack/drink, and hopefully no interruptions.
Before this step, know your craft space. Keep that in mind while you're sorting your supplies.
You need space for four piles: Keep, Trash, Donate, and Sell.
As you're going through the items, you'll need to think about which pile it goes in. Some items will be easy to determine, and others you may have to think about. If you are struggling with sorting, be sure to see my tips for decluttering.
While going through your supplies, keep in mind that some materials have a lifetime and can go bad/stop working. Printer inks, markers, pens, paints, glues, materials with an adhesive, etc., can all expire or stop working.
When sorting those items, check to see if they're still working, and if they are, make sure that if you keep them, you'll use them before they no longer work.
Trash Pile
Items you'd put in a trash pile would be things like:
- Pens that no longer work
- Paint that is dried out
- Vinyl/Transfer Tape that no longer sticks
- Any supplies or materials that go with machines/tools that no longer work or are supported
- Old ink for printers that no longer work/are no longer sold
- Machine mats that are past their prime
- Scrap materials that are too small to bundle
- Expired materials
- Broken craft supplies/blanks
- Broken organization supplies
Donate/Sell Piles
I am combining these two piles here because, depending on how many items you have and your needs, they can go in either pile.
Items that would go in these piles are:
- Leftover materials from a finished project
- Materials/supplies for crafts you no longer do
- Older machines that you have upgraded
- Duplicate tools
- Materials in colors you don't use
- Larger scraps
- Gently used items (half-used paint that is still usable, pens that still write, etc.)
- Organization supplies that don't work for the items you're keeping
When you are done sorting items, you may want to look at your keep and donate piles and see if you want to make any changes.
Maybe you have a lot more supplies for one type of craft than you originally thought, so you started putting them in the donate pile. You can gather those items, put them in a bundle, and sell them.
I love donating items, especially to schools, and I encourage everyone who can to donate what they can.
I also understand it can be hard to part with things we spent money on. Selling these items can make it easier to let them go. Consider selling some of what you currently have and use the money you make to buy organization supplies to help you organize what you're keeping.
If you're not interested in selling anything, create one donate pile and skip the sell pile altogether.
Keep Pile
This step may be the most important for small craft space organization success.
The keep pile is where you're going to have to really keep your craft space in mind. You may need to go through this pile multiple times, continuing to decrease the pile until you know that what you have will fit in your craft space.
Items that belong in the keep pile:
- Craft machines you currently use that are in good working order
- Craft supplies for crafts you currently do
- Craft supplies in colors you use
- Pens, paints, inks, glues, etc. that you currently use or will use in their lifetime (before they dry out/expire)
- Craft supplies for crafts you will use before they expire/go bad
- Multiples of tools/supplies you use regularly
- Organization supplies that will work with the items you're keeping
When this process is done, I highly recommend getting everything that is not in the keep pile out of your house.
Throw away everything in the trash pile. Place the items you're going to donate in bags/boxes and take them out to your car.
If you have items to sell, take photos now and list them on Marketplace or your local yard sale sites.
I know from experience that if you keep the items you're getting rid of where you can see them, you're likely to pull items out of the pile that you don't have space for.
Step 3. Storage/Organization Solutions for Small Craft Spaces
In this section, I am going to share some of my favorite organization solutions for small craft spaces. What works best for you is going to depend on a few things:
- Your craft space
- What you already own
- Your organization budget
While we go through this section, if your budget doesn't currently allow you to rush out and get the smart storage solutions I mention, that's okay.
You can start with what you have and create a wish/to-buy list, and as you have an organization budget, you can be sure to get items you actually need.
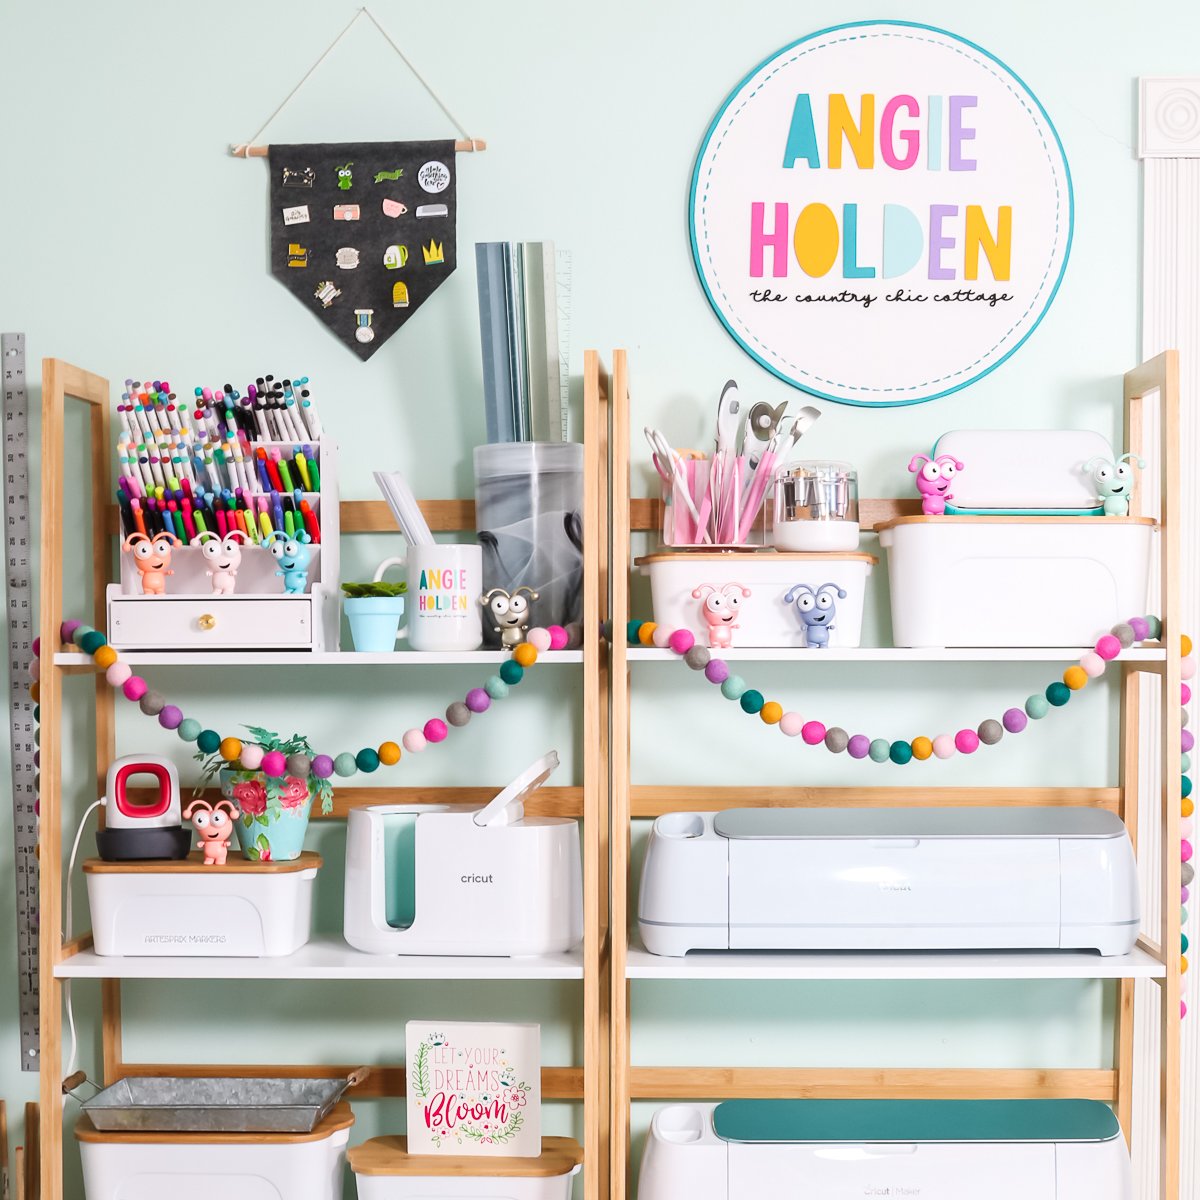
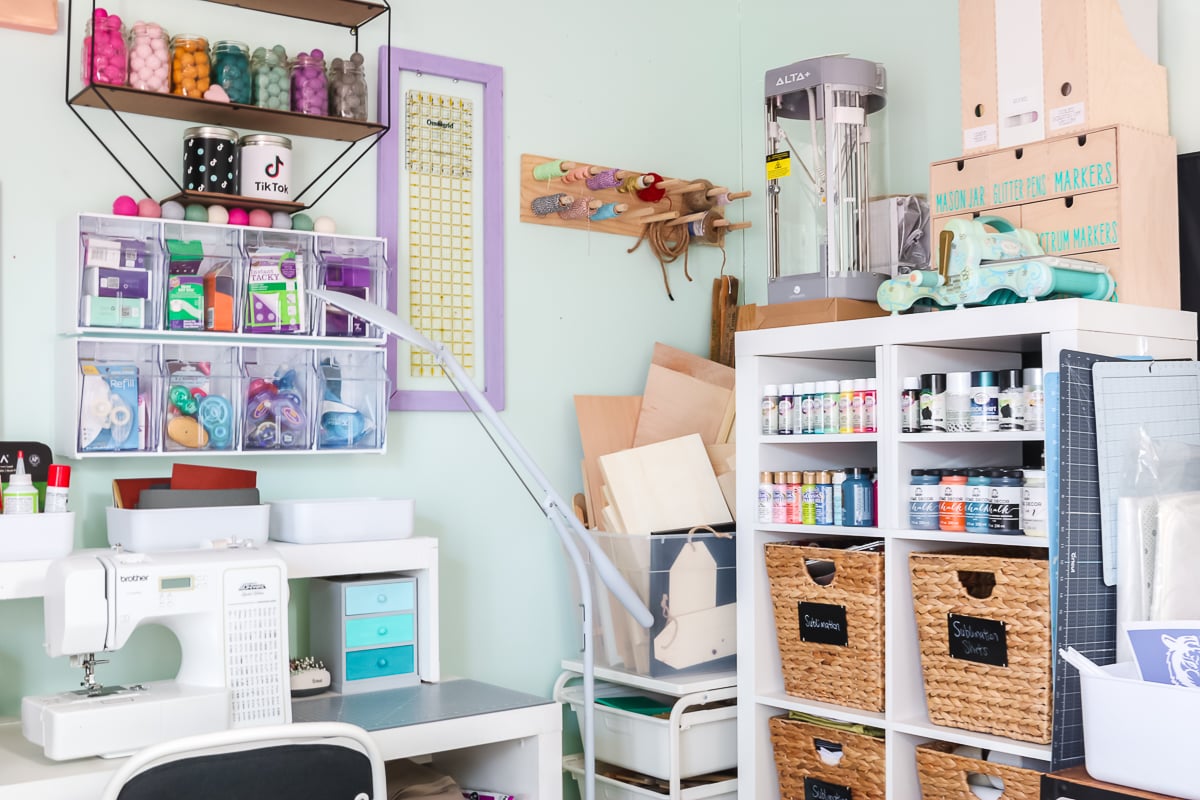
Vertical Storage
The first thing I tell everyone who has a smaller craft space to look at is vertical storage. You can increase your storage by double, even triple, by looking up.
Using vertical space can add so much storage to even the smallest craft area. There are a lot of ways to use the vertical space, so I'm going to share some of them with you.
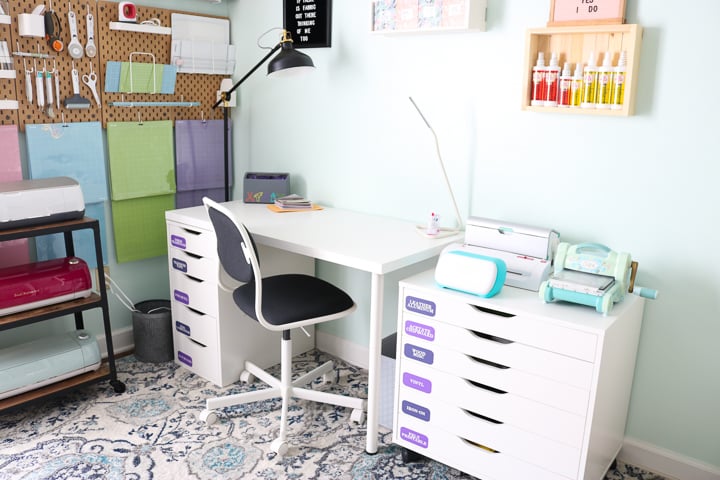
Pegboards
Pegboards are probably my favorite way to use the vertical space in my craft rooms. I love how easy they are to configure for different craft needs, and that they keep things where I can see them.
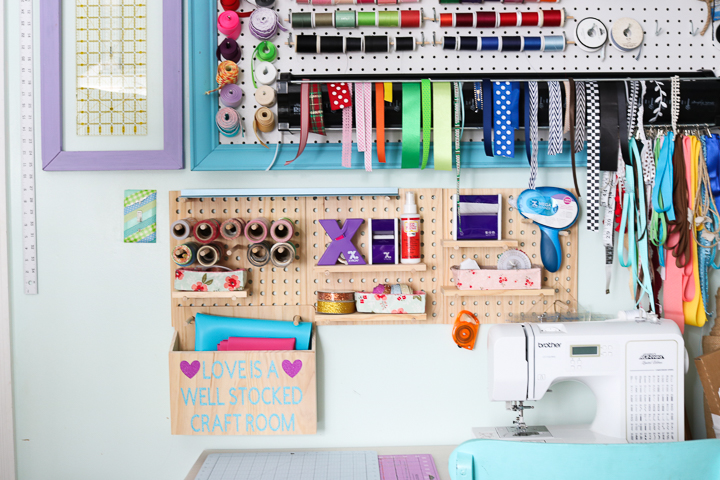
You can add shelves, baskets, hooks, and more to pegboards, making them perfect for crafters.
There are a lot of different pegboard options. IKEA has a line of pegboards and accessories that are great and work really well.
It's also worth looking at places like Marketplace or other local yard sale sites to see if anyone is selling what you're looking for.
IKEA is not the only option. I know places like Home Depot, Lowe's, etc also have pegboards and accessories that go along with them.
If you're not interested in pegboards, another option would be to add hooks directly to the walls.
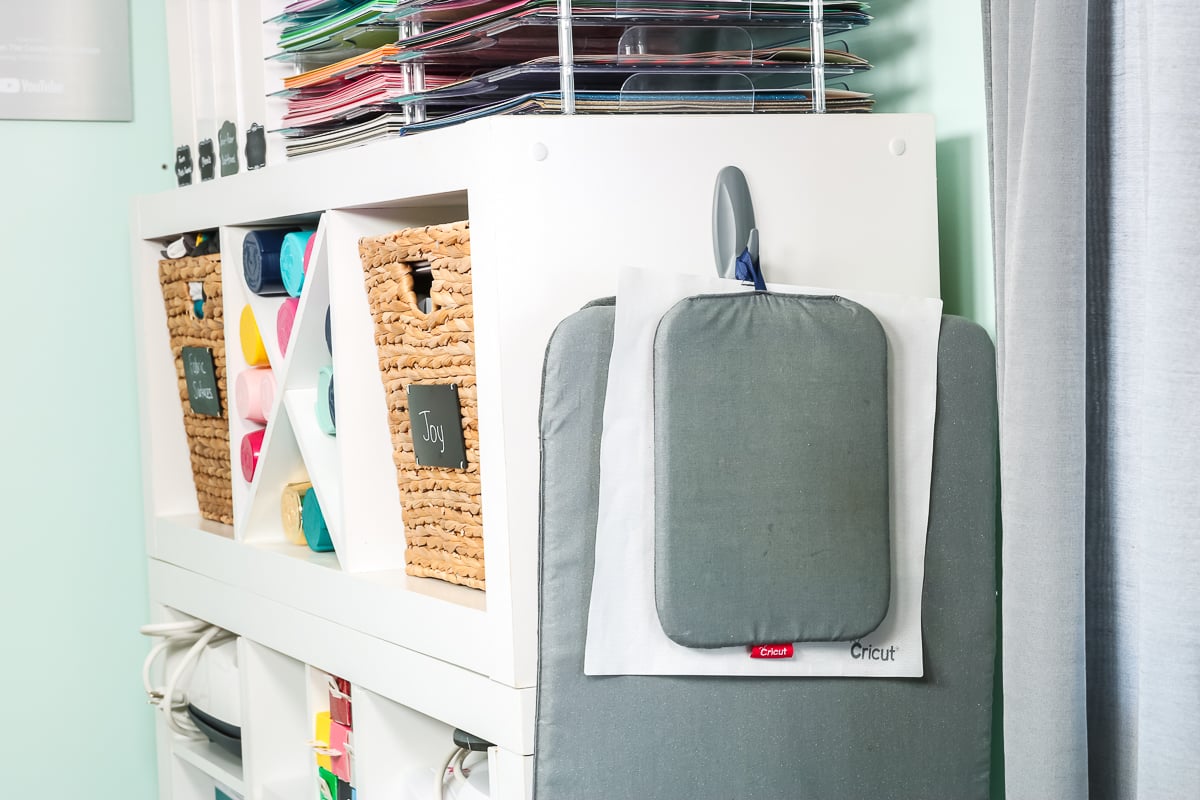
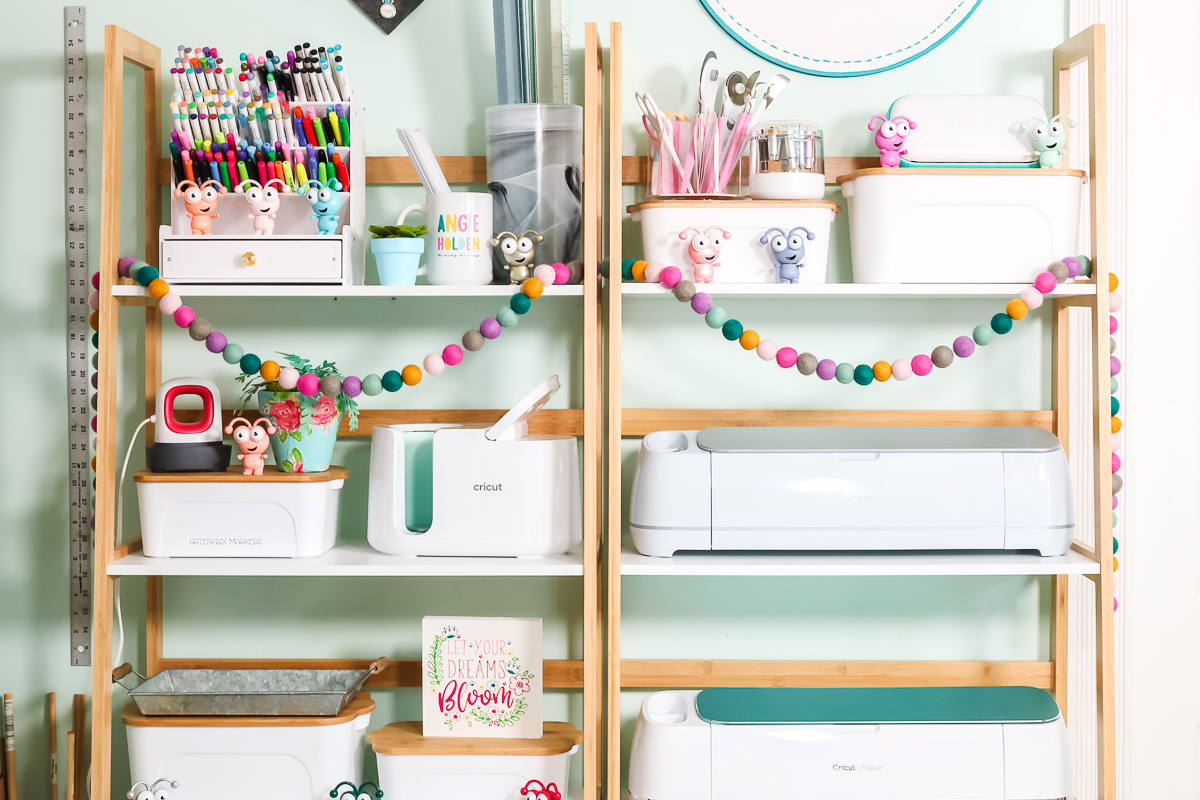
Shelves
Whether you're looking at shelving units or hanging shelves directly on the walls, shelves can be an inexpensive way to add vertical storage.
I have a combination of free-hanging shelves and shelving units in my craft room.
Another option is to look at hutches you can place above desks and tables. Anything that allows you to use the vertical space.
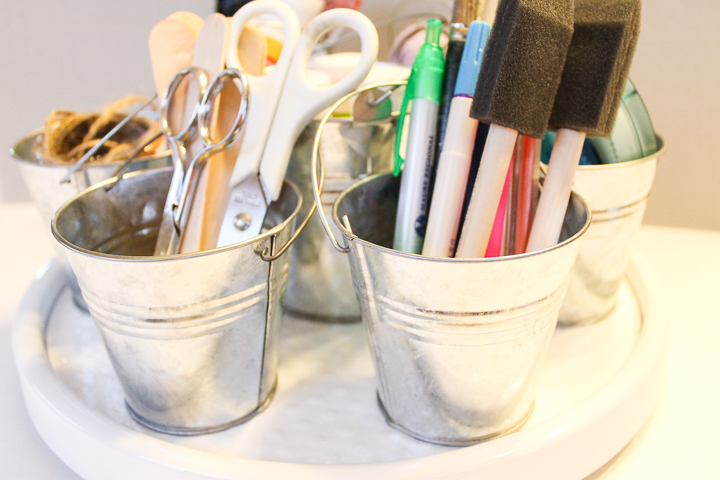
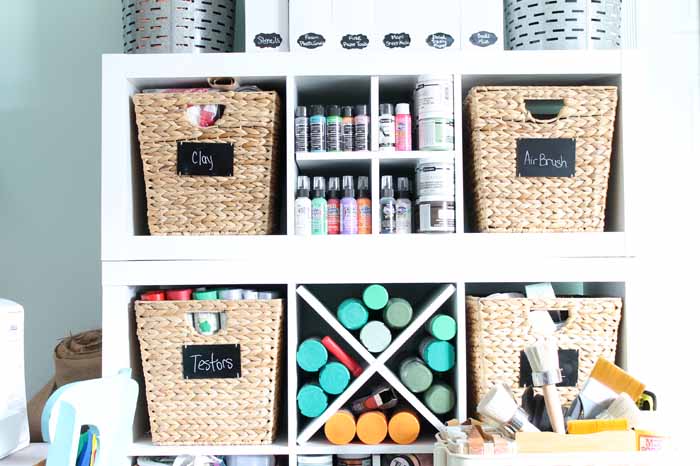
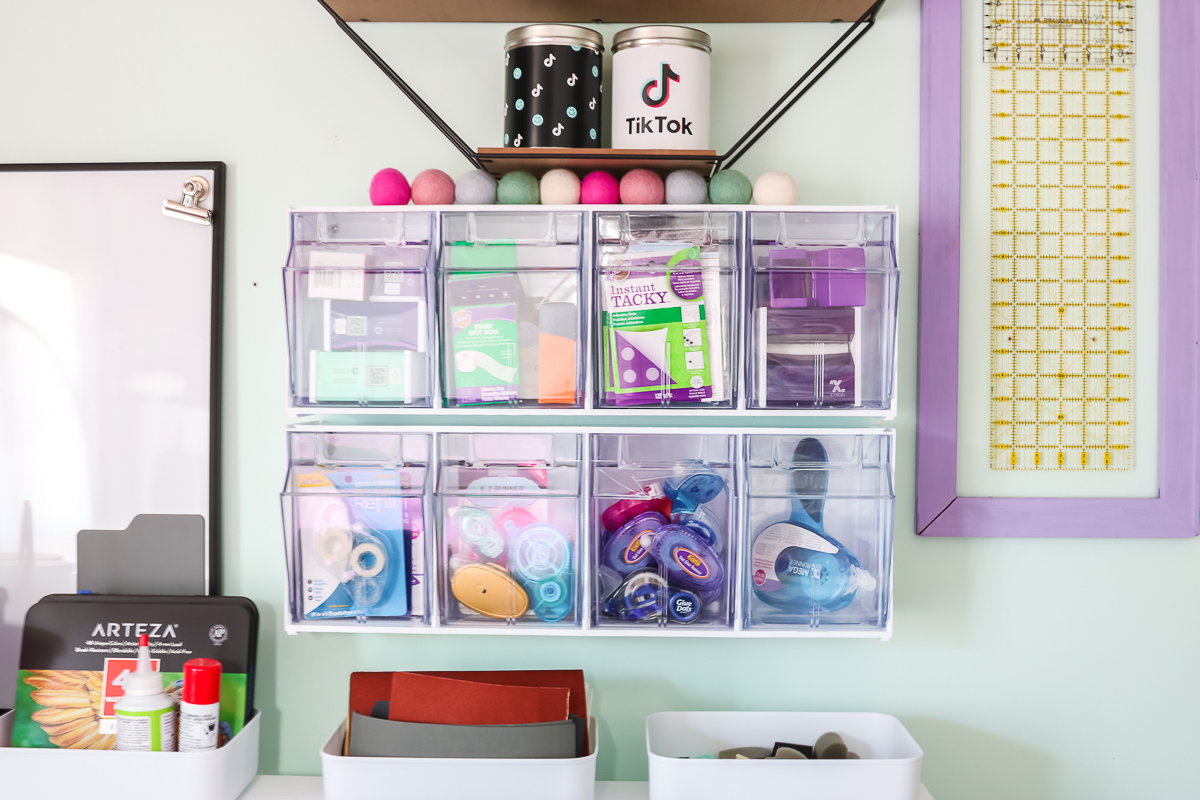
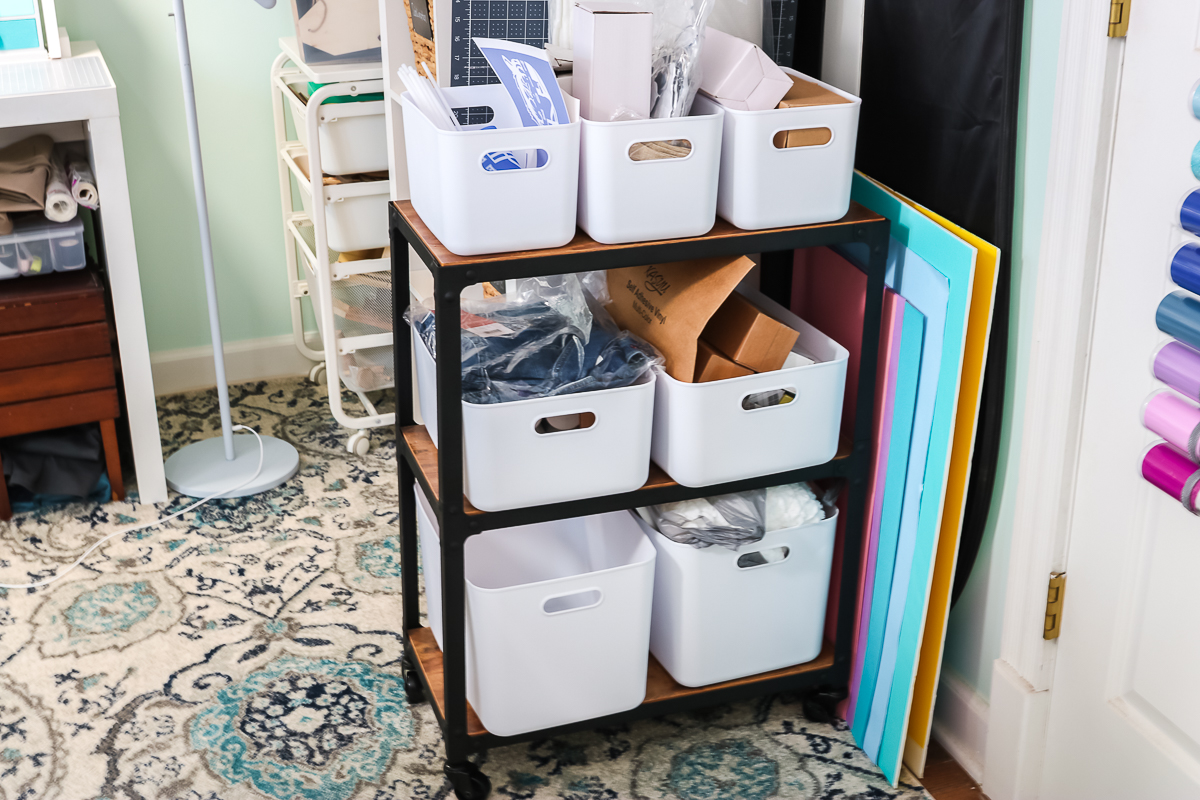
Containers
Next, we're going to look at containers. The containers you use will be determined by your craft space, the materials you use, and the type of organization you want.
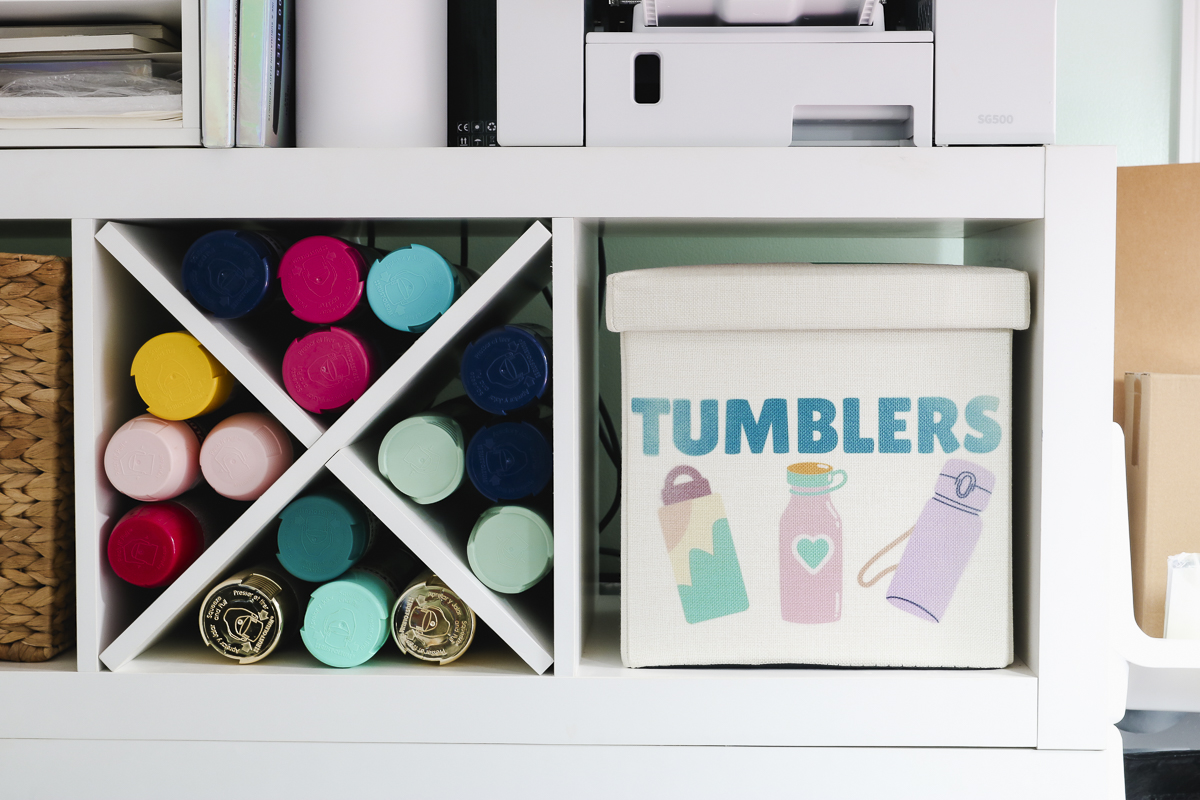
With cube shelves, you can use square bins that enclose the entire cube, paper organizers, dividers, pen organizers, paint shelves, etc.
Using baskets, bins, clear jars, solid jars, rods, and more will help organize your supplies.
Remember, if you choose to use solid containers, it may look good on the surface, but you also won't be able to see what is inside easily.
Multi-Purpose Furniture
The next small craft organization option we're going to talk about is multi-purpose furniture.
This can look like a rolling cart where you can store your supplies that also has tables that can be folded out as a work surface.
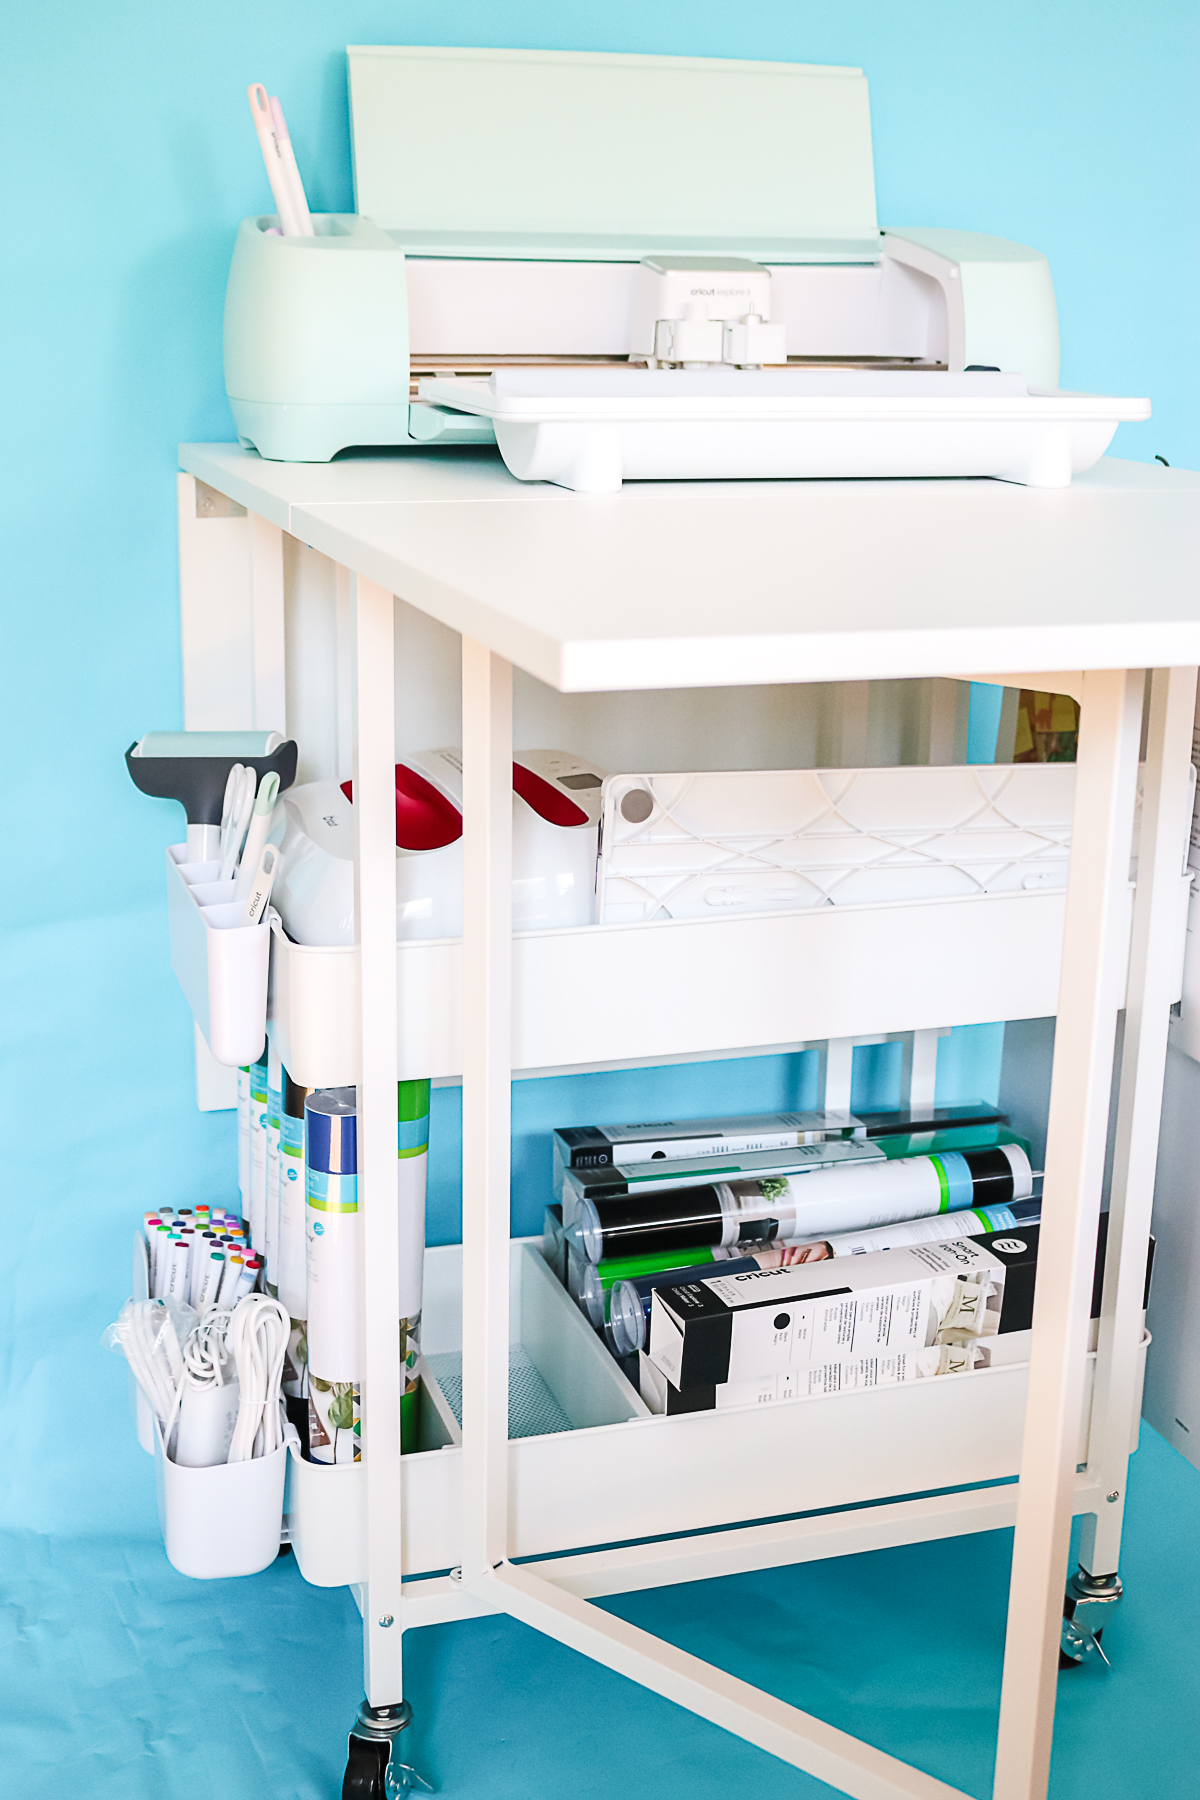
Another option is storage cabinets that close up and look like normal home decor. Look for cabinets that have fold-out tables and can close completely.
You can also think about other places in your home where you can store craft supplies. Consider an ottoman that opens and has storage inside.
There are a lot of multi-purpose furniture options to consider, even outside of your craft space.
Hooks and Magnets
The last smart storage options we're going to talk about today are hooks and magnets.
You can add hooks and magnetic strips to many places in your craft room.
Think about hooks on the sides of your cabinets, allowing you to hang mats, craft tools, blanks, and anything you want to keep where it's easy to grab.
Magnetic strips can be added to table tops or sides, and any metal tools can easily be added to them, securing them in place without having to screw anything in place.
In the end, when it comes to small space craft organization, what works best will depend on your space, your crafting needs, and your budget.
If the storage solutions that feel best for your space are out of your budget, create a wish-list and prioritize the most needed items first.
Also, consider what you may be able to find within your budget that may work for now. You don't have to plan your forever craft space today. You could be working in something small, like a craft closet, and that is okay.
If there is something that will work for now, consider that option and know it's okay to create a space that fits your needs now.
Step 4. Work Surface
Now we're ready to talk about your work surface. A clean work surface will make your crafting space so much better.
Do you have a dedicated table for your crafting? If you do, I encourage you to find ways to keep all storage off your work surface.
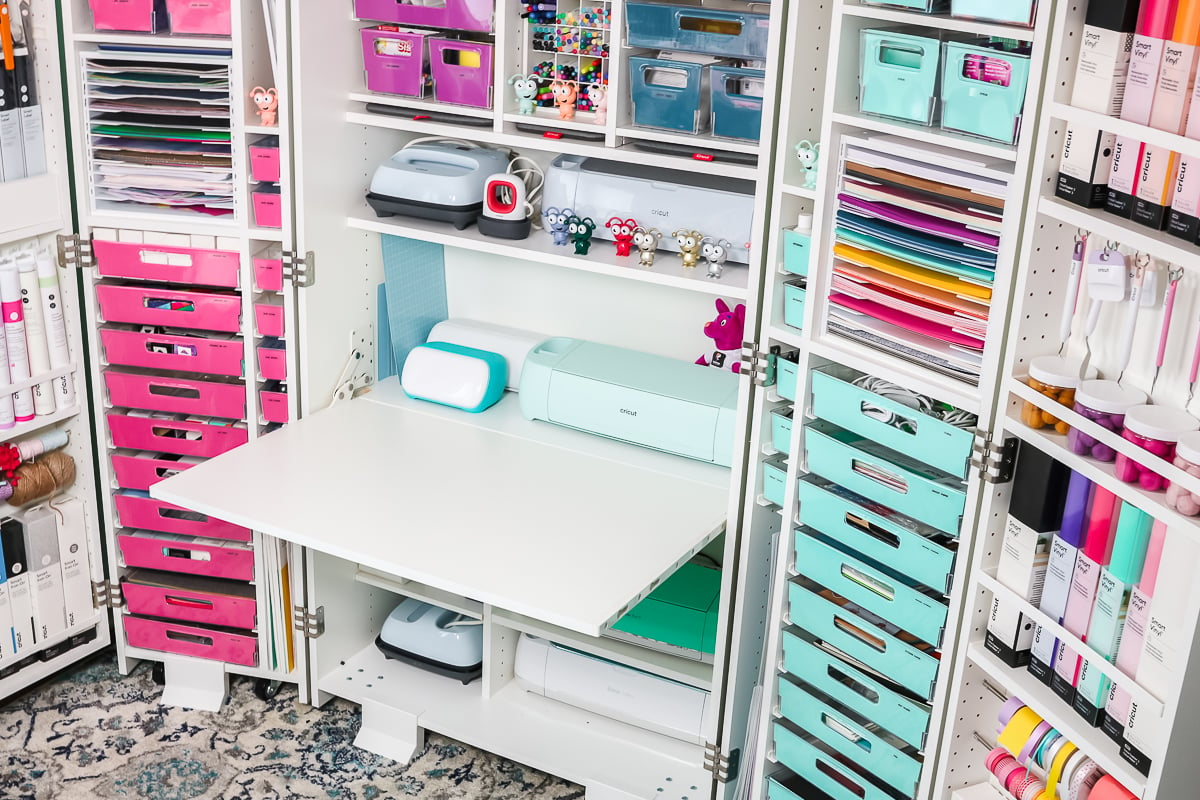
Look at the smart storage ideas above. What can you use to make sure your table is clear and ready for crafting?
Once your work surface is cleared off, make sure to set aside time at the end of your crafting to clean up after your craft session.
Having a clean workspace always entices me to sit down and craft more.
Work in Progress Organization
If you don't have a dedicated work surface, there are other options for helping keep the space clean.
If you have projects that take time to complete, consider Work in Progress (WIP) trays.
Having trays where you can place all the supplies for each craft you're working on makes it really easy to clean up at the end of craft time.
You can have multiple trays for different projects, and often you can find trays that stack so they'll fit on your shelves.
If you don't have room for trays or want something that can be completely enclosed, project bags are another option for unfinished projects.
Whatever you choose, having a place for those unfinished projects is really helpful. There is nothing worse than starting a project and then losing something you need to finish it.
Fold Away Workspace
If you have trouble keeping your work surface clean, I've got a tip for you. Look for portable work surfaces that can be folded up and put away.
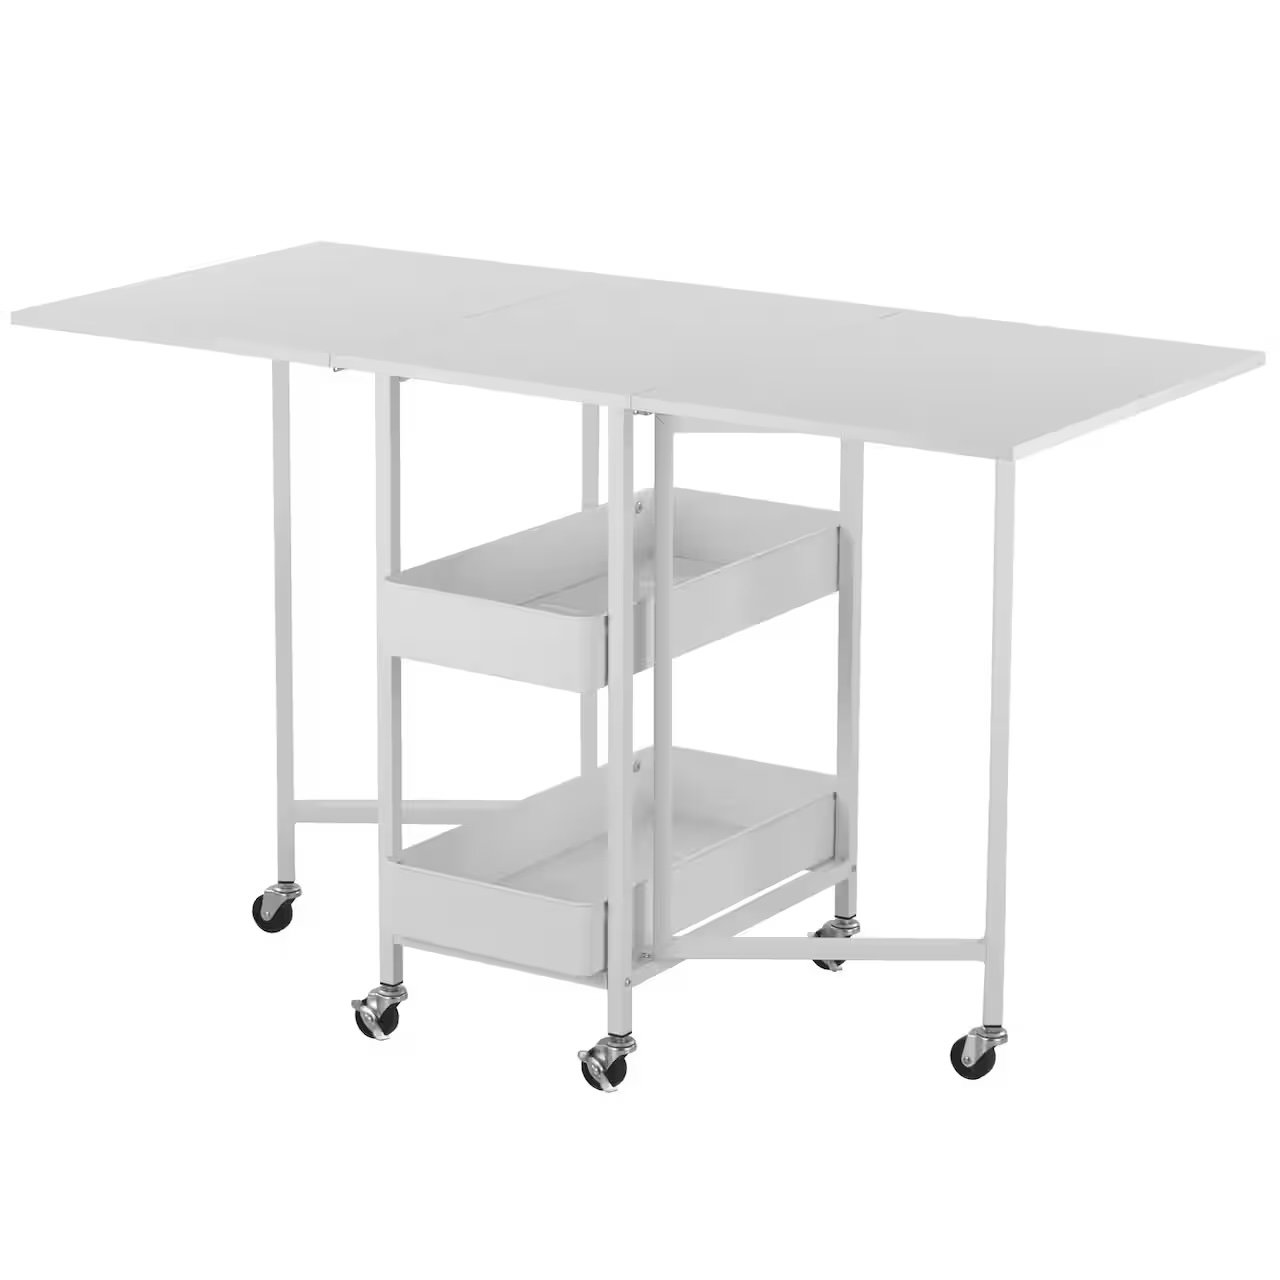
By using carts or tables that fold out, you're essentially forced into cleaning up in order to put the table/cart back away.
Some rolling carts/tables with fold-out workspaces have storage under them where you could store those WIP trays or bags.
Step 5. Labels
No matter what size craft space you have or what kind of organization you use, labels will be useful.
If I had to choose a favorite label option, it would probably be chalkboard labels. I am always rearranging things in my craft room, and chalkboard labels are easy to change as needed.
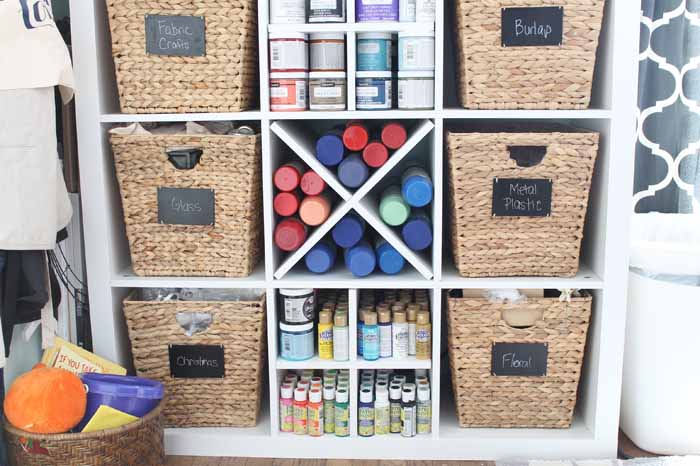
With my chalkboard labels, I use chalk markers. The markers give the chalk look in a way that lasts. Chalk markers don't wipe off unless you use water, which means I can label my supplies today and change them tomorrow if needed.
There are a lot of different label options, from paper to vinyl and permanent to temporary. I also pull out my label maker from time to time, especially when I know I won't have to change it right away.
Another perk of labeling your supplies is that you know exactly where everything goes when it's time to put things away.
How to Organize by Craft Type
Now that you have the supplies sorted, you need to figure out how you want to organize the supplies.
Organizing by craft type is a great way to start.
I can't list every different craft type here, but here are some organization tips for a variety of craft types.
Paper Crafters
Organization/storage solutions for paper crafters (scrapbookers, card makers, etc.) are things like:
- File folders
- Paper organizers
- Magazine holders
- Flat, slot organizers
- Small drawers and bins
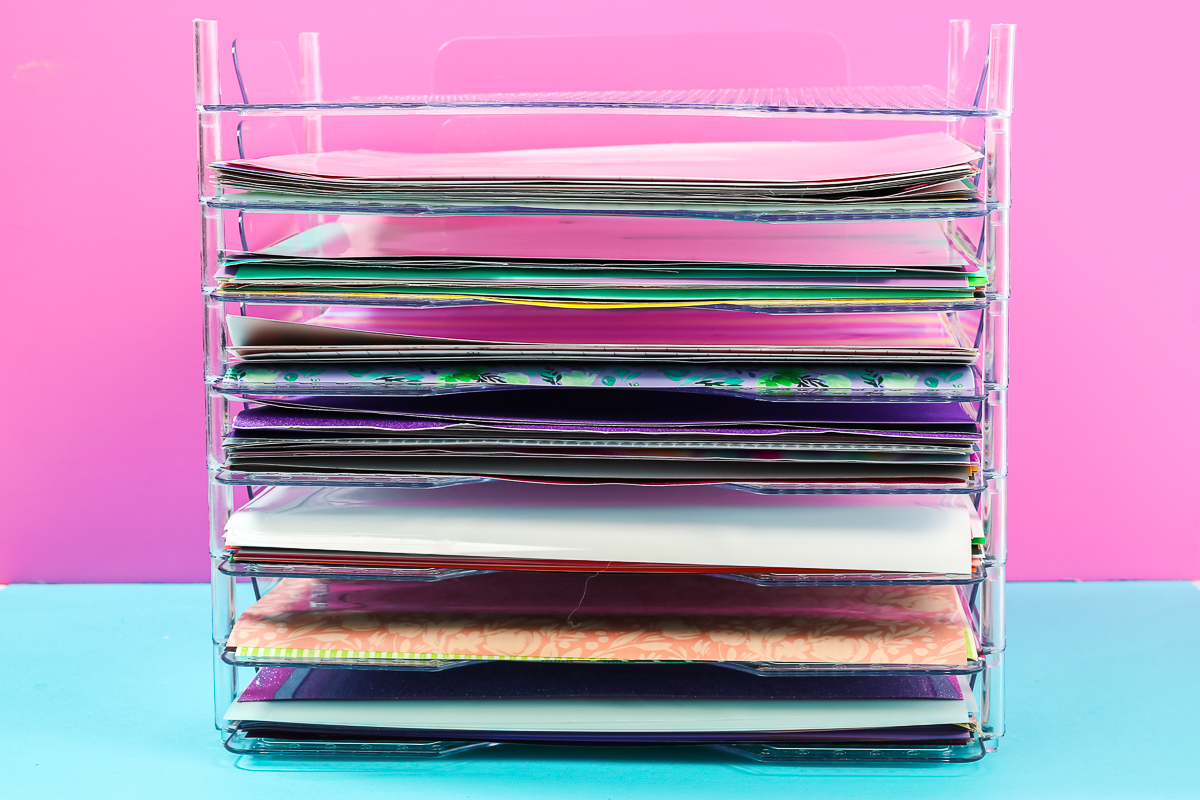
When it comes to organizing paper, you want something sturdy. Whether you store the paper vertically or horizontally, you want to make sure it's not getting bent or wrinkled in storage.
Small drawers or bins are perfect for paper crafting embellishments and other accessories.
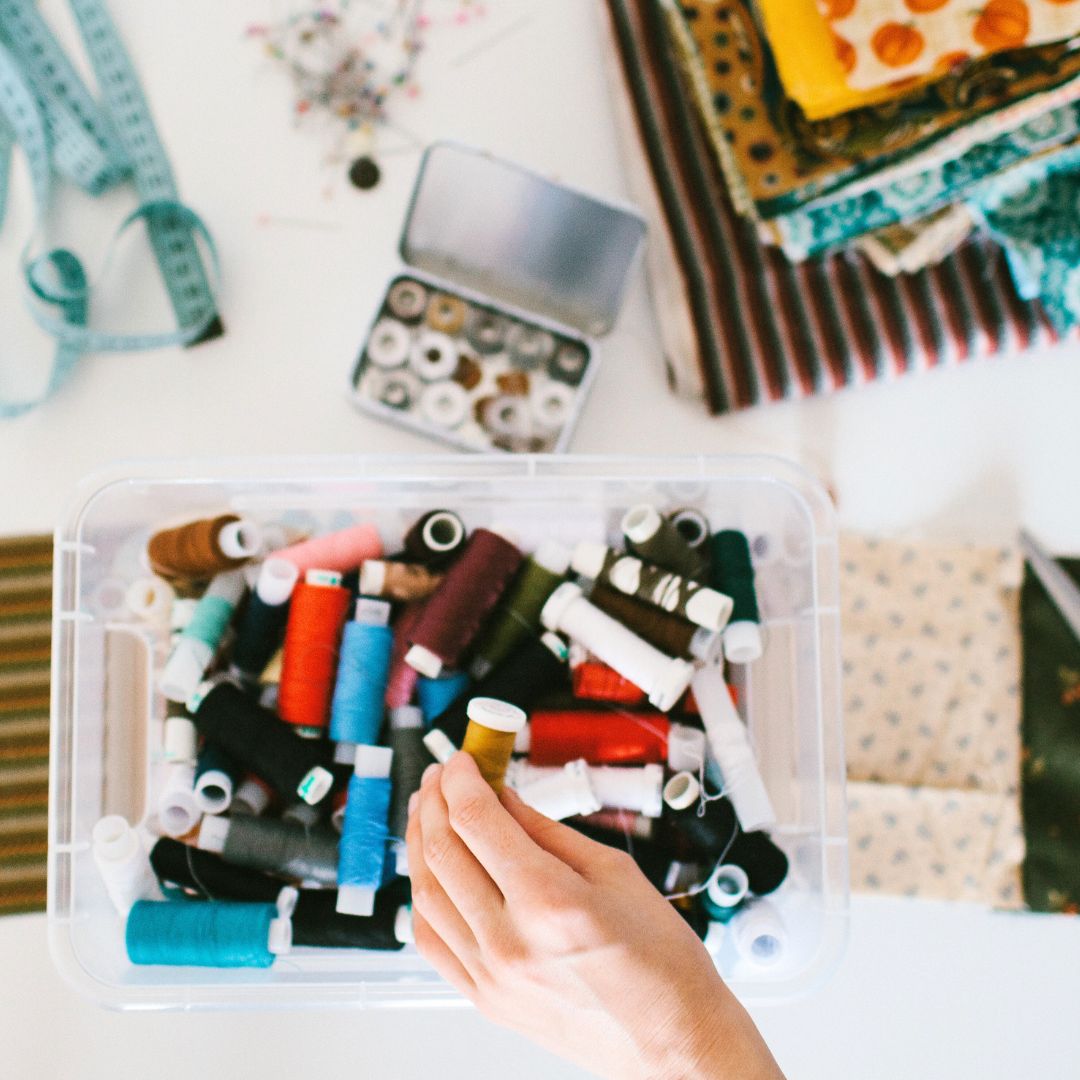
Sewing/Fabric Crafters
If you're a sewing or fabric crafter, you'll want to organize threads, tools, and fabric:
- Thread rack
- Fabric boards
- Shelves
- Storage bins
- Jars/clear storage
Thread racks are a great way to store your thread. You can get the thread off your work surface and up on the wall using some of that vertical space.
Depending on how much fabric you have, you can store it by folding it and placing it on shelves, hanging it, or using fabric boards. Wrap the fabric around the boards and store your fabric like books on your shelf.
Storage bins are perfect for off-season fabrics that can be stored outside your craft space.
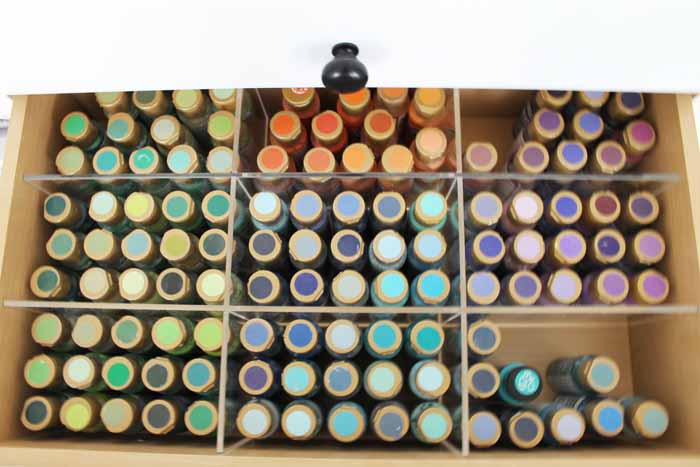
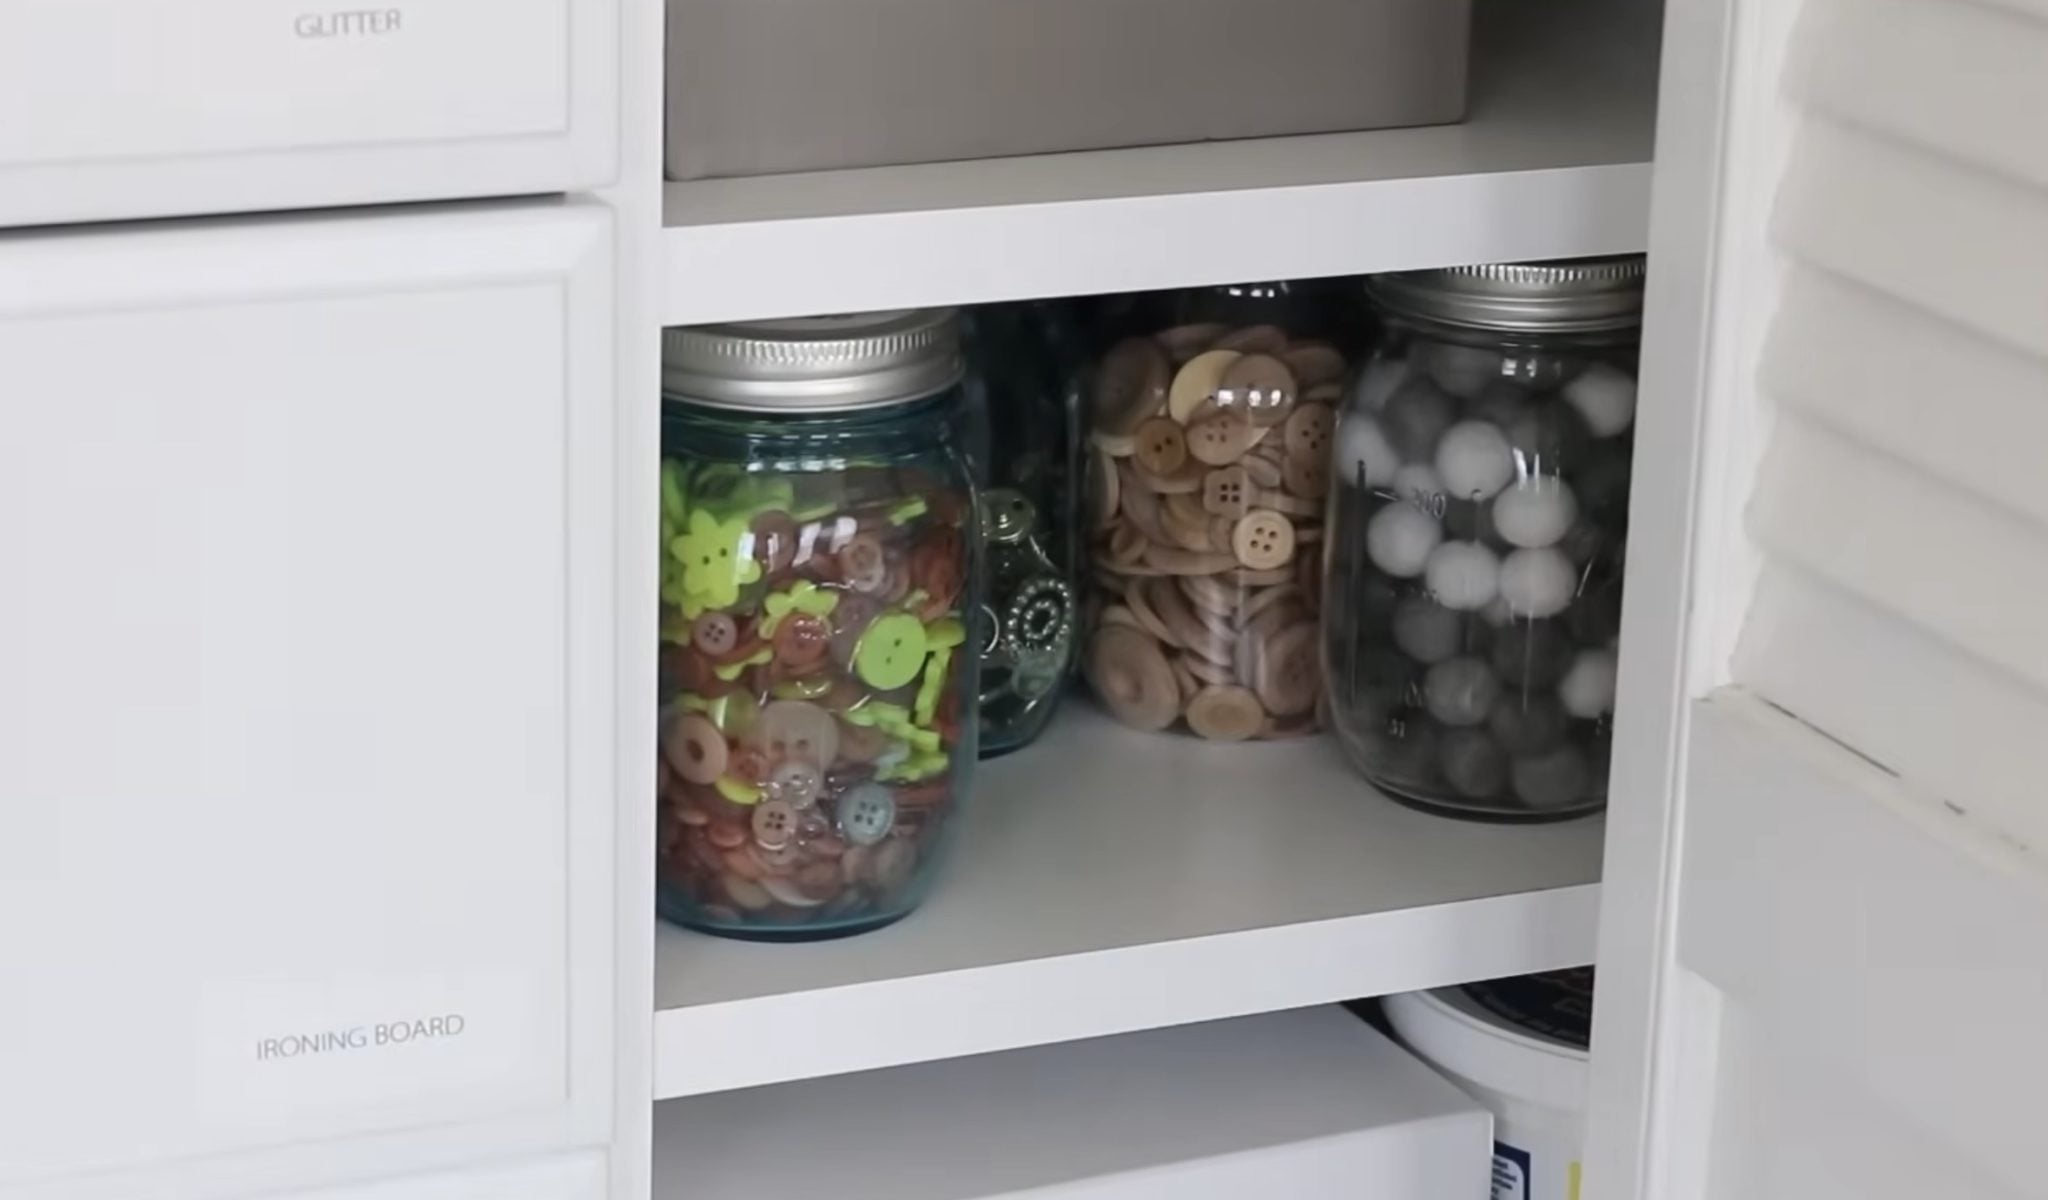
I love using jars or other clear containers to store buttons, sequins, and other embellishments. Clear jars are readily available, and they allow you to easily see what you're storing.
Paint Crafters
If you use paint in your crafts, organizing all the supplies can feel overwhelming:
- Jars/Vases
- Drawer dividers
- Drying rack
- Wall organizers
- Rolling carts
Jars or vases are great places to store paint brushes. You can even allow the brushes to dry in them.
Drawer dividers are great for storing paint. You can use the dividers to keep the paint upright so you can see the colors easily on the lids.
If you don't have drawer space, there are wall and shelf organizers that work great for organizing paint.
If you use paint pallets, drying racks are great for allowing them to dry and organizing them.
A lot of these supplies work well on rolling carts, so don't forget those when considering paint craft storage.
Small Craft Organization
Now, let's talk about organization for small crafts. I'm talking about jewelry, bow making, and other crafts that include small elements and supplies:
- Small drawers
- Draw organizers
- Tackle box
- Pill organizers
- Ice cube trays
All of the supplies listed above are perfect for beads, buttons, hooks, clasps, and other embellishments. If you're on a budget, hit the dollar store. There are so many options for small craft supplies.
I think the biggest thing is making sure you can keep the different supplies and elements sorted. There is nothing worse than having to dig through an entire drawer full of supplies looking for one little thing.
Don't put yourself in a box. Check out pill organizers, ice cube trays (with lids), and even tackle boxes. These can all be used to help organize your supplies.
Cricut Crafting
If you're a Cricut crafter, you probably have vinyl/HTV that you need to store.
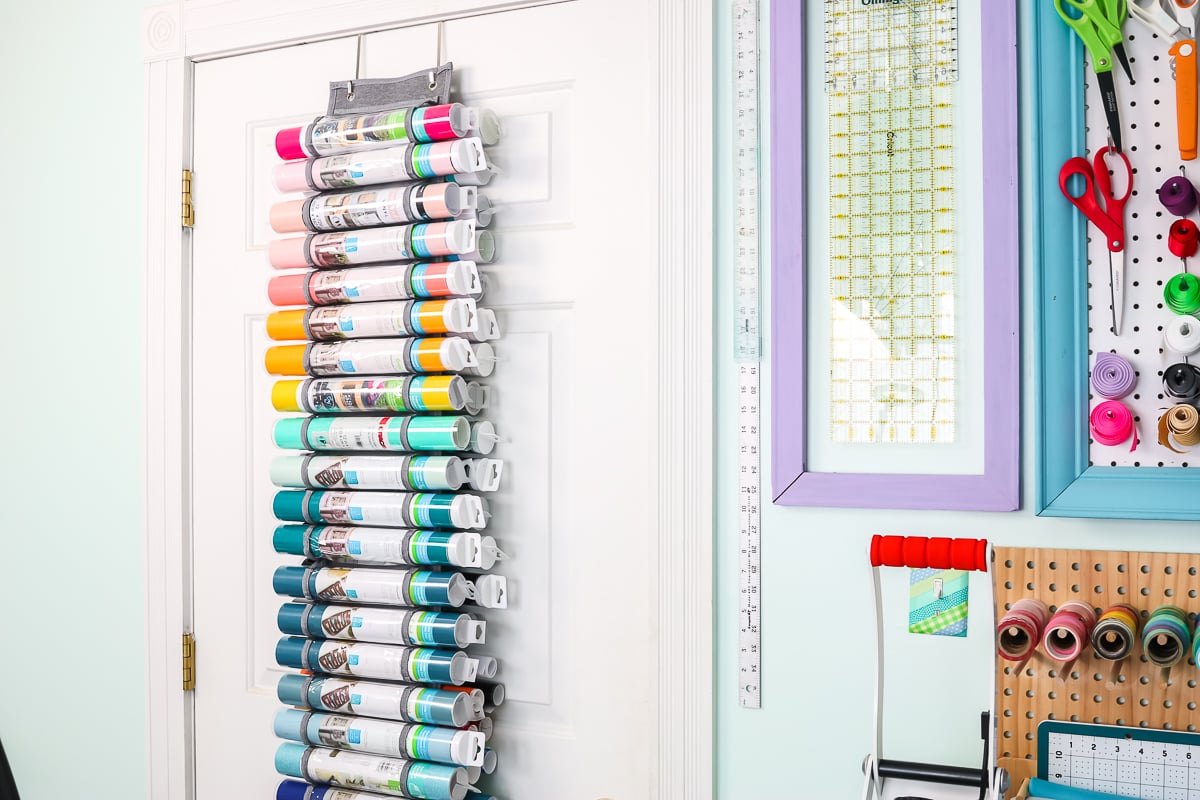
My favorite way to store rolls of vinyl/HTV is in over-the-door organizers. You can easily slide rolls into the spots, and it uses some of your vertical space instead of taking up room on your workspace.
If your vinyl materials are flat, I like to use some of the same paper storage options I mentioned above.
I do recommend looking at options that are horizontal vs vertical because vinyl isn't as sturdy as paper, so it doesn't stand up straight in vertical storage options.
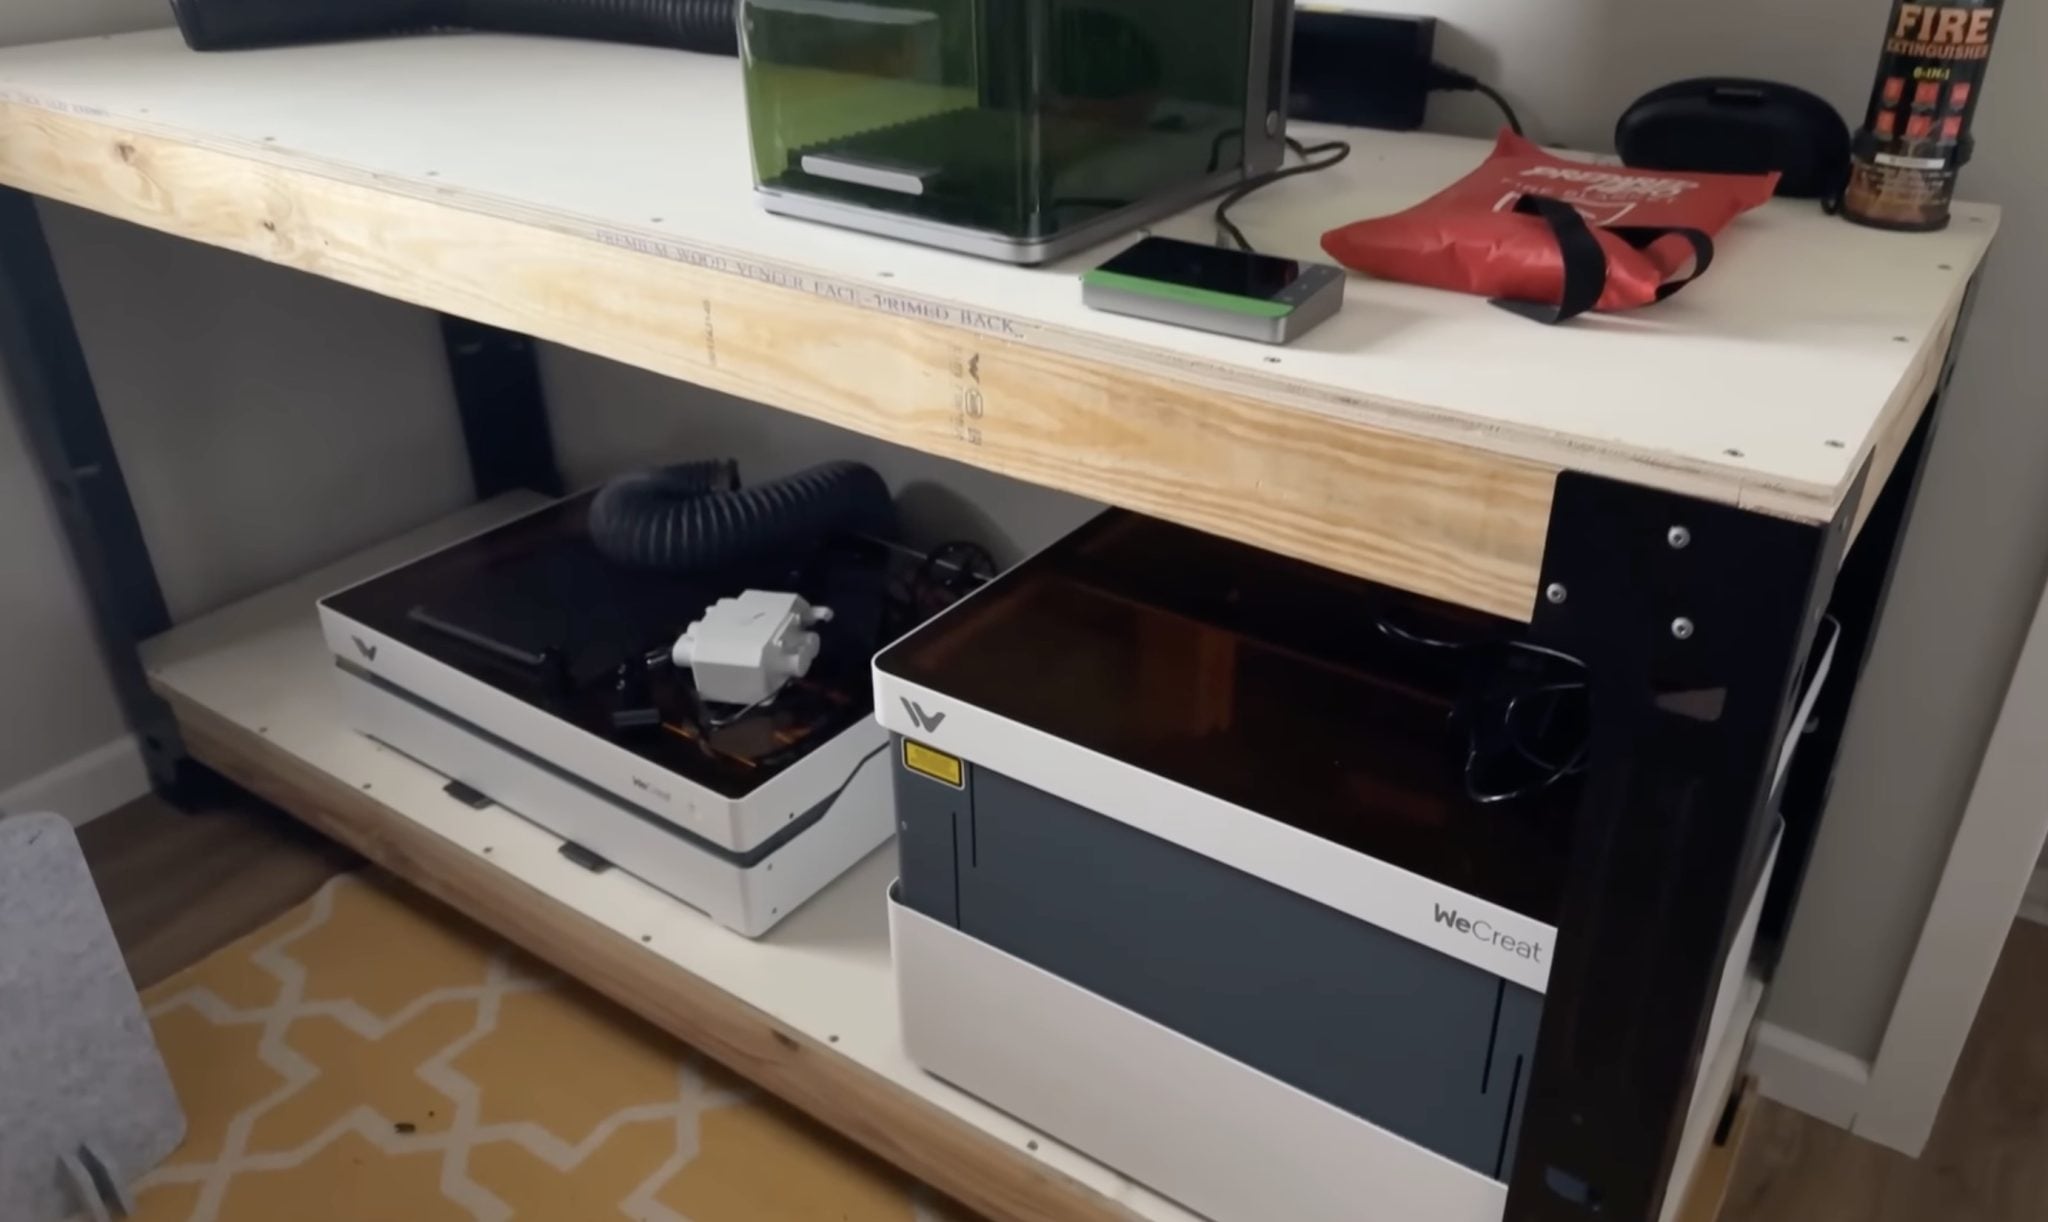
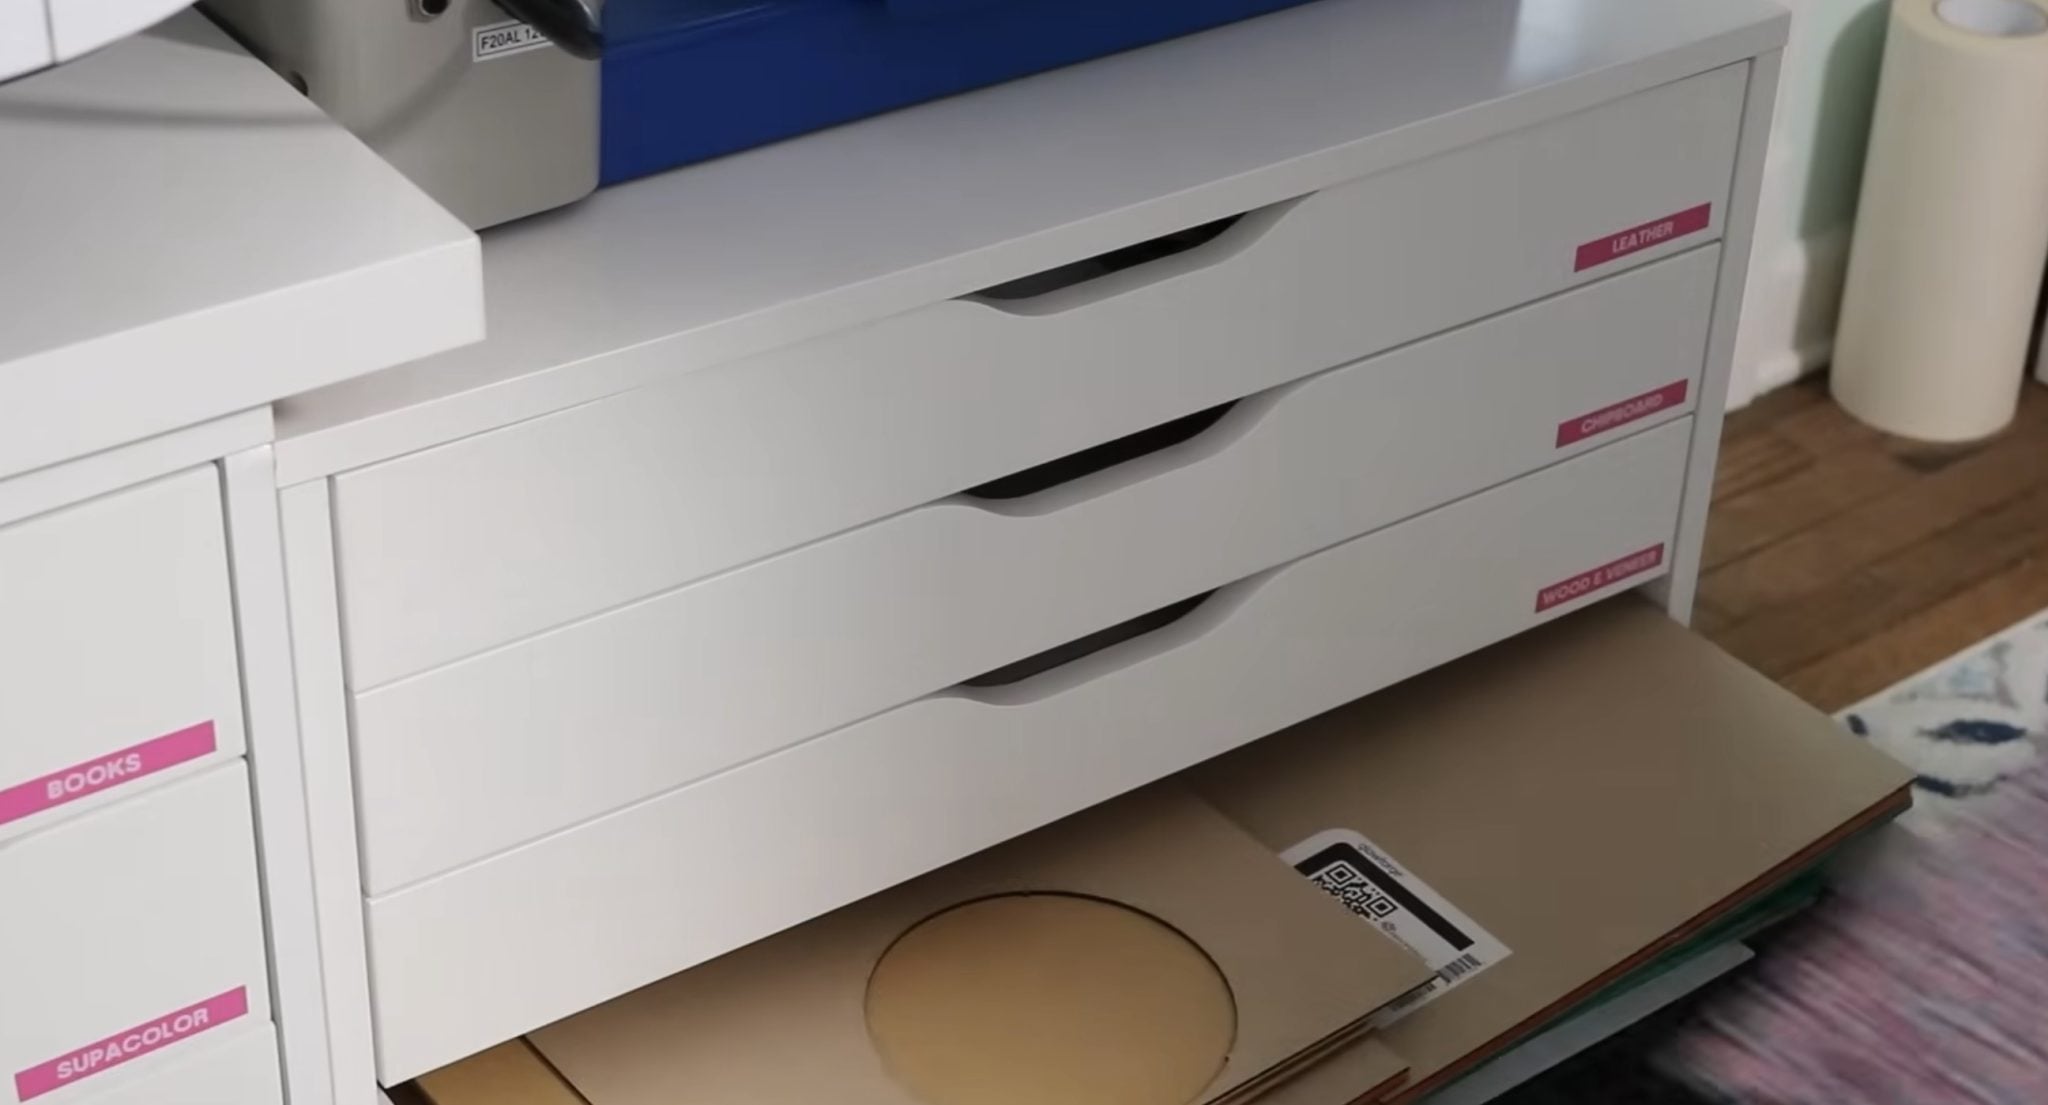
Laser Crafting
Laser crafting comes with a lot of materials. Depending on the size of your laser, those materials can be larger than other craft supplies.
For my laser supplies, I really like the options I found at IKEA. They have inexpensive drawer options that can hold those wood, leather, and acrylic materials.
If you have a bit more money to spend, other storage options are things like toolboxes. I'm not talking about handheld toolboxes, I'm talking about the larger toolboxes that are like wall cabinet-sized.
Head to Home Depot, Lowe's, or Harbor Freight and look at the options there. Husky is one brand name to look at, but there are others.
These can work well because you can also store your laser on top, allowing you to keep all your laser crafting in one space.
Bins are another option for laser craft storage. You can get bins in a variety of sizes, making it easy to store tumblers, coasters, acrylic, etc.
Printer/Heat Press Crafters
I am combining these two because my favorite way to store both is on a cart. Rolling carts that have storage below them are perfect for both of these machines.
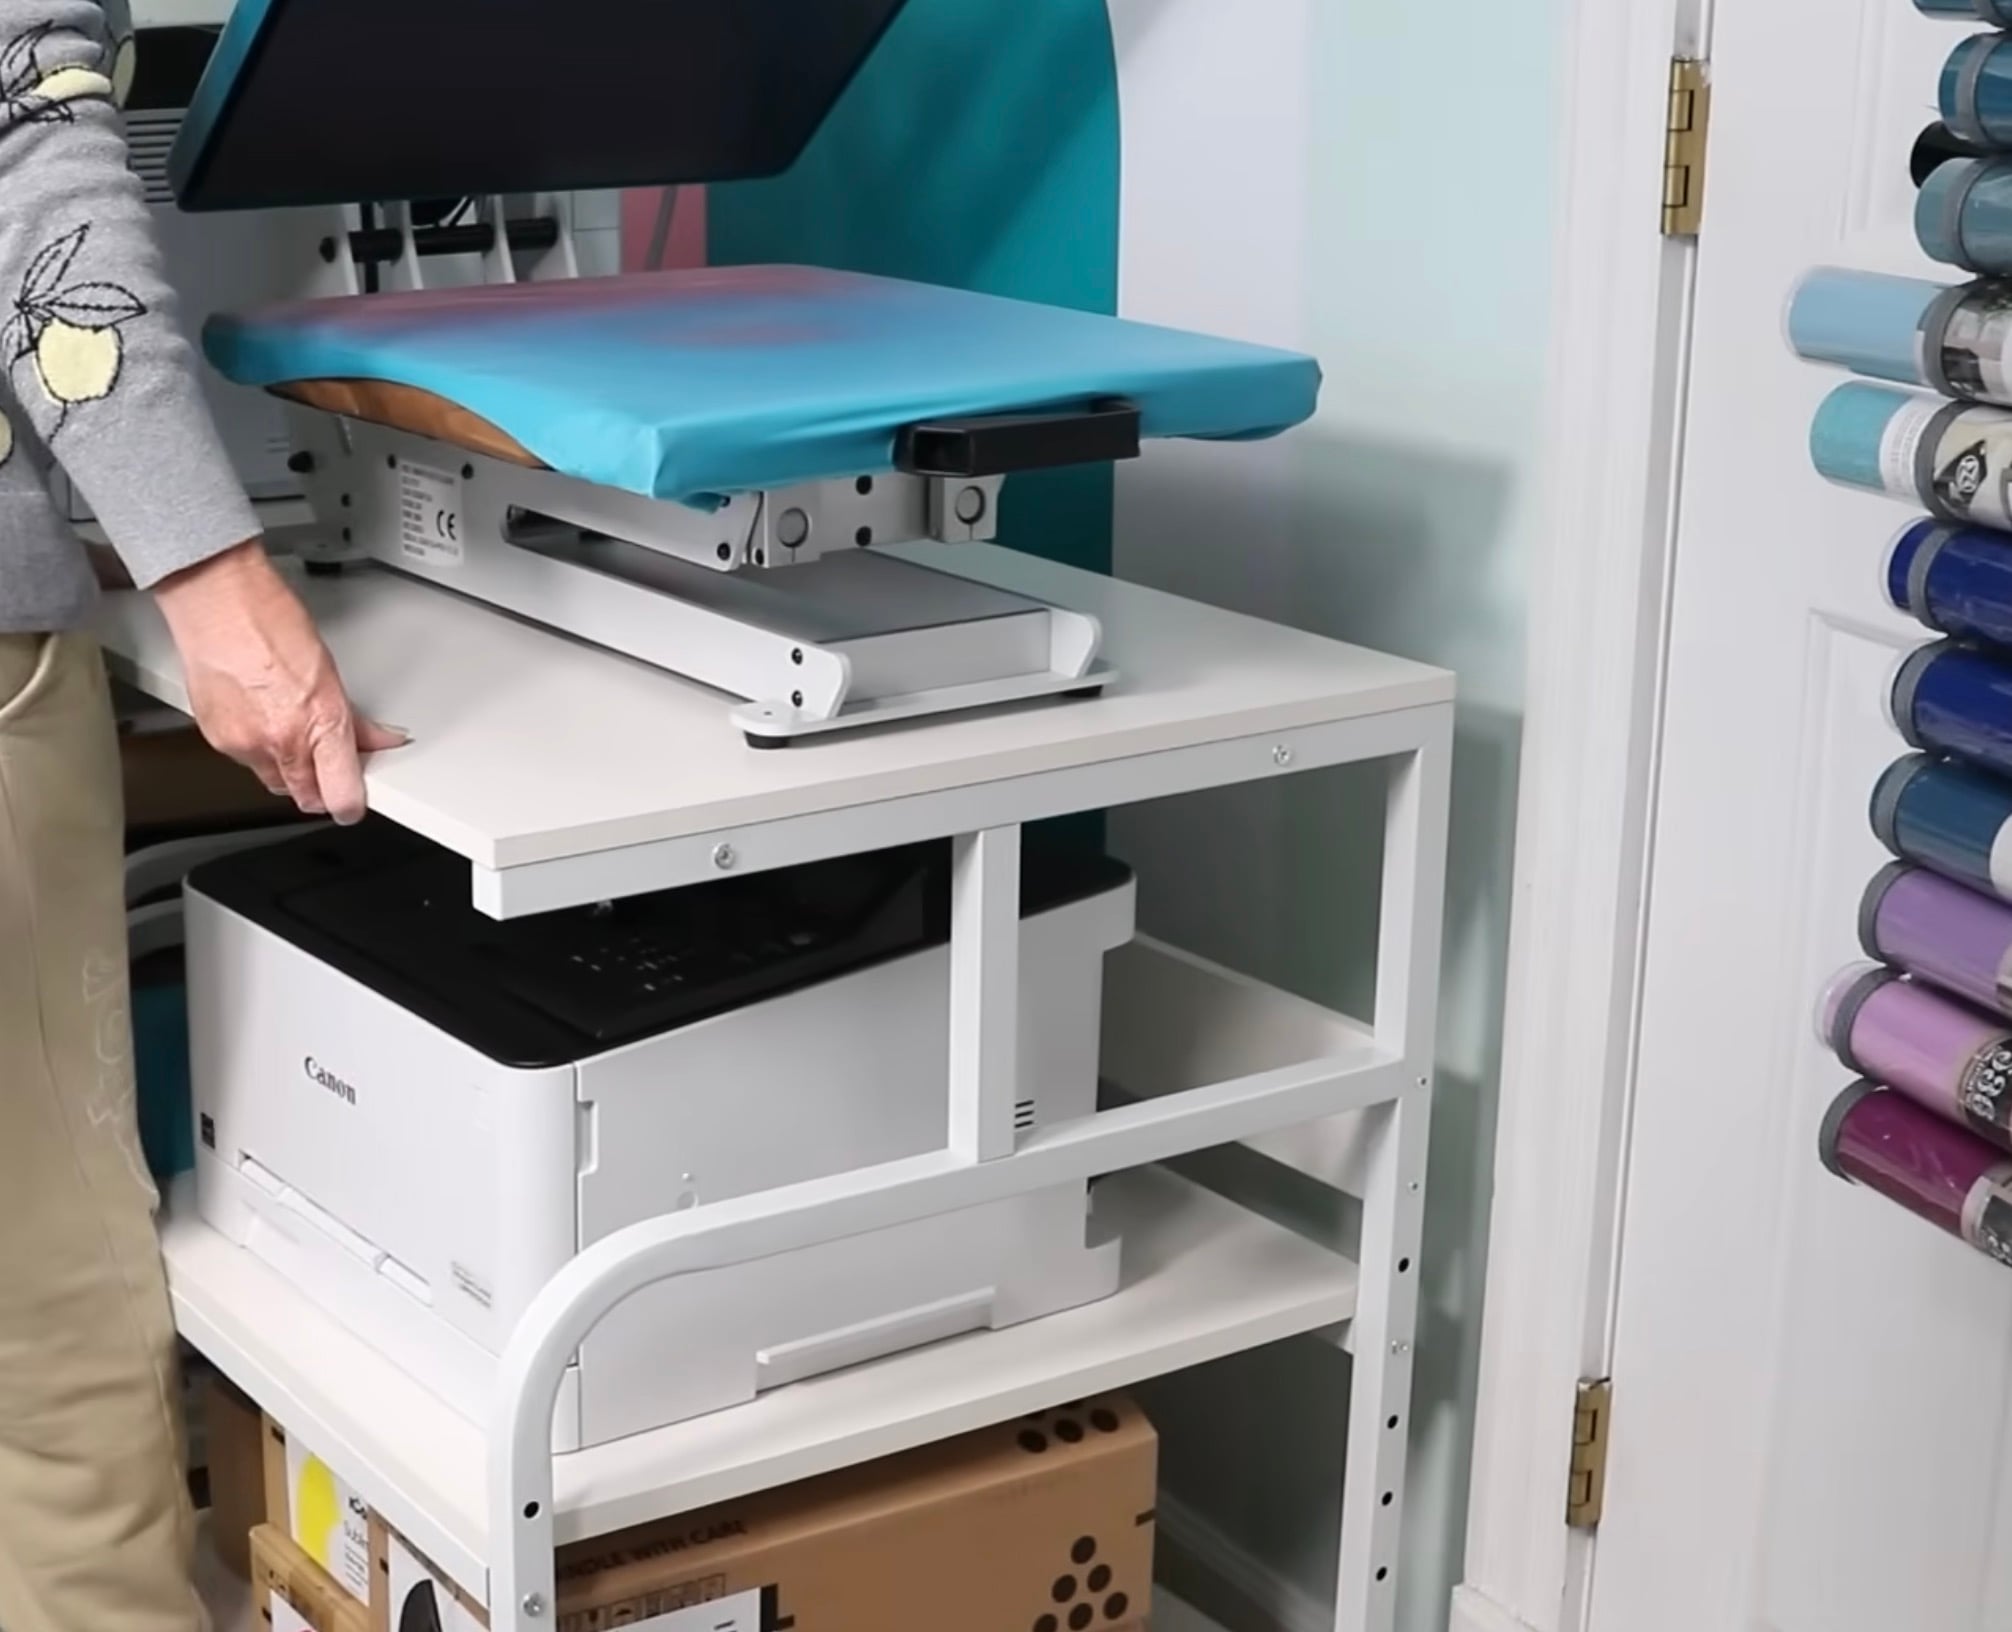
Whether you want to store materials or other craft machines on the shelves, there are a lot of options.
You can store printer paper, inks, Teflon sheets, protective paper, etc under the heat press or printer.
The best thing about these rolling carts is that you can roll them in and out as needed.
Step 6. Keeping Your Craft Space Organized
Now that you have your craft area defined, decluttered, and organized, we want to keep it that way.
First, make sure you're cleaning up at the end of your craft session. When you have a small craft space, it's really important to keep it cleaned up. It's easier than you may realize for things to get out of hand with small craft spaces if you don't clean up regularly.
Next, use the one-in, one-out rule. For every craft or supply you bring in, you have to let something go. This will help you control how much you have in your space.
When you're shopping for craft supplies, remember that every item you bring home means you have to let something go.
One of the things I like about this rule is that it encourages you to not only limit what you have but also to use supplies you already have. If you know that using some vinyl, cardstock, adhesive, or paint will allow you to buy more, you may find you're crafting more often.
The last tip is to reaccess your space regularly. I try to do regular mini purges to keep things from getting out of control, but that doesn't solve everything.
Even though I'm crafting all the time, I still end up with more things that I need, and some of my supplies go bad/dry out/expire.
I try to do a full sort/purge every 18-24 months. No matter what type of crafter you are, your space is going to evolve. You may find new crafts you enjoy or that you're not enjoying crafts you used to. Your favorite supplies may change and not fit where they used to.
All of these things and more can change your craft room needs, which is why you need to regularly assess your supplies and your space.
Are You Ready to Organize Your Small Craft Space?
It's never the wrong time to organize your small craft space. Before you begin, make sure you have the time you need to really get into the process and do it the right way.
The tips and ideas I shared here could feel like a lot. I encourage you to read through everything I shared a few times, if needed, to help make sure you're in the right mood to go through things, let things go, and organize.
I hope I've answered any questions you have about small craft space organization. If you have any additional questions, I'm happy to answer them in the comments.